5
Web Hacking Reconnaissance

The first step to attacking any target is conducting reconnaissance, or simply put, gathering information about the target. Reconnaissance is important because it’s how you figure out an application’s attack surface. To look for bugs most efficiently, you need to discover all the possible ways of attacking a target before deciding on the most effective approach.
If an application doesn’t use PHP, for instance, there’s no reason to test it for PHP vulnerabilities, and if the organization doesn’t use Amazon Web Services (AWS), you shouldn’t waste time trying to crack its buckets. By understanding how a target works, you can set up a solid foundation for finding vulnerabilities. Recon skills are what separate a good hacker from an ineffective one.
In this chapter, I’ll introduce the most useful recon techniques for a bug bounty hunter. Then I’ll walk you through the basics of writing bash scripts to automate recon tasks and make them more efficient. Bash is a shell interpreter available on macOS and Linux systems. Though this chapter assumes you’re using a Linux system, you should be able to install many of these tools on other operating systems as well. You need to install some of the tools we discuss in this chapter before using them. I have included links to all the tools at the end of the chapter.
Before you go on, please verify that you’re allowed to perform intrusive recon on your target before you attempt any techniques that actively engage with it. In particular, activities like port scanning, spidering, and directory brute-forcing can generate a lot of unwanted traffic on a site and may not be welcomed by the organization.
Manually Walking Through the Target
Before we dive into anything else, it will help to first manually walk through the application to learn more about it. Try to uncover every feature in the application that users can access by browsing through every page and clicking every link. Access the functionalities that you don’t usually use.
For example, if you’re hacking Facebook, try to create an event, play a game, and use the payment functionality if you’ve never done so before. Sign up for an account at every privilege level to reveal all of the application’s features. For example, on Slack, you can create owners, admins, and members of a workspace. Also create users who are members of different channels under the same workspace. This way, you can see what the application looks like to different users.
This should give you a rough idea of what the attack surface (all of the different points at which an attacker can attempt to exploit the application) looks like, where the data entry points are, and how different users interact with each other. Then you can start a more in-depth recon process: finding out the technology and structure of an application.
Google Dorking
When hunting for bugs, you’ll often need to research the details of a vulnerability. If you’re exploiting a potential cross-site scripting (XSS) vulnerability, you might want to find a particular payload you saw on GitHub. Advanced search-engine skills will help you find the resources you need quickly and accurately.
In fact, advanced Google searches are a powerful technique that hackers often use to perform recon. Hackers call this Google dorking. For the average Joe, Google is just a text search tool for finding images, videos, and web pages. But for the hacker, Google can be a means of discovering valuable information such as hidden admin portals, unlocked password files, and leaked authentication keys.
Google’s search engine has its own built-in query language that helps you filter your searches. Here are some of the most useful operators that can be used with any Google search:
site
- Tells Google to show you results from a certain site only. This will help you quickly find the most reputable source on the topic that you are researching. For example, if you wanted to search for the syntax of Python’s
print()function, you could limit your results to the official Python documentation with this search:print site:python.org.
inurl
- Searches for pages with a URL that match the search string. It’s a powerful way to search for vulnerable pages on a particular website. Let’s say you’ve read a blog post about how the existence of a page called /course/jumpto.php on a website could indicate that it’s vulnerable to remote code execution. You can check if the vulnerability exists on your target by searching
inurl:"/course/jumpto.php" site:example.com.
intitle
- Finds specific strings in a page’s title. This is useful because it allows you to find pages that contain a particular type of content. For example, file-listing pages on web servers often have index of in their titles. You can use this query to search for directory pages on a website:
intitle:"index of" site:example.com.
link
- Searches for web pages that contain links to a specified URL. You can use this to find documentation about obscure technologies or vulnerabilities. For example, let’s say you’re researching the uncommon regular expression denial-of-service (ReDoS) vulnerability. You’ll easily pull up its definition online but might have a hard time finding examples. The
linkoperator can discover pages that reference the vulnerability’s Wikipedia page to locate discussions of the same topic:link:"https://en.wikipedia.org/wiki/ReDoS".
filetype
- Searches for pages with a specific file extension. This is an incredible tool for hacking; hackers often use it to locate files on their target sites that might be sensitive, such as log and password files. For example, this query searches for log files, which often have the .log file extension, on the target site:
filetype:log site:example.com.
Wildcard (*)
- You can use the wildcard operator (
*) within searches to mean any character or series of characters. For example, the following query will return any string that starts with how to hack and ends with using Google. It will match with strings like how to hack websites using Google, how to hack applications using Google, and so on:"how to hack * using Google".
Quotes (" ")
- Adding quotation marks around your search terms forces an exact match. For example, this query will search for pages that contain the phrase how to hack:
"how to hack". And this query will search for pages with the terms how, to, and hack, although not necessarily together:how to hack.
Or (|)
- The or operator is denoted with the pipe character (
|) and can be used to search for one search term or the other, or both at the same time. The pipe character must be surrounded by spaces. For example, this query will search for how to hack on either Reddit or Stack Overflow:"how to hack" site:(reddit.com | stackoverflow.com). And this query will search for web pages that mention either SQL Injection or SQLi:(SQL Injection | SQLi). SQLi is an acronym often used to refer to SQL injection attacks, which we’ll talk about in Chapter 11.
Minus (-)
- The minus operator (
-) excludes certain search results. For example, let’s say you’re interested in learning about websites that discuss hacking, but not those that discuss hacking PHP. This query will search for pages that contain how to hack websites but not php:"how to hack websites" -php.
You can use advanced search engine options in many more ways to make your work more efficient. You can even search for the term Google search operators to discover more. These operators can be more useful than you’d expect. For example, look for all of a company’s subdomains by searching as follows:
site:*.example.comYou can also look for special endpoints that can lead to vulnerabilities. Kibana is a data visualization tool that displays server operation data such as server logs, debug messages, and server status. A compromised Kibana instance can allow attackers to collect extensive information about a site’s operation. Many Kibana dashboards run under the path app/kibana, so this query will reveal whether the target has a Kibana dashboard. You can then try to access the dashboard to see if it’s unprotected:
site:example.com inurl:app/kibanaGoogle can find company resources hosted by a third party online, such as Amazon S3 buckets (we’ll talk about these in more detail in “Third-Party Hosting” on page 74):
site:s3.amazonaws.com COMPANY_NAMELook for special extensions that could indicate a sensitive file. In addition to .log, which often indicates log files, search for .php, cfm, asp, .jsp, and .pl, the extensions often used for script files:
site:example.com ext:php
site:example.com ext:log
Finally, you can also combine search terms for a more accurate search. For example, this query searches the site example.com for text files that contain password:
site:example.com ext:txt passwordIn addition to constructing your own queries, check out the Google Hacking Database (https://www.exploit-db.com/google-hacking-database/), a website that hackers and security practitioners use to share Google search queries for finding security-related information. It contains many search queries that could be helpful to you during the recon process. For example, you can find queries that look for files containing passwords, common URLs of admin portals, or pages built using vulnerable software.
While you are performing recon using Google search, keep in mind that if you’re sending a lot of search queries, Google will start requiring CAPTCHA challenges for visitors from your network before they can perform more searches. This could be annoying to others on your network, so I don’t recommend Google dorking on a corporate or shared network.
Scope Discovery
Let’s now dive into recon itself. First, always verify the target’s scope. A program’s scope on its policy page specifies which subdomains, products, and applications you’re allowed to attack. Carefully verify which of the company’s assets are in scope to avoid overstepping boundaries during the recon and hacking process. For example, if example.com’s policy specifies that dev.example.com and test.example.com are out of scope, you shouldn’t perform any recon or attacks on those subdomains.
Once you’ve verified this, discover what’s actually in the scope. Which domains, subdomains, and IP addresses can you attack? What company assets is the organization hosting on these machines?
WHOIS and Reverse WHOIS
When companies or individuals register a domain name, they need to supply identifying information, such as their mailing address, phone number, and email address, to a domain registrar. Anyone can then query this information by using the whois command, which searches for the registrant and owner information of each known domain. You might be able to find the associated contact information, such as an email, name, address, or phone number:
$ whois facebook.comThis information is not always available, as some organizations and individuals use a service called domain privacy, in which a third-party service provider replaces the user’s information with that of a forwarding service.
You could then conduct a reverse WHOIS search, searching a database by using an organization name, a phone number, or an email address to find domains registered with it. This way, you can find all the domains that belong to the same owner. Reverse WHOIS is extremely useful for finding obscure or internal domains not otherwise disclosed to the public. Use a public reverse WHOIS tool like ViewDNS.info (https://viewdns.info/reversewhois/) to conduct this search. WHOIS and reverse WHOIS will give you a good set of top-level domains to work with.
IP Addresses
Another way of discovering your target’s top-level domains is to locate IP addresses. Find the IP address of a domain you know by running the nslookup command. You can see here that facebook.com is located at 157.240.2.35:
$ nslookup facebook.com
Server: 192.168.0.1
Address: 192.168.0.1#53
Non-authoritative answer:
Name: facebook.com
Address: 157.240.2.35
Once you’ve found the IP address of the known domain, perform a reverse IP lookup. Reverse IP searches look for domains hosted on the same server, given an IP or domain. You can also use ViewDNS.info for this.
Also run the whois command on an IP address, and then see if the target has a dedicated IP range by checking the NetRange field. An IP range is a block of IP addresses that all belong to the same organization. If the organization has a dedicated IP range, any IP you find in that range belongs to that organization:
$ whois 157.240.2.35
NetRange:       157.240.0.0 - 157.240.255.255
CIDR:           157.240.0.0/16
NetName:        THEFA-3
NetHandle:      NET-157-240-0-0-1
Parent:         NET157 (NET-157-0-0-0-0)
NetType:        Direct Assignment
OriginAS:
Organization:   Facebook, Inc. (THEFA-3)
RegDate:        2015-05-14
Updated:        2015-05-14
Ref:            https://rdap.arin.net/registry/ip/157.240.0.0
OrgName:        Facebook, Inc.
OrgId:          THEFA-3
Address:        1601 Willow Rd.
City:           Menlo Park
StateProv:      CA
PostalCode:     94025
Country:        US
RegDate:        2004-08-11
Updated:        2012-04-17
Ref:            https://rdap.arin.net/registry/entity/THEFA-3
OrgAbuseHandle: OPERA82-ARIN
OrgAbuseName:   Operations
OrgAbusePhone:  +1-650-543-4800
OrgAbuseEmail:  [email protected]
OrgAbuseRef:    https://rdap.arin.net/registry/entity/OPERA82-ARIN
OrgTechHandle: OPERA82-ARIN
OrgTechName:   Operations
OrgTechPhone:  +1-650-543-4800
OrgTechEmail:  [email protected]
OrgTechRef:    https://rdap.arin.net/registry/entity/OPERA82-ARIN
Another way of finding IP addresses in scope is by looking at autonomous systems, which are routable networks within the public internet. Autonomous system numbers (ASNs) identify the owners of these networks. By checking if two IP addresses share an ASN, you can determine whether the IPs belong to the same owner.
To figure out if a company owns a dedicated IP range, run several IP-to-ASN translations to see if the IP addresses map to a single ASN. If many addresses within a range belong to the same ASN, the organization might have a dedicated IP range. From the following output, we can deduce that any IP within the 157.240.2.21 to 157.240.2.34 range probably belongs to Facebook:
$ whois -h whois.cymru.com 157.240.2.20
AS      | IP               | AS Name
32934   | 157.240.2.20     | FACEBOOK, US
$ whois -h whois.cymru.com 157.240.2.27
AS      | IP               | AS Name
32934   | 157.240.2.27     | FACEBOOK, US
$ whois -h whois.cymru.com 157.240.2.35
AS      | IP               | AS Name
32934   | 157.240.2.35     | FACEBOOK, US
The -h flag in the whois command sets the WHOIS server to retrieve information from, and whois.cymru.com is a database that translates IPs to ASNs. If the company has a dedicated IP range and doesn’t mark those addresses as out of scope, you could plan to attack every IP in that range.
Certificate Parsing
Another way of finding hosts is to take advantage of the Secure Sockets Layer (SSL) certificates used to encrypt web traffic. An SSL certificate’s Subject Alternative Name field lets certificate owners specify additional hostnames that use the same certificate, so you can find those hostnames by parsing this field. Use online databases like crt.sh, Censys, and Cert Spotter to find certificates for a domain.
For example, by running a certificate search using crt.sh for facebook.com, we can find Facebook’s SSL certificate. You’ll see that that many other domain names belonging to Facebook are listed:
X509v3 Subject Alternative Name:
 DNS:*.facebook.com
 DNS:*.facebook.net
 DNS:*.fbcdn.net
 DNS:*.fbsbx.com
 DNS:*.messenger.com
 DNS:facebook.com
 DNS:messenger.com
 DNS:*.m.facebook.com
 DNS:*.xx.fbcdn.net
 DNS:*.xy.fbcdn.net
 DNS:*.xz.fbcdn.net
The crt.sh website also has a useful utility that lets you retrieve the information in JSON format, rather than HTML, for easier parsing. Just add the URL parameter output=json to the request URL: https://crt.sh/?q=facebook.com&output=json.
Subdomain Enumeration
After finding as many domains on the target as possible, locate as many subdomains on those domains as you can. Each subdomain represents a new angle for attacking the network. The best way to enumerate subdomains is to use automation.
Tools like Sublist3r, SubBrute, Amass, and Gobuster can enumerate subdomains automatically with a variety of wordlists and strategies. For example, Sublist3r works by querying search engines and online subdomain databases, while SubBrute is a brute-forcing tool that guesses possible subdomains until it finds real ones. Amass uses a combination of DNS zone transfers, certificate parsing, search engines, and subdomain databases to find subdomains. You can build a tool that combines the results of multiple tools to achieve the best results. We’ll discuss how to do this in “Writing Your Own Recon Scripts” on page 80.
To use many subdomain enumeration tools, you need to feed the program a wordlist of terms likely to appear in subdomains. You can find some good wordlists made by other hackers online. Daniel Miessler’s SecLists at https://github.com/danielmiessler/SecLists/ is a pretty extensive one. You can also use a wordlist generation tool like Commonspeak2 (https://github.com/assetnote/commonspeak2/) to generate wordlists based on the most current internet data. Finally, you can combine several wordlists found online or that you generated yourself for the most comprehensive results. Here’s a simple command to remove duplicate items from a set of two wordlists:
sort -u wordlist1.txt wordlist2.txtThe sort command line tool sorts the lines of text files. When given multiple files, it will sort all files and write the output to the terminal. The -u option tells sort to return only unique items in the sorted list.
Gobuster is a tool for brute-forcing to discover subdomains, directories, and files on target web servers. Its DNS mode is used for subdomain brute-forcing. In this mode, you can use the flag -d to specify the domain you want to brute-force and -w to specify the wordlist you want to use:
gobuster dns -d target_domain -w wordlist Once you’ve found a good number of subdomains, you can discover more by identifying patterns. For example, if you find two subdomains of example.com named 1.example.com and 3.example.com, you can guess that 2.example.com is probably also a valid subdomain. A good tool for automating this process is Altdns (https://github.com/infosec-au/altdns/), which discovers subdomains with names that are permutations of other subdomain names.
In addition, you can find more subdomains based on your knowledge about the company’s technology stack. For example, if you’ve already learned that example.com uses Jenkins, you can check if jenkins.example.com is a valid subdomain.
Also look for subdomains of subdomains. After you’ve found, say, dev.example.com, you might find subdomains like 1.dev.example.com. You can find subdomains of subdomains by running enumeration tools recursively: add the results of your first run to your Known Domains list and run the tool again.
Service Enumeration
Next, enumerate the services hosted on the machines you’ve found. Since services often run on default ports, a good way to find them is by port-scanning the machine with either active or passive scanning.
In active scanning, you directly engage with the server. Active scanning tools send requests to connect to the target machine’s ports to look for open ones. You can use tools like Nmap or Masscan for active scanning. For example, this simple Nmap command reveals the open ports on scanme.nmap.org:
$ nmap scanme.nmap.org
Nmap scan report for scanme.nmap.org (45.33.32.156)
Host is up (0.086s latency).
Other addresses for scanme.nmap.org (not scanned): 2600:3c01::f03c:91ff:fe18:bb2f
Not shown: 993 closed ports
PORT STATE SERVICE
22/tcp open ssh
25/tcp filtered smtp
80/tcp open http
135/tcp filtered msrpc
445/tcp filtered microsoft-ds
9929/tcp open nping-echo
31337/tcp open Elite
Nmap done: 1 IP address (1 host up) scanned in 230.83 seconds
On the other hand, in passive scanning, you use third-party resources to learn about a machine’s ports without interacting with the server. Passive scanning is stealthier and helps attackers avoid detection. To find services on a machine without actively scanning it, you can use Shodan, a search engine that lets the user find machines connected to the internet.
With Shodan, you can discover the presence of webcams, web servers, or even power plants based on criteria such as hostnames or IP addresses. For example, if you run a Shodan search on scanme.nmap.org’s IP address, 45.33.32.156, you get the result in Figure 5-1. You can see that the search yields different data than our port scan, and provides additional information about the server.

Figure 5-1: The Shodan results page of scanme.nmap.org
Alternatives to Shodan include Censys and Project Sonar. Combine the information you gather from different databases for the best results. With these databases, you might also find your target’s IP addresses, certificates, and software versions.
Directory Brute-Forcing
The next thing you can do to discover more of the site’s attack surface is brute-force the directories of the web servers you’ve found. Finding directories on servers is valuable, because through them, you might discover hidden admin panels, configuration files, password files, outdated functionalities, database copies, and source code files. Directory brute-forcing can sometimes allow you to directly take over a server!
Even if you can’t find any immediate exploits, directory information often tells you about the structure and technology of an application. For example, a pathname that includes phpmyadmin usually means that the application is built with PHP.
You can use Dirsearch or Gobuster for directory brute-forcing. These tools use wordlists to construct URLs, and then request these URLs from a web server. If the server responds with a status code in the 200 range, the directory or file exists. This means you can browse to the page and see what the application is hosting there. A status code of 404 means that the directory or file doesn’t exist, while 403 means it exists but is protected. Examine 403 pages carefully to see if you can bypass the protection to access the content.
Here’s an example of running a Dirsearch command. The -u flag specifies the hostname, and the -e flag specifies the file extension to use when constructing URLs:
$ ./dirsearch.py -u scanme.nmap.org -e php
Extensions: php | HTTP method: get | Threads: 10 | Wordlist size: 6023
Error Log: /tools/dirsearch/logs/errors.log
Target: scanme.nmap.org
[12:31:11] Starting:
[12:31:13] 403 -  290B  - /.htusers
[12:31:15] 301 -  316B  - /.svn  ->  http://scanme.nmap.org/.svn/
[12:31:15] 403 -  287B  - /.svn/
[12:31:15] 403 -  298B  - /.svn/all-wcprops
[12:31:15] 403 -  294B  - /.svn/entries
[12:31:15] 403 -  297B  - /.svn/prop-base/
[12:31:15] 403 -  296B  - /.svn/pristine/
[12:31:15] 403 -  291B  - /.svn/tmp/
[12:31:15] 403 -  315B  - /.svn/text-base/index.php.svn-base
[12:31:15] 403 -  293B  - /.svn/props/
[12:31:15] 403 -  297B  - /.svn/text-base/
[12:31:40] 301 -  318B  - /images  ->  http://scanme.nmap.org/images/
[12:31:40] 200 -   7KB  - /index
[12:31:40] 200 -   7KB  - /index.html
[12:31:53] 403 -  295B  - /server-status
[12:31:53] 403 -  296B  - /server-status/
[12:31:54] 301 -  318B  - /shared  ->  http://scanme.nmap.org/shared/
Task Completed
Gobuster’s Dir mode is used to find additional content on a specific domain or subdomain. This includes hidden directories and files. In this mode, you can use the -u flag to specify the domain or subdomain you want to brute-force and -w to specify the wordlist you want to use:
gobuster dir -u target_url -w wordlistManually visiting all the pages you’ve found through brute-forcing can be time-consuming. Instead, use a screenshot tool like EyeWitness (https://github.com/FortyNorthSecurity/EyeWitness/) or Snapper (https://github.com/dxa4481/Snapper/) to automatically verify that a page is hosted on each location. EyeWitness accepts a list of URLs and takes screenshots of each page. In a photo gallery app, you can quickly skim these to find the interesting-looking ones. Keep an eye out for hidden services, such as developer or admin panels, directory listing pages, analytics pages, and pages that look outdated and ill-maintained. These are all common places for vulnerabilities to manifest.
Spidering the Site
Another way of discovering directories and paths is through web spidering, or web crawling, a process used to identify all pages on a site. A web spider tool starts with a page to visit. It then identifies all the URLs embedded on the page and visits them. By recursively visiting all URLs found on all pages of a site, the web spider can uncover many hidden endpoints in an application.
OWASP Zed Attack Proxy (ZAP) at https://www.zaproxy.org/ has a built-in web spider you can use (Figure 5-2). This open source security tool includes a scanner, proxy, and many other features. Burp Suite has an equivalent tool called the crawler, but I prefer ZAP’s spider.

Figure 5-2: The startup page of OWASP ZAP
Access its spider tool by opening ZAP and choosing Tools▶Spider (Figure 5-3).
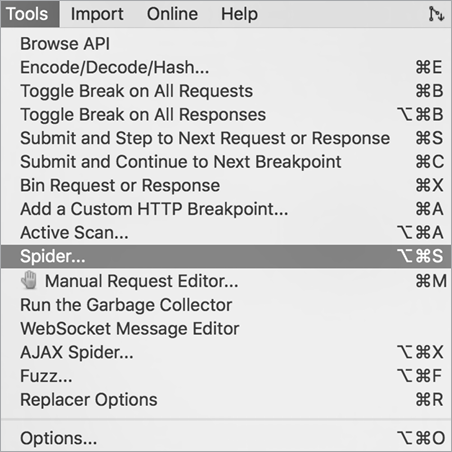
Figure 5-3: You can find the Spider tool via Tools▶Spider.
You should see a window for specifying the starting URL (Figure 5-4).

Figure 5-4: You can specify the target URL to scan.
Click Start Scan. You should see URLs pop up in the bottom window (Figure 5-5).

Figure 5-5: The scan results show up at the bottom pane of the OWASP ZAP window.
You should also see a site tree appear on the left side of your ZAP window (Figure 5-6). This shows you the files and directories found on the target server in an organized format.

Figure 5-6: The site tree in the left window shows you the files and directories found on the target server.
Third-Party Hosting
Take a look at the company’s third-party hosting footprint. For example, look for the organization’s S3 buckets. S3, which stands for Simple Storage Service, is Amazon’s online storage product. Organizations can pay to store resources in buckets to serve in their web applications, or they can use S3 buckets as a backup or storage location. If an organization uses Amazon S3, its S3 buckets can contain hidden endpoints, logs, credentials, user information, source code, and other information that might be useful to you.
How do you find an organization’s buckets? One way is through Google dorking, as mentioned earlier. Most buckets use the URL format BUCKET.s3.amazonaws.com or s3.amazonaws.com/BUCKET, so the following search terms are likely to find results:
site:s3.amazonaws.com COMPANY_NAME
site:amazonaws.com COMPANY_NAME
If the company uses custom URLs for its S3 buckets, try more flexible search terms instead. Companies often still place keywords like aws and s3 in their custom bucket URLs, so try these searches:
amazonaws s3 COMPANY_NAME
amazonaws bucket COMPANY_NAME
amazonaws COMPANY_NAME
s3 COMPANY_NAME
Another way of finding buckets is to search a company’s public GitHub repositories for S3 URLs. Try searching these repositories for the term s3. We’ll talk about using GitHub for recon in “GitHub Recon” on the following page.
GrayhatWarfare (https://buckets.grayhatwarfare.com/) is an online search engine you can use to find publicly exposed S3 buckets (Figure 5-7). It allows you to search for a bucket by using a keyword. Supply keywords related to your target, such as the application, project, or organization name, to find relevant buckets.

Figure 5-7: The GrayhatWarfare home page
Finally, you can try to brute-force buckets by using keywords. Lazys3 (https://github.com/nahamsec/lazys3/) is a tool that helps you do this. It relies on a wordlist to guess buckets that are permutations of common bucket names. Another good tool is Bucket Stream (https://github.com/eth0izzle/bucket-stream/), which parses certificates belonging to an organization and finds S3 buckets based on permutations of the domain names found on the certificates. Bucket Stream also automatically checks whether the bucket is accessible, so it saves you time.
Once you’ve found a couple of buckets that belong to the target organization, use the AWS command line tool to see if you can access one. Install the tool by using the following command:
pip install awscliThen configure it to work with AWS by following Amazon’s documentation at https://docs.aws.amazon.com/cli/latest/userguide/cli-chap-configure.html. Now you should be able to access buckets directly from your terminal via the aws s3 command. Try listing the contents of the bucket you found:
aws s3 ls s3://BUCKET_NAME/If this works, see if you can read the contents of any interesting files by copying files to your local machine:
aws s3 cp s3://BUCKET_NAME/FILE_NAME/path/to/local/directoryGather any useful information leaked via the bucket and use it for future exploitation! If the organization reveals information such as active API keys or personal information, you should report this right away. Exposed S3 buckets alone are often considered a vulnerability. You can also try to upload new files to the bucket or delete files from it. If you can mess with its contents, you might be able to tamper with the web application’s operations or corrupt company data. For example, this command will copy your local file named TEST_FILE into the target’s S3 bucket:
aws s3 cp TEST_FILE s3://BUCKET_NAME/And this command will remove the TEST_FILE that you just uploaded:
aws s3 rm s3://BUCKET_NAME/TEST_FILEThese commands are a harmless way to prove that you have write access to a bucket without actually tampering with the target company’s files.
Always upload and remove your own test files. Don’t risk deleting important company resources during your testing unless you’re willing to entertain a costly lawsuit.
GitHub Recon
Search an organization’s GitHub repositories for sensitive data that has been accidentally committed, or information that could lead to the discovery of a vulnerability.
Start by finding the GitHub usernames relevant to your target. You should be able to locate these by searching the organization’s name or product names via GitHub’s search bar, or by checking the GitHub accounts of known employees.
When you’ve found usernames to audit, visit their pages. Find repositories related to the projects you’re testing and record them, along with the usernames of the organization’s top contributors, which can help you find more relevant repositories.
Then dive into the code. For each repository, pay special attention to the Issues and Commits sections. These sections are full of potential info leaks: they could point attackers to unresolved bugs, problematic code, and the most recent code fixes and security patches. Recent code changes that haven’t stood the test of time are more likely to contain bugs. Look at any protection mechanisms implemented to see if you can bypass them. You can also search the Code section for potentially vulnerable code snippets. Once you’ve found a file of interest, check the Blame and History sections at the top-right corner of the file’s page to see how it was developed (Figure 5-8).
Figure 5-8: The History and Blame sections
We’ll dive deeper into reviewing source code in Chapter 22, but during the recon phase, look for hardcoded secrets such as API keys, encryption keys, and database passwords. Search the organization’s repositories for terms like key, secret, and password to locate hardcoded user credentials that you can use to access internal systems. After you’ve found leaked credentials, you can use KeyHacks (https://github.com/streaak/keyhacks/) to check if the credentials are valid and learn how to use them to access the target’s services.
You should also search for sensitive functionalities in the project. See if any of the source code deals with important functions such as authentication, password reset, state-changing actions, or private info reads. Pay attention to code that deals with user input, such as HTTP request parameters, HTTP headers, HTTP request paths, database entries, file reads, and file uploads, because they provide potential entry points for attackers to exploit the application’s vulnerabilities. Look for any configuration files, as they allow you to gather more information about your infrastructure. Also, search for old endpoints and S3 bucket URLs that you can attack. Record these files for further review in the future.
Outdated dependencies and the unchecked use of dangerous functions are also a huge source of bugs. Pay attention to dependencies and imports being used and go through the versions list to see if they’re outdated. Record any outdated dependencies. You can use this information later to look for publicly disclosed vulnerabilities that would work on your target.
Tools like Gitrob and TruffleHog can automate the GitHub recon process. Gitrob (https://github.com/michenriksen/gitrob/) locates potentially sensitive files pushed to public repositories on GitHub. TruffleHog (https://github.com/trufflesecurity/truffleHog/) specializes in finding secrets in repositories by conducting regex searches and scanning for high-entropy strings.
Other Sneaky OSINT Techniques
Many of the strategies I discussed so far are all examples of open source intelligence (OSINT), or the practice of gathering intel from public sources of information. This section details other OSINT sources you might use to extract valuable information.
First, check the company’s job posts for engineering positions. Engineering job listings often reveal the technologies the company uses. For example, take a look at an ad like this one:
Full Stack Engineer
- Minimum Qualifications:
- Proficiency in Python and C/C++
- Linux experience
- Experience with Flask, Django, and Node.js
- Experience with Amazon Web Services, especially EC2, ECS, S3, and RDS
From reading this, you know the company uses Flask, Django, and Node.js to build its web applications. The engineers also probably use Python, C, and C++ on the backend with a Linux machine. Finally, they use AWS to outsource their operations and file storage.
If you can’t find relevant job posts, search for employees’ profiles on LinkedIn, and read employees’ personal blogs or their engineering questions on forums like Stack Overflow and Quora. The expertise of a company’s top employees often reflects the technology used in development.
Another source of information is the employees’ Google calendars. People’s work calendars often contain meeting notes, slides, and sometimes even login credentials. If an employee shares their calendars with the public by accident, you could gain access to these. The organization or its employees’ social media pages might also leak valuable information. For example, hackers have actually discovered sets of valid credentials on Post-it Notes visible in the background of office selfies!
If the company has an engineering mailing list, sign up for it to gain insight into the company’s technology and development process. Also check the company’s SlideShare or Pastebin accounts. Sometimes, when organizations present at conferences or have internal meetings, they upload slides to SlideShare for reference. You might be able to find information about the technology stack and security challenges faced by the company.
Pastebin (https://pastebin.com/) is a website for pasting and storing text online for a short time. People use it to share text across machines or with others. Engineers sometimes use it to share source code or server logs with their colleagues for viewing or collaboration, so it could be a great source of information. You might also find uploaded credentials and development comments. Go to Pastebin, search for the target’s organization name, and see what happens! You can also use automated tools like PasteHunter (https://github.com/kevthehermit/PasteHunter/) to scan for publicly pasted data.
Lastly, consult archive websites like the Wayback Machine (https://archive.org/web/), a digital record of internet content (Figure 5-9). It records a site’s content at various points in time. Using the Wayback Machine, you can find old endpoints, directory listings, forgotten subdomains, URLs, and files that are outdated but still in use. Tomnomnom’s tool Waybackurls (https://github.com/tomnomnom/waybackurls/) can automatically extract endpoints and URLs from the Wayback Machine.
Figure 5-9: The Wayback Machine archives the internet and allows you to see pages that have been removed by a website.
Tech Stack Fingerprinting
Fingerprinting techniques can help you understand the target application even better. Fingerprinting is identifying the software brands and versions that a machine or an application uses. This information allows you to perform targeted attacks on the application, because you can search for any known misconfigurations and publicly disclosed vulnerabilities related to a particular version. For example, if you know the server is using an old version of Apache that could be impacted by a disclosed vulnerability, you can immediately attempt to attack the server using it.
The security community classifies known vulnerabilities as Common Vulnerabilities and Exposures (CVEs) and gives each CVE a number for reference. Search for them on the CVE database (https://cve.mitre.org/cve/search_cve_list.html).
The simplest way of fingerprinting an application is to engage with the application directly. First, run Nmap on a machine with the -sV flag on to enable version detection on the port scan. Here, you can see that Nmap attempted to fingerprint some software running on the target host for us:
$ nmap scanme.nmap.org -sV
Starting Nmap 7.60 ( https://nmap.org )
Nmap scan report for scanme.nmap.org (45.33.32.156)
Host is up (0.065s latency).
Other addresses for scanme.nmap.org (not scanned): 2600:3c01::f03c:91ff:fe18:bb2f
Not shown: 992 closed ports
PORT STATE SERVICE VERSION
22/tcp open ssh OpenSSH 6.6.1p1 Ubuntu 2ubuntu2.13 (Ubuntu Linux; protocol 2.0)
25/tcp filtered smtp
80/tcp open http Apache httpd 2.4.7 ((Ubuntu))
135/tcp filtered msrpc
139/tcp filtered netbios-ssn
445/tcp filtered microsoft-ds
9929/tcp open nping-echo Nping echo
31337/tcp open tcpwrapped
Service Info: OS: Linux; CPE: cpe:/o:linux:linux_kernel
Service detection performed. Please report any incorrect results at https://nmap.org/submit/.
Nmap done: 1 IP address (1 host up) scanned in 9.19 seconds
Next, in Burp, send an HTTP request to the server to check the HTTP headers used to gain insight into the tech stack. A server might leak many pieces of information useful for fingerprinting its technology:
Server: Apache/2.0.6 (Ubuntu)
X-Powered-By: PHP/5.0.1
X-Generator: Drupal 8
X-Drupal-Dynamic-Cache: UNCACHEABLE
Set-Cookie: PHPSESSID=abcde;
HTTP headers like Server and X-Powered-By are good indicators of technologies. The Server header often reveals the software versions running on the server. X-Powered-By reveals the server or scripting language used. Also, certain headers are used only by specific technologies. For example, only Drupal uses X-Generator and X-Drupal-Dynamic-Cache. Technology-specific cookies such as PHPSESSID are also clues; if a server sends back a cookie named PHPSESSID, it’s probably developed using PHP.
The HTML source code of web pages can also provide clues. Many web frameworks or other technologies will embed a signature in source code. Right-click a page, select View Source Code, and press CTRL-F to search for phrases like powered by, built with, and running. For instance, you might find Powered by: WordPress 3.3.2 written in the source.
Check technology-specific file extensions, filenames, folders, and directories. For example, a file named phpmyadmin at the root directory, like https://example.com/phpmyadmin, means the application runs PHP. A directory named jinja2 that contains templates means the site probably uses Django and Jinja2. You can find more information about a specific technology’s filesystem signatures by visiting its individual documentation.
Several applications can automate this process. Wappalyzer (https://www.wappalyzer.com/) is a browser extension that identifies content management systems, frameworks, and programming languages used on a site. BuiltWith (https://builtwith.com/) is a website that shows you which web technologies a site is built with. StackShare (https://stackshare.io/) is an online platform that allows developers to share the tech they use. You can use it to find out if the organization’s developers have posted their tech stack. Finally, Retire.js is a tool that detects outdated JavaScript libraries and Node.js packages. You can use it to check for outdated technologies on a site.
Writing Your Own Recon Scripts
You’ve probably realized by now that good recon is an extensive process. But it doesn’t have to be time-consuming or hard to manage. We’ve already discussed several tools that use the power of automation to make the process easier.
Sometimes you may find it handy to write your own scripts. A script is a list of commands designed to be executed by a program. They’re used to automate tasks such as data analysis, web-page generation, and system administration. For us bug bounty hunters, scripting is a way of quickly and efficiently performing recon, testing, and exploitation. For example, you could write a script to scan a target for new subdomains, or enumerate potentially sensitive files and directories on a server. Once you’ve learned how to script, the possibilities are endless.
This section covers bash scripts in particular—what they are and why you should use them. You’ll learn how to use bash to simplify your recon process and even write your own tools. I’ll assume that you have basic knowledge of how programming languages work, including variables, conditionals, loops, and functions, so if you’re not familiar with these concepts, please take an introduction to coding class at Codecademy (https://www.codecademy.com/) or read a programming book.
Bash scripts, or any type of shell script, are useful for managing complexities and automating recurrent tasks. If your commands involve multiple input parameters, or if the input of one command depends on the output of another, entering it all manually could get complicated quickly and increase the chance of a programming mistake. On the other hand, you might have a list of commands that you want to execute many, many times. Scripts are useful here, as they save you the trouble of typing the same commands over and over again. Just run the script each time and be done with it.
Understanding Bash Scripting Basics
Let’s write our first script. Open any text editor to follow along. The first line of every shell script you write should be the shebang line. It starts with a hash mark (#) and an exclamation mark (!), and it declares the interpreter to use for the script. This allows the plaintext file to be executed like a binary. We’ll use it to indicate that we’re using bash.
Let’s say we want to write a script that executes two commands; it should run Nmap and then Dirsearch on a target. We can put the commands in the script like this:
#!/bin/bash
nmap scanme.nmap.org
/PATH/TO/dirsearch.py -u scanme.nmap.org -e php
This script isn’t very useful; it can scan only one site, scanme.nmap.org. Instead, we should let users provide input arguments to the bash script so they can choose the site to scan. In bash syntax, $1 represents the first argument passed in, $2 is the second argument, and so on. Also, $@ represents all arguments passed in, while $# represents the total number of arguments. Let’s allow users to specify their targets with the first input argument, assigned to the variable $1:
#!/bin/bash
nmap $1
/PATH/TO/dirsearch.py -u $1 -e php
Now the commands will execute for whatever domain the user passes in as the first argument.
Notice that the third line of the script includes /PATH/TO/dirsearch.py. You should replace /PATH/TO/ with the absolute path of the directory where you stored the Dirsearch script. If you don’t specify its location, your computer will try to look for it in the current directory, and unless you stored the Dirsearch file in the same directory as your shell script, bash won’t find it.
Another way of making sure that your script can find the commands to use is through the PATH variable, an environmental variable in Unix systems that specifies where executable binaries are found. If you run this command to add Dirsearch’s directory to your PATH, you can run the tool from anywhere without needing to specify its absolute path:
export PATH="PATH_TO_DIRSEARCH:$PATH"After executing this command, you should be able to use Dirsearch directly:
#!/bin/bash
nmap $1
dirsearch.py -u $1 -e php
Note that you will have to run the export command again after you restart your terminal for your PATH to contain the path to Dirsearch. If you don’t want to export PATH over and over again, you can add the export command to your ~/.bash_profile file, a file that stores your bash preferences and configuration. You can do this by opening ~/.bash_profile with your favorite text editor and adding the export command to the bottom of the file.
The script is complete! Save it in your current directory with the filename recon.sh. The .sh extension is the conventional extension for shell scripts. Make sure your terminal’s working directory is the same as the one where you’ve stored your script by running the command cd /location/of/your/script. Execute the script in the terminal with this command:
$ ./recon.shYou might see a message like this:
permission denied: ./recon.shThis is because the current user doesn’t have permission to execute the script. For security purposes, most files aren’t executable by default. You can correct this behavior by adding executing rights for everyone by running this command in the terminal:
$ chmod +x recon.shThe chmod command edits the permissions for a file, and +x indicates that we want to add the permission to execute for all users. If you’d like to grant executing rights for the owner of the script only, use this command instead:
$ chmod 700 recon.shNow run the script as we did before. Try passing in scanme.nmap.org as the first argument. You should see the output of the Nmap and Dirsearch printed out:
$ ./recon.sh scanme.nmap.org
Starting Nmap 7.60 ( https://nmap.org )
Nmap scan report for scanme.nmap.org (45.33.32.156)
Host is up (0.062s latency).
Other addresses for scanme.nmap.org (not scanned): 2600:3c01::f03c:91ff:fe18:bb2f
Not shown: 992 closed ports
PORT      STATE    SERVICE
22/tcp    open     ssh
25/tcp    filtered smtp
80/tcp    open     http
135/tcp   filtered msrpc
139/tcp   filtered netbios-ssn
445/tcp   filtered microsoft-ds
9929/tcp  open     nping-echo
31337/tcp open     Elite
Nmap done: 1 IP address (1 host up) scanned in 2.16 seconds

Extensions: php | HTTP method: get | Threads: 10 | Wordlist size: 6023
Error Log: /Users/vickieli/tools/dirsearch/logs/errors.log
Target: scanme.nmap.org
[11:14:30] Starting:
[11:14:32] 403 -  295B  - /.htaccessOLD2
[11:14:32] 403 -  294B  - /.htaccessOLD
[11:14:33] 301 -  316B  - /.svn  ->  http://scanme.nmap.org/.svn/
[11:14:33] 403 -  298B  - /.svn/all-wcprops
[11:14:33] 403 -  294B  - /.svn/entries
[11:14:33] 403 -  297B  - /.svn/prop-base/
[11:14:33] 403 -  296B  - /.svn/pristine/
[11:14:33] 403 -  315B  - /.svn/text-base/index.php.svn-base
[11:14:33] 403 -  297B  - /.svn/text-base/
[11:14:33] 403 -  293B  - /.svn/props/
[11:14:33] 403 -  291B  - /.svn/tmp/
[11:14:55] 301 -  318B  - /images  ->  http://scanme.nmap.org/images/
[11:14:56] 200 -    7KB - /index
[11:14:56] 200 -    7KB - /index.html
[11:15:08] 403 -  296B  - /server-status/
[11:15:08] 403 -  295B  - /server-status
[11:15:08] 301 -  318B  - /shared  ->  http://scanme.nmap.org/shared/
Task Completed
Saving Tool Output to a File
To analyze the recon results later, you may want to save your scripts’ output in a separate file. This is where input and output redirection come into play. Input redirection is using the content of a file, or the output of another program, as the input to your script. Output redirection is redirecting the output of a program to another location, such as to a file or another program. Here are some of the most useful redirection operators:
- PROGRAM
>FILENAME Writes the program’s output into the file with that name. (It will clear any content from the file first. It will also create the file if the file does not already exist.) - PROGRAM
>>FILENAME Appends the output of the program to the end of the file, without clearing the file’s original content. - PROGRAM
<FILENAME Reads from the file and uses its content as the program input. - PROGRAM1
|PROGRAM2 Uses the output of PROGRAM1 as the input to PROGRAM2.
We could, for example, write the results of the Nmap and Dirsearch scans into different files:
#!/bin/bash
echo "Creating directory $1_recon." 1
mkdir $1_recon 2
nmap $1 > $1_recon/nmap 3
echo "The results of nmap scan are stored in $1_recon/nmap."
/PATH/TO/dirsearch.py -u $1 -e php 4 --simple-report=$1_recon/dirsearch
echo "The results of dirsearch scan are stored in $1_recon/dirsearch."
The echo command 1 prints a message to the terminal. Next, mkdir creates a directory with the name DOMAIN_recon 2. We store the results of nmap into a file named nmap in the newly created directory 3. Dirsearch’s simple-report flag 4 generates a report in the designated location. We store the results of Dirsearch to a file named dirsearch in the new directory.
You can make your script more manageable by introducing variables to reference files, names, and values. Variables in bash can be assigned using the following syntax: VARIABLE_NAME=VARIABLE_VALUE. Note that there should be no spaces around the equal sign. The syntax for referencing variables is $VARIABLE_NAME. Let’s implement these into the script:
#!/bin/bash
PATH_TO_DIRSEARCH="/Users/vickieli/tools/dirsearch"
DOMAIN=$1
DIRECTORY=${DOMAIN}_recon 1
echo "Creating directory $DIRECTORY."
mkdir $DIRECTORY
nmap $DOMAIN > $DIRECTORY/nmap
echo "The results of nmap scan are stored in $DIRECTORY/nmap."
$PATH_TO_DIRSEARCH/dirsearch.py -u $DOMAIN -e php –simple-report=$DIRECTORY/dirsearch 2
echo "The results of dirsearch scan are stored in $DIRECTORY/dirsearch."
We use ${DOMAIN}_recon instead of $DOMAIN_recon 1 because, otherwise, bash would recognize the entirety of DOMAIN_recon as the variable name. The curly brackets tell bash that DOMAIN is the variable name, and _recon is the plaintext we’re appending to it. Notice that we also stored the path to Dirsearch in a variable to make it easy to change in the future 2.
Using redirection, you can now write shell scripts that run many tools in a single command and save their outputs in separate files.
Adding the Date of the Scan to the Output
Let’s say you want to add the current date to your script’s output, or select which scans to run, instead of always running both Nmap and Dirsearch. If you want to write tools with more functionalities like this, you have to understand some advanced shell scripting concepts.
For example, a useful one is command substitution, or operating on the output of a command. Using $() tells Unix to execute the command surrounded by the parentheses and assign its output to the value of a variable. Let’s practice using this syntax:
#!/bin/bash
PATH_TO_DIRSEARCH="/Users/vickieli/tools/dirsearch"
TODAY=$(date) 1
echo "This scan was created on $TODAY" 2
DOMAIN=$1
DIRECTORY=${DOMAIN}_recon
echo "Creating directory $DIRECTORY."
mkdir $DIRECTORY
nmap $DOMAIN > $DIRECTORY/nmap
echo "The results of nmap scan are stored in $DIRECTORY/nmap."
$PATH_TO_DIRSEARCH/dirsearch.py -u $DOMAIN -e php --simple-report=$DIRECTORY/dirsearch
echo "The results of dirsearch scan are stored in $DIRECTORY/dirsearch."
At 1, we assign the output of the date command to the variable TODAY. The date command displays the current date and time. This lets us output a message indicating the day on which we performed the scan 2.
Adding Options to Choose the Tools to Run
Now, to selectively run only certain tools, you need to use conditionals. In bash, the syntax of an if statement is as follows. Note that the conditional statement ends with the fi keyword, which is if backward:
if [ condition 1 ]
then
  # Do if condition 1 is satisfied
elif [ condition 2 ]
then
  # Do if condition 2 is satisfied, and condition 1 is not satisfied
else
  # Do something else if neither condition is satisfied
fi
Let’s say that we want users to be able to specify the scan MODE, as such:
$ ./recon.sh scanmme.nmap.org MODEWe can implement this functionality like this:
#!/bin/bash
PATH_TO_DIRSEARCH="/Users/vickieli/tools/dirsearch"
TODAY=$(date)
echo "This scan was created on $TODAY"
DIRECTORY=${DOMAIN}_recon
echo "Creating directory $DIRECTORY."
mkdir $DIRECTORY
if [ $2 == "nmap-only" ] 1
then
  nmap $DOMAIN > $DIRECTORY/nmap 2
  echo "The results of nmap scan are stored in $DIRECTORY/nmap."
elif [ $2 == "dirsearch-only" ] 3
then
  $PATH_TO_DIRSEARCH/dirsearch.py -u $DOMAIN -e php –simple-report=$DIRECTORY/dirsearch 4
  echo "The results of dirsearch scan are stored in $DIRECTORY/dirsearch."
else 5
  nmap $DOMAIN > $DIRECTORY/nmap 6
  echo "The results of nmap scan are stored in $DIRECTORY/nmap."
  $PATH_TO_DIRSEARCH/dirsearch.py -u $DOMAIN -e php --simple-report=$DIRECTORY/dirsearch
  echo "The results of dirsearch scan are stored in $DIRECTORY/dirsearch."
fi
If the user specifies nmap-only 1, we run nmap only and store the results to a file named nmap 2. If the user specifies dirsearch-only 3, we execute and store the results of Dirsearch only 4. If the user specifies neither 5, we run both scans 6.
Now you can make your tool run only the Nmap or Dirsearch commands by specifying one of these in the command:
$ ./recon.sh scanme.nmap.org nmap-only
$ ./recon.sh scanme.nmap.org dirsearch-only
Running Additional Tools
What if you want the option of retrieving information from the crt.sh tool, as well? For example, you want to switch between these three modes or run all three recon tools at once:
$ ./recon.sh scanme.nmap.org nmap-only
$ ./recon.sh scanme.nmap.org dirsearch-only
$ ./recon.sh scanme.nmap.org crt-only
We could rewrite the if-else statements to work with three options: first, we check if MODE is nmap-only. Then we check if MODE is dirsearch-only, and finally if MODE is crt-only. But that’s a lot of if-else statements, making the code complicated.
Instead, let’s use bash’s case statements, which allow you to match several values against one variable without going through a long list of if-else statements. The syntax of case statements looks like this. Note that the statement ends with esac, or case backward:
case $VARIABLE_NAME in
  case1)
    Do something
    ;;
  case2)
    Do something
    ;;
  caseN)
    Do something
    ;;
  *)
    Default case, this case is executed if no other case matches.
    ;;
esac
We can improve our script by implementing the functionality with case statements instead of multiple if-else statements:
#!/bin/bash
PATH_TO_DIRSEARCH="/Users/vickieli/tools/dirsearch"
TODAY=$(date)
echo "This scan was created on $TODAY"
DOMAIN=$1
DIRECTORY=${DOMAIN}_recon
echo "Creating directory $DIRECTORY."
mkdir $DIRECTORY
case $2 in
  nmap-only)
    nmap $DOMAIN > $DIRECTORY/nmap
    echo "The results of nmap scan are stored in $DIRECTORY/nmap."
    ;;
  dirsearch-only)
    $PATH_TO_DIRSEARCH/dirsearch.py -u $DOMAIN -e php --simple-report=$DIRECTORY/dirsearch
    echo "The results of dirsearch scan are stored in $DIRECTORY/dirsearch."
    ;;
  crt-only)
    curl "https://crt.sh/?q=$DOMAIN&output=json" -o $DIRECTORY/crt 1
    echo "The results of cert parsing is stored in $DIRECTORY/crt."
    ;;
  *)
    nmap $DOMAIN > $DIRECTORY/nmap
    echo "The results of nmap scan are stored in $DIRECTORY/nmap."
    $PATH_TO_DIRSEARCH/dirsearch.py -u $DOMAIN -e php --simple-report=$DIRECTORY/dirsearch
    echo "The results of dirsearch scan are stored in $DIRECTORY/dirsearch."
    curl "https://crt.sh/?q=$DOMAIN&output=json" -o $DIRECTORY/crt
    echo "The results of cert parsing is stored in $DIRECTORY/crt."
    ;;
esac
The curl command 1 downloads the content of a page. We use it here to download data from crt.sh. And curl’s -o option lets you specify an output file. But notice that our code has a lot of repetition! The sections of code that run each type of scan repeat twice. Let’s try to reduce the repetition by using functions. The syntax of a bash function looks like this:
FUNCTION_NAME()
{
  DO_SOMETHING
}
After you’ve declared a function, you can call it like any other shell command within the script. Let’s add functions to the script:
#!/bin/bash
PATH_TO_DIRSEARCH="/Users/vickieli/tools/dirsearch"
TODAY=$(date)
echo "This scan was created on $TODAY"
DOMAIN=$1
DIRECTORY=${DOMAIN}_recon
echo "Creating directory $DIRECTORY."
mkdir $DIRECTORY
nmap_scan() 1
{
  nmap $DOMAIN > $DIRECTORY/nmap
  echo "The results of nmap scan are stored in $DIRECTORY/nmap."
}
dirsearch_scan() 2
{
  $PATH_TO_DIRSEARCH/dirsearch.py -u $DOMAIN -e php --simple-report=$DIRECTORY/dirsearch
  echo "The results of dirsearch scan are stored in $DIRECTORY/dirsearch."
}
crt_scan() 3
{
  curl "https://crt.sh/?q=$DOMAIN&output=json" -o $DIRECTORY/crt
  echo "The results of cert parsing is stored in $DIRECTORY/crt."
}
case $2 in 4
  nmap-only)
    nmap_scan
    ;;
  dirsearch-only)
    dirsearch_scan
    ;;
  crt-only)
    crt_scan
    ;;
  *)
    nmap_scan
    dirsearch_scan
    crt_scan
    ;;
esac
You can see that we’ve simplified our code. We created three functions, nmap_scan 1, dirsearch_scan 2, and crt_scan 3. We put the scan and echo commands in these functions so we can call them repeatedly without writing the same code over and over 4. This simplification might not seem like much here, but reusing code with functions will save you a lot of headaches when you write more complex programs.
Keep in mind that all bash variables are global except for input parameters like $1, $2, and $3. This means that variables like $DOMAIN, $DIRECTORY, and $PATH_TO_DIRSEARCH become available throughout the script after we’ve declared them, even if they’re declared within functions. On the other hand, parameter values like $1, $2, and $3 can refer only to the values the function is called with, so you can’t use a script’s input arguments within a function, like this:
nmap_scan()
{
  nmap $1 > $DIRECTORY/nmap
  echo "The results of nmap scan are stored in $DIRECTORY/nmap."
}
nmap_scan
Here, the $1 in the function refers to the first argument that nmap_scan was called with, not the argument our recon.sh script was called with. Since nmap_scan wasn’t called with any arguments, $1 is blank.
Parsing the Results
Now we have a tool that performs three types of scans and stores the results into files. But after the scans, we’d still have to manually read and make sense of complex output files. Is there a way to speed up this process too?
Let’s say you want to search for a certain piece of information in the output files. You can use Global Regular Expression Print (grep) to do that. This command line utility is used to perform searches in text, files, and command outputs. A simple grep command looks like this:
grep password file.txtThis tells grep to search for the string password in the file file.txt, then print the matching lines in standard output. For example, we can quickly search the Nmap output file to see if the target has port 80 open:
$ grep 80 TARGET_DIRECTORY/nmap
80/tcp open http
You can also make your search more flexible by using regular expressions in your search string. A regular expression, or regex, is a special string that describes a search pattern. It can help you display only specific parts of the output. For example, you may have noticed that the output of the Nmap command looks like this:
Starting Nmap 7.60 ( https://nmap.org )
Nmap scan report for scanme.nmap.org (45.33.32.156)
Host is up (0.065s latency).
Other addresses for scanme.nmap.org (not scanned): 2600:3c01::f03c:91ff:fe18:bb2f
Not shown: 992 closed ports
PORT STATE SERVICE
22/tcp open ssh
25/tcp filtered smtp
80/tcp open http
135/tcp filtered msrpc
139/tcp filtered netbios-ssn
445/tcp filtered microsoft-ds
9929/tcp open nping-echo
31337/tcp open Elite
Nmap done: 1 IP address (1 host up) scanned in 2.43 seconds
You might want to trim the irrelevant messages from the file so it looks more like this:
PORT STATE SERVICE
22/tcp open ssh
25/tcp filtered smtp
80/tcp open http
135/tcp filtered msrpc
139/tcp filtered netbios-ssn
445/tcp filtered microsoft-ds
9929/tcp open nping-echo
31337/tcp open Elite
Use this command to filter out the messages at the start and end of Nmap’s output and keep only the essential part of the report:
grep -E "^S+s+S+s+S+$" DIRECTORY/nmap > DIRECTORY/nmap_cleanedThe -E flag tells grep you’re using a regex. A regex consists of two parts: constants and operators. Constants are sets of strings, while operators are symbols that denote operations over these strings. These two elements together make regex a powerful tool of pattern matching. Here’s a quick overview of regex operators that represent characters:
dmatches any digit.wmatches any character.smatches any whitespace, andSmatches any non-whitespace..matches with any single character.escapes a special character.^matches the start of the string or line.$matches the end of the string or line.
Several operators also specify the number of characters to match:
*matches the preceding character zero or more times.+matches the preceding character one or more times.{3}matches the preceding character three times.{1, 3}matches the preceding character one to three times.{1, }matches the preceding character one or more times.[abc]matches one of the characters within the brackets.[a-z]matches one of the characters within the range of a to z.(a|b|c)matches either a or b or c.
Let’s take another look at our regex expression here. Remember how s matches any whitespace, and S matches any non-whitespace? This means s+ would match any whitespace one or more characters long, and S+ would match any non-whitespace one or more characters long. This regex pattern specifies that we should extract lines that contain three strings separated by two whitespaces:
"^S+s+S+s+S+$"The filtered output will look like this:
PORT STATE SERVICE
22/tcp open ssh
25/tcp filtered smtp
80/tcp open http
135/tcp filtered msrpc
139/tcp filtered netbios-ssn
445/tcp filtered microsoft-ds
9929/tcp open nping-echo
31337/tcp open Elite
To account for extra whitespaces that might be in the command output, let’s add two more optional spaces around our search string:
"^s*S+s+S+s+S+s*$"You can use many more advanced regex features to perform more sophisticated matching. However, this simple set of operators serves well for our purposes. For a complete guide to regex syntax, read RexEgg’s cheat sheet (https://www.rexegg.com/regex-quickstart.html).
Building a Master Report
What if you want to produce a master report from all three output files? You need to parse the JSON file from crt.sh. You can do this with jq, a command line utility that processes JSON. If we examine the JSON output file from crt.sh, we can see that we need to extract the name_value field of each certificate item to extract domain names. This command does just that:
$ jq -r ".[] | .name_value" $DOMAIN/crtThe -r flag tells jq to write the output directly to standard output rather than format it as JSON strings. The .[] iterates through the array within the JSON file, and .name_value extracts the name_value field of each item. Finally, $DOMAIN/crt is the input file to the jq command. To learn more about how jq works, read its manual (https://stedolan.github.io/jq/manual/).
To combine all output files into a master report, write a script like this:
#!/bin/bash
PATH_TO_DIRSEARCH="/Users/vickieli/tools/dirsearch"
DOMAIN=$1
DIRECTORY=${DOMAIN}_recon
echo "Creating directory $DIRECTORY."
mkdir $DIRECTORY
nmap_scan()
{
  nmap $DOMAIN > $DIRECTORY/nmap
  echo "The results of nmap scan are stored in $DIRECTORY/nmap."
}
dirsearch_scan()
{
  $PATH_TO_DIRSEARCH/dirsearch.py -u $DOMAIN -e php --simple-report=$DIRECTORY/dirsearch
  echo "The results of dirsearch scan are stored in $DIRECTORY/dirsearch."
}
crt_scan()
{
  curl "https://crt.sh/?q=$DOMAIN&output=json" -o $DIRECTORY/crt
  echo "The results of cert parsing is stored in $DIRECTORY/crt."
}
case $2 in
  nmap-only)
    nmap_scan
    ;;
  dirsearch-only)
    dirsearch_scan
    ;;
  crt-only)
    crt_scan
    ;;
  *)
    nmap_scan
    dirsearch_scan
    crt_scan
    ;;
esac
echo "Generating recon report from output files..."
TODAY=$(date)
echo "This scan was created on $TODAY" > $DIRECTORY/report 1
echo "Results for Nmap:" >> $DIRECTORY/report
grep -E "^s*S+s+S+s+S+s*$" $DIRECTORY/nmap >> $DIRECTORY/report 2
echo "Results for Dirsearch:" >> $DIRECTORY/report
cat $DIRECTORY/dirsearch >> $DIRECTORY/report 3
echo "Results for crt.sh:" >> $DIRECTORY/report
jq -r ".[] | .name_value" $DIRECTORY/crt >> $DIRECTORY/report 4
First, we create a new file named report and write today’s date into it 1 to keep track of when the report was generated. We then append the results of the nmap and dirsearch commands into the report file 2. The cat command prints the contents of a file to standard output, but we can also use it to redirect the content of the file into another file 3. Finally, we extract domain names from the crt.sh report and append it to the end of the report file 4.
Scanning Multiple Domains
What if we want to scan multiple domains at once? When reconning a target, we might start with several of the organization’s domain names. For example, we know that Facebook owns both facebook.com and fbcdn.net. But our current script allows us to scan only one domain at a time. We need to write a tool that can scan multiple domains with a single command, like this:
./recon.sh facebook.com fbcdn.net nmap-onlyWhen we scan multiple domains like this, we need a way to distinguish which arguments specify the scan MODE and which specify target domains. As you’ve already seen from the tools I introduced, most tools allow users to modify the behavior of a tool by using command line options or flags, such as -u and --simple-report.
The getopts tool parses options from the command line by using single-character flags. Its syntax is as follows, where OPTSTRING specifies the option letters that getopts should recognize. For example, if it should recognize the options -m and -i, you should specify mi. If you want an option to contain argument values, the letter should be followed by a colon, like this: m:i. The NAME argument specifies the variable name that stores the option letter.
getopts OPTSTRING NAMETo implement our multiple-domain scan functionality, we can let users use an -m flag to specify the scan mode and assume that all other arguments are domains. Here, we tell getopts to recognize an option if the option flag is -m and that this option should contain an input value. The getopts tool also automatically stores the value of any options into the $OPTARG variable. We can store that value into a variable named MODE:
getopts "m:" OPTION
MODE=$OPTARG
Now if you run the shell script with an -m flag, the script will know that you’re specifying a scan MODE! Note that getopts stops parsing arguments when it encounters an argument that doesn’t start with the - character, so you’ll need to place the scan mode before the domain arguments when you run the script:
./recon.sh -m nmap-only facebook.com fbcdn.netNext, we’ll need a way to read every domain argument and perform scans on them. Let’s use loops! Bash has two types of loops: the for loop and the while loop. The for loop works better for our purposes, as we already know the number of values we are looping through. In general, you should use for loops when you already have a list of values to iterate through. You should use while loops when you’re not sure how many values to loop through but want to specify the condition in which the execution should stop.
Here’s the syntax of a for loop in bash. For every item in LIST_OF_VALUES, bash will execute the code between do and done once:
for i in LIST_OF_VALUES
do
  DO SOMETHING
done
Now let’s implement our functionality by using a for loop:
1 for i in "${@:$OPTIND:$#}"
do
  # Do the scans for $i
done
We create an array 1 that contains every command line argument, besides the ones that are already parsed by getopts, which stores the index of the first argument after the options it parses into a variable named $OPTIND. The characters $@ represent the array containing all input arguments, while $# is the number of command line arguments passed in. "${@:OPTIND:}" slices the array so that it removes the MODE argument, like nmap-only, making sure that we iterate through only the domains part of our input. Array slicing is a way of extracting a subset of items from an array. In bash, you can slice arrays by using this syntax (note that the quotes around the command are necessary):
"${INPUT_ARRAY:START_INDEX:END_INDEX}"The $i variable represents the current item in the argument array. We can then wrap the loop around the code:
#!/bin/bash
PATH_TO_DIRSEARCH="/Users/vickieli/tools/dirsearch"
nmap_scan()
{
  nmap $DOMAIN > $DIRECTORY/nmap
  echo "The results of nmap scan are stored in $DIRECTORY/nmap."
}
dirsearch_scan()
{
  $PATH_TO_DIRSEARCH/dirsearch.py -u $DOMAIN -e php --simple-report=$DIRECTORY/dirsearch
  echo "The results of dirsearch scan are stored in $DIRECTORY/dirsearch."
}
crt_scan()
{
  curl "https://crt.sh/?q=$DOMAIN&output=json" -o $DIRECTORY/crt
  echo "The results of cert parsing is stored in $DIRECTORY/crt."
}
getopts "m:" OPTION
MODE=$OPTARG

for i in "${@:$OPTIND:$#}" 1
do

  DOMAIN=$i
  DIRECTORY=${DOMAIN}_recon
  echo "Creating directory $DIRECTORY."
  mkdir $DIRECTORY

  case $MODE in
    nmap-only)
      nmap_scan
      ;;
    dirsearch-only)
      dirsearch_scan
      ;;
    crt-only)
      crt_scan
      ;;
    *)
      nmap_scan
      dirsearch_scan
      crt_scan
      ;;
  esac
  echo "Generating recon report for $DOMAIN..."
  TODAY=$(date)
  echo "This scan was created on $TODAY" > $DIRECTORY/report
    if [ -f $DIRECTORY/nmap ];then 2
    echo "Results for Nmap:" >> $DIRECTORY/report
    grep -E "^s*S+s+S+s+S+s*$" $DIRECTORY/nmap >> $DIRECTORY/report
  fi
    if [ -f $DIRECTORY/dirsearch ];then 3
    echo "Results for Dirsearch:" >> $DIRECTORY/report
    cat $DIRECTORY/dirsearch >> $DIRECTORY/report
  fi
    if [ -f $DIRECTORY/crt ];then 4
    echo "Results for crt.sh:" >> $DIRECTORY/report
    jq -r ".[] | .name_value" $DIRECTORY/crt >> $DIRECTORY/report
  fi
  done 5
The for loop starts with the for keyword 1 and ends with the done keyword 5. Notice that we also added a few lines in the report section to see if we need to generate each type of report. We check whether the output file of an Nmap scan, a Dirsearch scan, or a crt.sh scan exist so we can determine if we need to generate a report for that scan type 2 3 4.
The brackets around a condition mean that we’re passing the contents into a test command: [ -f $DIRECTORY/nmap ] is equivalent to test -f $DIRECTORY/nmap.
The test command evaluates a conditional and outputs either true or false. The -f flag tests whether a file exists. But you can test for more conditions! Let’s go through some useful test conditions. The -eq and -ne flags test for equality and inequality, respectively. This returns true if $3 is equal to 1:
if [ $3 -eq 1 ]This returns true if $3 is not equal to 1:
if [ $3 -ne 1 ]The -gt, -ge, -lt, and le flags test for greater than, greater than or equal to, less than, and less than or equal to, respectively:
if [ $3 -gt 1 ]
if [ $3 -ge 1 ]
if [ $3 -lt 1 ]
if [ $3 -le 1 ]
The -z and -n flags test whether a string is empty. These conditions are both true:
if [ -z "" ]
if [ -n "abc" ]
The -d, -f, -r, -w, and -x flags check for directory and file statuses. You can use them to check the existence and permissions of a file before your shell script operates on them. For instance, this command returns true if /bin is a directory that exists:
if [ -d /bin]This one returns true if /bin/bash is a file that exists:
if [ -f /bin/bash ]And this one returns true if /bin/bash is a readable file:
if [ -r /bin/bash ]or a writable file:
if [ -w /bin/bash ]or an executable file:
if [ -x /bin/bash ]You can also use && and || to combine test expressions. This command returns true if both expressions are true:
if [ $3 -gt 1 ] && [ $3 -lt 3 ]And this one returns true if at least one of them is true:
if [ $3 -gt 1 ] || [ $3 -lt 0 ]You can find more comparison flags in the test command’s manual by running man test. (If you aren’t sure about the commands you’re using, you can always enter man followed by the command name in the terminal to access the command’s manual file.)
Writing a Function Library
As your codebase gets larger, you should consider writing a function library to reuse code. We can store all the commonly used functions in a separate file called scan.lib. That way, we can call these functions as needed for future recon tasks:
#!/bin/bash
nmap_scan()
{
  nmap $DOMAIN > $DIRECTORY/nmap
  echo "The results of nmap scan are stored in $DIRECTORY/nmap."
}
dirsearch_scan()
{
  $PATH_TO_DIRSEARCH/dirsearch.py -u $DOMAIN -e php --simple-report=$DIRECTORY/dirsearch
  echo "The results of dirsearch scan are stored in $DIRECTORY/dirsearch."
}
crt_scan()
{
  curl "https://crt.sh/?q=$DOMAIN&output=json" -o $DIRECTORY/crt
  echo "The results of cert parsing is stored in $DIRECTORY/crt."
}
In another file, we can source the library file in order to use all of its functions and variables. We source a script via the source command, followed by the path to the script:
#!/bin/bash
source ./scan.lib
PATH_TO_DIRSEARCH="/Users/vickieli/tools/dirsearch"
getopts "m:" OPTION
MODE=$OPTARG
for i in "${@:$OPTIND:$#}"
do
  DOMAIN=$i
  DIRECTORY=${DOMAIN}_recon
  echo "Creating directory $DIRECTORY."
  mkdir $DIRECTORY
  case $MODE in
    nmap-only)
      nmap_scan
      ;;
    dirsearch-only)
      dirsearch_scan
      ;;
    crt-only)
      crt_scan
      ;;
    *)
      nmap_scan
      dirsearch_scan
      crt_scan
      ;;
  esac
  echo "Generating recon report for $DOMAIN..."
  TODAY=$(date)
  echo "This scan was created on $TODAY" > $DIRECTORY/report
  if [ -f $DIRECTORY/nmap ];then
    echo "Results for Nmap:" >> $DIRECTORY/report
    grep -E "^s*S+s+S+s+S+s*$" $DIRECTORY/nmap >> $DIRECTORY/report
  fi
  if [ -f $DIRECTORY/dirsearch ];then
    echo "Results for Dirsearch:" >> $DIRECTORY/report
    cat $DIRECTORY/dirsearch >> $DIRECTORY/report
  fi
  if [ -f $DIRECTORY/crt ];then
    echo "Results for crt.sh:" >> $DIRECTORY/report
    jq -r ".[] | .name_value" $DIRECTORY/crt >> $DIRECTORY/report
  fi
done
Using a library can be super useful when you’re building multiple tools that require the same functionalities. For example, you might build multiple networking tools that all require DNS resolution. In this case, you can simply write the functionality once and use it in all of your tools.
Building Interactive Programs
What if you want to build an interactive program that takes user input during execution? Let’s say that if users enter the command line option, -i, you want the program to enter an interactive mode that allows you to specify domains to scan as you go:
./recon.sh -i -m nmap-onlyFor that, you can use read. This command reads user input and stores the input string into a variable:
echo "Please enter a domain!"
read $DOMAIN
These commands will prompt the user to enter a domain, then store the input inside a variable named $DOMAIN.
To prompt a user repeatedly, we need to use a while loop, which will keep printing the prompt asking for an input domain until the user exits the program. Here’s the syntax of a while loop. As long as the CONDITION is true, the while loop will execute the code between do and done repeatedly:
while CONDITION
do
  DO SOMETHING
done
We can use a while loop to repeatedly prompt the user for domains until the user enters quit:
while [ $INPUT != "quit" ];do
  echo "Please enter a domain!"
  read INPUT
  if [ $INPUT != "quit" ];then
    scan_domain $INPUT
    report_domain $INPUT
  fi
done
We also need a way for users to actually invoke the -i option, and our getopts command isn’t currently doing that. We can use a while loop to parse options by using getopts repeatedly:
while getopts "m:i" OPTION; do
  case $OPTION in
    m)
        MODE=$OPTARG
        ;;
    i)
        INTERACTIVE=true
        ;;
  esac
done
Here, we specify a while loop that gets command line options repeatedly. If the option flag is -m, we set the MODE variable to the scan mode that the user has specified. If the option flag is -i, we set the $INTERACTIVE variable to true. Then, later in the script, we can decide whether to invoke the interactive mode by checking the value of the $INTERACTIVE variable. Putting it all together, we get our final script:
#!/bin/bash
source ./scan.lib

while getopts "m:i" OPTION; do
  case $OPTION in
    m)
      MODE=$OPTARG
      ;;
    i)
      INTERACTIVE=true
      ;;
  esac
done

scan_domain(){
  DOMAIN=$1
  DIRECTORY=${DOMAIN}_recon
  echo "Creating directory $DIRECTORY."
  mkdir $DIRECTORY
  case $MODE in
    nmap-only)
      nmap_scan
      ;;
    dirsearch-only)
      dirsearch_scan
      ;;
    crt-only)
      crt_scan
      ;;
    *)
      nmap_scan
      dirsearch_scan
      crt_scan
      ;;
  esac
}
report_domain(){
  DOMAIN=$1
  DIRECTORY=${DOMAIN}_recon
  echo "Generating recon report for $DOMAIN..."
 TODAY=$(date)
  echo "This scan was created on $TODAY" > $DIRECTORY/report
  if [ -f $DIRECTORY/nmap ];then
   echo "Results for Nmap:" >> $DIRECTORY/report
    grep -E "^s*S+s+S+s+S+s*$" $DIRECTORY/nmap >> $DIRECTORY/report
  fi
  if [ -f $DIRECTORY/dirsearch ];then
    echo "Results for Dirsearch:" >> $DIRECTORY/report
    cat $DIRECTORY/dirsearch >> $DIRECTORY/report
  fi
  if [ -f $DIRECTORY/crt ];then
    echo "Results for crt.sh:" >> $DIRECTORY/report
    jq -r ".[] | .name_value" $DIRECTORY/crt >> $DIRECTORY/report
  fi
}
if [ $INTERACTIVE ];then 1
  INPUT="BLANK"
  while [ $INPUT != "quit" ];do 2
    echo "Please enter a domain!"
    read INPUT
    if [ $INPUT != "quit" ];then 3
      scan_domain $INPUT
      report_domain $INPUT
    fi
  done
else
  for i in "${@:$OPTIND:$#}";do
    scan_domain $i
    report_domain $i

  done
fi
In this program, we first check if the user has selected the interactive mode by specifying the -i option 1. We then repeatedly prompt the user for a domain by using a while loop 2. If the user input is not the keyword quit, we assume that they entered a target domain, so we scan and produce a report for that domain. The while loop will continue to run and ask the user for domains until the user enters quit, which will cause the while loop to exit and the program to terminate 3.
Interactive tools can help your workflow operate more smoothly. For example, you can build testing tools that will let you choose how to proceed based on preliminary results.
Using Special Variables and Characters
You’re now equipped with enough bash knowledge to build many versatile tools. This section offers more tips that concern the particularities of shell scripts.
In Unix, commands return 0 on success and a positive integer on failure. The variable $? contains the exit value of the last command executed. You can use these to test for execution successes and failures:
#!/bin/sh
chmod 777 script.sh
if [ "$?" -ne "0" ]; then
  echo "Chmod failed. You might not have permissions to do that!"
fi
Another special variable is $$, which contains the current process’s ID. This is useful when you need to create temporary files for the script. If you have multiple instances of the same script or program running at the same time, each might need its own temporary files. In this case, you can create temporary files named /tmp/script_name_$$ for every one of them.
Remember that we talked about variable scopes in shell scripts earlier in this chapter? Variables that aren’t input parameters are global to the entire script. If you want other programs to use the variable as well, you need to export the variable:
export VARIABLE_NAME=VARIABLE_VALUELet’s say that in one of your scripts you set the variable VAR:
VAR="hello!"If you don’t export it or source it in another script, the value gets destroyed after the script exits. But if you export VAR in the first script and run that script before running a second script, the second script will be able to read VAR’s value.
You should also be aware of special characters in bash. In Unix, the wildcard character * stands for all. For example, this command will print out all the filenames in the current directory that have the file extension .txt:
$ ls *.txtBackticks (`) indicate command substitution. You can use both backticks and the $() command substitution syntax mentioned earlier for the same purpose. This echo command will print the output of the whoami command:
echo `whoami`Most special characters, like the wildcard character or the single quote, aren’t interpreted as special when they are placed in double quotes. Instead, they’re treated as part of a string. For example, this command will echo the string "abc '*' 123":
$ echo "abc '*' 123"Another important special character is the backslash (), the escape character in bash. It tells bash that a certain character should be interpreted literally, and not as a special character.
Certain special characters, like double quotes, dollar sign, backticks, and backslashes remain special even within double quotes, so if you want bash to treat them literally, you have to escape them by using a backslash:
$ echo "" is a double quote. $ is a dollar sign. ` is a backtick. \ is a backslash."This command will echo:
" is a double quote. $ is a dollar sign. ` is a backtick. is a backslash.You can also use a backslash before a newline to indicate that the line of code has not ended. For example, this command
chmod 777
script.sh
is the same as this one:
chmod 777 script.shCongratulations! You can now write bash scripts. Bash scripting may seem scary at first, but once you’ve mastered it, it will be a powerful addition to your hacking arsenal. You’ll be able to perform better recon, conduct more efficient testing, and have a more structured hacking workflow.
If you plan on implementing a lot of automation, it’s a good idea to start organizing your scripts from the start. Set up a directory of scripts and sort your scripts by their functionality. This will become the start of developing your own hacking methodology. When you’ve collected a handful of scripts that you use on a regular basis, you can use scripts to run them automatically. For example, you might categorize your scripts into recon scripts, fuzzing scripts, automated reporting, and so on. This way, every time you find a script or tool you like, you can quickly incorporate it into your workflow in an organized fashion.
Scheduling Automatic Scans
Now let’s take your automation to the next level by building an alert system that will let us know if something interesting turns up in our scans. This saves us from having to run the commands manually and comb through the results over and over again.
We can use cron jobs to schedule our scans. Cron is a job scheduler on Unix-based operating systems. It allows you to schedule jobs to run periodically. For example, you can run a script that checks for new endpoints on a particular site every day at the same time. Or you can run a scanner that checks for vulnerabilities on the same target every day. This way, you can monitor for changes in an application’s behavior and find ways to exploit it.
You can configure Cron’s behavior by editing files called crontabs. Unix keeps different copies of crontabs for each user. Edit your own user’s crontab by running the following:
crontab -eAll crontabs follow this same syntax:
A B C D E command_to_be_executed
A: Minute (0 – 59)
B: Hour (0 – 23)
C: Day (1 – 31)
D: Month (1 – 12)
E: Weekday (0 – 7) (Sunday is 0 or 7, Monday is 1...)
Each line specifies a command to be run and the time at which it should run, using five numbers. The first number, from 0 to 59, specifies the minute when the command should run. The second number specifies the hour, and ranges from 0 to 23. The third and fourth numbers are the day and month the command should run. And the last number is the weekday when the command should run, which ranges from 0 to 7. Both 0 and 7 mean that the command should run on Sundays; 1 means the command should run on Mondays; and so on.
For example, you can add this line to your crontab to run your recon script every day at 9:30 PM:
30 21 * * * ./scan.shYou can also batch-run the scripts within directories. The run-parts command in crontabs tells Cron to run all the scripts stored in a directory. For example, you can store all your recon tools in a directory and scan your targets periodically. The following line tells Cron to run all scripts in my security directory every day at 9:30 PM:
30 21 * * * run-parts /Users/vickie/scripts/securityNext, git diff is a command that outputs the difference between two files. You need to install the Git program to use it. You can use git diff to compare scan results at different times, which quickly lets you see if the target has changed since you last scanned it:
git diff SCAN_1 SCAN_2This will help you identify any new domains, subdomains, endpoints, and other new assets of a target. You could write a script like this to notify you of new changes on a target every day:
#!/bin/bash
DOMAIN=$1
DIRECTORY=${DOMAIN}_recon
echo "Checking for new changes about the target: $DOMAIN.
 Found these new things."
git diff <SCAN AT TIME 1> <SCAN AT TIME 2>
And schedule it with Cron:
30 21 * * * ./scan_diff.sh facebook.comThese automation techniques have helped me quickly find new JavaScript files, endpoints, and functionalities on targets. I especially like to use this technique to discover subdomain takeover vulnerabilities automatically. We’ll talk about subdomain takeovers in Chapter 20.
Alternatively, you can use GitHub to track changes. Set up a repository to store your scan results at https://github.com/new/. GitHub has a Notification feature that will tell you when significant events on a repository occur. It’s located at Settings▶Notifications on each repository’s page. Provide GitHub with an email address that it will use to notify you about changes. Then, in the directory where you store scan results, run these commands to initiate git inside the directory:
git init
git remote add origin https://PATH_TO_THE_REPOSITORY
Lastly, use Cron to scan the target and upload the files to GitHub periodically:
30 21 * * * ./recon.sh facebook.com
40 21 * * * git add *; git commit -m "new scan"; git push -u origin master
GitHub will then send you an email about the files that changed during the new scan.
A Note on Recon APIs
Many of the tools mentioned in this chapter have APIs that allow you to integrate their services into your applications and scripts. We’ll talk about APIs more in Chapter 24, but for now, you can think of APIs as endpoints you can use to query a service’s database. Using these APIs, you can query recon tools from your script and add the results to your recon report without visiting their sites manually.
For example, Shodan has an API (https://developer.shodan.io/) that allows you to query its database. You can access a host’s scan results by accessing this URL: https://api.shodan.io/shodan/host/{ip}?key={YOUR_API_KEY}. You could configure your bash script to send requests to this URL and parse the results. LinkedIn also has an API (https://www.linkedin.com/developers/) that lets you query its database. For example, you can use this URL to access information about a user on LinkedIn: https://api.linkedin.com/v2/people/{PERSON ID}. The Censys API (https://censys.io/api) allows you to access certificates by querying the endpoint https://censys.io/api/v1.
Other tools mentioned in this chapter, like BuiltWith, Google search, and GitHub search, all have their own API services. These APIs can help you discover assets and content more efficiently by integrating third-party tools into your recon script. Note that most API services require you to create an account on their website to obtain an API key, which is how most API services authenticate their users. You can find information about how to obtain the API keys of popular recon services at https://github.com/lanmaster53/recon-ng-marketplace/wiki/API-Keys/.
Start Hacking!
Now that you’ve conducted extensive reconnaissance, what should you do with the data you’ve collected? Plan your attacks by using the information you’ve gathered! Prioritize your tests based on the functionality of the application and its technology.
For example, if you find a feature that processes credit card numbers, you could first look for vulnerabilities that might leak the credit card numbers, such as IDORs (Chapter 10). Focus on sensitive features such as credit cards and passwords, because these features are more likely to contain critical vulnerabilities. During your recon, you should be able to get a good idea of what the company cares about and the sensitive data it’s protecting. Go after those specific pieces of information throughout your bug-hunting process to maximize the business impact of the issues you discover. You can also focus your search on bugs or vulnerabilities that affect that particular tech stack you uncovered, or on elements of the source code you were able to find.
And don’t forget, recon isn’t a one-time activity. You should continue to monitor your targets for changes. Organizations modify their system, technologies, and codebase constantly, so continuous recon will ensure that you always know what the attack surface looks like. Using a combination of bash, scheduling tools, and alerting tools, build a recon engine that does most of the work for you.
Tools Mentioned in This Chapter
In this chapter, I introduced many tools you can use in your recon process. Many more good tools are out there. The ones mentioned here are merely my personal preferences. I’ve included them here in chronological order for your reference.
Be sure to learn about how these tools work before you use them! Understanding the software you use allows you to customize it to fit your workflow.
Scope Discovery
- WHOIS looks for the owner of a domain or IP.
- ViewDNS.info reverse WHOIS (https://viewdns.info/reversewhois/) is a tool that searches for reverse WHOIS data by using a keyword.
nslookupqueries internet name servers for IP information about a host.- ViewDNS reverse IP (https://viewdns.info/reverseip/) looks for domains hosted on the same server, given an IP or domain.
- crt.sh (https://crt.sh/), Censys (https://censys.io/), and Cert Spotter (https://sslmate.com/certspotter/) are platforms you can use to find certificate information about a domain.
- Sublist3r (https://github.com/aboul3la/Sublist3r/), SubBrute (https://github.com/TheRook/subbrute/), Amass (https://github.com/OWASP/Amass/), and Gobuster (https://github.com/OJ/gobuster/) enumerate subdomains.
- Daniel Miessler’s SecLists (https://github.com/danielmiessler/SecLists/) is a list of keywords that can be used during various phases of recon and hacking. For example, it contains lists that can be used to brute-force subdomains and filepaths.
- Commonspeak2 (https://github.com/assetnote/commonspeak2/) generates lists that can be used to brute-force subdomains and filepaths using publicly available data.
- Altdns (https://github.com/infosec-au/altdns) brute-forces subdomains by using permutations of common subdomain names.
- Nmap (https://nmap.org/) and Masscan (https://github.com/robertdavidgraham/masscan/) scan the target for open ports.
- Shodan (https://www.shodan.io/), Censys (https://censys.io/), and Project Sonar (https://www.rapid7.com/research/project-sonar/) can be used to find services on targets without actively scanning them.
- Dirsearch (https://github.com/maurosoria/dirsearch/) and Gobuster (https://github.com/OJ/gobuster) are directory brute-forcers used to find hidden filepaths.
- EyeWitness (https://github.com/FortyNorthSecurity/EyeWitness/) and Snapper (https://github.com/dxa4481/Snapper/) grab screenshots of a list of URLs. They can be used to quickly scan for interesting pages among a list of enumerated paths.
- OWASP ZAP (https://owasp.org/www-project-zap/) is a security tool that includes a scanner, proxy, and much more. Its web spider can be used to discover content on a web server.
- GrayhatWarfare (https://buckets.grayhatwarfare.com/) is an online search engine you can use to find public Amazon S3 buckets.
- Lazys3 (https://github.com/nahamsec/lazys3/) and Bucket Stream (https://github.com/eth0izzle/bucket-stream/) brute-force buckets by using keywords.
OSINT
- The Google Hacking Database (https://www.exploit-db.com/google-hacking-database/) contains useful Google search terms that frequently reveal vulnerabilities or sensitive files.
- KeyHacks (https://github.com/streaak/keyhacks/) helps you determine whether a set of credentials is valid and learn how to use them to access the target’s services.
- Gitrob (https://github.com/michenriksen/gitrob/) finds potentially sensitive files that are pushed to public repositories on GitHub.
- TruffleHog (https://github.com/trufflesecurity/truffleHog/) specializes in finding secrets in public GitHub repositories by searching for string patterns and high-entropy strings.
- PasteHunter (https://github.com/kevthehermit/PasteHunter/) scans online paste sites for sensitive information.
- Wayback Machine (https://archive.org/web/) is a digital archive of internet content. You can use it to find old versions of sites and their files.
- Waybackurls (https://github.com/tomnomnom/waybackurls/) fetches URLs from the Wayback Machine.
Tech Stack Fingerprinting
- The CVE database (https://cve.mitre.org/cve/search_cve_list.html) contains publicly disclosed vulnerabilities. You can use its website to search for vulnerabilities that might affect your target.
- Wappalyzer (https://www.wappalyzer.com/) identifies content management systems, frameworks, and programming languages used on a site.
- BuiltWith (https://builtwith.com/) is a website that shows you which web technologies a website is built with.
- StackShare (https://stackshare.io/) is an online platform that allows developers to share the tech they use. You can use it to collect information about your target.
- Retire.js (https://retirejs.github.io/retire.js/) detects outdated JavaScript libraries and Node.js packages.
Automation
- Git (https://git-scm.com/) is an open sourced version-control system. You can use its
git diffcommand to keep track of file changes.
You should now have a solid understanding of how to conduct reconnaissance on a target. Remember to keep extensive notes throughout your recon process, as the information you collect can really balloon over time. Once you have a solid understanding of how to conduct recon on a target, you can try to leverage recon platforms like Nuclei (https://github.com/projectdiscovery/nuclei/) or Intrigue Core (https://github.com/intrigueio/intrigue-core/) to make your recon process more efficient. But when you’re starting out, I recommend that you do recon manually with individual tools or write your own automated recon scripts to learn about the process.