
As you learned in Chapter 6, “Importing and Playing Audio,” you can import your favorite music into Windows Media Player (WMP), rate it, and play it. However, if you want to have maximum control over your music collection, you’ll probably want to use WMP to give Windows Media Center (WMC) a hand. Here’s why they’re “better together”:
WMP provides more control over the ripping process than WMC. In fact, to configure the audio format and quality settings that WMC uses to rip a CD, you must open WMP.
You’ll find it easier to edit and create genres and ratings in WMP than in WMC.
You can add or edit album art after ripping an album in WMC by using WMP.
If you want to enjoy additional visualizations in WMC, you must download them using WMP. And some optional visualizations make creating a slide show plus music very simple.
WMC is fully compatible with WMP’s genres, ratings, and other music features.
If you plan to use WMC to rip music from your CD collection, you need to configure Windows Media Player to do the heavy lifting for you; the options you set in WMP are used by both Windows Media Center and Windows Media Player. Even if you are using WMC strictly to enjoy music on other systems, it’s useful to know what ripping options are available in Windows Media Player so you can choose the options you prefer to build the best-quality digital music collection you can.
You can configure audio ripping in Windows Media Player 11 in two ways:
Open the Rip menu and select the digital music format from the Format menu and the bit rate from the Bit Rate menu (refer to Figure 13.1).
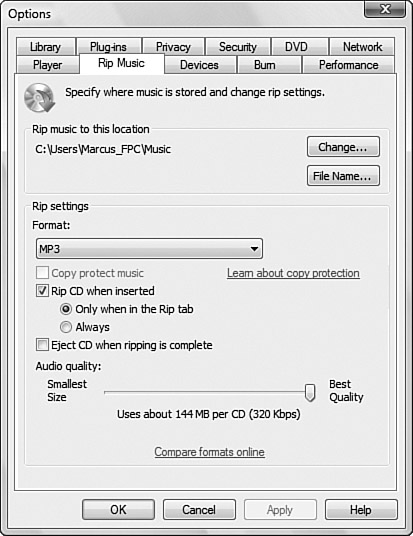
Right-click the lower left-hand corner of the WMP screen, select Tools, Options, and open the Rip Music tab (refer to Figure 13.2).

You can use WMP and WMC to rip music into either compressed (lossy) or uncompressed (full-quality) formats. Lossless formats include
Windows Media Audio Lossless
WAV
Lossy formats include
Windows Media Audio
Windows Media Audio Pro
Windows Media Audio (variable bit rate)
MP3
Which format should you choose for ripping your audio collection? That depends on what you want to do with it and how much storage space you have available for digital audio.
Note
A “lossy” format discards or reduces the precision of less audible audio data to reduce the size of the output file, while a lossless format faithfully stores all audio data in the original source, thereby creating a very large output file. The higher the bit rate used to encode music in a lossy format, the closer to the original (and the larger the output file).
Within WMP (but not WMC), you can always convert a lossless format to a lossy format to save space on a portable media player. (Use the Device Options dialog’s Advanced settings to configure conversion settings.) Keep in mind that you can never restore the audio quality lost when you use lossy audio ripping.
I pulled a CD from my collection (PDQ Bach’s A Little Nightmare Music) containing 41:48 minutes of music and ripped it into WAV and WMA lossless formats, as well as MP3 and WMA (variable bit rate) lossy formats. Table 13.1 shows the resulting rip sizes.
I chose the highest-quality settings for the “lossy” formats in the comparison shown in Table 13.1, and they demonstrate why I use 320Kbps MP3 as my ripping format of choice. As you can see from Table 13.1, this format/bit rate combination uses less than one-fourth the space of a WAV file and about 40% less space than a WMA (lossless) file. It’s not the smallest high-quality file (the Oscar for that category goes to WMA-VBR), but MP3 enables me to store hundreds of albums on a hard disk, and it has the advantage of being playable on virtually all digital media devices, including otherwise closed-in systems like the Apple iPod family that can’t deal with WMA files.
No matter what your preferences are, you can set WMP to rip your music any way you please.
Use Table 13.2 as a quick reference for each recording format supported by WMP 11. The highest bit rate in each format provides the best quality but also the largest file size.
Table 13.2. WMP 11’s Recording Formats
Recording Format | Extension | Supported Bit Rates | Notes |
|---|---|---|---|
Windows Media Audio | WMA | 48Kbps 64Kbps 96Kbps 128Kbps[1] 160Kbps 192Kbps | Uses higher bit rates for classical and symphonic music; uses lower bit rates for spoken word or to create smaller files |
Windows Media Audio Pro | WMA | 32Kbps 48Kbps 64Kbps[1] 96Kbps 128Kbps 160Kbps 192Kbps | Supports up to 5.1 surround audio; provides comparable quality to standard WMA at half the bit rate; also optimized for Windows-based smartphones |
Windows Media Audio Variable Bit Rate (VBR) | WMA | 40–75Kbps 50–95Kbps 85–145Kbps 135–215Kbps 240–355Kbps | Some older WMA-compatible players may not be able to handle VBR recordings |
Windows Media Audio Lossless | WMA | 470–940Kbps[2] | Performs no file compression for quality identical to original; creates very large music files |
MP3 | MP3 | 128Kbps 192Kbps 256Kbps 320Kbps | Works with players not compatible with WMA files |
WAV | WAV | 1411.2Kbps[2] | Performs no file compression for quality identical to original; creates very large music files (larger than WMA lossless); best choice for audio that needs additional editing before use; also the choice of serious audiophiles |
[1] Default bit rate [2] Only bit rate for this format | |||
You can use the Rip Music tab to set other options for ripping music in both WMP and WMC. These include
Where to store music: By default, the Music folder for the current user is the default destination. If you prefer to use a different drive or a network share folder, click the Change button to choose the location.
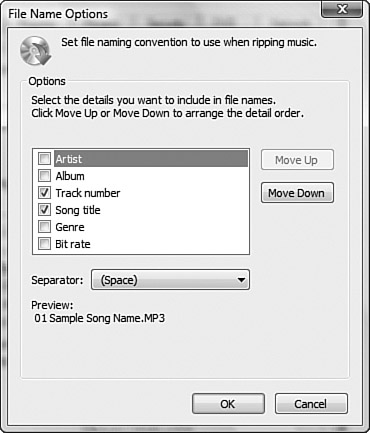
File name: By default, each digital audio track name contains the track number and song title. Click File Name to choose additional or other options, such as the artist’s name (Figure 13.3) and to choose a different separator character between options, such as an underscore character.
Whether to eject the music CD when you’re done ripping: This option is enabled by default.
As you learned in Chapter 6, you can use playlists generated in either WMP or WMC to play your digital music favorites. You can create playlists manually using drag and drop or by using criteria to filter your collection into a playlist automatically.
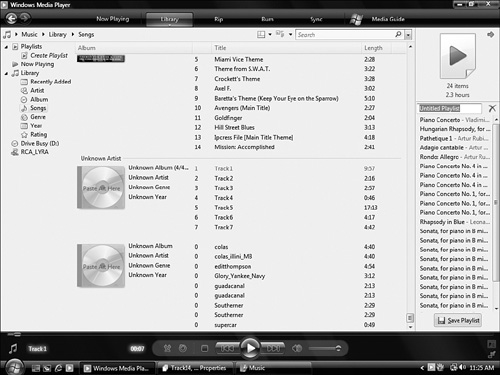
To create and save a custom playlist manually (see Figure 13.4):
To filter your collection to create a playlist automatically:
Click Library, Create Auto Playlist.
Enter a name for the playlist.
Click the plus (+) sign next to Music in My Library to continue.
Specify the first set of criteria (album, artist, bit rating, various date-related settings, ratings, how often the music has been played, and others).
Specify additional information as prompted.
Click the plus (+) sign under And Also Include or And Apply the Following Restrictions to the Auto Playlist to narrow the criteria.
When finished, click OK. Figure 13.5 shows the dialog after selecting criteria for composer and for duration.

Your new playlists appear in the Playlists section of the left-hand pane in WMP (Figure 13.6). Custom playlists and auto playlists have distinctive icons.
To edit a custom playlist, double-click it to display its contents in the central pane. You can right-click any track and select from options such as move up or down or remove (see Figure 13.7). To use drag and drop to change the order, click the Edit in List Pane button. The playlist opens in the Playlist pane at the right.

To edit an auto playlist, right-click it and select Edit. The filtering criteria appear in the Edit Auto Playlist dialog.
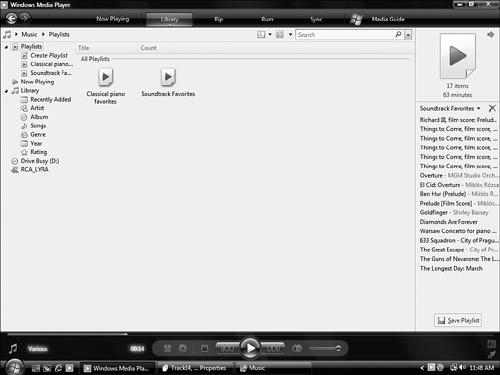
New custom playlists automatically appear in the Playlists portion of the music library, while new auto playlists appear in the Auto Playlists portion of the music library (see Figure 13.8).

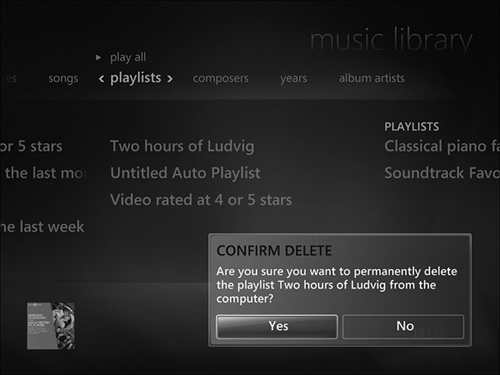
If you delete a playlist from within WMC (see Figure 13.9), it is removed from the computer and will not be available in either WMP or WMC.
Windows Media Player is the perfect place to make changes to album and song ratings, album art, and genres. While some of these changes can be made in Windows Media Center, WMP makes these types of changes faster and easier.
Windows Media Center and Windows Media Player automatically assign star ratings based on how frequently you listen to a song. (The greater the play frequency, the more stars are assigned.) However, you don’t need to play your favorites incessantly to give them the rating they deserve.
While you can rate audio in Windows Media Center, its “10-foot UI” forces you to rate audio tracks one at a time. However, in Windows Media Player, you can rate a group of tracks quickly. Here’s how:
Create (or edit) a custom playlist.
Open the playlist.
Drag the mouse across the stars next to each song in the playlist until you have highlighted the desired rating.
Click the mouse to lock in the rating. (WMP uses yellow stars for user-assigned ratings and white stars for automatically assigned ratings.)
Repeat steps 3 and 4 until all songs are rated as desired.
Figure 13.10 shows a playlist with a mixture of automatic and manual star ratings.

To rate all of the songs on an album with the same rating, right-click the album in Library view, select Rate, and select the rating desired (1–5 stars or unrated). You can also use this trick to change an individual song rating or to change a song (or album) to “unrated.” To change an individual song rating, right-click the song track, select Rate, and select the rating desired.
So you’ve been busy ripping some of your favorite CDs in Windows Media Center, and you notice that the album art’s gone missing or is incorrect, or you might note that there’s no artist, genre, or track information. These problems can be fixed in two ways:
You can search for a matching album online.
You can enter the information manually.
Before editing incomplete or incorrect information, right-click any track and select Find Album Info. An Album Info dialog appears that attempts to match what it knows about your selected track (from its tag information) to its own online music database.
Note
The accuracy of the results you get from the Find Album Info feature really depends on having at least an accurate track title. It also helps to have the artist or album in place. Also keep in mind that if information in these fields is inaccurate, Windows Media Player will have a more difficult time tracking down the correct information in its online database.
If Windows Media Player has enough to work with, it’s likely to come up with a short list of potential albums that includes the one for your track. If you find a match, simply select it and click Finish. Media Player will apply all known information about that album and its tracks to your music files, including the album’s cover art (if available).
If you can’t find a match, however, right-click the missing or incorrect information (album name, artist, composer, date, and so on) and type in the correct information from the CD liner notes or other source.
If you can find a picture of the album online or can scan the album yourself, you can fix the missing album artwork problem quite easily. Once you’ve obtained a copy of the album art:
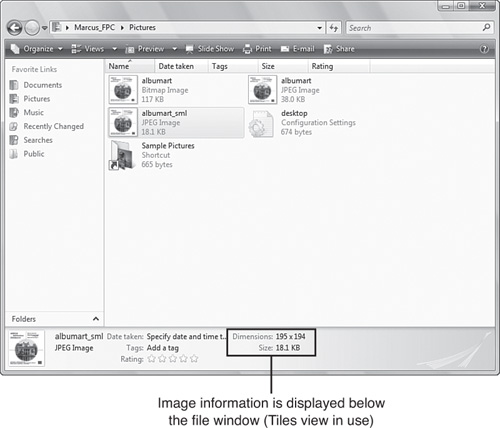
Reduce the image to a size around 200x200 pixels.
Save the image as a JPEG (.jpg) or PNG (.png) file.
View the image file in Windows Photo Gallery or Windows Live Photo Gallery.
Verify that the file size is less than 20Kbps (see Figure 13.11). If not, return to step 2 and reduce the image quality when you save the file. (Use Save for Web or Resize for Email.)
Right-click the file and select Copy.
Open Windows Media Player and select a view that shows album art or the placeholder CD icon.
Right-click the album art or placeholder you want to update and select Paste Album Art (Figure 13.12).

To add a genre in Windows Media Player, open the album in Library view, right-click the genre, and type in the replacement genre name. For example, instead of Classical, you can specify Classical Piano. Instead of rock, specify the type of rock (alternative rock, acid rock, pop-rock, and so on). By creating additional genre subdivisions, you can make a large and diverse music collection a whole lot easier to navigate.
Any genre you enter in Windows Media Player can then be selected in either WMP or Windows Media Center.
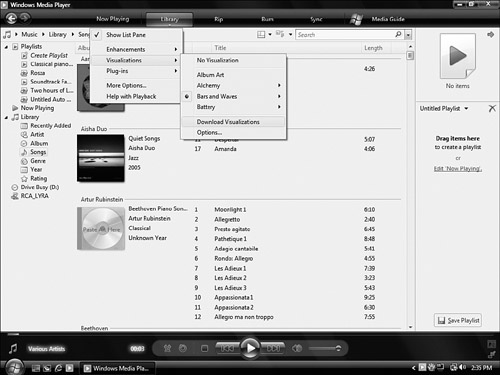
Windows Media Player 11 includes a large number of visualizations that can be displayed onscreen when playing music in either WMP or Windows Media Center. However, if you want to get additional visualizations, they’re easy to obtain. Click Now Playing, Visualizations, Download Visualizations (Figure 13.13).
The Microsoft Visualizations for Windows Media Player web page opens in your web browser. You can use visualizations made for Windows Media Player 10 or Windows Media Player 11. You can also make your own visualizations. To learn how, follow the link on the web page to the MSDN website.
Downloadable visualizations include adaptations from popular live-action and animated movies, slide show players with animated transitions, as well as abstract animations similar to those packaged with WMP 11.
To use a visualization, click Download and follow the onscreen prompts to run or open the visualization file when prompted; you can also save the visualization and run it from the hard disk to install it. Provide administrator credentials if prompted by User Account Control.
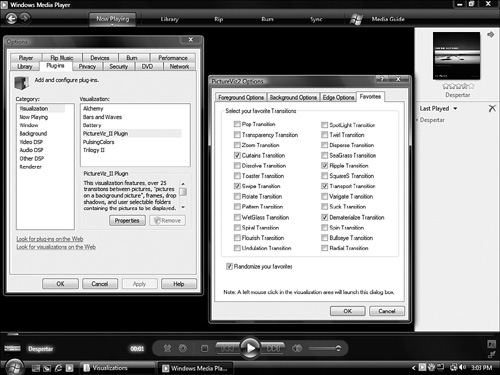
You can use most visualizations within WMC immediately. However, if the visualization has configuration options, you can configure these by clicking Visualization, Options in Windows Media Player. This opens the Plug-Ins tab shown in Figure 13.14. From this tab, select the Visualizations category in the pane on the left, the visualization to configure in the pane on the right, and click Properties to open the properties sheet. Select the desired properties, click OK to save changes, and use the visualization in either WMP or Windows Media Center.
Tip
Use Picture Viz I or II visualizations to make musical slide shows easy. With Picture Viz I, you must specify a single folder as the picture source. Picture Viz II lets you select a folder that contains subfolders (it uses the current user’s Pictures folder as the default) and features new and improved animation transitions. Both support JPEG, BMP, PNG, TIFF, EXIF, and TGA image formats.