
4. Getting a Quick Start
This lesson will take about 1 hour and 15 minutes to complete. Before beginning, make sure you have copied the files for Lesson 4 to your hard drive as described in the “Getting Started” section at the beginning of the book. If you are starting from scratch in this lesson, use the method described in the “Jumpstart” section of “Getting Started.”
![]()

Use Dreamweaver’s expertly designed CSS layouts to quickly create a standards-based web page, ready for your personalized content.
Defining a Dreamweaver site
The lessons in this book function within a Dreamweaver site. In Dreamweaver, you work with a local site stored in a folder on your hard drive. When you are ready to publish your site (see Lesson 17, “Publishing to the Web”), you upload your completed files to a remote site, stored on your web host’s server. The folder structures and files of the local and remote sites are usually mirrors of each other.
First, set up your local site:
1 Launch Adobe Dreamweaver CS5, if necessary.
2 Choose Site > New Site, and the Site Setup dialog box appears.
If you’ve used any previous version of Dreamweaver, you will notice that the Site Setup dialog box has been redesigned and simplified. Gone are the Basic and Advanced views. Now to create a website in Dreamweaver CS5 you need only to name it and select the local site folder:

3 In the Site Name field, type DW-CIB.
Site names typically relate to a specific project or client and will appear in the Files panel.
4 Next to the Local Site Folder field, click the folder (![]() ) icon. When the Choose Root Folder dialog box opens, navigate to the DW-CIB folder containing the files you copied from the Adobe Dreamweaver CS5 Classroom in a Book CD and click Select/Choose.
) icon. When the Choose Root Folder dialog box opens, navigate to the DW-CIB folder containing the files you copied from the Adobe Dreamweaver CS5 Classroom in a Book CD and click Select/Choose.
You could click Save at this time and begin working on your new website, but we’ll add one more piece of handy information.
5 Click the arrow (![]() ) next to the Advanced Settings category to reveal the tabs listed there. Select the Local Info category.
) next to the Advanced Settings category to reveal the tabs listed there. Select the Local Info category.
Although it’s not required, a good policy for site management is to store different file types in separate folders. For example, many websites provide individual folders for images, PDFs, video, and so on. Dreamweaver assists in this endeavor by including an option for a default images folder. Later, as you insert images from other places on your computer, Dreamweaver will use this setting to automatically move the images into the site structure.
6 Next to the Default Images Folder field, click the folder (![]() ) icon. When the dialog box opens, navigate to the DW-CIB > images folder containing the files you copied from the Adobe Dreamweaver CS5 Classroom in a Book CD and click Select/Choose.
) icon. When the dialog box opens, navigate to the DW-CIB > images folder containing the files you copied from the Adobe Dreamweaver CS5 Classroom in a Book CD and click Select/Choose.

You’ve entered all the information required to begin your new site. In subsequent lessons you’ll add more information to enable you to upload files to your remote site and to be able to test dynamic web pages.
7 In the Site Setup dialog box, click Save.
Setting up a site is a crucial first step in beginning any project in Dreamweaver. Knowing where the site root folder is located determines link pathways and enables many site-wide options in Dreamweaver such as Find and Replace.
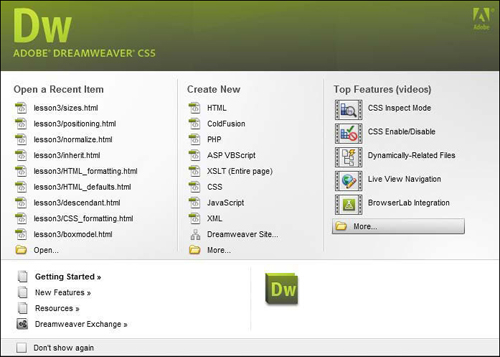
Using the Welcome screen
The Dreamweaver Welcome screen provides quick access to recent pages, easy creation of a range of page types, and a direct connection to several key help topics. The Welcome screen appears when you first start the program or when no other documents are open. Let’s use the Welcome screen to explore ways to create and open documents:
1 In the Create New column of the Welcome screen, click HTML to create a new, blank HTML page.
2 Choose File > Close.
The Welcome screen reappears.
3 In the Open A Recent Item section of the Welcome screen, click the Open button. This allows you browse for files to open in Dreamweaver. Click Cancel.
The Welcome screen shows you a list of up to nine of your recently used files. Recently used files are shown in the sample figure; however, your installation may not display any used files at this point. Choosing a file from this list is a quick alternative to choosing File > Open when you want to edit an existing page you have recently opened or created.
You will use the Welcome screen several times in this book. When you’ve completed the lessons in this book, you may prefer not to use the Welcome screen. If so, you can disable it by selecting the Don’t Show Again option in the lower left of the window. You can re-enable the Welcome screen in the General category of preferences.
Selecting a CSS layout
Adobe Dreamweaver CS5 provides 16 different CSS layouts. In this exercise, you’ll select and modify one. The CSS layouts are carefully built and tested to comply with web standards and to work cross-platform in all major browsers with no additional changes to the layout. Popular one-, two-, and three-column choices are included, specified either in fixed-width dimensions set in pixels or in relative measurements set in percentages:
1 Choose File > New.
2 In the New Document dialog box, from the first column, select Blank Page.
3 In the Page Type column, select HTML.
Dreamweaver allows you to create a wide range of page types. HTML is the page type most commonly used for building basic web pages.
4 In the Layout column, select “1 Column Fixed, Centered, Header And Footer.”
The preview for this layout displays a padlock (![]() ) symbol to indicate that the width is fixed at a set number of pixels. Other layouts display a spring (
) symbol to indicate that the width is fixed at a set number of pixels. Other layouts display a spring (![]() ) symbol to indicate that the width will expand or contract with the browser window.
) symbol to indicate that the width will expand or contract with the browser window.

5 Leave all other options at their default settings and click Create.
Your new page appears in Dreamweaver as a document with filler text and default coloring. This is the document window where you add your own content and customize the appearance of the page.
Saving a page
After you’ve created a page, it’s a good practice to save it immediately:
1 Choose File > Save. Alternatively, you could press Ctrl-S/Cmd-S.
2 When the Save As dialog box appears, navigate to the DW-CIB folder.
Type greenstart.htm or greenstart.html in the Filename field.
It’s a matter of personal preference whether you use three- or four-letter extensions in your filenames; either will work fine on the web. Just remember to be consistent. (This book will use .html.)
3 Click Save.
Modifying the page title
As described in Lesson 2, “HTML Basics,” the title of a web page is displayed in the browser’s title bar. Page titles are one of the elements used by search engines to index and rank websites. It’s important to always change Dreamweaver’s default page title of “Untitled Document” to a phrase that describes your specific web page:
1 If necessary, choose File > Open Recent > greenstart.html.
2 Click the Design button to view the page in Design view.
3 In the Title field of the document toolbar, select the placeholder text, Untitled Document.
4 Type Get a green start with Meridien GreenStart and press Enter/Return.
![]()
Changing headings
Dreamweaver’s CSS layouts are populated by sample headings, body text, and colors. Placeholder headings and text help you visualize the layout as it will appear when your final content is placed on the page. Changing the placeholders is a simple process:
1 Double-click the placeholder text, Instructions, to select it. Then type It’s Easy Being Green with GreenStart to replace it.
Note that the new text remains formatted as an <h1> element.

Note
Dreamweaver provides a number of methods for selecting text that operate similar to word processing software, such as dragging the mouse to highlight text, double-clicking a single word, or triple-clicking to select an entire paragraph.
2 Choose File > Save.
Inserting text
You can change paragraph text as easily as you changed the heading. You can enter text manually, but Dreamweaver also allows you to insert text from other sources, such as Microsoft Office:
1 Click the Design button to view the page in Design view.
2 Choose Window > Files to display the Files panel, if it isn’t visible.
3 Display the lesson04 folder. Click the triangle (![]() ) to the left of the folder name to reveal its contents. Double-click easygreen.rtf to open it.
) to the left of the folder name to reveal its contents. Double-click easygreen.rtf to open it.
Although Dreamweaver can’t open an RTF file, your computer will select a compatible application, such as Word, WordPad, TextEdit, or so on, and open the RTF file.
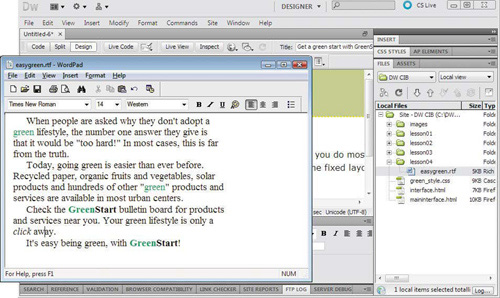
4 When the file opens, select all the text and press Ctrl-C/Cmd-C to copy the text to the clipboard. Do not close the application displaying easygreen.rtf.
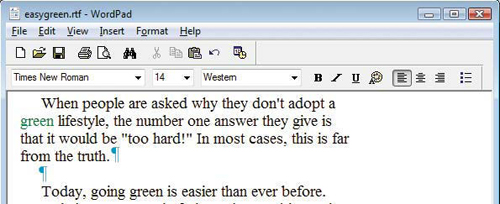
Note how the text is formatted in Times New Roman, with indentation, bolding, and green highlighting.
5 Switch to Dreamweaver and position the mouse pointer below the header, “It’s Easy Being Green with GreenStart.” With the mouse pointer at the beginning of the first paragraph element immediately following this heading, click and drag to the end of the text in the main content area—so that all the placeholder headings and paragraphs are selected—but don’t select the text in the footer.
6 Press Ctrl-V/Cmd-V to paste the text from the clipboard.
Before proceeding to the next step, it’s important to examine what just happened. You probably noticed that the pasted text replaced the selection and was automatically formatted as a paragraph <p> element. However, although the text itself came over successfully, the paragraph indents and font formatting didn’t. Besides ignoring the fonts and color, Dreamweaver missed something more important: the paragraph breaks.
Note
Results may differ when pasting text into Dreamweaver, depending on the originating program. Most types of font-based formatting are ignored, but the application of bold and italics may be honored. For example, Word will pass bold and italic formatting to Dreamweaver; WordPad and TextEdit will not.
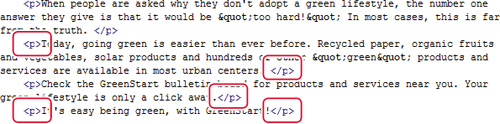
7 Insert your cursor at the end of the third paragraph “...only a click away.” Click the Code view button. Observe the code element that appears at the end of the paragraph.

It turns out that Dreamweaver didn’t completely ignore the paragraph returns, but instead of </p> tags it inserted <br /> line break elements. It’s important to know that Dreamweaver translates single paragraph returns copied from other programs into break codes. The trick for producing true HTML <p> elements is to insert additional returns between each of the original paragraphs.
8 Switch back to the application displaying easygreen.rtf.
9 Insert the cursor at the end of each paragraph and press Enter/Return to insert a second paragraph return.
In Word and other programs, you can automate the process of inserting extra returns for longer documents by using the Find/Change command to replace single paragraph returns with two in a row.
10 Select and copy all the text in easygreen.rtf.
11 Switch to Dreamweaver. Click the Design view button.
12 Select the improperly formatted text in the main content area. Press Ctrl-V/Cmd-V to paste from the clipboard.
The difference between the new and the old text is dramatic. The new text clearly displays extra space delineating each paragraph.
13 Select any of the newly pasted paragraphs. Click the Code view button. Observe the code elements at the beginning and end of each paragraph.
The newly pasted text is now properly structured with <p>...</p> tags.
14 Place the cursor in the footer area. Select the placeholder text and type Copyright 2010 Meridien GreenStart, All rights reserved to replace it.
The placeholder copy is replaced as you type.
15 Press Ctrl-S/Cmd-S to save.
Inserting images
Inserting images and graphics in Dreamweaver is straightforward. Once an image has been placed on a page, its image properties, such as alignment, can be adjusted using the Property inspector or within the CSS. In this exercise, you will replace the image placeholder with a banner graphic and insert an inline image into the site content:
1 If necessary, choose File > Open Recent > greenstart.html and click the Design button to view the page in Design view.
2 Select the image placeholder in the header section of the page. Although its dimensions are displayed in the placeholder itself, note its width and height in the Property inspector. If the Property inspector is not visible, choose Window > Properties.
The placeholder is 180 pixels by 90 pixels in size.

3 Double-click the placeholder.
The Select Image Source dialog box appears.
4 Navigate to the DW-CIB > images folder and select banner.jpg. Note the dimensions of the image displayed in the dialog box.
The banner image is 950 pixels by 200 pixels in size—quite a bit larger than the placeholder.

5 Click OK/Choose.
The banner image appears in the layout.
It is a recommended practice for web designers to enter a brief alternate description of images. The alternate text, or alt text, is seen when the image is not visible. The alt text will also appear for users with certain mobile devices, screen readers, or other browsing devices that may not see images. You can add the alt text using the Property inspector.
6 In the Property inspector Alt field, select the text Add logo here, type GreenStart banner in the Alternate Text field. Click OK.
Note the size of the banner in the Property inspector. Although the placeholder was only 180 by 90 pixels in size, Dreamweaver ignored these dimensions. That’s because the size of the placeholder doesn’t determine the size of the inserted image; Dreamweaver always honors an image’s actual size.
Note that the banner is not as wide as the predefined website structure. You’ll adjust this width in an upcoming exercise. Let’s insert an image within the page’s main content area.
7 Insert the cursor at the beginning of the paragraph “When people are asked....” Choose Insert > Image.
8 In the Select Image Source dialog box, navigate to the DW-CIB > images folder and choose butterfly.gif. Click OK/Choose.
9 In the Image Tag Accessibility Attributes dialog box, choose <empty> from the Alternate Text menu.

Web standards recommend that the <empty> attribute should be assigned to any graphics used for decorative or spacing purposes, and ones that add no specific information or semantic meaning to the page content. Assistive readers and other devices will ignore images with such a designation.
10 Click OK.
The butterfly appears in the first line of the paragraph and displaces the text in an unappealing way.

You could adjust the image position using the HTML align attribute accessible from the Property inspector. But this attribute is deprecated in HTML 4.01 and was removed from the HTML 5 specification. Instead, you’ll use a method already included with the layout, powered by CSS.
11 With the newly inserted image selected, choose fltrt from the Class pop-up menu in the Property inspector.

The class fltlft (abbreviation for float left) aligns the image to the left side of its container with text wrapping around it to the right. The class fltrt (abbreviation for float right) aligns the image to the right of its container and forces the text to flow around the left side of the image. All 16 CSS sample layouts include .fltrt and .fltlft in their default style sheet.
Float is a CSS relative property that moves an element to the left or right of the element containing it. (In this exercise, the container is div.content.) When one element floats, any subsequent element in the same container will flow or wrap around it. The float attribute essentially overrides, or resets, an element’s block attribute (if any), essentially making it perform as an inline element. Check out Lesson 3, “CSS Basics,” to learn more about CSS positioning.
The page now contains both text and images. In the next exercise, you will improve on the appearance by modifying the CSS styles.
12 Choose File > Save.
Selecting and modifying CSS styles
CSS styles are the current standard for all web styling and layout. In this exercise, you’ll adjust the width of the page, modify the background colors, add a background graphic to a page section, and adjust several text attributes. All these changes are accomplished using Dreamweaver’s CSS Styles panel.
Changing the page width
You probably noticed that the image inserted in the header section is slightly narrower than the predefined page width. The width attribute of a web page is typically applied either to the <body> element or to a parent <div> element that contains the main content. The first step to changing the width is to identify the CSS rule that is controlling it, which will take some CSS detective work:
1 If necessary, choose File > Open Recent > greenstart.html and click the Design button to view the page in Design view.
2 Insert the cursor anywhere in the page content. Observe the name and order of the tag selectors at the bottom of the document window.

The tag selector display order directly correlates to the page’s code structure. Elements appearing to the left are parents, or containers, of all elements to the right. The element farthest to the left is the highest in the page structure. As you can see, the <body> element is highest and <div.container> is second. No matter where you click the page, this relationship doesn’t change, so by simple deduction you can be certain that one or the other of these two suspects probably contains the width attribute you’re looking for.
3 Choose Window > CSS Styles, if the panel is not visible and open.
Minimize or close any panels as necessary to give maximum access to the CSS Styles panel.
4 In the CSS Styles panel, click the All button to switch from Current view, if necessary.
The All view displays the entire style sheet associated with the current page. The Current view displays only the styles that affect a selected element. A document must be open to see any styles in the CSS Styles panel.
5 Expand the <style> entry in the CSS Styles panel by clicking the plus symbol (![]() ) / disclosure triangle (
) / disclosure triangle (![]() ).
).
Note
In this page, the style rules are in the document head section. Dreamweaver indicates that styles are internal to the document with brackets: <style>. In later lessons you will work with styles stored in an external style sheet. Dreamweaver will list these style sheets by their filenames (for example, mystyles.css) in the CSS styles panel.
6 In the CSS Styles panel, click the body rule. Examine its properties. You may have to drag down the bottom border of the CSS Styles panel to see them all.
As displayed, the body rule has attributes for background, color, font, margins, and padding, but not for the width. Time to check the other suspect.

7 Click the .container rule. Observe its properties.
This rule features a width attribute of 960 pixels. Since the banner was 950 pixels in width, it seems clearly to be the culprit we’re looking for. Rules can be modified directly in the Properties section of the panel.
8 In the Properties section, click the number 960. Type 950 and press Enter/Return.

The web page collapses to the width of the banner graphic.
Changing the page background colors
As you learned in Lesson 3, a CSS rule can alter the properties and behavior of any HTML element, such as <body>. In this exercise you’ll modify the background color of the entire page.
1 Click the Design button to view the page in Design view.
2 In the CSS Styles panel, click the body rule, and then click the Edit Rule (![]() ) button.
) button.
3 When the “CSS Rule Definition For body” dialog box appears, select the Background category. Click the Background-color color box to display the color picker.
4 In the color picker, use the eyedropper to click the white color chip.
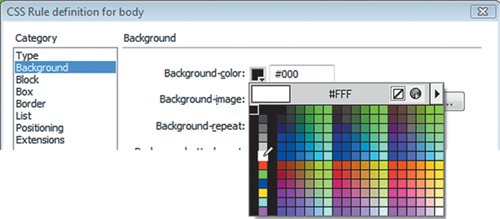
Dreamweaver automatically inserts the hexadecimal value for white, #FFF, in the Background-color field.
Note
Hexadecimal colors are typically written in six characters, two characters for each color channel: red, green, and blue. When both characters in a pair match, it can be abbreviated; for example, #003366 can be written as #036.
5 Click OK to complete the change.
Dreamweaver displays the new color in the Properties section of the CSS Styles panel—the body rule background color has now changed from dark gray to white. The header and footer background colors have not changed. Let’s assign a background color to the footer section.
6 Insert the cursor into the footer section. Observe the tag selectors.
The tag <div.footer> appears at the bottom of the document window. Although it seemed obvious, don’t assume how an element is styled. Always rely on your tag selectors a foolproof way to identify the page structure.
7 In the CSS Styles panel, double-click the .footer rule.
8 Change the Background-color to #060. Click OK.
The footer background changes from gray to dark green.
9 Choose File > Save.
Inserting a graphic background into the footer
Using one solid color over large sections of a page can make for a dull design. But intelligent use of gradient images can add a multidimensional flourish without unduly burdening Internet bandwidth. By combining background colors and background images, you can achieve amazing results. While foreground images are inserted directly onto the page, background images are placed using CSS. As with many other formatting commands, the support of background images using HTML-based attributes was deprecated in HTML 4.01. In this exercise, you will add a background graphic to the footer using CSS to create a three-dimensional effect:
1 Click the Design button to view the page in Design view, if necessary.
2 In the CSS Styles panel, double-click the .footer rule.
3 Select the Background category. Click the Browse button next to the Background-image field.
The Select Image Source dialog box appears.
4 Navigate to DW-CIB > images and select background.jpg. Observe the image dimensions and preview.

The image is 5 pixels by 30 pixels and 2 kilobytes in size. Since the page is 950 pixels, this graphic could never fill the footer unless it was copied and pasted hundreds of times. But, such antics are unnecessary with background images; they have a special capability called repeat.
5 Click OK/Choose. Click Apply.
The background image repeats automatically—both vertically and horizontally—to fill the entire footer. In some cases, a background is not designed to repeat in both directions. This graphic, for example, was intended to create a rounded 3D effect for the top edge of a <div> element. CSS allows you to control the repeat function, such as limiting it to either the vertical or horizontal axis among other settings.
![]()
6 Choose repeat-x from the Background-repeat field menu. Click Apply.
The graphic repeats only horizontally now; it aligns to the top of the <div> element by default. But the background color selected earlier doesn’t match the graphic; it’s too dark.
7 Select the Background-color color box to access the Eyedropper tool. Click the Eyedropper tool on the lighter of the two shades of green in the footer, which enters #090 into the Background-color field.
8 Click OK.
The background color now matches the background image perfectly. The result is the effect of a green container with a 3D rounded top edge. We’ll experiment with more dramatic effects in later lessons.
9 Choose File > Save.
Adjusting text fonts, colors, and sizes
CSS gives you tremendous control over page appearance. For example, it’s easy to change a page’s overall font formatting and appearance by changing a single rule.
Let’s take a look at the font types:
1 Click the Design button to view the page in Design view, if necessary.
2 In the CSS Styles panel, double-click the body rule.
3 When the “CSS Rule Definition for body” dialog box opens, observe the entry displayed in the Font-family field: Verdana, Arial, Helvetica, sans serif.
Why four typefaces? Can’t Dreamweaver make up its mind?
The answer is a simple, but ingenious, solution to a twofold problem. Not all computers have the same fonts installed, and HTML 4.01 can’t currently embed fonts in a web page. That means if you chose a single font and it wasn’t installed on the visitor’s computer, your carefully designed and formatted web page could immediately and tragically appear in Courier or some other equally undesirable font.

Normal browser display

Browser defaulting to Courier
By specifying fonts in groups, the browser is given a second, third, and perhaps fourth (or more) choice to default to before it picks for itself (egads!). Some call this technique “degrading gracefully.”
Dreamweaver CS5 offers more than a dozen predefined font groups out of the box. If you don’t see a combination you prefer, notice the Edit Font List option at the bottom of the Font-Family field menu that allows you to create new groups of your own.
But before you start building your own group, remember this: Your main consideration is not to pick your favorite font, but to figure out what fonts are installed on your visitors’ computers. You may prefer the font Hoefelter Allgemeine Bold Condensed, but it’s unlikely that a majority of web users have it installed on their computers. By all means select Hoefelter as your first choice, just don’t forget to slip in some of the more tried-and-true fonts like Arial, Helvetica, Tahoma, Times New Roman, Trebuchet MS, Verdana, and finally serif and sans serif.
Changing font and color
Using different fonts and colors helps to develop visual interest on a web page. You’ll use the CSS Styles panel to change the font type and color:
1 If necessary, choose File > Open Recent > greenstart.html and click the Design button to view the page in Design view.
2 In the CSS Styles panel, double-click the body rule.
3 From the Font-family menu, choose “Trebuchet MS, Arial, Helvetica, sans-serif.” Click OK.
You have successfully changed the basic font of the entire web page by editing one rule.
Note that the black footer text is a bit difficult to read against the green background. You can adjust the footer text color this way, too.
4 In the CSS Styles panel, double-click the .footer rule.
5 In the “CSS Rule Definition For .footer” dialog box, select the Type category.
6 Enter #FFF in the Color field. The footer text displays in white.
7 Click OK.
Altering text size
In addition to changing the font style and color, as in the previous exercise, you can also alter text size with CSS:
1 If necessary, choose File > Open Recent > greenstart.html and click the Design button to view the page in Design view.
The font size is set to 100% for this CSS layout in the body rule. All elements on the page will inherit this formatting unless otherwise specified. Let’s change the size of the text in the main content area.
2 Insert the cursor in the main content. Observe the tag selectors at the bottom of the document window. Identify the <div> element that contains the main content itself.
The main content is contained in <div.content>.
3 In the CSS Styles panel, double-click the .content rule.
4 In the “CSS Rule Definition For .content” dialog box, type 90 in the Font-size field, and choose % from the unit of measurement menu. Click OK.

The text in <div.content> element now displays at 90 percent of its original size.
5 Choose File > Save.
Using the Property inspector
The Property inspector has traditionally been used to apply quick HTML formatting. It now has the ability to create custom CSS formatting, too:
1 Click the Design button to view the page in Design view, if necessary.
2 If you don’t see the Property inspector docked under the Document window, choose Window > Properties.
Note
If you copied and pasted the text from Word in the exercise earlier in this chapter, the text may already be formatted in bold. Clicking the B button in this case will toggle the bold formatting off. Leave the bold formatting in place.
3 On the left side of the Property inspector, click the HTML button, if necessary, to display the HTML formatting commands.
4 Select the name “GreenStart” wherever it appears in the paragraph copy and click the B button to apply the <strong> tag.
The text “GreenStart” is displayed in bold. Let’s create a custom CSS rule using the Property inspector.
5 In the Property inspector, click the CSS button.
6 In the main heading, select “Green” in the word “GreenStart”.
7 Type #090 in the Color field and press Enter/Return to change the text’s color to match the green color used in the footer.

The New CSS Rule dialog box appears.
8 Choose Class from the Selector Type pop-up menu, if it is not displayed. Type green in the Selector Name field. Click OK.

The selected text changes color. Note the <span.green> tag selector at the bottom of the document window when you insert the cursor in the formatted text.
9 Click the Code view button and observe the selected code. It should look like this:
<span class="green">Green</span>Start
Dreamweaver created a CSS class and automatically applied it to the selected text using the <span> tag.
10 Click the Design view button.
11 Locate the word “GreenStart” in the paragraph copy. Select “Green” in the word “GreenStart”. In the Property inspector, click the HTML button and choose green from the Class menu.
The selected text displays in green. Although the text in the <h1> and <p> elements are formatted completely differently, the .green class still works as desired in both cases.
12 Click the Code view button and observe the selected code. It should look like this:
<span class="green"><strong>Green</strong></span><strong>
Start</strong>
This time, not only did Dreamweaver apply the .green class to the word “Green”, it also restructured the <strong> tag to comply with standard code syntax.
13 Apply the .green class to the words “Green” or “green” wherever they appear on the page.
14 Choose File > Save.
These few examples highlight how useful the Property inspector can be and the reason most web designers leave it open at all times while they work.
Previewing a page in Live view
So far you have been working in Dreamweaver using Code and Design view to build and format most of the page content. However, Code view ignores the graphical display, and Design view doesn’t always display page elements and formatting accurately. This requires you to switch back and forth from Dreamweaver to the browser frequently to preview the code as it will actually appear on the Internet. To save time and improve productivity, Dreamweaver has a built-in feature called Live view that does a better job generating the page display and virtually eliminates the need to switch to the browser. Live view has additional features that will be explored in later lessons.
1 If necessary, choose File > Open Recent > greenstart.html and click the Design button to view the page in Design view.
2 In the toolbar, click the Live View button. You may also press Alt-F11/Option-F11 to enter Live view.
The standard Dreamweaver document display is replaced by a live, simulated browser display. If the page includes elements such as links, JavaScript, or Flash movies, they will be active in Live view. However, you won’t be able to add text or images or modify most types of formatting while Live view is active.
3 To resume editing the document, click the Live view button again, or press Alt-F11/Option-F11 again.
Previewing pages in a browser
Although Dreamweaver does an excellent job of rendering web pages in the Document window and in Live view, it’s important to always review your pages in one or more browsers. Dreamweaver can automatically launch the desired browser and load the page, once it has been specified in Dreamweaver’s preferences. Browsers installed on your computer when Dreamweaver is installed will automatically be added to this list. Browsers installed later can be added manually.

Can you see the subtle variations between these views? Remember, the only one that matters is the browser.
1 Choose File > Preview In Browser > Edit Browser List.
The Preferences dialog box appears, with the Preview In Browser category selected.
2 If your desired browser is not already in the list, click the Add (![]() ) button to add it to the list.
) button to add it to the list.
3 In the Add Browser dialog box, leave all fields blank and click Browse.
4 When the Select Browser dialog box opens, navigate to the folder containing your preferred browser:
• Windows: All browsers will be installed by default in the Program Files folder.
• Mac: All browsers will be installed by default in the Applications folder.
5 Click Open.
6 In the Add Browser dialog box, in the Name field, type the name you want to appear in the browser list, such as Firefox, Internet Explorer, or Safari, if necessary.
7 Select the Primary Browser option to pick the browser that will open when you preview a page in your preferred browser. Click OK.
Only one browser can be primary. If another browser was designated primary, selecting this option will deselect the previous selection.

8 In the Preferences dialog box, click OK.
Note
Use the same method to add any additional browsers you may have installed. Viewing your pages in as many browsers as possible is a good testing practice.
9 Select File > Preview in Browser and choose your primary browser to preview the current page.
If you haven’t saved the page, Dreamweaver will remind you to do so.
In the Document window, clicking the Preview/Debug In Browser (![]() ) button allows you to manually select the browser that will preview the open page.
) button allows you to manually select the browser that will preview the open page.

10 After you’ve previewed your new web page, close your browser or simply switch back to Dreamweaver.
Congratulations—you’ve created your first full-blown web page in Dreamweaver. Using a Dreamweaver CSS layout as a head start, you learned how to modify text, change colors, add images, add and modify CSS rules, and quickly produce a professional-looking web page. You have previewed the page in Live view and in a browser. It’s easy to see how Dreamweaver combines substantial power with ease of use.
Review questions
1 What’s the advantage in using a CSS layout?
2 How can you use the tag selectors to determine what CSS element to edit?
3 How do you change the background color in a page section?
4 What special capability does a background image have, and how can you use it to create special effects?
5 How can you create custom CSS formatting using the Property inspector?
Review answers
1 The CSS layouts included with Dreamweaver have been carefully built and tested to work trouble-free in all major browsers.
2 When you insert the cursor anywhere in the page content, the names and the order of the elements in the tag selector display directly correlates to the structure of the HTML elements at that position, with the highest parent element farthest to the left.
3 Double-click the CSS rule that formats the element and enter a color into the Background-color field of the CSS Rule Definition dialog box. Click OK.
4 Background images can repeat multiple times, both vertically and horizontally. By combining them with background color, you can create special effects, like 3D.
5 In the Property inspector, click the CSS button. Select text or an object within the web page and then choose any of the formatting commands in the inspector. Dreamweaver will create a custom CSS rule based on the selection and formatting.