2.5.4. Adding ImageViews to Display the Images
Next, you’ll add two ImageViews to the GUI to display the images you added to the project in Section 2.5.1. You’ll do this by dragging the ImageViews from the Palette’s Images & Media section onto the GUI below the TextView. To do so, perform the following steps:
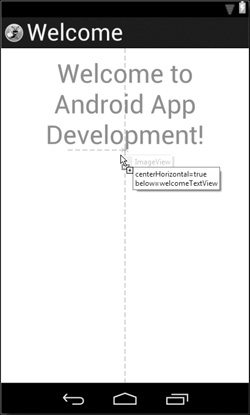
1. Expand the Palette’s Images & Media category, then drag an ImageView onto the canvas as shown in Fig. 2.22. The new ImageView appears below the welcome-TextView node. When you drag a component onto the canvas area, the Graphical Layout editor displays green rule markers and a tooltip appears. The rule markers help you position components in the GUI. The tooltip displays how the GUI component will be configured if you drop it at the current mouse position. The tooltip in Fig. 2.22 indicates that the ImageView will be centered horizontally in the parent layout (also indicated by the dashed rule marker that extends from the top to the bottom of the GUI) and will be placed below the welcomeTextView component (also indicated by the dashed rule marker with an arrowhead).
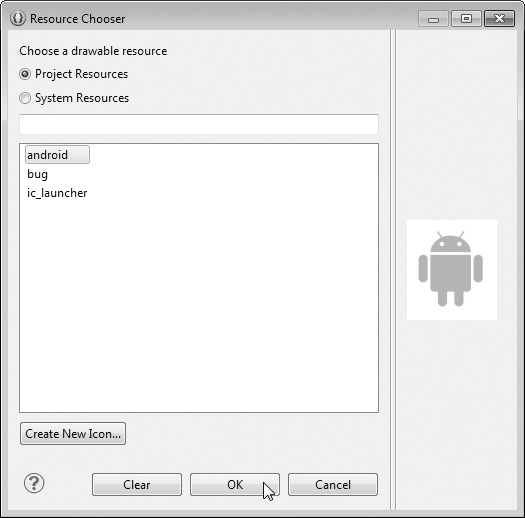
2. When you drop the ImageView, the Resource Chooser dialog (Fig. 2.23) appears so that you can choose the image resource to display. For every image you place in a drawable folder, the IDE generates a resource ID (i.e., a resource name) that you can use to reference that image in your GUI design and in code. The resource ID is the image’s file name without the extension—for android.png, the resource ID is android. Select android and click OK to display the droid image. When you add a new component to the GUI, it’s automatically selected and its properties are displayed in the Properties window.
3. The IDE sets the new ImageView’s Id property to @+id/imageView1 by default. Change this to @+id/droidImageView. An Update References? dialog appears to confirm the renaming operation. Click Yes. Next, a Rename Resource dialog appears to show you all the changes that will be made. Click OK to complete the renaming operation.
4. Repeat Steps 1–3 above to create the bugImageView. For this component, drag the ImageView below the droidImageView, select the bug image resource from the Resource Chooser dialog and set the Id property to @+id/bugImageView in the Properties window, then save the file.
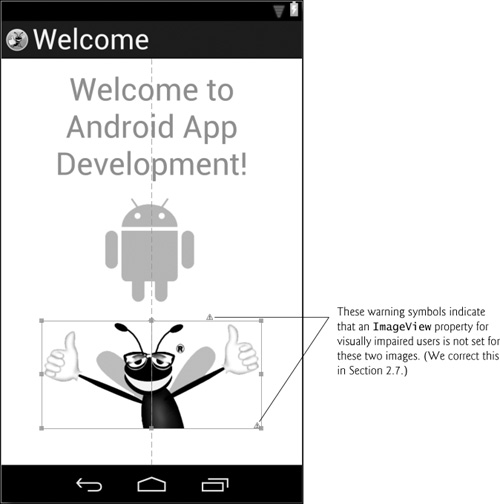
The GUI should now appear as shown in Fig. 2.24.