8. Applying Fills, Strokes, and Effects
Introduction
After you draw an object, you can apply fills, strokes, gradients, and other effects to enhance your documents. The Tools panel provides color boxes to make it easy for you to apply fill and stroke colors to objects. The Stroke panel provides additional options to quickly change stroke attributes, such as weight (width), position on the path, and stroke style. In addition to the typical stroke styles found in the Stroke panel, you can create and use custom stroke styles with stripes, dashes, and dots. For example, you can create a custom dashed stroke where you can specify the length of the dashes and gaps.
A gradient is a smooth transition between two or more colors in an object. You can apply a gradient from the Swatches or Gradient panel. The Gradient and Gradient Feather tools on the Tools panel allows you to change how a gradient appear for an object. You can specify how gradient colors blend, the angle of a linear gradient, and the location of the center for a radial gradient with a drag of the mouse over the gradient fill.
If you want to create a cool effect, you can apply blending modes, transparency, and other effects—shadow, glow, bevel and emboss, satin, and feather—to objects. A blend mode allows you to apply colors and shades to one object and have the effect interact with the objects underneath. InDesign comes with a variety of blend modes, including Overlay, Soft Light, Hard Light, Darken, Lighten, and Color. Transparency allows you to create see-through objects. Other special effects allow you to be creative without even knowing how to draw.
If you always create an object with a certain fill or stroke attribute, you can make those settings the default. InDesign has its own default fill and stroke settings of a black stroke and no fill. These are separate from any defaults that you may set.
Applying Fill and Stroke Colors
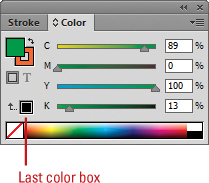
The Tools panel provides color boxes to make it easy for you to apply fill and stroke colors. The color box in the foreground is the Fill box and the outlined box in the background is the Stroke box. When you select an object, fill, or stroke, the color boxes (also known as thumbnails), on the Tools panel display the current colors. To change the fill or stroke color, select an object, fill or stroke, select the Fill or Stroke box on the Tools or Control panel, and then select a color from the Color and Swatches panel, or use the Eyedropper to apply a color from the active document.
Apply Colors to an Object, Fill or Stroke
![]() Select an object, fill, or stroke using a selection tool.
Select an object, fill, or stroke using a selection tool.
![]() Click the Fill or Stroke color box on the Tools or Color panel to choose the color’s destination.
Click the Fill or Stroke color box on the Tools or Color panel to choose the color’s destination.
![]() Click the Color button on the Tools panel to apply a color or click None to apply no color.
Click the Color button on the Tools panel to apply a color or click None to apply no color.
♦ A fill or stroke of None makes the object item transparent.
![]() Use any of the following methods to change the active fill or stroke colors:
Use any of the following methods to change the active fill or stroke colors:
♦ Select the Swatches panel, and then click a color swatch to change the color.
♦ Select the Color panel, and then specify a color using the controls.
♦ Select the Eyedropper tool on the Tools panel, and then click anywhere in the active document to change the color.
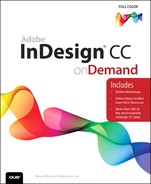
♦ Double-click the Fill or Stroke color box to open the Color Picker dialog box, select a color or enter color values, and then click OK.
♦ Click the Fill or Stroke color box on the Control panel, and then click a color swatch to change the color.


Use Default Colors and Switch the Fill and Stroke Colors
![]() Click the Default Fill and Stroke button to revert the fill and stroke colors to their default values of no fill and a black stroke.
Click the Default Fill and Stroke button to revert the fill and stroke colors to their default values of no fill and a black stroke.
![]() Click the Swap Fill and Stroke Colors button to switch current colors.
Click the Swap Fill and Stroke Colors button to switch current colors.

Timesaver
Press D to change the fill and stroke colors to their default values of no fill and a black stroke, and press X to switch the current colors.
Did You Know?
You can add colors from the Color Picker to the Swatches panel. Open the Color Picker dialog box, select the color you want to add to the Swatches panel, click Add To Swatches, type a name for the color, and then click OK.
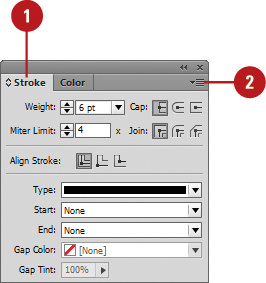
Changing Stroke Attributes
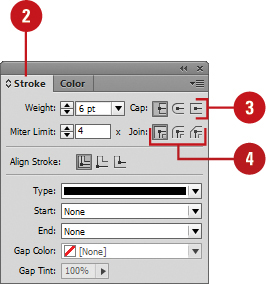
The Stroke panel makes it easy to change stroke attributes, such as weight (width), position on the path, and stroke style. The weight of a stroke represents the thickness of the line. A weight smaller than .25 may not print and a weight of 0 completely removes the stroke. In addition to the width of a stroke, you can also specify the position (known as alignment) of the stroke on the path (either center, inside, or outside) as well as specify the stroke cap, end join, and miter limit. You can apply these options to any object, even a text object. Style is what stands out on the page. You can change the stroke style by applying dashes and endpoints, such as arrows, circles, and squares.
Change the Weight of a Stroke
![]() Select one or more objects.
Select one or more objects.
![]() Select the Stroke panel.
Select the Stroke panel.
![]() Specify or enter a weight in the Stroke or Control panel.
Specify or enter a weight in the Stroke or Control panel.
♦ Click the up or down arrow, or Shift+click to change the weight by a larger interval.

Change the Alignment of a Stroke on the Path
![]() Select one or more closed objects.
Select one or more closed objects.
![]() Select the Stroke panel.
Select the Stroke panel.
![]() Click one of the following alignment buttons:
Click one of the following alignment buttons:
♦ Align Stroke to Center.
♦ Align Stroke to Inside.
♦ Align Stroke to Outside.

![]() Select the Stroke panel.
Select the Stroke panel.
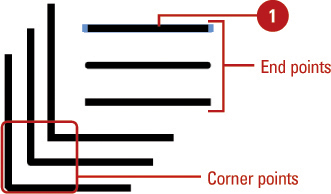
![]() To change the endpoints, click one of the following buttons:
To change the endpoints, click one of the following buttons:
♦ Butt Cap. Creates a square-edged end.
♦ Round Cap. Creates a rounded end.
♦ Projecting Cap. Creates a square-edged end that extends past the endpoint.
![]() To change the bends on corner points, click one of the following:
To change the bends on corner points, click one of the following:
♦ Miter Join. Creates a pointed join point.
♦ Round Join. Creates a rounded join point.
♦ Bevel Join. Creates a beveled (cut off) join point.
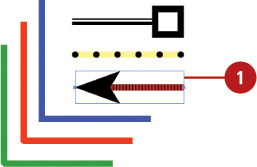
Style a Stroke
![]() Select one or more objects.
Select one or more objects.
![]() Select the Stroke panel.
Select the Stroke panel.
![]() Specify any of the following:
Specify any of the following:
♦ Type. Select a line style.
♦ Start. Select a style for the start point of the line.
♦ End. Select a style for the end point of the line.
♦ Gap Color. Select a color for the gap in dashed or dotted lines.
♦ Gap Tint. Select a tint percentage for the gap color.
Creating Stroke Styles
In addition to the typical stroke styles found in the Stroke panel, you can create and use custom stroke styles with stripes, dashes, and dots. For example, you can create a custom dashed stroke where you can specify the length of the dashes and gaps. In the Stroke Styles dialog box, you can create, edit, delete, save, and load stroke styles. After you create a custom stroke style, the saved stroke style appears in the Stroke panel for use in the future.
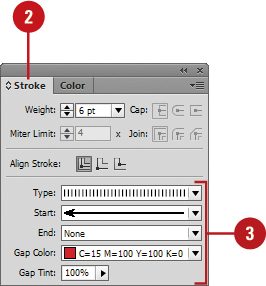
Apply a Custom Dashed Stroke
![]() Select one or more objects.
Select one or more objects.
![]() Select the Stroke panel.
Select the Stroke panel.
![]() Click the Type list arrow, and then click Dashed (at the bottom).
Click the Type list arrow, and then click Dashed (at the bottom).
The Stroke panel expands to display options for corners, dashes, and gaps.
![]() Enter a value in the first Dash box.
Enter a value in the first Dash box.
If you don’t enter any more values, the value in the first box is used for the rest of the boxes.
![]() Enter a value in the first Gap box.
Enter a value in the first Gap box.
![]() Fill in the remaining boxes.
Fill in the remaining boxes.
![]() To adjust the dashes and gaps, click the Corners list arrow, and then select an option:
To adjust the dashes and gaps, click the Corners list arrow, and then select an option:
♦ None. No changes.
♦ Adjust Dashes. Adjusts corner dashes to be equal.
♦ Adjust Gaps. Adjusts gap lengths to be equal.
♦ Adjust Dashes and Gaps. Adjusts corner dashes and gap lengths to be equal.

![]() Click the Options menu, and then click Stroke Styles.
Click the Options menu, and then click Stroke Styles.
The Stroke Styles dialog box appears, where you can create, edit, save, and load stroke styles.
![]() To use an existing style as the base for a new style, select it.
To use an existing style as the base for a new style, select it.
![]() Click New.
Click New.
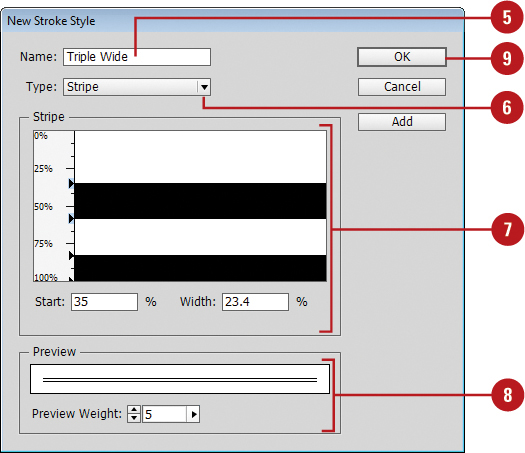
The New Stroke Style dialog box appears, where you can create a stroke style.
![]() Enter a name for the stroke style.
Enter a name for the stroke style.
![]() Click the Type list arrow, and then select a stroke type: Stripe, Dotted, or Dash.
Click the Type list arrow, and then select a stroke type: Stripe, Dotted, or Dash.
The dialog box varies depending on the stroke type that you choose.
![]() Adjust the options to create the style that you want.
Adjust the options to create the style that you want.
![]() View the preview at the bottom of the dialog box and adjust the Preview Weight to view the custom stroke style.
View the preview at the bottom of the dialog box and adjust the Preview Weight to view the custom stroke style.
![]() Click OK.
Click OK.
♦ To continue adding stroke styles, click Add.
![]() To delete a custom stroke style, select it, and then click Delete.
To delete a custom stroke style, select it, and then click Delete.
![]() To save stroke styles to a file, or load stroke styles from a file, click Save or Load.
To save stroke styles to a file, or load stroke styles from a file, click Save or Load.
![]() Click OK.
Click OK.

Applying Gradients
A gradient is a smooth transition between two or more colors in an object. You can apply a gradient from the Swatches or Gradient panel. After you apply a gradient, you can edit it. You can edit a gradient in an object and keep the gradient in the Swatches panel unchanged or you can edit the gradient in the Swatches panel and keep the gradient in an object unchanged. Editing a gradient is similar to creating one. The techniques are the same. All you need to do is select the element that you want to edit.
Apply a Gradient to an Object
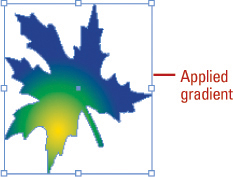
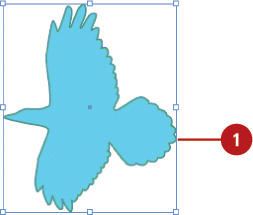
![]() Select an object.
Select an object.
♦ For a fill, click the Fill box on the Tools panel.
♦ For a stroke, click the Stroke box on the Tools panel.
♦ For type, convert it to outlines (click the Type menu, and then click Create Outlines), and then apply a gradient Fill or Stroke.

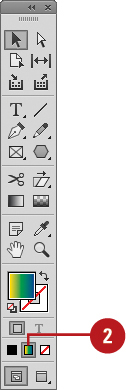
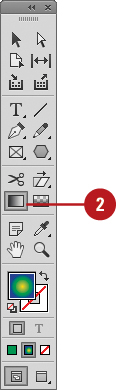
![]() Click the Apply Gradient button on the Tools panel.
Click the Apply Gradient button on the Tools panel.
![]() Or, do one of the following to apply a gradient:
Or, do one of the following to apply a gradient:
♦ Swatches Panel. Select the Swatches panel, and then click a gradient on the panel.
♦ Gradient Panel. Select the Gradient panel, select a color stop, and then use the color spectrum and sliders in the Color panel to create a color gradient.


See Also
See “Creating Gradient Swatches” on pages 226-227 for more information on creating gradients using the Swatches and Gradient panels.

![]() Select the Gradient panel.
Select the Gradient panel.
♦ To edit a gradient in the Swatches panel, select the Swatches panel, double-click a gradient swatch, edit the options as shown below, and then click OK.

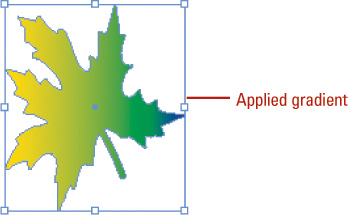
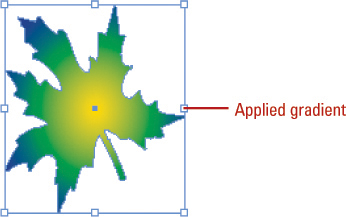
![]() To change the gradient type, click the Type list arrow, and then select a gradient type: Radial or Linear.
To change the gradient type, click the Type list arrow, and then select a gradient type: Radial or Linear.
![]() Do any of the following:
Do any of the following:
♦ Add color stops. Click below the gradient spectrum in a blank area.
♦ Remove color stops. Drag the stop down and away from the gradient spectrum.
♦ Move color stops. Drag the stop or enter a Location value.
♦ Duplicate color stops. Alt+drag (Win) or Option+drag (Mac) a color stop.
♦ Adjust color amount. Drag the diamond above the gradient spectrum.
♦ Reverse color stops. Click the Reverse button on the Gradients panel.

![]() To save the edited gradient, click the New Swatch button on the Swatches panel.
To save the edited gradient, click the New Swatch button on the Swatches panel.
Using the Gradient Tool
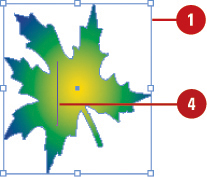
The Gradient tool on the Tools panel allows you to change how a gradient appears for an object. You can change how gradient colors blend, the angle of a linear gradient, and the location of the center for a radial gradient with a drag of the mouse over the gradient fill. You can double-click the Gradient tool to display the Gradient panel and create a gradient, or drag across an existing gradient to adjust the gradient fill.
Use the Gradient Tool to Change a Gradient
![]() Select an object with a gradient that you want to change.
Select an object with a gradient that you want to change.
![]() Click the Gradient tool on the Tools panel.
Click the Gradient tool on the Tools panel.
![]() To manually apply or adjust a gradient, double-click the Gradient tool on the Tools panel, and then specify any of the following options in the Gradient panel.
To manually apply or adjust a gradient, double-click the Gradient tool on the Tools panel, and then specify any of the following options in the Gradient panel.
♦ Type. Specify the type: Radial or Linear.
♦ Angle. Specify the gradient angle.
♦ Add color stops. Click below the gradient spectrum in a blank area.
♦ Remove color stops. Drag stops down and away from the gradient spectrum.
♦ Duplicate color stops. Alt+drag (Win) or Option+drag (Mac) a color stop.
♦ Reverse color stops. Click the Reverse button on the Gradients panel.

![]() To adjust the gradient angle and color stops, drag across the gradient in the object.
To adjust the gradient angle and color stops, drag across the gradient in the object.
The first drag point is the first color stop and the last drag point is the last color stop.
![]() To save the edited gradient, click the New Swatch button on the Swatches panel.
To save the edited gradient, click the New Swatch button on the Swatches panel.
Using the Gradient Feather Tool
The Gradient Feather tool on the Tools panel allows you to add an opacity, or transparency, to a gradient for an object. The Gradient Feather tool works just like the Gradient tool. You can change how gradient colors blend, the angle of a linear gradient, and the location of the center for a radial gradient with a drag of the mouse over the gradient fill. You can double-click the Gradient Feather tool to display the Effects dialog box, where you can adjust gradient feather options.
Use the Gradient Feather Tool to Change a Gradient
![]() Select an object with a gradient that you want to change.
Select an object with a gradient that you want to change.
![]() Click the Gradient Feather tool on the Tools panel.
Click the Gradient Feather tool on the Tools panel.

![]() To manually apply or adjust a gradient feather, double-click the Gradient Feather tool on the Tools panel, specify any of the following options in the Effects dialog box, and then click OK.
To manually apply or adjust a gradient feather, double-click the Gradient Feather tool on the Tools panel, specify any of the following options in the Effects dialog box, and then click OK.
♦ Type. Specify the type: Radial or Linear.
♦ Angle. Specify the gradient angle.
♦ Add color stops. Click below the gradient spectrum in a blank area.
♦ Remove color stops. Drag stops down and away from the gradient spectrum.
♦ Reverse color stops. Click the Reverse button on the Gradients panel.

![]() To apply or adjust a gradient feather, drag across the gradient in the object.
To apply or adjust a gradient feather, drag across the gradient in the object.
The first drag point is the first color stop and the last drag point is the last color stop.


![]() To save the edited gradient, click the New Swatch button on the Swatches panel.
To save the edited gradient, click the New Swatch button on the Swatches panel.
Creating Blends and Effects
Blend mode allows you to apply colors and shades to one object and have the effect interact with the objects underneath. InDesign comes with a variety of blend modes, including Overlay, Soft Light, Hard Light, Darken, Lighten, and Color. Experiment with them to find out what works best for you. When you work with groups of objects, you can set options to apply blending modes and opacity settings with the objects in the group or not. The Knockout Group option doesn’t apply settings to object groups, but it does to objects not in the group, while the Isolate Blending option does apply settings to object groups. You can set options in the Effects panel or Effects dialog box for Transparency.
Create a Blend Effect
![]() Select an object that appears on top of another object.
Select an object that appears on top of another object.
![]() Select the Effects panel.
Select the Effects panel.
♦ Click the Window menu, and then click Effects.
![]() Click the Blend Mode list arrow, and then select a blend mode.
Click the Blend Mode list arrow, and then select a blend mode.
![]() To add object transparency, enter an Opacity percentage or drag the slider to adjust it.
To add object transparency, enter an Opacity percentage or drag the slider to adjust it.


![]() Choose any of the following:
Choose any of the following:
♦ Isolate Blending. Objects in a group display their blending mode and transparency with each other. Group and select the objects that you want to use, and then select the Isolate Blending check box.
♦ Knockout Group. Objects in a group display their blending mode and transparency with other objects, but not each other. Group and select the objects that you want to use, and then select the Knockout Group check box.
♦ Add an Effect. Click the fx button to specify effect options for the selected object.
♦ Clear All Effects. Click the Clears All Effects button on the panel to clear all effects for the selected object.
![]() Select the Effects panel.
Select the Effects panel.
♦ Click the Window menu, and then click Effects.
♦ You can also click the Object menu, point to Effects, and then click Transparency to use a dialog box.
![]() Enter an Opacity percentage or drag the slider to adjust it.
Enter an Opacity percentage or drag the slider to adjust it.


See Also
See “Controlling Graphics Display Performance” on pages 166-167 for more information on setting transparency preferences for the onscreen quality of transparent objects in a new document.
Select a Color Space for Blending Transparent Objects
![]() Click the Edit menu, and then point to Transparency Blend Space.
Click the Edit menu, and then point to Transparency Blend Space.
![]() Select a document’s color space, such as Document RGB or Document CMYK.
Select a document’s color space, such as Document RGB or Document CMYK.
This converts the colors of all objects to a common color space (RGB or CMYK) for blending. This avoids color mismatches between objects in different color spaces.

Applying Shadow Effects
The Drop Shadow style is probably the most common effect used (next to Bevel and Emboss). The Inner Shadow style applies a shadow to the inside of an object. When you apply the Inner Shadow style, the shadow effect appears on the inside edges—like a reverse drop shadow. In addition to the distance and angle of the drop shadow, you can apply a blending mode and transparency. Other options include Global Light, Choke (inner), Spread (outer), and Noise. The Use Global Light option allows you to simulate the same light source on objects. The Spread and Choke options determine the amount of transparency used for the outer or inner part of the shadow. The Noise option introduces a random shift to the colors of the drop shadow.
Apply a Shadow Effect
![]() Select one or more objects.
Select one or more objects.
![]() Click the Object menu, point to Effects, and then click Drop Shadow or Inner Shadow.
Click the Object menu, point to Effects, and then click Drop Shadow or Inner Shadow.
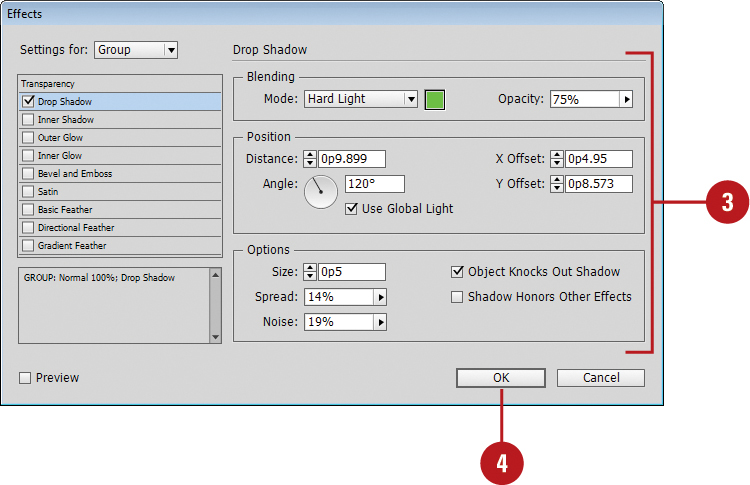
![]() Do any of the following:
Do any of the following:
♦ Blending options. Select a blending mode and opacity for the shadow effect.
♦ Position options. Specify Distance, Angle, and Offset (X and Y) values to position the shadow in relation to the object.
Select the Use Global Light check box to simulate the same lighting angle for all effects.
♦ Other options. Specify size and other options for the shadow; options vary depending on the type of shadow.
The Spread and Choke options determine the amount of transparency used for the outer or inner part of the shadow. The Noise option introduces a random shift to the colors of the drop shadow.
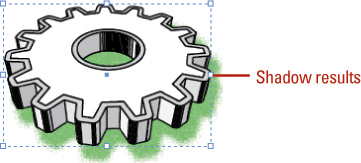
![]() Click OK.
Click OK.
Applying Glow Effects
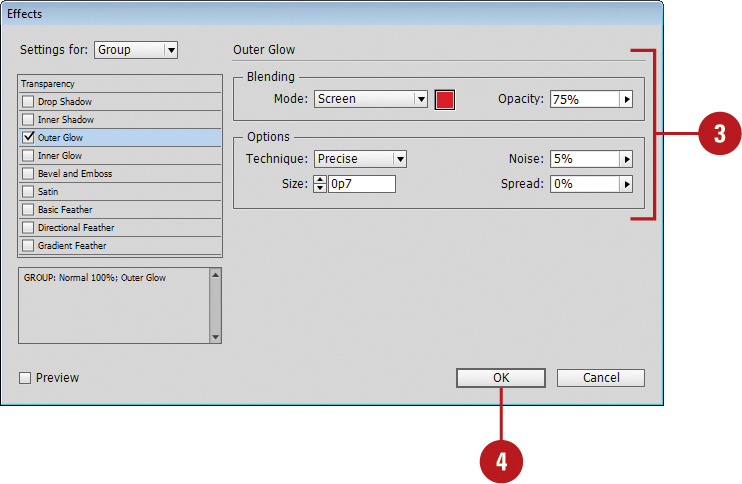
Outer Glow applies a glow in any color you choose to all selected objects. The Outer Glow style is an excellent way to create a neon effect for text. The Inner Glow style applies a glow to the inside of an object. When you apply the Inner Glow style, the effect appears on the inside edges—like a reverse outer glow. In addition to the technique (softer or precise) of the glow, you can apply specific blending modes and transparency. Other options include choke (inner), spread (outer), and Noise. The Spread and Choke options determine the amount of transparency used for the outer or inner part of the glow. The Noise option introduces a random shift to the colors of the glow.
Apply a Glow Effect
![]() Select one or more objects.
Select one or more objects.
![]() Click the Object menu, point to Effects, and then click Outer Glow or Inner Glow.
Click the Object menu, point to Effects, and then click Outer Glow or Inner Glow.
![]() Do any of the following:
Do any of the following:
♦ Blending options. Select a blending mode and opacity for the glow effect.
♦ Other options. Specify a Technique (softer or more precise glow) and Size of the glow; options vary depending on the type of glow.
The Spread and Choke options determine the amount of transparency used for the outer or inner part of the glow. The Noise option introduces a random shift to the colors of the glow.
![]() Click OK.
Click OK.

Did You Know?
You can apply the satin effect. The satin effect applies a textured appearance to an object. Select one or more objects, click the Object menu, point to Effects, click Satin, specify angle, distance, size, and invert options, and then click OK.
Applying Bevel and Emboss Effects
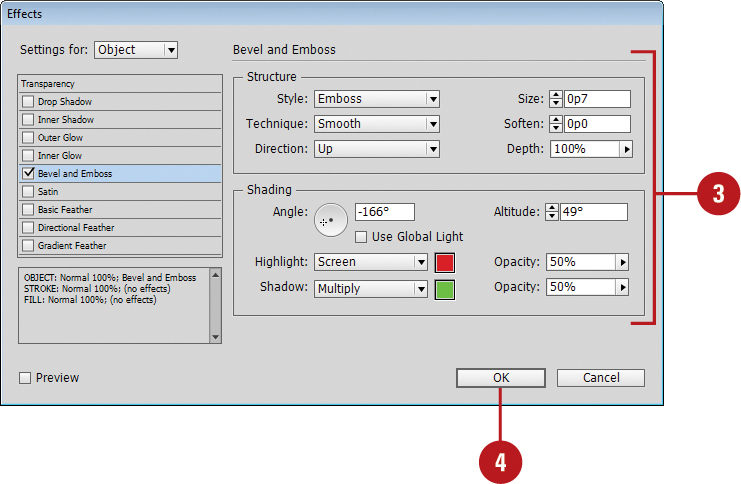
The Bevel and Emboss style, second only to Drop Shadow in popularity, creates a 3D illusion of roundness to a flat surface. You can apply the Bevel effect to outline text to get the impression of 3D text. If the object you’re applying the Bevel and Emboss has no transparent areas, the style will be applied to the outer edge of the image, and if you want to experiment beyond the standard rounded bevel, you can use a Chisel Hard option that makes text appear as if it’s carved out of stone.
Apply a Bevel and Emboss Effect
![]() Select one or more objects.
Select one or more objects.

![]() Click the Object menu, point to Effects, and then click Bevel and Emboss.
Click the Object menu, point to Effects, and then click Bevel and Emboss.
![]() Do any of the following:
Do any of the following:
♦ Structure options. Specify a Style (inner or outer bevel, emboss or pillow emboss), Technique (smooth, chisel hard, chisel soft), Direction, and Size for the effect.
♦ Shading options. Specify the Angle and Altitude values to position the effect in relation to the object.
Select the Use Global Light check box to simulate the same lighting angle for all effects.
Select a blending mode for Highlight and Shadow.
![]() Click OK.
Click OK.

Did You Know?
You can set the global light. The global light allows you to simulate the same lighting angle for all effects. You can set the angle and altitude options to create shadows. Click the Object menu, point to Effects, and then click Global Light.
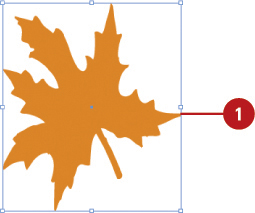
Applying Feather Effects
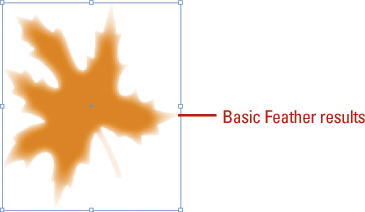
A feather effect softens the edges of an object to appear transparent. InDesign provides three different feather effects: Basic, Directional, and Gradient. The Basic Feather effect creates a soft edge around the outside of objects. The Directional Feather effect creates soft edges for the top, bottom, left, or right sides of objects. The Gradient Feather effect creates soft edges in a gradient. Instead of making a transition from one color to another, a gradient feather makes a transition from a color to a transparent fade. Some common feather options include Choke (inner) and Noise. The Choke option determines the amount of transparency used for the inner part of the feather. The Noise option introduces a random shift to the colors of the feather.
Apply a Feather Effect
![]() Select one or more objects.
Select one or more objects.
![]() Click the Object menu, point to Effects, and then click Basic Feather, Directional Feather, or Gradient Feather.
Click the Object menu, point to Effects, and then click Basic Feather, Directional Feather, or Gradient Feather.
![]() Specify the options for the type of feather effect you selected:
Specify the options for the type of feather effect you selected:
♦ Basic Feather. Specify a Feather Width, Choke, Corners (sharp, rounded, or diffused), and Noise for the effect.
♦ Directional Feather. Specify a Feather Width for top, bottom, left, or right, Noise, Choke, Shape, and Angle for the effect.
♦ Gradient Feather. Specify Opacity and Location for color stops, and Type and Angle for the gradient.
![]() Click OK.
Click OK.

Applying Corner Object Effects
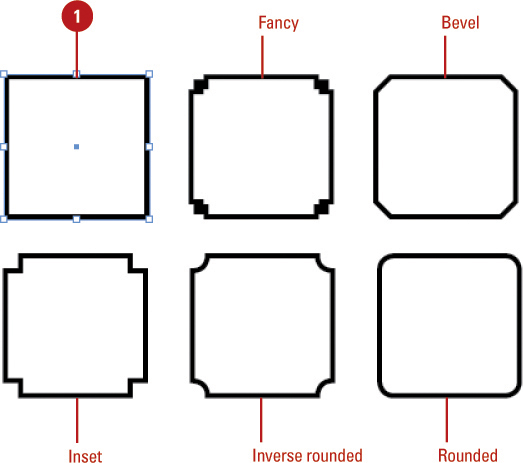
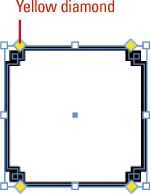
If you have an object with corners, you can change the shape of the object by applying corner object effects in the Corner Options dialog box. The effects include Fancy, Bevel, Inset, Inverse Rounded, and Rounded. In addition to specifying a corner effect, you can also specify a size for the effect. If you’re not satisfied with the end result, you can always open the dialog box and adjust the corner effect and size. In addition to the Corner Options dialog box, you can also use Live Corners to apply corner effects to rectangular frames. When you show Live Corners, a yellow box appears on the frame, which you can select and adjust (with yellow diamond handles) to change the corner radius and apply different corner effects.
Apply Corner Object Effects
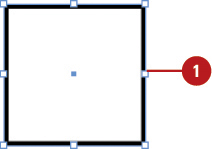
![]() Select an object that you want to change.
Select an object that you want to change.
![]() Click the Object menu, and then click Corner Options.
Click the Object menu, and then click Corner Options.
![]() Select the Preview check box to view your results in the document window.
Select the Preview check box to view your results in the document window.
![]() To apply the corner effects to all four corners of a rectangle, click the Make All The Settings The Same icon to select it.
To apply the corner effects to all four corners of a rectangle, click the Make All The Settings The Same icon to select it.
![]() Click a corner Effect list arrow, and then select an effect.
Click a corner Effect list arrow, and then select an effect.
♦ Fancy.
♦ Bevel.
♦ Inset.
♦ Inverse Rounded.
♦ Rounded.
![]() Specify a Size value for the effect.
Specify a Size value for the effect.
![]() Click OK.
Click OK.

![]() Select an object that you want to change.
Select an object that you want to change.
![]() Click the yellow box on the frame edge.
Click the yellow box on the frame edge.
Four yellow diamonds appear on the selected frame.

![]() To add corner effects, do any of the following:
To add corner effects, do any of the following:
♦ All Four Corners. Drag one of the yellow diamonds.
♦ Single Corner. Hold down Shift, and then drag a yellow diamond.
♦ Apply Effects. Alt (Win) or Option (Mac) click a yellow diamond to cycle through the effects.
♦ Change Effect Radius. Drag a yellow diamond toward the center of the frame.

![]() To stop editing, click anywhere outside the selected frame.
To stop editing, click anywhere outside the selected frame.
![]() To remove corner effects, click the Object menu, point to Corner Options, select None from an Effects list arrow, and then click OK.
To remove corner effects, click the Object menu, point to Corner Options, select None from an Effects list arrow, and then click OK.
![]() Click the View menu, point to Extras, and then click Hide Live Corners.
Click the View menu, point to Extras, and then click Hide Live Corners.

Did You Know?
You can set corner effects on all of a path’s corner points. Corner effects do not appear on smooth points. When you move a path’s corner points, the effects automatically change angles.
Converting Shape Objects
Sometimes when you create a shape with a certain look you just need to change the shape. Instead of creating a new shape, you can convert the shape to another shape by using Convert Shape buttons in the Pathfinder panel. The Pathfinder panel provides several different types of shapes: rectangle, rounded rectangle, beveled rectangle, inverted rounded rectangle, ellipse, triangle, polygon, and line. Some of the rectangle shapes use the radius value in the Corner Options dialog box to complete the conversion, so you can customize the shape.
Convert Shape Objects
![]() Select one or more objects.
Select one or more objects.
![]() Select the Pathfinder panel.
Select the Pathfinder panel.
♦ Click the Window menu, point to Object & Layout, and then click Pathfinder.
![]() Select from the following Pathfinder Convert Shape buttons:
Select from the following Pathfinder Convert Shape buttons:
♦ Rectangle. Converts selection to a rectangle.
♦ Rounded Rectangle. Converts selection to a rounded rectangle using the radius from the Corner Options dialog box.
♦ Beveled Rectangle. Converts selection to a beveled rectangle using the radius from the Corner Options dialog box.
♦ Inverted Rounded Rectangle. Converts selection to an inverted rounded rectangle using the radius from the Corner Options dialog box.
♦ Ellipse. Converts selection to an ellipse.
♦ Triangle. Converts selection to a triangle.
♦ Polygon. Converts selection to a polygon.
♦ Line. Converts selection to a line.
♦ Vertical or Horizontal Line. Converts selection to a vertical or horizontal line.


Setting Object Defaults
If you always create an object with a certain fill or stroke attribute, you can make those settings the default. I find it useful to set the stroke weight to 1 point. Then I don’t have to do it every time I create a new object. You can set the object defaults for the current document or for all new documents. InDesign has its own default fill and stroke settings of no fill and a black stroke. These program defaults are separate from the defaults you set.
Set Object Defaults
♦ Document Defaults. Open a document, deselect all objects, and then specify the defaults you want in the Stroke or other panels.
♦ All New Document Defaults. Close all documents, and then specify the defaults you want in the Stroke or other panels.
♦ Apply InDesign Defaults. Click the Default Fill and Stroke button on the Tools panel.

