5. Placing and Working with Graphics
What You’ll Do
Place Graphics from Adobe Bridge
Display XMP Graphic Information
Create Specialty Frames for Graphics
Select and Move Frames and Graphics
Control Graphics Display Performance
Introduction
You can use InDesign’s Place command to insert artwork into an open document. InDesign lets you place graphic files saved in Illustrator AI, Photoshop PSD, JPEG, EPS, TIFF, PICT (Mac), and PDF (Portable Document Format) formats, to name a few. You can even place another InDesign INDD file into a document. With the Place command, you can place multiple graphics of different types at the same time. If you need more control over the import and placement of graphics in your document, you can display and use an import dialog box for the type of graphic that you want to place.
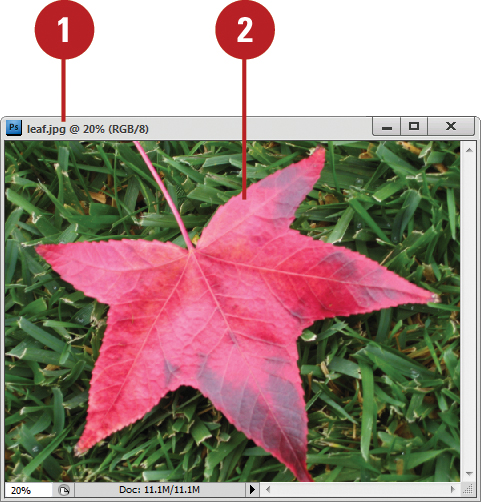
When you place graphics, InDesign loads them into a graphic preview cursor, which you can use to place them into a new or existing frame. When you place a graphic, InDesign creates a link to the original file. You can display and work with linked graphics in the Links panel.
Before you can work with the graphic in a frame, you need to select it first. You have several options depending on what you want to accomplish. You can select the frame and graphic, just the frame, or just the graphic. When you place a graphic into a frame, it doesn’t always fit the way you want. You can automatically resize the graphic to fill the entire frame or proportionally fill the frame. In some cases you want to place a graphic on top of an existing graphic. This is called a nesting graphic. For example, you can place a graphic in a rectangle frame, and then place another graphic in a circle frame inside the rectangle frame.
When you place multiple graphics in a document, the display performance of your screen can slow down. You can change display resolution settings for the entire document or for individual graphics to improve performance.
Placing Graphics
You can use InDesign’s Place command to insert artwork into an open document. InDesign lets you place graphic files saved in Illustrator AI, Photoshop PSD, BMP, JPEG, EPS, PNG, TIFF, GIF, WMF, PICT (Mac), SCT, DCS, and PDF formats, to name a few. You can even place another InDesign INDD file into a document. You can place multiple graphics of different types at the same time. When you place graphics, InDesign loads them into a graphic preview cursor, which you can use to place them into a new or existing frame. When you draw a new frame, the frame constrains to the proportions of the graphic unless you hold down Shift. The scale is displayed as part of the loaded cursor.
Place a Graphic
![]() To place a graphic into an existing frame (rectangle, elliptical, or polygon), select the frame using the Selection or Direct Selection tool on the Tools panel.
To place a graphic into an existing frame (rectangle, elliptical, or polygon), select the frame using the Selection or Direct Selection tool on the Tools panel.
![]() Click the File menu, and then click Place.
Click the File menu, and then click Place.
![]() Click the Files of Type (Win) or Enable (Mac) list arrow, and then click Importable Files, or select a specific file format.
Click the Files of Type (Win) or Enable (Mac) list arrow, and then click Importable Files, or select a specific file format.
![]() Navigate to the location with the file you want to import.
Navigate to the location with the file you want to import.
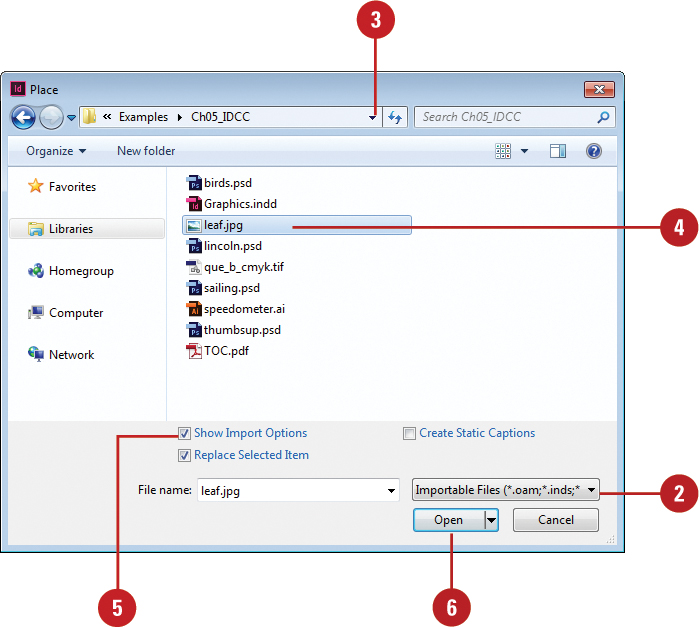
![]() Select the graphic file you want to place.
Select the graphic file you want to place.
![]() Select the Replace Selected Item check box to replace the selected item with the imported graphic.
Select the Replace Selected Item check box to replace the selected item with the imported graphic.
![]() Click Open.
Click Open.
The imported graphic is placed in a loaded preview cursor.
![]() Click or drag a rectangle frame with the loaded cursor to place the graphic in a new frame, or click in an empty frame to place it in an existing frame.
Click or drag a rectangle frame with the loaded cursor to place the graphic in a new frame, or click in an empty frame to place it in an existing frame.
♦ To place the graphic in an existing frame with a graphic, Alt (Win) or Option (Mac) click in the frame to add the graphic to it.
Placing Graphics with Options
If you need more control over the import and placement of graphics in your document, you can display and use an import dialog box for the type of graphic that you want to place. For example, when you import Illustrator artwork, you can specify import options to select individual artboards, layers, and a transparent background. When you import most images, such as TIFF and JPEG, you can specify import options to apply a clipping path along with an Alpha Channel and specify a color profile. For a Photoshop image, you can also select layers.
Place Graphics with Options
![]() Click the File menu, and then click Place.
Click the File menu, and then click Place.
![]() Click the Files of Type (Win) or Enable (Mac) list arrow, and then click Importable Files.
Click the Files of Type (Win) or Enable (Mac) list arrow, and then click Importable Files.
![]() Navigate to the location with the file you want to import.
Navigate to the location with the file you want to import.
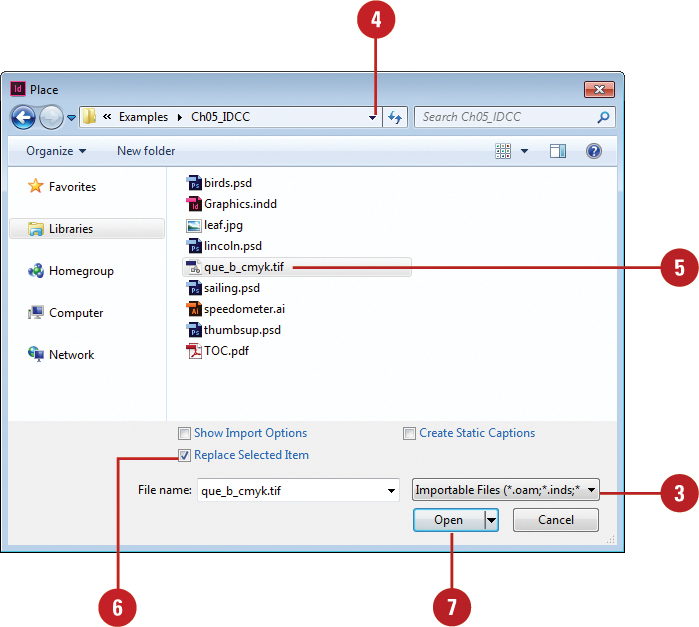
![]() Select the file you want to place.
Select the file you want to place.
![]() Select the Show Import Options check box to select import options.
Select the Show Import Options check box to select import options.
![]() Click Open.
Click Open.
♦ If you don’t select the Show Import Options check box, you can press Shift as you click the Open button to show import options.
![]() Select the options you want. Options vary depending on the imported file format.
Select the options you want. Options vary depending on the imported file format.
![]() Click OK.
Click OK.
The imported graphic is placed in a loaded cursor.
![]() Click or drag a rectangle frame with the loaded cursor to place the graphic where you want it in your document.
Click or drag a rectangle frame with the loaded cursor to place the graphic where you want it in your document.
Setting Place Import Options
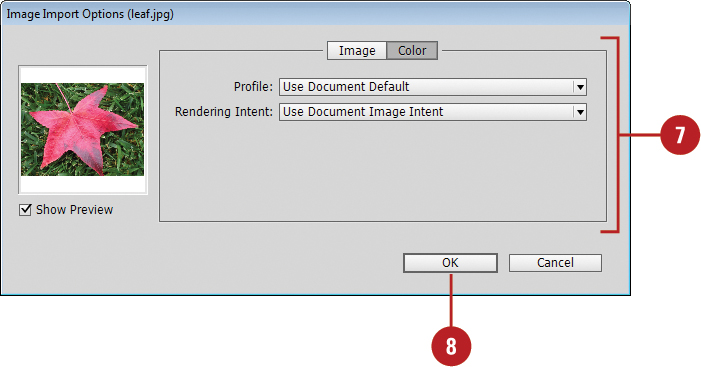
When you import graphics saved from Photoshop, Illustrator, or other compatible graphics programs, you can specify import options to use the same transparency as the original file, set the visibility of layers, and use clipping paths, which allows you to use only part of a graphic (the rest is transparent). If you save a Photoshop file with an Alpha Channel (white or shades of gray) as a PSD, TIFF or JPEG, or with a clipping path as a PSD, TIFF or EPS, you can import the graphic into your document and retain the Alpha Channel transparency or clipping path. For Photoshop, Illustrator, InDesign, and PDF files, you can specify which layers in the file you want to import into your document.
Import Layers or Transparency
![]() Click the File menu, and then click Place.
Click the File menu, and then click Place.
![]() Select the file (PSD, AI, INDD, or PDF) you want to place.
Select the file (PSD, AI, INDD, or PDF) you want to place.
![]() Select the Show Import Options check box to select import options.
Select the Show Import Options check box to select import options.
![]() Click Open.
Click Open.
The Place PDF or Image Import Options dialog box appears.
![]() To set transparency, click the General tab, and then select the Transparent Background check box.
To set transparency, click the General tab, and then select the Transparent Background check box.

![]() To set layer visibility, click the Layers tab, and then do any of the following:
To set layer visibility, click the Layers tab, and then do any of the following:
♦ Show or Hide Layers. Click the visibility icon.
♦ Update Links. Select options to reset/use or maintain layer visibility overrides.
![]() Click OK.
Click OK.

![]() Click or drag a rectangle frame with the loaded cursor to place the graphic.
Click or drag a rectangle frame with the loaded cursor to place the graphic.
![]() To edit the layers options, click the Object menu, and then click Object Layer Options.
To edit the layers options, click the Object menu, and then click Object Layer Options.
![]() Select the file (PSD, TIFF, JPEG, or EPS) with the clipping path or Alpha Channel you want to place.
Select the file (PSD, TIFF, JPEG, or EPS) with the clipping path or Alpha Channel you want to place.
![]() Select the Show Import Options check box to select import options.
Select the Show Import Options check box to select import options.
![]() Click Open.
Click Open.
The Image Import Options dialog box appears.
![]() Click the Image tab.
Click the Image tab.
![]() To import clipping paths, select the Apply Photoshop Clipping Path check box.
To import clipping paths, select the Apply Photoshop Clipping Path check box.

![]() To select an Alpha Channel, click the Alpha Channel list arrow, and then select the one you want or select None.
To select an Alpha Channel, click the Alpha Channel list arrow, and then select the one you want or select None.
![]() Click OK.
Click OK.

![]() Click or drag a rectangle frame with the loaded cursor to place the graphic.
Click or drag a rectangle frame with the loaded cursor to place the graphic.
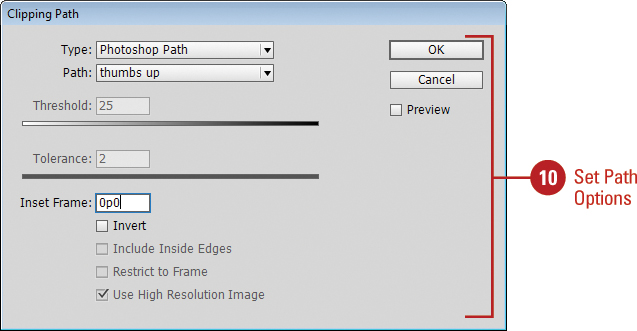
![]() To edit the clipping path, do any of the following:
To edit the clipping path, do any of the following:
♦ Modify Path Shape. Click the Selection tool, select the path, and drag points and handles.
♦ Convert Path to a Frame. Select the path, click the Object menu, point to Clipping Path, and then click Convert Clipping Path to Frame.
♦ Set Path Options. Click the Object menu, point to Clipping Path, and then click Options.
Placing Multiple Graphics
With the Place command, you can place multiple graphics of different types at the same time. When you place graphics, InDesign loads them into a graphic preview cursor, which you can use to place them into a new or existing frame. A number appears in the loaded cursor indicating the number of loaded graphics. With the loaded cursor, you can also create a contact sheet to place multiple graphics in a grid arrangement with the number of rows, columns, and spacing you want.
Place Multiple Graphics
![]() Click the File menu, and then click Place.
Click the File menu, and then click Place.
![]() Click the Files of Type (Win) or Enable (Mac) list arrow, and then click Importable Files.
Click the Files of Type (Win) or Enable (Mac) list arrow, and then click Importable Files.
![]() Navigate to the location with the files you want to import.
Navigate to the location with the files you want to import.
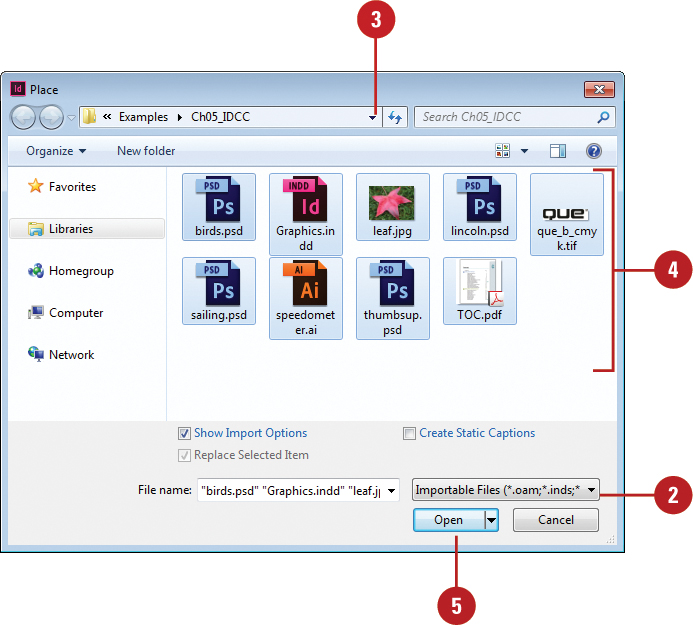
![]() Select the graphic files you want to place.
Select the graphic files you want to place.
♦ To select multiple files, use the Ctrl (Win) or ![]() (Mac) key for individual files or the Shift key for a range of files.
(Mac) key for individual files or the Shift key for a range of files.
![]() Click Open.
Click Open.
The imported graphic is placed in a loaded preview cursor. A number appears indicating the number of loaded graphics.
♦ Use the arrow keys to cycle through the graphic preview in the loaded cursor.
♦ Press Esc to delete the graphic in the preview of the loaded cursor.
♦ Use Alt (Win) or Option (Mac) to swap the element in the frame with the graphic in the loaded cursor.
![]() Click or drag a rectangle frame with the loaded cursor to place each graphic in a new frame, or click in an empty frame to place the graphic in an existing frame.
Click or drag a rectangle frame with the loaded cursor to place each graphic in a new frame, or click in an empty frame to place the graphic in an existing frame.
![]() Click the Files of Type (Win) or Enable (Mac) list arrow, and then click Importable Files.
Click the Files of Type (Win) or Enable (Mac) list arrow, and then click Importable Files.
![]() Navigate to the location with the file you want to import.
Navigate to the location with the file you want to import.
![]() Select the graphic files you want to place.
Select the graphic files you want to place.
♦ To select multiple files, use the Ctrl (Win) or ![]() (Mac) key for individual files or the Shift key for a range of files.
(Mac) key for individual files or the Shift key for a range of files.
![]() Click Open.
Click Open.
The imported graphic is placed in a loaded preview cursor. A number appears indicating the number of loaded graphics.
♦ Use the arrow keys to cycle through the graphic preview in the loaded cursor.
♦ Press Esc to delete the preview graphic in the loaded cursor.
♦ Use Alt (Win) or Option (Mac) to swap the element in the frame with the graphic in the loaded cursor.

![]() Ctrl (Win) or
Ctrl (Win) or ![]() (Mac)+Shift+drag a rectangle frame with the loaded cursor to place the graphics.
(Mac)+Shift+drag a rectangle frame with the loaded cursor to place the graphics.
♦ Grid. Before you release the mouse, use the arrow keys (Up and Down for rows or Right and Left for columns) to adjust the grid.
♦ Gutter. Before you release the mouse, use the Page Up or Page Down keys, or hold down Ctrl (Win) or ![]() (Mac) and press the arrows keys to change the gutter space.
(Mac) and press the arrows keys to change the gutter space.


Placing Graphics from Adobe Bridge
Adobe Bridge CC—available for download from Creative Cloud—allows you to search, sort, filter, manage, and process files one at a time or in batches. You can open or place graphics directly into InDesign by using the Open With (Adobe InDesign) or Place (In InDesign) commands in Bridge from the File menu. You can also drag thumbnails from Bridge into an open InDesign document window.
Browse and Open Graphics with Adobe Bridge
![]() Click the Go to Bridge button on the Application bar or click the File menu, and then click Browse in Bridge.
Click the Go to Bridge button on the Application bar or click the File menu, and then click Browse in Bridge.
♦ If prompted, install or update from Adobe Application Manager.
Adobe Bridge opens, displaying files and folders on your computer.
![]() Navigate to the location with the file you want to place.
Navigate to the location with the file you want to place.
![]() Select the graphic thumbnail representing the file that you want to open in your InDesign document.
Select the graphic thumbnail representing the file that you want to open in your InDesign document.
![]() Click the File menu, point to Open With, and then click Adobe InDesign CC.
Click the File menu, point to Open With, and then click Adobe InDesign CC.
Did You Know?
You can locate a linked graphic in Bridge from InDesign. In the Links panel, select the graphic name, click the Options button, and then click Reveal In Bridge.
Place Graphics with Adobe Bridge
![]() Click the Go to Bridge button on the Application bar or click the File menu, and then click Browse in Bridge.
Click the Go to Bridge button on the Application bar or click the File menu, and then click Browse in Bridge.
♦ If prompted, install or update from Adobe Application Manager.
Adobe Bridge opens, displaying files and folders on your computer.
![]() Navigate to the location with the file you want to place.
Navigate to the location with the file you want to place.
![]() Select the graphic thumbnail that represents the file you want to place in your InDesign document.
Select the graphic thumbnail that represents the file you want to place in your InDesign document.
![]() Click the File menu, point to Place, and then click In InDesign.
Click the File menu, point to Place, and then click In InDesign.
♦ Drag to InDesign. Drag the graphic from Bridge to the InDesign icon on the taskbar (Win) or Dock (Mac), hold for a moment to display InDesign, release the mouse (loaded cursor), and then drag to create a frame for the graphic.

Did You Know?
You can change XMP data for a graphic. Click the Go to Bridge button on the Application bar, locate and select the image you want, select the Metadata panel, click the Edit button for a data item, enter data, and then click the Apply button (check mark) at the bottom of the panel.
Adding Captions to Graphics
A caption is a description that appears below a graphic. Within InDesign, you can create static or live caption. A static caption remains the same unless you manually modify it, while a live caption can change if the graphic is updated or the metadata changes. A caption is placed in a text frame. You can create a caption from an existing graphic or while placing a graphic. When you create a caption, InDesign creates the text—either static text or variable text—based on the current caption settings. A live caption displays a string of variable text. If you move a live caption text frame to another graphic, the caption display changes.
Setup and Create a Caption
![]() Click the Object menu, point to Captions, and then click Caption Setup.
Click the Object menu, point to Captions, and then click Caption Setup.
![]() Click the Metadata list arrow, select the caption data you want, and then type the text you want before and after the metadata.
Click the Metadata list arrow, select the caption data you want, and then type the text you want before and after the metadata.
![]() To add multiple rows of metadata, click the Plus sign, and then repeat Step 2.
To add multiple rows of metadata, click the Plus sign, and then repeat Step 2.
♦ To remove a row of metadata, click the Minus sign next to it.
![]() Specify any of the following:
Specify any of the following:
♦ Alignment. Specify where to place the caption.
♦ Offset. Specify the spacing between the text frame and graphic.
♦ Paragraph Style. Specify a paragraph style for the text.
♦ Layer. Specify which layer to place the caption.
♦ Group Caption With Image. Select to group the caption with the graphic.
![]() Click OK.
Click OK.

![]() To add a caption, select the graphic, click the Object menu, point to Captions, and then click Generate Static Caption, or click Generate Live Caption.
To add a caption, select the graphic, click the Object menu, point to Captions, and then click Generate Static Caption, or click Generate Live Caption.

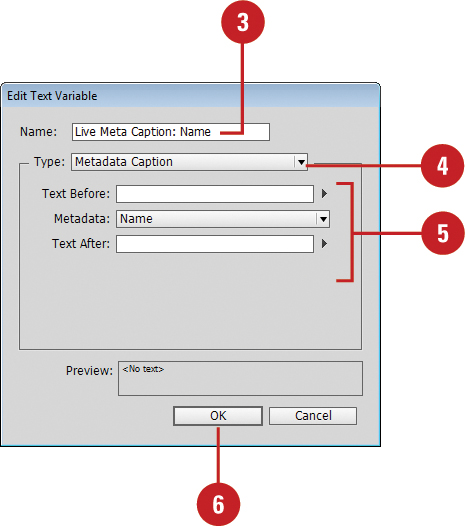
Define and Create a Caption Using Variables
![]() Click the Type menu, point to Text Variables, and then click Define.
Click the Type menu, point to Text Variables, and then click Define.
![]() Click New to create a new variable or select a variable, and then click Edit to change an existing one.
Click New to create a new variable or select a variable, and then click Edit to change an existing one.
![]() Type or revise the name.
Type or revise the name.
![]() Click the Type list arrow, and then click Metadata Caption.
Click the Type list arrow, and then click Metadata Caption.
![]() Click the Metadata list arrow, select the caption data you want, and then type the text you want before and after the metadata.
Click the Metadata list arrow, select the caption data you want, and then type the text you want before and after the metadata.
![]() Click OK.
Click OK.
![]() Click Done.
Click Done.

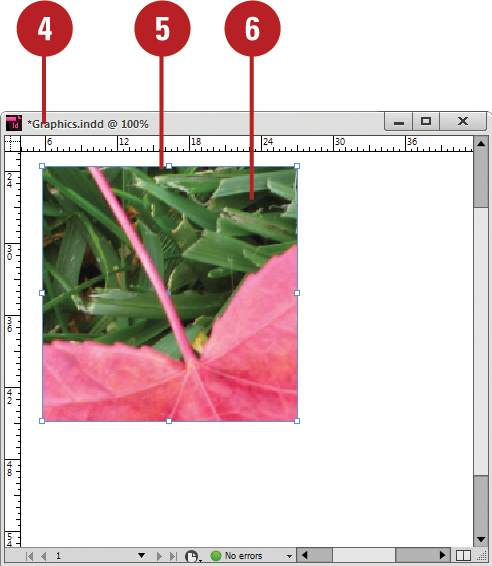
![]() Create a text frame for the caption with the Text tool, and then click to place the insertion point in the text frame.
Create a text frame for the caption with the Text tool, and then click to place the insertion point in the text frame.
![]() Click the Type menu, point to Text Variables, point to Insert Variable, and then click Live Metadata Caption: Name or another variable.
Click the Type menu, point to Text Variables, point to Insert Variable, and then click Live Metadata Caption: Name or another variable.
![]() Move the caption text frame next to graphic frame or group the caption frame to the graphic frame.
Move the caption text frame next to graphic frame or group the caption frame to the graphic frame.

Did You Know?
You can create a static caption while placing a graphic. Click the File menu, click Place, select a graphic file, select the Generate Static Captions check box, and then click Open.
You can convert a live caption to a static caption. Select the live caption, click the Object menu, point to Captions, and then click Convert To Static Caption.
Copying or Moving Graphics
Instead of using the Place command, you can also copy and paste or drag-and-drop graphics from other programs directly into frames in your document. When you copy and paste graphics, InDesign converts the image to a compatible format during the transfer and embeds the graphic in your document at full resolution. Embedding inserts a copy from one document into another. An embedded graphic doesn’t appear in the Links panel. When you drag-and-drop a graphic, InDesign creates a link just like when using the Place command.
Copy or Move Graphics
![]() Open the program with the graphic that you want to copy or move into your InDesign document.
Open the program with the graphic that you want to copy or move into your InDesign document.
![]() Select the graphic you want to use in InDesign.
Select the graphic you want to use in InDesign.

![]() Click the Edit menu, and then click Copy or Cut.
Click the Edit menu, and then click Copy or Cut.
![]() Close the program and switch back to InDesign.
Close the program and switch back to InDesign.
![]() Select the frame in which you want to place the graphic.
Select the frame in which you want to place the graphic.
![]() Click the Edit menu, and then click Paste Into.
Click the Edit menu, and then click Paste Into.
Drag and Drop Graphics
![]() Open the program with the graphic that you want to copy into your InDesign document together with the InDesign program.
Open the program with the graphic that you want to copy into your InDesign document together with the InDesign program.
![]() Select the graphic you want to use in InDesign.
Select the graphic you want to use in InDesign.
![]() Drag the graphic from the original program into your InDesign document.
Drag the graphic from the original program into your InDesign document.

Using the Links Panel
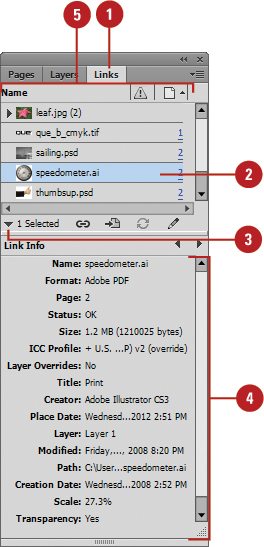
When you place a graphic, InDesign creates a link to the original file. Linking displays information stored in one document (the source file) in another (the destination file). You can edit the linked object from either file, although changes are stored in the source file. If you break the link between a linked object and its source file, the object becomes embedded. Embedding inserts a copy from one document into another. You can display and work with linked graphics in the Links panel. The Links panel allows you to relink a missing graphic, display a linked graphic, update a linked graphic, or edit a linked graphic in another program. Special icons appear next to linked graphics indicating a missing or modified link. You can also sort items and display information about a linked graphic, such as name, color space (mode), dimension (resolution), scale, format, and the path to the source in the Links panel.
Display Linked Graphic Information in the Links Panel
![]() Select the Links panel.
Select the Links panel.
♦ Click the Window menu, and then click Links.
Timesaver
Press Shift+Ctrl+D (Win) or Shift+![]() +D (Mac).
+D (Mac).
![]() Select the linked graphic for which you want to display information.
Select the linked graphic for which you want to display information.
![]() Click the Show/Hide Link Information triangle button on the panel.
Click the Show/Hide Link Information triangle button on the panel.
♦ You can click the Next and Previous button to view links.
![]() Scroll down the list as needed to review the information for the selected linked graphic.
Scroll down the list as needed to review the information for the selected linked graphic.
![]() To sort items in the Links panel, click the Name, Status icon, Page icon, or Type icon at the top of the panel to sort items in the list. Click the icon again to change the sort order.
To sort items in the Links panel, click the Name, Status icon, Page icon, or Type icon at the top of the panel to sort items in the list. Click the icon again to change the sort order.
Managing Linked Graphics
After you link or embed a graphic image file into an InDesign document, you can use the Links panel in InDesign to manage and work with the files. The Links panel displays a list of all the linked or embedded (contained within the document) files in your document. You can use the Links panel to update, replace, or relink a graphic image file. If a linked file is moved from its original location, you need to repair the link the next time you open the document. If a linked file needs to be updated, a warning icon appears in the Links panel to let you know. If you place the same graphic in multiple locations, the link collapses into a single row in the Links panel, which you can expand using the triangle.
Replace a Linked Graphic
![]() Select the Links panel.
Select the Links panel.
♦ Click the Window menu, and then click Links.
![]() Select the linked graphic that you want to relink.
Select the linked graphic that you want to relink.
![]() Click the Relink button on the panel.
Click the Relink button on the panel.

![]() Select the graphic file that you want to use as the replacement in the active document.
Select the graphic file that you want to use as the replacement in the active document.
![]() Click Open.
Click Open.

♦ You can also select the image in the document window, click the File menu, click Place, select a replacement image, select the Replace Selected Item check box, and then click Open.
Did You Know?
You can change a linked graphic to an embedded graphic. Select the Links panel, select the linked graphic, click the Options button, and then click Embed Link. If you prefer the graphic to be linked, select the embedded graphic (with the embedded icon), click the Options button, click Unembed Link, and then click Yes.
♦ Click the Window menu, and then click Links.
![]() Select the linked graphic that you want to change.
Select the linked graphic that you want to change.
♦ Expand/Collapse Multiple Links to Same Source. Click the Expand/Collapse triangle in the Links panel.
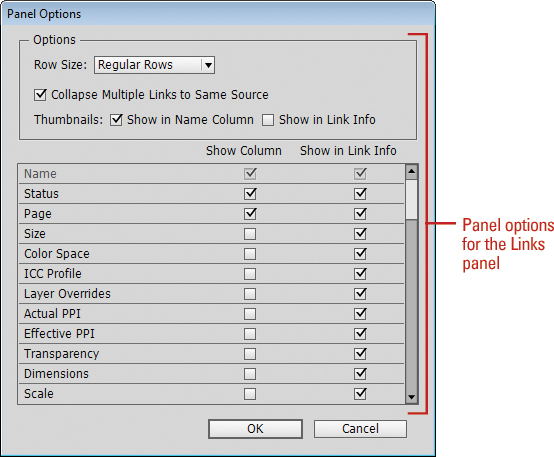
To enable or disable this option, click the Options button, click Panel Options, select or deselect the Collapse Multiple Links to Same Same Source check box, and then click OK.
![]() Do any of the following:
Do any of the following:
♦ Update a Link. Click the Update Link button on the panel.
♦ Update All Links. Click the Options button, and then click Update All Links.
♦ Locate a Placed Graph in a Document. Click the Go To Link button on the panel.
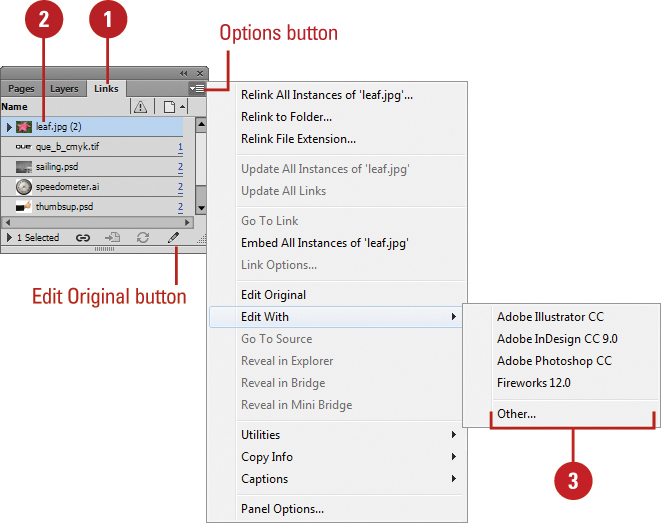
♦ Edit Original. Click the Edit Original button on the panel to open the program that created the file and edit it.
♦ View Information. Double-click the graphic name, and then view the link information at the bottom of the panel.
♦ Change from Linked to Embedded. Click the Options button, and then click Embed Link.

Editing a Linked Graphic
When you link a graphic into an InDesign document, you need to edit the graphic in the source file using the original or a compatible program. You can open the program from Windows Explorer or the Finder and then open the graphic file, or you can have InDesign do it for you. You can use the Edit Original command to edit the file with the program associated with that particular file extension, or go to the Edit With submenu to select an editing program. If you select multiple graphics, the Edit Original command opens all the images in their respective editing programs.
Edit a Linked Graphic in the Source
![]() Select the Links panel.
Select the Links panel.
♦ Click the Window menu, and then click Links.
![]() Select the linked graphic that you want to edit.
Select the linked graphic that you want to edit.
![]() Do any of the following:
Do any of the following:
♦ Edit Original. Click the Edit Original button on the Links panel.
If you selected multiple graphics, each graphic is opened in their respective editing program.
♦ Edit With. Click the Options button, point to Edit With, and then select an editing program.
The editing program opens, displaying the linked graphic.
![]() Make the changes you want to the linked graphic.
Make the changes you want to the linked graphic.
![]() Click the File menu, and then click Save.
Click the File menu, and then click Save.
![]() Click the File menu, and then click Exit or Quit.
Click the File menu, and then click Exit or Quit.
Your saved changes are updated in your document.
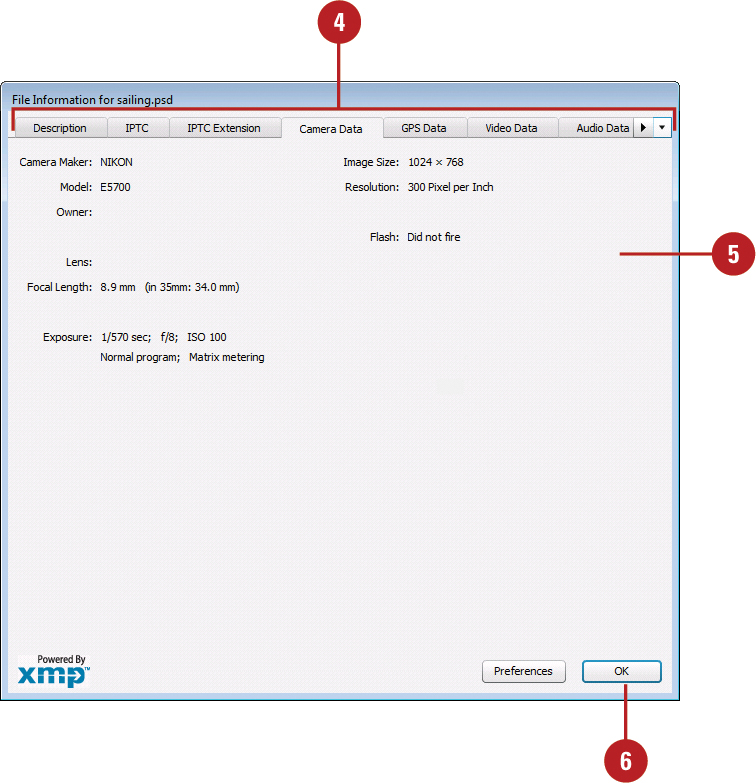
Displaying XMP Graphic Information
When you place a graphic into an InDesign document, the graphic file includes information and data about itself. This data is saved with the file as metadata in the XMP format (Extensible Metadata Platform), and can be recognized and accessed by InDesign or any other application, such as Adobe Bridge, that reads and edits XMP metadata. For example, if an image is a photograph, the metadata includes the type of image, where the image was shot, the camera used, shutter speed, f-stop, and other information, such as author and copyright. You can do the same with video and audio data, too.
Display XMP Metadata for a Linked Image
![]() Select the Links panel.
Select the Links panel.
♦ Click the Window menu, and then click Links.
![]() Select the linked graphic for which you want to display information.
Select the linked graphic for which you want to display information.
![]() Click the Options button, point to Utilities, and then click XMP File Info.
Click the Options button, point to Utilities, and then click XMP File Info.

![]() Click the different tabs to display information about the graphic.
Click the different tabs to display information about the graphic.
![]() Review the information and enter any new information (if available) you have related to the graphic.
Review the information and enter any new information (if available) you have related to the graphic.
![]() Click OK.
Click OK.
See Also
See “Inserting File Information” on page 478 for more information on the types of information available in the File Information dialog box.
See “Placing Graphics from Adobe Bridge” on page 148 for information on changing metadata for a selected graphic in Adobe Bridge.
Creating Specialty Frames for Graphics
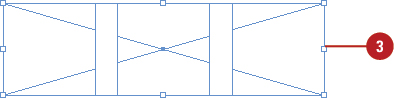
Instead of using the standard rectangle, ellipse, or polygon frames to place graphics, you can create and use specialty frames. A specialty frame is a vector-based compound path. You can create a compound path from one or more standard frames or text in InDesign, or you can import one from another vector-based program, such as Adobe Illustrator, that uses the AICB (Adobe Illustrator Clipboard). When you combine multiple frames into one compound path, the placed graphic appears across all the frames. You can create unique specialty frames from text characters. The Create Outlines command converts characters in a text frame into a compound path. If you no longer want to use a compound path, you can use the Release Compound Path command to split the compound path up into individual frames.
Create and Release a Compound Path as a Frame
![]() Select the Selection or Direct Selection tool on the Tools panel.
Select the Selection or Direct Selection tool on the Tools panel.

![]() Select the frames that you want to use in the compound path.
Select the frames that you want to use in the compound path.
♦ If the frames overlap, a transparent hole appears where the frames overlap.

![]() Click the Object menu, point to Paths, and then click Make Compound Path.
Click the Object menu, point to Paths, and then click Make Compound Path.
A compound path displays diagonal lines across the entire set of frames instead of individual frames.

![]() To release a compound path, select the compound path, click the Object menu, point to Paths, and then click Release Compound Path.
To release a compound path, select the compound path, click the Object menu, point to Paths, and then click Release Compound Path.
If there is a graphic in the compound path, it will only appear in the first frame after you release the compound path. The other frames will be empty.
![]() Select the text frame or double-click the text and then select characters.
Select the text frame or double-click the text and then select characters.


![]() Click the Type menu, and then click Create Outlines.
Click the Type menu, and then click Create Outlines.
InDesign creates a compound path from the text in the text frame.
If you want to place different graphics in each of the letter frames, you need to ungroup (if needed) and release the compound path for the entire group first.
![]() To release the compound path, click the Object menu, point to Paths, and then click Release Compound Path.
To release the compound path, click the Object menu, point to Paths, and then click Release Compound Path.
Import Paths as Frames
![]() Open the program with the path that you want to copy into your InDesign document together with the InDesign program.
Open the program with the path that you want to copy into your InDesign document together with the InDesign program.

![]() Drag the path from the original program into your InDesign document.
Drag the path from the original program into your InDesign document.
When a black line appears around the boundaries of your document window, release the mouse to place the path.

Did You Know?
You can also use copy and paste. Instead of using drag-and-drop, you can also use copy and paste to import a path from another vector-based program.
Selecting and Moving Frames and Graphics
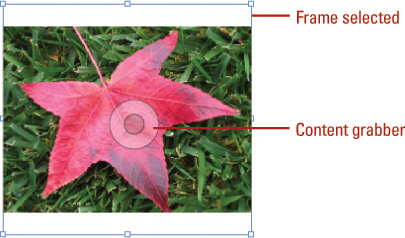
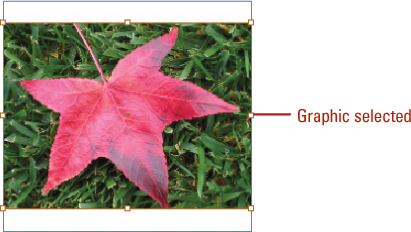
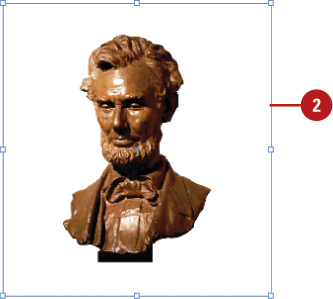
Before you can work with the graphic in a frame, you need to select it first. There are two bounding boxes around the graphic. One for the frame (blue) and another for the graphic (brown). You have several options depending on what you want to accomplish. You can select the frame and graphic, just the frame, or just the graphic. If you want to resize the frame as well as the graphic inside, you can select them both or use the Auto-Fit option. With the Auto-Fit option enabled, when you resize the frame, the graphic inside automatically resizes too. If you want to keep the frame the current size and resize the graphic, you need to just select the graphic and not the frame. The Selection and Direct Selection tools allow you to select the parts you want. To reposition the graphic and not the frame, you can use the Selection tool and content grabber (which replaces the Position tool).
Select and Move Frames and Graphics
♦ Select the Frame or Graphic. Select the Selection tool on the Tools panel, double-click the frame or graphic to select the other (it no longer switches to the Direct Selection tool).
♦ Select and Move the Frame and Graphic. Select the Selection tool on the Tools panel, click the frame to show a bounding box, and then drag the selection.
♦ Select and Move the Graphic within the Frame. Select the Direct Selection tool on the Tools pane, point to the graphic inside the frame, point to the content grabber (a circle), and then drag the graphic with the Hand cursor, or select the Direct Selection tool on the Tools panel, click inside the frame to show a bounding box with the Hand cursor, and then drag the graphic.
♦ Select and Move the Frame. Select the Direct Selection tool on the Tools panel, click the edge of the frame to show the points on the frame, Alt+click (Win) or Option (Mac)+click the frame edge again to select all the points, release the keys, and then drag the frame.

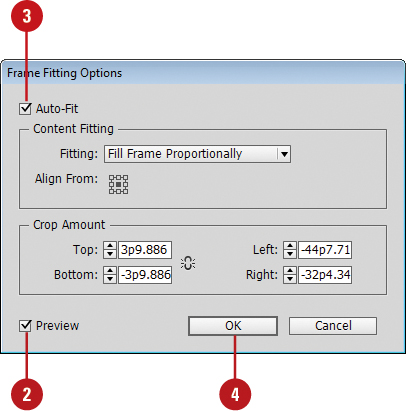
Use the Auto-Fit Option to Resize Frames and Graphics
![]() Click the Object menu, point to Fitting, and then click Frame Fitting Options.
Click the Object menu, point to Fitting, and then click Frame Fitting Options.
![]() Select the Preview check box to view your results in the document window.
Select the Preview check box to view your results in the document window.
![]() Select the Auto-Fit check box to resize a graphic automatically when you resize frame.
Select the Auto-Fit check box to resize a graphic automatically when you resize frame.
Timesaver
Click the Auto-Fit option in the Control panel.
![]() Click OK.
Click OK.

![]() To clear frame fitting options, click the Object menu, point to Fitting, and then click Clear Frame Fitting Options.
To clear frame fitting options, click the Object menu, point to Fitting, and then click Clear Frame Fitting Options.
Did You Know?
You can show or hide content grabber. Click the View menu, point to Extras, and then click Show Content Grabber or Hide Content Grabber.
Fitting Graphics in Frames
When you place a graphic into a frame, it doesn’t always fit the way you want. You can automatically resize the graphic to fill the entire frame or proportionally fill the frame. You can resize the graphic to fit the frame using commands on the Fitting submenu on the Object menu. If you want more control over how the graphic fits the frame, you can use the Frame Fitting Options dialog box. Instead of sizing frames and graphics separately, you can use the Auto-Fit option to resize them together. If you don’t want to use the frame fitting options, you can clear them.
Fit Graphics in Frames
![]() Select the Selection or Direct Selection tool on the Tools panel.
Select the Selection or Direct Selection tool on the Tools panel.
![]() Select the frame or the graphic.
Select the frame or the graphic.
![]() Click the Object menu, point to Fitting, and then use any of the following:
Click the Object menu, point to Fitting, and then use any of the following:
♦ Resize the Graphic to the Frame. Click Fit Content to Frame.
♦ Resize the Graphic Proportionally to the Frame. Click Fit Content Proportionally.
♦ Center the Graphic in the Frame. Click Center Content.
♦ Resize the Frame to the Graphic. Click Fit Frame to Content.
♦ You can also double-click a frame handle to resize it to the graphic; a corner for proportional; a top or bottom for vertical; a right or left for horizontal.
♦ Resize the Graphic to Fill the Frame. Click Fill Frame Proportionally.

Fit Graphics in Frames Using Dialog Box Options
![]() Select the Selection or Direct Selection tool on the Tools panel.
Select the Selection or Direct Selection tool on the Tools panel.

![]() Select the frame or the graphic.
Select the frame or the graphic.
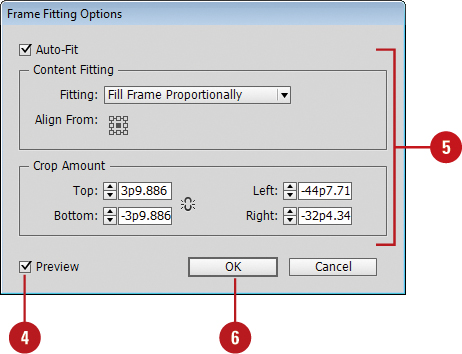
![]() Click the Object menu, point to Fitting, and then click Frame Fitting Options.
Click the Object menu, point to Fitting, and then click Frame Fitting Options.
![]() Select the Preview check box to view your results in the document window.
Select the Preview check box to view your results in the document window.
![]() Use any of the following methods:
Use any of the following methods:
♦ Auto-Fit. Select to resize a graphic automatically when you resize frame.
Timesaver
Click the Auto-Fit option in the Control panel.
♦ Fitting. Select a fitting option to fit content to the frame, fit content proportionally to the frame, or to fill the frame proportionally.
♦ Align From Reference Point. Click the square you want to use as the positioning point for graphic fitting adjustments.
♦ Crop Amount. Specify position values for Top, Bottom, Left, and Right to crop the graphic.
![]() Click OK.
Click OK.

![]() To clear frame fitting options, click the Object menu, point to Fitting, and then click Clear Frame Fitting Options.
To clear frame fitting options, click the Object menu, point to Fitting, and then click Clear Frame Fitting Options.
Nesting Graphics in Frames
In some cases you may want to place a graphic on top of an existing graphic. This is called a nesting graphic. For example, you can place a graphic in a rectangle frame, and then place another graphic in a circle frame inside the rectangle frame. You can also nest a text frame in a graphic frame. Frames can hold multiple levels of nested frames. After you nest graphics in a frame, you can use commands from the Select submenu on the Object menu to select the main container frame or nested frames.
Nest Graphics in a Frame
![]() Select the Selection tool on the Tools panel.
Select the Selection tool on the Tools panel.
![]() Select the graphic or text frame that you want to place in a graphic frame.
Select the graphic or text frame that you want to place in a graphic frame.
![]() Click the Edit menu, and then click Cut or Copy.
Click the Edit menu, and then click Cut or Copy.
![]() Select the graphic frame in which you want to place a graphic or text frame.
Select the graphic frame in which you want to place a graphic or text frame.
![]() Click the Edit menu, and then click Paste Into.
Click the Edit menu, and then click Paste Into.
![]() To select frames, do any of the following:
To select frames, do any of the following:
♦ Main Container. Click the frame using the Selection tool on the Tools panel.
♦ You can drag the center point square (cursor changes to a black arrow) to move the object.
♦ Nested Content. Select the main container, click the Object menu, point to Select, and then click Content.
♦ To select other objects, click the Object menu, point to Select, and then click Container.
Formatting Graphics in Frames
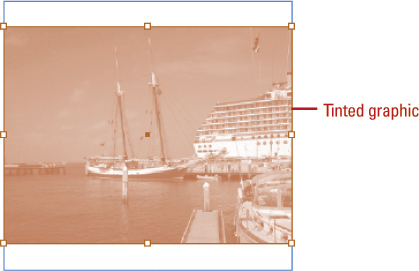
If you place a grayscale graphic into your document, you can change the color of the graphic to create a different effect. A grayscale graphics uses black values to display the image, which you can change to a different color. With the Direct Selection tool, simply select the grayscale graphic, and then apply a fill color to it. If you want to lighten the effect, you can change the tint of the color. You can also use the same technique to change the color of the graphic frame fill or stroke.
Color a Grayscale Graphic
![]() Select the Direct Selection tool on the Tools panel.
Select the Direct Selection tool on the Tools panel.
![]() Select the grayscale graphic that you want to color.
Select the grayscale graphic that you want to color.

![]() Adjust the Tint in the Color panel.
Adjust the Tint in the Color panel.
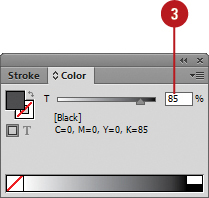
![]() Select a Fill color using the Tools or Color panel.
Select a Fill color using the Tools or Color panel.

Did You Know?
You can color a graphic frame. Select the Selection tool on the Tools panel, select the graphic frame, and then select a Fill or Stroke color using the Tools or Color panel.
See Also
See “Fitting Graphics in Frames” on page 160 for more information on displaying graphics in a frame.
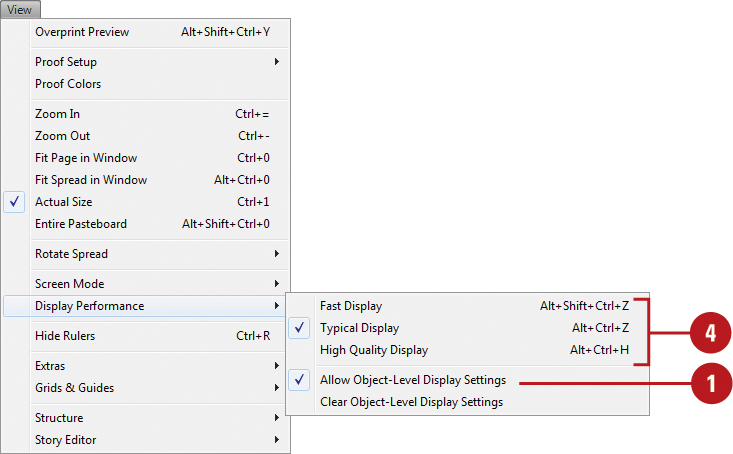
Controlling Graphics Display Performance
When you place multiple graphics in a document, the display performance of your screen can slow down. You can change display resolution settings for the entire document or for individual graphics to improve performance. You can set default display performance settings for all documents in the Display Performance preferences dialog box, for the current document on the Display Performance submenu on the View menu, or for individual graphics on the Display Performance submenu from the Object menu.
Change a Graphics Display Performance
![]() Click the View menu, point to Display Performance, and then click Allow Object-Level Display Settings to select it.
Click the View menu, point to Display Performance, and then click Allow Object-Level Display Settings to select it.
![]() Select the Selection or Direct Selection tool on the Tools panel.
Select the Selection or Direct Selection tool on the Tools panel.
![]() Select the imported graphic.
Select the imported graphic.
![]() Click the Object menu, point to Display Performance, and then select a performance option:
Click the Object menu, point to Display Performance, and then select a performance option:
♦ Fast Display. Draws raster images or vector graphics as a gray box. Use to quickly page through documents with a lot of graphics. Best performance, lowest quality.
♦ Typical Display. Draws a low-resolution image (default). Use to quickly identify parts of a graphic.
♦ High Quality Display. Draws a high-resolution image. Use to view image details. Lowest performance, highest quality.
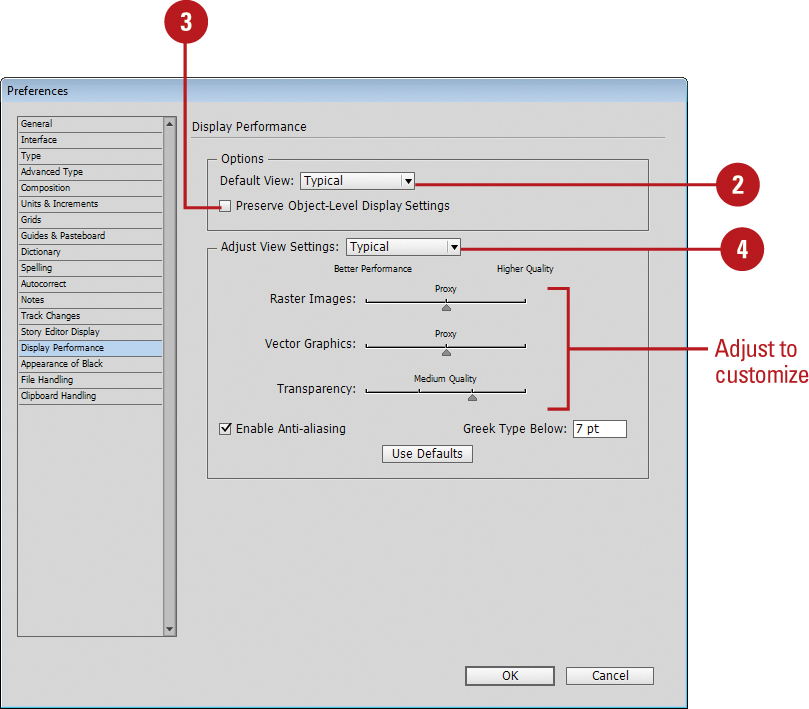
Set Default Display Performance Options
![]() Click the Edit (Win) or InDesign (Mac) menu, point to Preferences, and then click Display Performance.
Click the Edit (Win) or InDesign (Mac) menu, point to Preferences, and then click Display Performance.
![]() Click the Default View list arrow, and then select a performance option. See the previous page for details.
Click the Default View list arrow, and then select a performance option. See the previous page for details.
![]() Select the Preserve Object-Level Display Settings check box to specify different display performance settings for individual objects.
Select the Preserve Object-Level Display Settings check box to specify different display performance settings for individual objects.
![]() Click the Adjust View Settings list arrow, and then select a performance option. See the previous page for details.
Click the Adjust View Settings list arrow, and then select a performance option. See the previous page for details.
If you want a custom setting, drag the sliders for Raster Images, Vector Graphics, and Transparency.
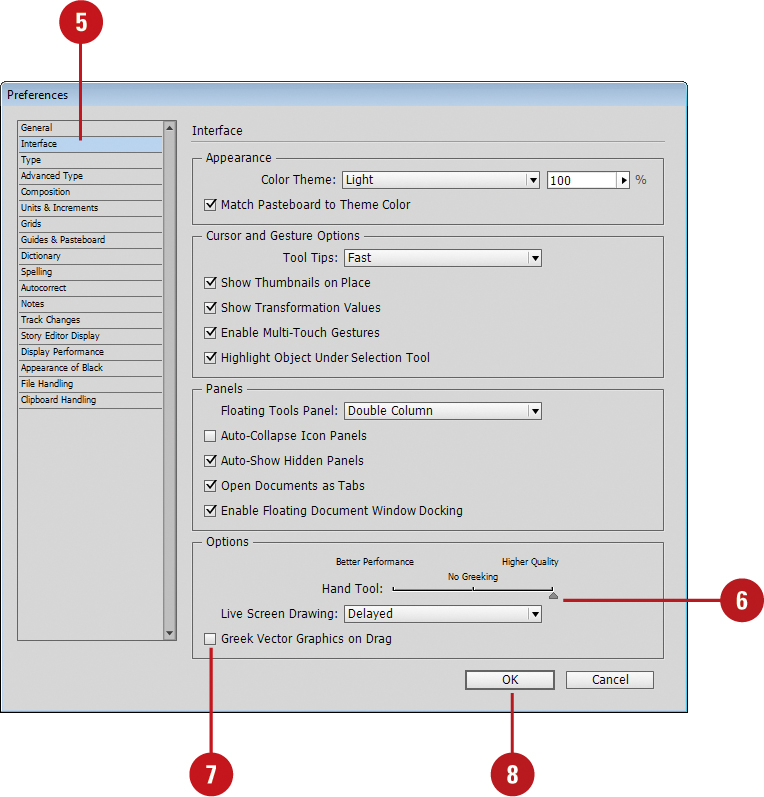
![]() Click the Interface category.
Click the Interface category.
![]() To specify text and graphic display performance with the Hand tool, drag the Hand Tool slider to the setting you want between better performance and higher quality.
To specify text and graphic display performance with the Hand tool, drag the Hand Tool slider to the setting you want between better performance and higher quality.
Greeking refers to text or graphics not meant to be readable, such as placeholder text, “lorem ipsum.”
![]() To enable greeking when you drag vector graphics for improved performance, select the Greek Vector Graphics on Drag check box.
To enable greeking when you drag vector graphics for improved performance, select the Greek Vector Graphics on Drag check box.
![]() Click OK.
Click OK.
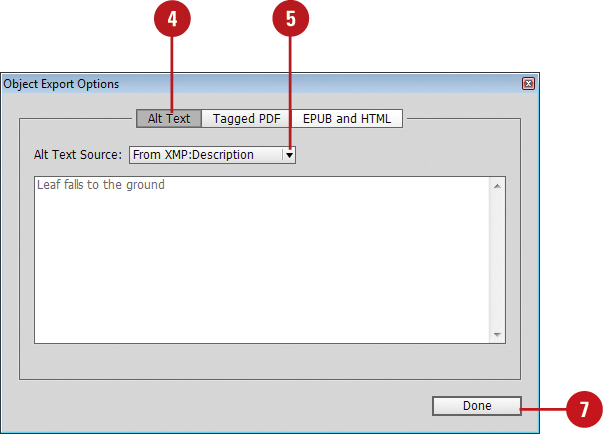
Adding Alt Text to Graphics
Alternative text, or alt text, is a brief text-based description of a graphic used to provide information to screen-readers or assistive devices, or to users when the graphic is not rendered. You can set alt text for a selected graphic by using the Object Export Options dialog box. You can enter alt text manually, use text specified in the document structure (elements marked with XML tags), or use text from metadata in the XMP format (Extensible Metadata Platform) applied to the graphic. You can view and change XMP data in applications like Adobe Bridge. When you import content from Microsoft, InDesign also imports alt text applied to graphics. In InDesign, you can view XMP data for a graphic in the Links panel; see “Displaying XMP Graphic Information,” on page 157 for details.
Add Alt Text to Graphics
![]() Select the Selection tool on the Tools panel.
Select the Selection tool on the Tools panel.
![]() Select the graphic frame or group that you want to add alt text.
Select the graphic frame or group that you want to add alt text.

![]() Click the Object menu, and then click Object Export Options.
Click the Object menu, and then click Object Export Options.
![]() Click the Alt Text tab.
Click the Alt Text tab.
![]() Click the Alt Text Source list arrow, and then select an option:
Click the Alt Text Source list arrow, and then select an option:
♦ Custom. Enter text manually.
♦ From Structure. Use text as specified in the Structure pane; items marked with XML tags.
♦ From XMP: Title, Description, or Headline. Use data stored in XMP title, description, or headline fields. When XMP data is updated in another application, and the link is updated. When link is updated, the alt text is too.
♦ From Other XMP. Use data stored in another XMP field. Enter the complete namespace and property name in <ns>: <property> format.
![]() Select another object to apply settings; the dialog box stays open.
Select another object to apply settings; the dialog box stays open.
![]() Click Done.
Click Done.