
9. Working with Points and Paths
Introduction
When you use InDesign’s vector drawing or pen tools, InDesign creates a path to store that information. Paths are defined mathematically using anchor points and segments. Once created, they can be precisely modified to fit any design situation.
Working with the various Pen tools, it’s possible to create precise paths, and even create complicated selections around virtually any shape. Once the path is created, it’s a simple matter to subtract anchor points, and add new or modify existing anchor points to produce complex paths. It’s even possible to convert straight segments (the visible line that connects two anchor points together) into elegantly curved segments, or you can remove the curve from a segment with a single click.
Paths can be used to precisely guide a brush stroke, or the interior of a path can be filled with any color or gradient available in InDesign using the Color, Stroke and Gradient panels. Paths can even be used as a clipping mask, which is an object whose shape masks out everything except the contents behind the shape.
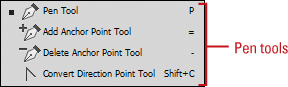
Drawing with the Pen Tool
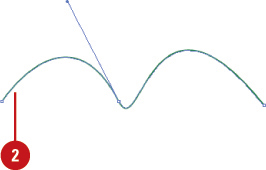
When you work with InDesign’s Pen tool, you’re creating a path. The path consists of curved and straight segments connected by anchor points. When you click with the Pen tool, you create corner points and straight segments. When you drag with the Pen tool, you can create smooth points and curve segments, which have direction handles you can use to change the curved segment. The shape of the curve segment is defined by the length and direction of the direction handles. As you create drawings with the Pen tool, you can turn on Smart Guides to help you align the segments.
Draw a Polygon with the Pen Tool
![]() Click the Fill box on the Tools panel, and then click the Color or None button to specify whether you want to fill the object or not.
Click the Fill box on the Tools panel, and then click the Color or None button to specify whether you want to fill the object or not.
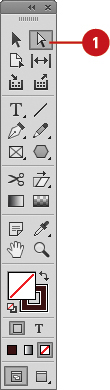
![]() Select the Pen tool on the Tools panel.
Select the Pen tool on the Tools panel.

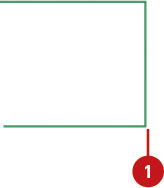
![]() Click to create the first anchor point.
Click to create the first anchor point.
♦ To draw segments constrained to 45 degrees, hold down Shift while you click.
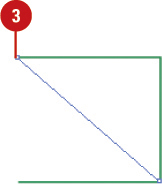
![]() Click to create the second anchor point at another location.
Click to create the second anchor point at another location.
A line segment appears between the two anchor points.
![]() Continue to add anchor points.
Continue to add anchor points.
![]() Do any of the following to complete the shape as a:
Do any of the following to complete the shape as a:

♦ Open Path. Click the Pen tool or any other tool on the Tools panel, or Ctrl+click (Win) or ![]() +click (Mac) outside the new shape to deselect it.
+click (Mac) outside the new shape to deselect it.
♦ Closed Path. Point to the starting anchor point, and then click it.

Draw Curves with the Pen Tool
![]() Click the Fill box on the Tools panel and then click the Color or None button to specify whether you want to fill the object or not.
Click the Fill box on the Tools panel and then click the Color or None button to specify whether you want to fill the object or not.
![]() Select the Pen tool on the Tools panel.
Select the Pen tool on the Tools panel.

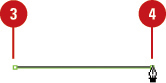
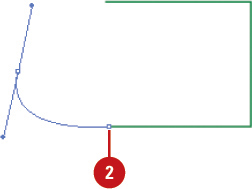
![]() Click and drag to create the first anchor point.
Click and drag to create the first anchor point.
As you drag, the direction handles move.

![]() Release the mouse, and then move to where you want the second point.
Release the mouse, and then move to where you want the second point.
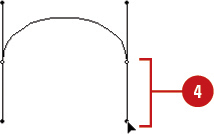
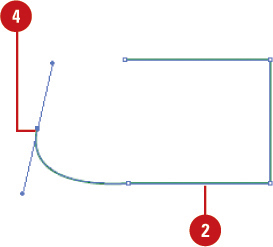
![]() Click and drag to create the second anchor point and a smooth curve.
Click and drag to create the second anchor point and a smooth curve.
♦ To create the second anchor point and corner curves, hold the Alt (Win) or Option (Mac) key as you drag.
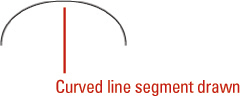
A curve segment appears between the two anchor points. As you drag, the direction handles move, which changes the curve segment.
The shape of the curve segment is defined by the length and direction of the direction handles.


![]() Continue to add anchor points and direction handles.
Continue to add anchor points and direction handles.
![]() Do any of the following to complete the shape as a:
Do any of the following to complete the shape as a:
♦ Open Path. Click the Pen tool or any other tool on the Tools panel, or Ctrl+click (Win) or ![]() +click (Mac) outside the new shape to deselect it.
+click (Mac) outside the new shape to deselect it.
♦ Closed Path. Point to the starting anchor point, and then click it.
Selecting and Moving Points and Segments
It’s hard to draw a segment right the first time. Moving anchor points and segments is all part of the process of creating artwork. When you move an anchor point, the segments that are connected to it change. When you move a straight segment, the anchor points on the segment move with it. If an anchor point connects two segments, moving the anchor point changes both segments. When you move a curve segment, the curve changes, but the connecting anchors remain the same. You can also change a curve segment by adjusting a direction point on the direction handle.
Select, Move, and Reshape Anchor Points or Segments
![]() Select the Direct Selection tool on the Tools panel.
Select the Direct Selection tool on the Tools panel.
![]() Click a blank area to deselect all points.
Click a blank area to deselect all points.
♦ To select and move multiple anchor points and segments, hold the Shift key, and then click the anchor points or segments you want, or drag a rectangle marquee around the ones you want.
![]() Drag an anchor point or drag the middle of a segment.
Drag an anchor point or drag the middle of a segment.
♦ For a smaller move, click the anchor point or segment, and then press an arrow key.
♦ To constrain the movement of anchor points or segments to 45 degrees, hold down Shift while dragging.
![]() To reshape a curve segment, click an anchor point or a curve segment, and then drag a direction point at the end of the direction handle.
To reshape a curve segment, click an anchor point or a curve segment, and then drag a direction point at the end of the direction handle.


![]() Do any of the following:
Do any of the following:
♦ Move Straight Segments. Select the segment, and then drag it.
♦ Adjust Length or Angle of Straighten Segments. Select an anchor point on the segment, and then drag the anchor point.
♦ Adjust Position or Shape of Curved Segments. Select a curved segment or an anchor point on the end, and then drag the segment.
♦ Move or Nudge Anchor Points or Segments. Select an anchor point or segment, click or hold down any of the arrow keys to move 1 pixel at a time in the direction of the arrow. To move 10 pixels at a time, hold down the Shift key.
♦ Copy a Path or Segment. Select a path or segment, hold down Alt (Win) or Option (Mac), and then drag the path or segment to another location.

Timesaver
Hold down Shift while dragging to constrain the movement of anchor points or segments to 45 degrees.
Did You Know?
You can quickly edit segments. When drawing with the Pen tool, you can temporarily use the Direct Selection tool to adjust existing segments by pressing Ctrl (Win) or ![]() (Mac) while drawing.
(Mac) while drawing.
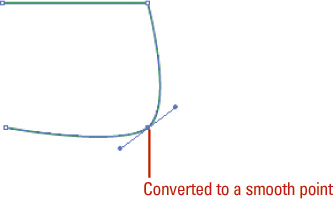
Converting Points
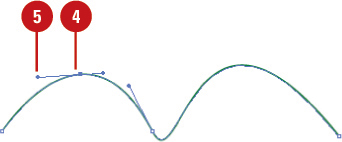
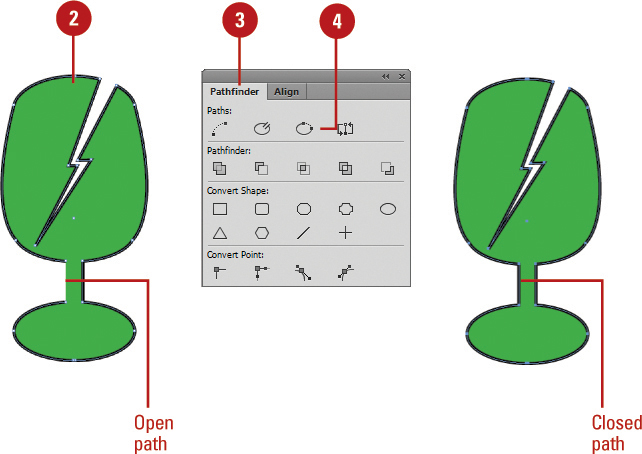
When you create a curve with the Pen tool, the curve segment after the second anchor point appears on the opposite side as the first curve segment. If you want the second curve segment to appear on the same side as the first, you need to convert the anchor point from a smooth point to a corner point. You can make this conversion as you create the curve segment with the Pen tool or you can do it later with commands on the Convert Point submenu, with buttons on the Pathfinder panel, or with the Convert Direction Point tool.
Convert Points on a Path
![]() Select the Direct Selection tool on the Tools panel.
Select the Direct Selection tool on the Tools panel.

![]() Select one or more points on a path to convert.
Select one or more points on a path to convert.

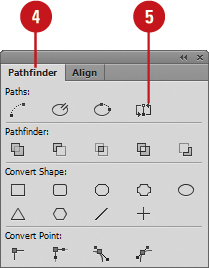
![]() Select the Pathfinder panel.
Select the Pathfinder panel.
♦ Click the Window menu, point to Object & Layout, and then click Pathfinder.
♦ You can also click the Object menu, point to Convert Point, and then select a convert command.
![]() Click the button with the convert command you want:
Click the button with the convert command you want:
♦ Plain. Changes points to have no direction points or lines.
♦ Corner. Changes points to have independent direction lines.
♦ Smooth. Changes points to be a continuous curve with connected direction lines.
♦ Symmetrical. Changes point to smooth points with equal length direction lines.


Convert Points on a Path Using the Convert Direction Point Tool
![]() Select the Direct Selection tool on the Tools panel, and then select a path to convert points.
Select the Direct Selection tool on the Tools panel, and then select a path to convert points.

![]() Select the Convert Direction Point tool on the Tools panel.
Select the Convert Direction Point tool on the Tools panel.
![]() Do any of the following to convert a point on a path:
Do any of the following to convert a point on a path:
♦ Drag a corner point to create a smooth point with no handles.
♦ Click a smooth curve point to create a corner point with no handles.
♦ Drag one of the handles of a smooth curve point to create a corner curve.
Adding and Deleting Anchor Points
Creating a path is not necessarily the end of the job; in fact, there are many ways you can modify a path once it’s been created. For example, you can add, subtract, or delete anchor points on an existing path. You can also modify those points to conform to any desired shape. In addition, existing anchor points can be modified to change the segments connecting the points. Just like anything else in InDesign, paths are flexible. They can be modified to meet whatever design considerations are needed to make the job successful.
Add Anchor Points
![]() Select the Direct Selection tool on the Tools panel.
Select the Direct Selection tool on the Tools panel.

![]() Select the object to which you want to add an anchor point.
Select the object to which you want to add an anchor point.
![]() Select the Add Anchor Point tool on the Tools panel.
Select the Add Anchor Point tool on the Tools panel.

![]() Click once on the path to add a new anchor point.
Click once on the path to add a new anchor point.
When you add an anchor point to a curve segment, a smooth point appears on the path. When you add an anchor point to a straight segment, a corner point appears.
![]() Click and drag on the path to add to and modify the segment.
Click and drag on the path to add to and modify the segment.

![]() Point to the endpoint to which you want to add an anchor point.
Point to the endpoint to which you want to add an anchor point.
A slash appears next to the Pen pointer.
![]() Click the endpoint to make it a corner point or drag it to make a smooth point.
Click the endpoint to make it a corner point or drag it to make a smooth point.
![]() Click once on the path to add a new anchor point.
Click once on the path to add a new anchor point.
Delete Anchor Points
![]() Select the Direct Selection tool on the Tools panel.
Select the Direct Selection tool on the Tools panel.
![]() Select the object from which you want to delete an anchor point.
Select the object from which you want to delete an anchor point.
![]() Select the Delete Anchor Point tool on the Tools panel.
Select the Delete Anchor Point tool on the Tools panel.

![]() Click once on an existing anchor point to remove it from the path.
Click once on an existing anchor point to remove it from the path.
The anchor points on either side of the deleted point are now used to define the segment.
Did You Know?
You can delete a segment. Select the Direct Selection tool, click to select the segment, and then press the Delete key or click the Edit menu, and then click Clear.
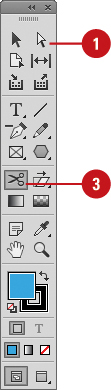
Splitting Paths
The Scissors tool on the Tools panel allows you to split an open path into two paths or open a closed path. If you just want to open a closed path, you can also use the Open Path button on the Pathfinder panel or the same command on the Paths submenu. You can split a path at an anchor point or in the middle of a segment. The Scissors tool creates two points, one on top of the other. You can use the Direct Selection tool to move one point away from the other. If a path contains text, you cannot split it into two segments.
Split a Path
![]() Select the Direct Selection tool on the Tools panel.
Select the Direct Selection tool on the Tools panel.
![]() Select the object with the path that you want to split.
Select the object with the path that you want to split.
![]() Select the Scissors tool on the Tools panel.
Select the Scissors tool on the Tools panel.
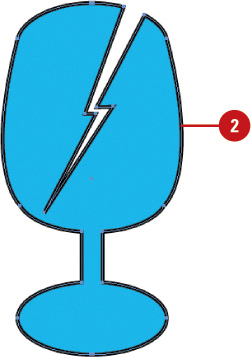
![]() Click the object’s path where you want to split it.
Click the object’s path where you want to split it.
If you click on a closed path, it turns into an open path. If you click on an open path, it splits it into two paths.
If you click a line segment, two endpoints appear, one on top of the other.
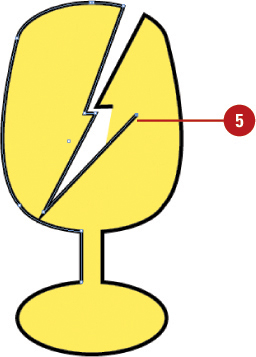
![]() To move the endpoints, select the Direct Selection tool, and then drag the selected endpoint to display the endpoint below it.
To move the endpoints, select the Direct Selection tool, and then drag the selected endpoint to display the endpoint below it.


![]() Select the anchor point or segment where you want to open a closed path.
Select the anchor point or segment where you want to open a closed path.

![]() Select the Pathfinder panel.
Select the Pathfinder panel.
♦ Click the Window menu, point to Object & Layout, and then click Pathfinder.
![]() Click the Open Path button on the panel.
Click the Open Path button on the panel.
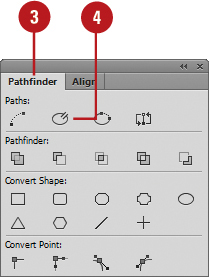
The closed path turns into an open path.
![]() To move the endpoints, select the Direct Selection tool, and then drag the selected endpoint to display the endpoint below it.
To move the endpoints, select the Direct Selection tool, and then drag the selected endpoint to display the endpoint below it.
Did You Know?
You can reverse the direction of a path. Select the Direct Selection tool, select the path you want to reverse, and then click the Reverse button on the Pathfinder panel, or click the Object menu, point to Paths, and then click Reverse Path.
Joining Anchor Points
If you have an open path with two endpoints that you want to connect, you can use the Join or Close Path buttons on the Pathfinder panel to connect them with a straight line. You can also use the Join or Open Path commands from the Paths submenu on the Object menu. With the Join command, you need to select the two anchor points that you want to connect. With the Close Path command, all you need to do is select the open path.
Join Anchor Points
![]() Select the Direct Selection tool on the Tools panel.
Select the Direct Selection tool on the Tools panel.
![]() Select the two anchor points on a path you want to join.
Select the two anchor points on a path you want to join.
![]() Select the Pathfinder panel.
Select the Pathfinder panel.
♦ Click the Window menu, point to Object & Layout, and then click Pathfinder.
![]() Click the Join Path button on the panel.
Click the Join Path button on the panel.
The anchor points are joined together.

Close an Open Path
![]() Select the Direct Selection tool on the Tools panel.
Select the Direct Selection tool on the Tools panel.
![]() Select the open path you want to close.
Select the open path you want to close.
![]() Select the Pathfinder panel.
Select the Pathfinder panel.
♦ Click the Window menu, point to Object & Layout, and then click Pathfinder.
![]() Click the Close Path button on the panel.
Click the Close Path button on the panel.
The open path becomes closed.
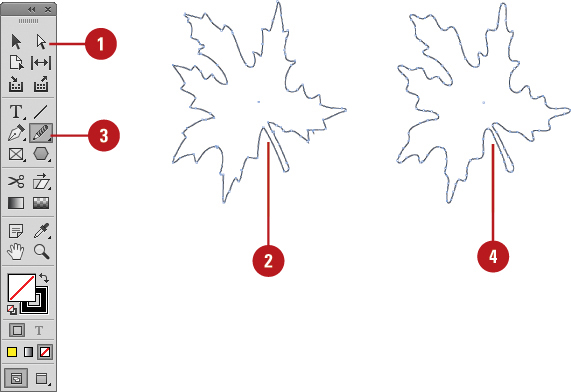
Using the Smooth Tool
If you create a path with some jagged edges, you can use the Smooth tool to remove extra anchor points to smooth it out. Simply select the Smooth tool on the Tools panel, and then drag along a selected path. You can customize the way the Smooth tool works by setting preferences in the Smooth Tool Preferences dialog box.
Use the Smooth Tool
![]() Select the Direct Selection tool on the Tools panel.
Select the Direct Selection tool on the Tools panel.
![]() Select the path you want to smooth out.
Select the path you want to smooth out.
![]() Select the Smooth tool on the Tools panel.
Select the Smooth tool on the Tools panel.
![]() Drag along the path to smooth it out.
Drag along the path to smooth it out.
The path is reshaped with fewer points.
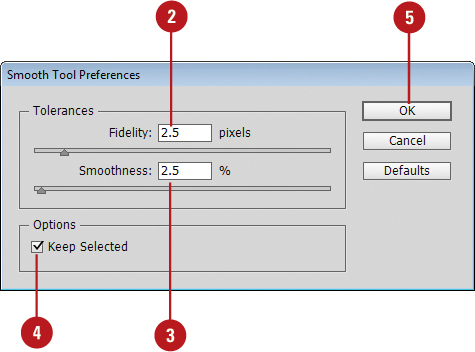
Set Smooth Tool Options
![]() Double-click the Smooth tool on the Tools panel.
Double-click the Smooth tool on the Tools panel.
![]() Drag the slider or enter a Fidelity value (.5-20). Fidelity determines how far the mouse must move before an anchor point is added. A higher value creates fewer anchor points and a smoother path while a lower value creates more anchor points and a rougher path.
Drag the slider or enter a Fidelity value (.5-20). Fidelity determines how far the mouse must move before an anchor point is added. A higher value creates fewer anchor points and a smoother path while a lower value creates more anchor points and a rougher path.
![]() Drag the slider or enter a Smoothness value (0-100). A high value creates a smoother curve, while a low value creates bends.
Drag the slider or enter a Smoothness value (0-100). A high value creates a smoother curve, while a low value creates bends.
![]() Select the Keep Selected check box to keep paths selected after you draw them.
Select the Keep Selected check box to keep paths selected after you draw them.
![]() Click OK.
Click OK.
Using the Pencil Tool
The Pencil tool is exactly what its name implies...a pencil. If you like to draw freehand or sketch objects, especially with a drawing tablet, the Pencil tool is right for you. You can use the Pencil tool in several ways. You can draw new line segments to create a path, reshape a path, or add to a path. You can customize the way the Pencil tool works by setting preferences in the Pencil Tool Preferences dialog box.
Use the Pencil Tool
![]() Select the Pencil tool on the Tools panel.
Select the Pencil tool on the Tools panel.
![]() Select a stroke color and weight and a fill of None on the Tools or Stroke panels.
Select a stroke color and weight and a fill of None on the Tools or Stroke panels.
![]() Use any of the following methods:
Use any of the following methods:
♦ New Path. Drag in a blank area to create an open or closed path. To create a closed path, hold down Alt (Win) or Option (Mac) while you finish drawing.
♦ Reshape Path. Drag along the edge of a selected open or closed path.
♦ Add to Path. Drag from an endpoint of an open path.


![]() Drag the slider or enter a Fidelity value (.5-20). Fidelity determines how far the mouse must move before an anchor point is added. A higher value creates fewer anchor points and a smoother path while a lower value creates more anchor points and a rougher path.
Drag the slider or enter a Fidelity value (.5-20). Fidelity determines how far the mouse must move before an anchor point is added. A higher value creates fewer anchor points and a smoother path while a lower value creates more anchor points and a rougher path.
![]() Drag the slider or enter a Smoothness percentage value (0%-100%). A high value creates a smoother curve, while a low value creates bends.
Drag the slider or enter a Smoothness percentage value (0%-100%). A high value creates a smoother curve, while a low value creates bends.
![]() Select or deselect any of the following check boxes:
Select or deselect any of the following check boxes:
♦ Keep Selected. Select to keep pencil paths selected after you draw them.
♦ Edit Selected Paths. Select to enable Reshaping for the Pencil tool within the specified pixel range (2-20).
![]() To revert settings back to the defaults, click Defaults.
To revert settings back to the defaults, click Defaults.
![]() Click OK.
Click OK.

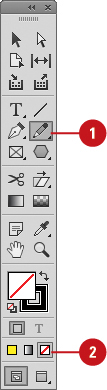
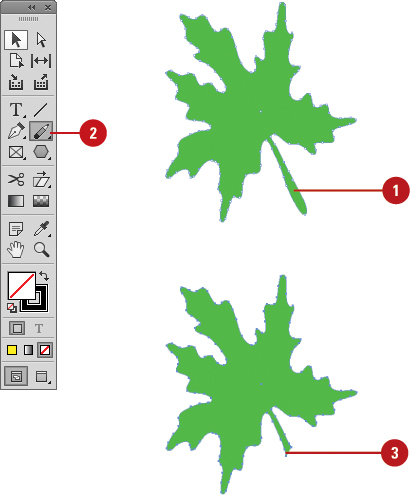
Erasing to Reshape Paths
Instead of selecting and deleting individual anchor points to reshape a path, you can use the Eraser tool on the Tools panel to delete parts of a path. When you use the Eraser tool to remove parts of a closed path, InDesign creates an open path. If you remove parts of an open path, InDesign creates two separate open paths. When you erase inside of a filled path, InDesign creates a compound path. This is useful when you want to simplify a complex drawing or remove a background.
Erase Parts of Paths
![]() Select the objects that you want to reshape with the Eraser tool.
Select the objects that you want to reshape with the Eraser tool.
![]() Select the Eraser tool on the Tools panel.
Select the Eraser tool on the Tools panel.
![]() Drag across the parts of the object that you want to erase.
Drag across the parts of the object that you want to erase.
The remaining parts of the path reconnect to close the path.
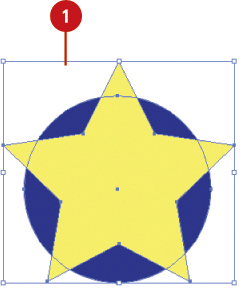
Working with Pathfinder
If you have overlapping objects, you can use buttons on the Pathfinder panel to create compound shapes, which are editable and releasable (restoring original attributes). You can use Pathfinder buttons (Add, Subtract, Intersect, Exclude Overlap, or Minus Back) on almost any object, except placed or rasterized images, mesh objects, or a single group.
Apply a Pathfinder Command
![]() Select two or more overlapping objects.
Select two or more overlapping objects.
![]() Select the Pathfinder panel.
Select the Pathfinder panel.
♦ Click the Window menu, point to Object & Layout, and then click Pathfinder.
![]() Select from the following Pathfinder buttons:
Select from the following Pathfinder buttons:

♦ Add. Use to join the outer edges of selected objects into a compound shape.
♦ Subtract. Use to remove objects in front of other objects and still preserve paint attributes.

♦ Intersect. Use to preserve object areas that intersect.
♦ Exclude Overlap. Use to change overlapping areas to transparency.

♦ Minus Back. Use to remove objects in the back, leaving only part of the frontmost object.
Did You Know?
You can release a compound shape to restore object attributes. Select the Selection tool on the Tools panel, select the compound shape, click the Object menu, point to Paths, and then click Release Compound Path.
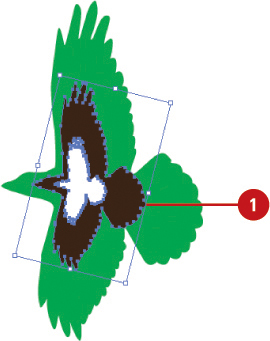
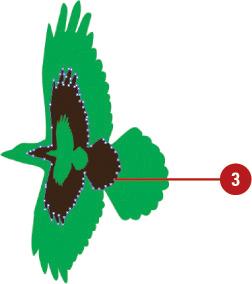
Creating a Compound Path
A compound path is a single object made up from two or more objects. In overlapping areas, a compound path removes the overlapping space displaying the attributes of the backmost object behind it. Think of it like a cookie cutter. After you create a compound path, you can release (restore) it at any time. However, the results are not exact. If you want to add another object to the compound path, you need to arrange the object in front or back of the compound object, select them both, and then reuse the Make Compound Path command.
Create a Compound Path
![]() Arrange your objects so that the frontmost object will be cut out to reveal the attributes of the backmost object.
Arrange your objects so that the frontmost object will be cut out to reveal the attributes of the backmost object.
![]() Select all the objects that you want to include in the compound path.
Select all the objects that you want to include in the compound path.

![]() Click the Object menu, point to Paths, and then click Make Compound Path.
Click the Object menu, point to Paths, and then click Make Compound Path.
![]() To add another object to the compound path, arrange the object in front or back of the compound object, select them both, and then click the Object menu, point to Paths, and then click Make Compound Path.
To add another object to the compound path, arrange the object in front or back of the compound object, select them both, and then click the Object menu, point to Paths, and then click Make Compound Path.
Did You Know?
You can convert a clipping path into a frame. Select the clipping path, click the Object menu, point to Clipping Path, and then click Convert Clipping Path To Frame.
See Also
See “Working with Pathfinder” on pages 273 for more information on additional ways to work with overlapping objects.
![]() Select the Direct Selection tool on the Tools panel.
Select the Direct Selection tool on the Tools panel.
![]() Click the edge of the object for which you want to reverse the fill.
Click the edge of the object for which you want to reverse the fill.
![]() Select the Pathfinder panel.
Select the Pathfinder panel.

♦ Click the Window menu, point to Object & Layout, and then click Pathfinder.
![]() Click the Reverse Path button on the panel.
Click the Reverse Path button on the panel.
Release a Compound Path
![]() Select the compound path.
Select the compound path.
![]() Click the Object menu, point to Paths, and then click Release Compound Path.
Click the Object menu, point to Paths, and then click Release Compound Path.

The single object reverts back to individual objects. All the objects are selected and painted with the attributes from the compound path, not their original attributes.
Working with Clipping Paths
A clipping path, or clipping mask, is a path whose shape masks out everything except the image contents behind the shape. You can create one in Adobe Photoshop and then place it into your InDesign document with the Apply Photoshop Clipping Path option in the Import Options dialog box, or you can have InDesign try to create a clipping path from the edges of an image. Once you have a clipping path, you can select and modify it like any other path using the Direct Selection tool and change options using the Clipping Path dialog box.
Modify a Clipping Path from a Graphic Image
![]() Select the clipping path.
Select the clipping path.

![]() Click the Object menu, point to Clipping Path, and then click Options.
Click the Object menu, point to Clipping Path, and then click Options.
![]() Select the Preview check box to view your results in the document window.
Select the Preview check box to view your results in the document window.
![]() Click the Type list arrow, and then click Detect Edges.
Click the Type list arrow, and then click Detect Edges.
![]() Specify a Threshold value to define the color used as the area outside the clipping path and Tolerance value to apply small color variations and smooth out the path.
Specify a Threshold value to define the color used as the area outside the clipping path and Tolerance value to apply small color variations and smooth out the path.
![]() Click OK.
Click OK.

Did You Know?
You can convert a clipping path into a frame. Select the clipping path, click the Object menu, point to Clipping Path, and then click Convert Clipping Path To Frame.
See Also
See “Setting Place Import Options” on pages 144 for more information on importing and modifying clipping paths or alpha channels.

![]() Click the Object menu, point to Clipping Path, and then click Options.
Click the Object menu, point to Clipping Path, and then click Options.
![]() Select the Preview check box to view your results in the document window.
Select the Preview check box to view your results in the document window.
![]() Click the Type list arrow, and then click Photoshop Path or Alpha Channel.
Click the Type list arrow, and then click Photoshop Path or Alpha Channel.
The list arrow below it changes to Path for Photoshop Path or Alpha for Alpha Channel.
![]() Specify a Threshold value to define the color used as the area outside the clipping path and a Tolerance value to apply small color variations and smooth out the path.
Specify a Threshold value to define the color used as the area outside the clipping path and a Tolerance value to apply small color variations and smooth out the path.

![]() Specify any of the following:
Specify any of the following:
♦ Inset Frame. Use to enlarge (negative values) or shrink (positive values) the path in the image.
♦ Invert. Select to switch the visible and non-visible areas.
♦ Include Inside Edges. Select to add areas to the clipping path in the image.
♦ Restrict to Frame. Select to prevent the clipping path frame from displaying areas outside the frame.
♦ Use High Resolution Image. Select to create the path from the high resolution version of the image.
![]() Click OK.
Click OK.
