
Lesson 5. Creating a Chapter Index Menu
Lesson Files
Lessons > 05_Swiss_start (or the My_Projects > Swiss_DVD project file you created in Lesson 4)
Media
Media > Swiss > Swiss_Assets > Menus folder
Time
This lesson takes approximately 30 minutes to complete.
Goals
Understand the concept of chapter index menus
Create a chapter index menu
Understand special buttons such as _PREV_, _UP_, and _NEXT_
Select and change multiple buttons
Apply button styles
Use a chapter index menu
Chapter index menus provide a way to jump directly to any chapter marker in a video track. Most professional DVDs include a chapter index menu to allow the viewer to navigate through a long movie or to easily locate a specific scene. Using a track with chapter markers already in place (as you did in Lesson 3) and a chapter index menu template, you can quickly assemble a chapter index menu in DVD Studio Pro.
There are several good reasons to use menu templates. For one, templates give your disc a consistent look and feel. They also simplify the menu creation process. In this exercise, you will customize your own SwissIndex chapter index menu template and create all the connections automatically.
Rather than creating a template from scratch, in this lesson you’ll customize one of the default templates included in DVD Studio Pro 4. The goal is to customize the chapter index menu in a way that works well with the previously designed SwissMainMenu.
In order to achieve this, you’ll change the font, buttons, and title, and add suitable background music. Once you are satisfied with your customized chapter index menu, you’ll save the template in the Palette. At that point, you will be in a position to instantly create and link this chapter index menu to your SwissMainMenu.
Toward the end of the lesson, you’ll explore some of the most useful techniques for assembling menus. The lesson culminates with an exercise in creating a template for a chapter index menu, enabling you to speed up the menu creation process.
Customizing a Default Chapter Index Menu
We’ll start by applying one of DVD Studio Pro’s prebuilt index menus to our ChapterIndexMenu. Then we’ll alter the prebuilt menu in order to customize it to our needs.
Selecting the Template
The first step is to select one of the templates provided with DVD Studio Pro.
1. Choose File > Open to open the Swiss_DVD project file you created in Lesson 4.
Note
If you did not create a Swiss_DVD project file in Lesson 4, use the 05_Swiss_start file you will find on the DVD provided with this book.
2. Click the Menu tab to get to the Menu Editor.
3. Choose ChapterIndexMenu from the View pop-up menu at the top left of the Menu Editor window.

4. In the Palette, click the Templates tab, and then scroll down to the Stripes Index template.

5. Double-click the Stripes Index template to apply it to the Menu Editor window.
Customizing the Background and Buttons
In the next steps, you will customize a button so that you can use it as a style for the other buttons in your chapter index menu. You’ll set various properties for the button, including the background, font, position, and overlay colors.
1. Click the Import Asset icon in the toolbar.
![]()
2. Navigate to Media > Swiss > Swiss_Assets > Slideshows and select SwissPhoto_01.jpg to import it.
3. From the Assets tab, select SwissPhoto_01.jpg and drag it onto the background of your index menu.
4. Choose Set Background from the Drop palette.
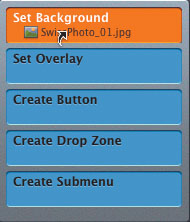
The white background will be replaced by the nice blue Swiss photo.
5. In the Palette, click the Styles tab, then the Project button, then the Text button to navigate to the SwissMenu text style you created in Lesson 4.
6. Select the SwissMenu text style, drag it to the text “PLACE TITLE HERE,” and choose Apply to Text Object from the Drop palette.

The format of the text should change to the SwissMenu text style.
7. Click the text “PLACE TITLE HERE” again to select the text itself.
8. Press Cmd-T to activate the Font window. Change the font size to 40.
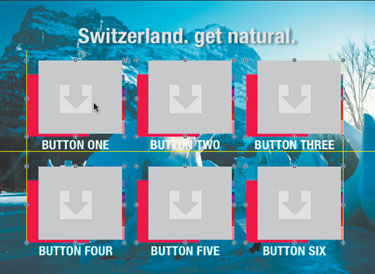
9. While the text is still activated, type Switzerland. get natural.
![]()
Your title for the index menu is now set.
Creating a Button Style
Button styles are an easy way to save the properties of your buttons. Once you save a button style in the Palette, you can quickly apply the style to other buttons. This technique saves time and keeps your menu designs consistent.
1. From the Palette, select the SwissMenu text style again, drag it onto Button 1 in the upper left of the menu, and choose Apply to Button from your Drop palette.

2. In the Button Inspector, change Offset X to 0 and Offset Y to 0.
This will move the button text into a better position.

3. While the button is still selected, change the font size to 24 pt in the Font window.
If you closed the Font window, use Cmd-T again to activate it.
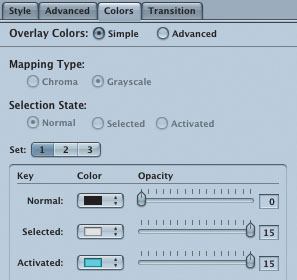
4. In the Button Inspector, click the Colors tab.
5. Choose white as the Selected highlight color and move the Opacity slider to 15.
6. Choose light blue as the Activated highlight color and move the Opacity slider to 15.

7. Back in your Menu Editor, Ctrl-click Button 1, and choose Create Button Style from the shortcut menu.
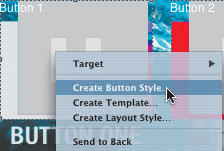
8. Name the style SwissIndexButton and click the Project check box. Then click Save.
The Project option saves this button style for this project file only. If we were to work with another project, this particular style would not show up in the Palette. However, anytime we open this project file, the SwissIndexButton style will show up in the Palette.
Applying a Button Style
Now that you’ve saved one button style, you can use it to set up the rest of the buttons for your chapter index menu.
1. Click the Styles tab, then the Project button, and then the Buttons button to navigate to the SwissIndexButton that you just created.

2. Shift-click the remaining five buttons to select them.
3. Double-click the SwissIndexButton to apply the style to those buttons.
4. Select all six index buttons, and drag them down a few pixels to get some distance from the title. Turn off the Title Safe Area if necessary.
Setting Up the Chapter Index Navigation Buttons
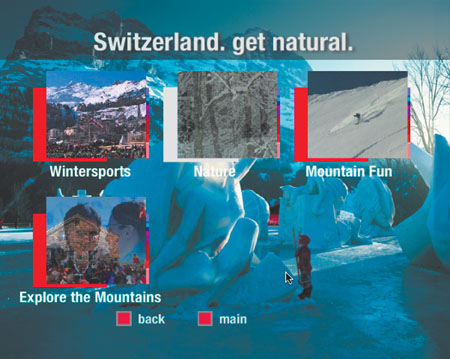
A great feature of DVD Studio Pro’s chapter index menu is its capability to automatically set up the navigation to the previous chapter index menu (if one exists), the next chapter index menu (again, if it’s necessary), and back to the main menu. To achieve this, you need to name the buttons in a specific way. The previous menu button needs to be named _PREV_, the button name for the main menu is _UP_, and the next menu button must be named _NEXT_. Because you have applied a pre-existing chapter index menu, the buttons are already properly named.
Note that these names are for the buttons themselves, not the text that may be in the button. As you can see from the names of the navigation buttons in our menu, their names are back, main, and next, respectively.
1. Select the _PREV_, _UP_, and _NEXT_ buttons on the bottom of your Menu Editor by holding down the Command key and dragging the white selection rectangle around them.

2. Click the Styles tab, then the Apple button, then the Buttons button, and navigate to the Mosaic Square Red button.

3. Double-click the button to apply the button properties to the selected buttons.
4. Select the back button to activate the Button Inspector.
5. Click the Colors tab in the Button Inspector, and choose white with an opacity of 15 for Selected, and light blue with an opacity of 15 for Activated.
Note
You can use three different highlight sets for each menu.
6. Ctrl-click the background of your menu, and choose Simulate Menu from the shortcut menu to test the buttons in Simulator.
![]()
All of the buttons in your menu have now been customized easily and consistently.
Completing the Customized Chapter Index Menu Template
You’re ready to complete the template. First, though, you’ll add a drop zone to put more emphasis on the title and the back, main, and next buttons.
1. In the Palette, click the Shapes tab and then the Apple button to navigate to the Square Black 40p button.

2. Select the Square Black 40p button and drag it to the top-left corner of the menu background.
3. Choose Create Drop Zone, Set Shape from the Drop palette.
4. Drag the lower right corner of the drop zone all the way to the right to cover the title “Switzerland. get natural.”
5. Press Cmd-Shift-B to send this drop zone all the way to the back.

6. Click the Assets tab, select SwissChapterIndex.AC3, drag it to the menu background, and choose Set Audio from the Drop palette.

7. Click the Transition tab in the Menu Inspector, and choose Motion Dissolve from the pop-up menu.

The menu is now complete, with a custom background, custom buttons, a custom drop zone and a custom soundtrack that plays while the menu is onscreen. Now let’s create a template for it!
8. Ctrl-click the background, and choose Create Template from the shortcut menu.

9. Name your new menu template SwissIndex and click the Project check box, and then click Save.
10. Press Cmd-S to save your project to the Lessons > My_Projects folder.
11. In the Palette, click the Templates tab and then the Project button to make sure that the template is there.
Since this menu is now available in the Palette, you can delete it from your project.
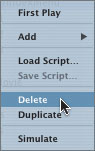
12. Click the Outline tab and Ctrl-click ChapterIndexMenu.
13. Choose Delete from the shortcut menu to delete this menu.
Congratulations! You have now customized the SwissChapterIndex menu, which you can use to create the chapter index of your DVD.
Automating the Chapter Index Menu Creation Process
Remember, chapter index menus provide a way to jump directly to any chapter marker in a video track. Using the SwissMovie track with chapter markers already in place and your newly created chapter index menu template, you can quickly assemble your customized Swiss chapter index menu and link it up to your main menu.
1. At the top of the Menu Editor window, select the SwissMainMenu (if it isn’t already showing) from the View pop-up menu.
2. From the Outline tab, drag the SwissMovie track onto the Chapter Index button in the Menu Editor.
As you drag, keep the mouse button held down until the Drop palette appears in the Menu Editor.
3. From the Drop palette, choose Create Chapter Index, Make Connections.
Note
Do not drag your original movie file from the Assets tab. Since the movie has already been added to a track, dragging directly from the Assets tab will duplicate the media in your project, and more important, the markers won’t be available. Instead, drag the track from the Outline tab, which references the media and chapter markers that are already part of your project.

The Choose Template or Layout Style dialog appears.
4. Click the Templates tab and then the Project button to navigate to the SwissIndex template that you just created.
5. Select SwissIndex from the list of choices.
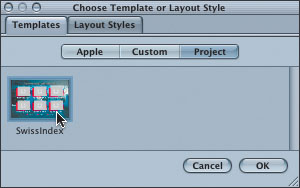
6. Click OK.
When you click OK, all of the chapter markers from your track turn into buttons in the new chapter index menus that are created. The names of your markers are automatically added to all the buttons, which link to the corresponding markers in the track. Also, the navigation to the main, previous, and next menus is automatically set up.
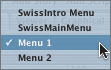
Because there are ten chapter markers in your track but only six buttons in your template, two new menus are created: Menu 1 and Menu 2. Menu 1 contains buttons for the first six chapter markers, and Menu 2 has the remaining four. Best of all, every button in each of these two new menus is automatically targeted for you.
7. In the Menu Editor, click Menu 1 from the View pop-up menu to see what the first chapter index menu looks like.
8. In the Outline tab, Ctrl-click Menu 1 and choose Simulate Menu from the shortcut menu to play your chapter index menu.
Because the buttons in this chapter index menu have a lot of motion, you probably will experience a delay in the playback of the menu (especially if you have a slower machine). Once you finally build the Swiss project, however, all actions will be a lot faster.

9. Click the next button to view the second chapter index menu.
Because only four buttons were needed for the second index menu (Menu 2), the other remaining template buttons were automatically deleted, allowing the user to see more of the pretty background image!
10. Save your project in the My_Projects folder.
Lesson Review
1. True or false: you can apply button styles to only one button at a time.
2. In a chapter menu, what does the _PREV_ button do?
3. True or false: DVD Studio Pro will only create chapter menus from previously saved templates.
4. How does DVD Studio Pro name new chapter menu buttons?
Answers
1. False. If you select multiple buttons, you can add the same style to all the selected buttons at one time.
2. If more than one chapter menu is created, the _PREV_ button links back to the previous chapter menu.
3. True. You must create a menu template before DVD Studio Pro will automatically create a chapter menu for you.
4. When DVD SP creates a chapter menu, it automatically gives each button the same name as the chapter marker of the Chapter it represents.
Keyboard Shortcuts
