Lesson 15. Creating Menu Elements
Lesson Files
Lessons > 15_Creating_Menu_Elements-Start
Media
Media > Blackbox folder
Time
This lesson takes approximately 60 minutes to complete.
Goals
Convert a button to a drop zone
Discover how to make your own DVD Studio Pro shapes
Learn how to use styles to quickly create menu elements
Import a LiveType project file (.ipr file) and make a round-trip from DVD Studio Pro to LiveType
Create a custom menu template
Explore special-purpose template buttons
With a little creativity you can do some fairly advanced menu composition right in DVD Studio Pro’s Menu Editor. For example, in previous lessons you added text to a menu background, placed text and graphics directly in menu buttons, and experimented with adding graphics to drop zones. Indeed, DVD Studio Pro’s menu composition features are incredibly advanced for a DVD-authoring program.
This lesson expands upon your previous experiments in menu compositing by showing you how to create some of the menu elements you’ve been working with and by teaching you some advanced menu design techniques. You’ll learn how to make your own shapes, and then add those shapes to a menu background to create drop zones and buttons. You’ll also get some practice creating styles—in this case, a button style—as a way to unify the look and functionality of your menus.
Midway through this lesson, you’ll get to experiment with round-trips between LiveType and DVD Studio Pro—a technique that will change the way you work with LiveType and advance the way you make menus in DVD Studio Pro. As the lesson progresses, you will complete a menu layout and then save the layout as a custom menu template that will be used in a later lesson. There’s a lot of cool stuff to cover in this lesson, so let’s begin.
Drop Zones vs. Buttons
Drop zones and buttons are extremely similar. Fundamentally, a drop zone is just a type of button that the user doesn’t interact with. In fact, buttons and drop zones are so similar that you can actually convert a button to a drop zone, and vice versa.
To experience the close relationship between drop zones and buttons first-hand, let’s quickly create a drop zone by transforming a button in the Menu Editor.
1. In DVD Studio Pro, open the file named 15_Creating_Menu_Elements-Start (or keep working on the project from the last lesson).
2. In the Assets tab, open the Menus folder and locate the asset named menuBackground.tif.

3. From the Assets tab, drag the menuBackground.tif asset over the Graphical view and release it.
By default, dropping a still picture asset into the Graphical view creates a new standard menu. Additionally, the Menu Editor updates to show the still image, with all layers visible. Take a close look at the Menu Editor and note that this new menu is just an empty background.
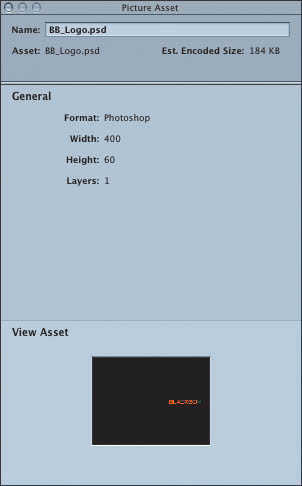
4. In the Assets tab, open the DropZonesAssets folder and select the BB_Logo.psd asset.

The Inspector updates to display the asset’s properties. Notice that this asset is a single-layered Photoshop document, 400 pixels wide and 60 pixels tall.
5. Drag the BB_Logo.psd asset over the Menu Editor, and choose Create Button from the Drop palette.

DVD Studio Pro creates an odd shaped button. Certainly, this button is not 400 pixels wide and 60 pixels tall. To allow the BB_Logo.psd asset to fully display, you’ll need to change the button’s dimensions.
6. In the Menu Editor, select the new button.
The Inspector updates to display the button’s properties.
7. Select the Button Inspector’s Advanced tab.
At the bottom of the Advanced tab is a Coordinates & Size area.
8. Adjust the button’s coordinates to the following:
Top = 60
Bottom = 120
Left = 50
Right = 450

These coordinates alter the button’s dimensions to 400 pixels wide by 60 pixels tall, and they also position the button correctly on the menu. You can now clearly see the BB_Logo.psd asset set in the button.
9. In the Menu Editor, Ctrl-click the new button and choose Convert Button to Drop Zone from the shortcut menu.

The button is converted to a drop zone. However, this drop zone isn’t very complex. It simply displays a still image—in this case a corporate logo—on top of the menu background.
Introducing Shapes
Shapes are like little islands of graphical content that you can move around and reposition over a standard menu background. A shape may contain any graphical content that you can create on a Photoshop layer. You can even have transparent areas in a shape that allow the menu background and set assets to show through. A set asset is a still image or video that is “set” into the shape.
Shapes can be used as either drop zones or buttons. However, there are a few differences between the ways that drop zone and button shapes are created and used.
A drop zone shape is used to blend new graphical content with a pre-existing menu background. For example, video assets can be set in drop zones to quickly create a motion menu.
A button shape provides all the same functions as a drop zone, but it also contains information that DVD Studio Pro can use to create button highlights.
In the following exercise, you’ll use one of DVD Studio Pro’s default shapes to check out how shapes work.
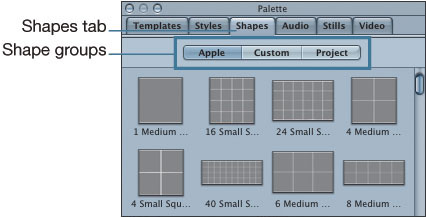
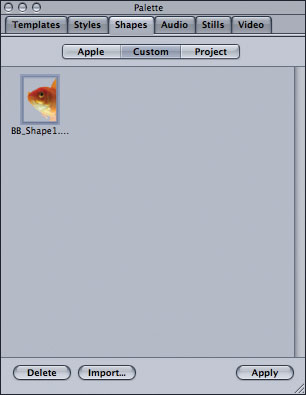
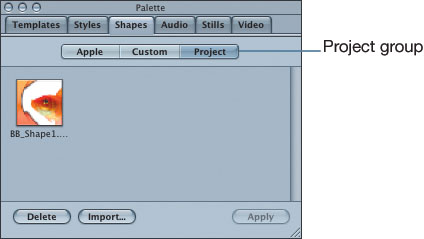
1. In the Palette, click the Shapes tab.

At the top of the Shapes tab are three shape group buttons. The first button, Apple, displays the default shapes that come with DVD Studio Pro. The other two buttons, Custom and Project, are currently empty. But not for long, because you’ll fill them with shapes over the course of this lesson.
Note
Unlike DVD Studio Pro 3, where the shapes were stored inside the Application package itself, when you install DVD Studio Pro 4 your shapes are stored in the Startup Disk > Library > Application Support > DVD Studio Pro > Apple > Shapes folder.

2. Use the Palette’s scroll bar to scroll down to the Frame Gold section.
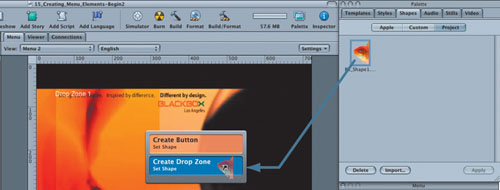
3. Grab the FrameGold6 shape (or any of the Frame Gold shapes—for this experiment it doesn’t matter which one you use) and drag it over the Menu Editor.
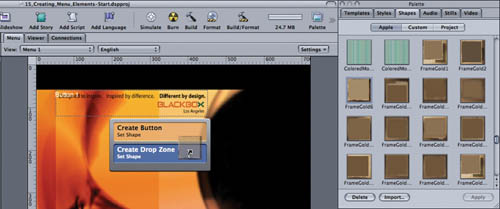
The Drop palette appears. Notice that the choices are Create Button and Create Drop Zone. Earlier in this lesson you saw how easy it is to convert buttons to drop zones and vice versa. Because buttons and drop zones are so similar, shapes can be used to create either.
4. Choose Create Drop Zone.
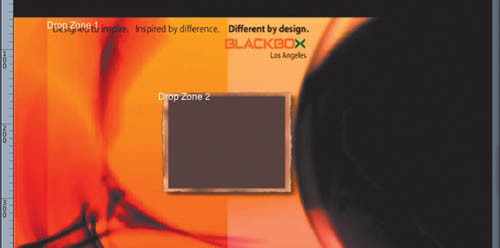
Because this is the second drop zone added to this menu, DVD Studio Pro creates a large drop zone named Drop Zone 2.
5. Use the handles around the edge of the drop zone to resize it so that it’s smaller, with an aspect ratio that is roughly 4:3.
6. From the Asset container’s DropZonesAssets folder, drag the rusty.mov asset over the drop zone, and choose Set Asset from the Drop palette.

The video asset is set in the button.
7. In the bottom-right corner of the Menu Editor, click the Motion button.
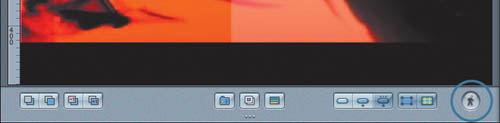
The set asset plays in the drop zone.
8. In the Menu Editor, select the drop zone and press Delete.
The drop zone is deleted.
Creating Drop Zone Shapes
A drop zone shape is like a small graphical program that is compiled by DVD Studio Pro. Like all programs, a shape must be carefully written by you, the graphical programmer. The output file for a shape is a Photoshop document. Concerning dimensions, the Photoshop document can be any size at all—720 × 534, 242 × 242, 9 × 9, or whatever you require. You can always resize a shape inside DVD Studio Pro.
When it comes to the document’s layer structure, however, there are strict conventions you must follow. Each shape should have four layers, and the content of each layer is rigidly defined.
The following exercise walks you through a typical shape file, demonstrating how shape layers are configured.
Tip
You can increase the size of a shape inside DVD Studio Pro, but doing so causes the shape to become blurry. To guard against this happening, always design shapes at the largest possible dimensions needed—you can then resize to make them smaller in DVD Studio Pro.
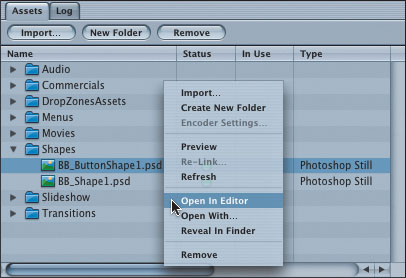
1. In the Assets tab’s Shapes folder, Ctrl-click the BB_Shape1.psd asset and choose Open In Editor from the shortcut menu.

The BB_Shape1.psd asset opens in Photoshop. This file has four layers:
• The Icon layer, which is the top layer
• The Highlight layer, which is second from the top
• The Shape layer, which is second from the bottom
• The Mask layer, which is the bottom layer
The order of these layers is important to note because it determines how DVD Studio Pro compiles the shape. Layer names are not important, but the layer order and content is.

2. In the Layers palette, deselect the Eye icon to turn off visibility for every layer except the Mask layer.

This first layer defines which area of the shape will display set assets. For example, in the preceding exercise, you set a video clip into a drop zone. When the menu played, the video clip was visible through a rectangular portion of that drop zone. In that shape, the rectangle that the video played through was defined by a Mask layer similar to this one. The set asset will display only in the white and gray areas of the Mask layer.
The Mask layer itself uses grayscale to determine the transparency of areas in the set asset. Areas in the Mask layer that are 100% black create complete transparency in the set asset; areas of 100% white are completely opaque. Graduated transparency occurs wherever there are gray areas in the Mask layer. Light gray areas cause the set asset to appear less transparent than dark gray areas.
3. In the Layers palette, deselect the Eye icon for the Mask layer, and then select the Eye icon for the Shape layer.

This is the second layer in the shape document, and this layer contains the graphics you will composite over the menu background. You can use graduated transparency in this layer to allow the menu background underneath to show through. And note that the Shape layer is rendered over the set asset when DVD Studio Pro compiles the project. With this in mind, make sure the Shape layer is transparent in any place you need the set asset to show through.
Note
Graduated transparency is allowed in the Shape layer.
4. Skip the Highlight layer for a moment.
The Highlight layer is used for button shapes only. The shape you’re looking at will be used as a custom drop zone; it’s not a button shape, so it doesn’t need any graphical content on this layer. (The Highlight layer is discussed in the upcoming section titled “Creating Button Shapes.”) However, you still need the Highlight layer. Remember, DVD Studio Pro reads the order of layers in a shape file, so it’s important that the third layer remain in the document, even if it’s empty.
5. In the Layers palette, deselect the Eye icon for the Shape layer, and then select the Eye icon for the Icon layer.

The fourth layer serves as the thumbnail image assigned to the shape in DVD Studio Pro’s Palette. The thumbnail lets you spot a shape at a glance, so make sure it properly represents the shape’s visual content.
Note
Make sure there is at least some graphic on the fourth layer, even if it doesn’t represent the shape. If you leave this layer empty, no icon will appear in the Palette, which means there won’t be anything to grab when you want to drag the shape into your project.
Importing Shapes
Once you’ve created a shape, you must import it into DVD Studio Pro’s Palette before you can use it. The Palette’s Shapes tab divides shapes into three different groups: Apple, Custom, and Project. Apple shapes are the default shapes installed with DVD Studio Pro; the Custom and Project groups are shapes that you make.
You determine whether to import shapes into the Custom or into the Project groups. The choice depends upon how you intend to use the shape in the future. If the shape should be available to all projects, whenever DVD Studio Pro is open, import the shape into the Custom group. If it’s a shape designed for a particular project, and one you are unlikely to use in any other DVD-Video, import it into the Project group.
In the next exercise, you’ll explore the differences between these two types of groups by importing a shape into both.
1. In the Palette, ensure that the Shapes tab is selected.
At the bottom of the Shapes tab is an Import button.

An Import window drops down from the Palette’s title bar.
3. Use the Import window to locate the file named BB_Shape1.psd, and click Import.

4. Click the Custom group button.
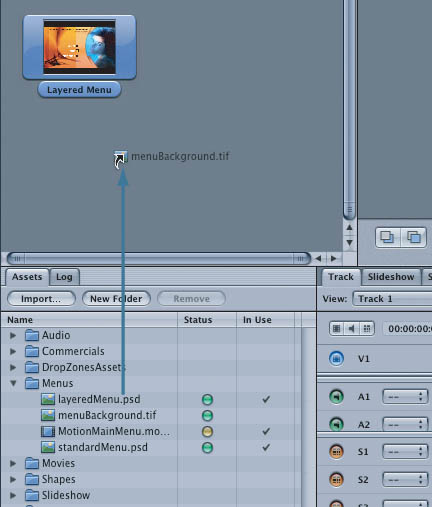
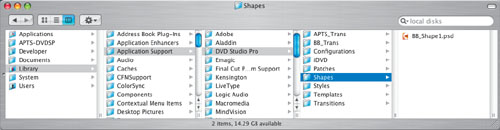
The shape has been imported as a Custom shape. It is now available to all DVD Studio Pro projects. On your hard disk, you can now find this shape in the Startup Disk > Library > Application Support > DVD Studio Pro > Shapes folder. The path to the imported shape is traced in the following figure.
This shape has been designed explicitly for the Black Box DVD-Video, and you are unlikely to use it in any project other than the one you’re currently working on. Why clutter up the Palette’s Custom group with a shape you’ll never use again? The Project group would be a far better home for this shape.
5. In the Palette, select the shape, and press the Delete key or click the Delete button at the bottom of the Palette.
A warning dialog tells you this shape will be permanently deleted from your hard disk. Keep this in mind, because when you clean up the Shapes tab, you clean the files right off your system.
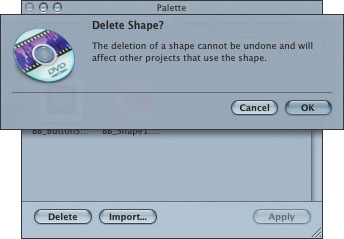
6. Click OK to dismiss the warning dialog.
On your hard disk, the shape has been deleted from the Startup Disk > Library > Application Support > DVD Studio Pro > Shapes folder.

Assets in the Assets tab cannot be imported as project-only Palette shapes in DVD Studio Pro 4. Therefore, you must delete BB_Shape1.psd so that you can import it into the Palette.
7. Ctrl-click the Palette’s background, and choose Import from the shortcut menu.
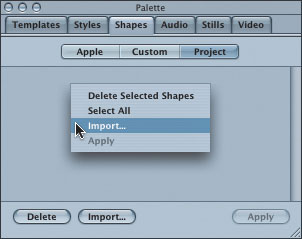
The Import window drops down from the Palette’s title bar.
8. Select the BB_Shape1.psd document, but don’t import it just yet.
9. At the bottom of the Import window, select the “For this project only” check box, and then click the Import button.

10. Click the Palette’s Project button.
The shape has been imported into the Project group.
Creating Drop Zones from Shapes
A few minutes ago you imported the BB_Shape1.psd shape into the shapes Project group. Let’s add that shape to the project.
1. Drag the BB_Shape1.psd project shape over the Menu Editor, and choose Create Drop Zone.
The shape is added to the menu as a drop zone.
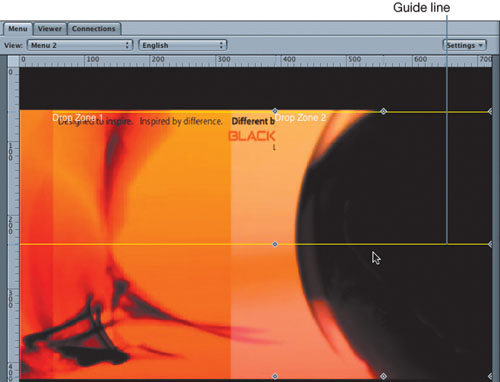
2. In the Menu Editor, select the drop zone and align it with the menu’s right edge, in the center of the menu.
A horizontal yellow guide line will appear when the drop zone is exactly aligned to the middle of the menu, and you will not be able to differentiate between the edge of the drop zone and the menu background.
3. From the Assets tab’s DropZonesAssets folder, drag the rusty.mov file over the drop zone, and choose Set Asset.

4. In the bottom-right corner of the Menu Editor, click the Motion button.
Rusty the fish swims in the drop zone! What a clever little fish...
5. Click the Motion button once again to stop playback.
Changing Drop Zone Order
At the moment, there’s a glaring problem with this menu. Drop Zone 2 is covering the right edge of Drop Zone 1. Fortunately, DVD Studio Pro lets you change the order of drop zones, which means you can composite drop zones on top of each other to build visually complex menus.
Drop Zone 2 is currently selected in the Menu Editor, so let’s move it under Drop Zone 1.
1. In the bottom-left corner of the Menu Editor, click the Send Back One Step button.

Drop Zone 2 is moved under Drop Zone 1, and you can now clearly see the Black Box logo.

Creating Button Shapes
To create a button shape, you follow the same procedure you would for creating a drop zone shape, but with one important difference: You must create an overlay image on the shape’s third layer.
1. In the Assets container’s Shapes folder, Ctrl-click the BB_ButtonShape1.psd asset and choose Open In Editor from the shortcut menu.
Photoshop pops open to display the shape’s source file.

2. Use the Layer palette’s Eye icons to turn each layer on and off, and examine the contents of each layer.
Like the drop zone shape you explored earlier, this shape has exactly four layers. Unlike the drop zone shape, this shape has graphics on the Highlight layer. DVD Studio Pro will use these graphics to create button states. Let’s take a moment to examine this layer, because its graphics have been configured in a very particular way.
3. Use the Layers palette’s Eye icons to ensure that just the Highlight layer is visible.
4. Press Cmd-+ to zoom in on the image until it is large and easy to see.
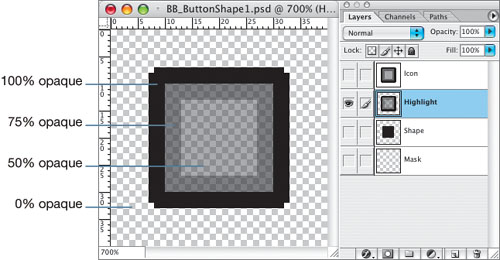
Important: Note that you can see through certain portions of the graphics to the layers below!
When it comes to creating multicolored button states, shapes work differently from an overlay image. In the last lesson, you learned that an overlay image could use 100% black, 66% black, 33% black, and 0% black to create multicolored button states. Shapes, on the other hand, use opacity, not grayscale values, to create these multiple colors. Specifically, shapes use 100% opaque, 75% opaque, 50% opaque, and 0% opaque.
The following table shows how opacity maps to the four grayscale values you used in the last lesson.
Opacity Values in Shape Highlight Layers

With these four opacity values in mind, let’s import the button shape and see how these values translate into multicolored button states.
5. In DVD Studio Pro, import the shape into the Palette’s Shapes tab (see “Importing Shapes,” earlier in this lesson, for more information).
You can import the shape as either a custom or project shape. However, because this is a generic shape that could be used in many different types of projects, let’s import it into the Custom shape group.

6. Drag the new shape over the Menu Editor, and choose Create Button from the Drop palette.

A new button is created on the menu.
7. Position the button as shown here.

Notice that this button is a multicolored button. Furthermore, the key colors assigned in the Inspector’s Colors tab have been assigned using the opacity values in the shape’s third layer. Cool!
Note
In Lesson 14 you changed DVD Studio Pro’s default colors to a custom set of colors. If you did not work through Lesson 14, your newly created button might not display multiple colors.
Creating Styles
A style is a preconfigured menu element you can drag from the Palette to the Menu Editor to quickly unify the look and functionality of all your project’s menus. Styles contain properties such as background graphics, button state colors, text fonts, and text color settings. In fact, styles will store any property that concerns the visual appearance of a menu element.
To create a style, you must first completely format a single menu element. The button you added in the last section is a menu element, and you are going to need several instantiations of this button later in the lesson. To save time later, let’s finish formatting this button, and then save it as a button style.
1. In the Menu Editor, select the button.
The Inspector updates to display the button’s properties. The first tab in the Button Inspector is the Style tab. This tab is used to format buttons, and all of the settings in this tab will be stored in the final button style.
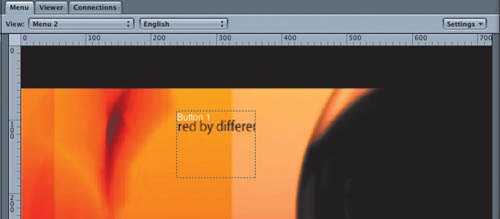
2. In the Text area of the Inspector’s Style tab, type Button 1 and select the Shadow check box.

3. Use the Style tab’s Position pop-up menu to align the text to the left of the button.

4. Use the Style tab’s Offset X adjustment to move the button text a bit farther left.

There is a vertical line that splits this menu roughly in half. When the text is properly aligned, the distance between the text and this vertical line will be the same as the distance between the button graphics and the line.

5. Format the button text to 24-point Helvetica.
The button is styled correctly, and it looks pretty good! In the next section, you will save this button as a button style.
Saving Styles
Once a button is completely configured with all the necessary graphics and text, it’s time to save it as a button style. Saved styles are added to the Palette’s Styles tab. Similar to shapes, styles can be saved to one of two different groups: the Custom group and the Project group.
• Custom group styles are available to all DVD Studio Pro projects. These styles are saved in the Startup Disk > Library > Application Support > DVD Studio Pro > Apple > Styles folder.
• Project group styles are available only to the currently open project. The saved style will be stored in the project bundle itself, in the Contents > Resources > Styles folder.
Tip
To find a project style, Ctrl-click the project bundle (the file that DVD Studio Pro creates when you first save the project) and choose Show Package Contents from the shortcut menu.
The following steps demonstrate how to save this style into the Project group.
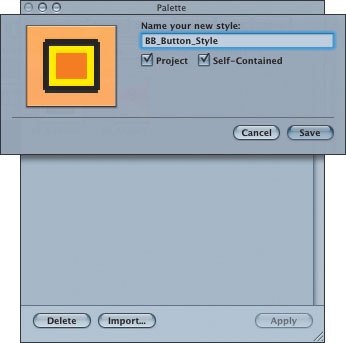
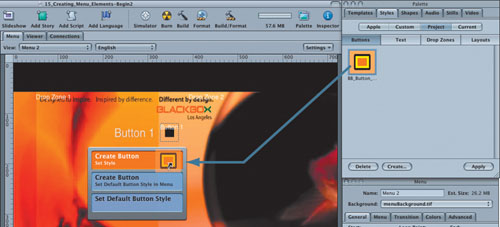
1. In the Menu Editor, Ctrl-click the newly styled button and choose Create Button Style from the shortcut menu.

A Save dialog drops down from the Palette’s title bar.

2. Name your style BB_Button_Style.
Under the Save dialog’s name text box are two check boxes: Project and Self-Contained.
• Select the Project check box if you want the style to be imported into the Project styles group. If you leave the check box unselected, the style will be imported into the Custom styles group.
• Select the Self-Contained check box if you’d like to move a copy of all the menu element’s graphical content into the style. For example, all background graphics, shape elements, and set assets will be moved into the final, saved style.
Tip
You should always choose the Self-Contained check box when saving styles. Self-contained styles have all of the graphics necessary to re-create a menu element, whereas styles that are not self-contained continue to reference the original graphics files on your hard disk(s). If you delete those original graphics files, your style will no longer work.
3. Select the Project and the Self-Contained check boxes, and click Save.
Note
Selecting the Project and Self-Contained check boxes will make your project file bigger, because all of the style’s graphical elements will be copied into the project bundle.
4. In the Palette, select the Styles tab, then click the Project button, and finally click the Buttons button (for button styles).

The newly saved button style is now in the Project group.
Note
If you did not select the Project check box when you saved the button style, the style will be located in the Custom group.
5. Drag the style from the Palette to the Menu Editor.
A new button is created.
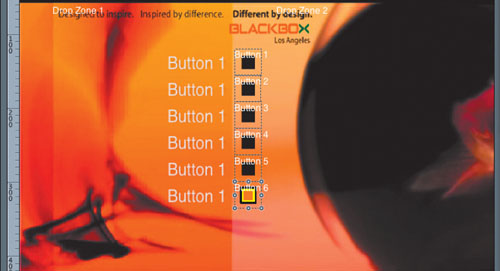
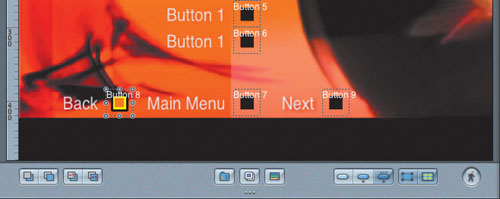
6. Drag the style onto the menu four more times, for a total of six buttons.
7. Position the buttons as shown here.
Saving Default Styles
In the last exercise, you saw how easy it is to create new buttons from a button style. If you’d like to avoid a trip to the Inspector every time you need a new button, you can save a style as a default button style. Our menu needs a few more buttons. Specifically, it needs Back, Main Menu, and Next buttons. Let’s add them now.
1. In the Menu Editor, Ctrl-click any button and choose Set as Default Button Style from the shortcut menu.

2. Draw three new buttons on the menu, and place them as shown here:

Each new button uses the new default button style and looks exactly the same as the other buttons on the menu.
3. Change the text on these three new buttons to Back, Main Menu, and Next.
Round-Trips to LiveType
LiveType is a titling and text animation tool that comes with Final Cut Pro. Little did anyone realize that LiveType would become the darling of DVD authors everywhere, because LiveType lets you quickly construct engaging motion menus.
DVD Studio Pro 4 contains several features that enhance its interaction with LiveType, including the following of particular note:
• Premultiplied alpha channels—The Menu Editor recognizes premultiplied alpha channels. LiveType creates movies with premultiplied alpha channels. This presents an excellent synergy, because if you set a rendered LiveType movie into a button or drop zone, you can see through transparent parts of the LiveType movie to the menu background below.
• Direct importing of .ipr files—An .ipr file is a LiveType project file. DVD Studio Pro lets you import .ipr files directly into your project and use them just as you would any other imported movie clip. This saves you time and disk space, because you no longer need to render finished LiveType movies. Just add the LiveType project file to your menu.
• Round-trips—Importing .ipr files has second distinct advantage: the round-trip. If you add an .ipr file to your DVD Studio Pro project, you can edit and resave the .ipr file, and the change will ripple into your DVD Studio Pro project.
Round-trips are an important workflow technique, so let’s perform one to see how they work.
1. In the Assets container’s DropZonesAssets folder, locate the PlaceHolderText.ipr asset.

This is a LiveType project file.
2. Drag the PlaceHolderText.ipr asset over drop zone 1, and choose Set Asset.
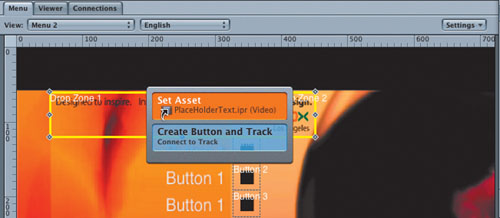
The .ipr file replaces the Black Box logo in drop zone 1. More to the point, the .ipr file perfectly fits the drop zone. Earlier you set this drop zone to be exactly 400 × 60 pixels, and the new .ipr file fits snugly in the drop zone.

The .ipr’s current text tells us very little about the menu—it is placeholder text. Let’s do a quick round-trip and change the text to Chapter Menu.
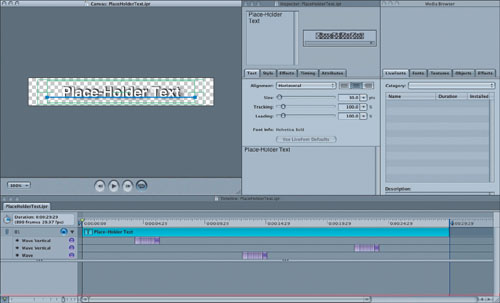
3. In the Assets tab, Ctrl-click the PlaceHolderText.ipr asset and choose Open In Editor from the shortcut menu.

The .ipr file opens in LiveType. This .ipr file has a single text track that says “Place-Holder Text.” At first glance, you’ll notice that this file is not 720 × 480 pixels. Indeed, it uses a custom project size. Let’s check out the project’s properties to discover this file’s dimensions.
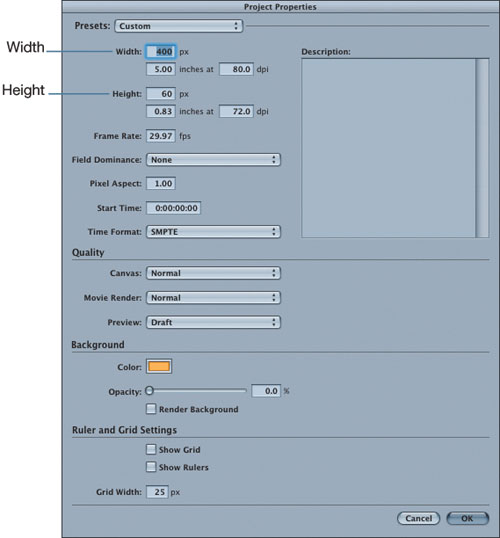
4. Choose Edit > Project Properties.
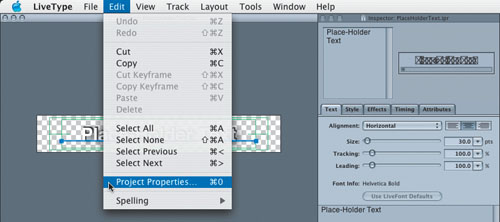
The Project Properties window opens. Notice that the file uses a width of 400 pixels and a height of 60 pixels. This is exactly the same size as the drop zone this asset is set in.
5. Click OK to close the Project Properties window.
6. In the LiveType Inspector, change the track’s text to Chapter Menu.

On LiveType’s Canvas, the text updates to say “Chapter Menu.”

7. Press Cmd-S (or choose File > Save).
LiveType resaves the project.
8. Switch back to DVD Studio Pro.
A few things have happened. First, the text in drop zone 1 has updated to say “Chapter Menu.” Second, the Asset Refresh alert dialog informs you that the PlaceHolderText.ipr file has changed.
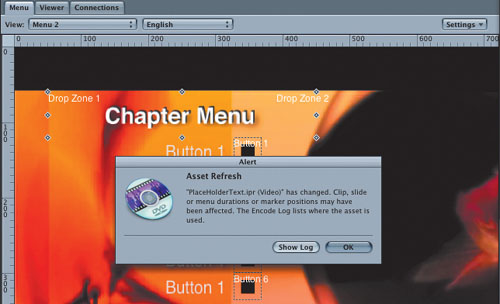
9. Click OK.
You’ve completed the round-trip. As you can see, it’s now easier than ever to update LiveType project files that you add as drop zones, button text, or even complete menu backgrounds. Creating DVD-Video just got easier.
Creating a Menu Template
Our menu template is nearly complete. All buttons and drop zones have been added, but there are still a few tasks left. This menu will be used as a chapter menu, and you must ensure that its buttons are correctly named.
Creating Special-Purpose Template Buttons
All template buttons fall into one of two categories: general-purpose and special-purpose buttons.
General-purpose buttons use the default DVD Studio Pro naming structure, starting at Button 1. If a general-purpose button has a text element, as the buttons in our menu do, this text element will be changed to a marker’s name when the template is assigned as a chapter menu.
Note
If a template button has an asset set into it, this asset will be changed to the marker’s video when the template is assigned as a chapter menu.
Three special-purpose buttons are designed especially for chapter menus. To distinguish these buttons from their general-purpose counterparts, special-purpose buttons use an underscore before and after the button name. The special-purpose buttons are named _PREV_, _UP_, and _NEXT_. The _UP_ button links the chapter menu to the original menu (if applicable). If there are more chapters in the track than there are general-purpose buttons on the template, DVD Studio Pro will create a series of submenus until all chapters have been assigned to a menu button. With multiple menus created, viewers need a way to navigate forward and backward between the new chapter submenus. The _PREV_ and _NEXT_ buttons serve this purpose.
The menu you are working on has six general-purpose buttons, named Button 1 through Button 6. These buttons are correctly named. However, the three special-purpose buttons at the bottom of the menu need to be renamed to match their functions. Let’s do that now.
1. Name the template’s Back button _PREV_.

2. Name the Main Menu button _UP_.
3. Name the Next button _NEXT_.

Saving a Template
Once a menu is completely configured with all the necessary graphics, text, and buttons, it’s time to save it as a menu template. Saved templates are added to the Palette’s Templates tab. As with styles and shapes, templates can be saved to one of two different groups: the Custom and Project groups.
• Custom group templates are available to all DVD Studio Pro projects. These templates are saved in the Startup Disk > Library > Application Support > DVD Studio Pro > Apple > Templates folder.
• Project group templates are available only to the currently open project. The saved template will be stored in the Project Bundle itself, in the Contents > Resources > Templates folder.
Note
There is also a third templates group, called the Apple group. You cannot save a template into the Apple group, because this group stores only the templates that came with DVD Studio Pro. To access these templates, navigate to your Startup Disk > Library > Application Support > DVD Studio Pro > Apple > Templates folder.

When properly designed, templates are a very valuable commodity because you can use them to quickly create menus for any project. For example, you can use the template you’re working on in other projects with only slight modifications to the graphics set in its drop zones. Each new template you build adds to your arsenal and provides expanded choices for future DVD designs. Consequently, it’s typically best to save templates into the Custom group, as you’ll do in the following steps, so that the templates are available to all future DVD Studio Pro projects.
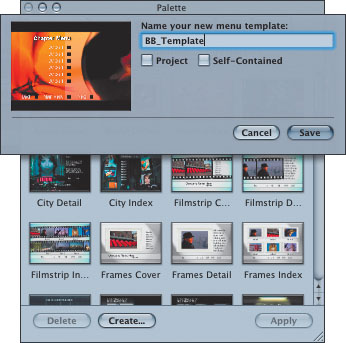
1. Ctrl-click the Menu Editor’s background, and choose Create Template from the shortcut menu.

A save dialog drops down from the top of the Palette.
2. Name the template BB_Template.
Under the Save dialog’s name text box are two check boxes:
• Project—Select this check box if you want the template to be imported into the Project templates group. If you leave the check box unselected, the template will be imported into the Custom templates group.
• Self-Contained—Select this check box if you’d like to move a copy of all the graphical content for menu elements into the template. For example, all background graphics, shape elements, and set assets will be moved into the final, saved template.
Tip
You should always select the Self-Contained check box when saving templates. Self-Contained templates have all of the graphics necessary to re-create the template, whereas templates that are not self-contained continue to reference the original graphics files on your hard disk(s). If you delete those original graphics files, your template will no longer work.
3. Select the Self-Contained check box.

4. Click Save.
5. In the Palette, select the Templates tab, and then click the Custom group button.

There’s your template!
The menu you created the template from is still in your project. Because the template is complete and saved, you no longer need this original menu, so let’s delete it right out of the project.
6. In the Graphical view, Ctrl-click the menu you’ve been working on, and choose Delete from the shortcut menu.

The menu is deleted.
Applying the Template
You’ve used templates at several points in previous lessons, and by now you should be familiar with how they work. In the following steps, you will apply your new template as a chapter index menu that links to ten slides in a slideshow.
There’s one important thing to note, however. Because the slideshow has ten slides, but the template you created has only six general-purpose buttons, DVD Studio Pro will need to create two separate chapter menus. One will link to the slideshow’s first six slides; the second will link to the slideshow’s remaining four slides.

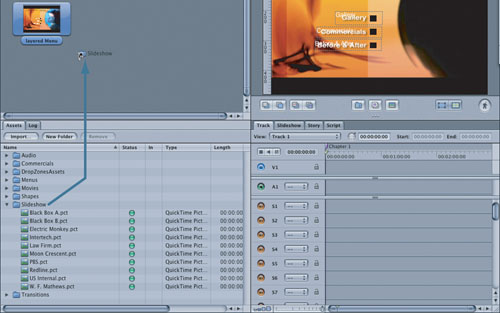
1. From the Assets tab, grab the entire Slideshow folder, drag it over the Graphical view, and drop it.
DVD Studio Pro is smart, and it realizes that because the folder contains still images, it should create a slideshow. Consequently, a slideshow is automatically created and populated with the still images in the Slideshow folder.
2. In the Graphical view, select the main menu item.
The Menu Editor updates to display the main menu.
3. From the Graphical view, hold down the Option key and drag the new slideshow over the main menu’s Gallery button.
A Drop palette appears.
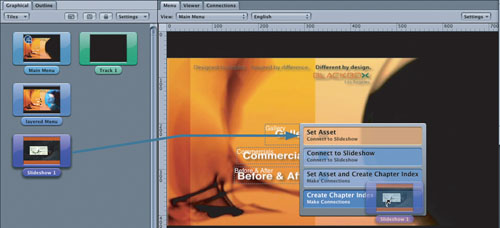
4. Choose Create Chapter Index.
The Choose Template or Layout Style window appears.
5. Select the Templates tab and then click the Custom button.
Your newly saved template appears.
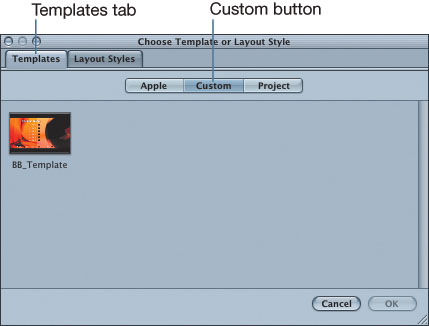
6. Select the template and click OK.
In the Graphical view, DVD Studio Pro creates two new submenus—chapter menus!

7. Ctrl-click the Main Menu item, and choose Simulate from the shortcut menu.

8. In the Simulator, activate the main menu’s Gallery button.
The first of the two new chapter submenus comes onscreen. Note that this menu is missing one special-purpose button—the button named _PREV_ (the Back button). When DVD Studio Pro creates the chapter menu, it understands there is no chapter submenu before this one, so it automatically removes the Back button.

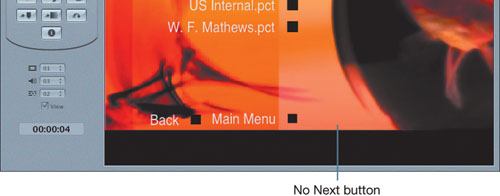
9. In the Simulator, click the menu’s Next button.
The Simulator jumps to the next chapter submenu. Notice that this submenu does not have a Next button, but it does have a Back button. When DVD Studio Pro creates the chapter submenu, it understands there is no chapter submenu after this one, so it automatically removes the special-purpose button named _NEXT_.
10. In the Simulator, click the main menu button.
Because this special-purpose button is named _UP_, the Simulator jumps to the main menu.
11. Save the project file to the My_Projects folder on your hard drive.
Lesson Review
1. To adjust a button’s pixel dimensions accurately, you must do what?
2. A button shape is made up of how many layers?
3. True or false: When you import a shape as a custom shape, it’s only available to the project you are currently working on.
4. Shape files can have multicolor highlights. What three opacity values map to the different colors?
5. What happens when you make a style self-contained?
6. True or false: If you import a LiveType project file (a .ipr file), you can open it in Livetype, change it, and resave it, and the changes will ripple into your DVD Studio Pro project?
Answers
1. Select the button, then visit the Button inspector’s Advanced tab > Coordinates and Size area.
2. Four: the Icon, Highlight, Shape, and Mask layer.
3. False. It’s available to all projects.
4. 100% opaque, 75% opaque, and 50% opaque.
5. All of the assets needed to recreate the style are stored with the style.