
Lesson 16. Creating Transitions
Lesson Files
Lessons > 16_Creating_Transitions-Start
Media
Media > Blackbox folder
Time
This lesson takes approximately 60 minutes to complete.
Goals
Learn how to apply and configure transitions in DVD Studio Pro
Explore video transitions in menus
Learn how to create and install custom alpha transitions
A transition provides a segue from one project item to another, via a short video clip. For example, it’s common practice to insert a dissolve between a menu button and the item it targets. When the viewer clicks the button, the DVD-Video fades to black, and then the target item fades onto the screen. This provides a less jarring display than having the menu just pop offscreen when a button is activated.
In the olden days of DVD-Video authoring, you had to composite all transitions by hand using an application like Final Cut Pro or Motion, and then add the transition clips as individual tracks or menus in DVD Studio Pro. It took a lot of time and effort. Now, using DVD Studio Pro’s transition features you can create transitions with the click of a button. DVD Studio Pro 4 does all the heavy lifting by compositing the transitions for you, behind the scenes.
DVD Studio Pro 4 transitions come in three varieties:
• Standard transitions use special effects such as blurs, ripples, or dissolves to transform the exiting project item into the entering project item.
• Video transitions use a premade QuickTime movie to transition from a menu to a targeted project item.
• Alpha transitions use a set of specially designed QuickTime movies to transition from one project item to the next.
This lesson will show you how to use and configure all three types of transitions. If you’re working in the video market, or if you’re a video enthusiast looking to take your DVD authoring to the next level, you’ll find that this lesson makes an important addition to your DVD-Video skills. In the DVD authoring world it’s all about having a leg up on the competition, and at this point in time no other DVD-Video authoring application provides such handy, timesaving, and advanced transition features as DVD Studio Pro 4.
Applying a Transition
Transitions can be applied to menus, menu buttons, slideshows, individual slides, tracks, and still image clips added to a track. All transitions start with a frame from the exiting item and end with the first frame from the entering item. When the exiting item is a menu, the transition start frame will be one of the following:
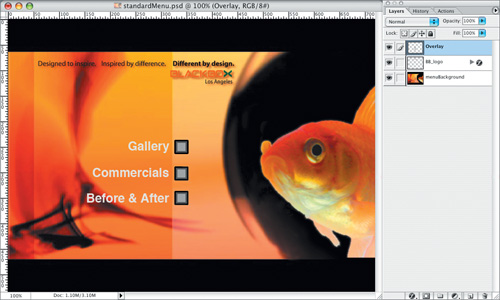
• If the menu uses a still background, the start frame will be the menu with all buttons in their normal state.
• If the menu uses a motion background, the start frame will be the first frame of the background video clip, with all buttons in their normal states and all drop zones displaying the first frame of their set assets.
Note
All transitions are rendered into video clips and then encoded to MPEG-2 when you build the project. This means transitions add to the file size of your finished DVD-Video. This is particularly significant for transitions added to menu items, because the encoded menu transition clips are stored in the same physical domain on the finished DVD as the menus (VTS_01_0.VOB). According to the DVD-Video specification, this domain must be less than 1 GB in size. Because DVD Studio Pro must render a separate transition clip for every button on every menu with a transition applied, it’s quite easy to fill this domain past its bursting point.
1. Open the project named 16_Creating_Transitions-Start, or keep working on the project you finished in Lesson 15.
2. In the Graphical view, select the Main Menu item.
The Inspector updates to display the menu’s properties. The third tab in the Menu Inspector is the Transition tab.
3. In the Menu Inspector, select the Transition tab.

4. In the Transition tab, click and hold the Transition pop-up menu.
The Transition menu lists all of DVD Studio Pro’s default transitions, including 19 standard and 14 alpha transitions.
Note
DVD Studio Pro’s default alpha transitions use names that begin with an alpha sign (α). These transitions are located in the Startup Disk > Library > Application Support > DVD Studio Pro > Apple > Transitions folder.
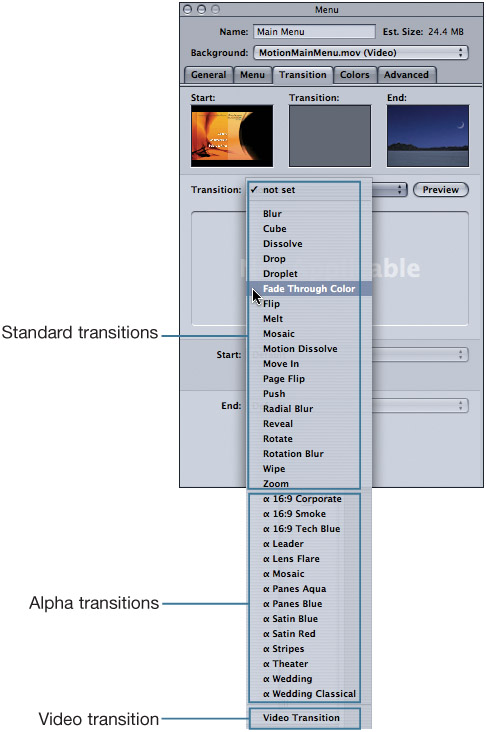
5. From the Transition menu, choose Fade Through Color.
Note
In the Graphical view a small triangle appears in the bottom-right corner of the item the transition is applied to.
In the Inspector, the transition parameters area updates to display new settings. The settings on display vary depending on which type of standard transition you choose. For Fade Through Color, you’ll see a Duration slider and color patch.

6. Click the color patch.
The Color Picker opens.
Tip
Use the Color Picker’s color sampler (the magnifying glass) to match colors from anywhere on the screen, including the Menu Editor.

7. Choose an orange color similar to the menu background.
8. Close the Color Picker.
9. In the Inspector’s Transition tab, click the Preview button.
The Transition thumbnail displays a preview of the Fade Through Color transition.

11. In the Simulator, activate the Gallery button.
The Simulator fades from the main menu, through the orange color you selected in step 7, and into the chapter menu.
Using a Video Transition
Menu transitions offer an option not found in slideshow and track transitions—the capability to use a video clip. If you’ve used a video compositing application such as Final Cut Pro or Motion to create your own custom transitions, you’ll love not having to jump to a new track that holds the video transition.
Additionally, DVD Studio Pro projects can have a maximum of 99 tracks. When you use the video transition option, the transition is tacked onto the end of the menu domain on the final DVD (VTS_01_0.VOB). As a result, no extra tracks are used for the transition clip.
Note
The menu domain VTS_01_0.VOB must be less than 1 GB in size, so be careful that your video transitions are not too big for this domain on the final DVD-Video disc.
1. In the Assets container’s Transitions folder, double-click the video named MotionMenuTransition.mov.

The clip plays in the Viewer. Notice that the clip is a transition that shows the main menu’s text floating away. Let’s return to the Menu Editor to assign this clip as a transition for the main menu’s Gallery button.
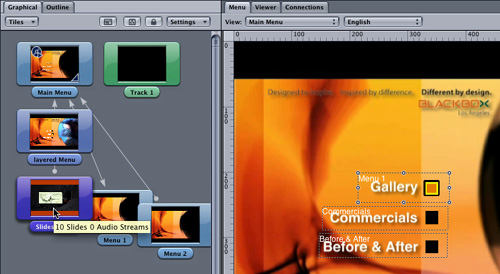
2. Open the main menu in the Menu Editor, and select the Gallery button.

The Inspector updates to show the Gallery button’s properties. Among the four tabs displayed in the Button Inspector is a Transition tab.
3. In the Button Inspector, select the Transition tab.

This tab is used to set a transition that is specific to the selected menu button. The Transition pop-up menu in this tab is currently set to Same as Menu, which means the button will use the same Fade Through Color transition that you specified in the last exercise.
4. Choose Video Transition from the Transition pop-up menu.

The transition parameters area updates to display an Asset menu. This is a hierarchical menu that lists all of the source files from the Assets tab that can be used as a video transition.
5. From the Asset pop-up menu, choose Transitions > MotionMenu-Transition.mov.

6. Simulate the main menu.
7. In the Simulator, activate the main menu’s Gallery button.
The video transition segues from the main menu to the chapter menu.
Note
You may see a small pause of black screen after the video transition ends and before the chapter menu comes onscreen. This occurs because the Simulator cannot composite the chapter menu fast enough to show it onscreen directly after the video transition has finished playing. Rest assured that on the final DVD-Video disc, the transition will play into the next menu without the black screen occurring.
8. Close the Simulator.
Using Alpha Transitions
An alpha transition is like a supercharged video transition. Similar to video transitions, alpha transitions use a video clip to segue from one project item to another. Unlike video transitions, the video clip in an alpha transition can have transparency, allowing you to see both the exiting and entering project items onscreen as the transition clip plays.
Because of this increased complexity, alpha transitions are composed of one to three different QuickTime videos, depending on the effect you wish to achieve with the alpha transition. Each of these videos serves a distinct purpose:
• The asset movie contains the video element that appears as the transition occurs. The asset video may have a premultiplied alpha channel that lets you see through to the exiting and/or entering project item(s).
• The asset matte movie is used to define which areas of the asset movie will be transparent when the asset movie does not have a premultiplied alpha channel.
• The background matte movie is used to blend the exiting and entering movies onscreen, at the same time.
The Transition Asset Folder
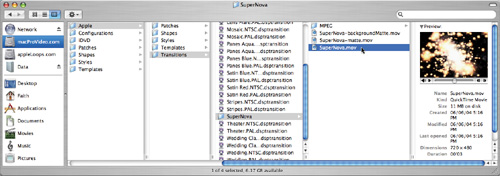
All of the videos that comprise a single alpha transition must be grouped into the same transition asset folder. The transition asset folder’s name is used as the name for the alpha transition, and you must take care to ensure that all of the movies it contains are named in a very particular way. For example, if the transition asset folder is named SuperNova, the asset movie must be named SuperNova.mov, the asset matte movie must be named SuperNova-matte.mov, and the background matte movie must be named SuperNova-backgroundMatte.mov. If you name the movies in any other way, DVD Studio Pro will not recognize them.
Note
The movies that comprise an alpha transition must be named using the conventions listed in the paragraph above, including the hyphen and capitalization. This is extremely important!

Installing an Alpha Transition
Before you can use an alpha transition, you must install it. Alpha transitions can be installed in two different places on your system:
• At the root of your disk: Startup Disk/Library/Application Support/DVD Studio Pro/Transitions/
• In your home folder: user/Library/Application Support/DVD Studio Pro/Transitions/
DVD Studio Pro initializes all alpha transitions when it opens. Consequently, if you want to use an alpha transition, you must install it before you launch DVD Studio Pro.
Note
When DVD Studio Pro opens, it automatically checks the vertical resolution of the movies in the transition assets folders. Movies that have vertical resolutions of 480, 486, 534, or 540 are assumed to be NTSC movies, and they will be available only to NTSC projects. All other vertical resolutions are considered to be PAL.
1. Save your project and quit DVD Studio Pro.
2. From this book’s companion files, locate the folder named Media > Blackbox > Transitions > Supernova.
This folder is pictured in the preceding figure, and it contains all of the movies needed to create the SuperNova transition.
Note
The SuperNova transition was constructed from the LiveType SuperNova object.
3. Copy the Supernova transition asset folder to your Startup Disk/Library/Application Support/DVD Studio Pro/Apple/Transitions folder.

4. Leave the Application Support/DVD Studio Pro/Apple/Transitions folder open on your Desktop.
In the next several sections of this lesson, you will be examining the assets in this folder, so leave it open on your screen so you can access it quickly.
5. Open the project you saved in step 1.
Let’s assign the SuperNova alpha transition to the project’s slideshow.
6. In the Graphical view, select the Slideshow item.
The Inspector updates to display the Slideshow’s properties.
7. In the Slideshow Inspector, select the Transition tab.
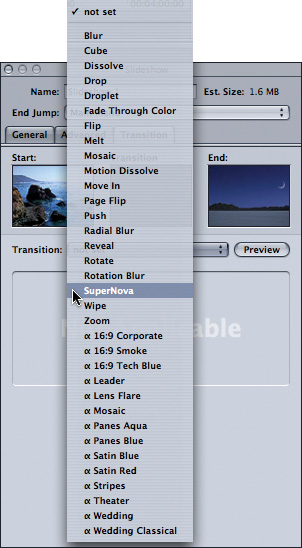
8. In the Transition tab, click the Transition pop-up menu and choose the SuperNova transition.
Note
Unlike DVD Studio Pro’s stock alpha transitions, custom alpha transitions do not have alpha signs (α) at the beginning of their names. The alpha sign appears only in front of alpha transitions that are installed inside the DVD Studio Pro application package.
The SuperNova transition is placed between every slide.
Note
Depending on the speed of your computer, the Simulator may drop frames during transition simulation. This is normal, and the final DVD-Video will play smoothly.
Exploring the Asset Movie
As you saw in the preceding section, the SuperNova alpha transition uses a video of a star going supernova to disguise a changing project item behind it. The video part of the supernova (the explosion you see during the transition) is contained in the SuperNova.mov asset movie. In the last exercise, you left the Application Support/DVD Studio Pro/Apple/Transitions/SuperNova folder open onscreen, and the SuperNova.mov asset movie is in this folder. Let’s open this asset movie in QuickTime and see what it looks like.
1. In the Finder, double-click the SuperNova.mov file.
The file opens in QuickTime.
2. Play the file.
It’s a video clip of a star going supernova, over a black background. Let’s see what happens if only this movie is available to the alpha transition.
3. Leave the SuperNova.mov file open in QuickTime.
You’ll come back to this file in few minutes, so leave it open for now.
4. Make sure your Finder window is in Column view.
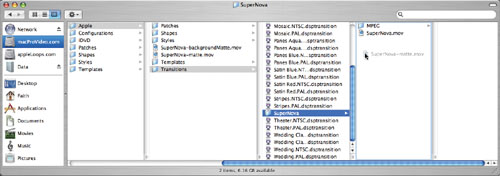
5. From the SuperNova folder, move the SuperNova-backgroundMatte.mov and SuperNova-matte.mov files two directories up (place them under the Transitions folder).

6. In DVD Studio Pro, simulate the slideshow again.
This time you see the asset movie during the transition, but you cannot see through the asset movie to the switching slides below. What happened? The short answer is that the SuperNova.mov asset movie does not have an alpha channel. To learn the long answer, read the next section.
Working with Alpha Channels
Earlier, you previewed the SuperNova transition attached to the slideshow, and you could see the slides changing behind the SuperNova transition. This is the “alpha” part of the alpha transition—in other words, you could see through the asset movie to the action below. To achieve this effect, you can include a premultiplied alpha channel directly into the asset movie. In fact, you should include an alpha channel in the asset movie, because it makes creating alpha transitions easier.
If the asset movie does not have an alpha channel (such as the one used in this transition), you can include an asset matte movie. The asset matte movie’s sole purpose is to provide information used to create an alpha channel for the asset movie.
Note
Although rare, there are situations where it’s difficult to include a premultiplied alpha channel in your asset movie. For example, you may need to share your alpha transitions with a friend in a far-off country. It’s very difficult to email that friend an animation codec movie with an alpha channel because the movie will be very large. If you compress the asset movie using a codec such as Sorenson 3, you’ll make the movie’s file size very small and easy to email, but the movie will not include an alpha channel. Fortunately, you can achieve the same effect by including an asset matte movie.
1. In the Finder, double-click the SuperNova-matte.mov file.
The movie opens in QuickTime.
2. Play the SuperNova-matte.mov file and take a close look.
Where the asset matte movie is black, the asset movie will be transparent. Where the asset matte movie is white, the asset movie will be opaque. Shades of gray in the asset matte movie will be varying degrees of transparent, depending on how gray they are.

3. In QuickTime, close the SuperNova-matte.mov.
4. In the Finder, move the SuperNova-matte.mov file back into the SuperNova transition assets folder.
5. In DVD Studio Pro, simulate the slideshow again.
The graphics in the asset matte movie are now being used to provide alpha channel information for the asset movie. You can see through the transition to the changing slides below.
Tip
DVD-Video is usually interlaced, which means there are 30 frames and 60 fields per second. For smoother transitions, render your asset matte movie at 60 progressive frames per second (progressive means “not interlaced”). DVD Studio Pro will automatically apply information from the correct frame in the asset matte movie to the correct field in the asset movie when it compiles the transitions.
Working with a Transition Switch Point
The transition switch point determines where the transition switches from the exiting item to the entering item. The transition switch point is used only if you do not include a background matte movie, and it follows a very particular set of rules:
• If the asset movie contains a marker named TransitionSwitchPoint, DVD Studio Pro will switch between the exiting and entering items at the frame indicated by the marker.
• If the asset movie does not contain a marker named TransitionSwitchPoint but does contain markers, DVD Studio Pro will switch between the exiting and entering items at the frame indicated by the first marker.
• If the asset movie does not contain any markers, the transition switch point will be directly in the middle of the asset movie.
1. If it is not already open, open the SuperNova.mov file in QuickTime.
Note that this asset movie has a marker named TransitionSwitchPoint.
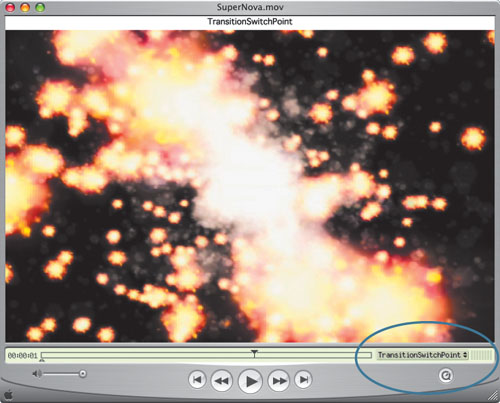
2. Select the TransitionSwitchPoint marker.
QuickTime jumps to the marker. This is the frame where the exiting item will be replaced by the entering item as the alpha transition plays.
3. In QuickTime, close the SuperNova.mov file.
Exploring the Background Matte Movie
As you saw in the last section, DVD Studio Pro uses a transition switch point to determine where the exiting item is replaced by the entering item. However, this happens only if there is no background matte movie included with the alpha transition. If a background matte movie is included, it takes precedence over the transition switch point.
The background matte movie itself is very similar to the asset matte movie. It uses grayscale values to determine how the exiting and entering items will be blended during the transition.
1. In the Finder, double-click the SuperNova-backgroundMatte.mov file.
The movie opens in QuickTime.
2. Play the SuperNova-backgroundMatte.mov file and take a close look.
Where the background matte movie is white, the exiting item appears completely opaque. Where the background matte movie is black, the entering item will be opaque. Shades of gray in the background matte movie will create a blend of the exiting and entering items.
Note
In general, the background matte movie will begin with a completely white frame (the exiting item) and end with a completely black frame (the entering item). This appropriately reflects a transition from the exiting item to the entering one. How you get from white to black determines how the exiting and entering items are blended during the transition.
To see exactly how this background matte movie works, let’s look at it all by itself. Let’s place only the background matte movie in the SuperNova transition assets folder, and then see what the transition looks like.

Tip
For smoother transitions, render your background matte movie at 60 progressive frames per second.
3. From the SuperNova transition assets folder, move the SuperNova.mov and SuperNova-matte.mov files one directory up (to the main Transitions folder).

4. In the Finder, move the SuperNova-backgroundMatte.mov file back into the SuperNova transition assets folder.

5. In DVD Studio Pro, simulate the slideshow again.
This time you do not see the asset movie during the transition, because the asset movie is not in the SuperNova transition assets folder. However, you do see a smooth blend between the exiting and entering project items! This blend is created by the white, black, and gray areas in the SuperNova-backgroundMatte.mov.
6. In the Finder, move the SuperNova.mov and SuperNova-matte.mov files back into the SuperNova transition assets folder.
7. In DVD Studio Pro, simulate the slideshow again.
The SuperNova alpha transition displays an explosion, and the exiting item blends into the entering item. Perfect.
Feel free to apply this alpha transition to other project items.
Tip
The SuperNova alpha transition is now installed on your system and is available to any NTSC project you author.
8. Save the project file to the My_Projects folder on your hard drive.
Lesson Review
1. What’s a transition?
2. True or false: An Alpha Transition must be installed before DVD Studio Pro is launched, or it will not be available to your project.
3. To install a transition, you must place it in which folder on your hard disk?
4. The transition asset movie contains what?
5. True or false: A custom alpha transition must have an asset movie, a matte movie, and a background matte movie.
6. What does the Transition switch point in the Asset movie do?
Answers
1. A smooth segue from one project item to the next.
3. Startup Disk > Library > Application Support > DVD Studio Pro > Apple > Transitions.
4. The video that plays as the transition proceeds.
5. False, though if you want to ensure your transition has an alpha channel, it helps to have all three.
6. It tells DVD Studio Pro when to switch between displaying the outgoing item and the incoming item.