
© Amber Palmer
Whatever sport you may find yourself shooting, your success depends on more than just getting the shots. Of course, being able to take a good photograph is an essential skill you need to develop, but it's far from composing the entire picture (pardon the pun).
One of the greatest paradoxes of professional artistry, whether it be photography, writing, painting, music, or any other pursuit, is that the more you do it, the less you do it. In other words, the professional artist spends more time doing the business of his art than pursuing the art itself. As a pro photographer, I spend time traveling, selling, managing and editing photographs, talking with clients and subjects, administrating and managing finances, doing e-mail, working with my Web site, and finally taking photos. The business of photography takes as much time as (and sometimes more time than) taking the photographs.
Understanding the flow of how your images are created and processed until their ultimate destination is essential for being able to effectively keep them organized, safe, and retrievable over time. This is the basis for workflow, which helps bring you one step closer to the professional photographer's ability of replication and consistency This means that your photography overall improves, benefiting you, your audience, and the subjects you're shooting.
So, while the most exciting moments of your photography experience may take place on or alongside the field of play or hanging on the side of a mountain, equally important but less thrilling is the time you spend on the computer ensuring that your photos are treated in the best manner possible so they can be best appreciated. This is the part of digital photography that most photographers underestimate in how much time it can consume, the never-ending thirst for more power and memory as well as new technology, and how daunting it can be to master the complicated and sophisticated software applications available today. This chapter examines the workflow and what it means to you as a digital sports photographer.
Workflow is a term that professionals use to describe the process of preparing for, shooting, and producing a photo. Because professionals manage so many photos, they must be extremely conscious of workflow issues Even if you are taking dozens or hundreds of photos (instead of thousands or more), you'll find that consciously organizing this process makes your shoots far more successful. Nothing ruins a great photo like not having enough memory left to store it, enough battery juice to shoot it, or having it get accidentally trashed when you move it from your camera to your computer.
Today's digital photographer has many choices and options for processing, producing, presenting, and distributing his or her images to the world, whether the images are for sale or simply for sharing. If you approach your photography from the workflow perspective, you are more likely to produce better images, get them to more people, and generally be more creative.
Tip
For a complete look at the digital photography workflow, pick up a copy of my book Total Digital Photography: The Shoot to Print Workflow Handbook also published by Wiley.
Having a consistent workflow enables me to free up a little more time. A digital sports photography workflow should be consistent from shoot to shoot Although professional sports photographers require a more complex and developed workflow than even a serious hobbyist, the basic approach I developed can help any sports photographer organize his or her shoot-to-print process.
A digital studio should not have to reinvent the process for each photo job; instead, it should constantly strive to improve an established workflow. Whether you are a beginner or a pro, putting a workflow process into place in your digital studio and photography practices will give you more time for whatever it is you want to do, and it will produce better photographs that are much more easily managed, archived, and distributed.
The "workflow" term is used throughout the photography industry in a variety of ways, ranging from meaning how images are processed within an application, such as Photoshop, to a broad definition of everything that happens to a photograph from concept to print. This latter definition is how I typically refer to digital photography workflow and was the foundation for the predecessor to this book, Total Digital Photography: The Shoot-to-Print Workflow Handbook (John Wiley & Sons, 2004).
Digital photography workflow encompasses everything about how a photograph is created and treated. It's helpful to outline that process now, both as a framework for looking at what is involved and as an overview of what follows in this book. The following list outlines the basic steps in taking and producing digital sports photographs — at any level.
For sports photography, creating a plan helps to produce better images. Two essential parts of that plan involve the pre-pixel and post-pixel stages of digital photography workflow. The pre-pixel stage is what happens in photography before the image reaches your camera's digital sensor: lighting, camera exposure settings, and how you've set up the photo shoot overall.
The post-pixel stage involves everything that happens to the image after the sensor has converted light into bits-and-bytes: file formats, downloading files from camera to computer, processing and archiving images, and processing images with software, such as Adobe Photoshop, Adobe Photoshop Elements, Microsoft Digital Image Pro, or ACD See. Finally, the post-pixel stage includes how your photos are distributed and presented, whether that's on the Web, in a slide show, or on paper.
Pre-Pixel.
The photo shoot concept.
Setup, in-studio or on-location.
Capturing the images
Post-Pixel.
Transferring images to the digital studio
Managing images
Archiving images
Editing images
Optimizing images
Distributing images
Printing images
In this chapter, you mostly explore the pre-pixel side of digital sports photography workflow, from preparing for the shoot to what you need to transfer your images to your computer to begin the post-pixel, digital stage. In Chapters 10 and 11, we get more into digital details as your photos are processed in the digital studio.
Digital sports photography differs from portraiture, commercial, wedding, and other types of photography is that only a small portion of images are posed or taken in controlled environment such as a studio By far, most of the photos you take will be on location, whether that's on a baseball field, in a sports hall, underwater, or on a ski slope. Rarely, unless you're a practicing pro photographer, will you be doing portraits of athletes in a studio.
What does this mean in terms of digital photography workflow? Primarily, it affects the pre-pixel stage when you're preparing for and executing your photography. This means you have to adapt to your environment, not the other way around. In a studio, you can control your lighting precisely, but you don't have this luxury when you're in the field.
Another aspect of sports photography, in terms of workflow, is that it's a one shot type of photography. Like wedding photography, you typically only get one chance to get the "money shot" In weddings, it's the kiss at the altar or several other key moments that cannot be replicated; in sports, it's the winning goal, the passionate defeat, or the tearful embrace of coach and player after a tough event. These are moments for which you must prepare and be ready, because if you don't get the shot you can't go back and do them again.
Now, realistically, if you're shooting pee-wee football and catching precious moments of your eight-year-old's athletic beginnings, the pressure isn't quite what it is if you're working for a sports news bureau taking shots of Wimbledon's top seed finishing off his opponent for the championship. You may just want to know how to get a good photo of your kid on the field and making it spectacular isn't necessary, but you still want it to be good. And, for most of you reading this book, that's probably the case However, if you're going to go to the effort of creating good photographs, you must practice digital photography workflow like the professional.
Underlying my discussion here of the whole shoot-to-print process is an assumption that, after you take your digital photos, you'll be processing and possibly printing them in your own digital darkroom.
I go into much more detail later in this book, but let me now preview the elements of your own digital sports photography studio. Given that the vast majority of your sports photography shots will be taken in the field, the digital studio for sports photography does not necessarily include facilities for taking posed photos. The primary role of your digital studio is managing, editing, and producing photos.
You want to have sufficient computer processing capacity and plenty of digital storage space in your studio, along with software to edit your photos. Printing options range from very high-quality home photo printers, to commercial and online printing. The digital photo studio is the last stop in the digital sports photography process.
Note
For a detailed examination of the range of options available for your digital studio, including helpful hardware and software tools, see Chapter 9.
By far the most important decision you need to make as an amateur or enthusiast is the type, brand, and model of camera to purchase. There are myriad digital cameras on the market today, and new ones are introduced almost daily. Each touts new digital technology innovations, gadgetry, and features to entice buyers and promises better, bigger, and sharper images.
Note
Many of you many already have a camera that you like to use, so consider this a primer on what to look for when stepping up to the next level of camera.
Some of the features advertised by camera manufacturers are more important than others. And many features are more or less self-explanatory The most important and basic decision you can make involves the difference between point-and-shoot and single lens reflex cameras.
Budget is most often a determining factor when choosing a camera, so the first thing to decide is whether you'll buy a point-and-shoot or an SLR (single lens reflex) camera.
I'm concluding this section by arguing that you'll be much happier with an SLR camera. But the choice is up to you. Before I make my case that you should get an SLR camera for digital sports photography, let me break down the differences between the two types of cameras Table 2-1 lists the main features of each type of camera.
Table 2-1. Point-and-Shoot versus SLR
Fixed, non-interchangeable lens | |
Optical plus digital zoom | |
LCD viewfinder with small, non-optical viewfinder (digital, instead) | |
Typically smaller megapixel size | |
Often less common or proprietary flash card types | |
Fewer manual controls that are often difficult to access/use | |
Often no support for external flash or lighting attachment capabilities | |
Small and lightweight | |
Significant "shutter lag" and limited shot-per-second rate; limited buffer for multiple-image shooting | |
Poor and/or slow auto-focus | |
Limited sensitivity (such as ISO) and shutter speed | |
SLR Cameras | Interchangeable lenses |
Optical, through-the-lens viewfinder | |
Larger mega-pixel size | |
Multiple digital file formats (such as RAW, JPEG, sometimes TIFF) | |
Most often, CompactFlash media; sometimes multiple types per camera (such as SecureDigital or SmartMedia) | |
Fully manual controls in addition to limited or full automatic or "program" settings | |
External flash and support for lighting attachments | |
Heavier and more bulky, but usually very ergonomic design | |
Less shutter lag, sometimes to the point of it being absolutely non-existent from a user standpoint; high buffer rate for multi-image shooting | |
Accurate and fast auto-focus, often configurable for various viewing "zones" | |
Wide ISO sensitivity range as well as shutter speeds |
As you may have guessed, I'm biased toward the SLR type of camera. If you can afford a digital SLR, you won't regret having purchased one over a point-and-shoot camera if you intend to shoot anything more than family snapshots. These cameras operate much like their film ancestors; the Canon EOS camera controls, for example, are very similar in digital and film.
That said, I often travel with a Canon PowerShot point-and-shoot camera only because it's easy to pull it out and snap a quick photo when it's inconvenient to open a camera case, mount a lens, and go to the trouble of putting together an SLR But I wouldn't think of using a point-and-shoot for taking photos of fencing, even if I had nothing else to use. For my purposes as a pro photographer, it is simply not capable of producing usable images It can't produce images fast enough, it can't deal with poor lighting, and it doesn't have the lens(es) I need to get the majority of the shots.
When will a point-and-shoot camera work? If the sport is taking place in good light (outdoors, most likely), the action isn't high-speed, and you don't need to be too far away from the players. This sounds limiting, but it works for a few sports — especially if you're trying to get shots when it's not in the middle of action. For example, taking photos of equestrian riders before or after riding a course, capturing a skateboarder perched at the top of a half-pipe, or even taking a snapshot while hang gliding are all good uses for a point-and-shoot. In many cases, a point-and-shoot will be all you can take with you in an extreme sport such as sky diving, hang gliding, or rock climbing because you are so limited in how much you can carry in terms of weight and size constraints. In these cases, you will be best off setting your camera to manual settings, or at least shutter-speed priority, before jumping off the cliff or beginning your climb.
Note
Shutter lag is that irritating tendency of lower-end cameras to have a delay between when you press the shutter release and when the camera takes the photo. If you've ever pressed the shutter hoping to get the batter throwing the bat or the goalie stopping the ball, and instead gotten a photo of a bat on the ground or the soccer ball already thrown back into the field, that's what happened.
Part of the problem with point-and-shoot cameras is that they seldom offer usable manual controls, and these are really what you want to use when you're shooting sports Why? When a camera is operating automatically, it has to process the image it "sees" before shooting. It has to take a meter reading on the light and white balance, focus, and then set its lens, shutter, and sensor sensitivity (ISO) as correctly as it can before the photo can be taken. When a pro photographer shoots images, all these controls have been preset in a manual mode, so the camera doesn't have to think about anything — it just has to respond to the photographer pressing the shutter release. For high-speed sports, this capability is essential and makes all the difference in getting great shots.
The fastest cameras on the market today shoot at between eight and nine frames per second, assuming that the photographer has set the camera to a multi-shot setting and that the other controls are optimized. The better cameras have high buffer rates, meaning the camera continues to shoot at this rate until it hits the point where it can't hold any more photos in its internal memory without downloading images to the flash card — professional cameras such as the Canon 1D Mark II can buffer as many as 40 shots.
Consumer and semi-pro SLR cameras, such as the Canon Digital Rebel, the Nikon D-100, and the Olympus E1, are quite capable for most general purposes assuming that you're not shooting elite or pro sports With hot-shoe (external flash) support and a wide variety of lenses, they often can operate at two or more shots per second, which is a beginning-level of acceptable speed for most sports, and you have many manual controls, lots of settings for sensitivity and shutter speed, and the ability to use many types of lenses. These are all priced in the $1,000 range. For most amateur and enthusiast photographers, these are the cameras I recommend most often And camera prices are coming down all the time, with newer models of higher-end cameras available today at a fraction of the cost of their predecessors For SLRs, the real cost comes in what you spend on getting the lenses that you want — their prices change more slowly, and a fast lens (meaning a fixed aperture ability regardless of focal length) is always more expensive than a variable-aperture lens. Table 2-2 surveys some accessible and popular SLRs for digital sports photography.
The cameras listed in Table 2-2 are quite similar in their specifications; of course, you'll want to compare many more technicalities. I find retail Web sites such as B& H Photo (www.bhphotovideo.com) very reliable sources of features and specifications and an easier way to compare products, rather than going to individual manufacturer sites.
Table 2-2. Comparison of Basic Features of Semi-pro SLR Cameras
Canon | Nikon | Olympus | FujiFilm | Pentax | |
|---|---|---|---|---|---|
Model | Rebel | D-100 | E-1 | FinePix S2 Pro | *ist D |
Megapixels | 6.3 | 6.1 | 5.0 | 6.1 | 6.1 |
Frames per Second(Burst Rate) | 2.5 | 2 | 3 | 2 | 2.6 |
Buffer Rate | 4 | Not specified | 12 | 7 | 6 |
ISO Range | 100–1600 | 200–1200 | 100–3200 | 100–1600 | 200–3200 |
Shutter Speed Range | 30 seconds to 1/4000 | 30 seconds to 1/4000 | 60 seconds to 1/4000 | 30 seconds to 1/4000 | 30 seconds to 1/4000 |
Media Type | CompactFlash | CompactFlash | CompactFlash | CompactFlash, SmartMedia | CompactFlash |
File Formats | JPEG, RAW | JPEG, TIF, RAW | JPEG, TIF, RAW | JPEG, TIF, RAW | JPEG, TIF, RAW |
Shooting sports is nearly always an on-location, out-of-studio activity. As such, you need to be prepared for working in the field and be as self-contained as possible. Things such as electrical connections, extra batteries, extra flash cards, various lenses, a computer, an Internet connection, and a printer may be inaccessible or unavailable.
Although digital photographers aren't hampered by carrying large amounts of film, they are burdened with lots of wires, computer equipment (even if it's just a portable hard drive), battery chargers, and other items. Flash cards are small, but are also expensive and easily lost among all the other equipment and must be made highly accessible yet carefully protected. Carry everything you need, and maybe a few items that you might need, but don't overload yourself because you need to be as mobile and portable as possible.
You want to put things together before you load up the car with equipment and head to the stadium. It means creating an equipment and photo shoot checklist, knowing something about what and whom you're going to photograph, understanding something about the sport, knowing if you will need or can obtain credentials, or maybe even just knowing ahead of time that you need model releases. As part of digital photography workflow, this is a very important early, pre-pixel step in ensuring great images at the completion of your photography efforts.
Note
See Chapter 13 for a discussion of the legal aspects of sports photography.
If you're shooting at anything more than a regular season youth game, you may want to contact the local or high-level sporting organization managing the event. Often, they have specific regulations, credentials, and information for photographers who are doing anything more than just taking snapshots of their family members. And, even if that's all you're doing, you still may want to see if you can get some special access because it means obtaining better pictures. Some sports events photographers from the media as well as have official photographers who may be shooting photos professionally to sell to families and athletes For events such as these, you may be restricted somewhat in obtaining any credentials without having an official reason for being at the event.
Figure 2-1 outlines workflow for digital sports photography.
As discussed, the vast majority of sports shoots don't take place in a studio or other controlled photography environment. You need to be ready to shoot on an outdoor sports field, in a gymnasium, in a sports hall, in bad light, in the rain, or in a crowd So preparing for these shoots isn't about setting up lights and understanding poses, but rather about how to have everything you need for the situation where you'll find yourself shooting and being able to adapt to it to get the best shots possible with the resources you have available.

You may be surprised at how little you really need to take to a photo shoot. And the less you take, the less you have to carry! The following checklist can be used to organize your equipment as you rush out the door to be on time for an event:
Camera 1
Camera 2(if necessary/available)
Camera bag or backpack
Lenses
Wide-angle zoom (approx. 17mm to 28mm)
Portrait/standard zoom (approx. 24mm to 70mm)
Telephoto zoom
Lens cleaner kit
Lens cleaner fluid
Lens tissue
Brush/blower
Bulb blower (for cleaning camera image sensor)
Flash cards in a zippered belt container (for portability and protection)
Portable hard drive with flash card support or laptop (for downloading and possibly viewing images on-site);if you have a laptop, you need a flash card reader
Light meter (optional)
Notebook and pen
Flash
Folding stool (a lifesaver!)
Extra batteries for camera and flash
Battery charger (if necessary) for camera battery
A shot list of images you need and/or want to take
Tip
Be sure that each lens has a haze or skylight filter mounted to protect the lens. These are flat glass disks that screw-mount to a lens; they are more common on interchangeable SLR-type lenses than on point-and-shoot lenses.
Note
Taking a portable hard drive with flash card support or a laptop is not always necessary. If you have sufficient flash card memory to accommodate your entire shot, you can leave these items at home.
Most amateur and semi-pro photographers use zoom lenses for sports photography, primarily because they are versatile and you never really know where you can stand to get the best shots Pro photographers — especially for field sports such as football or soccer, where the plays can be very distant — most often use fixed lenses that don't zoom, such as a 400mm or 600mm "big glass". These very expensive (commonly $6,000 to $10,000 and more) lenses feature near-perfect optics, are huge (they usually require a monopod, which is a telescoping, single-leg version of a tripod that lets you steady a camera and hold it without strain), and get the very best shots But they're overkill for anything but elite and pro sports, and even then only for certain sports where distance is a factor.
Another factor in lenses is referred to as "fast glass." A "fast" lens means that its aperture (f-stop) remains fixed at any focal length. Less-expensive zoom lenses often have an aperture range depending on to what focal length they are set. For example, an inexpensive 70-200mm zoom may have a range of f/2.8-5.6, meaning that if you are shooting it a 70mm, you have a wide, f/2.8 aperture capable of shooting in lower light; however, if you zoom out to 200mm to get that distant shot, less light enters the lens and the aperture is capable of shooting only at f/5.6. This means that shots for which there's plenty of light at the 70mm setting can turn out underexposed at 200mm.
Fast lenses have a fixed f-stop rating, often such as f/2.8, which is large enough to accommodate most lower-light situations in sports halls and other venues. The f/2.8 setting can remain constant at any focal length; for example, I shoot a 70–200mm Canon EF L series lens that, because of its extremely complex internal optics, can shoot at f/2.8 no matter the focal length. This means that I can manually set the camera to the f/2.8 setting and know that whether I am shooting close-in or zoomed-out, the light entering the camera is the same.
As with big glass, fast glass comes at a cost; you will often pay $1,500 and well beyond for this feature.
When packing for your shoot, you want to think about how you can best access your lenses and flash cards and how you may be downloading images from flash cards. I favor the photojournalist-style fanny pack that lets me access everything right at my hip, and which zips open toward me (not away from me, as with most non-photographic packs). This way, I can easily interchange lenses, and there's room for my ImageTank portable hard drive so I can be downloading and storing flash cards wherever I go. Figure 2-2 shows my photojournalist fanny pack.
You may find a different way that suits your needs than what I describe, but photojournalists shooting at a wide variety of events have used fanny packs in this manner for a long time because they work well. Although many photographers also wear photographers' vests to carry equipment and other things, and these are required (and supplied) at some big sports events like the Olympic Games — primarily as a way of identifying photographers — they are less necessary in the digital world. In the days of film, photographers needed more pockets to carry a variety of types of film and to separate exposed from fresh film.
Tip
Wearing a photographers' vest may give you a more professional look, meaning that sports officials may be less likely to question your presence at an event if you get closer to the action than the average fan. Of course, you want to have something more than a point-and-shoot if you're going to attempt to carry off this persona!
If you're going to shooting a sport in a specialized environment — sailing or rock climbing, for instance — you'll do more specific equipment preparation; sailing photographers, for example, quite commonly use a cooler on the boat to protect their equipment from the salt water but still have it accessible See the individual sports sections of this book to read more about these situations.
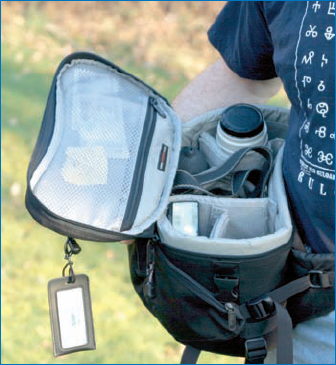
Figure 2-2. The camera fanny pack, like this one made by LowePro, is a staple component of the sports photographer, designed to support multiple lenses, flash cards, camera bodies, and portable hard drives all used on-the-fly without removing it from your hip.
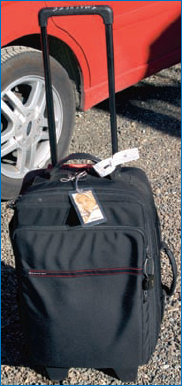
For traveling, however, I carry my equipment in a rolling suitcase-style camera bag that holds more than I need on-site at the specific shoot. This case allows me to carry extra equipment, a backup camera, my charger, and even a small laptop in a protected case; it's perfect for taking all my equipment on a plane or in a car trunk. When I get to the shoot, I transfer just what I need to the fanny pack Figures 2-3 and 2-4 show a rolling, suitcase-style camera bag.
Perhaps the most important thing in preparing for the photo shoot is to understand as much as possible about the environment in which you'll be working. Ask yourself these questions as you are preparing for your sports shoot:
Do you have an idea of what the light will be like?
Where will you be able to shoot?
Will you be close to or far away from the action?
Will there be any issue of accessing the area where you want to shoot?
Can you use a flash, and if so, will it be useful?
What kinds of shots do you need to get — action, crowds, individual players?
Will you be able to leave your equipment in a secure/protected spot, or with someone who will watch it while you take photos?
As much as possible, try to set your equipment ahead of time. Don't take lenses that you probably won't need; for example, if you're shooting in a small martial arts studio, you probably won't need a big telephoto lens. If you know that you'll be outdoors or indoors and you know the weather or the specific lighting, you can set your white balance accordingly.
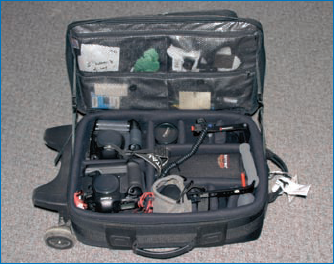
Figure 2-3. You can transport equipment securely in many ways, including the rolling suitcase style case. This case, made by Tamrac, has been all over the world and has protected my gear like a charm.
Finally, one of the most important preparatory steps is to think about the specific photographs you want to take:
Do you have a shot list of images you want or need to take? Whether you've created it or it's been provided to you by a client, a coach, an athlete, or a parent, knowing ahead of time the kinds of "must have" shots can directly affect how and what you'll shoot. Furthermore, it will help you keep on-track as you get caught up in the excitement of the event.
What will you do with the photos? If they are not being enlarged significantly, you can shoot a smaller image size, get more shots on your flash cards, and take up less archival/storage space.
The heat of the action is no time to be agonizing over the type of file format you'll use to capture photos. Nor is it the time to fidget around with your camera manual trying to find out how to change the file format to which your captured images are saved.
But file format is an important decision. Different file formats are more (or less) suitable for different final processing JPEGs, for instance, are a standard for online image display. TIFF is a long-time standard for many print processes. RAW photos capture more data and use more space on your memory card.
This list summarizes when to use what file format.
JPEG is the most common sports format, supported by virtually all cameras. It's also the easiest and smallest to work with, but potentially the poorest quality because it is a "lossy," compressed format.
TIFF is a high-quality, "lossless" file format suitable for larger and more editable images, but it's not directly supported by all cameras. Files tend to be large.
RAW is technically not a file format, but the actual and accurate image the camera "sees." RAW files require specialized support from the software you use and take more processing time and effort, but ultimately yield the best possible results of any images.
RAW+JPEG is an additional option. Some cameras shoot two files for each shot — one in RAW and the other in JPEG. Although this takes up much more space on your flash card, it gives you the advantage of having a very editable, lossless, archival-quality image along with a nimble and small JPEG file to work with for common purposes.
You may have to change file formats on-the-fly at the event, depending upon the conditions in which you're shooting and how the environment changes However, the more you can think about this ahead of time and prepare for the shoot, the better off you will find yourself when you get there.
Whenever possible, try to get to your digital sports photo shoot early to find your place, check lighting, get set up, introduce yourself to officials, and maybe even get a few player warm-up shots. If you can "stage" your shoot, all the better: find a secure, fixed position where you can safely keep your equipment, possibly get a seat, and base your operations for downloading images, changing lenses, and the like.
For example, at the Athens Olympic Games, when shooting fencing I was able to keep my rolling bag with lots of equipment and a computer in the photography media center, upstairs and a short hike from the fencing venue. It was a secure location monitored by Greek Olympic officials and workers from Kodak, Nikon, and Canon. I took my fanny pack to the fencing hall, where I had a small stool, and left my pack and sometimes a laptop in a dedicated photography area close to where I was shooting I didn't have to carry everything with me if I moved around; I could simply leave it by my seat. However, this luxury does not exist at most amateur athletic events.
The best scenario is if you have an assistant, friend, or family member willing to baby-sit your equipment while you move around; if you can engage them in helping to download images, all the better, as long as you can truly trust this person to safely and securely manage this step.
Here are some guidelines to follow when you are planning a shoot at a sports hall or on a playing field:
Get to the venue early. It's the only way you can really get the shots you want by being prepared and knowing your way around.
Find a good location from where you can stage your shoot. Depending upon your equipment, you may need to have a spot to sit and carry everything with you. On the other hand, you may need to store things securely, which means you need an assistant or a way to ensure that no one bothers what you have. It's often not even so much a worry about theft as it is a concern someone will knock into or drop a beer or Coke into your computer, hard drive, lenses, or other equipment.
Scope out the environment where you'll be shooting. What key points around the hall or field are good vantage points where you can perch without getting in the way? Are there high points or bleachers you can climb to get a wide-angle or distant perspective? How does the venue match the shot list you prepared before the shoot?
Assuming that you've scoped-out the area where you'll be shooting and you're comfortable that you have a safe spot where you can stage the day's activities, you can focus on some pre-pixel camera issues that are essential to getting good images.
If you've ever seen professional sports photographers or photojournalists at work, they often carry multiple cameras with different lenses, all preset and ready to go While not at every event, I carry more than one camera at the end of a world-level fencing finals, because inevitably the moment the final touch is scored, the house lights come up, teammates leap onto the stage, and the winner is tossed into the air Lighting, focal range, and other camera settings can change significantly in a minute or less, so shifting settings and lenses on one camera isn't practical.
In Figure 2-5, U. S. saber fencer Mariel Zagunis launches her gold medal — winning final assault on her opponent at the Athens Olympics In Figure 2-6, her teammates rush the stage to toss her in the air. In only a few moments, the change in lighting in the venue, the colors and reflection of additional clothing and bodies on the fencing strip, and the added ability to use a flash all contribute to very different settings for how a photo needs to be taken.
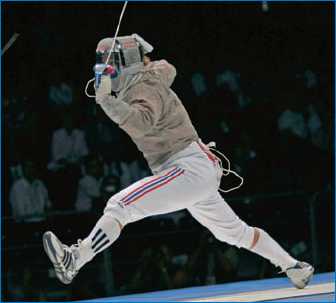
Figure 2-5. U.S. fencer Mariel Zagunis in her winning attack. The camera is set for high-speed, stop-action shots of a saber blade in motion, the lighting of the athlete and not the audience, and narrow depth of field.
Note
Narrow depth of field means that only a small area is in focus and whatever is behind the subject is blurred.
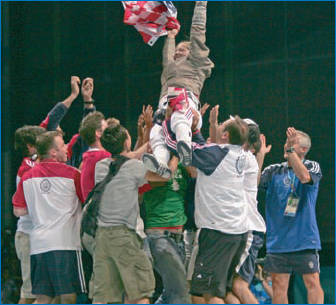
Figure 2-6. Less than one minute after the image in Figure 2-5 was taken, teammates of Mariel Zagunis celebrate victory. The camera setting had to be changed to allow a deeper field of focus, and it did not have to fire at such as top-action speed (but it still had to be sufficiently fast to catch someone being tossed in the air!).
Use the following list to think through and prepare your camera to capture fast-moving images:
What lenses will you use, specifically, for what shots?
What is the lighting light? If outside, what's the weather doing? What will be your best camera settings for the venue to get stop-action, wide-angle, telephoto, close-up, or other shots? Will you need to fix your camera on manual, or can you get away with using a shutter-speed priority automatic setting? (Note: I don't recommend using a fully automatic or "program" setting except in rare situations.
Consider special options that your camera may offer as a means to easier shooting. In many cases, you can set special options that deviate from the standard SLR camera features. This ranges from shutter release functions to a wide variety of settings and behavioral attributes of the camera. You should be familiar with these and make any adjustments that will help you adapt to shooting sports in the field.
Consider carrying a spare. If you are expecting moments during the game or event when lighting will change suddenly or you will need to shift from a telephoto to a wide angle or other lens, you may want to consider having another camera ready instead of having to change lenses — especially if you're going to be in a crowd or busy area.
The Sound of Photography: Recording Image Sound Clips
As an alternative to keeping written notes about images, some cameras today offer the capability of recording a short sound clip in WAV format that accompanies a given image. You can select a specific image you've taken, press a button on the camera, and an internal microphone in the camera allows you record your voice. It's stored onto the flash card along with the image, and when you download the image to your software package, the sound clip goes along with it. Most software packages, including Adobe Photoshop, Adobe Photoshop Elements, and ACDSee all support audio annotation to image files. Some applications also let you add audio to an image file while editing the image, but you must have a microphone (and a sound card) on your PC to do so.
In Photoshop Elements, adding audio to an image is very easy. Here's how:
Using the Photo Browser, open a photo and click the Record Audio Caption button, which opens a small dialog box. Alternatively, you can select a photo, and then click in the Properties window. Under the General section, you can click the Add or Change Audio Caption button.
Click the Record button, and then speak into your microphone (you need to have one connected to your computer or one that's built in).
When you're finished, click Stop. Listen to the annotation by clicking play. Rerecord, if necessary. You can also attach an existing audio clip to your photo, using the File

Close the feature. The audio clip has been attached.

Attaching an audio file to an image in Photoshop Elements.
If your camera supports audio annotation, as the Canon 1D Mark II does, you want to test the capability before you use it in the field. The microphone may, for example, not record sound very well when you're in a noisy environment such as a stadium or sports hall, in which case you won't hear your recording later when you need to listen to the annotation. Also, you may need to be closer to or farther away from the microphone to get a good-quality recording, so knowing how it works ahead of time is a good idea.
Audio files can be a very efficient way of keeping quick notes of player names, events, stages of play (semi-final, final, and so on), or other information you'll want to know later on, as opposed to writing it down If someone else will be editing your images, this is also a good way of communicating to that person important information about the image that can be more effective than having him compare images with your handwritten notes (especially if your handwriting is as bad as mine!).
I like to edit images and write books while sitting in busy places. I'm not sure why, but working in a bar, restaurant, or a coffeehouse works better for me than sitting in a quiet office. This can, however, invite disaster.
Sitting in a British pub last December, I was working on images from a fencing tournament that I had just shot in Paris, and I had taken a couple of days in London on my way home While working, I kept a soda at what I thought was a safe distance from my laptop. As it turned out, it was too close to the edge of the table and a passerby bumped into it. The sugary liquid splashed directly into the keyboard of my laptop.
I immediately shut down the computer and got a dry towel from the bartender. I dried off what I could and, in a near panic, proceeded to remove the keyboard with a screwdriver. I then frantically dried off whatever looked wet in the complex electronic underpinnings of my system.
I thought all was well, but over the next month the computer kept overheating, shutting down suddenly, and generally misbehaving. Finally, a little more than a month later, it gave up the proverbial ghost in the middle of a photography workshop where I was presenting images.
Bad things happen to good photographers every day. Lenses drop, cameras fall from tables, drinks fall into computers, and a plethora of other catastrophes occur to any photographer, especially those working in the field. Fragile, expensive electronic and glass equipment, as bombproof as camera manufacturers can make them, can easily be damaged. In addition, theft — especially theft of equipment left visibly on a car seat, as the insurance companies will tell you — is always a threat anywhere you go.
Before I share some tips on recovering from digital sports photo disasters, let me share some ideas on how to avoid them.
If you're careful, you can certainly prevent lots of problems, which is always best. The following list offers some suggestions that can help you do that:
Use a cable lock for your laptop and LCD projector. They all have a little slot into which a special computer lock can be inserted, and the cable snaked through a chair, a table, or another secure, large object. These are commonly available at computer and electronics stores. Cables are not foolproof and can be cut with a strong metal-cutting tool, but they provide significant deterrence for all but the most prepared thieves. You can also use the lock through your briefcase or camera bag handle as a further deterrent.
For devices lacking a lock-slot (such as the case with my portable DVD player, which I sometimes use to show images), you can purchase similar cable locks that allow you to glue a metal ring to them. You then slip the cable and/or lock into the ring, securing it. I don't suggest using this for cameras because it's typically difficult to find a clear spot where you can conveniently mount the ring.
Use your camera strap. Put it around your neck and get used to it. A large percentage of camera and lens damage can be averted by this simple effort — much like wearing a seat belt in a car.
If you don't like camera straps, use a handgrip on your camera. Adjusted properly, these quite comfortably allow you to hold a camera while your hand is completely at rest.
Use a haze or skylight filter on all your lenses. If you do bump or drop the lens, sometimes these take the hit and protect the lens.
Use a lens cap! Whenever you put your lenses away or you're not using them, keep the caps on. Also, and even more important, always, always use the cap cover for your camera body if you don't have a lens attached.
Keep drinks and food away from all equipment — FAR away!.
If you'll be in a challenging environment, such as snow, mud, rain, salt water, or other elements, keep your lenses and cameras in resealabel plastic bags inside your camera bag. If you're going from a cold to a hot environment, such as from the freezing outdoors into a heated room, keep lenses and cameras sealed inside the bags until they have adapted to the new temperature. This prevents condensation from building up inside the devices, which can be very damaging.
When you are changing lenses, have your lens caps ready to be placed on the lenses immediately. Don't let them sit out, exposed to the elements, while you dig for the covers.
Know how to clean your image sensor. Although it's a bit nerve-wracking if you've never done it, it's an essential procedure to understand and practice with your camera.
Note
For more on caring for your camera and cleaning your sensor, read Chapter 3.
When in your studio, store your camera equipment in a camera bag or other safe, clean spot.
You've done everything possible to prevent it, but the unthinkable still happens: The spilled drink, the dropped lens, the smashed camera. It happens when you're a sports photographer, and it's more likely than not that it will happen if you're carrying lots of stuff out-and-about. What next?
When my laptop took the liquid hit in London and ultimately died, it was diagnosed with a failed motherboard, which would cost more to fix than purchasing a new computer. Fortunately, I had obtained comprehensive insurance through the National Press Photographers' Association (contact them for coverage information at www.nppa.org), which provides photography-equipment coverage through a major insurance company. The policies, which vary in cost according to how much and what type of equipment you're insuring, covers literally any type of damage anywhere in the world. This is essential for a photographer such as I am, who's traveling all the time to shoots in locations such as Qatar, Cuba, Greece, Algeria, Vietnam, and Brazil Many photographers who have attempted to rely on their homeowners' insurance or automobile policies have been more than disappointed when trying to make claims for equipment loss or damage, especially when it has occurred in the field.
Obviously, if you're shooting with a camera that's $500 or less, then this type of insurance probably isn't necessary, especially given that most policies have a deductible of at least $500. However, if you're doing anything significant, no matter whether you're doing it professionally for a client or just for your own enjoyment, you'll want to invest in a policy for peace of mind wherever you may find yourself shooting.
As for dealing with disasters when they occur, repairing equipment in the field, for example, it is extremely difficult to undertake this yourself with the tiny, fragile parts and complex construction of today's computers and cameras. Even removing a keyboard key on a laptop can be challenging (but not as difficult as putting it back on!), and for the most part, we don't live in a do-it-yourself world anymore when it comes to photography. If you've spilled a liquid on your camera or laptop, follow these steps:
Immediately power-off the device. Much liquid damage that may not have hurt the camera or laptop if had been off or been turned off occurs due to it being short-circuited because it was on. Don't shut down a laptop in the conventional manner; instead, take out the power cord immediately and hold down the power button, which shuts it down immediately. Then remove the battery as quickly as possible; you can also simply remove the battery and power cord to shut it down instantly as well. This is not an advisable way to turn off the computer at any other time; you must realize that you will also very likely lose data when this happens.
If you've shut down a liquid-damaged camera, do not remove the flash card immediately Wait until the camera has dried before doing so; sometimes being plugged in to the connection pins actually prevents liquid from penetrating the card. If you have a point-and-shoot camera that does not use a flash card, or has the ability to simply hold images in memory, then do not turn on the camera. Remove the batteries, and don't plug it in. You'll want to take it directly to a repair center Only they will be able to recover any images that may still be present on the camera.
Assess the type of liquid. It makes a difference. If it's a sticky, sugary liquid like soda, a residue is left that can continue to damage the device and short-circuit various connections even after the liquid has dried. In this case, you need to have the camera professionally serviced as soon as possible and do not turn it on. Take out the batteries. Do not attempt to clean the camera with other liquids such as alcohol unless you do so with a lint-free cloth and touch only exposed surfaces. If it was plain water that was spilled, it should dry without a residue; salt water, conversely, leaves a salt residue, so it is imperative that you get the camera or computer to a repair facility as soon as possible because of salt's corrosive properties.
If you're still in the field after the camera or computer has dried, you can attempt to remove the flash card if it's essential to do so. Let it dry for at least 24 hours in a low-humidity environment before plugging it in to anything else because, although the camera or computer may have mostly dried, moisture may still be lurking inside the flash card.
If you feel the damage was superficial, you've let it dry, and the camera or computer seems to be operating normally, you still need to observe how the device behaves for several weeks after the damage occurred. If anything seems abnormal in how it's running, have it examined by a repair professional and document what happened. If you do have an insurance policy, they will want to know this information.
Your camera does the job of converting pre-pixel, analog light into a digital image. The point at which this takes place is when the image hits your camera's electronic sensor, a sensitive and delicate plate perfectly placed at the focal plane of the camera. Your camera probably has a little symbol on its side that looks something like the one in Figure 2-7.

Figure 2-7. This symbol, as seen on the side of a Canon 1D Mark II, is common to most cameras — both film and digital — and accurately represents the camera's focal plane.
This symbol indicates the exact plane at which the light hits the surface of the sensor; the same symbol appears on film cameras showing where the film is held against the pressure-plate and the point at which the film is exposed. For digital or film cameras, this is an important mark especially for precisely measuring focal distance when shooting close-up images.
Digital camera sensors are almost always either a CCD (charge-coupled device) or a CMOS (complementary metal oxide semiconductor) plate Both are chips that do essentially the same thing: Through an array of light-sensitive points, representing pixels (picture elements), they interpret an image as a matrix of tiny sports of light that together make up an image.
Many of the higher-end pro cameras use CMOS technology, which is more expensive but higher quality and more controllabel, although they tend to be more "noisy" They are expensive because the digital noise must be filtered, a costly process when the intent is to produce a perfect image. If you're shooting in RAW format and using larger format, CMOS chips are superior.
CCDs have been available for a long time and began as the key elements in digital scanners. They're reliable, inexpensive, and produce very good-quality images for cameras shooting at five megapixels or less.
After the camera's sensor has absorbed the image, it converts it into a digital file that is stored briefly in the camera's internal memory. It is then downloaded to the media you have in the camera, namely a flash card When you're shooting multiple images, such as holding down the shutter to catch a sequence of shots of a running back catching a ball or a climber rappelling down a cliff, the camera may "choke," meaning that the buffer is full. The camera is unable to shoot additional photos until it offloads the images to the flash card Some cameras have more memory than others; most consumer and semi-pro cameras can hold 4 to 12 shots at a time So even if your camera can shoot more than four or five frames per second, it's only as good as its buffer rate because if the buffer fills, no more photos can be taken.
If you plan to shoot sports where action sequences are essential — such as I have to do for fencing —you want to make sure that the camera you purchase has a sufficiently large buffer and frame-per-second rate; otherwise, you'll miss key images that other cameras can capture However, for sports such as sailing, hang gliding, and even wrestling or some types of gymnastics, these factors may be less important.
If shutter-lag occurs with your camera, meaning the photograph is taken a moment or two after you depress the shutter release, then you'll need to figure out how to anticipate the action whenever you can. It may be difficult and take some practice, but it's a necessary skill to acquire if you're shooting any fast-action sport with a slow-action response from your camera.
Another factor in multiple image speed is the flash card's write speed; cards have varying rates of how fast images are recorded on them Some of the more expensive cards have write speed rates of 80X, which translates to a sustained data transfer rate of about 12MB (megabytes) per second. Less expensive cards with lower speed rates transfer photos more slowly (for example, a card with a 40X speed rating transfers about 6MB per second) Faster cards obviously allow your camera's buffer to empty more quickly.
Your flash cards need to be downloaded to a portable hard drive or laptop, an essential and critical step in digital photography workflow. You want to be absolutely certain that your images have been secured on a hard drive before you do anything else with the flash card, such as formatting it or erasing the images to take more shots Consider the two ways you might accomplish this with a laptop or with a portable drive.
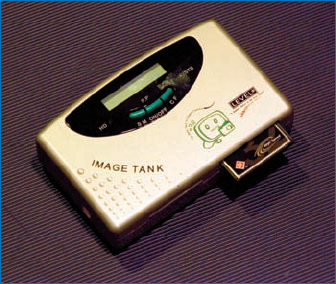
I've become very reliant on a portable hard drive called the ImageTank when I'm in the field. It is a very simple device with a slot for a flash card (as well as one for SmartMedia) and a couple of operation buttons. Containing a 20GB hard drive, which is all I need for several days of shooting, it has a simple LCD display that shows only that the device is on, a card has been inserted, and the data on it is being transferred to the hard drive Because it's so simple, the rechargeable battery lasts a very long time; it also runs on a 12-Volt DC cigarette-lighter connection or on 110-220 AC. When I'm back in my digital studio or in my hotel room, I simply connect it via a USB cable to my PC and back up the images.
Portable hard drives are probably the download device of choice for sports where staging a PC is difficult or impossible. They are light, portable, reliable, and easy to use wherever you may be. I typically store one in my camera fanny pack and download while I'm shooting.
Tip
When purchasing a portable hard drive, look for one with FireWire or USB 2.0 support. These transfer images much faster than USB 1.0, assuming that your PC supports these faster formats.
Other types of portable devices exist, such as a portable CD burner that allows you to directly transfer flash cards to a CD all on one device. Although they're interesting, I have found CDs to be fragile enough, and subject to failure often enough, that I hesitate to fully trust this type of a download when I can't verify the CD in the field.
In my experience, the portable hard drives that tout all types of extras — especially image display windows — typically consume battery time far too quickly; they also are poor at displaying images with any speed, so the feature is only of limited use. Finally, the fewer the features, the less expensive the device is Simplicity reigns when storing images securely in the field! Figure 2-8 shows an ImageTank.
Although many types of flash card readers that can be used with PCs are available in today's market, reliability among different PCs, readers, and flash cards continues to be somewhat challenging. The most common type of reader, shown in Figure 2-9, is attached to a cable with a USB connection. Once connected, it appears and is viewed just like a drive. These can be purchased for a variety of types of camera flash cards, and some readers support multiple card types. The other common type of reader is a PCMCIA or PC Card reader; this type of device can be inserted into the laptop "slot" on the side of the computer, and the flash card is inserted into it, as shown in Figure 2-10.
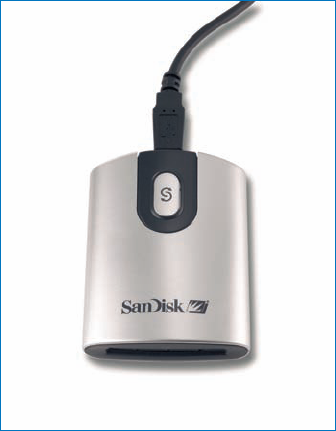
Figure 2-9. Attaching to your computer's USB or FireWire port, flash card readers like this one from SanDisk are a simple way to transfer images to your PC.
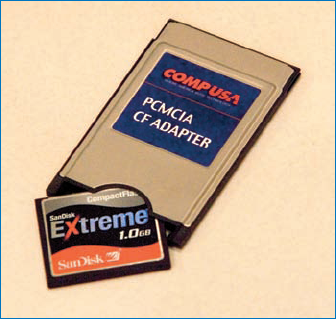
Figure 2-10. Designed for notebook and laptop computers, PCMCIA (PC Card) style readers allow you to attach a flash card by inserting the card into the reader, and the reader into card slot available on virtually all portable computers.
Tip
Test your flash card reader in your digital studio before taking it into the field! Record a full card of images, and download them into the computer you'll be using to be sure that everything is compatible.
Always take a backup flash card reader into the field, just in case your primary one is lost or damaged or fails for some reason. Doing so has been a lifesaver for me on countless occasions.
The other factor that is important when downloading flash cards to your computer, or transferring files from your portable hard drive, is what application you'll use to move the files and store them on the PC. You can use any number of applications to do this, ranging from the tried-and-true Microsoft Windows Explorer window to applications such as ACDSee, which let you configure images as they are stored.
I actually use Windows Explorer commonly when transferring images, and I typically do not do anything with the images until they're safely on my PC hard drive. Follow these steps to save your image files to your PC via Windows Explorer:
Connect the card reader or portable hard drive via the USB or FireWire connection (as appropriate). If you're using a card reader, insert the flash card.
A small window appears, indicating that your computer recognizes the files on the flash card and giving you options for what application you'd like to use to view and/or download them. You can then select the application you want to use and your images will download and appear in it.
In Windows Explorer, a window appears showing the files and drives on your computer, including the flash card. Figure 2-11 shows the Explorer window in Windows XP.
If you haven't done so, create a subfolder to contain the images you're going to transfer.
Select the files/folders, and drag them to your destination subfolder. Your files may be in a subdirectory on your portable drive or flash card. You can either transfer the entire folder or click down to the individual files for transfer. The images should transfer, one by one, to your hard drive. Note that they are still on the original flash card too.

ACDSee and Photoshop Elements also both include very good image-retrieval utilities, but I suggest that you keep it simple if you use them. You can easily and quickly download images, but you can create a problem just as fast. For applications that automatically transfer images from flash cards or drives to your PC, typically you have many options to configure, such as automatically renaming the files or moving them instead of copying, which means that, as the files are transferred, they are removed from the source device or card Moving files isn't the most prudent method, simply because if fate intervenes and anything interrupts the process, you're in danger of losing images Renaming images is relatively safe, but may slow down the transfer process Renaming usually is much faster when done to files already on your hard drive.
Warning
NEVER, NEVER remove a flash card while you're in the middle of transferring images. Doing so can permanently corrupt the card and cause you to lose images. If it does happen, some flash cards come with recovery software that may allow you to rescue files.
After your images are safely on your hard drive, you may want to immediately back them up by recording them to a CD or DVD or to another hard drive. Don't rename the files or change them in any way, especially if they are JPEG files. JPEG files are a lossy file format, which means that nearly anything you do to a JPEG file causes it to degrade by a fraction. When working with JPEGs, you should create archive files before working on any of the images. Basically, keep a copy of the original files; these are only for using as source files of which you can create copies. Store these in a very safe place!
Digital photography workflow for sports differs from studio photography especially at the pre-pixel stage because virtually all sports photography is done on-location Preparing for a sports photo shoot means being prepared in the field, knowing your equipment, and having a good grasp of the sport, venue, action, and people you're out to capture.
Being prepared for and executing a digital sports shoot means knowing what to do as conditions and the environment where you're shooting change. The sports photographer knows how to adapt to where he or she is shooting. Being able to anticipate the unexpected makes all the difference in catching those once-in-a-lifetime shots — and being able to recognize them when they happen.
Knowing what to do when disaster or near-disaster strikes is important as well, and it means being resourceful and ready with backup equipment and resources. Photographers will do almost anything to ensure that their images are safe and that they have plenty of them from which to choose!
Finally, it's important to be ready to transfer images from your camera to a storage device of some kind so that they're ready to be processed back in your digital studio. You can do this in a variety of ways, and what your shooting, what equipment you can have with you, and how far away you are from your studio all have a bearing on how you handle the images you take.