

© David Esquire
As a child, I enjoyed spending time in the summer with my uncle Bernie, who had been a pro photographer and filmmaker working for the U.S. Navy and for the Eastman Kodak Company. I'd visit him in North Carolina, and he would take me to downtown Asheville to presentations known as travelogues. I was a well-traveled youngster, and I remember fondly seeing films and slide shows from around the world, such as my uncle's documentary of India. You may have slightly worse memories of photo slide shows by zealous, but very amateur, photographer relatives, intent upon sharing their photo journeys of woods, gardens, or tourist traps with a captive but resentful young audience.
Well, I have good news. As a photographer, now is the best time to have the world see your, whether in print, online, or on display. Printing fantastic-looking, long-lasting images is relatively easy and inexpensive, getting photos on the Web has become very simple, and creating a multimedia slide show with music and cool motion and transition effects is something almost anyone can do, and it's guaranteed to keep even the most fidgety nine-year-old captivated, at least for a little while!
With so many options for preparing your images, deciding what best to do with them, and determining how best to provide them to friends, family, or clients, it can get really confusing, really fast. You may find that taking photos is the easy part and that getting them printed or displayed is pretty hairy. In this chapter, your options are broken down into bite-sized chunks that get you started on how to prepare your images for distribution, and then what to do with them. But, really, there are only two options to consider: print or digital. First, this chapter looks at ways that you can create beautiful prints. Very high-quality deskjet and even dye sublimation printers are accessibly priced and fairly easy to use. Beyond that, professional print services can turn your spectacular shot into a poster, a coffee mug, or a frameable-quality 8 × 10. This chapter also explores some digital presentation options, including virtual contact sheets and slideshows.
It's a good bet that at least some of your photos will end up in print, even in a world where many images stay in a digital format There's no substitute for the tangible, tactile feel and look of a printed image Let's take a look at the various options you have for printing your select images so that they look their best and last the longest.
Rapidly evolving technology is making it possible for every digital sports photographer to produce great prints. In Chapter 9, I outlined the process of creating a digital studio to manage and edit your digital sports photos. And in Chapter 10, I presented a highly condensed introduction to editing sports photos in Photoshop Elements.
Digital reproduction and print reproduction use very different technology and logic to display color photos. Digital presentation (on your computer monitor, for example) involves combining backlit, glowing red, green, and blue elements. This coloring method is referred to as RGB (Red, Green, Blue). Color printing involves mixing colors to produce a spectrum of colors.
RGB digital display is capable of reproducing a wider spectrum of color than printed photos. On the other hand, digital display is done at a much lower resolution than printing. Most monitors display images at under 100 pixels (dots) per inch, while even photo printers that cost less than $100 can produce digital sports photos with a resolution of 600 dots per inch or higher. In short, digital display is better for color, but printed photos can come close to the color veracity of digital and display far more detail than a digital image.
Note
When I say that digital display is better for color display, I mean digital display is capable of presenting color with more depth and accuracy. This, however, assumes that the viewing monitor has been accurately calibrated. Hardware and software packages like ColorVision's Spyder2PRO Studio adjust monitor colors to conform to display standards.
In addition to the overview of editing sports photos that was presented in Chapter 10, you need to be aware of a couple specific things when printing digital sports photos. First, most color photo printing processes create a wide spectrum of hues by mixing four colors — cyan, magenta, yellow, and black (referred to as CMYK, where black is denoted with a K to avoid confusion with blue).
Tip
The most inexpensive home printers may produce black by mixing cyan, magenta, and yellow, but most have a separate black ink cartridge for darker dark colors. Higher-quality inkjet printers can have as many as eight color cartridges to enhance colors, but the additional color cartridges are usually hues like light cyan or light magenta. So the four-color CMYK model remains the basic standard for digital color printing.
That means that even if you do your editing with RGB color model settings, you should switch to CMYK to see a closer approximation of how your photos will print. Do this in Photoshop by choosing Image
The other challenge in preparing sports photos for printing is that monitor colors are generally not synchronized very well with printer colors. The brilliant cardinal red on your monitor may print as hazy pink. Maroon and gold become gray and yellow. You get the point. The best solution is to calibrate your monitor to industry standards and then use profiles to synchronize your screen colors with your printer.
Note
You calibrate your monitor to ICC (International Color Consortium) standards using devices/software combinations like SpyderPro II that I explored in Chapter 9
Most Epson, HP, Canon, and other photo printers include profile programs in the installation software. You can configure your photo-editing program to display colors by choosing your printer profile. In Photoshop, this is done by choosing View
In Figure 11-1, a printer profile is being selected so that the photo of snorkelers in the deep blue water at Hanauma Bay prints the way it looks.
In Photoshop Elements, choose a profile for an installed printer by selecting File
Other image editors also provide profile synchronization. In Paint Shop Pro, choose File
Calibrating your monitor and selecting the appropriate color profile in your editing software helps reduce the amount of guesswork (and wasted photo paper and ink!) involved in printing your sports photo with the colorization you want.

Inkjet printers that spray jets of cyan, magenta, yellow, and black ink onto photo paper are the most popular and accessible home photo printers. They range from cute, toaster-sized printers that churn out great 4-x-6 prints to huge commercial/professional printers that are capable of printing posters.
Even if you end up taking (or uploading) your most spectacular shots to a commercial printer, you want to print up proofs at home. But if you invest some time and a bit of cash, you can produce very impressive inkjet photos at home that none of your friends will be able to distinguish from commercial prints.
Consider these factors in choosing an inkjet that meets your budget and quality needs:
In general, higher resolution produces better color, because more dots per inch means that a printer can mix up highly tuned combinations of microscopic dots to match colors more accurately.
In general, the more colors your printer supports, the better. Three-color inkjets (cyan, magenta, yellow) don't produce quality color photos, but I've seen amazing results from four-color printers from Epson, Canon, HP, and others.
You can mix paper from one manufacturer with printers from another manufacturer and get good color reproduction. But mismatched printer/paper combinations produce prints that often fade much faster than when you use paper manufactured by your printer company.
Printers with separate, replaceable cartridges for each color of ink can save you money if you print lots of photos. For example, you don't have to throw away your all-color cartridge every time you run out of cyan. But individual cartridges require a trip to the office supplies store every time a single color runs out, and the annoyance can wipe out the value of saving a few bucks by not replacing an entire cartridge when one color runs out.
Dye-sublimation printing mixes gaseous inks to produce colors that blend more smoothly and accurately than inkjet printers. Many of the commercial photo printers found in drugstores and many of the machines used by professional print shops use dye-sublimation (dye-sub, for short) technology.
Companies like Sony and Canon make personal dye-sub printers. Generally, these printers are affordable only in the sizes that print 4-x-6 photos. For small prints, dye-sub printing is something like 20 percent more costly than inkjet printing. And, because dye-subs can't double as a home/office printer, most of us end up taking photos to a commercial processor for the improved color availabel from dye-subs.
Color laser printers are a low-cost, high-speed option for proofs, but the color produced by laser printers is significantly worse than either inkjets or dye-subs.
You don't have to be a professional to get professional quality, services, and benefits. Pro photographers work with high-end labs as well as specialized school and sports photo services to produce sports packages and photos. Many labs, however, will work with any photographer, from amateur to pro. Printing at a lab can work two ways: You take it into the lab locally, or you send it to them via mail, e-mail, or another online method. Either way, you're relying on a professional service to turn your digital file into a print.
Sometimes, this may be as simple as taking your print to an electronic kiosk, where you insert a CD or flash card and your photo is processed automatically. For example, at the Olympic Games in Athens, Kodak had a service center where you simply went in, uploaded your card, and got your images printed in an hour or so.
For these services, you need to have full-sized images for printing high-quality prints. For an 8x-10 print, for example, size it in your image-editing package to exactly 8 inches by 10 inches and make the resolution 300 dpi. Save it as a JPEG or TIFF file, and most any lab should be able to print it. If they require anything more specialized, they will tell you ahead of time and they will have information to help you on their Web site.
Assuming that you've prepared your file correctly, as described in the preceding section, you want to store your prepared images on a CD or a flash card and give it to the lab. They then process the files and produce the prints you order.
Some labs, of course, are better than others. Large companies with big services, even though they have a conveyer-belt-type operation, have very good quality and prices. Costco, for example, uses Fuji Frontier printers that print onto photographic paper (it's not an inkjet process; your images are actually projected and photographically exposed, which is a very permanent and high-quality method) and processes your photos in an hour or less. You can upload the images there directly into a little kiosk right at the photo center. These services, however, are not very accommodating if you need some special treatment to a print, such as touchup or color correction. For this type of file printing, you will want to keep your image in RGB color mode, not CMYK, as it is different than if it were printed using inks.
As I mentioned, photography labs that specialize in working with pro photographers generally accept work from any photographer, amateur or professional, and are excellent for high-quality prints that you really want to treat well. They hand-print every image, ensure color correction, and can make other adjustments. Of course, you end up paying more for this service and treatment; however, if you have an extra-special photograph, this is a better choice.
Labs very often will request a specific file type; high-end labs typically want TIFF files, which tend to be larger than JPEGs. Labs like Costco take JPEGs without any problem. TIFF files are a "lossless" format that, while bigger and bulkier, preserve image quality over many iterations of saving and editing.
Also, if you're using a large consumer service lab (like Costco or Wal-Mart), you want to make sure that your files are sized exactly correctly. Attempting to print a 5-×−7 photo from an 8-×−10 image, or vice versa, may not turn out very well!
Using big labs in other parts of the country can save you lots of money, and the quality can be superb. It also takes longer, and if you don't use a reliable or good lab, it can be a big headache. If your print isn't what you expected, or the quality isn't what you wanted, then you have to send it back and wait for several days.
Online labs come in basically three varieties. Most offer a variety of prints and prices, with add-on services for color-profiling, touchup, and custom sizes.
Big labs process your photos from files you send them, via e-mail, FTP, or on CD. Some let you upload images to their system as well; Costco and Wal-Mart both offer this service.
Some services let you upload galleries of images and then select images you want to print; Kodak EasyShare Gallery, Shutterfly, and Snapfish are three such services. Other people can see these images as well, including your family members and friends. They can choose the images they want from those you upload and have them printed and delivered for a small fee per print.
Services specializing in photographers who want to sell their images let you establish a gallery storefront, where you can display your images and print them for yourself, but primarily it is meant to display the images for clients to select and purchase them. Printroom.com, for example, has several thousand photographers that present and sell their images online. Printroom.com fulfills the prints — meaning they print and ship the orders, and handle the payment transactions — and send you a check each month for your sales, minus a small commission. And now they even let you sell high-resolution digital images online in addition to prints and products.
For online galleries, all the services need is a thumbnail to post your images; some, like Printroom.com, offer utilities that automatically configure your images for this. Then, when an image is ordered, you upload a full-sized image (sending all your full-sized images gets really unwieldy); Printroom even offers a configurable image agent that automatically does this for you if you're not at your computer or out of town. For others services, such as those you are using only to for printing images, you need to send the full-sized images right away. It is often faster and better to just send your images on a CD, especially if you have many of them.
Tip
GoDaddy.com, a major Web-hosting service, offers a place where you can easily upload and share really large files online without having to use an FTP server or client. Check out their "Online File Folder" service www.GoDaddy.com to find out more about it and to sign up for an account. However, you pay for how much space you have, which can be very large if you aren't careful. I use this service to easily deliver large image files to various clients around the world; I simply send a secure link via a special e-mail to clients, and they can click the link and download the files. It times-out after a period I specify, and I can tell whether they've downloaded the files. This is also a great way to send big images to a lab without having to send CDs or use an FTP server.
Don't hesitate to ask any lab — online or local — to give you samples of their work and quality. Any good lab will let you provide one of your images for testing; they will provide you with a sample print. I suggest you try this before settling on any one lab; you may be surprised at the difference in quality among them. Also look at how they ship your prints. Even the best prints can suffer from poor packaging if they get bent when inserted into a mailing tube, or shipped with inadequate protection from mail handling.
Also, scrutinize the breadth of services the labs offer. Most should offer a wide range of images, ranging from wallet photos to rather large, poster-sized prints. Printroom.com, for example, includes prints up to 40-×−60 inches (which is larger than most). Many services also offer other types of printing products, such as coffee mugs, T-shirts, mouse pads, trading cards, and other items with your photos imprinted on them.
Millions of photos populate the Web today, nearly all of them tiny little 72 ppi images that appear bigger-than-life when displayed on computers screens everywhere in the world. How can you get your images online where others can look at them?
Your images can be uploaded to an online service for presentation, sharing, and printing. You can share your photos with friends, family, teammates, and fellow fans.
Services like Yahoo! Photos or Kodak EasyShare Gallery allow you to post photos that others can purchase (or just look at for fun) Those services charge everyone competitive rates for all kinds of printing options People (including you!) can order posters, coffee mugs, and a variety of photo sizes and frame options.
If you want to sell your photos, several online services let you sell images to clients, and then they print and fulfill them Or, if you have a Web site, you can share your photos with the world that way.
You may be ambitious enough to have your own Web site that you maintain and where you present images This requires that you either hire someone to build a Web site for you, or you use a program like Microsoft FrontPage or another consumer Web-building tool to create a site.
You need your own URL (Uniform Resource Locator, which is a Web address, like www.smithfamily.com, www.bigvalleysoccer.com, or something like that) that you purchase from a Web service; www.register.com offers the chance to look for names and buy them, as does www.GoDaddy.com and many others I like GoDaddy very much and think they have the best service, prices, and products availabel on the Web for acquiring, creating, and maintaining Web sites.
You don't need to know HTML, or even how to use FrontPage, Dreamweaver, or another Web-design software to create your own Web site. You can display sports photos on Web sites generated by easy, interactive online tools at Yahoo's Geocities (www.geocities.com), although annoying pop-up ads plague this program. Also, for Web galleries of images, Photoshop and other applications include automatic gallery and slide show capabilities that can be formatted into HTML and added into a Web site relatively easily. Some word processing and publishing programs, such as Microsoft Word, allow you to save files as Web pages, as well.
Note
For a complete and highly accessible guide to creating your own Web site, check out Build Your Own Web Site by David Karlins. The companion Web site — www.buildyourownwebsite.us — has articles and tools that will get your sports photos online in an hour or less. Also take a look at HTML Complete Course by Donna L. Baker; it teaches you how to create an entire Web site with simple HTML and free tools.
For some people, however, building their own Web site is a bit intimidating, and even building a simple one takes some technical skills. Some photographers using professional online photography fulfillment services use the template provided by the services as their sole Web site, where they can show galleries and include contact information; for other photographers, this isn't enough. For example, as you can see in Figures 11-2 and 11-3, I use my own Web site for fencing photos — www.FencingPhotos.com
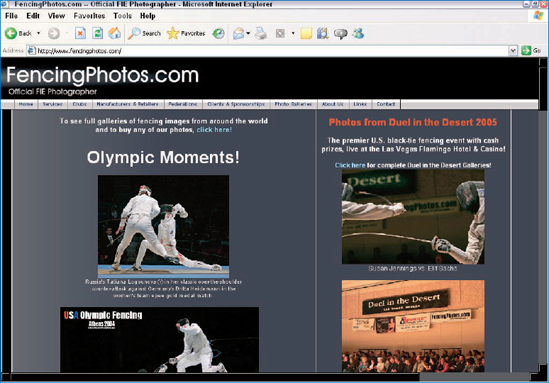
Figure 11-2. The main FencingPhotos.com site, where I present key images and provide a front-end to my photo galleries
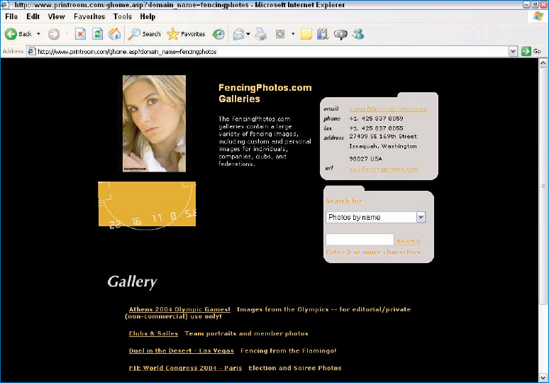
Figure 11-3. The Printroom.com-hosted galleries section of FencingPhotos.com, which presents all the different menus of image galleries for people to find shots of their clubs, individuals, teams, events, competitions, fine art photography, and so on
A gallery of images, shown in Figure 11-4, is presented for people to review and select shots they'd like to buy; they can also glance over the shots and even zoom in, shown in Figure 11-5, to a large image view to see an image better and to make various selections for purchase (such as converting it to black and white). Most people never know or notice that they've technically left the www.fencingphotos.com site; the effect of transition to the Printroom.com-hosted site is seamless.
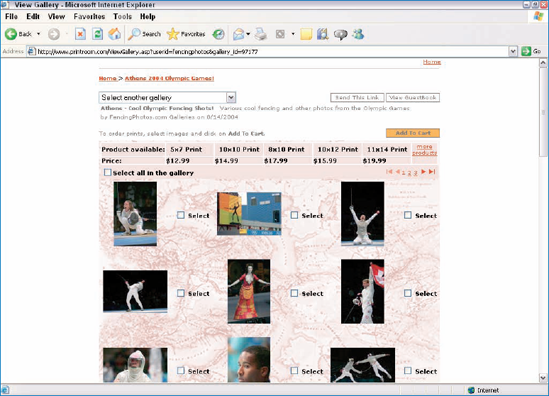
Figure 11-4. A gallery of images from FencingPhotos.com, hosted by Printroom.com but seamless to the Web surfer
If you don't intend to sell your images right away, then you may be satisfied using Yahoo! Photos, Kodak EasyShare Gallery, Snapfish, DotPhoto, or Shutterfly. These services allow you to upload, share, and buy prints easily, and they provide a quick, fast way to get your images online for others to see.

Figures 11-6, 11-7, 11-8, 11-9, and 11-10 show photos on display at various Web services.

Figure 11-6. Yahoo! Photos is one of the easiest photo-sharing services on the Web, and it includes very visual and easy-to-follow directions for setting up an online photo gallery.

Figure 11-7. Buying prints online is a primary use of photo-sharing services, and the prices are very competitive. Kodak EasyShare Gallery, provides high-quality photos printed on, of course, Kodak paper.

Figure 11-8. Most services provide free or inexpensive software utilities that allow you to easily upload thumbnail and full-size images, such as Snapfish Photoshow.
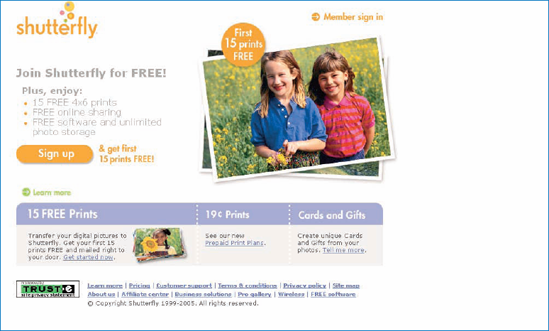
Figure 11-9. Another way many of the services get you to sign up is by offering free prints — which is a great way to try them out, such as this offer from Shutterfly.
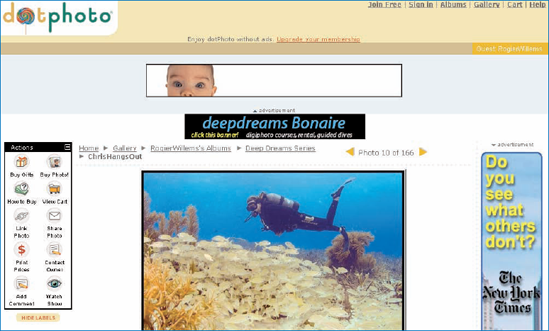
Figure 11-10. DotPhoto features various photographers' galleries on a showcase page, which is a nice way to get your work seen.
Virtually all these services offer a way for you to upload your images to their site easily, without having to change them significantly yourself. If you have your own Web site, you have to resize images so that they are physically small enough that they don't take up lots of size on your Web site and so that they don't take too long to load when people visit your site — typically images are about two or three inches at 72 ppi resolution. (72 pixels per inch is known as screen resolution, and it's the most a computer screen can display, so it's useless to have images with resolutions any higher than that on the Web.)
The services, instead, offer utility software — either online or something you install on your computer — that automatically converts your large image files into small thumbnails and uploads them to their Web site for display. It's better for you to do it on your computer using their software, because uploading the big images would take forever! Figures 11-11 and 11-12 show utility software screenshots from Kodak's Ofoto Now (PC) and Ofoto Express (Mac) that is part of the EasyShare Gallery and Printroom.com's Pro Studio Manager.
Some of the utilities, especially those from sales-oriented services intended for selling photos like Printroom.com, are pretty elaborate, providing additional capabilities such as gallery management and organizational tools and even a way for the software to automatically check for orders and upload full-sized images even if you're not there to check the system.
Note
Preparing images for the Web generally means they need to be much smaller than in print and lower resolution. For galleries, thumbnails are rarely larger than an inch or two wide and tall with a resolution of 72 dpi. Enlarged images may be several more inches wide and tall, but are still 72 dpi. You can resize a digital image to these dimensions using an image-editing package like Photoshop Elements; however, you'll want to save them as separate files. Once a file has been saved in a smaller size, if you try to enlarge it the results will be poor and jaggy (highly digitized due to low resolution). Many online photo services' utility software will create thumbnails automatically for you.
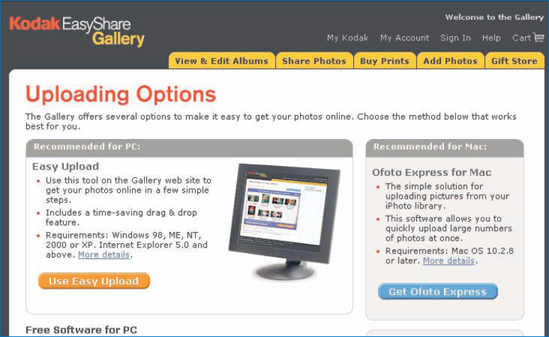
Figure 11-11. Kodak EasyShare Gallery contains simple, step-by-step instructions for using its proprietary image-uploading tool for PCs (Ofoto Now) or Macs (Ofoto Express).
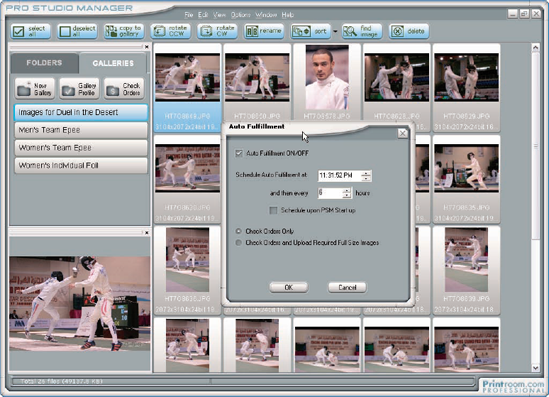
Figure 11-12. Printroom's Pro Studio Manager, in addition to providing uploading and management capabilities, provides a way for the system to check orders automatically at specified intervals. This way, photographers selling images have their orders fulfilled even when they're not there to manage the studio.
One of the factors often differentiating photographers in it for a living from those doing it just for fun is the way they present their images. If you are intent on selling your images, or even if you just want to present your images nicely, it's worth going to the trouble of putting together proof books or albums. You have these display choices:
You can present your images in a live slide show, complete with sound and projection for a big group.
You can create a slide show that you send people as an e-mail attachment or place on a CD or DVD for distribution, complete with music and other fun multimedia components
You can create screen savers to give to friends and family
For any of the various things that can happen to your image(s), you're going to have to figure out whether your digital photo needs to be prepared for the specific use. Depending on the end product, you need to make sure it's the right size and resolution. For example, if it's going to be displayed on the Web, you may need to downsize the image so it's ready to be display and won't choke a Web site because it's too big. The rest of this section looks at these various display choices and how you can make your images look their very best.
Proof books are the mini-albums that allow you to place a large number — 25, 50, or more — of small prints (4 × 6 or 5 × 7s) into slip-covers. Customers or friends can look at the many images and decide on which they may want as larger prints. Typically, you won't have spent much time with these proof images because there are so many of them, and you're counting on people selecting a few images to be enlarged that you'll work on in more detail. Online and local labs all offer proof book services that help to automate the printing of a large number of shots.
Another method for presenting images is to produce contact sheets In the days of film, photographers would place negatives directly in contact with photographic paper and then expose the paper; this would create a sheet with many images, all the exact size of the negatives, for people to review and compare Various image-editing packages, such as ACDSee, allow you to create virtual contact sheets; you simply tell the software to place any number of image files into a contact sheet, and it automates the creation of it It's a nice and remarkably easy way to let people select images, and you can often store one contact sheet as a single image file that lets them review the images as thumbnails in a print instead of online Figure 11-13 shows a contact sheet created with ACDSee of shots that I took at a regional soccer championship.
You may want to be able to look at your photos and compare them in a print, without having to use a computer or have large prints produced. Or you may want an easy way to compare images on the Web without having to page from photo to photo. You can use contact sheets either to print, to save as a file to send to someone, or even to put into HTML format so you can place the sheet on a Web site. Here's how to create a virtual contact sheet using ACDSee.
In your ACDSee file/image browser, select the images you want to put into the contact sheet. You can either select images one by one (hold down the Ctrl button as you do so) or create a special folder with all the files you want to use.
With the images selected, choose Create

Format the contact sheet (by adding drop-shadows or other effects to the thumbnails, for example). You can also choose your output options, you can change the size of the thumbnails, and you can create captions, headers, and footers.
Click OK, and a single file is generated with the images placed and sized correctly with all of your images organized for display at 72 dpi. You can print this file, or you can create a contact sheet for print more automatically by following the next set of steps.
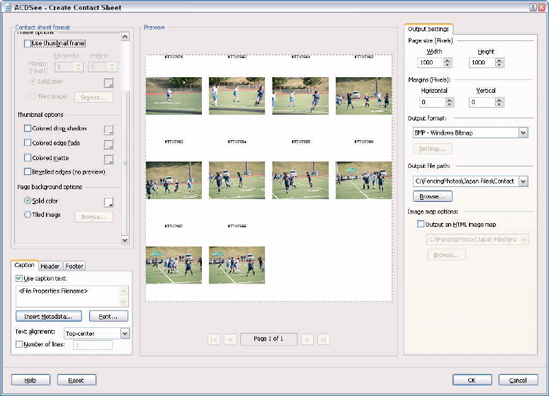
Figure 11-13. You can use ACDSee to create a contact sheet of images. Note the various options availabel for presenting the sheet.
To create a contact sheet to be printed, follow these steps:
In your ACDSee file/image browser, select the images you want to put into the contact sheet. You can either select images one by one (hold down the Ctrl button as you do so) or create a special folder with all the files you want to use.
With the images selected, choose Create
Select your format options for your printed contact sheet. Choose from items such as captions, drop shadows, and so on).
Assuming you've properly set your printer (there's a dialog box to do this), clicking OK prints the contact sheet.
Another way to present images so that they look very professional is to project them using an LCD projector onto a screen. Many photographers believe that showing photos in a large format — such as projected onto a big screen — makes for bigger sales and more impressed clients, and I have to agree with them that it is an impressive way to show photographs. In addition to the hardware required — a computer along with an LCD projector (and these devices are not inexpensive, costing at least $1,500 for one that's reasonably good) — you need software to present the images. You may also want to have music with your presentation, so you need speakers. We get into these products a little later in this chapter.
The bottom line is that image presentation is as important as shooting the pictures well It's as important in photography as it is for a culinary creation to be properly presented by a chef who's worked hard to make it taste incredible — how it looks can have a direct effect on how it's perceived by the diner Likewise, you're undoubtedly working hard to produce great photos, and they deserve to be presented in their best light.
If you're planning to present and project images, you'll want to consider a few tips:
Fewer is better: No one wants to sit through hundreds of images.
Show the best shots of different images, not multiple shots of the same thing.
Mix-up your images unless you have a specific reason for being chronological.
Use a software package that lets you use some fun transitions, but don't go too wild — even a plain, smooth fade often will suffice for all images. Too many transitions gets tiring and distracting.
Some software applications, such as Photodex's ProShow Gold, allow you to add motion effects to your images. By moving the images in and out and turning them slightly, your audience stays engaged to a greater degree.
Don't let slides linger too long, or display them too quickly. Allow you audience to view them, but if they stay too long it gets tedious. About two to four seconds per slide is about right.
Adding music can enhance your presentation.
Every photographer loves to show his or her work — we're all natural hams when it comes to wanting an audience for the two-dimensional prizes we've captured in the field In the past, the only ways to present your work was to give a slideshow with a slide projector or have a gallery showing Today, there are many ways of presenting images to audiences of all sizes, but you should still keep the basic principles outlined in the previous section in mind.
In December 2004, I was asked to present my photographs of the Olympic Games to an audience in Paris of the International Fencing Federation (FIE) annual World Congress meeting, consisting of representatives from about 120 countries around the world This was a golden opportunity to present my work to a highly appreciative audience anxious for an entertaining break from committee and electoral meetings Not only did I have the challenge of figuring out what to show that was both exciting and diplomatic, but I also had to choose a software program that would show the work in the most compelling way.
In addition, the FIE asked me to make copies of the presentation and distribute it to each delegation — 120 copies in all. So I had my work cut out. This section I explains what I did and why, and it offers some choices and recommendations for how you can learn and benefit from my experience.
For years, I've been looking hard for the best product I can possibly find that lets me create high-end, slick slideshows. Many products are on the market, ranging from very easy-to-use but rather limited consumer packages to very high-end authoring tools that require lots of effort to learn and use. Very few products are in the middle, being easy to use for the average photographer, but still powerful enough to provide the options and capabilities they need.
To present images to an audience, photographers need software that effectively provides the following features:
An easy way to load photos into a sequence of slides that can be managed and rearranged easily.
Good options for adding music from a variety of common formats (MP3, WAV, and WMA, for example).
Lots of options for slide transitions — how the slides move from one to the next (for example, with various effects such as fade, wipe, blinds, and so on).
An easy way to synchronize slides and sound so that they work in tandem, beginning and ending together, as well as being able to have multiple tracks play in order.
An easy way to edit and work with images, such as rotating them, moving them around, enlarging/shrinking them, adding text to them, and being able to alter their contrast and other basic attributes.
A way to produce an HTML version of the slide show that is Web-ready to load into a personal Web site.
The ability to output the slideshow in a variety of ways, including producing them as an executable file, a screen saver, or a slide show on a CD containing all the original photos (or not), and being able to produce a DVD or a CD that runs on a DVD player (known as a VCD, or video CD).
I searched in vain for a long time to find a product that met my criteria. I even tried using Microsoft Powerpoint — which is used to give business presentations, and which I use very often for giving workshops — but it handles images miserably in large quantities.
A very powerful archival tool, iView MediaPro, provides one of the more powerful slide show capabilities availabel on the market today, but it still is primarily an image archival and management product. It's very easy to use for creating a very simple slide show: You simply drag and drop slides into a window, which are automatically rendered as thumbnails and consequently are very easy to manage, and you can add sound or video. The software uses its own special terminology that you need to learn to really get the most out of it. For example, it refers to managing images as cataloging; however, after you understand it, the program becomes the most powerful tool availabel today for keeping track of your images. For this reason, I recommend it highly.
For slideshows, the magic solution I finally discovered was a product called ProShow Gold, from a Texas-based company called Photodex Corporation. They produce a consumer version of it, called ProShow, which is also great, but the ProShow Gold was the answer to my prayers, literally: It features all the criteria listed a few sections back in addition to a number of other capabilities, which are especially helpful in protecting my work.
You can set a slideshow to time out, so that it stops running after a matter of weeks or number of presentations, which is invaluable for protecting your work.
You can add a registration number to shows, which the user must have to run it.
You can create a file that runs your slideshow, including the music, transitions, and so on that contains all your images embedded in it so no on can extract them.
Special motion effects, which are highly configurable, allow you to have images move, zooming in and out and around the page from slide to slide, in addition to transitions. This not only looks great and helps keep audiences engaged, but it also protects your work from being videotaped, captured in a screenshot, or otherwise copied.
Remarkably robust image-editing tools let you modify images in the slideshow easily and on-the-fly, which means that you don't have to extract them into a separate image-editing package to adjust them after they're loaded into the show.
It offers easy ways to put multiple shows together, add text, and use a loop option so the show can keep running.
It includes simple tools for synchronizing slides to audio (this feature alone originally sold me on the product), as well as randomizing transitions, motion, and slides.
Maybe I don't even need to tell you that this product was the perfect solution for my presentation in Paris and has now taken a front seat in all my photography workshops to help people easily and quickly display their photos. It let me create a show and screen saver, shown in Figure 11-14, with different transitions from slide to slide (see Figure 11-15) that I could easily copy onto 120 CDs and distribute without having to worry about them being abused, and that gave the delegates a really great gift from the Olympic Games and the fencing federation.

Figure 11-14. I used ProShow Gold to create a slideshow of great sports shots along with music, captions, and lots of special effects.
Unbelievably, ProShow Gold sells for less than $100, and ProShow (the consumer version) sells for even less. For me, this product is as important as Photoshop. Nonetheless, many slideshow packages exist that let you display and present your images to an audience using transitions, sound, and other features.
Now that you have a good idea of what software is out there to help you create a slideshow, you are probably wondering what kind of equipment you need to do this:
A computer loaded with your slideshow package and your images.
An LCD or other type of projector (really large venues will have very powerful projectors to which you can attach your computer) that supports a PC connection.
A highly reflective screen.
Speakers with a subwoofer that attach to your computer.
Tip
There are legal issues involved with incorporating music in a presentation. Adding sound to your presentation makes it much more powerful. However, you need to be aware that there are legal limitations to putting on large shows and playing copy-protected music. Most music on CDs or that you have purchased online limit you to playing them just for your own personal use; [n1]using them in a public performance is usually prohibited by law. For more on legality of reusing copyrighted music, check out Music and Video Downloading: Your Guide to Legal, Safe, and Trouble-Free Downloads by Russell Shaw and Dave Mercer.

Figure 11-15. ProShow Gold offers a large variety of special effects, such as transitions, which move the show from one slide to the next.
Putting on your own show from a big sporting event is lots of fun for you, your family, and your friends. It's a great thing to put on a loop function at a party and just let it run with people getting to enjoy the various images as they happen to look at the screen. Also, giving screen savers or slideshows on a CD or DVD is a wonderful gift.
Another option is to create screensavers, which can be done automatically in ProShow. This makes a nice gift for your friends and for your own computer. ProShow and ACDSee both let you automatically generate a screensaver from your slide show and run it in Windows.
When it comes to photography, nothing is more satisfying than having an individual, customer, family member, or audience, appreciate your work. Today, this can take place online, in print, or even projected in front of a group — all from the digital images you took at one or several sporting events.
Whether you're displaying gallery-quality prints from your spectacular rock-climbing adventure or just showing a slideshow of your daughter's soccer finals, choosing the right format for their ultimate use makes life much easier. A digital image can take on many sizes, formats, and treatments; for example, preparing an image for print can be very different — and create an image of very different size — than producing the same shot to be displayed on a Web gallery.
Online, you can share, sell, and print images easily with a variety of services that range from simple consumer-friendly Web sites to powerful professional online tools and storefronts. Whatever you plan to do with your photos, looking at how they can be processed online is well worth your time to best manage your digital photography workflow.
Finally, getting images displayed with music, transitions, and other accoutrements for a multimedia slide show can be a wonderful way to treat an audience. You can even put images and everything else onto DVDs, CDs, screen savers, and more. A number of software packages are availabel to do this, and you will want to look at them to find the one that best suits your purposes.