C H A P T E R
What Was That?
Good audio captivates viewers, bad audio scares them away. Video editors are often strong on the picture side, but lacking in the audio area. It’s important to realize that audio is more than 50% of what people “see.” It is essential to get your mix right and to smooth out the rough spots—otherwise the viewer has to struggle to comprehend.
Reality television may have lowered the audience’s standards for image quality, but the demands for good sound have not diminished. Fix that hum, remove those pops, make the voice dynamic, and get the best mix. Learn to harness the incredible power inside the “box” to engage your audience.
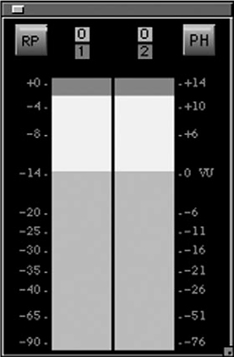
You may never have considered the console as an audio tool, but it is. If you’d like to see the exact peaks of a specific clip or a section of a sequence, or even an entire sequence, here’s what to do:
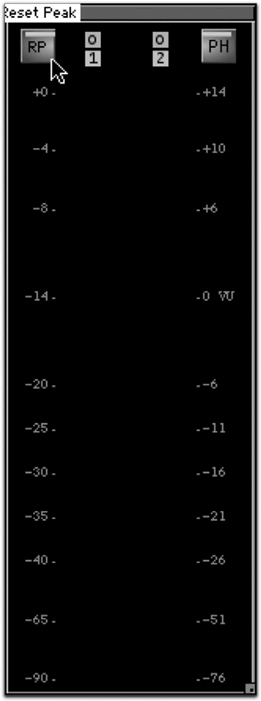
![]() In the Audio Tool, click on the RP button. This resets the peaks that may have been saved in the Audio Tool LED meters and in the console.
In the Audio Tool, click on the RP button. This resets the peaks that may have been saved in the Audio Tool LED meters and in the console.
![]() Play a clip, sequence, or section of a sequence.
Play a clip, sequence, or section of a sequence.
![]() Press Ctrl+6 (Cmd+6) to call up the console.
Press Ctrl+6 (Cmd+6) to call up the console.
In the bottom of the console, amidst all of the other minutia is a little table listing the highest peak for each and every track!

You can have audio clips with different sample rates in your Xpress Pro sequence, which is very handy indeed. But when it’s time to output your sequence you’ll need to convert any audio that doesn’t match the sample rate of your project.

![]() Select your sequence in its bin.
Select your sequence in its bin.
![]() Select Bin>Change Sample Rate. The Change Sample Rate dialog appears.
Select Bin>Change Sample Rate. The Change Sample Rate dialog appears.
![]() From the Sample Rate pulldown, select the sample rate of your project (if you’re not sure what it is, check your Audio Project settings).
From the Sample Rate pulldown, select the sample rate of your project (if you’re not sure what it is, check your Audio Project settings).
![]() From the Quality pulldown, select High.
From the Quality pulldown, select High.
![]() If you would like the original clips deleted, check Delete Original Media.
If you would like the original clips deleted, check Delete Original Media.
![]() Select the drive you would like the new audio clips written to and click OK.
Select the drive you would like the new audio clips written to and click OK.
The non-conforming clips are replaced in your sequence and new audio clips are created in its bin. If you checked Delete Original Media, you’ll find that the original audio clips remain in their bins but their associated master clips have been deleted.
Make sure to be aware of any audio in your sequence that is shared with other sequences or projects, such as tracks from a stock music library. If you have any audio of this nature, make sure not to select Delete Original Media.
You’ll minimize the time it takes to conform audio sample rates by converting music tracks from CDs at the time of import.
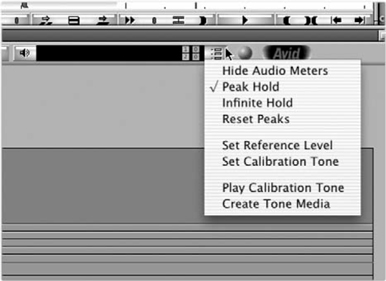
It’s always a good idea to put bars and tone at the beginning of your sequence before you output to tape. In fact, it’s essential to do so if your tape is bound for television broadcast or will be used as a master to make dupes. Luckily, Xpress Pro can generate tone media for you right from the Audio Tool.

![]() Select Tools>Audio Tool or use the keyboard shortcut Ctrl+1 (Cmd+1).
Select Tools>Audio Tool or use the keyboard shortcut Ctrl+1 (Cmd+1).
![]() Click on the Peak Hold (PH) menu button and select Create Tone Media. The Create Tone Media dialog appears.
Click on the Peak Hold (PH) menu button and select Create Tone Media. The Create Tone Media dialog appears.
![]() We recommend keeping the tone media level and frequency at their default settings, but you can change them if you need to.
We recommend keeping the tone media level and frequency at their default settings, but you can change them if you need to.
![]() Set the tone media length. The default of 60 seconds is usually fine.
Set the tone media length. The default of 60 seconds is usually fine.
![]() Set the number of tracks to 2.
Set the number of tracks to 2.
![]() Set your target bin and drive and click OK.
Set your target bin and drive and click OK.
Tone media appears as a clip in your target bin. Cut it into your sequence as you would any other audio file.
As for color bars, you’ll find a folder called Test_Patterns within the SupportingFiles folder in your Xpress Pro application folder. This folder contains stills of color bars for both NTSC and PAL. Import them to an Xpress Pro bin using the File>Import command.
By default, Xpress Pro plays odd-numbered audio tracks through the left channel and even-numbered tracks through the right. You can change Xpress Pro’s default left/right channel panning assignment and have it center all of your tracks for you.

![]() In the Project window, click on the Settings tab.
In the Project window, click on the Settings tab.
![]() Double-click on Audio. The Audio Settings dialog appears.
Double-click on Audio. The Audio Settings dialog appears.
![]() Click the circle next to All Tracks Centered so it turns pink, and close the Audio Settings dialog.
Click the circle next to All Tracks Centered so it turns pink, and close the Audio Settings dialog.
Stereophonic Bliss (Part 2) ![]()
You can also get creative and use the Audio Mix tool to pan your tracks to taste.
![]() Open the Audio Mix tool by selecting Tools>Audio Mix. This is a good candidate for keyboard mapping, because no keyboard shortcut exists.
Open the Audio Mix tool by selecting Tools>Audio Mix. This is a good candidate for keyboard mapping, because no keyboard shortcut exists.
![]() Click and hold in the Pan Level field on the audio track you’d like to modify. The Audio Pan Slider appears.
Click and hold in the Pan Level field on the audio track you’d like to modify. The Audio Pan Slider appears.
![]() As you continue to hold the mouse button down, adjust the slider to the left or the right to pan the audio track where you want it.
As you continue to hold the mouse button down, adjust the slider to the left or the right to pan the audio track where you want it.
If you want to adjust multiple segments at once, use the Set Pan On Tracks command in the Audio Mix Tool Fast Menu. It applies the pan value of the current segment to its entire track, or a portion thereof. Set In and Out Marks in your Timeline to adjust a portion of the track, or clear any In and Out Marks to adjust it all.
The Audio Pan Sliders are convenient but don’t offer a particularly fine level of control. For more precise audio panning, use the numeric keypad to enter a value. Click on the Pan Level field and type away as described below. Positive values pan to the right and negative values to the left.

- To pan hard right (all the way to the right channel), type 100, then press Enter (on the numeric keypad, not the Return key).
- To pan hard left, type –100, then Enter.
- To pan to the center, type 0, then Enter.
- You can also center pan by Alt+clicking (Option+clicking) on the Pan Level Field.
You can type in any positive or negative value between 0 and 100, with 50 being halfway between center and hard left/right. Pan tracks to give your audio more dimension. Try placing a sound effect in a specific area of stereo space to emphasize its position on screen.
If you’ve gone the distance and set yourself up with a killer Xpress Pro editing system, you undoubtedly have a nice pair of speakers to monitor your audio. All the subtle nuances (and flaws) of your audio will sound clear as day to you. Most likely, the viewers of your show won’t have such nice speakers; they’ll be listening to the crappy speakers that most television manufacturers continue to use in their products. For this reason, it’s imperative to check your audio on a cheap TV before you output your final cut. That way you can hear exactly what your audience will (or won’t) hear and can make any necessary adjustments.

Try laying your show off to VHS and playing it back through the cheapest TV set you can find. We suggest going so far as playing your sequence back through your computer’s internal speaker, if it has one. If your audio sounds good this way, you can be confident it’ll sound good anywhere!
Adjust the Audio Tool in the Timeline ![]()
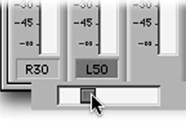
With limited screen real estate, you may not want to keep the Audio Tool up all the time, but it is definitely a handy item to have. Well, guess what? The little audio LED meters in the Timeline toolbar aren’t just meters. They give you access to most of the functions of the Audio Tool, including the ability to adjust the output level.
You can adjust the levels on a Mac by Option+clicking the tiny speaker icon. The small button to the right of the meters is the Meter menu, which gives you the rest of the Audio Tool features.
Less Is More ![]()
The more audio tracks you have in your sequence, the more difficult it can be to achieve a satisfactory audio mix. It’s tempting to keep raising levels here and there, but the more you do this the likelier you are to start residing in audio meter red zone (it’s actually more of a light brown in Xpress Pro). When you need to raise the level of something in a mix, try lowering something else instead. Quite often it will have the same effect. It’s a trick that professional mixing engineers have used for years. Mixing audio is always a balancing act, so looking at things from all angles can help keep things from swaying too far one way or the other.
Communication Is the Key ![]()
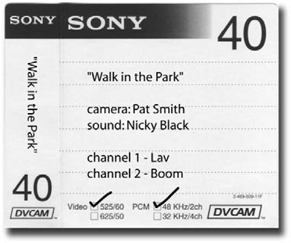
It’s important to know how the audio on your source tapes was recorded. There are some common techniques, such as recording a lavalier mic on the left channel and a shotgun mic on the right. Sometimes several microphones are recorded on a single channel, and sometimes there are channels with nothing on them at all. The only way you can be sure about what you’re hearing is to communicate with your director, cameraman, or audio engineer to find out exactly how they recorded audio to tape. Get them to enter this information on the tape labels, and it’ll stay attached to the footage to help everyone down the line in the post-production chain.
Four In One ![]()
In many cases you’ll need to have more than one of Xpress Pro’s principal audio tools open at the same time. This can easily lead to a very cluttered screen, especially if you are editing on a one-monitor system. Well, you need never again suffer this agony as you can toggle between the various audio tools in a single window. With any of the principal audio tools open (Audio Mix, Automation Gain, Audio EQ, or AudioSuite), click on the pulldown menu in the upper-left corner of its window and select which tool you want see. Toggle back and forth from here, instead of opening each tool individually.

Eventually you’ll have to deal with an audio clip that just wasn’t recorded loud enough. Even when you raise the track’s level to the maximum in the Audio Mix or Automation Gain Tool, it still won’t cut through the clutter. An easy way to increase the volume of a track that isn’t loud enough is to double it. Copy and paste the same audio clip into another audio track in your Timeline at the same point in time, and its volume will be effectively doubled.
![]() Click the Segment Mode button in the Timeline or press the Segment Mode key on your keyboard.
Click the Segment Mode button in the Timeline or press the Segment Mode key on your keyboard.
![]() Click on the audio segment you wish to double.
Click on the audio segment you wish to double.
![]() Select Edit>Copy or use the keyboard shortcut Ctrl+C (Cmd+C).
Select Edit>Copy or use the keyboard shortcut Ctrl+C (Cmd+C).
![]() Make sure there is an audio track with empty space below your highlighted segment. You may need to add another audio track by selecting Clip>New Audio Track.
Make sure there is an audio track with empty space below your highlighted segment. You may need to add another audio track by selecting Clip>New Audio Track.
![]() While holding down Option (Control), drag your highlighted segment to the empty space on the track below.
While holding down Option (Control), drag your highlighted segment to the empty space on the track below.
![]() Move the Position Indicator to the first frame of your highlighted segment and select Edit>Paste, or Ctrl+V (Cmd+V). The segment is pasted back in its original track.
Move the Position Indicator to the first frame of your highlighted segment and select Edit>Paste, or Ctrl+V (Cmd+V). The segment is pasted back in its original track.
You now have two copies of the same audio segment at the same point in time in your Timeline. Make sure you leave Segment Mode when you’re done by clicking the Segment Mode button.
They Went Thataway ![]()
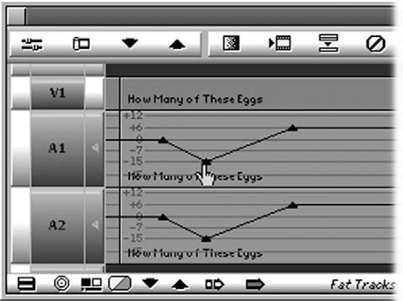
Xpress Pro lets you keyframe audio levels to change the levels of your audio tracks over time. Unfortunately, it does not let you keyframe your audio channels’ pan assignments. As an example, let’s say you wish to have the audio of an actor who is walking across the screen left to right follow her as she moves. An effective technique for this is to fake a keyframed pan by using dissolves.
![]() Make sure the audio tracks you want to affect are the only ones selected.
Make sure the audio tracks you want to affect are the only ones selected.
![]() Using the Add Edit button in the Timeline toolbar or the Add Edit key on your keyboard, add an edit to your audio where you want the animated pan to begin and another where you want it to end.
Using the Add Edit button in the Timeline toolbar or the Add Edit key on your keyboard, add an edit to your audio where you want the animated pan to begin and another where you want it to end.
![]() Use Add Edit to divide this newly created segment into five segments of equal length.
Use Add Edit to divide this newly created segment into five segments of equal length.
![]() Open the Audio Mix Tool by selecting Tools>Audio Mix.
Open the Audio Mix Tool by selecting Tools>Audio Mix.
![]() In the Audio Mix Tool, assign pan values for the five new segments as follows:
In the Audio Mix Tool, assign pan values for the five new segments as follows:
- Segment 1—L100
- Segment 2—L50
- Segment 3—MID
- Segment 4—R50
- Segment 5—R100
You will need to advance the position indicator to the next segment in order to change its pan value.
![]() Using the Quick Transition button in the Timeline or the Quick Transition key on your keyboard, add a 30-frame dissolve, centered on cut, between each of the five segments.
Using the Quick Transition button in the Timeline or the Quick Transition key on your keyboard, add a 30-frame dissolve, centered on cut, between each of the five segments.
![]() Play back your keyframed pan to see how it sounds.
Play back your keyframed pan to see how it sounds.
Depending on the duration of the audio, you might need to create more than five segments, or make the dissolve duration shorter or longer, but with a little tweaking you’ll have audio that follows your actor across the screen. This is just one example, but once you get the hang of it you’ll be able to keyframe audio pans for all types of situations.
All too often, we get source tapes with a hum on the audio tracks. Noise from the AC circuit can easily infiltrate an audio cable during recording and cause this annoyance. If this happens to you, here’s an easy way to get rid of it:
![]() In your Timeline, select the audio tracks with the offending hum.
In your Timeline, select the audio tracks with the offending hum.
![]() Park the position indicator somewhere within the segments from which you’d like to remove the hum.
Park the position indicator somewhere within the segments from which you’d like to remove the hum.
![]() Open the Audio EQ Tool by selecting Tools>Audio EQ.
Open the Audio EQ Tool by selecting Tools>Audio EQ.
![]() Click on the Audio EQ Tool Fast Menu, and select NTSC Hum Buster or PAL Hum Buster, depending on which standard your footage was recorded.
Click on the Audio EQ Tool Fast Menu, and select NTSC Hum Buster or PAL Hum Buster, depending on which standard your footage was recorded.

Rubber band keyframes make it easy to control your audio levels without ever leaving the Timeline. It’s better than adding segment edits and dissolves to raise or lower the audio on a track—you get much more control with keyframes. If you want to move those keyframes around in time, though, you’ll need to use a modifier key:
- To move Rubber Band keyframes left and right, hold down Alt (Option) while you click and drag the keyframe left and right.
- To snap your Rubber Band keyframes to the audio reference lines in the Timeline track, hold down Ctrl (Cmd) as you click and drag the keyframe up and down.
Modify Me ![]()
In many cases, holding down a modifier key such as Alt, Option, Cmd, or Control while clicking on a button, slider, or field performs hidden functions. We encourage you to poke around for yourself as you’ll discover all sorts of ways to save yourself mouse clicks and menu picks. Here are a few in the Audio Mix Tool that we find useful:

- Alt+click (Option+click) on a level slider or volume level field to reset it to 0.
- Alt+click (Option+click) on a pan level field to pan it center (Mid).
- Alt+click (Option+click) on a slider’s track number to select which track is assigned to that slider.
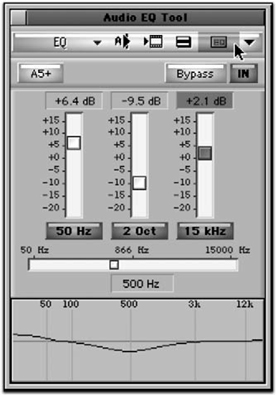
The Audio EQ Tool has a Fast Menu that contains some very useful preset templates. You can add your own templates to that menu to build a library of preset EQs that can really save the day when you’ve got limited time to sweeten your audio. Consider building a library of templates for different types of microphones, voices, and background noises.

When you achieve an EQ setting that you want to save, do the following:
![]() Park the position indicator over the segment in your Timeline that has your desired EQ applied to it.
Park the position indicator over the segment in your Timeline that has your desired EQ applied to it.
![]() Make sure the track that your EQ is applied to is turned on. You should turn off other audio tracks if they also contain EQs at that point in your Timeline.
Make sure the track that your EQ is applied to is turned on. You should turn off other audio tracks if they also contain EQs at that point in your Timeline.
![]() Open the Audio EQ Tool by selecting Tools>Audio EQ.
Open the Audio EQ Tool by selecting Tools>Audio EQ.
![]() Select File>Open Bin, or use the keyboard shortcut Ctrl+O (Cmd+O). Depending on your platform, do one of the following:
Select File>Open Bin, or use the keyboard shortcut Ctrl+O (Cmd+O). Depending on your platform, do one of the following:
- If you are on a PC, navigate to Program Files/Avid/Avid Xpress/Supporting Files/Site_Effects”.
- If you are on a Mac, navigate to Applications/Avid Xpress Pro/Supporting Files/Site_Effects.
![]() Open the file Site_EQs_Bin.avb. The Site EQs bin opens.
Open the file Site_EQs_Bin.avb. The Site EQs bin opens.
![]() Drag the purple effect icon from the EQ tool to the Site EQs bin, and close the bin when finished.
Drag the purple effect icon from the EQ tool to the Site EQs bin, and close the bin when finished.
Your new EQ template is now listed in the Fast Menu, and you can access it from any project.
Suite Menu ![]()
You can use the same steps to save AudioSuite effect templates to the AudioSuite Tool Fast Menu. Just open Site_AudioSuite_Bin.avb from the Site_Effects folder, instead of Site_EQs_Bin.avb.

![]()
Perform dynamic adjustments to your audio tracks by using the Audio Loop Play button. It’s found in the four main audio tools and lets you loop a section of audio while you “turn the knobs” to find that perfect level, pan, or EQ setting. We find this feature particularly useful when we’re trying to isolate a frequency in the Audio EQ Tool.
- Select the section of audio you wish to loop by setting In and Out marks in your Timeline.
- If you set no marks, Xpress Pro will loop the audio segment closest to the position indicator.
- Monitor as few tracks as possible to get the fastest response.
- When you make an adjustment, it might take a few seconds for the change to become audible. This will vary based on the speed of your computer and how many tracks you are monitoring.
- Use the Bypass button to make a before-and-after comparison.
Listening to the same bit of audio over and over again might drive you crazy, but it’s often the best way to fine-tune a mix to perfection.
In Xpress Pro, the master output volume control is well hidden in the Output tab of the Audio Project Settings dialog. If you output only to DV via FireWire, then you should really never change its default setting of 0. You’ll get optimal quality this way. In fact, it’s really easy to cause distortion by making even minor adjustments. That having been said, you can use it to raise or lower your master output level if you’re ready to lay off to tape and the whole thing is just too quiet or loud. Just don’t say we didn’t warn you!

If you’re outputting to analog tape via Mojo or a D/A converter, then you might need to make adjustments here. To access the master Output Gain control:
![]() In the Project window, click on the Settings tab.
In the Project window, click on the Settings tab.
![]() Double click on Audio Project. The Audio Project Settings dialog appears.
Double click on Audio Project. The Audio Project Settings dialog appears.
![]() Click the Output tab.
Click the Output tab.
![]() Adjust the master audio output level by using the Output Gain slider or by typing a value into the Output Level field.
Adjust the master audio output level by using the Output Gain slider or by typing a value into the Output Level field.
If your deck has audio meters, make sure to set its input level, and Xpress Pro’s output level, as you play a reference tone from your Xpress Pro sequence.
Don’t confuse the Output Gain control with the Master Volume control. Output Gain affects the volume of what’s going to tape, while Master Volume affects the volume of what’s going to your computer’s speakers.
Mixing audio for long periods of time fatigues the ears. Eventually your aural perception starts to change. With this fatigue comes the tendency to start cranking up audio levels. When you find yourself in this situation, lay off a section of your show to tape, play it back through your home TV, and compare it to some other content such as a DVD movie, or even a television broadcast. This will give you a sense of the overall volume and EQ of your mix relative to what your audience is used to hearing. Is your mix too loud? Too soft? Is the dialogue buried under the music? It’s a good reality check to take, especially when you’ve been in the Xpress Pro driver’s seat a bit too long.
London Calling (Part 1) ![]()
Simulate the sound of a voice coming through a telephone receiver without ever using a phone:

![]() In your Timeline, park the position indicator over the segment of audio you wish to make sound like it’s coming through a telephone.
In your Timeline, park the position indicator over the segment of audio you wish to make sound like it’s coming through a telephone.
![]() Make sure your segment’s track(s) are turned on.
Make sure your segment’s track(s) are turned on.
![]() Open the Audio EQ Tool by selecting Tools>Audio EQ.
Open the Audio EQ Tool by selecting Tools>Audio EQ.
![]() Click on the Audio EQ Tool’s Fast Menu and select Telephone EQ ‘A’.
Click on the Audio EQ Tool’s Fast Menu and select Telephone EQ ‘A’.
![]() Click the Audio Loop button to listen to the results. Depending on the speed of your system, you may need to render the EQ first by clicking the Render Effect button.
Click the Audio Loop button to listen to the results. Depending on the speed of your system, you may need to render the EQ first by clicking the Render Effect button.
You can also try Telephone EQ ‘B’ and see which works best for your particular audio segment.
The Telephone EQ presets mimic the telephone-voice-sound by cutting low and high frequencies while boosting the midrange. You can reverse this to remove the telephone-voice-sound from audio. The Telephone EQ ‘B’ preset cannot be edited, so here’s how do it with Telephone EQ ‘A’:

![]() Apply the Telephone EQ ‘A’ preset to your audio using the steps listed in the first half of the tip.
Apply the Telephone EQ ‘A’ preset to your audio using the steps listed in the first half of the tip.
![]() Set the three EQ sliders as follows (from left to right):
Set the three EQ sliders as follows (from left to right):
- 1st slider: +15dB
- 2nd slider: -10.5dB
- 3rd slider: +15dB
Take a look at the EQ graph. It’s now a mirror-image of where you started from.
As with any EQ, the exact settings will vary depending on the characteristics of your source audio. This should get you in the ballpark, then use Audio Loop Play while you tweak the sliders to fine-tune.
The Baby with the Bathwater ![]()
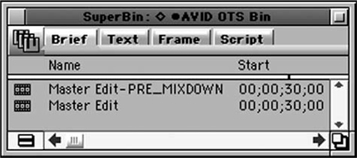
Performing an audio mixdown is necessary if you want to monitor more than eight tracks of audio at once (the most Xpress Pro allows). Mixing down is also a common workaround for the 1-AudioSuite-Effect-Per-Segment limitation. This is all fine and dandy until the time comes that you need to recapture footage or output an EDL. You won’t be able to, as tape name and timecode information get thrown out when the mixdown takes place. To save yourself from having to manually search for that missing bit of footage later on, save a pre-mixdown version of your sequence. Since it will still contain all your original audio segments, with their related tape names and timecode locations, you can refer to it should the need arise.
Working in Xpress Pro, you’ll most commonly deal with audio material that’s sampled at 48kHz, 44.1kHz, and 32kHz. Here’s what you need to know:
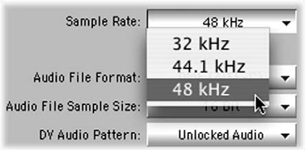
- Audio from a camcorder that was set to record at 16-bit has a sample rate of 48kHz.
- Audio from a camcorder that was set to record at 12-bit has a sample rate of 32kHz.
- Audio tracks from a CD have a sample rate of 44.1kHz.
- You should always set your camcorder to record at 16-bit.
- You should always set your Xpress Pro project’s sample rate to 48kHz unless your source audio is predominantly 32kHz.
- When importing tracks from audio CDs, always click Yes when asked if you want Xpress Pro to perform the sample rate conversion, unless time is a factor (you’ll have to convert them before output anyway, so you may as well get it out of the way now).
Your Free Music Librarian ![]()
Now that iTunes is cross-platform, all Xpress Pro users can use it to create a killer production music library. And unlike a real librarian, this one works for free. It automatically loads track info for most stock music library CDs. It can also sample-rateconvert your CD audio tracks from 44.1kHz to 48kHz as it imports them, to save you from having to convert upon import into Xpress Pro (you can set this up in the Importing section of the iTunes Preferences dialog). We use it to create playlists of music selects and burn them to CDs for our clients. We also use it to encode MP3s to email to our graphic artist when she needs to sync an animation to a piece of audio from our Xpress Pro sequence.

Set a global level for your entire track by using the Set Level On Track command in the Audio Mix Tool Fast Menu. It sure beats adjusting the level on each track segment individually.

![]() To make a global adjustment, clear any In and Out marks in your Timeline. To adjust just a portion of the Timeline, select it by setting In and Out marks.
To make a global adjustment, clear any In and Out marks in your Timeline. To adjust just a portion of the Timeline, select it by setting In and Out marks.
![]() Park your position marker over any audio segment within the range you wish to adjust.
Park your position marker over any audio segment within the range you wish to adjust.
![]() Open the Audio Mix Tool by selecting Tools>Audio Mix.
Open the Audio Mix Tool by selecting Tools>Audio Mix.
![]() In the Audio Mix Tool, enable your desired track by clicking on its Track Number button so it turns purple. Repeat for any additional tracks you’d like to adjust.
In the Audio Mix Tool, enable your desired track by clicking on its Track Number button so it turns purple. Repeat for any additional tracks you’d like to adjust.
![]() Set the desired level on your tracks.
Set the desired level on your tracks.
![]() Click on the Audio Mix Tool Fast Menu and select Set Level On Track—Global if you are making a global adjustment or Set Level On Track—In/Out if you’ve set In and Out marks.
Click on the Audio Mix Tool Fast Menu and select Set Level On Track—Global if you are making a global adjustment or Set Level On Track—In/Out if you’ve set In and Out marks.
The level adjustment is now applied to your entire track or a portion of it. You can use the same steps to make a global pan setting by using the Set Pan On Track command, also found in the Audio Mix Tool Fast Menu.
Similar commands can be found in the Fast Menus of the Automation Gain, Audio EQ, and AudioSuite tools. Familiarize yourself with them, because they’re the best way to apply adjustments or effects to large groups of audio segments.
If you can tap a beat on the table, you can cut video to music in Xpress Pro. All you need to do is play the music from your Timeline as you tap the beat on the Add Edit key. Cutpoints will be created, synchronized with the music, and you can drop in pieces of video to snap-to the rhythm of your soundtrack.

- Start with a sequence that has your music already edited into it.
- Make sure you have an empty video track above your music. If needed, add a new one by selecting Clip>New Video Track or using the keyboard shortcut Ctrl+Y (Cmd+Y).
- Make sure the Add Edit key is mapped to your keyboard. It’s the H key by default.
- Turn off all tracks but the empty video track, otherwise you’ll create cut points on them as well.
Click the Play button, and as your music plays tap the rhythm on the Add Edit key (don’t click the Add Edit button on the screen—that will stop playback). At the end, what you’ll have is a video track of filler segments all timed to the beat of your music. Replace each segment with video of your choosing, and you’ve got a perfect rhythmically-timed edit!
Audio recorded on analog tape always has a certain degree of tape hiss. In best cases it’s virtually inaudible; in worst cases it can sound like your audio was recorded in a snakepit. Use Xpress Pro’s Tape Hiss Filter to remove it, and your audio will enjoy a step up in quality:
![]() Park the position indicator over a segment where you wish to remove tape hiss.
Park the position indicator over a segment where you wish to remove tape hiss.
![]() Make sure the tracks for your segment are turned on and other audio tracks are turned off.
Make sure the tracks for your segment are turned on and other audio tracks are turned off.
![]() Open the Audio EQ Tool by selecting Tools>Audio EQ.
Open the Audio EQ Tool by selecting Tools>Audio EQ.
![]() Click on the Audio EQ Tool’s Fast Menu and select Tape Hiss Filter.
Click on the Audio EQ Tool’s Fast Menu and select Tape Hiss Filter.
Listen to the results. Chances are this will have fixed the problem. Since the Tape Hiss Filter cuts high-end frequencies, you may experience the side-effect of unwanted dropoff in high end. If that’s the case, try the Tape Hiss Filter with High End Boost EQ preset instead. It’s not always as effective as the basic Tape Hiss Filter but can be a useful alternative.

We always advise on getting as much work done up front as possible. If you’ve captured or imported audio that you know you’ll need to apply level, panning, or EQ adjustments to and you’ve got some time on your hands before editing begins, apply adjustments directly to the source clips. It’s one way of giving yourself a head start.

![]() Load the clip you wish to adjust into the Source Monitor by double-clicking it in its bin.
Load the clip you wish to adjust into the Source Monitor by double-clicking it in its bin.
![]() Click the Toggle Source/Record in Timeline button, which can be found in the lower left of the Timeline window. The source clip’s tracks appear in the Timeline.
Click the Toggle Source/Record in Timeline button, which can be found in the lower left of the Timeline window. The source clip’s tracks appear in the Timeline.
![]() Apply any desired adjustments in the Audio Mix, Automation Gain, or Audio EQ tools. All of these tools are accessible from the Tools menu.
Apply any desired adjustments in the Audio Mix, Automation Gain, or Audio EQ tools. All of these tools are accessible from the Tools menu.
Remember to click the Toggle Source/Record in Timeline button again when you’re finished so your sequences, instead of your sources, will appear in the Timeline window.
You can also apply AudioSuite effects to your source audio clips. Drag the clip from its bin to the AudioSuite window (this works only with master clips, not subclips).
A source audio clip with uneven levels can make your life miserable. This is a common problem with talking head footage. Professional voiceover artists know how to keep the volume of their voice consistent, but for everyone else there’s usually some variance in audio level. Instead of having to set tons of audio level keyframes to fix this, use the AudioSuite Compressor. It narrows the dynamic range of your source audio to remove spikes or dropouts in audio level. For a quick fix, there’s a preset for uneven levels in a voice recording:

![]() Park the position indicator over a segment of audio that contains uneven levels.
Park the position indicator over a segment of audio that contains uneven levels.
![]() Make sure the tracks for your desired segments are turned on and other audio tracks are turned off.
Make sure the tracks for your desired segments are turned on and other audio tracks are turned off.
![]() Open the AudioSuite Tool by selecting Tools>AudioSuite.
Open the AudioSuite Tool by selecting Tools>AudioSuite.
![]() Click on the AudioSuite Fast Menu and select Compressor>8to1 Voice Over.
Click on the AudioSuite Fast Menu and select Compressor>8to1 Voice Over.
![]() Render by clicking the Render Effect button at the top of the AudioSuite window.
Render by clicking the Render Effect button at the top of the AudioSuite window.
When Background Noise Is Good ![]()
We’ve included some tips in this section to help you remove unwanted noise from your audio tracks. That being said, background noise is an inherent part of any audio recorded in the field. When you cut together a string of sound bites, for example, your sequence will probably have gaps in the audio tracks. During those gaps, things may sound too quiet as the background noise from the original environment is gone. You can smooth out these gaps by filling them with room tone, which is audio of the room, or environment, where the recording took place.

Experienced audio engineers always record room tone at the end of a session. Sometimes this will be listed on a shot log, and sometimes you can identify it by finding video of a microphone or mic boom, which indicates that room tone is present on the audio. Sometimes you have to locate it by scrubbing to the end of a tape and finding it there. In any case, you should find out if it was recorded, and even if it wasn’t you might be able to find a few dead seconds within your source audio and use that.
You should determine at the beginning of your project whether your final audio output will be stereo (two channels) or mono (one channel). Once you make a decision, try to stick with it. If you start one way and then switch horses midstream, your relative audio levels will change and you could very well be faced with the task of adjusting the levels of every audio segment in your sequence.

Set your project to stereo or mono in the Audio Project Settings dialog:
![]() In the Project window, click on the Settings tab.
In the Project window, click on the Settings tab.
![]() Double-click Audio Project. The Audio Project Settings dialog appears.
Double-click Audio Project. The Audio Project Settings dialog appears.
![]() Click on the Output tab.
Click on the Output tab.
![]() Choose Stereo or Mono by clicking on the Mix Mode Selection button to toggle.
Choose Stereo or Mono by clicking on the Mix Mode Selection button to toggle.
One case where it makes sense to temporarily switch to mono is if you are laying off a stereo sequence to a mono VHS deck. Remember that levels will shift, but at least you’ll be able to get both channels of audio onto your tape.
Step Up and Take a Solo ![]()
You’ve got multiple audio tracks but just want to monitor one or two of them. The obvious way to do this would be to turn off the audio tracks you don’t want to monitor by clicking on their speaker icons in the Timeline, but this will be a major pain if you have loads of ’em. You’d have to turn them all off individually and then turn them all back on again. A much easier way is to Ctrl+click (Cmd+click) on the speaker icon for the tracks you wish to solo. This turns the speaker icon green for the tracks you’ve soloed. To monitor all your tracks again, simply click on the one of soloed tracks.

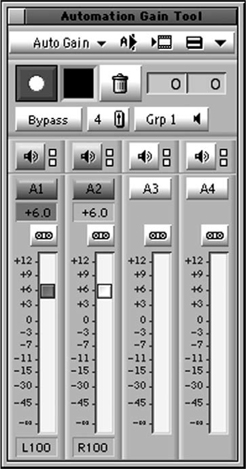
Xpress Pro’s Automation Gain Tool lets you mix your audio tracks live as your sequence plays. It records any level adjustments you make by creating keyframes. This feature really comes in handy when you want to ride the levels to produce a perfect audio mix, but it also can create an unfathomable quantity of keyframes. Here’s how to do it without creating an overabundance of those little black triangles.
![]() Select the section of audio you want to mix live by setting In and Out marks in your Timeline.
Select the section of audio you want to mix live by setting In and Out marks in your Timeline.
![]() Open the Automation Gain Tool by selecting Tools>Automation Gain.
Open the Automation Gain Tool by selecting Tools>Automation Gain.
![]() Select which tracks you want to mix by clicking on their Track Selection buttons so they turn purple.
Select which tracks you want to mix by clicking on their Track Selection buttons so they turn purple.
![]() Select which tracks you want to monitor by clicking on their speaker icons so they turn purple. The fewer tracks you monitor, the better your tool response will be.
Select which tracks you want to monitor by clicking on their speaker icons so they turn purple. The fewer tracks you monitor, the better your tool response will be.
![]() Click the Record button in the Automation Gain Tool.
Click the Record button in the Automation Gain Tool.
![]() As your sequence plays back, adjust the level slider(s) to mix your audio in real time. When your Out mark is reached, playback stops.
As your sequence plays back, adjust the level slider(s) to mix your audio in real time. When your Out mark is reached, playback stops.
![]() Click on the Automation Gain Tool Fast Menu to list its contents.
Click on the Automation Gain Tool Fast Menu to list its contents.
![]() Select Filter Automation Gain On Track—In/Out. This reduces the newly created keyframes to a manageable amount.
Select Filter Automation Gain On Track—In/Out. This reduces the newly created keyframes to a manageable amount.
To give yourself some lead-in time, set a preroll amount (in seconds) in the Automation Gain Tool Preroll field before you start recording. It’s directly to the right of the Trash icon.
The mouse can be in only one place at a time, and thus you can ride only one audio level fader at a time. If you want to be able to mix more than one track at a time, consider investing in a MIDI-compatible audio mixer or automation controller such as the Avid-qualified JL Cooper FaderMaster Professional or the Digi002 control surface from Digidesign. The hardware faders on these devices control the level sliders in Automation Gain, and you can manipulate up to eight tracks at the same time. If you use audio production software such as ProTools, you can use this device with that as well.

Audio Sweetness ![]()
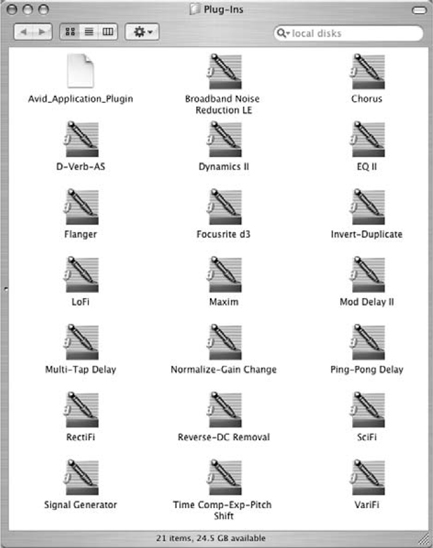
A handful of AudioSuite plug-ins are included with Xpress Pro, but you don’t have to stop there. Loads of third-party developers make them, and you can choose from things like sci-fi sound effects, advanced EQs, and voice enhancement filters. Even though AudioSuite plug-ins are generally designed for Pro Tools, you can use many of them with Xpress Pro as well. A good place to start is with the demo plug-ins included on the Xpress Pro installer CD. You’ll find it in the Goodies folder. Run the installer, and take ‘em for a test drive. A comprehensive list of what’s available can be found on the Digidesign web site. They’re the division of Avid that makes Pro Tools. Go to www.digidesign.com and follow the link to Developers, then Plug-In Info.
A good companion to Xpress Pro is Bias SoundSoap, an audio cleaning solution that’s geared to make your sound squeaky clean. It’s one of those tools we turn to in a deadline crunch, since it does most of the work automatically. Tape hiss, buzzing, hum, rumble, and most other types of background noise can be eliminated with a single click of the Learn Noise button. Since SoundSoap is a standalone tool, it can also be used to clean audio for other applications, not just Xpress Pro. Go for a test wash at www.bias-inc.com/products/soundsoap.

A New Duration ![]()
Editing can sometimes feel like assembling a jigsaw puzzle—it’s a challenge to get all the pieces to fit together. Sometimes a piece of audio just won’t fit, such as a voiceover or music track that needs to fit precisely in a 30-second spot. When this happens, use the Time Compression Expansion plug-in in the AudioSuite window.

![]() Park the position indicator within the segment of audio you’d like to compress or expand.
Park the position indicator within the segment of audio you’d like to compress or expand.
![]() Make sure your desired audio tracks are turned on, and all others are off.
Make sure your desired audio tracks are turned on, and all others are off.
![]() Open the AudioSuite tool by selecting Tools>AudioSuite.
Open the AudioSuite tool by selecting Tools>AudioSuite.
![]() Click on the Plug-In Selection Menu and select Time Compression Expansion.
Click on the Plug-In Selection Menu and select Time Compression Expansion.
![]() Click the large purple plug icon to open the Time Compression Expansion controls.
Click the large purple plug icon to open the Time Compression Expansion controls.
![]() In the Destination Length field (the second field from the top in the right column), type in the desired length of your audio segment in the format mm:ss. For example, if you want a duration of 1 minute and 30 seconds, type 01:30.
In the Destination Length field (the second field from the top in the right column), type in the desired length of your audio segment in the format mm:ss. For example, if you want a duration of 1 minute and 30 seconds, type 01:30.
![]() Click OK to close the Time Compression Expansion window.
Click OK to close the Time Compression Expansion window.
![]() Click the Render Effect button in the AudioSuite Window.
Click the Render Effect button in the AudioSuite Window.
Time Compression Expansion works best with minor adjustments, such as compressing a 62-second segment to fit 60 seconds. If you compress or expand a segment too far, the results are usually not very good.