
Lesson Files | iLife08_Book_Files > Lessons > Lesson15 > L15_Photo Page Assets iLife08_Book_Files > Lessons > Lesson15 > L15_Blog Assets |
Time | This lesson takes approximately 90 minutes to complete. |
Goals | Build a photo page Create a blog Add blog entries Incorporate additional photos in a blog Make a video blog entry Create a podcast entry |
Blog. n. A website on which one or more people produce an ongoing narrative or discussion. (From web log.)
That’s a fine definition as far as it goes, which is really not very far at all. It leaves out the most important point about blogs, which is that blogs—and their offshoots like podcasts and web photo albums—are among the most powerful, flexible, convenient, and enjoyable ways for you to get personal in public that civilization has yet seen. From the privacy of your own home, or from anywhere else you can get on the web for that matter, you can express yourself with words, pictures, and video, sharing your thoughts and experiences with a few million of your closest friends in a matter of moments—and those friends can tell you how they feel about it mere seconds after your fingers have left the keyboard.
Think we’re exaggerating? Tell us about it on your blog.
You’ve already seen how iPhoto makes it simple to post anything from your picture library online in a matter of moments. But if you already have a website, and want to post your pictures on a webpage that matches your site’s other pages in style, you need something else. That something else is an iWeb photo page.
An iWeb photo page can slip seamlessly in among your site’s other pages, and you don’t have to abandon iPhoto’s convenience either: iWeb uses iLife’s Media Browser to let you reach right into your iPhoto library and get the pictures you want.
iWeb photo pages share some of the characteristics of a blog: People can subscribe to them, and they can (at your discretion) add comments to them. That’s why we’re covering them in this lesson.
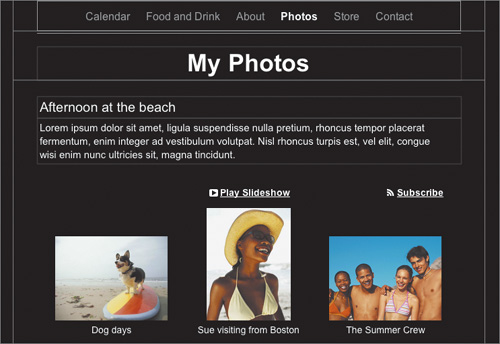
In this exercise, you’ll make a photo page on the Jammin’ Java site to show photo highlights of acts that have performed at the cafe over the past year.
In the Lesson15 folder, open the L15_Photo Page Assets folder, and drag the two folders, JJ recent events and On the road, into iPhoto.
You’ll need the pictures in these folders for this exercise and the next. If you have iPhoto in your Dock, you can simply drag the folders onto it there. iPhoto will open and import the pictures, creating two Events, just as you saw in an earlier lesson. Once the pictures are imported, you can close iPhoto if you like. It doesn’t need to be open for iWeb to use the pictures in the iPhoto library.

If you closed iWeb at the end of the last lesson, open it.
When iWeb opens it always displays the last page you worked on.
Click the + button at the bottom left of the iWeb window.
The New Page sheet appears, showing the available page templates from the theme you last used.

Click the Photos template and then click Choose.
A new photo page opens in the webpage canvas, and a Photos page appears in the sidebar. Notice also that the Photos page appears in the navigation menu along with the site’s other pages.
Note
Although earlier you created other pages for the site by copying an existing page and modifying it, that shortcut won’t work here—you need to use the Photos template in order to take advantage of the special photo layout and display capabilities built into that template. Fortunately, you’ll soon learn some shortcuts to make it easier to customize a pristine page template so it blends into your site.
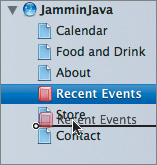
In the sidebar, double-click the name of the new page and rename it Recent Events.
The new name appears in the navigation menu. However, it might be better if the Recent Events page came after the Store page and before the Contact page in the menu. That’s an easy fix.
In the sidebar, drag the Recent Events page between the Store page and the Contact page.
As you drag, a black line appears, showing where the page will be placed when you drop it. After you drag the page, the navigation menu changes to reflect the new top-to-bottom order of the pages in the sidebar.
Double-click the page header and type the new name for the page.
This page is not a personal photo page, as the placeholder text in the header suggests, but a collection of photos from recent events at Jammin’ Java.

Choose View > Show Layout if the layout is not currently visible.
Having the layout visible will help you with the next part of this exercise.
Now that the page is in place and appropriately named and labeled, your next task is to make it resemble the other pages on the site.
In the sidebar, click one of the other pages to display it in the webpage canvas, then click the banner graphic on that page and choose Edit > Copy (or press Command-C).
You’re stashing the banner on your clipboard so you can quickly place it on the photo page. While you’re on the other page, you can pick up a couple more useful items to use in the photo page makeover.
In the iWeb toolbar, click Colors to bring up the Colors window, then click the Color window’s magnifying glass and click the magnifying glass pointer on one of the letters in the page’s yellow-orange header.
The color you clicked with the magnifying pointer appears in the long rectangular swatch at the top of the Colors window.
Drag the color from the swatch at the top of the Colors window into one of the small squares in the palette at the Colors window’s bottom.
The square you dragged the color onto now contains the yellow-orange color. The Colors window provides this palette so that you can store a set of colors in order to get to them quickly when you need to use them.
Use the Colors window’s magnifying pointer to pick up the gray background color of a text box on the page and stash that color in the Colors window’s palette.
Using the Metrics Inspector, click the navigation menu and note its Y position on the page as displayed in the Inspector window, then do the same for the separator lines above and below the navigation menu.
Using the sidebar, click the Recent Events page, then click the Recent Events page’s navigation menu and position it at the same Y position (154 pixels from the top of the page).
This provides room at the top of the page for the next step.

Choose Edit > Paste (Command-V).
The banner you copied from the other page now appears on the Recent Events page in the same location. When you copy objects on a page in iWeb, the copy includes the object’s position information.

Select the Recent Events text in the header, then click the yellow-orange color you placed in the Colors window’s palette.
The header color now matches the header color on the other pages.
Click the separator line below the navigation menu, and use the Metrics Inspector to set the line’s Start X position to 0, set its End X position to 700, set both its Start Y and End Y positions to 204, and then choose Edit > Duplicate.
The first separator line now spans the page, and a new line appears selected just below and to the right of it.

Use the Metrics Inspector to set the duplicate line’s X and Y positions to the ones you noted (for example, 0 and 158).
The line moves to the new position, which matches the layout on the site’s other pages.
Double-click the page title text box and replace the placeholder text with the title Highlights from the last 12 months.
With the header and navigation menu areas set, and the title in place, it’s time to address the main content of the page.
An iWeb photo page’s content region contains a title text box and a small main content text box. The rest of the page’s content region is occupied by the photo grid, which can expand as you add pictures to the page or when you double-click a picture to show it in the detail view that the page provides.
For this part of the exercise, you’ll add the pictures that depict recent performances at Jammin’ Java, give those pictures captions, and provide a detailed description of the performers shown in the pictures.
The first thing you need to do, however, is to position the objects on the page so they’re ready to receive the content you want to add.
Click the main content text box beneath the title and press Delete.
The main content text box goes away. Although you’ll add a detailed description of the performers to the page later, the main content text box is not the best place for it: The description you’ll be adding is long enough to push the photo grid too far down the page to look right. Moving the main text box below the photo grid is also not a good idea: When the grid expands, it will cover anything immediately below it. Later, you’ll see how to work around these problems. Now, though, you need to take care of the blank space you left by deleting the main content text box.

Click once inside the photo grid area, making sure not to click a photo placeholder.
Clicking a blank area inside the photo grid selects its enclosing box so you can reposition the grid on the page.
Use the Metrics Inspector to set the grid’s Y position to 342.
The blank space above the grid is eliminated.

Tip
When you drag an object by hand, a help tag appears showing you the current coordinates of that object. If you don’t want to bother with the Metrics Inspector, you can use the coordinates shown in the help tag to help you position the object accurately.
Now it’s time to place the performer descriptions you want to add.
As has been discussed, the content region on a photos page changes size dynamically, so you can’t add text content below the grid in that region. However, there is another region left on the page that you can exploit: the footer region. When the content region expands, the footer region—along with everything in it—moves down to accommodate the expansion. You can put your description text box there.
In the Inspector window’s toolbar, click the second button from the left to show the Page Inspector, and then click Layout.
The layout pane of the Page Inspector allows you to adjust the height of the content region. Although its height changes dynamically depending on the content it contains, the size you set here still controls how far down from the bottom of the content region the footer region appears. You want to bring the footer region up closer to the bottom of the photo grid.

Set the Content Height in the Page Inspector to 400.
The footer moves up.
In the footer, click the Made on a Mac logo and press Delete.
In the iWeb toolbar, click Text Box.
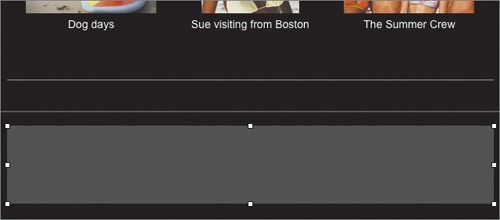
A new text box appears on the page, right over the photo grid.
Click the frame of the text box to select it.

Hold down the Command key as you drag the box into the footer region of the page, and then release the mouse button once the box is in the region.
Ordinarily, dragging an object down below the bottom of the content region expands the size of the region. Holding down the Command key allows the object to cross a region’s boundary.

Show the Graphic Inspector, choose Color Fill from the Inspector’s Fill pop-up menu, click the Fill color button in the Inspector, and then click the gray swatch that you placed in the Colors Window’s palette.
The Inspector shows the gray color in its Fill color button, and the text object in the footer takes on the same hue.

Show the Metrics Inspector, and set the text object’s width to 623 pixels, its X position to 38, and its Y position to 690.
The text box spans most of the width of the footer region. You don’t need to set its height: When you add text to it, it will expand as needed.
With all page’s objects in place, you’re finally ready to add content to the page.
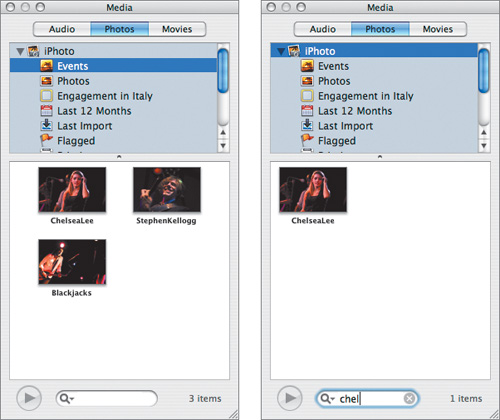
In iWeb’s toolbar, click Media. Then, in the window that appears, click Photos, click the disclosure triangle beside iPhoto in the window’s top section, and click Events in the iPhoto source list that appears.
The Media Browser opens, and the bottom part of the window shows you the contents of the item you selected in the iPhoto source list. You’re going to choose pictures from the JJ Recent Events folder you imported earlier. This iPhoto Event is the last Event in the window’s bottom section.

Double-click the last Event in the window’s bottom section to show the Event’s contents.
The three pictures in the JJ Recent Events Event appear in the window. If you can’t find this Event, however, you can find the pictures you need by their titles. To find the first picture, do the following: In the top section of the window, click iPhoto, and then type chelsea in the window’s search field. The window displays the first picture you’re going to add to your page, a picture of Chelsea Lee.
If you can’t see the Event you need, you can find pictures by title, keyword, or rating.
Tip
To make it easier to find and use pictures from iPhoto on your site, give them distinct titles, or use keywords, to take advantage of the Media Browser window’s search capabilities. You can also open iPhoto and flag the pictures you want to use on your page and pick them up from the Flagged collection in the Media Browser window.
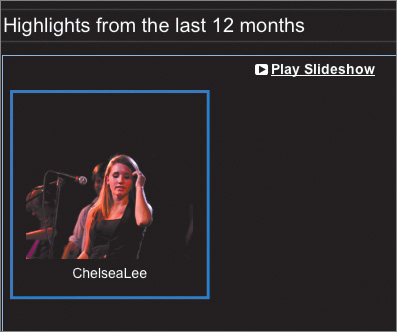
Drag the picture of Chelsea Lee from the Media Browser window and drop it on the first placeholder image in the webpage’s photo grid.

The picture of Chelsea Lee replaces the placeholder and the other picture placeholders vanish. Even though the placeholders are gone, you can still add additional pictures to the grid just by dragging them.
Add the pictures of Stephen Kellogg and the Blackjacks to the grid.
If you need to search for these pictures, type kell in the Media Browser window’s search field to find the first picture, and blackj to find the second one.

Drag the Recent Events.rtf file from the L15_Photo Page Assets folder and drop it on the gray text box you placed in the webpage’s footer region.
The descriptions of the three performances appear in the text box. You’re going to use the titles of the events from this text to provide captions for the pictures, replacing the picture titles.

In the text box, select Chelsea Lee CD Release Show - Saturday 9/22/07 and choose Edit > Copy (Command-C).
This is the header of the first item in the box, and is in bold type, so it should be easy to spot.
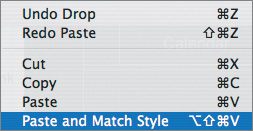
Click the caption under the picture of Chelsea Lee and then choose Edit > Paste and Match Style.
You want the caption to retain its format and this command does exactly that: The caption is pasted without bold formatting and remains centered under the image. If you have nimble fingers, you can use the keyboard shortcut for this command: Command-Option-Shift-V.
Repeat steps 6 and 7 twice for the remaining two pictures, copying and pasting Stephen Kellogg and the Sixers - December ’06 for the Stephen Kellogg picture’s caption, and The Blackjacks - Saturday 5/19/07 for the Blackjacks picture’s caption.
You may notice that some captions are too long to fit beneath the pictures.
Click any picture in the grid.
A Photo Grid panel appears with controls for adjusting the layout and appearance of the page’s photo grid.

Choose 3 from the Caption Lines pop-up menu in the Photo Grid panel.
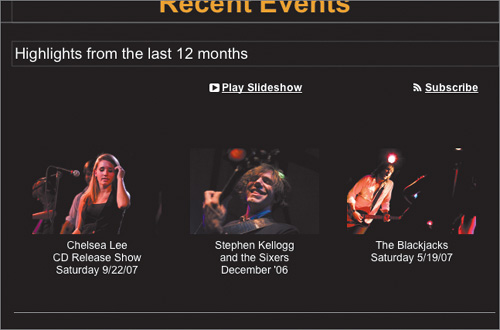
The captions now appear in their entirety. You can show as many as seven lines of caption below each picture. If you wish, you can edit the captions to make them lay out more neatly, such as inserting a Return between “Chelsea Lee” and “CD Release Show.”
The page is ready to publish, but before you do that, you may want to make some final adjustments and set a few more options.
In the photo grid, drag the Stephen Kellogg picture to the right of the Blackjacks picture.
As you drag, the Blackjacks picture moves to the left to make room for the picture you’re dragging. Although not strictly necessary, this step puts the pictures in the same order as they appear in the descriptive text on the page.
Double-click one of the pictures in the grid.
You see a larger version of the picture in a detail view, and the footer moves down to make room.
In the Inspector window’s toolbar, click the third button from the left to show the Photos Inspector.
On a picture’s detail page, visitors are offered the option of downloading the picture. You use the Photos pane of the Photos Inspector to specify the size of the pictures visitors can download, or choose not to allow downloads at all, by making a choice from the Photo Download Size pop-up menu. The Inspector also provides an option you can set to allow visitors to the page to subscribe to the page with iPhoto, much like they can with an iPhoto Web Album. You can also choose to allow visitors to add their own comments to the page, much like they can do on a blog.

Note
If you allow visitors to make comments, you need to keep an eye on them; iWeb keeps in contact with your site and tells you when new comments have appeared, and it gives you the ability to delete individual comments if someone posts an inappropriate or rude one. Monitor the page frequently after you publish it if you allow comments; otherwise, you may find inappropriate or offensive comments piling up on the page. The web is a big place, and not everyone who uses it is mature, responsible, and polite.
In the Photos Inspector, click Slideshow.
You use this pane to control whether your photo page allows visitors to view the pictures in a slideshow, and to set slideshow display options.

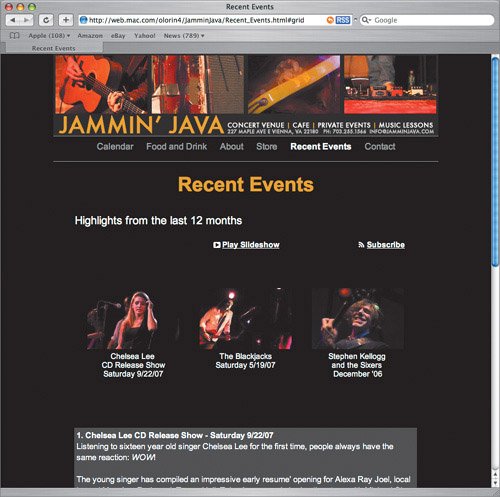
At the bottom of the iWeb window, click Publish.
The Jammin’ Java Recent Events page is published. Go ahead and check it out.
On the web, sites that don’t add new content frequently don’t get visited. One of the best ways to keep a site fresh is to add new content to it with a blog: an online diary, or log, of observations, announcements, and insights.
iWeb blogs provide the features and components that every blog needs:
A main page that lists the most recent entries, and which gets updated automatically when a new entry is added
The blog entries themselves, including links that allow the reader to move from one entry to the next
An archive of entries, so that even when older entries have dropped off the main page, readers can still find them
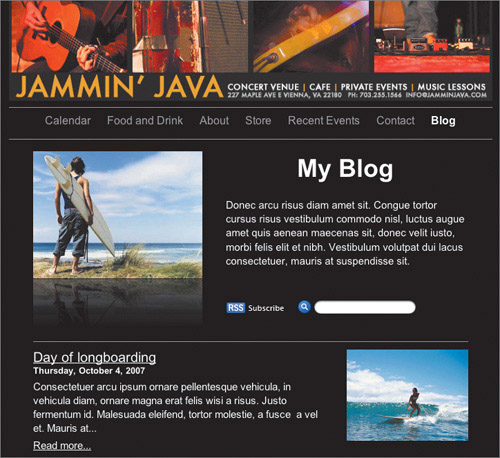
For the Jammin’ Java site, the blog is called From the Green Room. It comprises entries made by the site’s owners, the Brindley Brothers, written and posted on those occasions when they leave their cafe and hit the road to perform.
In this exercise, you’ll create the blog, customize its pages to match the rest of the site as you did with the Recent Events photo page, and add a few entries, including photos and a video, from the Brindley Brothers’ road shows.
Click the + button at the bottom left of the iWeb window and in the sheet that appears choose Blog, then click Choose.
iWeb creates a new blog for you consisting of a main page, an entry page, and an archive page. The entry page appears in the webpage canvas. Before you start adding entries, you need to customize the three pages iWeb has created to have the same look as the rest of the site.

In the sidebar, click Blog to see the main blog page.
This page is the one visitors see when they click Blog in the site’s navigation menu. You’ll begin customizing this page first.

Move the navigation menu down, adjust the bottom separator line, and add a top separator line as you did for the photos page. Then visit another page, copy the banner, return to the main blog page, and paste it.
If you don’t remember how to do this, refer to the Customizing the Photos Page exercise earlier in this lesson.
In the sidebar, click Archive.
The archive page appears in the canvas. Even though you still have work to do on the main page, you should take advantage of the banner graphic that you still have on your clipboard.

Move the navigation menu, add and adjust the separator lines, and paste the banner, as you did with the main blog page.
Change the header text to From the Green Room - Archive and change its color to the yellow-orange color stored in the Colors window’s palette.
Select the text Green Room in the header and change its color to a deep green. Then save that green color in the Colors window’s palette so that you can use it again.

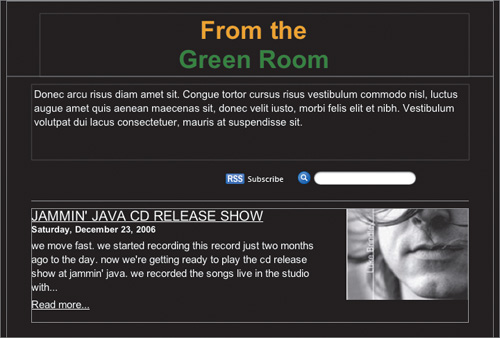
In the sidebar, click Entries, and customize the first entry’s navigation menu, then change the header’s text to From the Green Room, insert a return after “the,” and then apply the colors as you did for the Archive page.
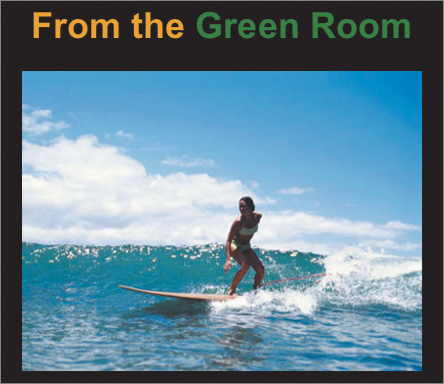
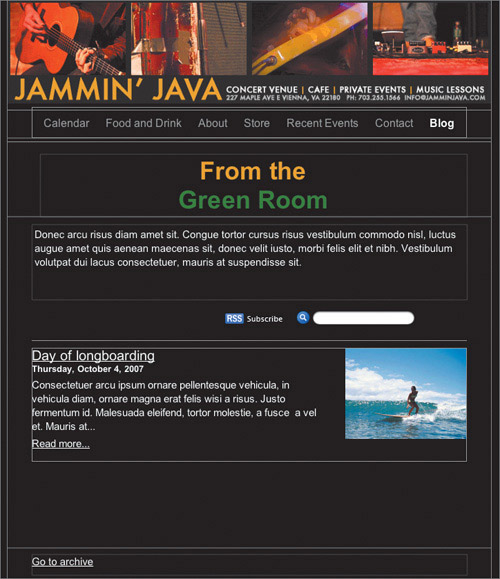
Go back to the main blog page and change its header to read From the Green Room and apply the same colors to it.
Delete the first placeholder image on the main blog page and resize the header text object so that it stretches across the page, then resize the placeholder text object below the header so that it spans the page as well.
Select and move the objects in the page’s content region up to eliminate the empty space created by removing the placeholder image and resizing the two text objects.
You’re now ready to tackle the first blog entry.
Once you have a blog set up in iWeb you seldom need to bother with the archive page or the main page—iWeb updates them itself, every time you add a new entry. You spend most of your time creating entries.
You’ll finish formatting the first entry, which will become a model for subsequent entries, and then put some content in it.
Click Entries in the sidebar to see the first blog entry.
Click the text object that holds the entry’s placeholder text and use the Graphic Inspector to change its color fill to match the same gray color used for text objects elsewhere in the site.
The gray color is still in the Colors window’s palette ready for you to use.
In the blog entry list at the top of the canvas, double-click the entry’s date.
A calendar panel appears, allowing you to set the date and choose a date format.

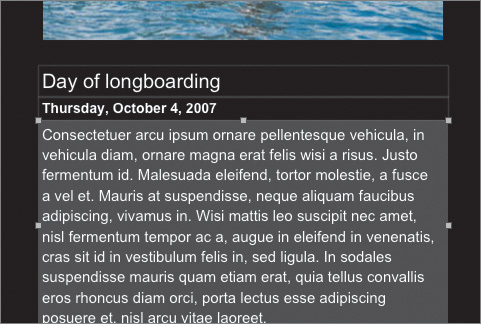
Set the date to 12/23/2006 and then double-click the entry’s title. Change it to read JAMMIN’ JAVA CD RELEASE SHOW.
The entry’s title changes on the page as well.
Open the L15_Blog Assets folder inside the Lesson15 folder and drag the file Blog 12-23-06.rtf into the gray entry text object.
The placeholder text in the object is replaced with the contents of the file you dragged.

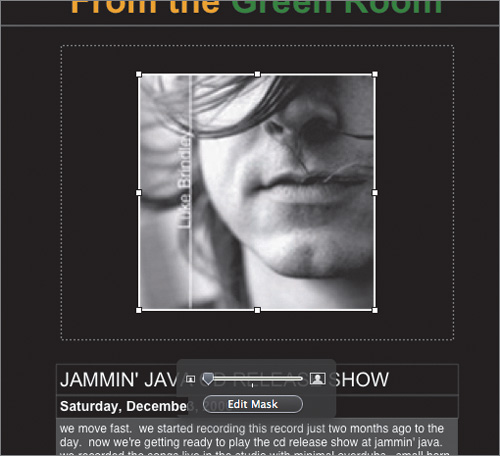
Drag the file lb.gif from the L15_Blog Assets folder and drop it on the entry’s placeholder image, then click the image.
A picture resizing and repositioning panel appears.
Drag the panel’s magnifying slider to the left to reduce the image’s size so that it no longer fills the placeholder image object.
The first blog entry is now complete. Next, you’ll make a few minor changes to the main blog page.
The main blog page appears, with the first entry listed on it. The entry listing includes the picture you placed in the entry.
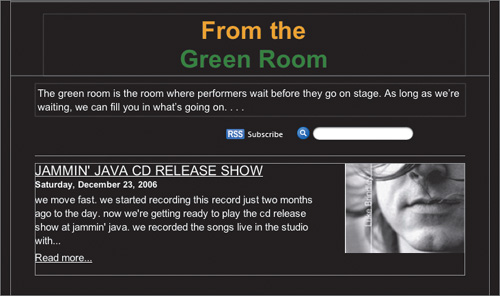
Replace the placeholder text in the blog description text object below the header with the following:
The green room is the room where performers wait before they go on stage. As long as we’re waiting, we can fill you in on what’s going on . . .
Move the objects on the page below the blog description up to eliminate some of the blank space below the description.
The main page is now ready to list additional blog entries, so let’s create another one.
In the sidebar, click Entries.
In the entry list above the entry page, click the first (and only) entry listing and then choose Edit > Duplicate.
A new entry appears in the list. When you create a blog using a customized page template, it’s usually easier to duplicate an entry than it is to use the Add Entry button and then customize the new entry that it creates.
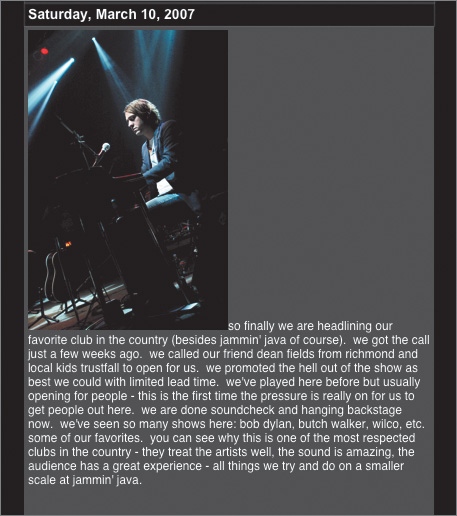
Double-click the name of the duplicate entry and replace the selected title with 9:30 CLUB, then set the entry’s date to 3/10/2007.
The title and date appear above the entry’s main content text object.
Select the text in the entry’s main content and delete it, then drag the file Blog 3-10-07.rtf from the L15_Blog Assets folder and drop it on the entry’s main content text object.
The new blog entry text appears in the main text object.
Using the Photos pane of the Media Browser, click iPhoto in the source list and type brindley in the search field.
Three concert photos of the Brindley Brothers appear in the Media Browser’s viewing area.

Drag the first picture shown in the Media Browser’s viewing area and drop it on the picture above the entry’s title.
The picture you dragged replaces the other picture.

This entry is ready to post as it is, but what about the other two pictures from the same performance? You can give this blog entry added flair by putting those pictures inside the entry’s text object.
Drag the second picture of the Brindley Brothers’ performance from the Media Browser to an unoccupied space on the page.
To embed a picture in a text object, you paste it directly into the text, but first you have to get the picture onto the page.

Click the picture you just dragged and choose Edit > Cut (Command-X).
Double-click the blog entry to make it editable, place the insertion point at the beginning of the entry’s text, and choose Edit > Paste (Command-V).
The picture appears before the first words in the text, but it leaves a lot of empty space. You can change that with the Wrap pane of the Text Inspector.
Click the picture you just pasted to select it, show the Text Inspector, click Wrap in the Inspector to show the Wrap pane, and then click Object Causes Wrap.
The text wraps around the picture’s right side. You can choose whether the picture appears at the left or right of the text object with the picture alignment buttons in the Wrap pane.

Click the Right Alignment button.
The picture moves to the right of the text object, and the text wraps around it on the left.

Drag the remaining performance picture from the Media Browser to the page, cut the picture to place it on the clipboard, place the insertion point at the end of the entry’s text, and paste the picture.
Use the Text Inspector to wrap the text around the picture, and align the picture to the left.
Although there’s no text remaining to wrap around the picture’s right side, it’s aligned with the left edge of the text object, creating a balanced layout.

In addition to the pictures taken at the 9:30 Club performance, the Brindley Brothers also had some video shot. That’s worthy of a blog entry of its own.
In the entry list above the entry page, click the first entry you made in the blog, choose Edit > Duplicate, then rename the new entry 9:30 CLUB VIDEO and set its date to 3/10/2007.
Select the text in the entry’s main content and delete it, then type here’s some video from our performance at the club.
Drag the file brindley brothers saturday night.mp4 from the L15_Blog Assets folder and drop it on the picture above the entry’s title text object.
The video replaces the picture.

Note
You can add video from the Media Browser or from files in the Finder, as you’ve done here. iWeb can handle most QuickTime files.
When you drag a video onto a blog entry’s image placeholder, as you’ve done here, you’ve created a video podcast. You’ll find out more about podcasts later in this lesson.
Sometimes, less is more. You don’t need pictures or video in a blog entry—in fact, the majority of blogs comprise text-only entries. One virtue of text is that it takes up very little storage space, which means it can be transferred over the Internet very quickly. The next blog entry you’ll make is a text-only entry.
Duplicate the initial blog entry you made, then click its picture and press Delete.
The entry doesn’t have a picture to go with the text. However, keep in mind that when you delete the placeholder picture object in an entry, there’s no way of getting it back for that entry.
Note
iWeb, as you’ve seen, can display the image in an entry’s picture placeholder when it adds that entry to the main blog page. If the placeholder is deleted, iWeb won’t show a picture on the main blog page, even if you added another picture to the entry at the same location as the deleted picture placeholder.
Shift-click to select the entry text object, the date text object, and the title text object, and move them up the page to reduce the now-empty space below the entry’s header text object.
In the entry list, rename the new entry LIVE AT BELMONT - LYNYRD SKYNYRD and set its date to 9/9/2007.
In the blog’s entry text object, select the text and delete it.
In the Finder, drag the file Blog 9-9-07.rtf from the L15_Blog Assets folder into the entry text object in the iWeb window.
You now have a text-only blog entry, ready to be duplicated the next time you need to make a text-only entry.

Although the From the Green Room blog is now ready for publication, you may want to review the main entry page to see if it looks the way you want, and to set any additional options for the blog. In this part of the exercise, you’ll look at some of the available options.
In the sidebar, click Blog, and then double-click one of the entry summaries, making sure not to click any linked text in the summaries.
A Blog Summary panel appears. You can use this to show or hide pictures in the entry summaries, and to set the picture size, proportions, and placement in each summary. If you have a blog that is mostly text entries, for example, you might want to deselect the “Show photos” checkbox.
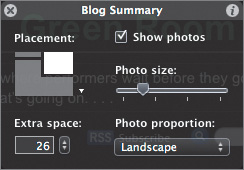
In the upper-right corner of the Blog Summary panel, click the round button with the i in it.
This displays the Blog & Podcast Inspector. You can use the Blog pane of this Inspector to set how many summaries to show on the page, to control the length of each summary, to display a blog search field so that visitors can search your blog, and to allow visitors to add comments and attachments, such as pictures, to your blog entries.

Note
As was mentioned earlier in this lesson, if you allow visitors to make comments, you need to keep an eye on them so that you can swiftly act to delete comments that are inappropriate or offensive, or to remove attachments that you don’t want on your entry.
The From the Green Room blog is now ready to be published with a single click of iWeb’s Publish button.
What, exactly, is a podcast? In iWeb, it’s any blog or podcast page that contains an audio or video file in the page’s media placeholder. In practice, a podcast is the web equivalent of a radio or TV broadcast; a single podcast is called an episode and a group of them is called a series. People can subscribe to podcasts using a variety of applications, such as iTunes. In addition, with iWeb you can not only publish podcasts on your .Mac website, but you can submit them to the iTunes Store, where they can be made available to the few hundred million people who use iTunes.
You’ve already made one podcast in this lesson: the blog entry that contains the Brindley Brothers video clip from their 9:30 Club performance.
Note
iWeb contains a podcast page template that you can use for a blog that consists primarily of podcast episodes. It includes a subscription link that allows visitors to your site to subscribe directly to your podcast series, so that every time you publish a new episode, the subscribers receive it automatically in their iTunes library. However, any blog page can be a podcast page if it has an audio or video media file in its media placeholder.
In this exercise, you’ll take the podcast file you created with GarageBand in Lesson 12 and create a new podcast entry on the From the Green Room blog.
Note
If you haven’t worked through Lesson 12, just read through the next few steps. There’s an alternate podcast file in the Lesson12 folder that you can use later in this exercise.
Open GarageBand, and then open the GarageBand podcast project that you created in Lesson 12.
Choose Share > Send Podcast to iWeb.

The Send Podcast to iWeb command in GarageBand is designed to send the podcast episode directly to a new entry in your site’s blog. If your site has more than one blog or podcast, GarageBand first asks you which blog or podcast you want to receive the episode.
GarageBand then presents a sheet in which you choose how to prepare the episode for delivery to iWeb. You can choose whether GarageBand compresses the episode using MP3 (a widely used audio compression format) or AAC (a more advanced compression format used by devices such as the iPod). You can also choose how GarageBand optimizes the compression: for example, whether the episode should be compressed for best musical quality (which produces larger files), or for best spoken-word quality (which produces smaller episodes). If your GarageBand project is an enhanced podcast that contains pictures synchronized to the audio, you can also choose whether to put the pictures into a standard podcast size.
For the project created in Lesson 12, the default settings, shown here, are the ones you want.
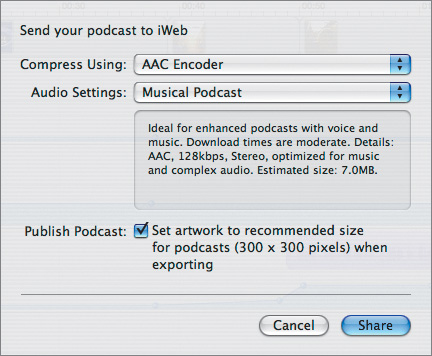
Click Share.
GarageBand prepares the podcast episode for delivery, creating chapter markers if necessary, mixing the audio tracks together, and converting and compressing the audio. The process can take a few minutes depending on the length and complexity of the project, but a series of progress sheets appear to keep you informed about what GarageBand is currently doing.

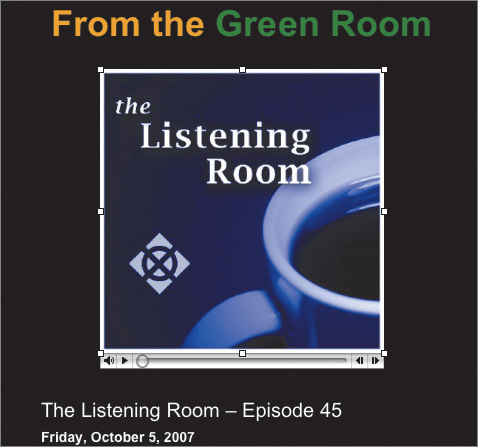
When GarageBand finishes its work, it sends the episode to iWeb, which creates a new blog or podcast entry page to receive the finished goods.

As you can see, a problem arises if you’ve customized your blog or podcast pages from the template that iWeb provides: The podcast episode delivered by GarageBand ends up on a page that uses the uncustomized version of the template. That problem is easily solved with a few quick copy and paste maneuvers.
Select the text in the new entry’s main text object and choose Edit > Copy (Command-C).
In the entry list at the top of the webpage canvas, select the first blog entry you made that includes a media placeholder, and choose Edit > Duplicate.
The duplicate appears in the entry list and on the webpage canvas.
Select the text in the duplicate page’s main text object and then choose Edit > Paste (Command-V).
Go back to the entry that GarageBand created, click the podcast in the media placeholder to select it, and choose Edit > Copy (Command-C).
Return to the entry you duplicated, select the current contents of the media placeholder, and choose Edit > Paste (Command-V).
Replace the text in the page’s title text object with the podcast title.
In the entry list, select the now-unneeded entry created by GarageBand and click Delete Entry.
You now have the podcast on the customized From the Green Room blog page. It’s ready to be published and for people to subscribe to it.
Note
If you haven’t created the podcast in Lesson 12, you can still create the podcast entry. First, perform step 2 above. Then replace the contents of the entry’s main text object with a description of the podcast, and change the entry’s title and date. Finally, in the Finder, drag the file TLR_Brindley_Brothers.m4a from the L15_Blog Assets folder into the entry’s media placeholder in iWeb.
You can expand the potential audience for your podcast by submitting it to the iTunes Store, where it can be easily searched for and downloaded by the millions of iTunes users.
Bring up the Blog & Podcast Inspector and click Podcast to see the Inspector’s podcast settings options.
The Blog & Podcast Inspector’s Podcast pane has two sections: one for the entire blog, referred to in the pane as the Podcast Series, and one for the current blog entry, referred to as the Podcast Episode.
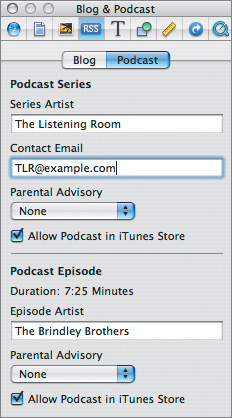
In the Podcast Series section of the Inspector, in the Series Artist field, provide the name of the author or artist responsible for the series, and then provide a contact email address in the Contact Email field.
The email address is not made public, but used only by Apple’s iTunes Store staff so they can contact you.
Make sure Allow Podcast is checked in iTunes Store.
This checkbox applies to the entire blog. It must be selected for a podcast series to be submitted to the iTunes Store and for individual episodes in the series to be made available. You can also optionally indicate whether the series should have a Clean or Explicit label when it’s listed among the Store’s offerings by making a choice from the Parental Advisory pop-up menu.
In the Podcast Episode area, in the Episode Artist field, provide the name of the author or artist featured in the episode, and then click Allow Podcast in iTunes Store.
The Allow Podcast in iTunes Store checkbox in the Podcast Episode area can be selected or deselected for individual blog entries, which is necessary for a blog that contains a mix of entries, some of which are podcast episodes and some of which are not, such as the From the Green Room blog. You can also provide Parental Advisory ratings on an episode-by-episode basis.
Choose File > Submit Podcast to iTunes.
A sheet appears requesting some additional information about the podcast.
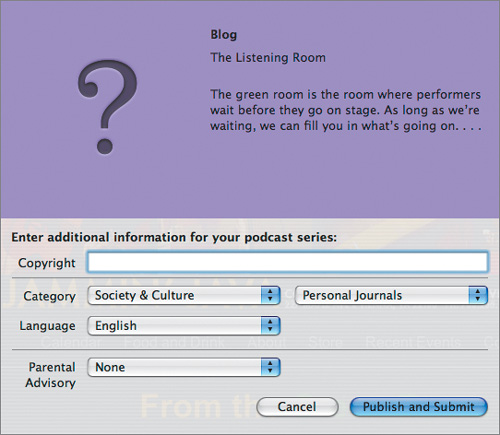
In the Copyright field, enter the copyright information for your podcast, and classify your podcast by choosing a category from the Category pop-up menu and an option from the subcategory pop-up menu to its right. Then click Publish and Submit.
iWeb publishes the site and opens iTunes. If this were your own site and your own podcast, you would then follow the instructions in the iTunes window to complete the podcast submission. When you submit a podcast, it may take a few days for Apple to approve it and for the podcast to appear in the iTunes Store.
With your site published and your podcast in the iTunes Store, fame and fortune surely await you.