
Lesson Files | iLife08_Book_Files > Lessons > Lesson16 > TDC_Ride iLife08_Book_Files > Lessons > Lesson11 > Bike Ride Score FINAL.band |
Time | This lesson takes approximately 90 minutes to complete. |
Goals | Learn DVD concepts and terminology Create an iDVD project Modify the DVD menu screens Add a slideshow to the DVD Burn a DVD |
A U.S. Senator once allegedly said, “A billion here, a billion there, and pretty soon you’re talking real money.” Substitute “capacity” for “money” and you could be talking about how many bytes it will take to store all the pictures, music, and movies you’d like to share.
As you’ve learned, iLife does make it pretty darn easy to take your songs and pictures and movies and put them on the web, but you’ve usually got to compress your songs and pictures and movies a fair amount to make that kind of sharing practical. What’s more, it means that the people you share them with have to go online to enjoy them and, in the process, to suffer the unique joys of waiting for the download to finish. When it comes to a relaxing and engaging home entertainment experience, few things still beat popping a DVD in the player and curling up on the sofa with a bowl of popcorn and a remote control.
iDVD is the iLife application that puts you in touch with the couch potato lurking in all of us.
At one time the acronym DVD stood for Digital Versatile Disc and in keeping with that original meaning, iDVD is certainly versatile. Making a DVD with iDVD can be a complex creative undertaking requiring a lot of time, thought, planning, and ingenuity—or it can be as simple as making a couple of menu choices, sticking a recordable DVD into your Mac’s optical disc drive, and clicking a button.
The work you’ll do in this lesson falls somewhere between a complex creative undertaking and the super-simple click-and-burn solution. Before you begin, though, it will help if you take just a few minutes and get to know some basic iDVD concepts, along with some of the names and functions of the tools that iDVD offers.
Although the purpose of using iDVD is to make a shiny DVD that you can play in your DVD player or on your Mac, what you are actually making as you work is an iDVD project. Each iDVD project is stored in its own project file, which you can store anywhere on your Mac. iDVD remembers the last project you worked on, and opens that project’s project file when you launch iDVD.
If iDVD can’t find the last project you worked on, it shows you this window when it launches, and it also displays this window when you close the project that you’re currently working on:

The functions of the first two buttons in the main pane of this window are obvious. Here are brief descriptions of what the other two buttons do.
This button offers a quick way to create a DVD containing multiple movies and photo slideshows. You simply drag movies and sets of photos into the main iDVD screen, choose a design theme for the DVD, and click a button—at which point iDVD creates a complete project, ready for you to use to burn a DVD or to further customize. Magic DVD is a great way to get a running start when assembling a DVD project.

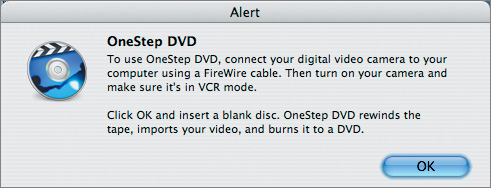
This is an even simpler way to use iDVD. Connect your video camera to your Mac, click this button, and iDVD takes the video from your camera and prepares a DVD from it.
Although you won’t use either of these techniques in this lesson, the iDVD project that you’ll create starts with a process just about as easy as the one that Magic DVD offers.
Nearly all the work you do when creating an iDVD project happens in the iDVD main window.

On the window’s right side is a pane that displays various collections available to you as you build your projects. The first collection shown in this pane is a list of theme families that you can use as the basis for your project. These are similar in many ways to the themes that you use in iWeb when you design a site, or in iPhoto when you create a book, card, or calendar.
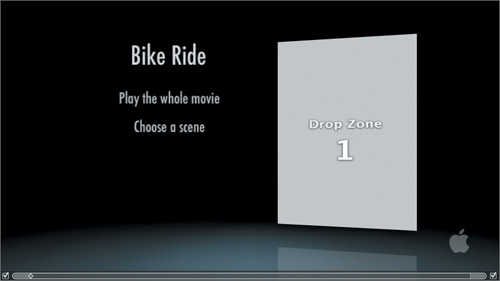
On the window’s left is the main area where you build your project. This area normally presents a DVD menu.
Unlike the menus you use in Mac applications, which drop down from a menu bar or pop up from a button on the screen, in DVD parlance a menu refers to the entire screen that the viewer of a DVD sees. On the other hand, DVD menus are like your Mac’s menus in that they provide the viewer with a way to choose an item in order to cause something to happen: for example, starting the movie playing or showing a slideshow.
The items that DVD users interact with on a DVD menu are called buttons, even though they may not look like buttons.
A DVD viewer typically uses the DVD player’s remote control to move among the buttons on the DVD menu and to pick one—usually by clicking a real, physical button on the player’s remote control. (If you use your Mac’s DVD Player application to view a DVD on your Mac, you can navigate among the buttons on the DVD’s menu with the simulated DVD remote control that DVD Player provides.)
The appearance of a DVD menu’s buttons is set initially by the theme family that you choose when you create a DVD project. You can change a button’s appearance with the Buttons pane, which you access by clicking Buttons below the pane on the right of the iDVD window. The Buttons pane contains a collection of button styles you can apply to DVD menu buttons.
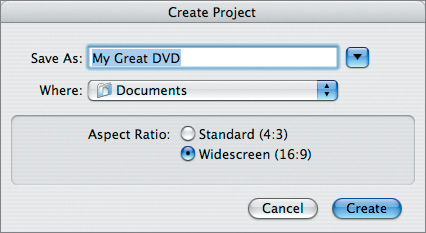
Many of the theme families you can use in iDVD come in two sizes: the 4:3 aspect ratio used by standard television sets, and the 16:9 widescreen aspect ratio used by modern HDTVs. You choose the aspect ratio for your project when you create it from scratch, though you can change it at any time. iDVD can also choose the appropriate aspect ratio for your project when you create it by sending a movie to iDVD from GarageBand, as you’ll see later.
In addition to coming in two aspect ratios, many iDVD theme families offer three menu themes: one for the main menu, one for chapters submenus, and one for extras submenus.

Chapters submenus are used when a movie on the DVD is marked with chapter markers, as you did with GarageBand in an earlier lesson. Viewers use a chapters submenu to view the individual scenes in a movie.
Extras submenus are used when a DVD contains additional material, such as the behind-the-scenes production videos that many commercial DVDs offer in addition to the main feature.
Both extras submenus and chapters submenus appear onscreen when the person viewing the DVD chooses a menu button on the main DVD menu that links to those submenus. You establish those links when you construct your iDVD project.
A number of iDVD themes provide animation, just like many commercial DVDs. Menus with animation are known as motion menus.
On a motion menu, a playhead appears in a scrubber bar at the bottom of the DVD menu in the iDVD window (it doesn’t appear, of course, on the final DVD that you make).
You can position the playhead by dragging it left or right to see different parts of the animation. The shaded areas that may appear at the left and right of the scrubber bar indicate the presence of intros and outros in the animation. These are sequences of animation that appear respectively when the menu first appears on screen, and when the menu leaves the screen.
Depending on the theme family, iDVD menus and submenus may also contain one or more drop zones.
Drop zones are sections of the DVD menu that contain an image, slideshow, or movie. Drop zones add visual interest to the menu, and frequently show small scenes taken from the content of the DVD itself. You can change the contents of a drop zone by dropping your own media into the drop zone as you build your project.
The project you’re about to build you’ve seen before in a previous lesson: It’s the film you scored in GarageBand.
Open the GarageBand project that contains the BikeRide movie you scored in an earlier lesson.
If you didn’t complete that lesson, the finished project can be found in the Lesson11 folder inside the Lessons folder; it’s called Bike Ride Score FINAL.band.
In GarageBand, choose Share > Send Movie to iDVD.
GarageBand displays a series of progress sheets as it prepares the movie for iDVD. When the preparation finishes, iDVD opens. After a few seconds, iDVD creates a new project containing the movie. Because chapter marks were added to the movie in GarageBand, iDVD automatically creates both a Play Movie menu button and a Scene Selection menu button. This last button links to a chapters submenu.

Quit GarageBand.
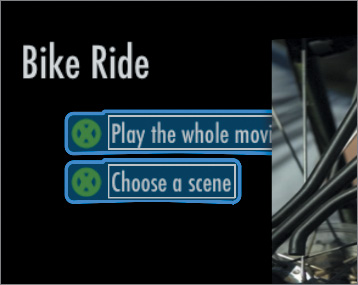
In the iDVD window, if the Play Movie menu button isn’t selected, click it, then click the text inside the selected menu button.
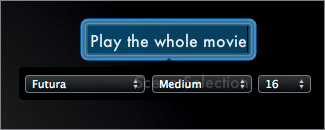
The text inside the menu button is selected, and a formatting panel appears near the button. You can use the formatting panel to change the typeface, style, and size of the menu button’s text.
Change the button’s text to read Play the whole movie.
Click the Scene Selection menu button once to select it, click it again to select its text, and then change the button text to read Choose a scene.
Double-click the text label above the menu buttons to select its text and change it from BikeRide to Bike Ride.
You can double-click text labels in the DVD menu to select their text because labels don’t have any associated action. Notice that when you select the text of a label, it also displays a formatting panel.

Now that you have the main menu’s text label and menu button labels squared away for the moment, you should take a look to see where each menu and menu button on the DVD currently leads.
At the bottom of the iDVD window, click the Map View button.

iDVD displays a navigation map of the project. In the map, the main menu, each submenu, and the movies they lead to are displayed as boxes with connecting lines so that you can see which ones are connected to which. For example, the Bike Ride menu (marked with a folder icon by its title) links to the movie you sent from GarageBand. It’s labeled with the name of the menu button that leads to it, and is marked with a clapboard icon—the clapboard icon indicates that it is a movie. The main menu also connects to the chapters submenu, which is labeled “Scenes 1-4.” This is not the label on the main menu’s “Choose a scene” menu button, but the label that iDVD put on the submenu to which the “Choose a scene” menu button leads. The chapters submenu, in turn, links to four movies; the menu buttons on the chapters submenu are labeled with the names that the chapter markers were given in GarageBand.

Move your pointer over the warning icon at the bottom left of the Bike Ride box.
A help tag appears when the pointer hovers over the icon. iDVD marks menus in the navigation map with warning icons when it detects possible problems. In this case, iDVD has detected that the menu has empty drop zones.

Click the Bike Ride box in the navigation map. Then, at the bottom right of the navigation map, click Return.
The DVD’s main menu appears in the iDVD window. When you select an item in the navigation menu, iDVD displays that item in its window when you click Return.
When iDVD created the project, it chose a theme family for you, so next you’ll change the theme family used by the project. Don’t worry yet about the empty drop zone problem that iDVD pointed out on the navigation map. Because different themes have different drop zones, you can wait to deal with it until after you switch themes.
If the Themes collection isn’t showing in the right pane of the iDVD window, click the Themes button in the window’s lower-right.
Choose 7.0 Themes from the pop-up menu at the top of the pane, then scroll down the pane and click the Center Stage theme family.
A sheet appears telling you what happens when you switch a project’s theme family: The theme for all menus in the project will change. If you like, you can click the disclosure triangle at the sheet’s bottom-left to read additional information.
Click OK.
iDVD changes the theme of the menu shown in the window; it also changes the theme of any submenus in the project as well. As a result of this change, the menu buttons and text label have moved and changed appearance.
With the project’s theme family swapped for a different one, you can now deal with the empty drop zone problem. But before you fill the drop zones, you first need the media with which you want to fill them.
In the Finder, open the Lesson16 folder and drag the TDC_Ride folder inside into iPhoto to import the pictures it contains into your iPhoto library.
If iPhoto is in your Dock, you can simply drag the folder onto the iPhoto icon to import its pictures. Otherwise, open iPhoto and drag the folder onto the iPhoto window’s main viewing area. When iPhoto finishes importing the pictures, you can, if you like, quit iPhoto.
At the bottom of the iDVD window, click the Drop Zone button.

The drop zone editor appears in the main pane of the iDVD window, listing all the drop zones on the current menu, as well as the menu itself along the bottom of the pane. In addition, the pane at the right of the iDVD window now displays the iLife Media Browsers. iDVD shows the Media Browsers automatically when you edit drop zones, because you usually fill drop zones with media from your various iLife Media Libraries.
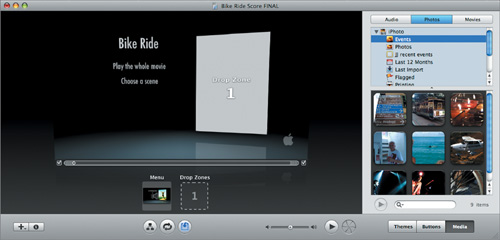
At the top of the iDVD window’s right pane, click Photos, then click iPhoto in the list below, and type bicycle in the pane’s search field.
The Media Browser shows you a number of pictures that match the search term.

In the lower section of the Media Browser, find the picture titled “Bicycle_Ride 2” and drag it into the first (and only) drop zone shown in the iDVD drop zone editor.
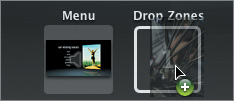
The drop zone in the editor shows a small version of the picture, and the main menu displayed above it shows a larger version of the same picture in the menu’s drop zone.

At the bottom of the iDVD window, click the Drop Zone button again.
The drop zone editor goes away and the main menu again fills the left pane of the iDVD window.
Unlike the default main menu that iDVD picked when it created the project, the Center Stage main menu has no background audio. You’ll add some and make some other minor adjustments as well.
At the bottom right of the iDVD window, click Media, then at the top of the Media Browser pane, click Audio.
Your iTunes and GarageBand collections appear at the top of the pane.
Click GarageBand at the top of the media collections list, and then select Bike Ride Score FINAL from the GarageBand folder in the Media Browser.
You’ll use the first few seconds of the movie’s score as the background music for the main menu.
Drag the song from the Media Browser to an unoccupied part of the main menu.
When the motion menu plays, it will play the complete soundtrack of the movie. You’ll fix that next.
With nothing selected in the main menu, choose View > Show Inspector.
The semi-transparent Inspector window appears showing the Menu Info Inspector. The Inspector window will show a different inspector for each item you select in the current menu. When nothing is selected, the Inspector gives you options for modifying characteristics of the entire menu—in this case, the project’s main menu. As you can see, the Loop Duration slider in the Inspector’s Background section is set all the way to the end, meaning the entire audio file will play when the motion menu is playing.

Drag the Loop Duration slider left to the 2-second mark.
As you drag, a help tag above the slider shows the current time setting of the slider. If your menu has movies in its drop zones, the slider also controls how long they will play. The duration slider shows the duration of the longest media in the menu, whether in a drop zone or background audio or movie.
In the Audio section of the Inspector, slide the main volume slider to the left until it’s above the second tick mark.
You can choose to showcase the audio by raising the volume, which is better for complete songs, or to make it into something more like an ambient sound by lowering it, which is more suitable for short sound loops.
In the Buttons section of the Inspector, click the Highlight swatch.
A Colors window appears. The button highlight color shows the DVD viewer which menu button is currently selected; you can change the highlight color specified by the menu’s theme to a different one.
Use the Colors window to pick a different menu button highlight color, such as a medium green.
Choose File > Save (Command-S).
It’s always a good idea to save your work whenever you make changes to your iDVD project.
Close the Inspector and the Colors windows.
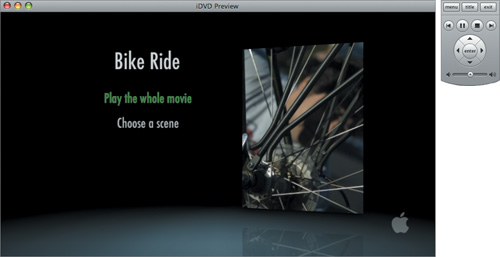
Before moving on to the next design exercise, you can take a moment to use iDVD’s preview feature to get an idea of how the DVD viewer will experience the DVD.
At the bottom of the iDVD window, click the round Play button.

The Play button turns the iDVD window into a preview window and brings up the iDVD remote control window so you can experience using the DVD as a viewer would.
Click the down arrow button on the remote control.
The “Choose a scene” menu button highlights.
On the remote control, click enter.
The preview window shows the outro animation for the DVD’s main menu and then shows the Scenes 1-4 menu.
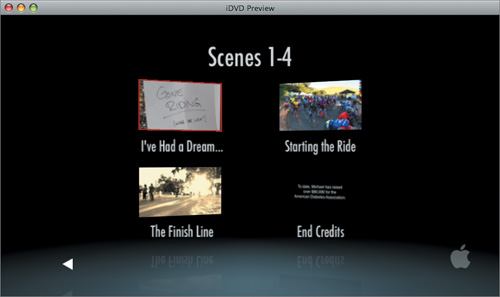
Use the remote control’s arrow buttons to move to the Starting the Ride menu button and then click the control’s enter button.
The Bike Ride movie begins playing, starting at the scene you picked.
On the remote control, click menu.
The Scenes 1-4 menu appears again in the preview window.
On the remote control, click title.
The DVD’s main menu appears in the preview window.
On the remote control, click exit.
The remote control goes away and the iDVD window replaces the preview window.
Next you’ll change the appearance of the menu buttons on the main menu to give them a thematic relationship to the movie’s subject matter.
In the main menu, Shift-click to select both menu buttons.
At the bottom-right of the iDVD window, click Buttons.
The Buttons palette appears in the window’s right pane. The menu at the top of the pane shows the extra highlight graphics that can be added to text-only menu buttons. The first item removes the highlight graphic from the selected buttons.
Choose Bullets from the pop-up menu at the top of the pane.
On this menu, the items above the line affect the button only when it’s highlighted; items below the line change the button appearance at all times.

Scroll down the list of bullets in the palette and click the round bullet that has spokes inside.
This highlight bullet, though not specifically designed for the purpose, nicely carries the movie’s biking theme over to the button highlight.

However, adding the bullet has caused the menu buttons to move to the right so they’re partially hidden beneath the main menu’s drop zone.
Choose View > Show Inspector.
The Inspector window shows the options for changing buttons, because buttons are the items that are selected on the main menu. The iDVD Inspector window is context-sensitive, showing the options for the currently selected objects.
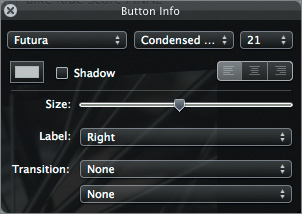
In the Inspector window, choose Left from the label pop-up and then slide the Size slider to the right until the bullets are as large as the rectangle that surrounds the menu button text.
When you choose Left, the menu buttons reposition themselves and the menu button text appears to the left of the bullet. The Size slider affects the bullets, not the text, which can be changed by adjusting its type size with the pop-up menu in the Inspector window’s top-right.
Click the main menu to deselect the menu buttons.
The bullets disappear, because they’re visible only when a button is highlighted.
DVDs are not just for video. You can also add slideshows of still images to your DVD. The pictures you use in the slideshow can come from anywhere on your Mac, but it’s easiest to get them from your iPhoto library, which, as you’ve already seen, can be displayed in the iDVD Media Browser.
Note
iDVD expects pictures for slideshows to have a 4:3 aspect ratio. It will scale pictures with wider aspect ratios to that aspect ratio. You can use iPhoto’s Crop tool to crop pictures to the proper DVD aspect ratio.
You’ll use the pictures in the TDC_Ride folder that you already imported into iPhoto to create the iDVD slideshow.
At the bottom-left of the iDVD window, click the + button.
A menu appears, offering items that you can add to the current menu.
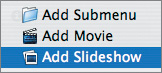
Choose Add Slideshow from the menu.
A new menu button appears on the main menu.

Using techniques you’ve learned earlier, add the same bullet highlight to this button that you added to the other two menu buttons and change the text of the menu button label to read View bike ride slideshow.
Remember to use the Inspector window to put the label to the left of the bullet, and to resize the bullet to match the other two menu buttons.

Double-click the slideshow menu button.
The iDVD slideshow editor appears in the left pane of the iDVD window, and the Media Browser’s Photo collection appears in the right pane.
Type bicycle in the Media Browser’s search field.
All the bicycle pictures that you imported appear in the bottom panel of the Media Browser.
Select all the bicycle pictures in the browser, then drag them to the left pane of the iDVD window.
iDVD lays the picture thumbnails out in the slideshow editor pane. A number appears at the bottom-right of each thumbnail to indicate its position in the slideshow.
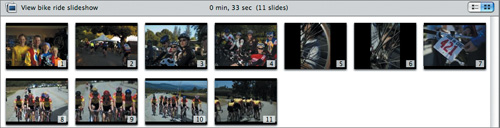
At the upper-right of the slideshow editor pane, click the left side of the multi-segment slide layout button.
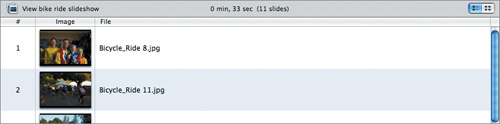
The slides now appear in a vertical list in the pane. The vertical list provides additional information about each slide, such as its file name, which can be useful when you build slideshows using several different collections of pictures.
Drag the Bicycle_Ride 1.jpg slide to the top of the list.
The slide you dragged is now the first one in the list. Rearranging the order of slides in an iDVD slideshow is a simple matter of dragging the slides into the order you prefer.
At the bottom-left of the slideshow editor, click the Slide Duration pop-up menu and choose 5 seconds, then click the Transition pop-up menu and choose Fade Through Black.
The top of the slideshow editor pane displays how long the slideshow will now take to play.

Note
The Slide Duration menu offers a Fit to Audio choice that sets the length of each slide automatically so that the slideshow will last exactly as long as any music you add to the show. You can add a soundtrack to the slideshow by dragging an audio file from the Media Browser into the speaker well at the bottom of the editing pane. The Slide Duration menu also offers a Manual setting. When this is chosen, the slides won’t advance automatically: instead, the DVD viewer uses the DVD remote control to move from one slide to another.

Click the preview button at the bottom of the iDVD window to view the slideshow.
The preview window replaces the iDVD window, the iDVD remote control appears, and the show begins playing. The show uses the timing and transition that you set. You can use the pause button on the remote to stop the show, and the left and right arrow buttons to move among the slides.
Click exit on the remote control window and then click Return at the bottom right of the slideshow editor.
The main menu of the iDVD project appears.
Choose File > Save (Command-S).
You are now ready to put your DVD into production.
When your iDVD project looks the way you want, you can burn a DVD in your Mac’s optical drive. But before you actually burn your iDVD project to a DVD, you should make a few final checks.
Note
If your Mac doesn’t have a drive that can burn DVDs, or if you don’t happen to have a recordable DVD available, just read through this section.
Click the Map View button at the bottom of the iDVD window.
It’s always good to take one last look at the map to see if there are any warning icons you need to deal with, and to make sure that the DVD menu structure is arranged the way you want it.
Note
You can use the map orientation buttons at the bottom-left of the map to flip the map between horizontal and vertical orientations, and you can use the size slider beneath the map to change the size of the map’s thumbnails so you can see more of the map.

Click Return at the bottom right of the Navigation Map, and then choose Project > Project Info.
The Project Window appears. The bar near the top of the window shows you how much space on the DVD your project will take, and shows the amount of space taken by each kind of media in your project. You use the Media area at the bottom of this window to see which files iDVD will use when it creates the DVD, and to check whether they’re all available. If a checkmark doesn’t appear in the Status column for a particular file, it means that iDVD couldn’t find the file. This can happen if the file has been moved or changed after you added it to the project. To fix this, you need to move the file back, or replace it in your project with a different file.

You can also use the Project Info window to change the encoding method used for the DVD, to specify whether it’s NTSC video (for US televisions) or PAL (European television systems), to change the project’s aspect ratio, and to choose whether the DVD is to be burned on a single-layer or dual-layer DVD.
Note
The encoding methods are Best Performance, High Quality, and Professional Quality. Best Performance is the fastest method, but it can fit less material on the DVD than the other two methods. When Best Performance is chosen, iDVD can encode your media (that is, convert it into the format used by DVDs) in the background as you work on your project; background encoding is not available for the other two methods.
Select the text in the Disc Name field and change it to Bike Ride Movie, and then close the Project Info window.
When you create a DVD by sending a movie to iDVD from GarageBand, iDVD automatically chooses a name for the disc you burn that’s the same as the name of the GarageBand file. When you change the disc name, the name you specify is converted to upper-case when the disc is created. You can only use letters, numbers, and spaces in disc names (spaces are converted to underscores).
Get a recordable DVD disc and click the Burn button at the bottom of the iDVD window.

The button opens up to show the standard Mac disc-burning icon, and iDVD requests that you insert a blank disc.
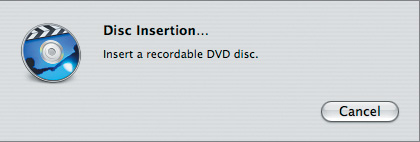
Insert the blank disc into the Mac’s optical disc drive.
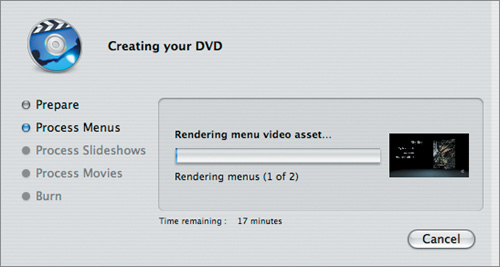
After a few seconds, iDVD detects the disc and begins the disc-burning process. This process can take anywhere from a few minutes to several hours, depending on the amount of material you’ve included in the project and the encoding method you’ve chosen. A sheet appears to keep you apprised of the current stage of the disc-burning process, along with an estimate of how long it will take. You can cancel the process at any time, but canceling renders the recordable disc you inserted useless.
Note
When iDVD finishes burning the DVD, it ejects the disc and gives you the opportunity to burn another copy. The second and subsequent copies may take less time to burn than the first because iDVD doesn’t have to encode the material again.
Tip
If you need to move your project to another Mac to burn it, or to give it to someone else to work on, you can choose File > Archive Project. This places all the media needed by the project into the archived project file.
Once the DVD is burned, you can quit iDVD, put the disc back into your Mac, and play it with your Mac’s DVD Player application.

Or, even better, you can pop some popcorn, turn off your mobile phone, and enjoy your evening at the movies.