
To demonstrate how to create and use content providers we will create an app to store what is on your mind and how happy you are on a daily basis.
Yes, there are apps doing that; however, if you want to create an app to record sport notes and scores instead, feel free to modify the code as it involves basically the same functionality.
In this recipe, we will store new thoughts and retrieve them using a content provider. For the various elements of the app, we will be using fragments because they will neatly demonstrate the effect of the observer pattern.
For this recipe, you just need to have Android Studio up and running and a physical or virtual Android device.
Let's see how to set up a project using a content provider. We will be using the Navigation Drawer template for it:
- Create a new project in Android Studio and name it
DailyThoughts. Click on the Next button. - Select the Phone and Tablet option and click on the Next button.
- Choose Navigation Drawer Activity and click on the Next button.
- Accept all values on the Customize the Activity page and click on the Finish button.
- Open the
strings.xmlfile within theres/valuesfolder. Modify the strings for the entries that start withtitle_section. Replace them with the menu items needed for our app. Also replace theaction_samplestring:<string name="title_section_daily_notes">Daily thoughts</string><string name="title_section_note_list">Thoughts list</string> <string name="action_add">Add thought</string>
- Open the
NavigationDrawerFragmentfile, and in theonCreatemethod, modify the strings for the adapter accordingly:mDrawerListView.setAdapter(new ArrayAdapter<String>( getActionBar().getThemedContext(), android.R.layout.simple_list_item_activated_1, android.R.id.text1, new String[]{ getString(R.string.title_section_daily_notes), getString(R.string.title_section_note_list) })); - In the same class, within the
onOptionsItemSelectedmethod, remove the secondifstatement that is displaying a toast. We do not need it. - Open
main.xmlfrom theres/menufolder. Remove the item for the settings and modify the first item so it will use theaction_addstring. Also rename it's ID and add a neat icon for it:<menu xmlns:android= "http://schemas.android.com/apk/res/android"xmlns:tools="http://schemas.android.com/tools" tools:context=".MainActivity"> <item android:id="@+id/action_add" android:title="@string/action_add"android:icon="@android:drawable/ic_input_add"android:showAsAction="withText|ifRoom" /> </menu>
- In the
MainActivityfile, in theonSectionAttachedsection, apply the correct strings for the different options:public void onSectionAttached(int number) { switch (number) { case 0: mTitle = getString( R.string.title_section_daily_notes); break; case 1: mTitle = getString( R.string.title_section_note_list); break; } } - Create a new package named
db. Within this package, create a new class,DatabaseHelper, that extends theSQLiteOpenHelperclass. It will help us to create a new database for our application. It will contain just one table:thoughts. EachThought tablewill have an id, a name and a happiness rating:public class DatabaseHelper extends SQLiteOpenHelper { public static final String DATABASE_NAME = "DAILY_THOUGHTS"; public static final String THOUGHTS_TABLE_NAME = "thoughts"; static final int DATABASE_VERSION = 1; static final String CREATE_DB_TABLE = " CREATE TABLE " + THOUGHTS_TABLE_NAME + " (_id INTEGER PRIMARY KEY AUTOINCREMENT, " +" name TEXT NOT NULL, " +" happiness INT NOT NULL);";public DatabaseHelper(Context context){ super(context, DATABASE_NAME, null, DATABASE_VERSION);} @Override public void onCreate(SQLiteDatabase db) { db.execSQL(CREATE_DB_TABLE); } @Override public void onUpgrade(SQLiteDatabase db, int oldVersion, int newVersion) { db.execSQL("DROP TABLE IF EXISTS " + THOUGHTS_TABLE_NAME); onCreate(db);} } - Create another package and name it
providers. Within this package, create a new class calledThoughtsProvider. This will be our content provider for all our daily thoughts. Make it a descendant of theContentProviderclass. - From the Code menu, choose the Implement methods option. In the dialog that appears, all available methods are selected. Accept this suggestion and click on the OK button. Your new class will be extended with these methods.
- On top of the class, we will create some static variables:
static final String PROVIDER_NAME = "com.packt.dailythoughts"; static final String URL = "content://" + PROVIDER_NAME + "/thoughts"; public static final Uri CONTENT_URI = Uri.parse(URL); public static final String THOUGHTS_ID = "_id"; public static final String THOUGHTS_NAME = "name"; public static final String THOUGHTS_HAPPINESS = "happiness"; static final int THOUGHTS = 1; static final int THOUGHT_ID = 2; static final UriMatcher uriMatcher; static{ uriMatcher = new UriMatcher(UriMatcher.NO_MATCH); uriMatcher.addURI(PROVIDER_NAME, "thoughts", THOUGHTS); uriMatcher.addURI(PROVIDER_NAME, "thoughts/#", THOUGHT_ID); } - Add a private member,
db, that refers to theSQLiteDatabaseclass, and modify theonCreatemethod. We create a new database helper:private SQLiteDatabase db; @Override public boolean onCreate() { Context context = getContext(); DatabaseHelper dbHelper = new DatabaseHelper(context); db = dbHelper.getWritableDatabase(); return (db == null)? false:true; }
Next, implement the query method. A query returns a cursor object. A cursor represents the result of the query and points to one of the query results so the results can be buffered efficiently as it does not need to load data into memory:
private static HashMap<String, String>
 THOUGHTS_PROJECTION;
@Override
public Cursor query(Uri uri, String[] projection,
 String selection, String[] selectionArgs, String
  sortOrder) {
   SQLiteQueryBuilder builder = new SQLiteQueryBuilder();
   builder.setTables(
    DatabaseHelper.THOUGHTS_TABLE_NAME);
   switch (uriMatcher.match(uri)) {
      case THOUGHTS:
        builder.setProjectionMap(
         THOUGHTS_PROJECTION);
         break;
      case THOUGHT_ID:
        builder.appendWhere( THOUGHTS_ID + "=" + uri.getPathSegments().get(1));
        break;
      default:
        throw new IllegalArgumentException(
         "Unknown URI: " + uri);
    }
    if (sortOrder == null || sortOrder == ""){
        sortOrder = THOUGHTS_NAME;
    }
    Cursor c = builder.query(db, projection,selection, selectionArgs,null, null, sortOrder);
    c.setNotificationUri(
     getContext().getContentResolver(), uri);
    return c;
}We will implement the other methods using the following steps:
- Implement the
getTypemethod. Thedirdirectory suggests we want to get all thought records. Theitemterm indicates that we are looking for a particular thought:@Override public String getType(Uri uri) { switch (uriMatcher.match(uri)){ case THOUGHTS: return "vnd.android.cursor.dir/vnd.df.thoughts"; case THOUGHT_ID: return "vnd.android.cursor.item/vnd.df.thoughts"; default: throw new IllegalArgumentException( "Unsupported URI: " + uri); } } - Implement the
insertmethod. It will create a new record based on the provided values, and if this succeeds we will be notified about the change:@Override public Uri insert(Uri uri, ContentValues values) { long rowID = db.insert( DatabaseHelper.THOUGHTS_TABLE_NAME , "", values); if (rowID > 0) { Uri _uri = ContentUris.withAppendedId(CONTENT_URI, rowID); getContext().getContentResolver().notifyChange( _uri, null); return _uri; } throw new SQLException("Failed to add record: " + uri); } - The
deleteandupdatemethods are out of scope for this recipe, so we will not implement them now. Challenge: Add your own implementation here. - Open the
AndroidManifest.xmlfile and add add theprovidertag within theapplicationtag:<providerandroid:name=".providers.ThoughtsProvider"android:authorities="com.packt.dailythoughts"android:readPermission= "com.packt.dailythoughts.READ_DATABASE"android:exported="true" /> - Add the permission for other apps to read data. We will use that in the last recipe. Add it outside the
applicationtag:<permission android:name="com.packt.dailythoughts.READ_DATABASE"android:protectionLevel="normal"/>
- Open the
strings.xmlfile and add new strings to it:<string name="my_thoughts">My thoughts</string> <string name="save">Save</string> <string name="average_happiness">Average happiness</string>
- Create two new layout files:
fragment_thoughts.xmlfor our list of thoughts andfragment_thoughts_detailto enter new thoughts. - Define the layout for
fragment_thoughts.xml. AListViewwidget is just fine to display all thoughts:<?xml version="1.0" encoding="utf-8"?> <LinearLayout xmlns:android= "http://schemas.android.com/apk/res/android" android:layout_width="match_parent" android:layout_height="match_parent" android:orientation="vertical" > <ListView android:id="@+id/thoughts_list"android:layout_width="match_parent"android:layout_height="wrap_content" ></ListView> </LinearLayout> - The layout for
fragment_thoughts_detail.xmlwill contain theEditTextandRatingBarwidgets so we can enter what we are thinking and how happy how we currently are:<?xml version="1.0" encoding="utf-8"?> <LinearLayout xmlns:android= "http://schemas.android.com/apk/res/android"android:orientation="vertical"android:layout_gravity="center"android:layout_margin="32dp"android:padding="16dp"android:layout_width="match_parent"android:background="@android:color/holo_green_light"android:layout_height="wrap_content"> <TextView android:layout_margin="8dp"android:textSize="16sp"android:text="@string/my_thoughts" android:layout_width="match_parent"android:layout_height="wrap_content" /> <EditText android:id="@+id/thoughts_edit_thoughts"android:layout_margin="8dp"android:layout_width="match_parent"android:layout_height="wrap_content" /> <RatingBar android:id="@+id/thoughs_rating_bar_happy"android:layout_width="wrap_content"android:layout_height="wrap_content"android:layout_gravity="center_horizontal"android:clickable="true"android:numStars="5"android:rating="0" /> <Button android:id="@+id/thoughts_detail_button"android:text="@string/save" android:layout_width="match_parent"android:layout_height="wrap_content" /> </LinearLayout> - Also create a layout for the rows in the list of thoughts. Name it
adapter_thought.xml. Add text views to display an ID a title, or name and the rating:<?xml version="1.0" encoding="utf-8"?> <LinearLayout xmlns:android= "http://schemas.android.com/apk/res/android" android:orientation="vertical" android:layout_gravity="center" android:layout_margin="32dp" android:padding="16dp" android:layout_width="match_parent" android:background= "@android:color/holo_green_light" android:layout_height="wrap_content"> <TextView android:layout_margin="8dp" android:textSize="16sp" android:text="@string/my_thoughts" android:layout_width="match_parent" android:layout_height="wrap_content" /> <EditText android:id="@+id/thoughts_edit_thoughts" android:layout_margin="8dp" android:layout_width="match_parent" android:layout_height="wrap_content" /> <RatingBar android:id="@+id/thoughs_rating_bar_happy" android:layout_width="wrap_content" android:layout_height="wrap_content" android:layout_gravity="center_horizontal" android:clickable="true" android:numStars="5" android:rating="0" /> <Button android:id="@+id/thoughts_detail_button" android:text="@string/save" android:layout_width="match_parent" android:layout_height="wrap_content" /> </LinearLayout> - Create a new package, name it:
fragments, and add two new classes to it:ThoughtsDetailFragmentandThoughtsFragment, both of which will be descendants of theFragmentclass. - To the
ThoughtsFragmentclass, add theLoaderCallBackimplementation:public class ThoughtsFragment extends Fragment implementsLoaderManager.LoaderCallbacks<Cursor>{ - From the Code menu, choose Implement methods, accept the suggested methods, and click on the OK button. It will create the
onCreateLoader,onLoadFinished, andonLoaderResetimplementations. - Add two private members that will hold the list view and an adapter:
private ListView mListView;private SimpleCursorAdapter mAdapter;
- Override the
onCreateViewmethod, where we will inflate the layout and get a reference to the list view. From here we also will call thegetDatamethod:@Override public View onCreateView(LayoutInflater inflater, ViewGroup container, Bundle savedInstanceState) { final View view = inflater.inflate( R.layout.fragment_thoughts, container, false); mListView = (ListView)view.findViewById( R.id.thoughts_list); getData(); return view; }
The following steps will help us to add a loader manager to our app:
- Implement the
getDatamethod. We will use theinitLoadermethod ofloaderManagerfor that. The projection defines the fields we want to retrieve, and the target is an array of ID's within theadapter_thought_titlelayout, which will save us some work using theSimpleCursorAdapterclass.private void getData(){String[] projection = new String[] { ThoughtsProvider.THOUGHTS_ID, ThoughtsProvider.THOUGHTS_NAME, ThoughtsProvider.THOUGHTS_HAPPINESS}; int[] target = new int[] { R.id.adapter_thought_id, R.id.adapter_thought_title, R.id.adapter_thought_rating }; getLoaderManager().initLoader(0, null, this); mAdapter = new SimpleCursorAdapter(getActivity(), R.layout.adapter_thought, null, projection, target, 0); mListView.setAdapter(mAdapter); } - After the
initLoadercall, a new loader needs to be created. For this we will have to implement theonLoadFinishedmethod. We use the same projection as we did for the adapter and we will create aCursorLoaderclass using theuricontent of theThoughtsProviderwe have created in the preceding steps. We will sort the outcome by ID (descending):@Override public Loader<Cursor> onCreateLoader(int id, Bundle args) { String[] projection = new String[] { ThoughtsProvider.THOUGHTS_ID, ThoughtsProvider.THOUGHTS_NAME, ThoughtsProvider.THOUGHTS_HAPPINESS}; String sortBy = "_id DESC";CursorLoader cursorLoader = new CursorLoader(getActivity(), ThoughtsProvider.CONTENT_URI, projection, null, null, sortBy); return cursorLoader; } - In
onLoadFinished, notify the adapter about the loaded data:mAdapter.swapCursor(data);
- Finally, let's add the implementation for the
onLoaderResetmethod. In this situation, the data is no longer available so we can delete the reference.mAdapter.swapCursor(null);
- Let's have a look at the
ThoughtsDetailFragmentmethod. Override theonCreateViewmethod, inflate the layout, and add an on-click listener for the save button in the layout:@Override public View onCreateView(LayoutInflater inflater, ViewGroup container, Bundle savedInstanceState) { final View view = inflater.inflate( R.layout.fragment_thoughts_detail, container, false); view.findViewById( R.id.thoughts_detail_button).setOnClickListener( new View.OnClickListener() { @Override public void onClick(View v) { addThought(); } }); return view; } - Add the
addThoughtmethod. We will create new content values based on the input via theEditTextandRatingBarfield We will use theinsertmethod of the content resolver based on the provided URI. After inserting the new record, we will clear the input:private void addThought(){ EditText thoughtsEdit = (EditText)getView().findViewById( R.id.thoughts_edit_thoughts); RatingBar happinessRatingBar = (RatingBar)getView().findViewById( R.id.thoughs_rating_bar_happy); ContentValues values = new ContentValues(); values.put(ThoughtsProvider.THOUGHTS_NAME, thoughtsEdit.getText().toString()); values.put(ThoughtsProvider.THOUGHTS_HAPPINESS, happinessRatingBar.getRating()); getActivity().getContentResolver().insert( ThoughtsProvider.CONTENT_URI, values); thoughtsEdit.setText(""); happinessRatingBar.setRating(0); } - Again it is time to glue things together. Open the
MainActivityclass and add two private members that will refer to the fragments we have created as follows:private ThoughtsFragment mThoughtsFragment; private ThoughtsDetailFragment mThoughtsDetailFragment;
- Add two private members that will initialize them if needed, and return the instance:
private ThoughtsFragment getThoughtsFragment(){ if (mThoughtsFragment==null) { mThoughtsFragment = new ThoughtsFragment(); } return mThoughtsFragment; } private ThoughtsDetailFragment getThoughtDetailFragment() { if (mThoughtsDetailFragment==null){ mThoughtsDetailFragment = new ThoughtsDetailFragment(); } return mThoughtsDetailFragment; } - Remove the implementation for
onNavigationDrawerItemSelectedand a new one to display the list of thoughts. We will implement the KPI option later:@Override public void onNavigationDrawerItemSelected(int position) { FragmentManager fragmentManager = getFragmentManager(); if (position==1) { fragmentManager.beginTransaction(). replace(R.id.container, getThoughtsFragment()).commit(); } } - In the
onOptionsItemSelectedmethod, test whether the id isaction_add, and if so, display the details fragment. Add the implementation just after the line where we get the id:if (id== R.id.action_add){FragmentManager fragmentManager = getFragmentManager(); fragmentManager.beginTransaction().add( R.id.container, getThoughtDetailFragment() ).commit(); } - After saving details, the fragment has to be removed again. Open
ThoughtsDetailFragmentone more time. To the end of theaddThoughtmethod, add this to do the trick:getActivity().getFragmentManager().beginTransaction(). remove(this).commit();
- However, it would be better to let the activity handle the displaying of fragments since they are intended to be helpers to an activity. Instead, we will create a listener for an
onSaveevent. On top of the class, add aDetailFragmentListenerinterface. Also create a private member and a setter for it:public interface DetailFragmentListener { void onSave(); } private DetailFragmentListener mDetailFragmentListener; public void setDetailFragmentListener( DetailFragmentListener listener){ mDetailFragmentListener = listener; } - Add these lines to the end of the
addThoughtmember to let the listener know things have been saved:if (mDetailFragmentListener != null){ mDetailFragmentListener.onSave(); } - Go back to the
MainActivityclass, and add a listener implementation for it. You could use the Implement methods option from the Code menu for it if you want:public class MainActivity extends Activityimplements NavigationDrawerFragment. NavigationDrawerCallbacks, ThoughtsDetailFragment.DetailFragmentListener { @Override public void onSave() { getFragmentManager().beginTransaction().remove( mThoughtsDetailFragment).commit(); } - To tell the detail fragment that the main activity is listening, scroll to the
getThoughtDetailFragmentclass and call thesetListenermethod right after the creation of a new detail fragment:mThoughtsDetailFragment.setDetailFragmentListener(this);
Now run the app, choose Thoughts list from the navigation drawer, and click on the plus sign to add new thoughts. Following screenshot gives the example of adding thought:
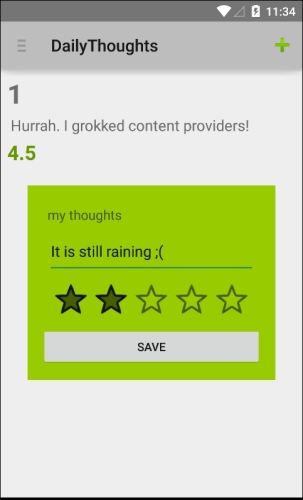
We do not need to tell the fragment that contains the list about the new thought we have created in the detail fragment. Using a content provider with an observer, the list will be updated automatically.
This way we can accomplish more and achieve less error-prone functionality writing less code, which is exactly what we want. It allows us to improve the quality of our code.