
Now that we have completed the previous recipes and the driver that will be using our CloudOrder app knows where to go to for a particular order, it would be great if, once the goods are delivered, he (or she) will be able to select that order and have it signed for delivery by the customer on the device.
In this last recipe, we will implement code to make the customer draws his or her signature on the device. The signature will be sent to Parse as an image and the CloudOrder record will be updated.
- Create a new class and name it
SignatureActivity. - Create a new layout and name it
activity_signature.xml. - Switch the layout to Text. Add the TextView and the Button widget to the layout. Make sure that the layout looks like this:
<?xml version="1.0" encoding="utf-8"?> <LinearLayout xmlns:android="http://schemas.android.com/apk/res/android" android:orientation="vertical" android:layout_width="match_parent" android:padding="8dp" android:layout_height="match_parent"> <TextView android:id="@+id/signature_text" android:text=" Please sign here:" android:textSize="24sp" android:textColor="@android:color/black" android:layout_width="match_parent" android:layout_height="wrap_content" /> <Button android:id="@+id/signature_button" android:text="Send signature" android:layout_width="match_parent" android:layout_height="wrap_content" /> </LinearLayout> - To allow the customer to draw his signature, we need to create a custom widget.
- Right under the
com.packt.cloudorderpackage, create a new package and name itwidget. - Within this new package, create a new class and name it
SignatureView. - Make the
SignatureViewclass descend from theViewclass and override theonDrawmethod to draw a path wherever we put our finger or stylus on the screen. Override theonTouchmethod to create the path. snippet for creating the path will look like this:package com.packt.cloudorder.widget; import android.content.Context; import android.graphics.Bitmap; import android.graphics.Canvas; import android.graphics.Color; import android.graphics.Paint; import android.graphics.Path; import android.graphics.drawable.Drawable; import android.util.AttributeSet; import android.view.MotionEvent; import android.view.View; public class SignatureView extends View { private Paint paint = new Paint(); private Path path = new Path(); public SignatureView(Context context, AttributeSet attrs) { super(context, attrs); paint.setAntiAlias(true); paint.setStrokeWidth(3f); paint.setColor(Color.BLACK); paint.setStyle(Paint.Style.STROKE); paint.setStrokeJoin(Paint.Join.ROUND); } @Override protected void onDraw(Canvas canvas) { canvas.drawPath(path, paint); } @Override public boolean onTouchEvent(MotionEvent event) { float eventX = event.getX(); float eventY = event.getY(); switch (event.getAction()) { case MotionEvent.ACTION_DOWN: path.moveTo(eventX, eventY); return true; case MotionEvent.ACTION_MOVE: path.lineTo(eventX, eventY); break; case MotionEvent.ACTION_UP: break; default: return false; } invalidate(); return true; } - Add the
getSignatureBitmapmethod to theSignatureViewclass so that we can get the signature as a bitmap from theSignature viewwidget:public Bitmap getSignatureBitmap() { Bitmap result = Bitmap.createBitmap(getWidth(), getHeight(), Bitmap.Config.ARGB_8888); Canvas canvas = new Canvas(result); Drawable bgDrawable =getBackground(); if (bgDrawable!=null) { bgDrawable.draw(canvas); }else { canvas.drawColor(Color.WHITE); draw(canvas); } return result; } } - Go back to the
signature_activitylayout and add the signature view between the text view and the button:<com.packt.cloudorder.widget.SignatureView android:id="@+id/signature_view" android:layout_width="match_parent" android:layout_height="200dp" android:layout_marginLeft="3dp" android:layout_marginTop="3dp" android:layout_marginRight="0dp" android:layout_marginBottom="18dp"/> - Build the project. It should make any rendering issues disappear.
- Implement the
SignatureActivityclass. First, make it anActivitydescendant and override theonCreatemethod. Set the content view to the layout we have just created and add anonClickimplementation for the button in the layout, like this:public class SignatureActivity extends Activity { @Override protected void onCreate(Bundle savedInstanceState) { super.onCreate(savedInstanceState); setContentView(R.layout.activity_signature); findViewById(R.id.signature_button).setOnClickListener(new View.OnClickListener(){ @Override public void onClick(View v) { } }); } } - Add the activity to the manifest file after the
MainActivitydeclaration as follows:<activity android:name=".SignatureActivity"/>
- If the driver selects any of the orders, we need to display the signature activity that in turn needs to know which order has been selected. Go to the
MainActivityclass and appendOnItemClickListeneron the list view at the end of theOnCreatemethod, just after theQuery.findInBackgroundcall:((ListView)findViewById(R.id.main_list_orders)).setOnItemClickListener(new AdapterView.OnItemClickListener() { @Override public void onItemClick(AdapterView<?> parent, View view, int position, long id) { } }); - In the
onItemClickevent, let's figure out which order has been selected using the following code snippet:ListView listView = (ListView)findViewById(R.id.main_list_orders); CloudOrder order = (CloudOrder)listView.getAdapter().getItem(position); gotoSignatureActivity(order);
- In the
gotoSignatureActivitymethod, we want to start theSignatureactivity, using an intent, and pass the selected order fromMainActivitytoSignatureActivity, using a bundle as shown:private void gotoSignatureActivity(CloudOrder order){ Intent intent = new Intent(this, SignatureActivity.class); Bundle extras = new Bundle(); extras.putString("orderId", order.getObjectId()); intent.putExtras(extras); this.startActivity(intent); } - In the
SignatureActivityclass, add the following to theOnClickimplementation of the button:sendSignature();
- For the
sendSignaturemethod implementation, we will create a newParseFileobject and feed it with the bitmap data that comes from the signature view. We will send the file to Parse using thesaveInBackgroundmethod:private void sendSignature() { final Activity activity = this; SignatureView signatureView = (SignatureView)findViewById(R.id.signature_view); ByteArrayOutputStream stream = new ByteArrayOutputStream(); signatureView.getSignatureBitmap().compress(Bitmap.CompressFormat.PNG, 100, stream); byte[] data = stream.toByteArray(); final ParseFile file = new ParseFile("signature.jpg", data); file.saveInBackground(new SaveCallback() { @Override public void done(com.parse.ParseException e) { } }); } - Once the saving is done, we want to update the order with information about the file we have created and the status, for example
10, which could indicate that the order has been finished or something like that. Its actually value does not really matter here. - If no error occurred during saving, we use the
createWithoutDatamethod of theParseObjectclass so that we could pass the right object ID and the fields that we want to update. We will save these changes as well so that the record at Parse will be updated. (For the sake of simplicity, we use this approach; although, we could accomplish the same thing using theCloudOrderobject) The implementation of the done call back looks like this:if (e == null) { Bundle extras = getIntent().getExtras(); ParseObject order = ParseObject.createWithoutData("CloudOrder", extras.getString("orderId")); order.put("signature", file); order.put("status", 10); order.saveInBackground(new SaveCallback() { @Override public void done(ParseException e) { if (e==null){ Toast.makeText(activity, "Signature has been sent!", Toast.LENGTH_SHORT).show(); } } }); - Run the app, select an order, sign it, and click on the SEND SIGNATURE button. If everything goes well, a toast will be shown, indicating that the signature has been sent.
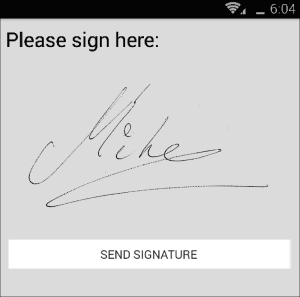
This is what your signature looks like after signing by a customer:
- Check it out for yourself at www.parse.com. Refresh the view for Cloud order. Notice that for the order that you have selected in the app, the
signature.jpgfile appears in the signature column. Double-click on it to see its contents. This is what your data rows may look like at www.parse.com after submitting a signature image to it:
Actually, you should be using string resources instead of hardcoded values. By reusing string resources (or constant values) not only for the class and field names but also for other texts, you will reduce the number of errors caused by typos. This will improve the quality of your app. It also will make it much easier to localize your app later. (In the last three chapters, we will focus more on these kind of things but here is some good practice to start with right away.) The following steps gives usage of string resources:
- Check out the
strings.xmlfile. It resides in theres/valuesfolder. Imagine we would have included the text for the toast being displayed in step 19. Yourstrings.xmlfile could look like this:<?xml version="1.0" encoding="utf-8"?> <resources> …<string name="app_name">Cloud order</string><string name="parse_class_cargo_order">CargoOrder</string> <string name="signature_send">Your signature has been sent.</string> - In your code, you could refer to a string resource using the
getStringmethod. You could replace the hardcoded string for the toast being displayed in step 19 for example with a string reference, like this:Toast.makeText(activity, getString(R.string.signature_send), Toast.LENGTH_SHORT).show();
- In your layout file, you could also refer to this string resource, for example, in a text view:
<TextView
    android:text="@string/signature_send"
	android:layout_width="wrap_content"
	android:layout_height="match_parent" />
We will describe how to use strings, colors, dimensions, and other type of resources in depth later, but you can already get a bit familiar with the concepts by replacing all hardcoded strings in this recipe with string resource references or where applicable, use constant values for them.
With the implementation of this recipe, we have completed our CloudOrder app. Feel free to further customize it and make enhancements wherever you want to.
The custom widget draws a path on the view, for which a bitmap will be created. Using a ParseFile object, the bitmap data will be send to Parse (which in turn will store the file in Amazon and keep a reference to the file).
If this succeeds, we will update the CloudOrder row to which the signature applies by denoting to which file the image in the signature column refers to.
Have a closer look at the documentation at www.parse.com. There are a couple of interesting features available including the saveEventually method and the cloud code options.
The saveEventually method will store the update locally if there is no Internet connection available, which is a common scenario for mobile apps. Once the Internet connection has been restored, this method will take of, sending the data that has been queued to be sent to the cloud. This option will save you much troubles and time.
Also check out the other features such as cloud code and the various third-party integrations that are available, such as Twilio, if you want to send text or voice messages (which could be handy for confirmation purposes in on-boarding processes) and SendGrid, which is a tool for e-mail delivery.
Following the recipes in this chapter, we have implemented some very interesting functionalities with little effort, which is really great! The app however is not very eye-catching yet. By applying the concepts of Material design, which will be explained in the next chapter, we can make the app look great and more intuitive to use.
- For more information, refer to Chapter 3, Material Design.