12. Publishing a Project
You’ve created and imported artwork, designed interactive components, and built the application structure. Your project includes smooth animated transitions and sound effects. You’ve even added video that users can control, and now it’s time to share your masterpiece with the world (or at least with your client—for review and feedback).
In this lesson, you’ll learn how to do the following:
• Choose a delivery option
• Prepare the application for publishing
• Publish the application files
• View and share published files
• Publish to the web using Adobe Dreamweaver CS5
This lesson will take about 40 minutes to complete. Copy the Lesson12 folder into the lessons folder that you created on your hard drive for these projects (or create it now), if you haven’t already done so. As you work on this lesson, you won’t be preserving the start files; if you need to restore the start files, copy them from the Adobe Flash Catalyst CS5 Classroom in a Book CD.
![]()
Export your finished project as a SWF file that leverages the ubiquity of Flash Player 10 or later. Output an offline version of the product for iterative design or client review. Publish to the web or create an Adobe AIR installation file and distribute the program as a desktop application.
Delivery options
There are three ways to publish and distribute a Flash Catalyst application. One version includes the necessary files to run the project as a web application, but cannot run locally. A second version can run locally, but cannot be run from a web server or launch URLs. There is also an option to build an Adobe AIR application. We’ll refer to these as the deploy-to-web, run-local, and AIR versions of the application.
Note
For applications that require additional work by a Flex developer, you’ll save and share the Flash Catalyst project file (.fxp). The project file contains all the assets and code the developer needs to continue working with the project in Adobe Flash Builder.
Deploy-to-web produces a smaller SWF file, along with the Flex 4 framework files. This version includes everything you need to publish the application to a web server for viewing online.
Run-local is a larger SWF file with all of its assets included and no dependencies. The purpose of this redistributable version is to share it. For example, you can share the file with a client and they’ll have everything they need to view the application locally.
AIR is a stand-alone desktop application that runs without a web browser or Internet connection. Flash Catalyst publishes a single AIR application file used to download and install the application.
Note
Even with a data-centric project that requires further development in Flash Builder, you may want to publish preliminary versions of the application for sharing with clients or colleagues during the design and development workflow.
Publishing your application
When you publish a Flash Catalyst project, you choose which version(s) of the application to create. You can also choose to include accessibility features and whether or not to embed fonts.
Accessibility
Your Flash Catalyst projects are built for accessibility by default to support assistive technologies such as screen readers. This improves the user experience and makes projects readily apparent and easily navigable for visually impaired users. This capability is enabled through the Flex framework accessibility support. Including accessibility features in your project increases the size of the SWF file to accommodate the support. The only reason that you’d choose not to build for accessibility is to reduce the size of your published application.
Embedding fonts
You can make sure that everyone sees text as you’ve designed it to look by embedding fonts in the application’s SWF file.
The main limitation to using embedded fonts is that embedded fonts increase the file size of your application.
Before you publish
It’s always a good idea to do a little clean-up and test your projects before publishing. Take a look at the following pre-publishing ideas for optimizing your application.
• Delete objects that are not used in the application. If an object is not being used in a state, then select it and press the Delete key to remove it from the current state only. If an object is not used anywhere in the application, select it and click the Delete icon (![]() ) in the Layers panel.
) in the Layers panel.
• Before publishing, you can optimize vector graphics by using the Optimize Artwork options in the Heads-Up Display (HUD) or by choosing Modify > Optimize Vector Graphics.
• To reduce the file size of the application, compress graphics in the Library panel. Right-click a graphic in the Library panel and choose Compression Options. Reduce the Quality setting and click OK.
• Your Flash Catalyst applications are Flex projects. Before publishing, you can switch over to the Code workspace and see how the components and states are created. You can also view the Problems panel in Code view to make sure that your project doesn’t have any issues that need resolving.
• Run the project and test it before publishing. Check to make sure that all navigation and links are working properly. Preview all transitions to make sure they run smoothly. Test any video or sound controls.
• Save the project prior to publishing.
Publish to SWF
Let’s publish the Interactive Banner application so that we can take a look at the publishing options and the different files that get produced.
- Start Flash Catalyst, browse to the Lesson12 folder on your hard drive, and open the Lesson12_Banner.fxp file.
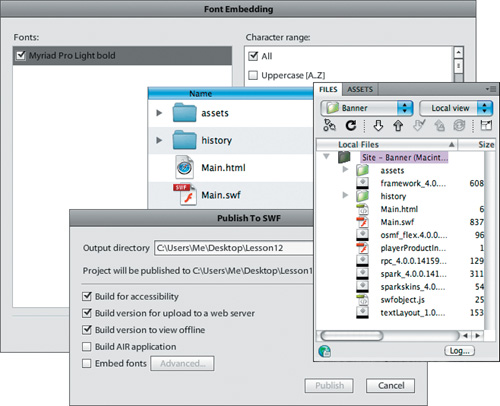
- Choose File > Publish To SWF/AIR.
The options to Build For Accessibility, Build Version For Upload To A Web Server, and Build Version To View Offline are selected by default. You need to choose an Output Directory for the published files.

- Click Browse and navigate to the Lesson12 folder on your hard drive. Select the Lesson12 folder and click OK/Open.
- Select the Build AIR Application option.
- Select the Embed Fonts option.
Selecting Embed Fonts activates the Advanced button.
- Click Advanced to open the Font Embedding dialog box.
You can specify which fonts and character ranges to embed. For example, exclude specific language options, such as Greek and Thai. Limiting what you choose to embed can help reduce the size of your published SWF file.
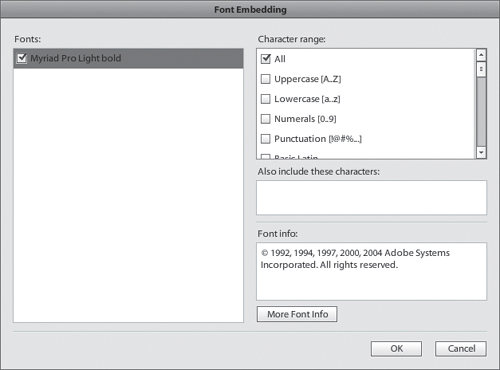
- Click OK to accept the default font embedding settings.
- Click Publish.
Note
When you publish a project that has already been published, a message asks if you want to overwrite the existing files. You can choose Cancel and publish to a different directory, or choose Overwrite to replace the existing files.
Viewing the published files
Publishing a project generates the Main.swf file, along with any other files needed to run the application, depending on the options you select.
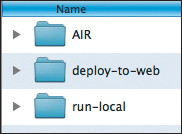
Flash Catalyst creates a new subfolder in the location you choose as the Output Directory. The new folder has the same name as your project file. Within that folder, you’ll find a separate folder for each version of the application you choose to create—deploy-to-web, run-local, and AIR.
deploy-to-web is the folder containing the deployable web version of the application.
run-local is the folder containing the offline version of the application.
AIR is the folder containing the AIR application file.
Tip
You can rename the deploy-to-web and other application folders to something more descriptive of your application. Keep in mind that if you rename the folder, republishing the project will not overwrite the previous version.
- Open the Lesson12 folder on your hard drive.
The folder includes the Output Directory with the same name as the project file, Lesson12_Banner.
- Open the Lesson12_Banner Output Directory folder.
The three versions of your application are stored here.
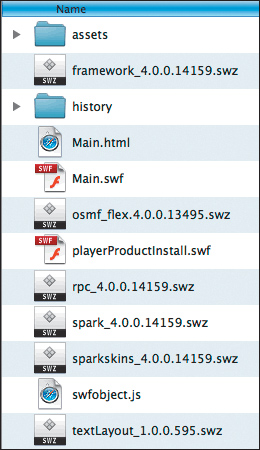
- Open the deploy-to-web folder.
The deployable web version of the application includes all the necessary files to run the application from a web server. These are the files you upload to your web server if you want to deploy the application online.
Note
Since Flash Player 9, the Flex framework files are cached by the Flash Player. Over time, most users will have the Flex framework as part of their Flash Player. In these cases, they’ll just need to download the much smaller SWF file from your web server. But until then, it’s best to put these files on your web server next to the SWF file.
The deploy-to-web files include the Main.swf application file and the main.html wrapper for the SWF file. This file references the swfobject.js code that performs Flash Player version checks and redirects a user to upgrade their Flash Player, if needed. If you choose to place the SWF file inside a different HTML page, you can copy and paste this code. The Flex framework files are also included and are external to the application SWF file. This helps to keep the size of the SWF file small, which is better for web delivery. The assets folder includes any linked assets. In the case of the Banner project, the sound and video files are stored here. All images are embedded in this project. The history folder includes a set of files that allow a Flex application to store browser history as you move from page to page within the application.
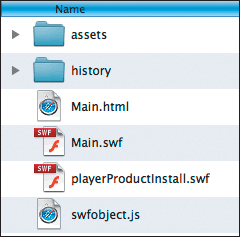
- Close the deploy-to-web folder and open the run-local folder.
You can share the contents of the run-local folder with others to view the application. As long as they have Flash Player 10 or later installed, they can open the application in a web browser. In the run-local version of the application, the Flex framework is built into the SWF file. The reason for doing this is so that you can pass it around to someone else (a client) and they’ll have everything they need to run the SWF file locally. The trade-off is that it makes the SWF file much bigger, but it has no external dependencies.
- Double-click the Main.html file.
The Main.html file opens and loads the Main.swf file.
- Close the browser.
- Close the run-local folder and open the AIR folder.
The AIR folder includes one file. Anyone that has this file can install and run the AIR application.
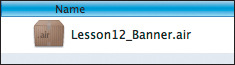
- Double-click the Lesson12_Banner.air file.
The Application Install dialog box opens. If the application was already installed, you’ll have the option to run the installation again or uninstall the program.
Note
If you don’t have the Adobe AIR runtime installed, or if your version of the AIR runtime needs updating, then you may need to install that first. Follow the prompts to install or update the AIR runtime if prompted.
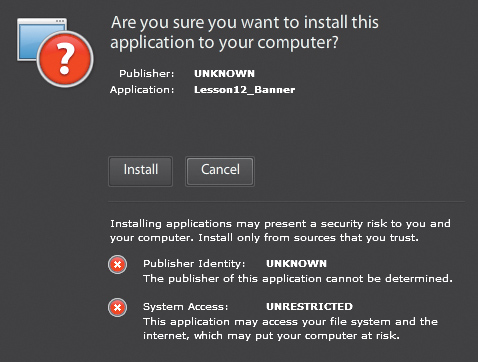
- Click Install.
The Installation options appear.

- Make sure that Start Application After Installation is selected, and click Continue.
The program installs. When the installation is complete, the Lesson12_Banner application starts in a new application window.
- Test the application by moving from page to page and viewing the videos on pages 4 and 5.
- Close the application window.
- Double-click the Lesson12_Banner.air file again.
The installer recognizes that you already have the application installed.
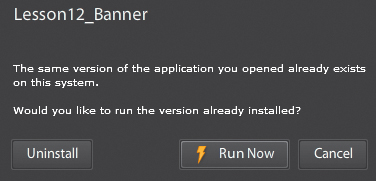
- Click Uninstall.
The uninstaller removes the application from your computer.
- When the application removal is complete, click Finish to close the dialog box.
Publishing to the web with Adobe Dreamweaver CS5
To deploy your published project to the web, upload the entire contents of the deploy-to-web folder to your web server. You can use a File Transfer Protocol (FTP) client, or use the site publishing and file management features within Adobe Dreamweaver CS5.
There are three main steps to publishing to the web using Dreamweaver:
- Start Dreamweaver and create a new site. To do this, you create a local root folder and site structure.
- Connect to the remote site.
- Upload the Flash Catalyst application files.
Create a local root folder and site structure
A local root folder is a folder on your computer that holds subfolders and files for the website. It’s like a staging area.
When you publish a Flash Catalyst application, the deploy-to-web folder is the local root folder on your hard drive.
- Start Adobe Dreamweaver CS5.
- Choose Site > New Site.
The Site Setup dialog box opens.
Tip
When you start Dreamweaver, you can also choose Dreamweaver Site in the Create New section of the Welcome screen.
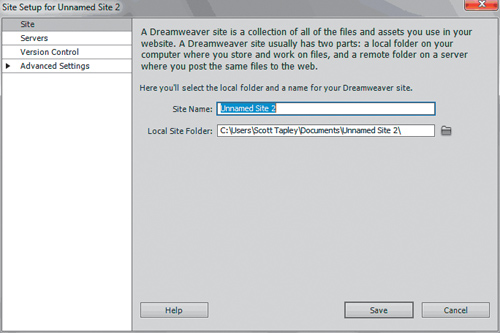
- Delete the temporary name, Unnamed Site 1. Enter Banner as the name for the new site.
- Click the Folder icon to the right of the Local Site Folder field.
The Choose Root Folder dialog box opens.
- Browse to the Lesson12_Banner folder, open it, and select the deploy-to-web folder that was created when you published your application.
- Click Open and then click Select/Choose.
- Click Save.
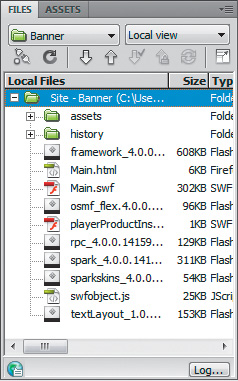
Your local root folder is defined. The Dreamweaver Files panel displays the folders and files for your site.
Connect to a remote site
Many websites let you publish files through FTP. You can connect to a remote site by using the Site Definition dialog box in Adobe Dreamweaver CS5.
To complete this activity, you need to have a site to which you can publish files and the FTP login information for accessing the site.
- Choose Site > Manage Sites from the menu bar.
The Manage Sites dialog box opens.
- Select the site named Banner (the one you just created), and click Edit.
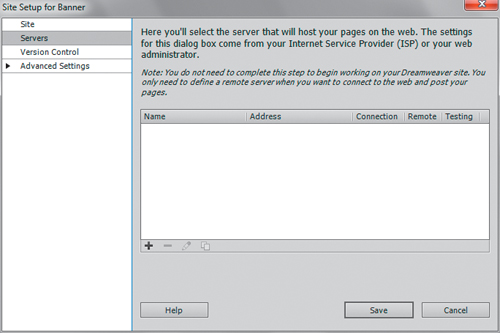
The Site Setup dialog box opens.
- Click Servers in the left column.
The Servers area of the Site Setup dialog box opens.
- Click the Add Server button (
 ).
). - Enter your FTP access information.
Note
You can get your FTP access information from your site administrator or Internet service provider.
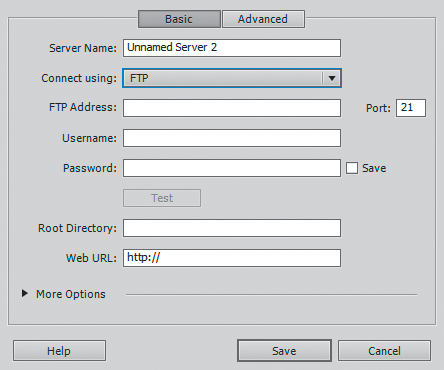
- Click Test to test the connection.
Dreamweaver confirms the connection.
- Click Save.
The new server appears in the list of servers in the Site Setup dialog box.
- Click Save to close the Site Setup dialog box.
- Click Done to close the Manage Sites dialog box.
Upload files
Once you establish an FTP connection, you can publish files directly from the Files panel.
- Make sure the Dreamweaver Files panel is open.
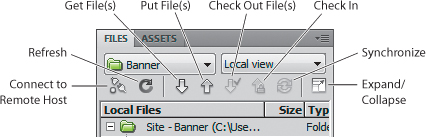
- Click the Expand/Collapse icon in the Files panel toolbar.
The Files panel expands.
- Click the Connect To Remote Host icon to select it, if it’s not already selected.
Dreamweaver connects to the web server.
- Select the root folder for your site in the Local (right) pane.
- Click the Put Files icon. If you are asked to confirm the file transfer, then click OK.
Dreamweaver uploads the application files and opens the Background File Activity dialog box. You can save a log file with details about the file transfer.
Tip
To upload one or more folders or files without uploading the entire site, select them and click the Put Files icon.

- Click Close to close the dialog box.
- Click the Expand/Collapse icon to collapse the Files panel.
- Choose File > Exit to close Dreamweaver.
Review questions
1 What are the three types of applications you can publish from your Flash Catalyst project?
2 Which two application types are published by default?
3 Why would you ever choose not to build a project for accessibility?
4 Which fonts should be embedded in the application when you publish?
5 What is an Adobe AIR application?
6 What are the main steps you need to complete when publishing an application to the web using Adobe Dreamweaver?
7 Which of the published application folders do you use as the site root folder when you upload your application to the web?
Review answers
1 You can publish three types of applications. One version includes the necessary files to run the project as a web application, but cannot run locally. A second version can run locally, but cannot be run from a web server or launch URLs. The third version is an Adobe AIR application that runs from the desktop without a browser or Internet connection.
2 Deploy-to-web and run-local are published by default.
3 Including the accessibility options when you publish a project results in a larger SWF file. You can deselect Build For Accessibility to reduce the size of your application SWF file.
4 In general, don’t embed fonts if you know that users already have them. To be safe, embed any fonts other than Arial, Courier New, Georgia, Times New Roman, and Verdana. Embedding non-web fonts ensures that users see the design exactly as you do, even if they don’t have the same fonts on their computer.
5 Adobe AIR is a cross-operating system runtime that allows you to build and deploy rich Internet applications (RIAs) to the desktop. Using Flash Catalyst, you can publish the project as an Adobe AIR application and then upload the published file to your web server. This allows someone to download and install the application locally. The application runs on their desktop without a web browser or an Internet connection.
6 Start Dreamweaver and create a new site. To do this, you create a local root folder and site structure. Connect to the remote site. Upload the Flash Catalyst application files.
7 The deploy-to-web folder can be used as the site root folder when publishing the application to the web using Dreamweaver.