8. Adding and Controlling Video and Sound
Web video is everywhere—news, sports, entertainment, e-commerce, corporate communications, education, blogs, and social networking are a just few examples. Thanks to sites like YouTube and Hulu, more and more people are going directly to the web for their daily dose of information, and they expect to be entertained.
In this lesson, you’ll learn how to do the following:
• Prepare video for the web
• Import video and sound
• Preview video and sound
• Add video to an application
• Control video playback
• Add sound effects
This lesson will take about 60 minutes to complete. Copy the Lesson08 folder into the lessons folder that you created on your hard drive for these projects (or create it now), if you haven’t already done so. As you work on this lesson, you won’t be preserving the start files; if you need to restore the start files, copy them from the Adobe Flash Catalyst CS5 Classroom in a Book CD.
![]()
With higher bandwidth Internet connections, many web surfers have come to expect video and sound with each and every visit to the Internet.
Preparing video for the web
Most web browsers have Adobe Flash Player installed, making it easier than ever to include Flash video files (FLV and F4V) in a web page. But before you can add video to your rich Internet applications, you must encode it for web delivery.
What is encoding?
In Flash Catalyst, encoding involves converting your final edited video footage to a format compatible with Adobe Flash Player. Flash Catalyst supports FLV and F4V video files. FLV and F4V are container formats for Flash video. FLV files generally contain video data that is encoded using the On2 VP6 or Sorenson Spark codec and audio data encoded using an MP3 audio codec. F4V files generally contain video data that is encoded using an H.264 video codec and the AAC audio codec.
What is a video codec?
A codec is an encoding/decoding algorithm that controls how video files are compressed during encoding, and decompressed during playback.
• H.264 is an MPEG-4–based standard for web delivery. H.264 is recommended for a variety of devices, including high-definition (HD) video, 3GPP cell phones, video iPods, and PlayStation Portable (PSP) devices.
• On2 VP6 is the standard codec for encoding Flash video (FLV) files for Flash Player 8 and higher.
• Sorenson Spark is the required video compression format for Flash Player 6 and 7.
• MP3 is a standard file format on the Internet and on many portable digital audio players.
• Advanced Audio Coding (AAC) is a standardized encoding scheme for digital audio. Designed to be the successor to the MP3 format, AAC generally achieves better sound quality than MP3 at similar bit rates.
How do I encode my video?
There are several applications that you can use to create FLV and F4V files, including Adobe Flash Professional CS5, Adobe Premiere Pro CS5, Adobe After Effects CS5, Adobe Media Encoder, and Sorenson Squeeze.
Each of these programs includes many presets, so most editors will not need to adjust any parameters when preparing their video for the web. You can simply select a format (FLV/F4V) and choose from a collection of presets, such as Web - Medium Quality for Flash 8 and higher. When you choose a preset, the video and audio codec and other settings are set automatically, including picture size, frame rate, bit rate, and so on. You can also begin with a preset, and then modify individual settings, if needed.

Whenever possible, encode a file from its uncompressed form. If you convert a file that has already been compressed using a different format, and then recompress that file into the FLV or F4V format, the previous encoder can introduce video noise.
To explain each format’s unique characteristics goes well beyond the scope of this course. For more information on preparing video for the web, visit the Adobe Developer Connection Video Technology Center online at www.adobe.com/devnet/video.
Importing and previewing video and sound
Adding motion video can turn an otherwise dull site into something engaging and memorable. The first step to adding video or sound to an application is importing the media files into your Flash Catalyst project.
Flash Catalyst supports video files with the .flv and .f4v filename extensions and audio files with the .mp3 filename extension.
Import video and sound
When you import a single video file, a new Video Player object is created in the target layer and added to the artboard. The source video is stored in the project library. When you import more than one video file, or an audio file, the files are stored in the library until you decide to use them.
- Start Flash Catalyst, browse to the Lesson08 folder on your hard drive, and open the Lesson08_Banner.fxp file.
- Choose File > Import > Video/Sound File.
The Import dialog box opens.
- Browse to the Lesson08 folder on your hard drive. Ctrl/Command-click to select cityscape.flv, restaurants.flv, and button_click.mp3.
- Click Open.
- Open the Library panel and expand the Media category.
The video and sound files you imported appear in the Library panel.

Preview video and sound
If your video and sound files have similar names, such as video1, video2, and so on, you can quickly identify them by previewing media in the Library panel. It’s a good idea to preview media files before adding them to the application.
- Select cityscape.flv in the Library panel.
A still image appears at the top of the Library panel. The image includes a Play button. If you play the video, Rewind and Pause buttons appear.

- Preview the cityscape.flv and restaurants.flv video files.
- Select the button_click.mp3 sound file in the Library panel.
A Play button appears at the top of the Library panel. If you play the sound, Rewind and Pause buttons appear.

- Preview the button_click.mp3 sound file.
It sounds like a button click.
Adding video to an application
There are two ways to add video to the application.
• Import a single video file directly into the current state.
• Drag a video from the Library panel to the artboard in the current state.
When you add a video to the application, the source video is stored in the library and a Video Player object is added to the current state and appears in the Layers panel. The Video Player is a container used to hold and play the video.
Add video to the artboard
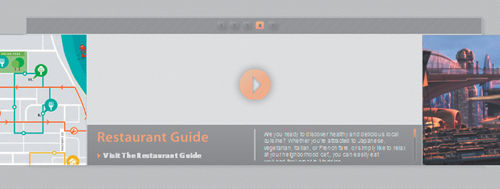
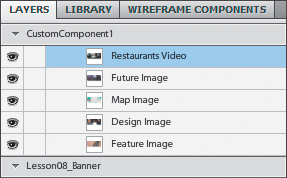
The interactive banner application includes a custom component called Image Slider. The Image Slider component includes background images for each page. You are going to replace the background image for the Restaurants page with a short video clip.
- Select the Restaurants page in the Pages/States panel.
- Collapse the Timelines panel so you can see more of the artboard. If you can’t see the entire artboard in the workspace, then change the workspace magnification to 66%.
- In the Layers panel, unlock the Image Slider row.
- In the artboard, double-click the background image to edit the Image Slider component in Edit-In-Place mode.
- In the Layers panel, select Restaurants Image and click the Delete icon (
 ) in the Layers panel to remove it from all states in the application.
Note
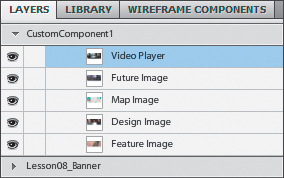
The Image Slider component is named Image Slider in the Layers panel, but its component name in the library is CustomComponent1. When you open the Image Slider component in Edit-In-Place mode, the name CustomComponent1 appears in the Breadcrumbs bar.
Removing the still image leaves a gap in the Image Slider. You’ll fill the gap with the restaurants.flv video.
- Open the Library panel and expand the Media category.
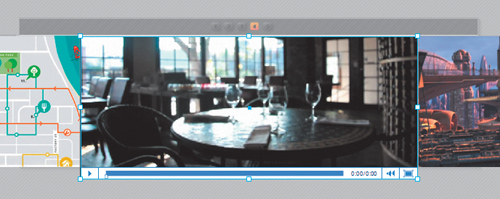
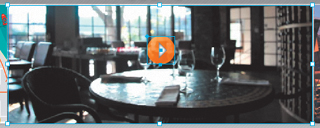
- Drag a copy of the restaurants.flv video to the artboard and position it in the gap you created in step 5.
The video includes wireframe video controls below the video in the artboard. The video controls extend below the artboard, but that’s OK because you’re going to replace these with a custom control.
- Open the Layers panel.
A Video Player object is added to the Layers panel in the Image Slider component.
Set video player properties
As with other objects, a video player can exist in more than one state, and it can have a unique set of properties in each state where it exists. You modify Video Player properties in the Properties panel.
- Open the Common section in the Properties panel.
You can set the position, size, opacity, and rotation of the video. By default, the wireframe video controls are added below the video. To change which video appears in the controller, you can use the Source link in the Properties panel. This allows you to update the video without going through the steps to add, position, and set properties all over again. The properties apply to the Video Player, not the video file it contains.
Tip
Using the same video player to load and control different videos in different states is one way to optimize the performance of your application.
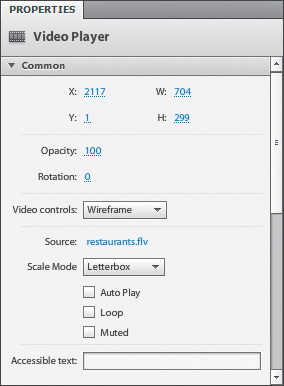
- Open the Video Controls menu and choose Standard.
The controls below the video player change from the blue wireframe controls to a standard set of black and white controls.

- Open the Scale Mode pop-up menu and choose Letterbox. This should be the default setting. Scale Mode controls how the video scales when you drag its selection handles.
None sizes the video player but not the video picture. If you make the bounding box smaller than the video, the video is cropped.
Letterbox scales uniformly as large as possible without cropping the video. Black or white bars appear around the video if the video is a different aspect ratio than the video player bounding box.
Stretch matches the size of the video picture to the size of the video player window. This does not maintain its height to width ratio. The video is not cropped, but can appear distorted from the non-uniform scaling.
Zoom sizes and crops the video to match the size of the video player while maintaining the video’s height to width ratio.
In the Properties panel, you can set the video to begin playing automatically (Auto Play), loop repeatedly (Loop), or begin with its sound muted (Muted).
You can enter Accessible text, which is recognized by screen readers and other accessibility programs.
- Open the Component section of the Properties panel.
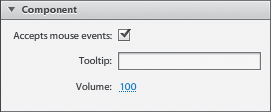
If the video includes sound, you can adjust its volume. You can also create a tooltip for the video player.
- Open the Text section in the Properties panel, click the Color swatch and select a new color, such as red.

The text in the video controls change to the color you selected. You can also change the style, opacity, and size of the text.
- In the Common section of the Properties panel, open the Video Controls menu and choose None.
This removes the video controls below the video player. You’re going to replace these with a custom play/pause button.
Tip
You can add filters to a video player in the Filters section of the Properties panel. For example, you can use a drop shadow to make it look like the video is floating above the artboard. You’ll learn more about applying filters later in this course.

- Press Esc to exit Edit-In-Place mode.
Controlling video playback
Now that you’ve hidden the default video controls, you need to give the user another way of playing and stopping the video in the Restaurants page.
You can use original artwork to create a custom video controller component. The controller can be as simple as a button used to play the video, or it can be a complex custom component that contains separate controls for things like play, pause, rewind, and so on.
Once you define the parts of your controller, you need to add interactions to control video playback. A control can be created from any component or group.
Attach controls to the video
The interactive banner application includes a Play/Pause toggle button that was created earlier. We can use this button to control the video, but the button and the video need to exist together, either at the main application level, or together inside the same component. Right now, the video player containing the restaurants video is located inside the Image Slider component, so we need to add the Toggle Button to the Image Slider.
- Select the Restaurants page in the Pages/States panel, if it’s not already selected.
- In the Layers panel, unlock the Toggle Button row.
You are going to move the Toggle Button into the Image Slider component, but to do this it needs to be unlocked.
- Select Image Slider in the Layers panel, and click State1 in the Heads-Up Display (HUD) to edit the component in Edit-In-Place mode.
- In the Layers panel, expand the Lesson08_Banner section. Drag the Toggle Button from the Lesson08_Banner section into the Image Slider component (CustomComponent1). Position the Toggle Button as the topmost layer.
A message warns you that if you move the Toggle Button, you will lose any effects or interactions that are applied to it. This includes transitions and action sequences. If you want to use the Toggle Button component to control the video inside the Image Slider, you need to place the button inside the Image Slider component.
- Click OK.
The Toggle Button is the top layer in the Image Slider component.
Note
You could have deleted the Toggle Button in the main application layers, and then dragged a new instance of the Toggle Button from the Library panel into the Image Slider custom component. But dragging the button from the main application into the component is faster.
- In the Layers panel, select Toggle Button, hold down Shift, and select Video Player.
Both objects are selected in the artboard.
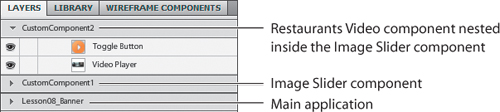
- In the HUD, convert the selected objects to a Custom/Generic component.
- In the Layers panel, rename the new custom component Restaurants Video.
- In the HUD, click State1 to edit the Restaurants Video component in Edit-In-Place mode.
This component includes the Toggle Button and Video Player. With both objects inside the same component, you can use the Toggle Button to control the Video Player.
You can tell by the Layers panel that you’re editing a custom component (CustomComponent2) that is located inside another custom component (CustomComponent1), which is located in the Lesson08_Banner application.
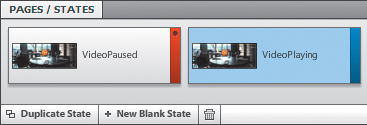
- Click Duplicate State in the Pages/States panel.
- Rename State1 VideoPaused and State2 VideoPlaying.
Having two states makes it possible to change the appearance of the button while the video is playing.
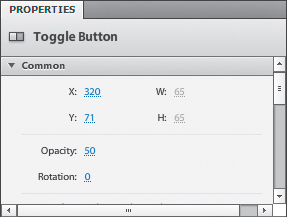
- Make sure VideoPlaying is selected in the Pages/States panel.
- Select Toggle Button in the Layers panel.
- Change the Opacity value of the Toggle Button to 50 in the Properties panel.
When the video is playing (in the VideoPlaying state), the Toggle Button dims to 50% opacity.
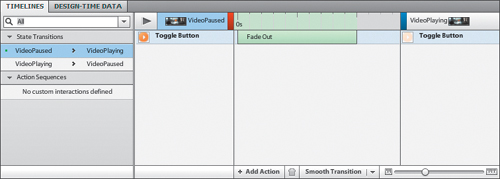
- In the Timelines panel, select VideoPaused > VideoPlaying in the State Transitions list.
- Click Smooth Transition.
The Toggle Button begins at 100% opacity in the VideoPaused state and fades out to 50% opacity in the VideoPlaying state, creating a smooth transition. You can preview this by clicking the Play Transition button in the Timeline.
- Collapse the Timelines panel.

Add interactions to control video playback
With the Video Player and the Toggle Button together in the same component, the Toggle Button can now control the video.
- Select the Toggle Button.
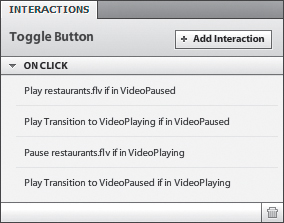
- In the Interactions panel, add the following four On Click interactions:
• Play Video, Video Player – restaurants.flv, When In VideoPaused.
• Play Transition To State, VideoPlaying, When In VideoPaused.
• Pause Video, Video Player – restaurants.flv, When In VideoPlaying.
• Play Transition To State, VideoPaused, When In VideoPlaying.
The Toggle Button now includes four On Click interactions.
- Run the project in a browser, navigate to the Restaurants page (page 4), and test the video controls.
Notice that when the video finishes playing, the Toggle Button remains at 50% opacity and doesn’t toggle back to the play symbol. There are two problems. The Restaurants Video component is ending in the VideoPlaying state, and the Toggle Button stays selected (pause symbol). It should toggle back to its deselected Up state (play symbol). You’ll fix that next.
- Close the browser and return to Flash Catalyst.
The Restaurants Video component is still in edit in Edit-In-Place mode.
Reset the video after playing
To reset the video and Toggle Button after playing, you must do two things:
• Add an interaction that returns the Restaurants Video component to its VideoPaused state.
• Sync the Toggle Button so that its properties in each state match its natural on/off behavior, allowing it to toggle to the correct setting when returning to the VideoPaused state.
- Select Video Player in the Layers panel.
- In the Interactions panel, click Add Interaction.
On Video Play Complete is the event that will trigger the interaction. This is the only option available because you have a video player selected. Play Transition To State is selected by default, and that’s what you want.

- Click Choose State, and select VideoPaused.
- Click OK.
The Video Player will return to the VideoPaused state when the video is finished playing.

- Select VideoPaused in the Pages/States panel.
- Select the Toggle Button, and look in the Common section of the Properties panel.

By default, the Toggle Button is not selected. This is perfect because the Toggle Button begins in the VideoPaused state and is not selected until someone clicks it.
- Double-click the Toggle Button to view its states in Edit-In-Place mode.
The Toggle Button begins deselected with its Up state (play symbol) visible. When someone clicks the button, it changes to its Selected Up state (pause symbol).

- Press Esc to close the Toggle Button.
- Select VideoPlaying in the Pages/States panel, select the Toggle Button, and look in the Properties panel.
When the video is playing (after the button is clicked), the button toggles to its Selected Up state but its properties are telling us that it’s not selected. This causes a conflict, and the button loses sync because the button property doesn’t reflect that it is selected while playing. To fix that, we need to change the button’s Selected property to match its Selected Up state when the video is playing.
- In the Properties panel for the Toggle Button, click the Selected property to select it.

- Run the project in a browser, navigate to the Restaurants page (page 4), and test the video controls.
Now when the video finishes playing, it automatically returns to the VideoPaused state and the button toggles to the play symbol.
- Close the browser and return to Flash Catalyst.
- Click Lesson08_Banner in the Breadcrumbs bar to exit Edit-In-Place mode.
- Lock the Image Slider layer in the Layers panel.
Adding sound effects
Sound effects aren’t just fun. They improve usability by identifying buttons, menus, and other interactive objects.
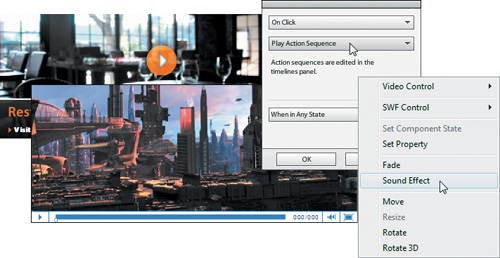
You can add sound effects to components or groups by adding an action sequence interaction and then adding a Sound Effect to the action sequence in the Timelines panel.
- Unlock the Top Btns layer in the Layers panel, and open the Timelines panel.
The Top Btns layer includes the top five navigation buttons. You can add sound effects that play when someone clicks a button.
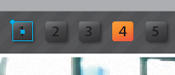
- In the artboard, click to select the top navigation button labeled 1.
- In the Interactions panel, click Add Interaction.
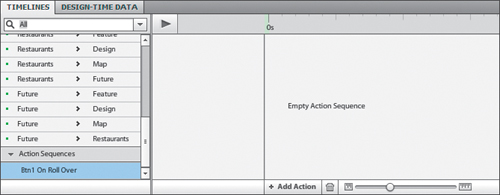
- Choose On Roll Over, Play Action Sequence, and When In Any State.

- Click OK.
An empty On Button Roll Over action sequence is added to the Timelines panel.
- Click Add Action, and choose Sound Effect.
The Select Asset dialog box opens. You can add a sound from the Media category in the library or import a new sound.
- Click Import.
The Import dialog box opens to the Adobe Flash Catalyst CS5 sound effects directory.
- Select the Flash Beep.mp3 file, and click Open.
The Flash Beep.mp3 file is added to the Media category in the library and is selected in the Select Asset dialog box.

- Click the Play button at the top of the Select Asset dialog box to preview the Flash Beep.mp3 file.
- Click OK to add the sound effect.
The Flash Beep.mp3 sound effect is added to the action sequence.

- Click the Play button in the Timelines panel to preview the action sequence.
The sound effect plays.
Tip
You can delay the start of the sound by dragging the Sound Effect bar in the Timeline, or by changing its Delay property in the Properties panel.
The duration of the sound effect is 1 second. If the sound was longer than 1 second, you would need to extend its duration to match the length of the audio file. You can do that in the Properties panel or by dragging its resize handle.
The sound plays immediately when the interaction occurs.
- In the Properties panel, select the Repeat property.

The Repeat property expands. You can enter the number of times you want the sound effect to repeat, or choose Forever if you want the sound effect to continue playing without stopping.
- Click the Play button in the Timelines panel.
The sound effect plays the number of times entered in the Properties panel.
- Deselect Repeat so the sound effect plays once when someone rolls over the navigation button.
- Add another action sequence to the top navigation button labeled 1, but this time make it an On Click interaction that plays the button_click.mp3 sound effect that you imported to the library.

The top navigation button labeled 1 includes three interactions. The first is the On Click interaction that navigates to the Feature page (page 1). A second On Click action sequence plays the button_click.mp3 sound effect. The On Roll Over action sequence plays the Flash Beep.mp3 sound effect.
- Run the project in a browser and click back and forth between the first and second pages to test the sound effects.
Notice that when you’re on page 1, the Top Btn 1 sound effects don’t play. That’s because the button is disabled in its target state.
- Close the browser and return to Flash Catalyst.
- Add the same On Roll Over and On Click sound effects to the other top navigation buttons.
Review questions
1 How can you import a video file directly to the artboard for the current state in the application (without dragging it from the Library panel)?
2 How do you set a video to play continuously?
3 How can I set a video to begin playing automatically, without requiring someone to click a Play button?
4 By default, what is used to control the playback of video?
5 What rule applies when using a component to control video playback?
Review answers
1 If you import one video at a time, the video is added to the current state. Importing multiple videos places them in the library only.
2 Select the video player and select Loop in the Properties panel to play a video continuously.
3 Select the video player and select Auto Play in the Properties panel to play a video automatically.
4 By default, the wireframe video controls are added below the video in the video player. In the video player Properties panel, you can change to the standard controls, or hide the controls by choosing None, and then create custom controls using other components.
5 The component and the video player must both be in the main application layers or together inside the same component. For example, a component in the main application layers cannot be used to control a video that is nested inside other components.
6 You can attach sound effects to components and groups.
7 To add a sound effect, select the component or group. Add an action sequence to the component or group. In the Timelines panel, open the Add Action menu and add a Sound Effect.