9. Publishing Animations
Introduction
After you finish creating your animation in Edge Animate, you can publish your composition for use in different applications. Edge Animate provides three publishing options: Web, Animate Deployment Package, and iBooks / OS X. The Web option, the most common, publishes for use on the web as an optimized HTML web page. When you publish a web page, you can view your animation in an HTML5/JavaScript compatible web browser, which includes Mozilla Firefox, Apple Safari, Google Chrome, and Microsoft Internet Explorer 9, and mobile devices. The Animate Deployment Package option publishes for use in other Adobe programs, such as InDesign, Digital Publishing Suite (DPS), and Muse. And finally, the iBooks / OS X option publishes for use in Apple iBooks Author on OS X systems as an OS X Dashboard Widget.
Before you publish a composition, you need to do a few things first. You need to specify the publish settings you want, and define the optional use of the Down-level Stage and Preloader Stage. The Down-level Stage allows you to create an information display screen, known as a poster image, for users who don’t have a compatible web browser to view your Edge Animate composition. The Preloader Stage allows you to create a progress bar for display when your Edge Animate composition loads in a web browser.
Publishing Considerations
You may be asking yourself, what is the difference between saving a composition and publishing one. When you save a composition, Edge Animate saves the HTML, Edge Animate (.an), JavaScript (.js), and related files for development purposes. Edge Animate manages the internal structure of the files for organization and development, not for optimization and distribution. That’s where publishing comes in.
Preparing to Publish a Composition
Before you publish a composition, you need to do a few things first. You need to specify the publish settings you want, and define the optional use of the Down-level Stage and Preloader Stage. The Down-level Stage allows you to create an information display screen for users who don’t have a compatible web browser to view your composition. The Preloader Stage allows you to create a progress bar for display when your composition loads in a web browser.
You can specify publish settings in the Publish Settings dialog box in Edge Animate, which you can access on the File menu. Edge Animate provides three publishing options: Web, Animate Deployment Package, and iBooks / OS X.
Publish for the Web
The Web option allows you to publish a composition for use on the web as an optimized HTML web page. In addition, you can specify options to publish for use with the Google Chrome Frame plug-in for IE 6, 7, and 8, for distribution with CDN (Content Delivery Network), or for use as static HTML content.
Publish for Adobe Programs
The Animate Deployment Package (.oam) option allows you to publish a composition for use with other Adobe programs, such as Muse, InDesign CS6, and Digital Publishing Suite (DPS).
Adobe Muse is a program built upon Adobe AIR (Flash Platform) that allows you to design and publish web sites. Muse takes advantage of other Adobe services, much like Edge Animate does, such as TypeKit to integrate fonts, and Business Catalyst for creating web sites.
Adobe InDesign is a program that allows you to design and pre-flight page layouts for print or digital distribution.
Adobe Digital Publishing Suite (DPS) is an online service that allows you to create, optimize, and distribute content produced in Adobe InDesign for tablet devices. Once imported into InDesign, you can use DPS tools to publish content to the online service.
Publish for Apple iBooks Author
The IBooks / OS X option allows you to publish a composition for use with Apple iBooks Author, which is only available on OS X (not for use on the Windows platform). Apple iBooks Author is a free application on the Mac App Store that allows you to create a multi-touch book for iPad tablet devices. Edge Animate publishes a Dashboard Widget (.wdgt) file, which is a compressed folder of files compatible for use in iBooks Author.
Publishing the Files
When you publish a composition, Edge Animate puts the files in a target folder named publish within your project folder by default, however you can change it. Edge Animate integrates the content from the Edge Animate file (.an) into the other files and doesn’t include it in the publish folder.
Publishing a Composition
Before you publish a composition, you need to do a few things first. You need to specify the publish settings you want, and define the optional use of the Down-level Stage and Preloader Stage. Edge Animate provides three publishing options: Web, Animate Deployment Package, and iBooks / OS X. The Web option publishes for use on the web as an optimized HTML web page. The Animate Deployment Package option (.oam) publishes for use in other Adobe programs, such as InDesign, Digital Publishing Suite (DPS), and Muse. The iBooks / OS X option publishes for use in Apple iBooks Author as an OS X Dashboard Widget (.wdgt) on OS X systems. When you publish a composition, Edge Animate puts the files in a target folder named publish within your project folder by default, however you can change it. However, it’s not recommended.
Publish a Composition
![]() Open the composition you want to publish.
Open the composition you want to publish.
![]() Define the use of the Down-level Stage or Preloader Stage.
Define the use of the Down-level Stage or Preloader Stage.
• Click the View menu, and then click Preloader Stage or Down-level Stage.
![]() Click the File menu, and then click Publish Settings.
Click the File menu, and then click Publish Settings.
![]() Specify any of the following publishing options:
Specify any of the following publishing options:
• Web. Creates optimized HTML and related JavaScript files.
• Animate Deployment Package. Creates an OAM file for use in Adobe Muse, Adobe InDesign, or Adobe DPS.
• iBooks / OS X. Creates a WDGT file for use in Apple iBooks Author (only on OS X systems).
![]() Click Publish to publish the composition or click Save to save the settings and publish later.
Click Publish to publish the composition or click Save to save the settings and publish later.
• If you save your publishing settings, you can click the File menu, and then click Publish to publish the composition.
Timesaver
Press Ctrl+Alt+S (Win) or ![]() +Option+S (Mac) to publish a composition.
+Option+S (Mac) to publish a composition.
Publishing for the Web
When you publish a composition for the Web, Edge Animate takes all saved files in the project folder and optimizes them for use on the web. When you publish a composition, Edge Animate integrates the content from the Edge Animate file (.an) into the other files and doesn’t include it in the publish folder. In addition for the web, you can specify options to publish with the Google Chrome Frame plug-in for use with IE 6, 7, and 8, for distribution with CDN (Content Delivery Network), or for use as static HTML content.
Publish to the Web
![]() Open the composition you want to publish.
Open the composition you want to publish.
![]() Click the File menu, and then click Publish Settings.
Click the File menu, and then click Publish Settings.
![]() Click the Web category, and then select the Web check box.
Click the Web category, and then select the Web check box.
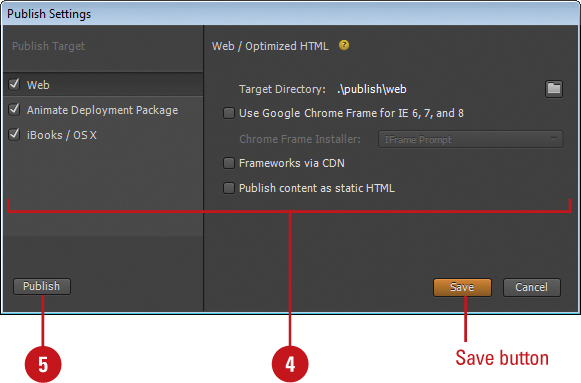
![]() Use the default Target Directory or click the Browse folder icon, select a folder location, and then click Select Folder.
Use the default Target Directory or click the Browse folder icon, select a folder location, and then click Select Folder.
![]() Select or deselect the check boxes for the publishing options:
Select or deselect the check boxes for the publishing options:
• Use Google Chrome Frame for IE 6, 7, and 8. Adds HTML code to use a plugin for Microsoft Internet Explorer versions 6, 7, or 8.
• Frameworks via CDN. Uses a link to use jQuery using the content distribution network.
• Publish content as static HTML. Uses HTML instead of some JavaScript into the composition at runtime.
![]() Click Save to save the settings to publish later or click Publish to publish the composition.
Click Save to save the settings to publish later or click Publish to publish the composition.
• If you save your publishing settings, you can click the File menu, and then click Publish to publish the composition.

Publishing to the Web for IE 6, 7, and 8
When you publish for the web, Edge Animate uses the latest HTML5 and JavaScript technology to create animation for web browsers on desktops, tablets, and mobile devices. If a user is not using the latest web browser, your animation might not work properly. You can help with web browser compatibility by selecting the Web option to make the free Google Chrome Frame plug-in available for Microsoft Internet Explorer (IE) version 6, 7, or 8 users to install on Windows. When the user of an older version of IE tries to view your Edge Animate composition, it prompts them to install the Google Chrome Frame plug-in, which renders your animation as if it was viewed in Google’s Chrome browser. This option adds code to the <head> section of the HTML file.
Publish to the Web Using Google Chrome Frame Plug-in
![]() Open the composition you want to publish.
Open the composition you want to publish.
![]() Click the File menu, and then click Publish Settings.
Click the File menu, and then click Publish Settings.
![]() Click the Web category, and then select the Web check box.
Click the Web category, and then select the Web check box.
![]() Use the default Target Directory or click the Browse folder icon, select a folder location, and then click Select Folder.
Use the default Target Directory or click the Browse folder icon, select a folder location, and then click Select Folder.
![]() Select the Use Google Chrome Frame for IE 6, 7, and 8 check box.
Select the Use Google Chrome Frame for IE 6, 7, and 8 check box.
![]() Click the Chrome Frame Installer list arrow, and then select an installer prompt option:
Click the Chrome Frame Installer list arrow, and then select an installer prompt option:
• No Prompt. Don’t prompt the user to install the plug-in.
• IFrame Prompt. Prompts the user to install using iFrame.
• Overlay Prompt. Prompts the user to install using an overlay.
![]() Click Save to save the settings to publish later or click Publish to publish the composition.
Click Save to save the settings to publish later or click Publish to publish the composition.

• If you save your publishing settings, you can click the File menu, and then click Publish to publish the composition.

Publishing to the Web Using CDN
The Content Distribution Network (CDN) makes the JavaScript and jQuery library files, known as the Adobe Edge Animate Runtime, needed for an Edge Animate composition available online so you don’t have to. The Adobe Edge Animate Runtime libraries are static files required for Edge Animate composition to run properly. The files don’t contain any of your content, so once they are downloaded on a user’s system, they don’t need to be downloaded again. This is useful when you want to reduce the overall size of your composition project files for distribution on the web. The Frameworks via CDN option creates a link to the needed jQuery library files, which are cached locally on the user’s system ready for use in your composition as needed.
Publish to the Web Using Frameworks via CDN
![]() Open the composition you want to publish.
Open the composition you want to publish.
![]() Click the File menu, and then click Publish Settings.
Click the File menu, and then click Publish Settings.
![]() Click the Web category, and then select the Web check box.
Click the Web category, and then select the Web check box.
![]() Use the default Target Directory or click the Browse folder icon, select a folder location, and then click Select Folder.
Use the default Target Directory or click the Browse folder icon, select a folder location, and then click Select Folder.
![]() Select the Frameworks via CDN check box.
Select the Frameworks via CDN check box.
![]() Click Save to save the settings to publish later or click Publish to publish the composition.
Click Save to save the settings to publish later or click Publish to publish the composition.

• If you save your publishing settings, you can click the File menu, and then click Publish to publish the composition.
Publishing to the Web as Static HTML
The Web option to publish the contents of your composition as a static HTML document takes HTML elements (including the Stage) that are normally created by JavaScript and integrates them into the HTML document. Instead of rendering the elements in your web browser using JavaScript, the elements are rendered using HTML. Since the content is now part of the HTML document, it improves searchability and indexing on the web.
Publish to the Web as Static HTML
![]() Open the composition you want to publish.
Open the composition you want to publish.
![]() Click the File menu, and then click Publish Settings.
Click the File menu, and then click Publish Settings.
![]() Click the Web category, and then select the Web check box.
Click the Web category, and then select the Web check box.
![]() Use the default Target Directory or click the Browse folder icon, select a folder location, and then click Select Folder.
Use the default Target Directory or click the Browse folder icon, select a folder location, and then click Select Folder.
![]() Select the Publish content as static HTML check box.
Select the Publish content as static HTML check box.
![]() Click Save to save the settings to publish later or click Publish to publish the composition.
Click Save to save the settings to publish later or click Publish to publish the composition.

• If you save your publishing settings, you can click the File menu, and then click Publish to publish the composition.
Publishing for Adobe Programs
The Animate Deployment Package option allows you to publish a composition for use with other Adobe programs, such as Muse, InDesign CS6, and Digital Publishing Suite (DPS). Adobe Muse is a program built upon Adobe AIR (Flash Platform) that allows you to design and publish web sites. Adobe InDesign is a program that allows you to design and pre-flight page layouts for print or digital distribution. Adobe Digital Publishing Suite (DPS) is an online service that allows you to create, optimize, and distribute content produced in Adobe InDesign for tablet devices. Once imported into InDesign, you can use DPS tools to publish content to the online service. The Animate Deployment Package option publishes a package OAM file that you can drag and drop or import using the Place command in the other Adobe programs. In the published file, you can also include a poster image that gets displayed when the animation first loads. When the user clicks the poster image, the animation starts to play.
Publish as an Edge Animate Deployment Package
![]() Open the composition you want to publish.
Open the composition you want to publish.
![]() Click the File menu, and then click Publish Settings.
Click the File menu, and then click Publish Settings.
![]() Click the Animate Deployment Package category, and then select the Animate Deployment Package check box.
Click the Animate Deployment Package category, and then select the Animate Deployment Package check box.
![]() Use the default Target Directory or click the Browse folder icon, select a folder location, and then click Select Folder.
Use the default Target Directory or click the Browse folder icon, select a folder location, and then click Select Folder.
![]() Use the default Published Name or enter one of your own.
Use the default Published Name or enter one of your own.
![]() To change the poster image, click the Choose Poster Image button, and then select an image file from Library assets.
To change the poster image, click the Choose Poster Image button, and then select an image file from Library assets.
![]() Click Save to save the settings to publish later or click Publish to publish the composition.
Click Save to save the settings to publish later or click Publish to publish the composition.

• If you save your publishing settings, you can click the File menu, and then click Publish to publish the composition.
Import a Package into Adobe Program
![]() Start Adobe program, such as InDesign CS6 or Muse, and then open the file you want to use.
Start Adobe program, such as InDesign CS6 or Muse, and then open the file you want to use.
![]() Click the File menu, and then click Place.
Click the File menu, and then click Place.
![]() Click the Files of type list arrow, and then click All Files.
Click the Files of type list arrow, and then click All Files.
![]() Navigate to and select the Edge Animate Deployment Package (.oam) file.
Navigate to and select the Edge Animate Deployment Package (.oam) file.
![]() Click Open.
Click Open.
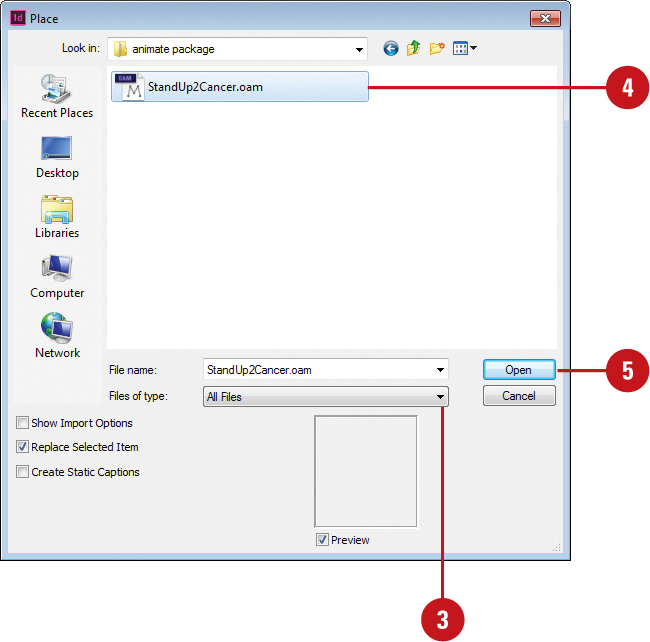
For InDesign, a loaded cursor appears with the package.
![]() Click or drag in the document where you want to place the composition as you would any other imported file type.
Click or drag in the document where you want to place the composition as you would any other imported file type.

Publishing for iBooks Author
The IBooks / OS X option allows you to publish a composition for use with Apple iBooks Author, which is only available on OS X (not for use on the Windows platform). Apple iBooks Author is a free application on the Mac App Store that allows you to create a multi-touch book for iPad tablet devices. Edge Animate publishes a Dashboard Widget (.wdgt) file, which is a compressed folder of files compatible for use in iBooks. Some elements, such as the animated GIF files used for the preloader, cannot be published. You can drag and drop or import using the Insert menu the HTML widget (.wdgt) file into an open iBooks Author file. In the published file, you can also include a poster image that gets displayed when the animation first loads. When the user clicks the poster image, the animation starts to play.
Publish for Apple iBooks / OS X
![]() Open the composition you want to publish.
Open the composition you want to publish.
![]() Click the File menu, and then click Publish Settings.
Click the File menu, and then click Publish Settings.
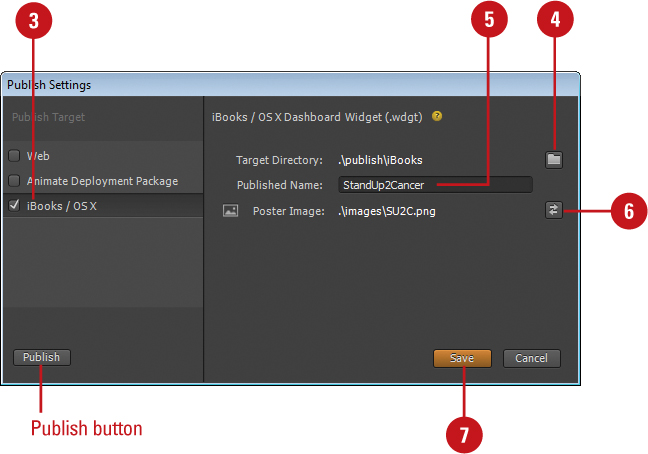
![]() Click the iBooks / OS X category, and then select the iBooks / OS X check box.
Click the iBooks / OS X category, and then select the iBooks / OS X check box.
![]() Use the default Target Directory or click the Browse folder icon, select a folder location, and then click Select Folder.
Use the default Target Directory or click the Browse folder icon, select a folder location, and then click Select Folder.
![]() Use the default Published Name or enter one of your own.
Use the default Published Name or enter one of your own.
![]() To change the poster image, click the Choose Poster Image button, and then select an image file from Library assets.
To change the poster image, click the Choose Poster Image button, and then select an image file from Library assets.
![]() Click Save to save the settings to publish later or click Publish to publish the composition.
Click Save to save the settings to publish later or click Publish to publish the composition.
• If you save your publishing settings, you can click the File menu, and then click Publish to publish the composition.
Import an Animation into Apple iBooks Author
![]() In OS X, start iBooks Author, and then open the file you wan to use.
In OS X, start iBooks Author, and then open the file you wan to use.
• Download iBooks Author app. You can download the free iBooks Author app from the Mac Apple Store.
![]() Click the Insert menu, point to Widget, and then click HTML.
Click the Insert menu, point to Widget, and then click HTML.
An HTML frame appears in the iBooks document. Resize the HTML frame as needed.
![]() In the Widget panel under the Interaction tab, click Choose.
In the Widget panel under the Interaction tab, click Choose.

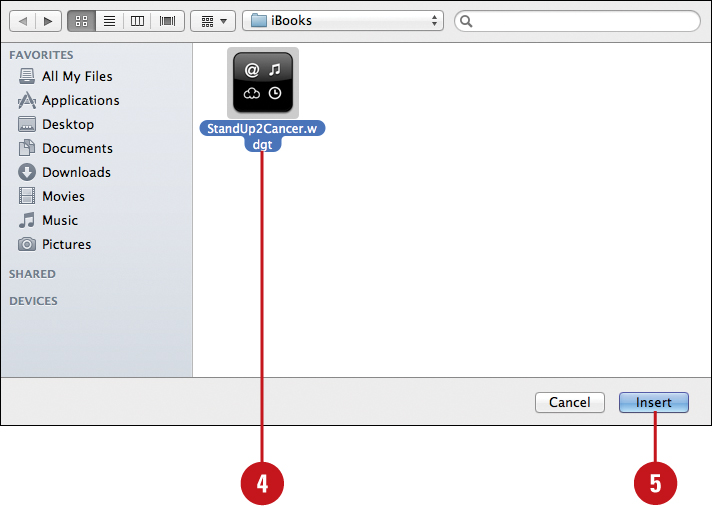
![]() Navigate to and select the Dashboard Widget (.wdgt) file.
Navigate to and select the Dashboard Widget (.wdgt) file.
![]() Click Insert.
Click Insert.
The widget published from Edge Animate appears in the HTML frame.
Capturing a Poster Image
If you create a composition that doesn’t automatically play the animation (the Autoplay option is deselected) on start up in a web browser or when a web browser is not compatible with Edge Animate, you can set the appearance of a static image, known as a poster image, that gets displayed when the web page first loads. When the user clicks the poster image, the animation starts to play, if compatible. Edge Animate creates a PNG file named Poster.png that gets published along with the composition. The Poster image is used on the Down-level Stage that allows you to create an information display screen for users who don’t have a compatible web browser to view your composition. You create a poster image from the Properties panel by capturing a still image of the Stage at a point in the Timeline.
Capture a Poster Image
![]() In the Timeline panel, move the Playhead to the place where you want to capture a poster image of the Stage.
In the Timeline panel, move the Playhead to the place where you want to capture a poster image of the Stage.
![]() In the Elements panel, click the Stage.
In the Elements panel, click the Stage.
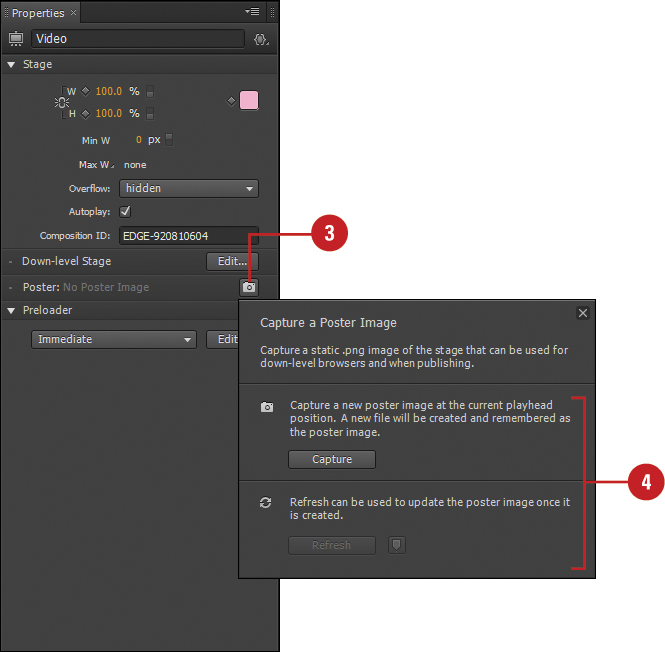
![]() In the Properties panel, click the Capture Poster Image button.
In the Properties panel, click the Capture Poster Image button.
A window appears, displaying options to capture a new poster image or refresh an existing one.
![]() Click Capture to create a new poster image, or click Refresh to overwrite the current poster image.
Click Capture to create a new poster image, or click Refresh to overwrite the current poster image.
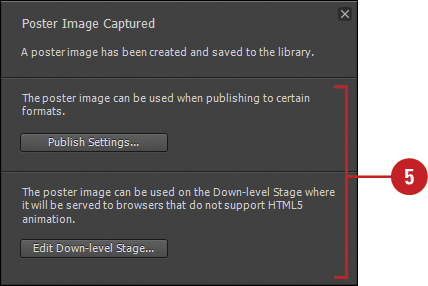
The captured image named Poster.png is placed in the Library panel under Assets and copied in to your project’s images folder.
A window appears, displaying options to access publish settings or the Down-level Stage.
![]() Click Publish Settings or Edit Down-level Stage, or click the Close button to exit the window.
Click Publish Settings or Edit Down-level Stage, or click the Close button to exit the window.
Remove the Poster Image
![]() In the Library panel under Assets in the images folder, right-click (Win) or control-click the poster image file, and then click Reveal in Explorer (Win) or Reveal in Finder (Mac).
In the Library panel under Assets in the images folder, right-click (Win) or control-click the poster image file, and then click Reveal in Explorer (Win) or Reveal in Finder (Mac).
Windows Explorer or Finder window opens, displaying the folder with the file selected.

![]() Delete the selected file using either of the following:
Delete the selected file using either of the following:
• Windows. Press Delete, and then click Yes.
• Mac. Drag the file to the Trash on the Dock.
The file is moved to the Recycle Bin (Win) or Trash (Mac), where you can permanently remove it.

![]() Switch back to Edge Animate, and then click Yes to update your composition with the change.
Switch back to Edge Animate, and then click Yes to update your composition with the change.
Creating a Down-level Stage
The Down-level Stage allows you to create an information display screen for users who don’t have a compatible web browser to view your Edge Animate composition. Instead of displaying a blank screen when the animation can’t run, you can display a still screen that gives the user instructions on what to do now. The Down-level Stage opens in a special editing mode with its own Stage. You can capture a poster image from the main Stage in Edge Animate or import an image from another program, such as Adobe Photoshop. In addition to the image, you can also add text with instructions or a link to where the user can download a compatible web browser, such as Google Chrome. The text properties in the Down-level Stage are limited to support low-level browsers. If you want to see the Down-level Stage in action, you need to use a web browser which is not compatible with Edge Animate compositions.
Create a Down-level Stage
![]() In the Elements panel, click the Stage.
In the Elements panel, click the Stage.
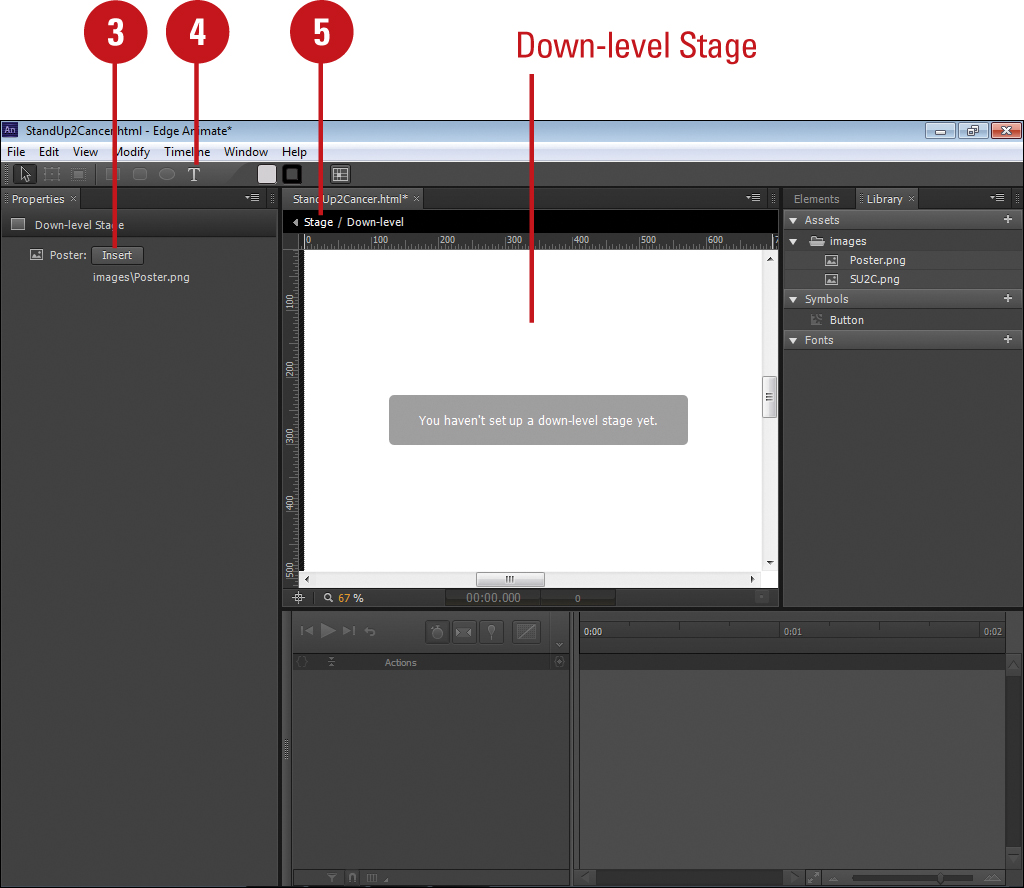
![]() In the Properties panel, click the Down-level Stage Edit button.
In the Properties panel, click the Down-level Stage Edit button.
• Show and Hide the Down-level Stage. Click the View menu, and then click Down-level Stage.
The Down-level Stage appears with a white fill by default until you change it.
![]() To add an image, do any of the following:
To add an image, do any of the following:
• Poster Image. Click the Insert button arrow in the Properties panel.
• External Image. Drag an image file from a file system window to the Down-level Stage or click the File menu, and then click Import to select it.
![]() To add text, click the Text Tool on the Tools panel, drag a text box, enter text, and then click the Close button on the Text window.
To add text, click the Text Tool on the Tools panel, drag a text box, enter text, and then click the Close button on the Text window.
![]() Click the Back button or Stage on the Edit bar to exit the Down-level Stage editing mode.
Click the Back button or Stage on the Edit bar to exit the Down-level Stage editing mode.
Change Properties in the Down-level Stage
![]() Click the View menu, and then click Down-level Stage.
Click the View menu, and then click Down-level Stage.
![]() Select the element you want to change on the Stage or in the Elements panel; select the Down-level element to set Stage properties.
Select the element you want to change on the Stage or in the Elements panel; select the Down-level element to set Stage properties.
![]() In the Properties panel, select from the available options:
In the Properties panel, select from the available options:
• Position and Size. Specify position X and Y values or Size W and H values.
• Link. Select a link target and enter a link URL when the element is clicked.
You can get Google Chrome at www.google.com/chromeframe.
• Text. Select text attributes, such as font-family, size, weight, color, alignment, and spacing.
• Image. Click the Select Image button to select an image.


![]() Click the Back button or Stage on the Edit bar to exit the Down-level Stage editing mode.
Click the Back button or Stage on the Edit bar to exit the Down-level Stage editing mode.

See Also
See “Saving Images from Photoshop” on page 268 for information on saving an image as a poster image.
See “Using the Open URL Snippet” on page 210 for information on link target options.
Creating a Preloader Stage
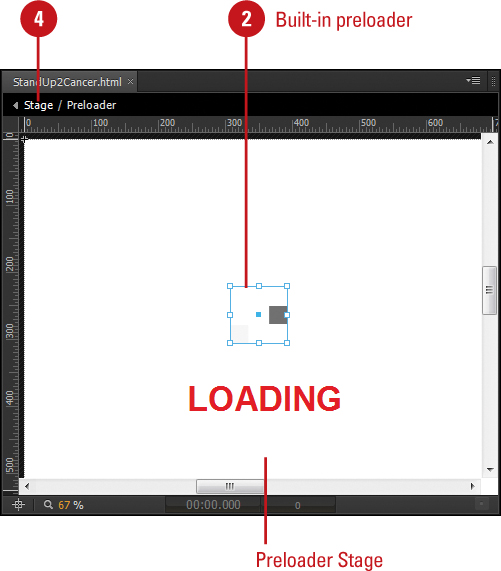
The Preloader Stage allows you to create a progress bar for display when your Edge Animate composition loads in a web browser. The Preloader Stage works in a special editing mode with its own Stage. The Preloader Stage provides built-in loaders with an animated progress bar to make it quick and easy to add one to your composition. However, if you want something more custom, you can create an animated GIF in Adobe Flash Professional and then export it for use in Edge Animate. In addition to the preloader animation, you can also add text with information for the user or a link to access a URL on the web. When you create a preloader be sure to keep it simple and small in size, so it doesn’t take a long time to load and defeat its purpose.
Create a Preloader Stage
![]() In the Elements panel, click the Stage.
In the Elements panel, click the Stage.
![]() In the Properties panel, click the Preloader list arrow, and then select Immediate (right now) or Polite (slowly).
In the Properties panel, click the Preloader list arrow, and then select Immediate (right now) or Polite (slowly).
![]() Click the Preloader Edit button.
Click the Preloader Edit button.
• Show and Hide the Preloader Stage. Click the View menu, and then click Preloader Stage.
![]() Select a preloader:
Select a preloader:
• Predefined. Click the Insert Preloader Clip-Art list arrow, select a preloader, and then click Insert.
• External Custom. Drag an animated GIF file from a file system window to the Preloader Stage or click the File menu, and then click Import to select it.
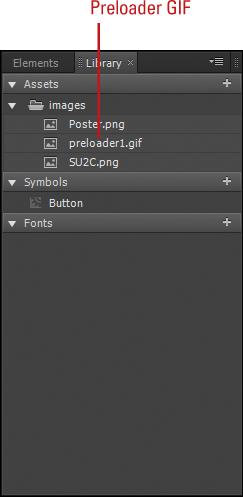
The insert preloader GIF is placed on the Stage, in the Library panel under Assets, and copied in to your project’s images folder.

![]() To add text, click the Text Tool on the Tools panel, drag a text box, enter text, and then click the Close button on the Text window.
To add text, click the Text Tool on the Tools panel, drag a text box, enter text, and then click the Close button on the Text window.
![]() Click the Back button or Stage on the Edit bar to exit the Preloader Stage editing mode.
Click the Back button or Stage on the Edit bar to exit the Preloader Stage editing mode.

Change Properties in the Preloader Stage
![]() Click the View menu, and then click Preloader Stage.
Click the View menu, and then click Preloader Stage.
![]() Select the element you want to change on the Stage or in the Elements panel; select the Preloader element to set Stage properties.
Select the element you want to change on the Stage or in the Elements panel; select the Preloader element to set Stage properties.
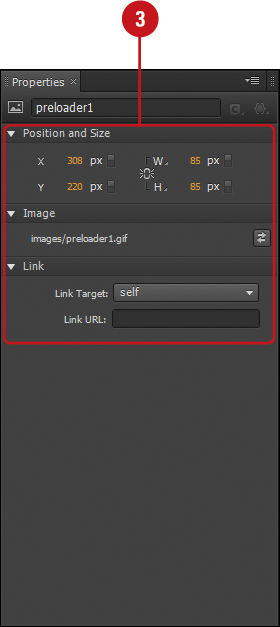
![]() In the Properties panel, select from the available options:
In the Properties panel, select from the available options:
• Position and Size. Specify position X and Y values or Size W and H values.
• Link. Select a link target and enter a link URL when the element is clicked.
You can get Google Chrome at www.google.com/chromeframe.
• Text. Select text attributes, such as font-family, size, weight, color, alignment, and spacing.
• Image. Click the Select Image button to select an image.
![]() Click the Back button or Stage on the Edit bar to exit the Preloader Stage editing mode.
Click the Back button or Stage on the Edit bar to exit the Preloader Stage editing mode.
See Also
See “Exporting Animations from Flash” on page 276 for information on creating a custom preloader in Flash Professional.