
CH. 8 MAKING A SHEATH
No fixed blade is complete without a proper sheath. A sheath will prevent your knife from accidentally cutting or stabbing you or another object when it’s not in use. It will also protect the edge from damage, and cushion the knife from any impact that could occur from a fall.
A sheath will allow you to safely and conveniently bring your knife with you wherever you go. The design of your knife sheath will determine how it is carried and how easily it is accessed. Consider where you’ll be taking your knife and what you’ll most likely be wearing to help you find the best style of sheath for you.

A GOOD SHEATH DESIGN WILL ALLOW YOU TO SAFELY AND CONVENIENTLY TAKE YOUR BLADE WHEREVER YOU GO.
SHEATH STYLES
A belt knife is designed with a sheath that has a clip or loop to allow you to wear the knife on your belt. A vertical carry is the most commonly used style of belt sheath and uses a loop on the top of the sheath to hold your knife vertically on your side.
This kind of sheath can also be made horizontally, with the sheath running along the length of the belt. The knife can then be worn anywhere along the circumference of your belt, on the front, side, or back. This style tucks the sheath away, preventing it from getting caught on brush or bumping into things. It also makes your knife less visible than a vertical carry. If you use a horizontal carry, make sure you have a way of securely holding the knife inside the sheath.
You can also make a canted sheath. This style involves attaching your belt loop at an angle so that your knife is carried on your side at an angle halfway between a horizontal and vertical carry. This can help keep your knife out of the way. If you make this style of sheath, think about what side you want to carry your knife on to determine which way the sheath will tilt.
If you don’t wear a belt, consider using a clip on your sheath so you can wear it inside your waistband. This can also be useful to make your knife a concealed carry.

IF YOU WEAR A CANTED SHEATH ON YOUR NONDOMINANT SIDE, YOU CAN GRAB YOUR KNIFE WITH YOUR DOMINANT HAND BY REACHING ACROSS YOUR BODY. THIS IS CALLED A CROSS DRAW AND CAN MAKE FOR A COMFORTABLE AND EASY WAY TO ACCESS YOUR KNIFE.

ATTACHING A CLIP TO A SHEATH WILL ALLOW YOU TO USE EITHER YOUR BELT OR A WAISTBAND TO CARRY YOUR KNIFE.
Neck knives are another popular way to carry a blade. A sheath for a neck knife is often made of a synthetic material such as Kydex, which offers a secure fit. The knife can then be suspended from a cord around your neck with the handle pointing down. This allows easy and quick access. A neck sheath can also be made from leather and worn with the handle facing up.
Boot knives aren’t as common as some other methods of carry but still provide an interesting way to carry a blade. Boot knives are usually small self-defense knives that are clipped or strapped into a boot. I used to travel with a small concealed boot knife back in my hitchhiking days, and it always made me feel really tough. It also tended to rub against my ankle and was never comfortable or practical to draw. A boot knife can make a great backup knife and is sure to spark a conversation if someone happens to see it.
You can get creative with designing a sheath to accommodate your needs. I’ve seen shoulder holster knives designed to hold a knife under a jacket and sheaths made to strap to the outside of a backpack. Dive knives, used by scuba divers and free divers, are designed to clip to an arm or a leg and hold the knife secure during underwater activities. I find a lot of women’s clothing to be less than practical when it comes to carrying knives and have had to use creative solutions to wear my blade. I’ve even worn small knives clipped to the inside of my bra so that I didn’t have to leave my knife at home.

A NECK KNIFE CAN PROVIDE A CONVENIENT ALTERNATIVE TO A BELT KNIFE.
SHEATH MATERIALS
These are some of the more common materials used in making knife sheaths. Pick a material that will be functional for the kind of sheath you want to make, and don’t forget to make something that complements your knife and is easy on the eyes.
Leather: Leather is a traditional and classic sheath material. It makes a sturdy sheath that is both beautiful and durable. The moldability of leather allows it to create a custom fit to your knife, and its softness makes for a quiet draw. Depending on its environment, leather can have a tendency to dry-rot, crack, or even mold over time. Regular oiling and care can prevent these factors from being a problem.

PROPER MAINTENANCE OF A LEATHER SHEATH CAN HELP IT LAST A LIFETIME.
Kydex: Kydex is a synthetic material often used for knife sheaths. It is incredibly tough and durable and offers fantastic protection to your blade. As a thermoplastic, it can be molded exactly to the shape of your knife and provides a strong, tight fit. It isn’t as quiet as leather on the draw, and the tendency of the blade edge to rub across the material can dull your knife over time. Kydex will stand up well to harsh environments or saltwater and will maintain its integrity without maintenance. It is available in a variety of colors and patterns.

A KYDEX SHEATH WITH A HORIZONTAL CARRY DESIGN. MADE BY JEFF SANTOS.
Nylon: Nylon makes a soft, lightweight sheath. Nylon isn’t as rigid as other materials, which makes it comfortable to wear but also means it won’t offer as much protection for your blade. Nylon will stretch out over time and won’t offer the custom fit that you’ll get from leather or Kydex. Velcro or snaps are usually used to keep the blade from falling out. Nylon is an inexpensive material, but it will eventually wear out and can be vulnerable to slices or tears.
Plastic: Plastic is often used as a sheath material on cheap production knives. It is lightweight and inexpensive but tends not to make for a great fit. I have never had much success in keeping a knife in a plastic sheath, but it does offer good protection for your blade and is better than nothing.
LEATHERWORKING TOOLS
While it’s possible to improvise, buying a couple of inexpensive leatherworking tools is a great investment if you plan on making leather sheaths. The time and frustration I save by using these tools make them worth their weight in gold.
Scratch compass: This compass is set at a specific measurement and dragged along the edge of the leather, marking a line with consistent spacing. I use the scratch compass for marking the stitching line of my knife sheath.
Spacer set: This handy little tool is used to mark consistently spaced stitch holes. Yes, you can absolutely measure and mark out each hole on the leather of your knife sheath. Or, you could roll the spacer set along the line you made with your scratch compass and instantly have marks for perfectly spaced stitch holes.

THE USE OF A SCRATCH COMPASS (ABOVE) AND SPACER SET (BELLOW) CAN HELP YOU EASILY CREATE UNIFORM LINES AND HOLES IN LEATHER. USING THESE TOOLS CAN HELP YOU CREATE A BETTER-QUALITY LEATHER SHEATH.

MAKING A LEATHER SHEATH
The natural feel and durability of leather makes it one of my favorite sheath materials. The following instructions will give you the process of making a simple and effective leather sheath.
MATERIALS AND EQUIPMENT
![]() paper
paper
![]() tape
tape
![]() plastic cling wrap
plastic cling wrap
![]() 7 oz to 8 oz (207 ml to 237 ml) vegetable-tanned leather
7 oz to 8 oz (207 ml to 237 ml) vegetable-tanned leather
![]() artificial sinew
artificial sinew
![]() leather dressing
leather dressing
![]() contact cement
contact cement
![]() pencil
pencil
![]() scissors
scissors
![]() ruler
ruler
![]() utility knife
utility knife
![]() matches
matches
![]() pliers
pliers
![]() drill press
drill press
![]() 1/16" (2 mm) drill bit
1/16" (2 mm) drill bit
![]() spacer set
spacer set
![]() scratch compass
scratch compass
![]() harness sewing needles
harness sewing needles
![]() wood file
wood file
![]() belt sander
belt sander
![]() sanding belts (60, 120, 200 grit)
sanding belts (60, 120, 200 grit)
![]() leather dressing
leather dressing
1. DRAW THE PATTERN.
Using your ruler, draw a straight line the full length of the paper. This will be the leather seam of the sheath. Place the spine of your knife about 1/4 inch (6 mm) from the line and roughly parallel with it. Then, trace around the curve of the knife edge, leaving a bit of space between the actual edge of the blade and your pencil line. Extend this line up two-thirds the length of the handle and make a mark to designate the top of your sheath. Draw a second line running along the knife edge, but make this one about 1/2 inch (1.3 cm) out from the first line. The space in between these two lines is where your welt will go. At the top of the pattern, extend the two lines at least 5 inches (12.7 cm) past the top of your sheath to create the belt loop. I like the belt loop to be more narrow than the sheath, so taper both sides so that the loop will not be visible when you view your sheath from the front. Make sure you leave enough length so that when you fold and stitch the strap, you have a space that is at least 2 inches (5.1 cm) wide for your belt. Fold the paper in half on the center seam and cut around your pattern through both sides of the paper to give you two identical sides of your sheath. Trim the sheath so that only one side has a belt loop.

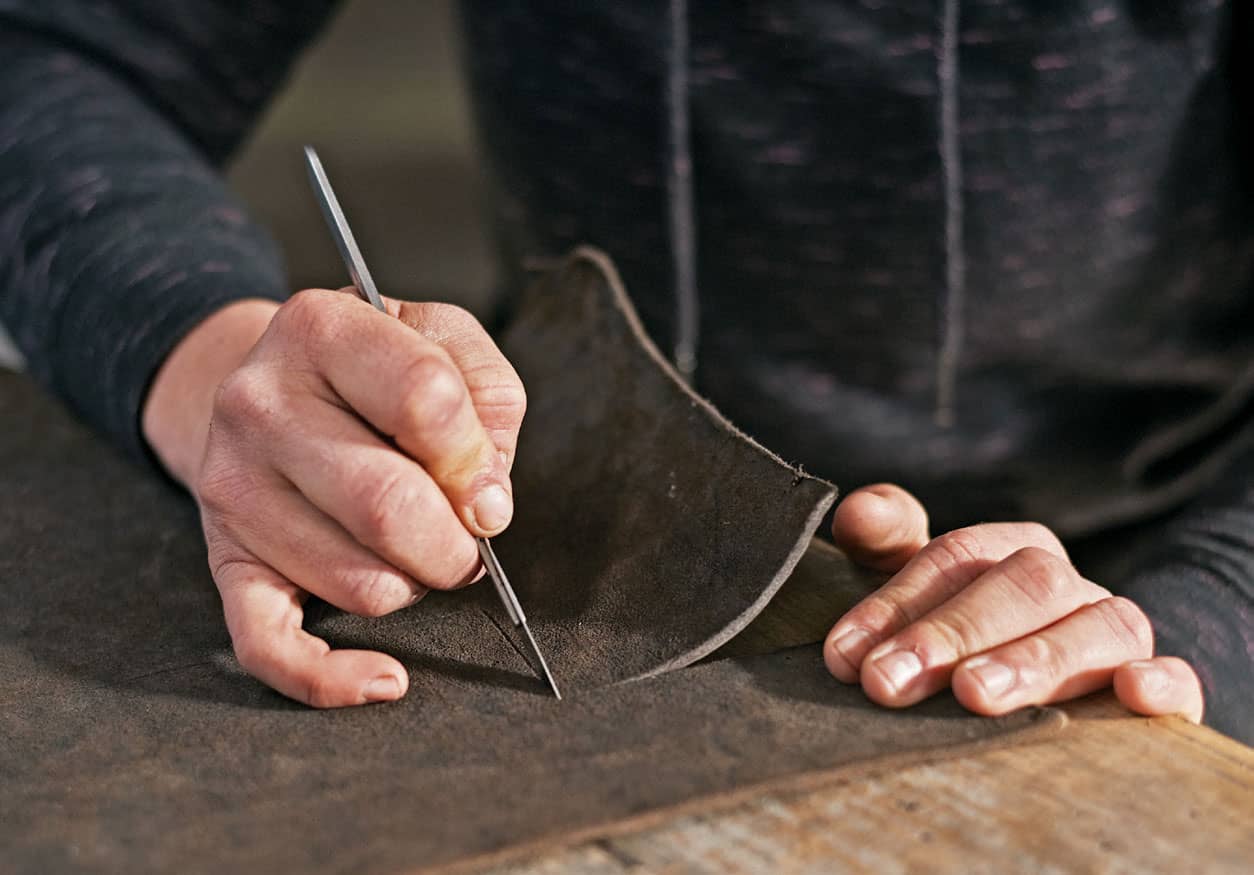
THE EXACT DIMENSIONS OF YOUR SHEATH WILL BE RELATIVE TO THE SIZE OF YOUR SPECIFIC BLADE.
2. TEST THE PATTERN AND DRAW THE WELT.
Place your knife in the sheath pattern and see if there are any modifications you need to make. Leather is thicker and more cumbersome than paper, so depending on how thick your leather is, you might need to make your design bigger if the knife isn’t fitting well in the paper. If everything looks good, trace the curve of the sheath on a leftover piece of paper. Then, trace the inside line to mark out the pattern for the welt. The welt is a strip of leather sewn between the two sides of the sheath, creating a boundary between the knife’s edge and the stitching. Cut this pattern out and test it out in your paper sheath. The welt should fit neatly inside the seam of the sheath.
BE CAREFUL NOT TO OVERSHOOT THE CUTS ON THE CORNERS, AS THIS WILL CAUSE A WEAKNESS IN THE SHEATH.
3. TRANSFER THE PATTERN TO THE LEATHER.
Place the pattern on the rough side of the leather. This will be the inside of your sheath. It’s important at this point to think about whether you’re making a right or left handed sheath. If you’re making a right handed sheath, you should have the belt loop side of the pattern on the left side of the sheath when it is placed on the leather. If you’re making a left handed sheath, flip the pattern over to put the belt loop on the right side. Tape the pattern down and trace it with a pencil. Cut through your lines using a sharp utility knife. When cutting out the welt, leave a little extra leather on the outside edge. It can be sanded off the finished sheath, and this way you can be sure the leather ends up flush. When you have everything cut out, place your knife as it will sit in the sheath. Try wrapping the leather around it to make sure everything fits together and that there will be enough room for your knife.
4. MAKE BELT STITCH HOLES.
Fold the belt loop down to where it will be attached to the sheath and trace around the piece of leather that will be stitched down. Using your scratch compass, make a mark 1/4 inch (6 mm) in from the edge of the leather at the end of the belt loop where the stitches will be going. Roll the stitch set around the seam, following the line you made with the compass. You’ll need the holes to outline the entire area that will be in contact with the sheath. Use the drill press with a 1/16 inch (2 mm) bit to drill through the marks on the leather.

USE A FILE TO ROUGH UP THE LEATHER. THIS CREATES A BETTER SURFACE FOR THE CONTACT CEMENT TO HOLD ON TO.
5. GLUE THE BELT LOOP AND REDRILL THE HOLES.
By using glue in addition to stitching, you can make sure all the seams of your sheath are tough enough to stand up to whatever you put them through. As a bonus, it makes it way easier to keep everything in place later on as you drill and stitch. Use your file to rough up the smooth part of the leather where the belt loop will be attached to the sheath, as well as the side of the loop that will be stitched down. Apply contact cement on both pieces of leather and let it dry for a bit according to the instructions on the bottle. Press and hold the two pieces together to make sure they bond. Redrill the holes you made in the belt loop, this time going through both pieces of leather.

THE RUNNING STITCH IS A VERY BASIC STITCH THAT MOST PEOPLE ARE FAMILIAR WITH. THE NEEDLE IS BROUGHT BACK AND FORTH THROUGH THE MATERIAL, ALTERNATING SIDES WITH EACH STITCH.
6. STITCH THE BELT LOOP.
Use a basic running stitch to go through all the holes, and then stitch back through the alternating holes to fill in the spaces. It can be tough to work the needle through the leather with your fingers, so I like to grab the needle with a pair of pliers and push and pull it through that way. It’s easy to break needles doing this, so keep several spare needles on hand. Every two or three holes, tighten your stitch by pulling on the thread. To end the thread, go back through a few stitches and then tie a knot. Melt the end by burning the thread with a match.

USE AN OLD BELT ON YOUR BELT GRINDER TO SAND THE LEATHER SIDE OF YOUR SHEATH.
7. GLUE THE SEAM AND THE WELT.
Once the welt is glued in, it will be almost impossible to remove it to make adjustment—so test your sheath with the welt lain inside it before you commit with the contact cement. Make sure your knife has enough space to lie inside the sheath. Mark where the edge of the welt will lie by tracing it with a pencil. Use your file to rough up the smooth side of the welt. Apply glue to the area you traced where the welt will be lying, as well as the same area on the opposing side of the sheath and both sides of the welt. Wait for the contact cement to set, and then press all three layers of leather firmly together. At this point, it’s really starting to look like something!
8. SAND THE EDGE.
Use the belt sander to sand down the edge of your sheath so that all three layers of leather are flush. Take it down to a fine grit and soften the sharp edges of your grind a bit, which will pretty things up. As you define the edge of your sheath, you’ll have a definite edge to work off of when marking out your stitch holes.
9. MAKE THE STITCH HOLES IN THE MAIN SEAM.
Use the scratch compass to make a line around the entire seam of the sheath about 1/4 inch (6 mm) from the edge of the leather. Use your spacer set to mark out the holes for drilling and drill through all three pieces of leather to make the stitch holes.
10. STITCH THE SHEATH.
Cut your thread four to five times the length of your sheath. Starting three holes from the top of the sheath, thread your needle and thread through the hole. Pull the end of the string and even the two sides up so that half of the string is on one side and half is on the other. Thread a needle on the other end of the thread so that you now have two needles to work with. Stitch back up with one needle through the holes you missed using a running stitch. When you reach the top, come back down the sheath until you get back to the place that you started. Do the same thing with the needle on the other side, going through the same holes again. This creates a backstitch that reinforces the upper corner, which is the part of the sheath that takes the most abuse and is the most vulnerable to wear and tear. Once you’re back where you started with both needles, start stitching down the sheath. Go for two or three holes before switching to the other needle and filling in the spaces.

FILL IN THE SPACES THAT DON’T HAVE THREAD BY USING YOUR SECOND NEEDLE. DON’T FORGET TO GIVE YOUR STITCHES A TUG EVERY FEW HOLES TO KEEP THINGS TIGHT.
11. ADD THE FINAL TOUCHES.
Soak the leather in warm water for five to ten minutes or until it starts to soften. Wrap the entire knife in cling wrap and secure the wrap with tape. This will keep the water off your blade and prevent it from rusting, as well as give it a little more bulk so that it will come out of the sheath easily even after the leather has dried and shrunk. Place the knife in the leather and let it dry around your knife. Once your sheath is completely dry, remove your knife and take it out of the plastic wrap. Try removing and inserting your knife a few times to see if there’s a good fit. If you’re not happy, rewet the sheath and try forming it again. Leather dressing adds water resistance to the leather and makes rewetting it to reform it much more difficult, so make sure you like the way your knife fits before you go to the next step. Once you’re happy with your sheath, cover the outside with a few coats of leather dressing and admire the work you’ve done.

THE FINISHED LEATHER SHEATH FOR THE PROJECT KNIFE.