
CH. 7 MAKING A HANDLE
Now that the majority of the metalwork is done, it’s time to switch mediums. There are countless options for the combination of materials that can be used to build a knife’s handle, and each will create a different look. The handle aesthetic is a defining part of any knife. The materials you choose will help to create the unique character of your knife.
One of my favorite parts about making my own knife is getting to create my own perfectly fitted handle. Most knives are made to have a one-size-fits-all grip, despite the fact that hand shapes and sizes can vary greatly. By carefully shaping the material, you can create a grip on your blade that is personalized to fit the shape of your hand exactly.

A GOOD HANDLE ON A BLADE CAN TURN A GOOD KNIFE INTO A GREAT KNIFE.
SCALE MATERIALS
To make the handle for your blade, you will attach two pieces of material to the outside of your tang. These pieces are called scales. You can make your scales out of a wide variety of natural and man-made materials. While there are some benefits and drawbacks of using certain materials, a lot of this comes down to personal preference.
When choosing the material for a knife handle, you should take into consideration the environment and kind of abuse your handle will need to take. If you’re going to be hammering on your handle frequently during the process of batoning, it might not make sense to use a softwood that could be easily damaged. Changes in temperature and humidity will also make some natural materials shrink and swell, which could affect the integrity of your handle.
The following is a list of common handle materials for fixed-blade knives. In experimenting with different handle materials, be creative but don’t let it be at the expense of function. Regardless of your choice in material, the most important part of selecting your scales is to make sure to have equally sliced, perfectly flat halves.
WOOD
The availability of a great variety of different kinds of wood allows for a wide range of choices in color and design. These tend to make more durable handles. Knife scales are often made with stabilized wood. During the stabilization process, wood is injected with a polymer resin. This makes it more durable and less likely to crack or warp, especially when transitioning through different climates. Some woods definitely need to be stabilized to perform well, but very hard or oily woods don’t need to undergo this process.
ANTLER, HORN, OR BONE
These materials give a beautiful, traditional look to a handle. As a primitive survivalist, I love the idea of using the same materials as my ancestors to make a knife handle. However, the don’t naturally provide a great grip and can be slippery, especially when there’s blood on the handle. They are also affected by temperature and moisture and are prone to cracking.
G10
G10 is a composite made from fiberglass cloth and resin. It is tough, lightweight, and makes a durable handle. G10 can be slippery to hang on to when it is wet.
MICARTA
Micarta is a synthetic material made out of a fabric, such as canvas or linen, soaked in resin. It performs similarly to G10 but is nicer looking and a bit more expensive. Users agree that G10 is slightly grippier when the handle is dry, but Micarta is grippier when wet. When the handle is exposed to an oily or greasy liquid, however, it will make the Micarta a bit slippery.
CARBON FIBER
Carbon fiber is made from woven strands of carbon set in resin. Lightweight and expensive, the woven strands catch the light, making a beautiful handle. While carbon fiber is known for its strength, it can also crack and come apart from an impact, such as dropping your knife.

WOODEN SCALES CAN BE PURCHASED FROM KNIFE SUPPLY COMPANIES. THESE SCALES COME AS A MATCHED SET.

SPACERS, ALSO CALLED LINERS, ARE THIN PIECES OF MATERIAL THAT ARE SANDWICHED IN BETWEEN THE TANG AND THE HANDLE. THIS OPTIONAL ADDITION CAN BE USEFUL IF YOU HAVE THIN SCALES AND NEED TO ADD SOME BULK TO YOUR HANDLE. THEY CAN ALSO ACT AS A BUFFER TO ENSURE A GOOD FIT FOR YOUR SCALES AND CAN COMPENSATE FOR SOME OF THE SHRINK AND SWELL OF THE MATERIAL IF IT IS AFFECTED BY HEAT OR HUMIDITY. THESE SPACERS ARE ON A BUSHCRAFT KNIFE MADE BY ABE ELIAS.

IN MANY WAYS, THE MATERIAL OF YOUR HANDLE IS ONLY LIMITED BY YOUR IMAGINATION AND ABILITY TO CREATIVELY IMPROVISE. WHEN KELLY MCGUIRE PILCHER HAD TO HAVE HER FIRST RIB REMOVED FOR MEDICAL REASONS, SHE WAS ABLE TO TAKE IT HOME WITH HER AFTER SURGERY. HER FATHER SUGGESTED USING IT TO MAKE A KNIFE HANDLE. TEXAS-BASED KNIFEMAKER TRAVIS PAYNE WAS THE MAN FOR THE JOB AND WAS ABLE TO CREATE THIS KNIFE USING RESIN AND KELLY’S RIB.

THE LINEN OR CANVAS BASE CAN GIVE A MICARTA HANDLE CHARACTER. THIS KNIFE MADE BY JEFF BAILEY HAS A MICARTA HANDLE.
PINS
Pins are the pieces of thin, round metal that are inserted through holes to help hold the scales to a full-tang blade. These pins, once finished, will leave a small circle of metal visible on the handle. Pins can be made out of almost any kind of metal, depending on your particular taste. A well-chosen pin can complement and add to the overall appeal of your handle.
Stainless steel, nickel silver, and brass are all common choices for pins. You can use welding rod, nails, pins from knife supply companies, or any other round stock. I love using copper for my pins. Copper, much like steel, goes through an oxidation reaction. Unlike rust, this actually creates a protective layer that prevents further corrosion. It does cause a green patina, but with frequent use it won’t form. Copper is a soft metal, but I’ve never had an issue with it being too soft to do its job. While it’s not the most popular choice, I love its earthy feel.
If the holes you’ve drilled are the same diameter as your pins, you’ll need to thin your pins down. Take your pins to the belt sander and grind them down evenly using a 120 grit belt. To ensure material is taken off evenly from the circumference of the pin, insert it in a hand drill spinning in the reverse direction of the belt. Lightly pass the spinning pin over the belt. The drill acts like a lathe, and your pin will come out round. Test them in the holes until they have a good fit. They should be snug, but you don’t want to have to use to much force to get them to fit. This could cause the scales to crack or break.
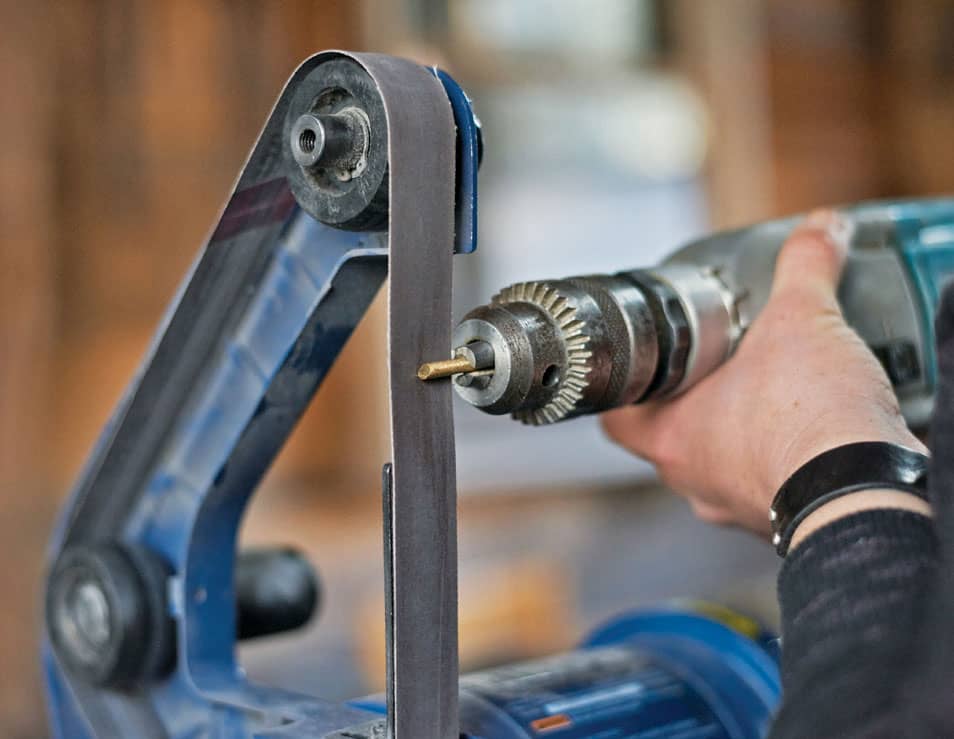
THIN YOUR PINS ON A BELT SANDER, MAKING SURE TO KEEP THEIR ROUND SHAPE BY USING A DRILL. IF YOU DECIDE TO MAKE MORE THAN ONE KNIFE, YOU CAN INVEST IN THE PROPER SIZE CLEARANCE BIT TO AVOID THIS STEP. THESE BITS COME IN A VARIETY OF NUMBERS AND WILL CREATE A HOLE BIG ENOUGH TO ACCOMMODATE A SPECIFIC SIZE PIN. IF YOUR HARDWARE STORE DOESN’T HAVE NUMBER SIZE CLEARANCE DRILL BITS, YOU CAN ORDER THEM FROM AN INDUSTRIAL SUPPLIER.
Some knifemakers will pein the end of their pin to further secure the scales. By applying gentle taps with a hammer, the metal on the end of the pin is flattened, mushrooming out just slightly. By having the end larger than the rest of the pin, it really holds the scale to the tang. This technique was a necessity before the development of strong epoxy, but it is largely done as a show of expert craftsmanship today. If you do choose to pein your pins, make sure to countersink the holes slightly on the outside of the handle. This way, the metal will fill the countersink and won’t stick out above the surface of the handle.
A technique to create hidden pins can be used if you don’t want them to be seen as part of your knife handle. By stopping the drill holes before they exit the outside of the wood and cutting the pins short, the pins will still perform their job without being visible.
Using epoxy along with your pins is essential for more than just creating a secure bond of the tang to the scales. It also acts as a waterproof seal to prevent corrosion from happening under your handle. Don’t use a quick-set epoxy, as they tend to not hold as well and you’ll need the extra time to set up your handle properly. Pigment can be mixed in with the epoxy to change its color.


IF YOU’D LIKE TO FURTHER CUSTOMIZE THE LOOK OF YOUR BLADE USING PINS, MOSAIC PINS CAN BE USED. CHARACTERIZED BY A UNIQUE PATTERN ON THE ENDS, THESE PINS ARE FULLY FUNCTIONAL AS WELL AS DECORATIVE. YOU CAN MAKE YOUR OWN BY EPOXYING DIFFERENT SIZES AND SHAPES OF THIN DIAMETER STEEL STOCK INTO METAL TUBING, OR YOU CAN BUY THEM FROM A SUPPLIER. THESE MOSAIC PINS ARE UTILIZED BY KNIFEMAKER MIKE JONES IN HIS HUNTING KNIVES.
HANDLE ERGONOMICS
A well-fitting handle should allow to you completely forget about the fact that you’re gripping your blade at all. The size and shape of your hand will dictate what makes the best handle for you. More than being comfortable, good handle ergonomics will make you more efficient. If you’re strained and using effort when you’re holding your knife, you’ll be more prone to fatigue, especially if you’re using a knife for long hours or heavy work.
When knives are designed for production, the handle is crafted to fit the average hand of the consumer. The average hand of an adult male is about 4 inches (10.2 cm) across. As a smaller female, with a hand that measures 3 inches (7.6 cm) across, this creates a problem. While I can deal with a handle that extends well beyond my palm, the girth of the handle creates a bigger problem. While the average man tends to be in the 71/2 inch (19.1 cm) range in length, my hand is a full inch shorter. My fingers usually can’t wrap fully around the handle of most production knives, causing me to have to work hard to keep my hand on it. You should be able to easily close your fist around the handle without having to use a death grip.
I have a good friend who has the opposite problem—his hands are so massive, they make most knife handles disappear. Your handle should be long enough to allow you to use your entire hand to grip the blade, and the scales of your handle should curve out enough to fill up the space made inside your palm when you make a fist. The hand is a curved surface, so avoid straight lines and rough corners.
Try going to a store and holding a bunch of knives to see what shapes you like, and then work with that shape and modify it to fit your specific hand. While finger grips seem like a good idea, they can actually spread your fingers out and make for an awkward grip on the blade. A curve on the bottom of your handle will allow your fingers to wrap around nicely, and a tapered end can help maximize your grip. Your pinkie finger creates a much smaller grip circumference than your longer fingers, so this taper allows for the use of your full hand. Additionally, having a handle that is taller than it is wide will prevent the blade from spinning in your hand.
Think of the grip that you’ll most frequently be using when you use your blade. You use a kitchen knife very differently than one that is designed to carve wood. Make sure your handle feels comfortable using this grip. Avoid making your grip too specific, however, as you’ll hold it differently when completing different tasks.
Your handle ergonomics are correct if your knife feels comfortable in your hand. Take the time to really make sure you have a good fit; it’s worth it in the long run. As the point of contact between me and my blade, the perfect handle makes me feel like my knife is an extension of my body and helps me to use my tool in a safe and effective way.

THE MINIMALIST DESIGN OF THIS BIRD AND TROUT KNIFE BY PATRICK DURKIN CUMMINS, APPROPRIATELY NAMED THE DURKIN TROUT, MAKES FOR A SECURE GRIP WITHOUT THE ADDITION OF HANDLE SCALES. THIS CREATIVE APPROACH FOR A HANDLE IS GREAT FOR KNIVES THAT PERFORM A SPECIFIC TASK BUT CAN BE LIMITING WHEN UTILIZED ON A MORE MULTI-PURPOSE KNIFE.
MAKING A WOODEN HANDLE
Despite all the different composite materials available, I love the comfortable feel and traditional look of a wooden handle. As you set up your work space to make your handle, be aware that the epoxy might make a mess. It might be a good idea to put down cardboard, newspaper, or butcher paper to protect any surfaces. Also, find a disposable container to mix the epoxy in. You can use an old plastic container or even a couple of pieces of painter’s tape stuck to a piece of cardboard. Make sure your pins are sanded down to size before you start.
MATERIALS AND EQUIPMENT
![]() wooden handle scales
wooden handle scales
![]() pins
pins
![]() 2-part epoxy
2-part epoxy
![]() permanent marker
permanent marker
![]() acetone
acetone
![]() painter’s tape
painter’s tape
![]() drill bit (to match pin size)
drill bit (to match pin size)
![]() C-clamps
C-clamps
![]() rubber gloves
rubber gloves
![]() craft sticks
craft sticks
![]() hack saw
hack saw
![]() wood saw or band saw
wood saw or band saw
![]() belt sander
belt sander
![]() sandpaper
sandpaper
1. MARK YOUR SCALES.
Check to make sure your scales are perfectly flat. Figure out how you want your scales to sit on the blade, making use of whatever part of the grain you’d like to show. Make a mark on your scales to designate which side will be the inside and what will be the top and bottom. This will make it easier to keep track of how to put it together later on.
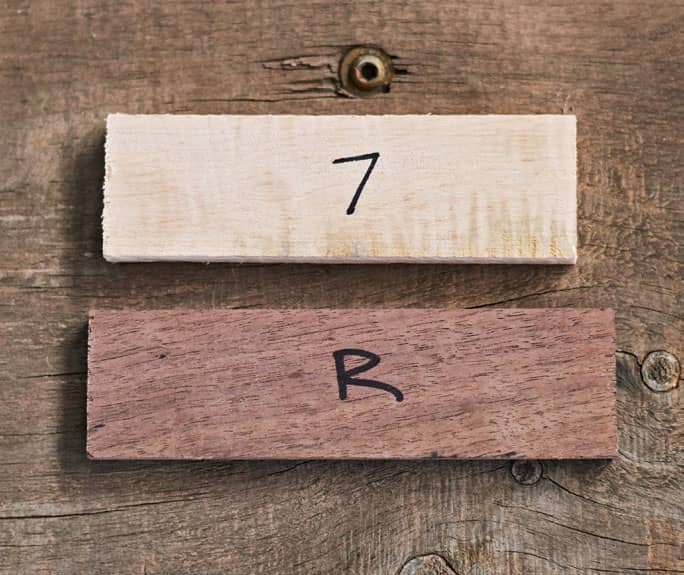
MARK THE SCALES TO SHOW HOW THEY WILL SIT ON THE TANG IN A WAY THAT IS CLEAR TO YOU. DECIDE ON A SYSTEM THAT WORKS AND USE IT FOR EVERY KNIFE YOU MAKE.
2. DRILL YOUR HOLES.
Position one of your scales as it will sit on the blade. Tape the blade and the scale together with painter’s tape. Holding them secure, drill through the hole in your tang all the way through the scale. Push one of your pins through the holes, securing the two pieces. This will keep the existing holes lined up as you drill your second hole. Drill through the second hole in your tang. If you have more than two pins in your handle, repeat this process, securing each new hole with a pin. Don’t forget to drill out your lanyard hole, if you have one. Using your marker, trace the outline of your tang on the inside of the scale.
3. REPEAT THE PROCESS ON YOUR SECOND SCALE.
Remove the pins, the tape, and the first scale from your blade and put it aside. Tape your second scale to the blade and repeat the process.
4. CUT OUT THE HANDLE SCALES.
Heading to your band saw or wood saw, follow the lines you made to cut out the rough shape of your handle. Put the scales back on the knife, and sand down the profile of the handle to match the profile of the tang. The scales will be covering more of the bolster than you want at this point, so use your marker to draw a line where your handle will end.

MAKE SURE THE HANDLE SCALES AND TANG DON’T SLIDE OR MOVE AS YOU’RE DRILLING YOUR HOLES, AS EVERYTHING NEEDS TO LINE UP TO ENSURE A GOOD FIT FOR THE PINS.
5. FINISH THE BOLSTER AREA OF YOUR HANDLE.
Take the scales off of your blade and pin the two scales together. Cut off any excess material around the front of the bolster and sand it down to your designated line. Unlike the rest of the handle, this bolster area will be harder to work once the scales are attached, as the finished blade will protrude from the scales here. Working on it later will most likely result in scratching the ricasso, so sand the bolster area of your scales down to a fine finish grit.

BRING THE AREA ON THE FRONT OF THE BOLSTER TO A FINISH BEFORE YOU ATTACH THE SCALES. THIS AREA WILL BE ALMOST IMPOSSIBLE TO WORK AFTER YOUR HANDLE IS ASSEMBLED WITHOUT SCRATCHING THE POLISH ON YOUR BLADE.
6. PREPARE THE HANDLE MATERIALS AND MIX THE EPOXY.
Using coarse grit paper, rough up the inside of your scales as well as the outside of your tang. Then, use acetone and a rag to wipe down all the surfaces that will be adhered. Epoxy won’t bond properly to a surface if it is dirty or has any oils on it, so make sure your hands are clean as you’re handling it. Following the instructions on your particular brand of epoxy, mix it together. Using a craft stick, spread it all over the inside of each scale. You want to make sure you have enough epoxy that when you clamp the scales together, all of the surface area on the inside is completely covered.
7. ASSEMBLE AND GLUE THE HANDLE.
Put the pins in the first scale and fit the blade over the pins. Fit the second scale on, gently tapping the pins in to make sure they’re in the right position. Using your C-clamps, clamp down on the handle, squeezing everything together securely. Wipe off any excess epoxy that runs out, but don’t worry about getting all of it, as you can clean it up later. Let your knife sit clamped overnight to dry.

IF IN DOUBT ABOUT WHETHER OR NOT YOUR EPOXY HAS SET, LET IT SIT FOR LONGER. IT’S BETTER TO BE SAFE THAN SORRY AT THIS POINT IN THE GAME.
8. SAND THE HANDLE.
Once your epoxy has set, bring your knife back to the grinder. Clean up the edges, and keep shaping your handle. Test your grip as you go, taking off more material wherever it puts pressure on your hand in an uncomfortable way. Once you’re happy with your grip, take the belts down to a finer grit. Polish your handle by hand sanding with finer and finer paper until you get to finish you want.
9. FINISH YOUR HANDLE.
Finish your handle by applying a coat of oil to the wood. I prefer to use tung oil, but any wood finishing oil will work. Oiling your handle not only gives it a nice finish but protects the wood from moisture.

YOU’LL NEED THE BLADE TO BE WRAPPED ONCE AGAIN TO MAKE THE SHEATH, BUT REMOVE THE PAINTER’S TAPE AND TAKE A MOMENT TO ADMIRE YOUR FIRST KNIFE.