
So far, you have subclassed UIView, created instances of the subclass, inserted them into the view hierarchy, and specified their frames and backgroundColors. In this section, you will write the custom drawing code for BNRHypnosisView in its drawRect: method.
The drawRect: method is the rendering step where a view draws itself onto its layer. UIView subclasses override drawRect: to perform custom drawing. For example, the drawRect: method of UIButton draws light-blue text centered in a rectangle.
The first thing that you typically do when overriding drawRect: is get the bounds rectangle of the view. The bounds property, inherited from UIView, is the rectangle that defines the area where the view will draw itself.
Each view has a coordinate system that it uses when drawing itself. The bounds is a view’s rectangle in its own coordinate system. The frame is the same rectangle in its superview’s coordinate system.
You might be wondering, “Why do we need another rectangle when we already have frame?”
The frame and bounds rectangles have distinct purposes. A view’s frame rectangle is used during compositing to lay out the view’s layer relative to the rest of the view hierarchy. The bounds rectangle is used during the rendering step to lay out detailed drawing within the boundaries of the view’s layer. (Figure 4.14).

You can use the bounds property of the window to define the frame for a full-screen instance of BNRHypnosisView.
In BNRAppDelegate.m, update firstView’s frame to match the bounds of the window.
- (BOOL)application:(UIApplication *)application
didFinishLaunchingWithOptions:(NSDictionary *)launchOptions
{
self.window = [[UIWindow alloc] initWithFrame:[[UIScreen mainScreen] bounds]];
// Override point for customization after application launch
CGRect firstFrame = CGRectMake(160, 240, 100, 150);
CGRect firstFrame = self.window.bounds;
BNRHypnosisView *firstView = [[BNRHypnosisView alloc] initWithFrame:firstFrame];
[self.window addSubview:firstView];
self.window.backgroundColor = [UIColor whiteColor];
[self.window makeKeyAndVisible];
return YES;
}
Build and run the application, and you will be greeted with a full-sized view with a red background.
You are going to ease into the drawing code by drawing a single circle – the largest that will fit within the bounds of the view.
In BNRHypnosisView.m, add code to drawRect: that finds the center point of bounds.
- (void)drawRect:(CGRect)rect
{
CGRect bounds = self.bounds;
// Figure out the center of the bounds rectangle
CGPoint center;
center.x = bounds.origin.x + bounds.size.width / 2.0;
center.y = bounds.origin.y + bounds.size.height / 2.0;
}
Next, set the radius for your circle to be half of the smaller of the view’s dimensions. (Determining the smaller dimension will draw the right circle in portrait and landscape orientations.)
- (void)drawRect:(CGRect)rect
{
CGRect bounds = self.bounds;
// Figure out the center of the bounds rectangle
CGPoint center;
center.x = bounds.origin.x + bounds.size.width / 2.0;
center.y = bounds.origin.y + bounds.size.height / 2.0;
// The circle will be the largest that will fit in the view
float radius = (MIN(bounds.size.width, bounds.size.height) / 2.0);
}
The next step is to draw the circle using the UIBezierPath class. Instances of this class define and draw lines and curves that you can use to make shapes, like circles.
First, create an instance of UIBezierPath.
- (void)drawRect:(CGRect)rect
{
...
// The circle will be the largest that will fit in the view
float radius = (MIN(bounds.size.width, bounds.size.height) / 2.0);
UIBezierPath *path = [[UIBezierPath alloc] init];
}
The next step is defining the path that the UIBezierPath object should follow. How do you define a circle-shaped path? The best place to find an answer to this question is the UIBezierPath class reference in Apple’s developer documentation.
From Xcode’s menu, select Help → Documentation and API Reference. You can also use the keyboard shortcut Option-Command-? (be sure to hold down the Shift key, too, to get the ‘?’).
(When you access the documentation, Xcode may try to go get the latest for you from Apple. You may be asked for your Apple ID and password.)
When the documentation browser opens, search for UIBezierPath. You will be offered several results. Find and select UIBezierPath Class Reference.

This page opens to an overview of the class, which is interesting, but let’s stay focused on your circle-shaped path question.
The lefthand side of the reference is the table of contents. (If you do not see a table of contents, select the
![]() icon at the top left of the browser.)
icon at the top left of the browser.)
In the table of contents, find the Tasks section. This is a good place to begin the hunt for a method that does something specific. The first task is Creating a UIBezierPath Object. You have already done that, so take a look at the second task: Constructing a Path. Select this task, and you will see a list of relevant UIBezierPath methods.

A likely candidate for a circular path is addArcWithCenter:radius:startAngle:endAngle:clockwise:.
Click this method to see more details about its parameters.
You have already computed the center and the radius. The start and end angle values are in radians.
To draw a circle, you will use 0 for the start angle and M_PI * 2 for the end angle.
(If your trigonometry is rusty, you can take our word on this or click the Figure 1 link within the Discussion of this method’s documentation to see a diagram of the unit circle.)
Finally, because you are drawing a complete circle, the clockwise parameter will not matter. It is a required parameter, however, so you will need to give it a value.
In BNRHypnosisView.m, send a message to the UIBezierPath that defines its path.
- (void)drawRect:(CGRect)rect
{
CGRect bounds = self.bounds;
// Figure out the center of the bounds rectangle
CGPoint center;
center.x = bounds.origin.x + bounds.size.width / 2.0;
center.y = bounds.origin.y + bounds.size.height / 2.0;
// The circle will be the largest that will fit in the view
float radius = (MIN(bounds.size.width, bounds.size.height) / 2.0);
UIBezierPath *path = [[UIBezierPath alloc] init];
// Add an arc to the path at center, with radius of radius,
// from 0 to 2*PI radians (a circle)
[path addArcWithCenter:center
radius:radius
startAngle:0.0
endAngle:M_PI * 2.0
clockwise:YES];
}
You have defined a path, but you have not drawn anything yet. Back in the UIBezier class reference, find and select the Drawing Paths task. From these methods, the best choice is stroke. (The other methods either fill in the entire shape or require a CGBlendMode that you do not need.)
In BNRHypnosisView.m, send a message to the UIBezierPath that tells it to draw.
- (void)drawRect:(CGRect)rect
{
...
UIBezierPath *path = [[UIBezierPath alloc] init];
// Add an arc to the path at center, with radius of radius,
// from 0 to 2*PI radians (a circle)
[path addArcWithCenter:center
radius:radius
startAngle:0.0
endAngle:M_PI * 2.0
clockwise:YES];
// Draw the line!
[path stroke];
}
Build and run the application, and you will see a thin, black outline of a circle that is as wide as the screen (or as tall if you are in landscape orientation).
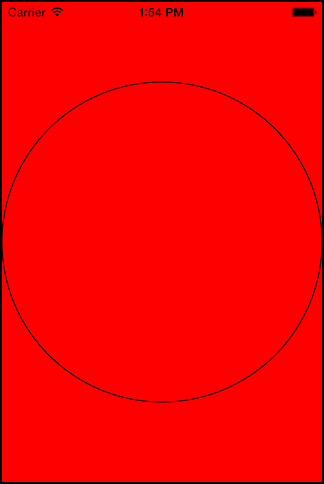
Based on the original plan for Hypnosister, the line describing your circle is not yet right. It should be wider and light gray.
To see how to fix these issues, return to the UIBezierPath reference.
In the table of contents, find the Properties section.
One of these properties should stand out as useful in this case – lineWidth.
Select this property. You will see that lineWidth is of type CGFloat and that its default is 1.0.
In BNRHypnosisView.m, make the width of the line 10 points.
- (void)drawRect:(CGRect)rect
{
...
// Add an arc to the path at center, with radius of radius,
// from 0 to 2*PI radians (a circle)
[path addArcWithCenter:center
radius:radius
startAngle:0.0
endAngle:M_PI * 2.0
clockwise:YES];
// Configure line width to 10 points
path.lineWidth = 10;
// Draw the line!
[path stroke];
}
Build and run the application to confirm that the line is now wider.
There is no property in UIBezierPath that deals with the color of the line. But there is a clue in the class overview. Use the table of contents to return to the Overview. In the fifth paragraph (as of this writing), there is a parenthetical aside that reads, “You set the stroke and fill color using the UIColor class.”
The UIColor class is linked, so you can click it to be taken directly to the UIColor class reference. In UIColor’s Tasks section, select Drawing Operations and browse through the associated methods. For your purposes, you could use either set or setStroke. You will use setStroke to make your code more obvious to others.
The setStroke method is an instance method, so you need an instance of UIColor to send it to. Recall that UIColor has convenience methods that return common colors. You can see these methods listed under the Class Methods section of the UIColor reference, including one named lightGrayColor.
Now you have the information you need. In BNRHypnosisView.m, add code to create a light gray UIColor instance and send it the setStroke message so that when the path is drawn, it will be drawn in light gray.
- (void)drawRect:(CGRect)rect
{
...
// Configure line width to 10 points
path.lineWidth = 10;
// Configure the drawing color to light gray
[[UIColor lightGrayColor] setStroke];
// Draw the line!
[path stroke];
}
Build and run the application, and you will see a wider, light gray outline of a circle.
By now, you will have noticed that a view’s backgroundColor is drawn regardless of what drawRect: does. Often, you will set the backgroundColor of a custom view to be transparent, or “clear-colored,” so that only the results of drawRect: show.
In BNRAppDelegate.m, remove the code that sets the background color of the view.
BNRHypnosisView *firstView = [[BNRHypnosisView alloc] initWithFrame:firstFrame];firstView.backgroundColor = [UIColor redColor];[self.window addSubview:view];
Then, in BNRHypnosisView.m, add code to initWithFrame: to set the background color of every BNRHypnosisView to clear.
- (instancetype)initWithFrame:(CGRect)frame
{
self = [super initWithFrame:frame];
if (self) {
// All BNRHypnosisViews start with a clear background color
self.backgroundColor = [UIColor clearColor];
}
return self;
}
Build and run the application. Figure 4.18 shows the clear background and the resulting circle.

There are two approaches you can take to draw multiple concentric circles inside the BNRHypnosisView. You can create multiple instances of UIBezierPath, each one representing one circle. Or you can add multiple circles to the single instance of UIBezierPath, and each circle will be a sub-path. It is slightly more efficient to use one instance, so you are going to do that.
To fill the screen with concentric circles, you need to determine the radius of the outermost circle. You will start drawing a circle with this radius and then draw circles with a decreasing radius for as long as the radius remains positive.
For the maximum radius, you are going to use half of the hypotenuse of the entire view. This means that the outermost circle will nearly circumscribe the view, and you will only see bits of light gray in the corners.
In BNRHypnosisView.m, replace the code that draws one circle with code that draws concentric circles.
- (void)drawRect:(CGRect)rect
{
CGRect bounds = self.bounds;
// Figure out the center of the bounds rectangle
CGPoint center;
center.x = bounds.origin.x + bounds.size.width / 2.0;
center.y = bounds.origin.y + bounds.size.height / 2.0;
// The circle will be the largest that will fit in the view
float radius = (MIN(bounds.size.width, bounds.size.height) / 2.0);
// The largest circle will circumscribe the view
float maxRadius = hypot(bounds.size.width, bounds.size.height) / 2.0;
UIBezierPath *path = [[UIBezierPath alloc] init];
// Add an arc to the path at center, with radius of radius,
// from 0 to 2*PI radians (a circle)
[path addArcWithCenter:center
radius:radius
startAngle:0.0
endAngle:M_PI * 2.0
clockwise:YES];
for (float currentRadius = maxRadius; currentRadius > 0; currentRadius -= 20) {
[path addArcWithCenter:center
radius:currentRadius // Note this is currentRadius!
startAngle:0.0
endAngle:M_PI * 2.0
clockwise:YES];
}
// Configure line width to 10 points
path.lineWidth = 10.0;
// Draw the line!
[path stroke];
}
Build and run the application. It is not quite what you were expecting; it looks more like crop circles than concentric circles (Figure 4.19).

The problem is that your single UIBezierPath object is connecting the sub-paths (the individual circles) to form the complete path. Think of a UIBezierPath object as a pencil on a piece of paper – when you go to draw another circle, the pencil stays on the piece of paper. You need to lift the pencil off the piece of paper before drawing a new circle.
In the for loop in BNRHypnosisView’s drawRect:, pick up the pencil and move it to the correct spot before drawing each circle.
- (void)drawRect:(CGRect)rect
{
CGRect bounds = self.bounds;
// Figure out the center of the bounds rectangle
CGPoint center;
center.x = bounds.origin.x + bounds.size.width / 2.0;
center.y = bounds.origin.y + bounds.size.height / 2.0;
// The largest circle will circumscribe the view
float maxRadius = hypot(bounds.size.width, bounds.size.height) / 2.0;
UIBezierPath *path = [[UIBezierPath alloc] init];
for (float currentRadius = maxRadius; currentRadius > 0; currentRadius -= 20) {
[path moveToPoint:CGPointMake(center.x + currentRadius, center.y)];
[path addArcWithCenter:center
radius:currentRadius // note this is currentRadius!
startAngle:0.0
endAngle:M_PI * 2.0
clockwise:YES];
}
// Configure line width to 10 points
path.lineWidth = 10.0;
// Draw the line!
[path stroke];
}
Build and run the application. You should now have concentric circles.

You have seen only a sampling of what UIBezierPath can do. Be sure to check out the documentation and try some of the challenges at the end of this chapter to get a better feel for some of the clever things you can do by stringing together arcs, lines, and curves.