
In this chapter, you are going to add photos to the Homepwner application. You will present a UIImagePickerController so that the user can take and save a picture of each item. The image will then be associated with an Item instance and viewable in the item’s detail view (Figure 15.1).

Images tend to be very large, so it is a good idea to store images separately from other data. Thus, you are going to create a second store for images. ImageStore will fetch and cache images as they are needed.
Your first step is to have the DetailViewController get and display an image. An easy way to display an image is to put an instance of UIImageView on the screen.
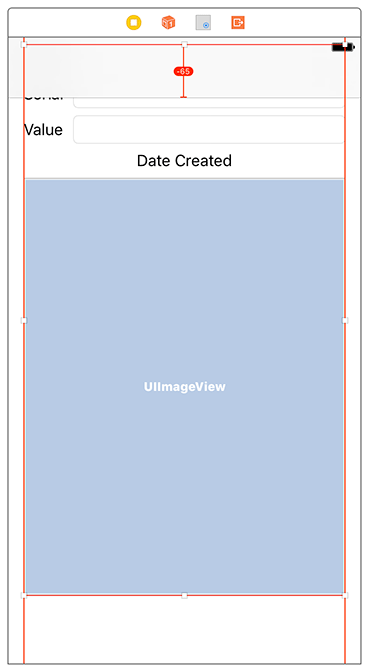
Open Homepwner.xcodeproj and Main.storyboard. Then drag an instance of UIImageView onto the view at the bottom of the stack view. Select the image view and open its size inspector. You want the vertical content hugging and content compression resistance priorities for the image view to be lower than those of the other views. Change the Vertical Content Hugging Priority to be 248 and the Vertical Content Compression Resistance Priority to be 749. Your layout will look like Figure 15.2.

A UIImageView displays an image according to the image view’s contentMode property. This property determines where to position and how to resize the content within the image view’s frame. UIImageView’s default value for contentMode is UIViewContentMode.scaleToFill, which adjusts the image to exactly match the bounds of the image view. If you keep the default, an image taken by the camera will be scaled to fit into the square UIImageView. To maintain the image’s aspect ratio, you have to update contentMode.
With the UIImageView selected, open the attributes inspector. Find the Content Mode attribute and change it to Aspect Fit (Figure 15.3). You will not see a change on the storyboard, but now images will be resized to fit within the bounds of the UIImageView.

Next, Option-click DetailViewController.swift in the project navigator to open it in the assistant editor. Control-drag from the UIImageView to the top of DetailViewController.swift. Name the outlet imageView and make sure the storage type is Strong. Click Connect (Figure 15.4).

The top of DetailViewController.swift should now look like this:
class DetailViewController: UIViewController, UITextFieldDelegate {

    @IBOutlet var nameField: UITextField!
    @IBOutlet var serialNumberField: UITextField!
    @IBOutlet var valueField: UITextField!
    @IBOutlet var dateLabel: UILabel!
    @IBOutlet var imageView: UIImageView!
Now you need a button to initiate the photo-taking process. You will create an instance of UIToolbar and place it at the bottom of DetailViewController’s view.
In Main.storyboard, press Command-Return to close the assistant editor and give yourself more room to work in the storyboard. You are going to need to temporarily break your interface to add the toolbar to the interface.
Select the bottom constraint for the stack view and press Delete to remove it. You need to make room for the toolbar on the bottom. As of Xcode 8.1, it is difficult to resize the stack view. So instead, drag the stack view up a bit (Figure 15.5). The view will be misplaced for now, but you will fix this shortly.
Now drag a toolbar from the object library onto the bottom of the view. Select the toolbar and open the Auto Layout Add New Constraints menu. Configure the constraints exactly as shown in Figure 15.6 and then click Add 5 Constraints. Because you chose the option to update frames, the stack view is repositioned to its correct location.

A UIToolbar works a lot like a UINavigationBar – you can add instances of UIBarButtonItem to it. However, where a navigation bar has two slots for bar button items, a toolbar has an array of bar button items. You can place as many bar button items in a toolbar as can fit on the screen.
By default, a new instance of UIToolbar that is created in an interface file comes with one UIBarButtonItem. Select this bar button item and open the attributes inspector. Change the System Item to Camera, and the item will show a camera icon (Figure 15.7).

Build and run the application and navigate to an item’s details to see the toolbar with its camera bar button item. You have not connected the camera button to an action yet, so tapping on it will not do anything.
The camera button needs a target and an action. With Main.storyboard still open, Option-click DetailViewController.swift in the project navigator to reopen it in the assistant editor.
In Main.storyboard, select the camera button by first clicking on the toolbar and then the button itself. Control-drag from the selected button to DetailViewController.swift.
In the Connection pop-up menu, select Action as the connection type, name it takePicture, select UIBarButtonItem as the type, and click Connect (Figure 15.8).

If you made any mistakes while making this connection, you will need to open Main.storyboard and disconnect any bad connections. (Look for yellow warning signs in the connections inspector.)