
Chapter 1: Using Your iPad and iPhone with Windows 8.1
In This Chapter
![]() Discovering the best peripheral your PC ever had
Discovering the best peripheral your PC ever had
![]() Running iTunes on Windows
Running iTunes on Windows
![]() Breaking the iTunes link with iCloud
Breaking the iTunes link with iCloud
![]() Recommending great iPad apps to use with Windows
Recommending great iPad apps to use with Windows
![]() Letting your kids use iPads and iPhones
Letting your kids use iPads and iPhones
Like it or not — and I know that many don’t — tablets are changing the way the world works and plays. Whether it’s an iPad, a Kindle, a Nook, or an Android, mobile devices are rolling over the computing landscape like rainclouds over Redmond. Big rainclouds.
Some people moan about the way “toy computers” are taking over. I, for one, relish it. A tablet is vastly superior to a notebook — even an ultrabook, or any other kind of book — in performing very specific tasks. And they’re tasks I do all the time: surfing the web, watching videos, keeping up on Facebook and Twitter, even light e-mail.
Sure, I would never use a tablet or a phone to write a book or build a complex investment-tracking spreadsheet. But (appearances to the contrary) I don’t write books all day, every day. And online investment-tracking software is so good now, there’s very little reason for me to futz with obtuse Excel formulas.
 Although Microsoft certainly disagrees with me, I see the iPad as the best peripheral a Windows PC ever had. And, yes, I include Windows 8.1 in that assessment, too. Although I can flip back and forth from the desktop to the Metro Start screen when necessary in Windows 8.1, I find it much simpler to just walk away from Windows 8.1 and pick up the iPad when I need to do something the iPad’s good at.
Windows RT, Microsoft’s attempt to go head-to-head with the iPad using a completely incompatible version of Windows, has been a resounding failure, to the tune of billions of dollars. Microsoft swears it’s going to keep trying, and it has enough money to throw at it to keep the idea bobbing up and down for a while. But as far as I’m concerned, Windows RT is a tragic mistake.
In this chapter, I’m not going to try to turn you to the iPad Side of the Force. But I do want to point out places where real, live everyday Windows users such as yourself should seriously consider using an iPad — or an Android tablet — if you have one. I explain how to wrangle with iTunes, but only when you have to, and point you to apps and techniques for combining Windows and the iPad.
I also won’t try to introduce you to the iPad or take you through an iPad tutorial. iPad For Dummies by Edward Baig and Bob LeVitus does a great job with the basics, and Exploring iPad For Dummies by Galen Gruman and iPad All-in-One For Dummies (all published by John Wiley & Sons, Inc.) by Nancy Muir tackle deeper subjects. Instead, I’m going to concentrate on how you can use your iPad with Windows 8.1 and vice versa.
Running iTunes on Windows, Or Maybe Not
iTunes is Apple’s program originally designed to sync your Windows PC or Mac with iPods and later other mobile devices. Apple’s iDevices used to be kind of like dumb boxes that wouldn’t work without iTunes on a computer to sync and organize contacts, playlists, and the like. You don’t really need iTunes for your iPad or iPhone any more. Apple has made the iPad and the iPhone free-standing devices, ready to connect directly to the iCloud. But if you overlook the fact that iTunes is simply one of the worst Windows applications ever created, it has some good points, too.
Never mind me. I’ve been complaining about the iTunes program running on Windows for more than a decade now. (iTunes on the Mac is a completely different kettle of fish.) And iTunes on Windows does have a sharing capability that makes it possible for one PC on your home network to play music that’s available to iTunes on another. Still, as a Windows program, iTunes leaves much to be desired.
I’m most assuredly not dissing the iTunes Store, the online shop where you can buy music, video, apps, and more from Apple, all of which are formatted to work on Apple’s devices. The iTunes Store has its own problems, but it’s revolutionized the way I buy music. In 2009, in response to Amazon’s launching a DRM-free MP3 store, iTunes put one of the final nails in the coffin of music Digital Rights Management — where the people who sell music control how it’s played, even after you buy it. Apple made an incredible array of music relatively affordable and easy to access, to a whole lotta people, and it’s made a bundle of money out of the effort.
Why you may need or want iTunes for Windows
As long as all your iPhone/iPad music, videos, or books reside in (or can be retrieved from) the iTunes Store, you're better off starting and staying with the iCloud. (iCloud is Apple's service that stores and syncs your iPhone or iPad data over the Internet.) Don't install the Windows iTunes app, and don't even try to understand it. Just follow the instructions to set up iCloud at www.apple.com/icloud/setup.
 Switching your iPad or iPhone over to using iCloud is simple: In the iPad or iPhone Settings app, on the left, tap iCloud. Make sure you have the right account set up (believe me, you don’t want to hassle with mismatched accounts), on the right at the bottom, tap Storage and Backup. Slide the iCloud Backup setting to On. Then wait — it took two hours for my initial backup.
If you have some music, videos, or books on your computer that aren’t in iCloud, or if you want to be able to pull your iCloud stuff (especially music) into your PC, the iTunes app is something you have to bear with. Two reasons why you may want iTunes:
![]() iTunes is the easiest way to sideload non-iTunes stuff from your PC onto your iPad. For example, if you’ve acquired books, movies, TV shows from someplace other than the iTunes Store, it’s easier to use the iTunes Windows app to put them on an iPad.
iTunes is the easiest way to sideload non-iTunes stuff from your PC onto your iPad. For example, if you’ve acquired books, movies, TV shows from someplace other than the iTunes Store, it’s easier to use the iTunes Windows app to put them on an iPad.
![]() If you’ve paid for iTunes Match, running iTunes on your PC is the only way to pull music from iCloud and use it on your PC. If you have a sizable collection of music, see the nearby “Music on iCloud — iTunes Match” sidebar.
If you’ve paid for iTunes Match, running iTunes on your PC is the only way to pull music from iCloud and use it on your PC. If you have a sizable collection of music, see the nearby “Music on iCloud — iTunes Match” sidebar.
Installing iTunes
Fair warning. iTunes is one of the snarliest Windows programs I’ve ever used: It takes over the computer and doesn’t let go until it’s good and ready. It’s slow to switch services (links on the left side). Double-clicking anything can result in really odd behavior. All in all, it doesn’t look or work like a Windows app. And it’s been like that for ten years.
 iTunes uses another Apple program, QuickTime — a video-playing program that I’ve sworn at for many years. When you install iTunes, you install QuickTime, whether you want to or not.
From time to time, Apple also tries to get you to install other pieces of software, such as Safari, Bonjour Services, the Apple Updater, and MobileMe, and it’s been known to use sneaky techniques to convince you to install other software. So keep your guard up and keep your clicking finger at bay. The idea is to install iTunes because you have to — and nothing extra. If that friendly Apple update reminder appears miraculously on your screen three months from now and says you need to install another wonderful Apple product, you have my permission to guffaw and obliterate the reminder.
Here’s how to get your Windows PC iTuned:
1. Crank up your favorite browser and head to www.itunes.com.
Apple redirects your browser to a different page, but that’s okay. You end up in the right place, which looks like Figure 1-1.
2. Tap or click the Free Download button.
Apple kindly offers you an opportunity to sign up for its spam, er, mailing lists, and requests your e-mail address. Don’t give it to them.
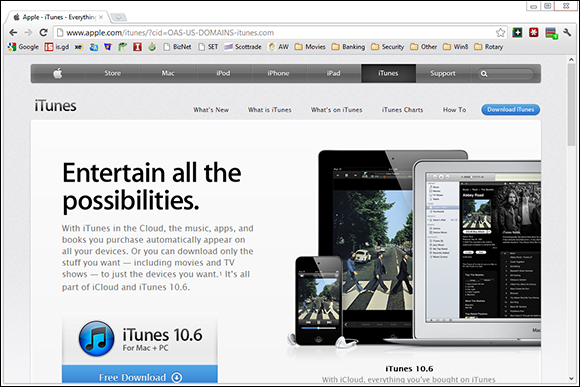
Figure 1-1: The landing page for installing iTunes.
3. Deselect any boxes, don’t type your e-mail address, but do tap or click the Download Now button.
Your browser downloads the correct version — 32-bit or 64-bit. Depend-ing on which browser you’re using, you may have to tap or click something to save and run the downloaded file.
4. In the standard splash screen that appears, tap or click Next.
The options in Figure 1-2 appear.

Figure 1-2: The iTunes installer options.
5. Deselect the Use iTunes as the Default Player for Audio Files and the Automatically Update iTunes and Other Apple Software check boxes.
In the past, Apple has used the update “permission” to bother iTunes users into installing Safari and putting ten new icons on the desktop.
If you let iTunes take over all your audio files, it appears in all sorts of weird places and does things that aren’t at all intuitive — to me, anyway. Most importantly, if iTunes is your default audio player, every time you click an audio file, you have to wait and wait and wait and wait for iTunes to get itself put together and start playing the tune.
6. Tap or click Install.
The installer splashes an ad on your screen, does its thing, and ends several minutes later with a Congratulations! message.
7. Tap or click Finish.
You can quit at this point or you can continue on to start iTunes for the first time. See the next section.
Setting up iTunes
Before you use iTunes for the first time, you run through the iTunes Setup Assistant program. Here’s how to minimize your ongoing headaches:
1. If you quit immediately after iTunes is installed (see the preceding section) or if iTunes was preinstalled on your PC, tap the iTunes tile on the Metro All Apps screen or double-click the iTunes icon on the desktop to run iTunes for the first time.
If you didn’t quit iTunes, you automatically come to this step after iTunes has been successfully installed.
2. Tap or click through another license agreement, which is considerably longer than the U.S. Constitution. Choose I Agree, Yer Honor (or words to that effect).
Then head over to YouTube and look up the South Park episode where Butters reads the iTunes agreement. You don’t want to mess with these people.
The iTunes Tutorials home page appears, as shown in Figure 1-3.
3. When the tutorials are done, close the Tutorials home page.
The initial iTunes Music page appears, as shown in Figure 1-4.
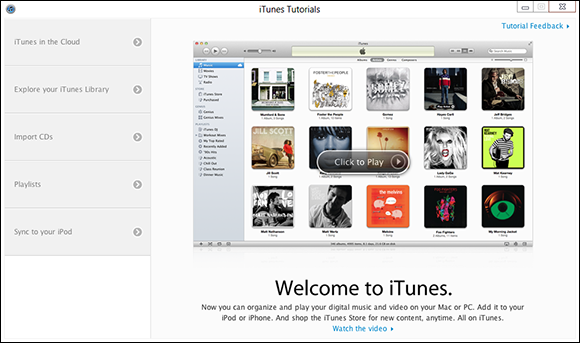
Figure 1-3: Take the tutorials. They’re worth the effort.

Figure 1-4: Time to get your music files set up, the iTunes way.
4. At the bottom of the screen, tap or click the Find MP3 and AAC Files in My Home Folder link.
Pardon Apple’s weird terminology. It doesn’t actually look for music in a Home folder; it looks in your Music library. (Windows 8.1 mangles libraries; if yours isn’t working the way you think it should, see Book VII, Chapter 3.)
Depending on how much music you have stored in your Music library, the scan can take minutes or hours.
If you’re curious about what iTunes actually does with your music, don’t be overly concerned. Unlike earlier versions, the latest version of iTunes doesn’t move any files. Instead, it builds a database that points to your music and stores it in the new MusiciTunes folder. Still worried? Crank up File Explorer and go look. And breathe a sigh of relief.
You may or may not want to use iTunes to import (rip) music CDs — I explain how to do that using Windows Media Player in Book VI, Chapter 7. But even if you don’t want to use iTunes to rip CDs, it’s a good idea to make one simple change, right now.
5. Choose Edit⇒Preferences. Tap or click the Import Settings icon near When You Insert a CD.
The Import Settings dialog box appears, as shown in Figure 1-5.
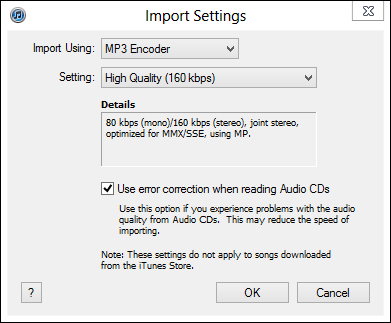
Figure 1-5: Make sure iTunes rips to MP3 format.
6. Choose MP3 Encoder in the Import Using drop-down list.
That ensures the ripped music files appear as MP3 files. You may prefer AAC format (or WMA format, for that matter), but there’s nothing as clean — or as ubiquitous — as MP3.
7. Unless you rip many CDs every day, select the Use Error Correction When Reading Audio CDs check box.
Although using error correction may make the ripping process run a little slower — okay, a lot slower — it’ll guarantee that you get the best recordings possible from those old, dirty scratched CDs. You know you have them.
8. Tap or click OK, and then tap or click OK again.
You end up back in iTunes.
 If you ever discover that iTunes failed to pick up a new song — one that you ripped from a CD, downloaded from the Internet, or bought from an online service — simply locate the song file or album folder in File Explorer and drag it into iTunes.
Pulling Internet videos onto your iPad
Most (but not all) of the videos that you can see on the Internet can be scraped and stored permanently on your iPad or iPhone. That can be very useful if you’re going to be someplace that doesn’t have an Internet connection for your iPad, or if you’re going to watch the same video over and over (hey, you have kids, yes?) and you don’t want to pay for repeatedly downloading the same clip.
Many products will scrape videos off the Internet. KeepVid (www.keepvid.com) was one of the first, and it works well for most videos on YouTube, DailyMotion, Megavideo, Metacafe, and Vimeo. To use the free version of KeepVid, go to the KeepVid website and paste in the URL of the video you want to save.
My personal preference is the Firefox Video DownloadHelper add-in (http://addons.mozilla.org/en-US/firefox/addon/video-downloadhelper). When you install Video DownloadHelper in Firefox, it watches to see whether scrapable videos are on the page you're viewing. If there are, a little icon starts rotating. Tap or click the icon and download the video. Easy.
The trick with KeepVid, Video DownloadHelper, or any other video scraper you find is that you need to have it produce videos in MP4 format. Although MP4 isn’t a format as much as it’s a group of formats (details too boring to recount here), almost all the time, MP4 files play just fine on an iPad.
Of course, you don’t do this for copyrighted material or on sites that otherwise expressly forbid it.
Here’s how to get videos off the Internet and into your iPad. Follow these steps:
1. Use Video DownloadHelper or a similar scraper to produce MP4 files.
2. Start iTunes. On the left, under Library, tap or click the Movies line.
iTunes doesn’t have any way to make a playlist of movies just yet, but you can still play individual movies with your iPad’s built-in Video app.
3. Locate the MP4 files in File Explorer. Then drag and drop them into the iTunes Movies folder.
A thumbnail of the movie appears, as shown in Figure 1-6.

Figure 1-6: Drag MP4 movies into iTunes and then sync to get them on your iPad.
4. When you’re done dragging all your MP4 files into the Movies folder, connect your iPad or iPhone and sync.
If the movie will play on your iPad or iPhone, it gets copied over to the device.
Once in a while, the movie won’t sync properly. I have no idea why, but I’ve found that if you drag the movie from the iTunesLibraryMovies folder to the iPad Movies folder, it gets copied onto the iPad.
Creating a movie playlist
For reasons known only to The Most Valuable Company on Earth, it’s impossible to string iPad movies together in a playlist. You’re forced to play them one at a time; playlists don’t exist in the Video app. If you want to play one MP4 file followed by another followed by another, with no human intervention required, you have to get tricky.
It’s trivial to put music in a playlist: On the iPad, go into the iPod app. Tap or click the Plus (+) icon at the bottom left, type a playlist name, and tap or click the blue (+) icon to the left of any songs you want to add to the list. Tap or click the blue Done button, and you’re, uh, done. The iPod app on the iPad has all sorts of capabilities to help you build playlists — you can sort your songs by genre or bring up album covers, or add podcasts or audiobooks. You can even make new playlists by stringing together old playlists. But you can’t make a playlist in the iPad’s Video app. And you can’t make a playlist of videos inside iTunes and get it to work on the iPad.
There’s a trick, though — one that I’ve never seen documented anywhere. By using iTunes on your PC, you can trick your iPad into thinking that it has a Movie playlist and play all the movies you want with just one click. How? Use iTunes to make the iPad think that the video playlists are, in fact, TV shows. I know it doesn’t make any sense. But it works. Here’s how:
1. Plug the iPad into your PC and fire up iTunes. Inside the iTunes Movies list, Ctrl-click or Shift-click to select the videos that you want to put in your playlist. Right-click and choose Get Info.
Maybe someday iTunes for Windows will get a touch interface. For now, no such luck.
The Multiple Item Information dialog box appears.
2. Tap or click the Options tab. In the Media Kind drop-down list, choose TV Show.
That turns all your videos into TV Shows. Yeah, it doesn’t really change anything. But it works.
3. Tap or click the Video tab. Type a name for your new video playlist, in the Show box.
That gives your video playlist — er, your TV shows — a name. See Figure 1-7.

Figure 1-7: Create a video playlist by making iTunes think your videos are “TV shows.”
4. Tap or click OK.
The next time you sync your iPad (or iPhone), the playlist appears in the iPad’s Video app, but you have to tap or click (the grayed-out and hard to see) TV Shows link at the top of the app to bring them up.
Perhaps not surprisingly, this method comes with limitations. After you put a video in a “TV Show” playlist, it disappears from the Movie folder, and it won’t appear inside the Movies part of the Video app. So if you put The Muppets: Bohemian Rhapsody in a TV Show playlist, it won’t appear with the other videos. You can get around that shortcoming as follows:
![]() Stick another copy of The Muppets: Bohemian Rhapsody, if you have one, in the Movie folder.
Stick another copy of The Muppets: Bohemian Rhapsody, if you have one, in the Movie folder.
![]() When you’re done with your playlist, return the video to the Movie folder: Go to the TV Shows list, right-click the video, choose Get Info, click Options, and change the Media Kind back to Movie.
When you’re done with your playlist, return the video to the Movie folder: Go to the TV Shows list, right-click the video, choose Get Info, click Options, and change the Media Kind back to Movie.
By default, your iPad plays the videos in a TV Show playlist in alphabetical order. If you want to choose the sequence in which videos appear on the playlist, the easiest approach I’ve found is to modify the Sort Show. In the TV Shows section, right-click a video and choose Get Info. Click the Sorting tab and type in the Sort Show box (see Figure 1-8).
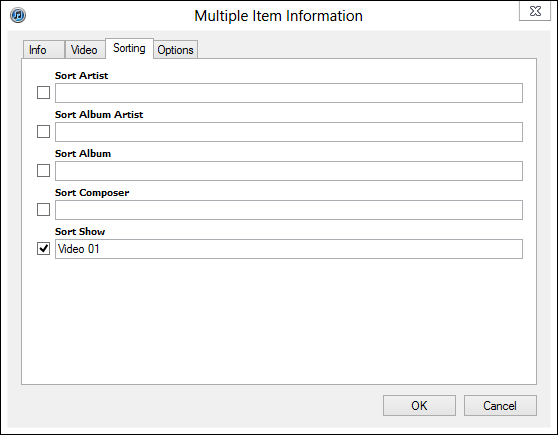
Figure 1-8: Change the names of the “TV Shows” so they sort alphabetic-ally in the order you want.
Great iPad Apps to Use with Windows
Full disclosure: I love my new iPad. Don’t know how I ever lived without it.
On the other hand, as you have probably surmised by a quick perusal of the thousand or so pages in this book, I have a complex love-hate relationship with Windows. The PC runs rings around the iPad in a dozen different areas. The converse is just as true. How to get the best out of both? It ain’t easy.
If you’re like me, you’ve been using Windows for a long time but got an iPad on something of a lark — it’s cute, does a few things very well, and it’s very good with kids and not-so-computer-savvy members of the family. I talk about that at length in the next section.
The iPad is also hell for a touch typist, incompatible with many Windows-friendly programs like Office (at least, the real Office) and Flash, and too expensive to just sit in a closet most of the time. Unlike a smartphone with a camera, an iPad doesn’t have any compelling, redeeming social graces.
So now that you have it, what do you do with it — how can you make your iPad work within your Windows-centric life?
I don’t claim to have The Answer. In fact, everything’s changing so quickly, I doubt that anybody caught straddling both the Win and iPad worlds has more than a tiny piece of the equation figured out. But I’ve found a handful of apps and a couple tricks that you may find useful.
Controlling Windows from your iPad
More than a dozen PC remote control apps are available in the Apple App Store. Some of them work surprisingly well:
![]() LogMeIn Ignition: A favorite among reviewers, although at $29.95 for the iPad application, it’s pricey. You have to run LogMeIn on both the iPad and the Windows machine. If you go with LogMeIn Free on the Windows PC, you can’t transfer files, print remotely, hear sounds from the PC, or share desktops. To do any of that, you have to spend an additional $69.95 per year for the Windows PC’s software.
LogMeIn Ignition: A favorite among reviewers, although at $29.95 for the iPad application, it’s pricey. You have to run LogMeIn on both the iPad and the Windows machine. If you go with LogMeIn Free on the Windows PC, you can’t transfer files, print remotely, hear sounds from the PC, or share desktops. To do any of that, you have to spend an additional $69.95 per year for the Windows PC’s software.
![]() GoToMyPC: Another name that should sound familiar to Windows aficionados, it also draws good reviews, but it turns even pricier quickly. Figure on spending $9.99 per month per computer after the initial, 30-day, free trial period.
GoToMyPC: Another name that should sound familiar to Windows aficionados, it also draws good reviews, but it turns even pricier quickly. Figure on spending $9.99 per month per computer after the initial, 30-day, free trial period.
![]() Desktop Connect: A lesser-known product that demands you run a Virtual Network Computing (VNC) program on your Windows PC. You also have to connect with a hard-coded IP address.
Desktop Connect: A lesser-known product that demands you run a Virtual Network Computing (VNC) program on your Windows PC. You also have to connect with a hard-coded IP address.
![]() Splashtop: Another lesser-known product works well on a Wi-Fi system, connecting to PCs on the same network, but going outside the local network can get more difficult. I use Splashtop to play videos that aren’t in MP4 format on my iPad.
Splashtop: Another lesser-known product works well on a Wi-Fi system, connecting to PCs on the same network, but going outside the local network can get more difficult. I use Splashtop to play videos that aren’t in MP4 format on my iPad.
![]() TeamViewer: My favorite, remote control program (free for non-commercial use) can run in one of two ways. You either install the TeamViewer program on your Windows PC and let it control the interaction or you simply run the program on your PC, manually, any time you want to be able to access the Windows PC from your iPad (see Figure 1-9). When you run the program manually on your Windows PC, it generates a random user ID and password, which you use on the iPad to initiate the session.
TeamViewer: My favorite, remote control program (free for non-commercial use) can run in one of two ways. You either install the TeamViewer program on your Windows PC and let it control the interaction or you simply run the program on your PC, manually, any time you want to be able to access the Windows PC from your iPad (see Figure 1-9). When you run the program manually on your Windows PC, it generates a random user ID and password, which you use on the iPad to initiate the session.

Figure 1-9: TeamViewer lets you control your PC from an iPad — and it’s free. This shot of Win8.1 was taken from an iPad.
After TeamViewer’s connected, it lets you use the iPad keyboard, pinch to expand or reduce the size of the screen, tap with two fingers to emulate a right-click, use the buttons on the top of the screen for Alt and Ctrl and Esc, and much more. Even Flash animations come through remarkably quickly.
Delivering PowerPoint presentations with your iPad
I’ll never forget the first time I saw a PowerPoint presentation delivered from an iPad. Actually, it combined a laptop, a projector, and an iPad. The presenter had a reasonably good PowerPoint presentation, running on a plain-vanilla Win7 laptop connected to a projector. Instead of hiding behind his laptop and mousing his way through the slides, or staring at the projector screen and using a clicker, he was actually looking at the audience, glancing at the slides and notes on the iPad in front of him, swiping his way through the presentation. The presentation went extraordinarily well because the presenter interacted with the audience, not with his PC, not with the projector screen. He had the right tools for the job.
If you have a Windows 8.1 tablet that weighs less than a Volkswagen and doesn’t overheat, you can use the tablet to make the presentation from the desktop. But if you’re running Win8.1 on a laptop, holding the computer while delivering the presentation just isn’t in the cards. I know. I’ve tried.
If you haven’t yet seen, or delivered, a PowerPoint presentation with an iPad, you’re in for a treat. The liberating little tablet changes the entire dynamic of making PowerPoint presentations.
The presenter was using Slideshow Remote from LogicInMind. It’s $4.99 from the App Store. Slideshow Remote shows you the slides on your iPad, of course, but it also shows notes and it previews the next slide. You can even bring up a full slide thumbnail list, just like in PowerPoint itself, and jump to specific slides with a swipe and a tap.
Extending your Windows display with iDisplay
What? You didn’t know that you can use your iPad to extend your Windows PC’s display?
iDisplay — $4.99 in the App Store — works using Wi-Fi, not a cable, and you don’t have to invest in a fancy video card with two outputs. Instead, you download and run the iDisplay app on both your iPad and your Windows PC. Go into the Windows app, find the iPad, and then start the iDisplay app on it. Stick the monitors side by side (see Figure 1-10), and you can click and drag from one screen to the other.
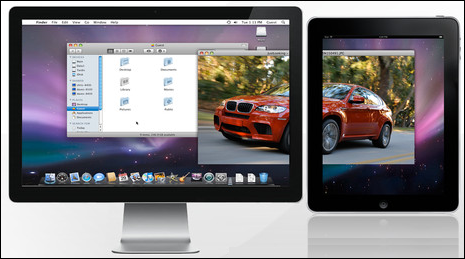
Figure 1-10: iDisplay extends your Windows PC’s desktop without a fancy video card.
iDisplay is best suited for shuffling relatively static information off to the side of your screen — all the bits have to travel by Wi-Fi, and they don’t move quickly. I use iDisplay to run TweetDeck on the side of my screen.
Moving files between your PC and the iPad
The iPad’s file system can best be described as, uh, rudimentary. Actually, nonexistent comes to mind. Be that as it may, from time to time, you may want to transfer a file other than a typical iTunes file — music, video, podcast, photo, or book — to or from your iPad.
My personal favorite? Dropbox. I talk about Dropbox in Book VIII, Chapter 1, in the context of cloud backup. But for normal, everyday files, the Dropbox iPad app (free, from the App Store) works fine. Download and install the app, give it your username and password, and you’re done. Dropbox handles syncing across multiple platforms, invisibly and reliably. Even if your Internet connection goes down, the files are still in the box.
You can use iCloud to transfer files, but it’s considerably more complicated than Dropbox.
Working with Windows documents on the iPad
If you’re looking for a Microsoft Office replacement for the iPad, you’re out of luck.
The iPad doesn’t do Office, and none of the alternatives come close to “genuine” Office. Sorry, but it’s trivially easy to construct documents in Word, Excel, or PowerPoint that get plastered when edited in any of the Microsoft Office alternatives. Of course, the same can be said for Microsoft’s own online version of Office, the Office Web Apps.
My best advice is to avoid editing existing Word, Excel, or PowerPoint files on your iPad. If you want to create new files, simple files, that stand some chance of being properly interpreted in the original Office programs, consider using Apple’s own iWork for iPad.
iWork consists of three applications, each of which can be purchased separately for $9.99:
![]() Pages handles word processing.
Pages handles word processing.
![]() Numbers is for spreadsheets.
Numbers is for spreadsheets.
![]() Keynote produces presentations.
Keynote produces presentations.
Parts of iWork will drive any Office aficionado mad — documents are selected from a gallery, and you don’t save them because they’re saved automatically. Techniques for selecting and modifying text are quite different, but if you follow the onscreen tutorial, you’ll get the hang of it quickly. If you plan on using any of the iWork apps for more than 30 seconds, invest in the iPad Keyboard Dock ($69) or any of the zillions of external keyboards now available for the iPad.
Moving iWork files in and out of the iCloud is easy, but that doesn’t help much if your main machine’s running Windows.
Getting Dropbox files into the iWork apps is easy — you just open them. But getting modified files back into Dropbox is a monumental pain in the neck. You can e-mail the files or sync them with iTunes, but if you want to make modified files available in Dropbox, follow these instructions on the Techinch site: www.techinch.com/2011/02/02/integrate-dropbox-with-pages-keynote-and-numbers-on-ipad.
If you want to work with PDF files on the iPad, get GoodReader, $4.99 in the App Store. GoodReader lets you read PDFs, but it also allows you to mark up and annotate PDF and TXT files, and sync with Dropbox or remote servers. It’s an amazing, legendary program.
Playing with Kids on Your iPad or iPhones
Permit me to end this chapter with a bit of personal advice, aimed at the parents (and grandparents!) in the crowd.
In 2010 and 2011, there was a rash of articles in the popular press saying that iPads and iPhones would rot your kids’ brains. I mean, it’s hard to wade through a bunch of headlines like these from The New York Times and not feel like an iPad’s the root of all kiddy evil: “Growing Up Digital, Wired for Distraction” and “The Risks of Parenting While Plugged In” and “An Ugly Toll of Technology: Impatience and Forgetfulness.” I forgot what the other headlines said, but you get my drift. Typical admonishment: People are raising a generation of kids in front of screens whose brains are going to be wired differently.
Well, yes. That’s exactly the point.
When I was a kid, the child development experts said that any more than 45 minutes of television per day would make a kid irresponsible, incapable of concentrating, unable to interact with people, and a developmental basket case. Look what happened to me. Oh, wait. That isn’t a good comparison. Look at what happened to the entire generation. Perhaps everyone suffered from short attention spans and terminal halitosis. But somehow I think we all pulled through it, give or take a few politicians.
I don’t claim to be a child development expert. But I do know this. Putting an iPad (or Android, Kindle, whatever) into your child’s hands isn’t a brain cell death sentence. It’s opening an important new world.
Yes, I’ve read about the studies that show toddlers who grow up on tablets don’t develop vocabularies until a later age. I know about the teen tech idiot savants, who can’t write a sentence but spin out programs to solve algebra problems. The high schoolers who send 20,000 SMSs a month but can’t find time to finish a homework assignment. The kids who play so many games they forget to sleep at night.
On the other hand, I’ve seen the toddlers who spend hours and hours practicing their letters and numbers, shapes and words, colors and coordination, exploring with their parents’ help, and going right back to the iPad at every opportunity — because it’s fun. And I know a whole lot of people in Silicon Valley who make a living, not by writing book reports, but by churning out miles of incredible code. The best of the bunch started as teenagers. Young teenagers.
The trick, in my opinion, is to use the technology to interact with your kids. Sure, my toddler and I still read books — real, dead tree books — every day. But most of the day when we’re playing indoors, the topics are generally educational, and they’re invariably on the iPad or the PC.
Am I setting up my toddler for having his brain wired the wrong way? Pshaw. Will his interpersonal skills suffer? Not if he gets some time playing with other kids. Will he be able to use all the tools he’ll need as he gets older? Yeah, I think so. Most of all, he won’t be intimidated by these talking pieces of glass. It’ll be second nature, and when the time comes, he’ll be able to start standing on the shoulders of giants. It’s just that, in the meantime, he has to learn that he can’t tap or swipe a TV screen and get it to change channels, or slide his finger on a magazine and expect it to move forward a page.
So I say take your kids to the library. Watch TV with them. Make sure they have time with other kids their own age. And get a tablet into their hands at an early age, so you can play with them.
A friend of mine asked me to come up with a list of iPad apps that my wife and I like to play with our toddler. Here’s the list:
![]() The Cat in the Hat
The Cat in the Hat
![]() Dr. Seuss Band
Dr. Seuss Band
![]() Anything by the GiggleBellies
Anything by the GiggleBellies
![]() Any Sandra Boynton books
Any Sandra Boynton books
![]() Pat the Bunny
Pat the Bunny
![]() Twinkle Twinkle (Super Simple Learning)
Twinkle Twinkle (Super Simple Learning)
![]() My First Words Baby Picture dictionary
My First Words Baby Picture dictionary
![]() Starfall ABCs
Starfall ABCs
![]() Elmo Loves ABCs
Elmo Loves ABCs
![]() Any Duck Duck Moose stories
Any Duck Duck Moose stories
![]() Nighty Night!
Nighty Night!
![]() Pepi Bath
Pepi Bath
![]() The Little Critter books
The Little Critter books
If you own an Xbox, look for the SmartGlass app for iPad and iPhone in the Apple App Store.
You can also scrape videos off YouTube. I leave it to your search skills to find videos on YouTube for your kids. And, of course, you can watch YouTube directly, if you hook the iPad up to your Wi-Fi.
All the apps I listed are in the Apple App Store — immediately accessible from the iPad, or if you want to surf, go to www.apple.com/itunes. The YouTube app comes preloaded on your iPad or iPhone.
Computers are going to give your kids (and grandkids and their grandkids) abilities I can hardly dream about today. Don’t be afraid to teach them well. In spite of what the experts say.