10. Printing
It may seem old-fashioned, but you can actually print your photos from Photoshop—at home, on a desktop printer, through a photo-printing service such as Shutterfly or Costco, or by sending them to a professional service provider. Whether you’re printing the photo itself or including it in another document that will be printed, it’s a good idea to proof the image so you know what to expect.
And before you send the file anywhere, save a copy of the full file, with all its layers intact, so that you can edit it again for another purpose later.
Archiving Photoshop Files
You may need to convert an image to a different color mode for printing, or compress it in GIF or JPEG format for posting to the Web. Before you make any of those changes, though, make sure you save one full version, with all the layers and masks and filters and any other editable changes intact, so that you can return to the image and prepare it for another purpose later. Make sure you save it in PSD format.
How you archive the image depends on your general file organization, but consider creating a separate folder (backed up to a removable hard drive) just for these PSD files, so you’ll be able to find them easily later and copy them for a new use.
Proofing Your Image
When you’re printing an image, surprises are unwelcome and can be quite expensive. To anticipate any changes that might occur when you print, identify and correct out-of-gamut colors, and then preview the final results onscreen (called soft proofing).
Setting up color management
Your monitor displays colors in RGB, but professional printing usually uses CMYK (cyan, magenta, yellow, and black) inks, also called process inks. However, the RGB and CMYK color models both reproduce different gamuts, or ranges of colors. For example, you can produce neon colors in RGB, but not in CMYK; you can reproduce some pastels in CMYK, but not in RGB. Of course, pure black is also easier to represent with CMYK than with RGB, because CMYK includes a black ink.
The difference between RGB and CMYK gamuts is tricky enough. But the story gets more complicated because each monitor and printer model supports a slightly different gamut. So, to get the color you expect, it’s important to use a color profile for your particular device that accurately defines the gamut it can reproduce.
Color management in Photoshop uses color profiles to convert colors from one color space to another. You select the color profiles for your devices to accurately proof and print your images. Photoshop can embed those profiles into your image files, so that Photoshop and other applications can accurately manage color as you work with the image.
Remember, though, that the color profile is only as good as the data it contains. Monitor displays can vary subtly, even within models, and they can change over time. To obtain accurate results from color management, calibrate your monitor and create a profile that captures the gamut of your monitor at that moment in time. For help calibrating your monitor, see Photoshop Help.
By default, Photoshop is set up for RGB as part of a digital workflow. If you’re preparing artwork for print, however, change the settings to be more appropriate for printing.
To set up color management:
- Choose Edit > Color Settings.
- In the Color Settings dialog box, choose a preset from the Settings menu to select the appropriate working spaces and color-management policy options. North America Prepress 2, for example, uses settings for a typical prepress workflow. If you have custom profiles, select them in the Working Spaces area.
Figure 10.1. The Color Settings dialog box.

Tip
If you don’t understand an option in the Color Settings dialog box, move the cursor over it and read the description at the bottom of the dialog box.
Soft proofing
To soft-proof an image, you need to set up a proof profile. The proof profile (also called a proof setup) defines how the document will be printed and adjusts its appearance onscreen to match.
To create a proof profile:
- Choose View > Proof Setup > Custom.
- In the Customize Proof Condition dialog box, select Preview.
- From the Device to Simulate menu, choose a profile for your final output device. If you’re sending the image out to be printed, obtain a profile from your print service provider.
- Deselect Preserve Numbers, if it’s selected. The Preserve Numbers option displays colors without converting them to the output device color space.
- From the Rendering Intent menu, choose Relative Colorimetric.
A rendering intent determines how the color management system makes the conversion from one color space to another. The standard rendering intent for printing in North America and Europe is Relative Colorimetric, which preserves the color relationships without sacrificing color accuracy.
- If it’s available for your chosen profile, select Simulate Paper Color, which automatically selects Simulate Black Ink as well.
When you simulate paper color, Photoshop simulates the dingy white or real paper, according to the proof profile. When you simulate black ink, Photoshop simulates the dark gray that actually prints to most printers, instead of solid black.
- Click OK.
When you set up a custom proof profile with Preview selected, it automatically displays the image with the proof profile. To toggle the proof profile, choose View > Proof Colors, or press Ctrl+Y (Windows) or Command+Y (Mac OS).
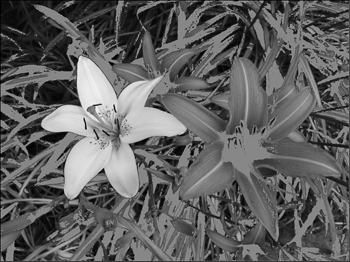
Identifying out-of-gamut colors
RGB images often contain some colors that are outside the CMYK gamut, so it’s a good idea to identify those colors before printing. That way, you can make changes to the image that are acceptable to you, instead of trusting the conversion to make the appropriate changes.
To view out-of-gamut colors, choose View > Gamut Warning. Photoshop displays a neutral gray in the image window where the colors are out of gamut.
Figure 10.2. Colors that don’t fall into the range supported by your targeted printer appear gray onscreen.
Tip
To make the out-of-gamut display more visible, you can change its color by choosing Edit > Preferences > Transparency and Gamut or Photoshop > Preferences > Transparency and Gamut, and then selecting a color in the Gamut Warning area.
To correct out-of-gamut areas, make temporary changes while Proof Colors is selected. Make the changes nondestructively, so that you aren’t affecting the underlying image. Often, using a Hue/Saturation adjustment layer is a good choice, because you can target a specific color range. To edit a specific portion of the tonal range using a Hue/Saturation adjustment layer, select a color group from the pop-up menu (for example, Reds), and then drag the sliders at the bottom of the panel to include a very small portion of the spectrum. You can also drag the targeted adjustment tool to modify specific areas.
Tip
Name the adjustment layer for the device you’re printing to, so you’ll remember to use it again if you print to the same device later—or to hide it if you target a different device.
Printing a hard proof
If you want to hold the proof in your hand, rather than trust your monitor, you can print a hard proof. Your print service provider may print one, calling it a proof print or a match print. A hard proof is printed to a device that’s less expensive than a printing press, but for an accurate hard proof, make sure you’re printing to a device that can support high-resolution printing.
To print a hard proof:
- Choose View > Proof Setup > Custom.
- From the Device to Simulate menu, select the final output printer (not the device to which you’re printing the hard proof). Click OK.
- Choose File > Print.
- Choose Color Management from the pop-up menu on the right side of the dialog box.
- Select Proof. The profile that appears next to it matches the one you selected in the proof setup.
- From the Color Handling menu, choose Photoshop Manages Colors.
- From the Printer Profile menu, select the profile for the device you’re actually printing to.
- Click the Print Settings button.
- In the Print dialog box that appears, access the printer driver options, and turn off color management for the printer so that the printer profile settings don’t override your profile settings.
- Click Print.
Printing to a Desktop Printer
If you’re printing photos to share with friends or family, you’ll probably want to use your home desktop printer. You can proof the image onscreen before printing to a desktop printer, too, saving ink and photo paper. Follow the instructions in the soft-proofing section, but make sure to select the profile for your local printer.
To print to a desktop printer:
- Soft-proof the image, and then make any changes you need to make.
- Choose File > Print.
- Choose Color Management from the pop-up menu on the right side of the Print dialog box.
- Select Document.
- From the Color Handling menu, choose Photoshop Manages Colors.
Figure 10.3. The Print dialog box.

- Choose the profile for your printer from the Printer Profile pop-up menu.
- Select Match Print Colors under the preview window so you can soft-proof right there, within the Print dialog box.
Tip
You can scale an image using options in the Print dialog box. The shaded area in the preview window represents the margins of the selected paper; the printable area is white. If you scale the image in the Print dialog box, it affects the size and resolution of the printed image, but leaves the Photoshop file untouched. Keep an eye on the print resolution noted in the Scaled Print Size area to make sure you’re not compromising quality too much by scaling the image up.
- If all is well, click Print.
- In the Print dialog box that displays your printer’s settings, turn off the printer’s color management, and select the appropriate paper stock, print quality, and any other settings.
- Click Print.
Tip
If you’re going to print to a typical inkjet desktop printer, keep the image in RGB mode. Usually, desktop printers accept RGB data and use internal software to convert to CMYK. Sending CMYK data results in double conversion with unpredictable results.
Preparing to Print an Image Professionally
Whether you’re sending your files to a full-service print provider for output on a printing press or uploading them to a quick printer such as Shutterfly or Costco for standard photo prints, you should take a few minutes to prepare your image and make sure you’ll get the results you want. Proof the image, make any changes, and then duplicate and flatten the image so that others can’t accidentally tweak layers and settings.
Follow these steps for the best results:
- Find out what device your image will be printed to, and obtain the appropriate device profile.
- Soft-proof the image.
- Make any changes to ensure you’ll get the results you want. Use nondestructive techniques, such as adjustment layers, so you can modify the image differently for another purpose later.
- Save a copy of the file to a folder that names the print service—or include the print service name in the filename so you’ll remember later.
- Choose Image > Duplicate.
- Select Duplicate Merged Layers Only, and click OK.
- Choose Edit > Convert to Profile.
- In the Convert to Profile dialog box, choose the destination profile for the device you’ll be printing to. Then click OK.
- Choose File > Save. Save the image in the format the service provider recommended, such as JPEG or TIFF. Select Embed Color Profile, and select the maximum quality possible.
Note
Some printers may prefer to receive your documents in PDF format. You can save a file in Photoshop PDF format.