4. Project Management Guidelines
Decisions Involving Your Printer
Every commercial printing job requires that you consider numerous variables ranging from what your budget and schedule allow to the paper stock and printing process. The earlier you think about these factors, the more control you’ll have over the quality, cost, and schedule of your project.
Preparing a publication for commercial printing takes careful thought: Commercial printing processes have inherent limitations, and it’s possible to create publications that are difficult to print. By thinking of your design and production cycles as steps in a larger process, you can make choices that will allow you to achieve the best printed results.
In addition to choosing a commercial printer, you may need to select a separate prepress service. One-stop shopping can prevent misunderstandings and improve quality control. Prepress work can include scanning, color trapping, imposition, and platemaking. Several types of vendors provide these services: prepress houses, color trade shops, and color-capable service bureaus, as well as most commercial printers. Shop for vendors who are willing to answer your printing questions, provide technical support, and help you to achieve your printing objectives.
The Publishing Process
Successfully completing a printed publication requires several steps, including planning and organization, design and content development, and prepress tasks that prepare your electronic files to be reproduced with ink on paper.
Making informed decisions in the planning stages builds a solid foundation for your project. When you have questions about your project, seek advice from your vendors. Keep track of decisions you make: who is responsible for the completion and quality of each task, when each phase must be completed, and what requirements must be met for the final output.
1 Define project and quality requirements
Before you start to work, define the requirements for the publication, including your budget, the schedule, and the final quality you want.

2 Choose prepress tasks
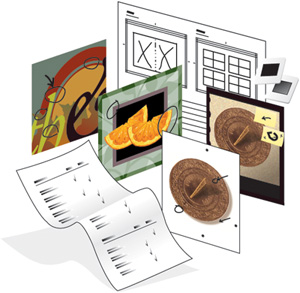
Determine which prepress tasks you’ll do, based on your available resources and the final schedule. Specialized tasks such as trapping and imposition will probably be part of the work done by the prepress firm or the printer.
3 Select and consult your vendors
Evaluate commercial printers and prepress service providers based on the requirements of your project and the services you require. Review samples of their work, and choose vendors who can provide the quality you demand. Visit the sites of potential vendors if possible. Select a commercial printer early in the process so they can assist you in planning your project.

4 Create your publication
Define the number of colors you’ll use, including process and spot colors (or both). Select the paper on which your job will print, and make sure the printer you’ve selected agrees that the paper is a good choice. Some papers have better printing characteristics than others; you should be sure yours doesn’t create a press problem.
Assemble the text and the vector, raster, and line art for your publication. Review the design to determine how the page elements interact and overlap. Determine, by communication with your printer, who will be responsible for the conversion of color in images. Ask the printer to provide an ICC color profile if possible. Discuss any printing issues with your printer as your design evolves.

5 Check the desktop proofs
Print proof copies of your publication on a black-and-white or color PostScript desktop printer. Consult your printer about the recommended proofing methods to check color quality and to ensure against production problems.

6 Hand off your files
Through communication with your prepress provider, determine what type of files to prepare. Run a preflight check on your document; then, package your files and prepare the final desktop proofs, a report listing details about your document, and any additional files. Coordinate with the customer service representative at the printing plant or service bureau, and turn over the files to them on the appropriate medium.
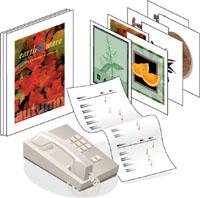
7 Check the final proofs, and authorize printing
Examine the proof provided by your printer for quality and correctness. Check proofs for correct trapping, and for smooth and consistent tints. If appropriate, meet with your printer to review press proofs for final color quality. After you approve the press proof, the publication will be printed and assembled.

8 Archive your publication
After your publication has been printed, you need to store all your files in a consistent manner so that you can quickly find and update them if needed. Decide what type of storage media you’ll use, and develop a file-naming system that lets you search for all files needed to revise or reprint your publication.
And, remember that all great designers “steal” from their previous works. Artwork prepared for one project can easily be reused on similar projects, thus saving you time and money. Within the terms of use agreed on between your firm and photographers, illustrators, and writers, some material from one publication can easily find its way into other projects. A good archiving system allows for the quick access to files, illustrations, and artwork used in earlier projects.

Money Matters
Every print project requires you to balance costs, schedule, and quality. When you’re preparing a budget, estimate fixed and variable costs. Fixed costs don’t vary depending on how many copies of the job you print. These costs include payment for designing, writing, editing, photography, and print preparation. Variable costs—those costs that vary depending on how many copies you print—include press time, paper, and binding.
Estimate the resources and skills of the workgroup assigned to the project. If you have the skills and equipment to do some of the prepress work in house, it can be cheaper than having the work done by an outside contractor.
Avoid last-minute changes. Modifications made late in the project cycle can result in missed press dates, additional charges from the printer, and delays in binding and delivery. As a general rule, the closer changes are made to the press date, the more costly they are.
If you and your service provider understand each other’s requirements, you can both take steps to stay on-budget while ensuring the project’s success.
Reviewing Your Requirements
Both the cost and the impact of your publication are greatly affected by the printing process. The cost can also be affected by your schedule—a rush job is more costly than a job the printer can run on a normal schedule. Asking yourself the following questions may help you arrive at requirements appropriate to your project:
• Audience: How do you need to influence your audience? Does the printed piece have to distinguish itself visually from similar pieces? Does it have to get the attention of an audience to inform them, or is the audience anticipating the information in the piece? Must the piece appeal visually to design-conscious buyers?
• Length of time on the market: Is this a publication that announces a one-time-only offer (like a sale flyer), or will it be used over and over again (like a cookbook)?
• Image issues: Is visual detail important to the message? Illustrations in a history textbook may not be color-critical, but the detail must be clear for the image to be informative. Flesh tones should always look human and healthy. Images for a clothing catalog require clear detail, especially for fine prints and textures.
• Color matching: Will people make critical decisions based on the color in the piece? Clothing catalogs usually require an exact match to the actual clothing. If the color is wrong, customers may be dissatisfied with the clothing they receive. In other cases, it’s more important for colors to be balanced; food images in grocery ads or cookbooks require a pleasing photograph but not necessarily a color match.

Sample requirements
Newsletters The newsletter is printed with one color of ink (usually black), photographs are recognizable but may lose some detail from the original, and the paper stock is a standard type that’s always on hand. The piece is designed to be read and discarded. Timeliness is the most important factor with newsletters.
Direct-mail catalog The catalog is printed using paper that’s regularly kept in stock by the printer. The standard size makes it cheaper to bind and finish. The catalog includes crisp black-and-white photographs and color photographs with good detail. Color accuracy is important but not critical, because buying decisions aren’t usually based on the represented color. Color register must be accurate. The publication will be replaced in several months.
Fine clothing catalog This catalog uses premium papers and inks. Color in the photographs is required to match the actual clothing. Press register must be very accurate, and all the artwork must be trapped perfectly. Although the expected life of the publication is short, a high-quality publication helps persuade the customer to buy.
Corporate annual report In an annual report, the image of the company is conveyed by the quality of design, printing, and appearance of the publication. Color, although less critical than in a clothing catalog, is accurate; and black-and-white photographs are very sharp. The product can have no discernible flaws.
Who Does What?
One of the decisions you must make regarding a project is how much of the prepress work you’ll do yourself. With the expanding range of electronic publishing tools, you may be tempted to do many of the tasks yourself. But tasks that can be done on the desktop require skill, time, and equipment you may not have or want to acquire.
At the final stage, you must make a critical decision about the format in which you hand off your files. Your prepress provider may prefer that you turn over files in their native format (using Package or Collect for Output) and let the vendor convert them to PostScript for imaging onto plates. In that case, you hand over files in the formats appropriate to your page-layout, illustration, or image-editing programs, and the vendor converts them. Or your prepress vendor may recommend that you convert your document to Adobe PDF format, using settings recommended by the prepress firm.
The following is intended to help weigh the trade-offs in choosing prepress tasks.
Scanning, digital camera images, and color correction
Most original photos originate as digital camera images. If you work with a professional photographer, you can ask the photographer to make any color corrections needed prior to transferring the images to you, or you can make color corrections yourself on a calibrated computer display.
If you’re working with film or photographic prints, you can scan the images yourself using a flatbed or film scanner, or you can choose to have your prepress vendor do the scanning for you.

Although they’re becoming rare, some prepress service providers use a drum scanner that delivers superb image quality. Drum-scanning is costly, but you may need the greater resolution that it provides. Along with the high-resolution files, low-resolution versions (called OPI files) can also be provided to speed up design and proofing.
Doing your own image editing and color correction can be time consuming, but you have complete control over the appearance of the final image. Most graphic designers enjoy the creative options that are provided by having the full-resolution images at their disposal along with the many powerful tools available in Adobe Photoshop to enhance those images.
Trapping
It’s likely that several of the desktop tools you’re already using—such as illustration, image-editing, and page-layout programs—can apply trapping automatically or semi-automatically. For example, Adobe Illustrator lets you trap color artwork before it’s imported into a page-layout application.

Although doing so may seem like a good idea, it’s seldom appreciated by the prepress vendor, because this sort of trapping isn’t as sophisticated as that available on their equipment. In addition, artwork that’s trapped manually often prevents the automated trapping functions in prepress from doing their job. When generating halftone screens, they already know how much to allow for dot gain.
Color mode conversion
You can convert your document from its native color to the process color necessary for printing, after communication with your prepress vendor; or the prepress vendor can perform the conversion as part of the preparation they do in advance of printing.
As long as you and your prepress supplier agree on the method and the ICC profiles applied, the conversion of color is a reasonably easy step that can save you some time (and perhaps a bit of cost) if you do it yourself. However, some prepress specialists prefer that you hand your files over for production in native mode (some images in RGB color, for example) and then leave the conversion to them.
Converting files to Adobe PDF
Many commercial printers have adopted a workflow that uses full-resolution Adobe PDF files as source material for printing. If you and your printer have agreed that this will be the workflow for your project, be sure to obtain the proper settings files (or your printer’s recommendation of standard settings) from the printer before making your own PDF files.

PDF workflows are significantly simpler than those in which all the contributing files are provided in native format. There is just one document, all fonts are embedded in that document, and all the illustrations and images are included.
The disadvantage can be that corrections—even simple typographic corrections—are often impossible to make in the PDF file. Making modifications requires you to generate a new master document to provide for production.
Selecting Vendors
Word of mouth is the best way to find a good printing firm. Ask around, and you’ll learn quickly about local printers and their work.
Or you can examine printed material that is similar to your project and find out who printed it. Decide whether you want to work with a commercial printer that does the prepress work in house, or whether you prefer to have prepress work done at a different location. Obtaining prepress services from a commercial printer allows you to communicate with just one vendor and manage only one relationship. If you choose to work with several vendors, make sure they understand each other’s requirements and are comfortable working with each other.
Questions to ask about prepress services
• What proofing options are available, and how many proofing cycles are permitted? Is the recommended proofing option reflective of the final output?
• What file formats do they accept? From which platforms?
• Do they offer scanning? Do they offer—and accept—OPI files?
• Do they use trapping software?
• Do they support color management using ICC profiles? Can they provide an ICC profile for the presses that will print your job?
Questions to ask about printing
• Are both sheet-fed and web-fed presses available? The former are fed individual sheets of paper, print more slowly, and tend to be used for most commercial jobs. The latter are fed from a continuous roll, print faster (tens of thousands of impressions per hour), and are used for very long runs. The nature of your job determines which is preferable.
• How many colors can be printed in one press run? A two-color press requires two press runs to print process color. You’ll be able to cut costs—and get a better printing job—by shopping for a commercial printer with a four-color press.
• Do they provide bindery and finishing services in house? Will they be able to complete your project on time? Do they have responsive customer service representatives?
Careful planning is the best defense against unexpected problems. Test everything early in production—fonts, scanned art, EPS graphics, etc.—when mistakes are cheaper and easier to fix. Make a thorough checklist and follow it religiously.
—Eric and Jan Martí, Command Z, Palo Alto, CA
Decisions Involving Your Printer
Once you’ve made a choice, discuss the specifics of the project with your printer. You may wish to inquire about the following:
• Color settings to use, ICC profiles to set for proofing, and color mode conversion
• Any trap specifications your job should have
• Any other recommended settings or processes to use
The printer may have recommendations related to your design and choice of color. Having the right paper stock, coating, and ink types is important to the quality of your final publication, and the availability of critical materials can affect scheduling. You may wish to bring up some of the following topics:
• Your project schedule and budget
• The dimensions of your publication and how many copies you plan to print
• The colors you plan to specify
• Decisions about finishing and binding
• Your use of bleeds and crossovers
• The graphics in your publication
Your printer may have recommendations concerning materials, bindings, or special inks and may be able to point out ways to save money by making minor changes in your publication. Discussing the project gives the printer a chance to notice if particular inks and grades of paper need to be ordered in advance.
File Handoff Checklist
Minimize surprises and surcharges from your prepress vendor by using the following checklist when preparing your files for handoff.
Create a logical filename. Many documents arrive for production named “brochure” or “document 1.” Using machine-generated names for your document is unwise, because your “document 1” can be confused with another “document 1.” Instead, give your document a name like “Cabinet Booklet” or “Valves Brochure” so that the name is a good identifier.
Eliminate all unnecessary elements. Delete all extraneous colors, patterns, and other elements from the file, including those that may be invisible or behind other elements or layers.
Use the correct format. Make sure all files are in the correct format. Consult your prepress vendor for the best file format to use.
Make spot color names consistent. If you use the same spot color several times in one document, be consistent in specifying each object’s color. If you want the vendor to convert certain spot colors to process colors, indicate where you want that done.
Provide a desktop proof. Print your files first on a PostScript laser printer. Send these laser prints with your files, so the prepress vendor can check against them, making sure the prints are identical to the files in every respect: size (unless you’ve scaled your proof), content, placement, bleeds, crops, traps, and so forth.
Package all graphics and document files. Using your page-layout application, choose the Package or Collect for Output function to copy all the graphics and fonts required for your project.
Provide contact information. In a work order or cover letter (or in the Instructions file created by Adobe InDesign), list your name, company name, and phone numbers, including after-hours numbers. Include your document specifications (quantity, page size, colors, and so on), because this information will travel with the document and become part of the job ticket generated by the printer when your job goes into production.
