
2
Next Step Projects
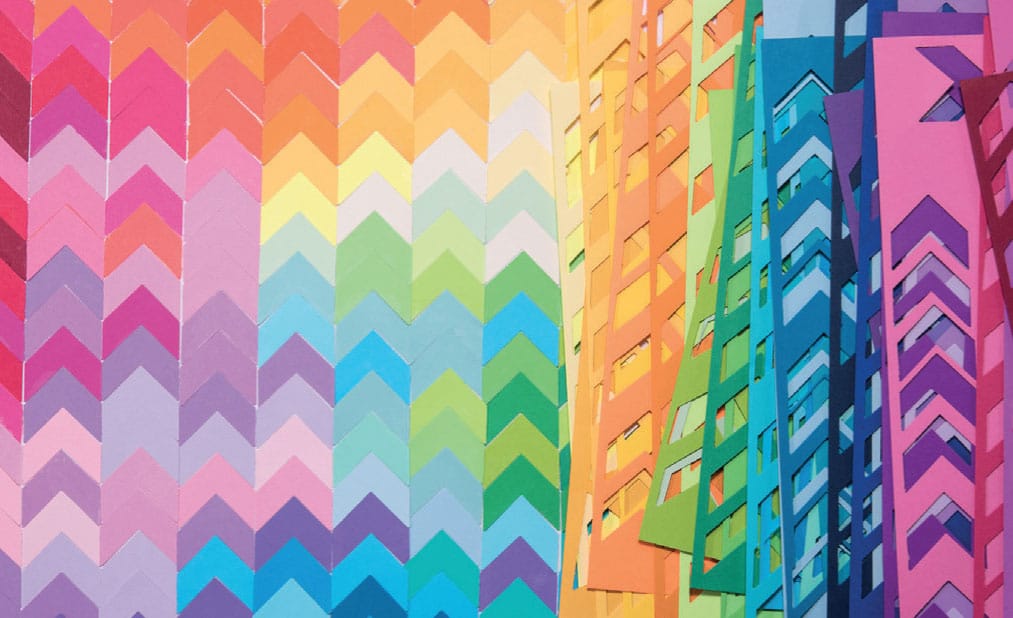
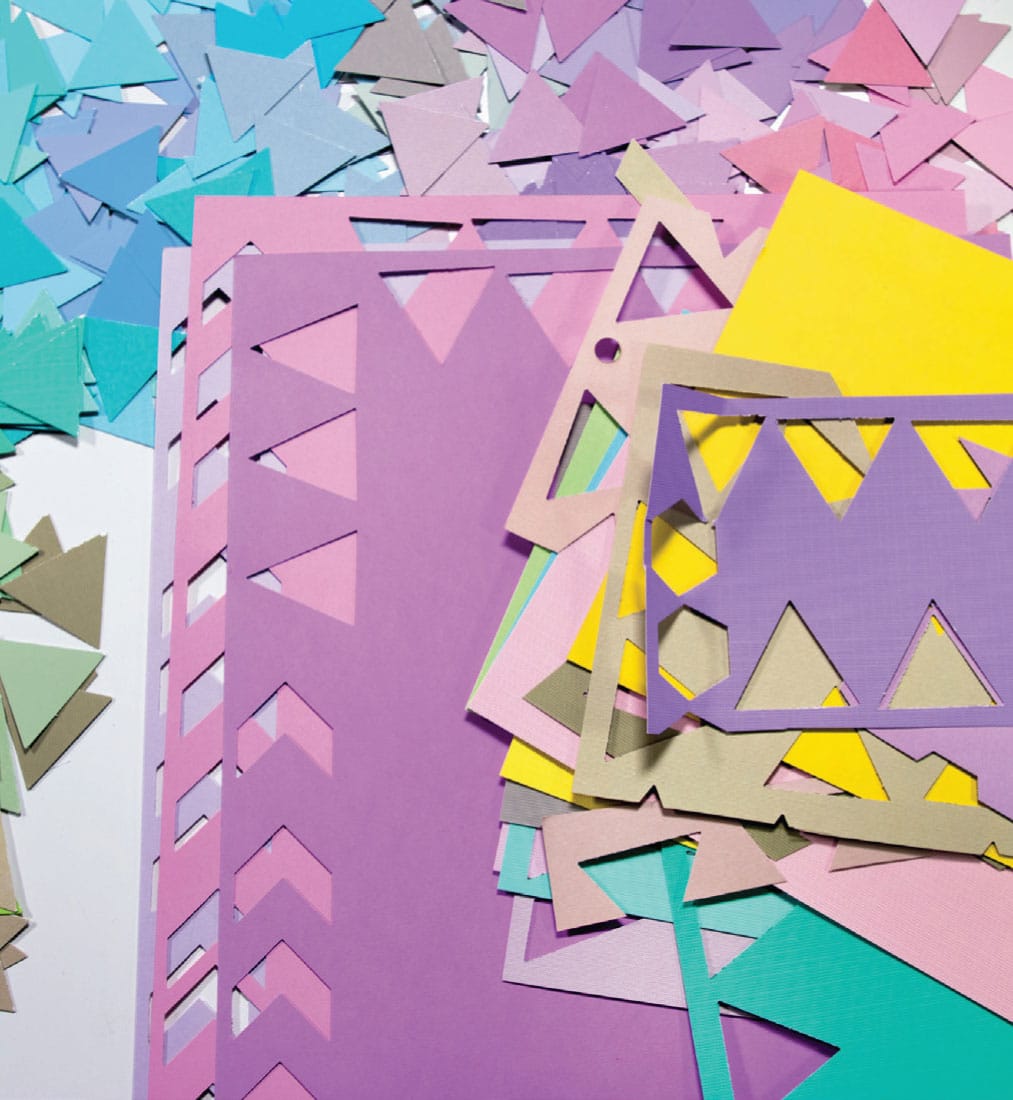
Chevron Spectrum
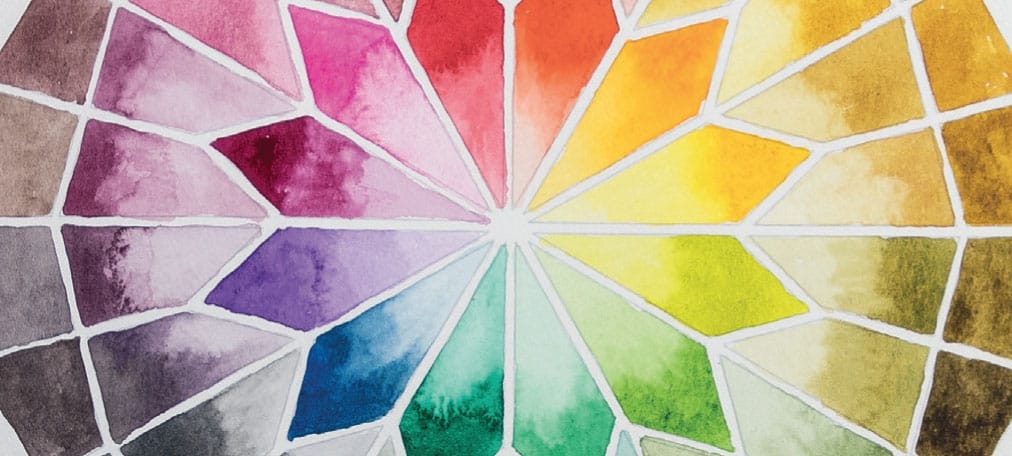
Working with the full spectrum in highly saturated colors is one of the more enjoyable activities. This project fits into the Around the Wheel category introduced shown here. There are literally a million variations of this project, but the thing to know is that you don’t want to use browns, grays, taupes, or neutral. No siree-bob. Brights, we want brights.
Let’s get science-y for a second. Your eye sees all of the things like, say, a glorious insane rainbow circus and all its components, but your brain blends colors together subconsciously to make it easier for your conscious brain to concentrate on getting tacos. This process is called gestalt, which is the German word for the system your brain uses to process the crazy amount of visual data you are receiving at any single moment. Your brain does it really fast for survival purposes. Basically, you can’t take forever identifying individual colors and a tree and your mother and a tiger that wants to eat you. You need to spot that stuff without even knowing your brain is at work because what you need to be doing, obviously, is finding tacos. Or pie.
SKILL LEVEL
Medium
SKILLS EXPLORED
Pointillism; ombré; chroma; saturation
MATERIALS
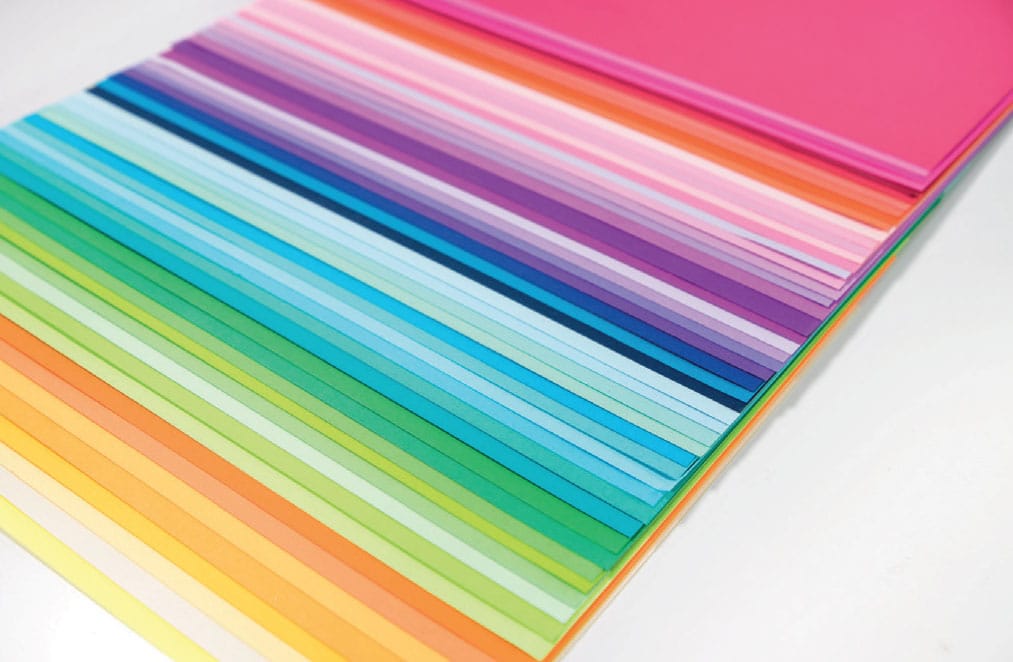
Crafter’s card stock
Chevron punch
Glue stick
11” x 15” (28 x 38 cm) mixed-media paper
MESS LEVEL
Not too bad, but the chevrons can scatter in a light breeze
TIME TO COMPLETE
60–90 minutes
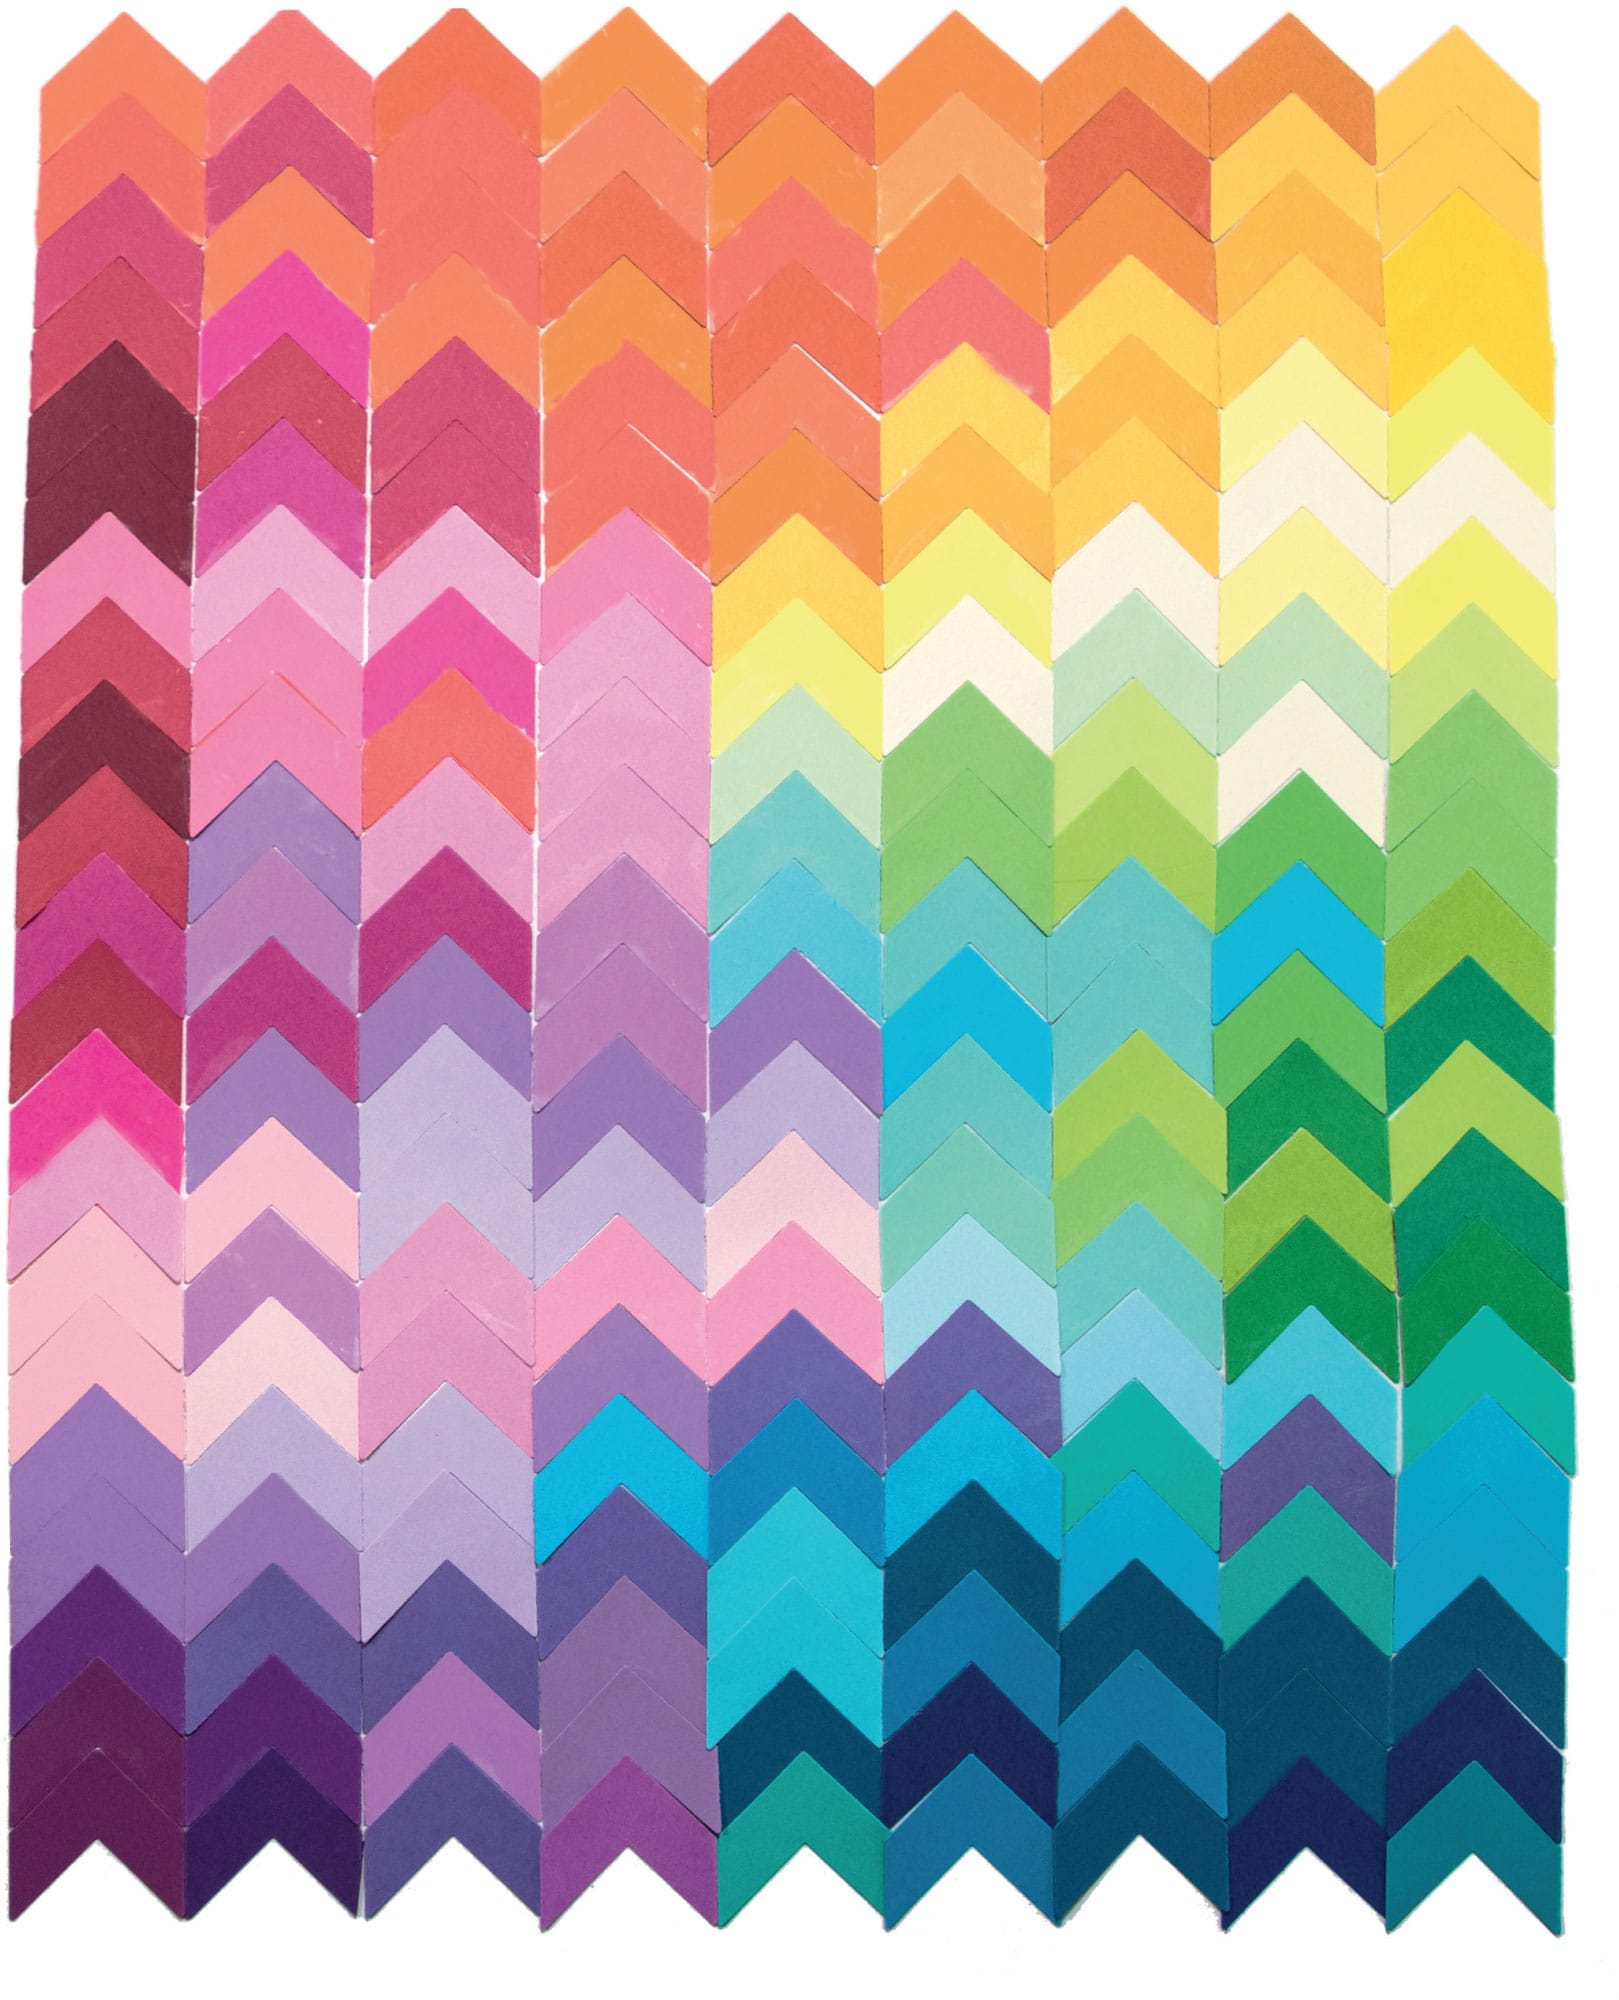
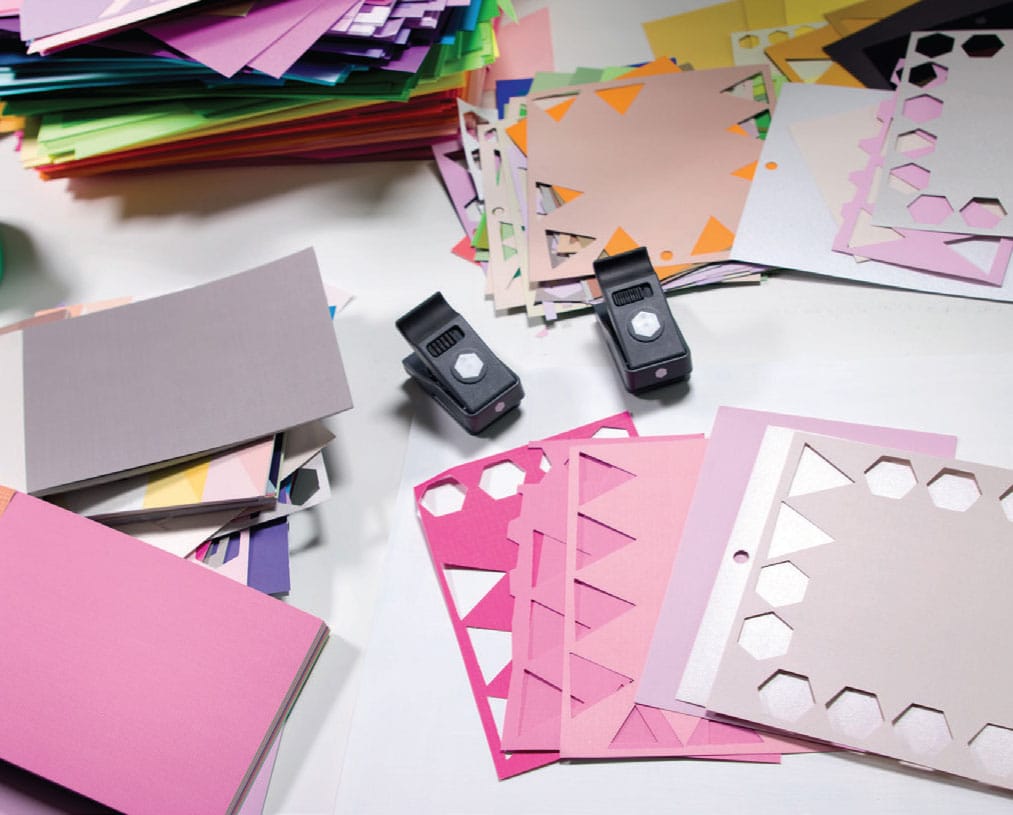
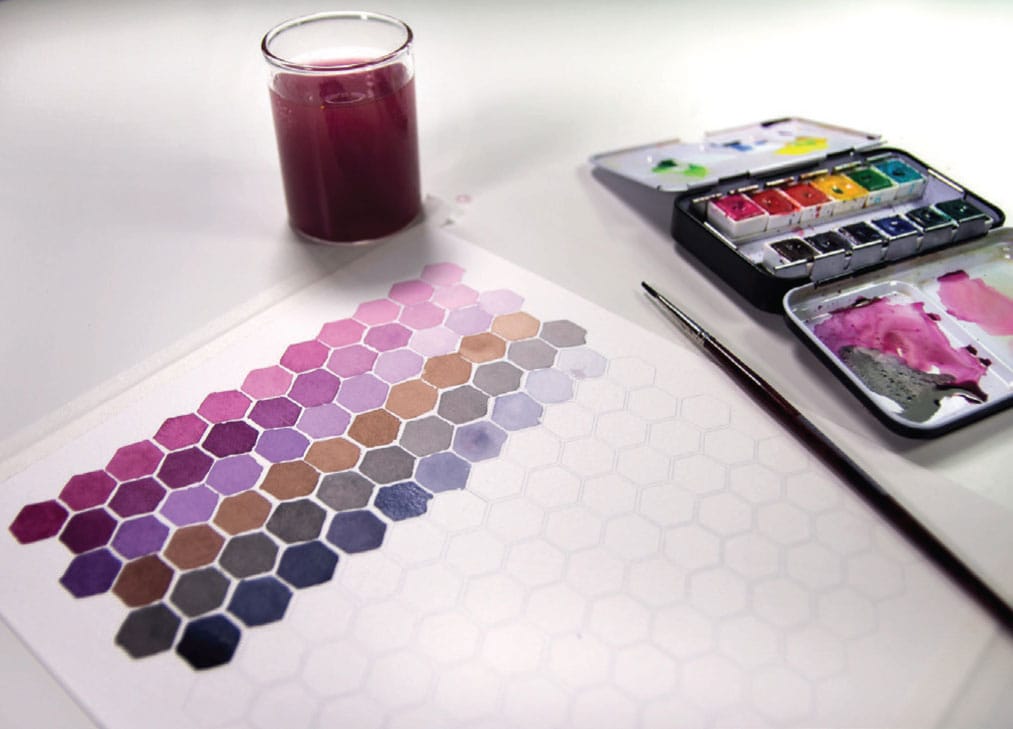
1 Assemble your collage material and support paper. Do all the punching first. Sometimes it’s helpful to punch “upside down” so that you can see where your paper is positioned in the cutting element.
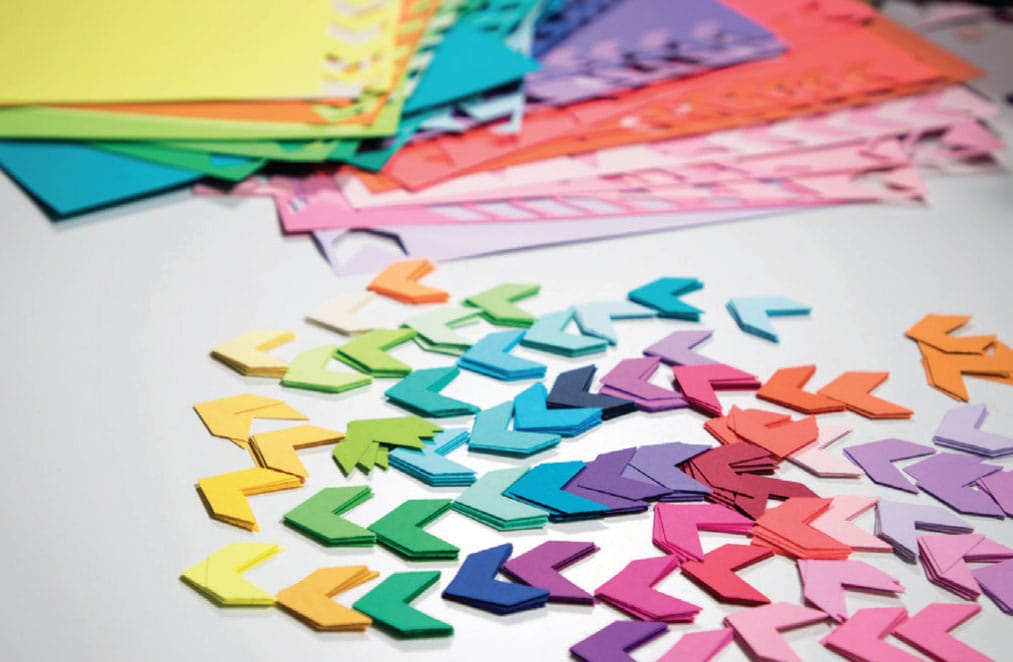
2 Once you have your shapes assembled, apply glue to the paper and begin. I started in the top left and worked down and across simultaneously. After I applied everything, I took a few moments to decide if there was any one color I didn’t like. In a couple of instances I applied a new color right on top of the old one. Boom. Fixed.
Talent Doesn’t Exist
I don’t believe in talent.
Before attending a concert featuring well-known twelve-string guitarist Leo Kottke, a friend of mine found herself in an elevator with the musician himself. She wistfully told him, “I wish I could play the guitar like you.” He replied, Oh, you could. You just have to be a dorky, lonely teenager and sit alone in your bedroom for hours and weeks and months and years fiddling around with your guitar. You’ll get just as good.
I don’t think talent exists the way we usually think of it. Someone pops on the scene suddenly and is called an overnight success, but we don’t see the fifteen years of prep, hard work, and ramen that went into that “overnight.”
Here’s my equation for success in almost any field:
10 parts hard work + 10 parts luck + 1 part innate ability = success
We would never tell a brain surgeon, “Wow, you are so talented at brain surgery.” That’s laughable. The reason the surgeon is good at her job is because she studied for years, sacrificed nights of sleep, and underwent an extremely rigorous gauntlet of training. None of us would sign up for brain surgery by a novice who had taken a human anatomy class and “showed promise.” Sure, brain surgeons have a certain kind of aptitude, a mental ability to store a lot of data, a baseline of intelligence, and the means to pay for medical school. Those things amount to nothing if they didn’t actually do the work.
Perhaps it would be more helpful to think of talent as a kind of aptitude. Shaq O’Neal happens to be seven feet tall, which probably helps his basketball career. Not all tall people have an aptitude for basketball, but most nba players are taller than average. So Shaq’s height represents a kind of physical talent. He grew up in Newark with an incarcerated dad and a struggling single mom. He went to the gym to “get off the streets” and learned to play basketball. The circumstances of a difficult childhood actually funneled him into playing sports, and his natural aptitude (plus physical height) became a learned skill. And he got very, very good at it. I imagine if you asked him why he was good at basketball, he would point to all the hours he spent in the gym as a teenager.
I hear you saying, “But I don’t have any aptitudes!” Au contraire, grasshopper. Some people are definitely wired for certain kinds of activities. I don’t like cooking, but from what I hear, cooking is a flow trigger for a lot of people. This boggles my mind, but if you want to do something, guess what? That’s evidence that you have an aptitude! I don’t want to cook, or downhill ski, or play the kazoo: I probably do not have flow triggers in those areas. But there are other areas that spark me up! Don’t let your lack of skill or experience hold you back from participating more with the things that capture your interest.
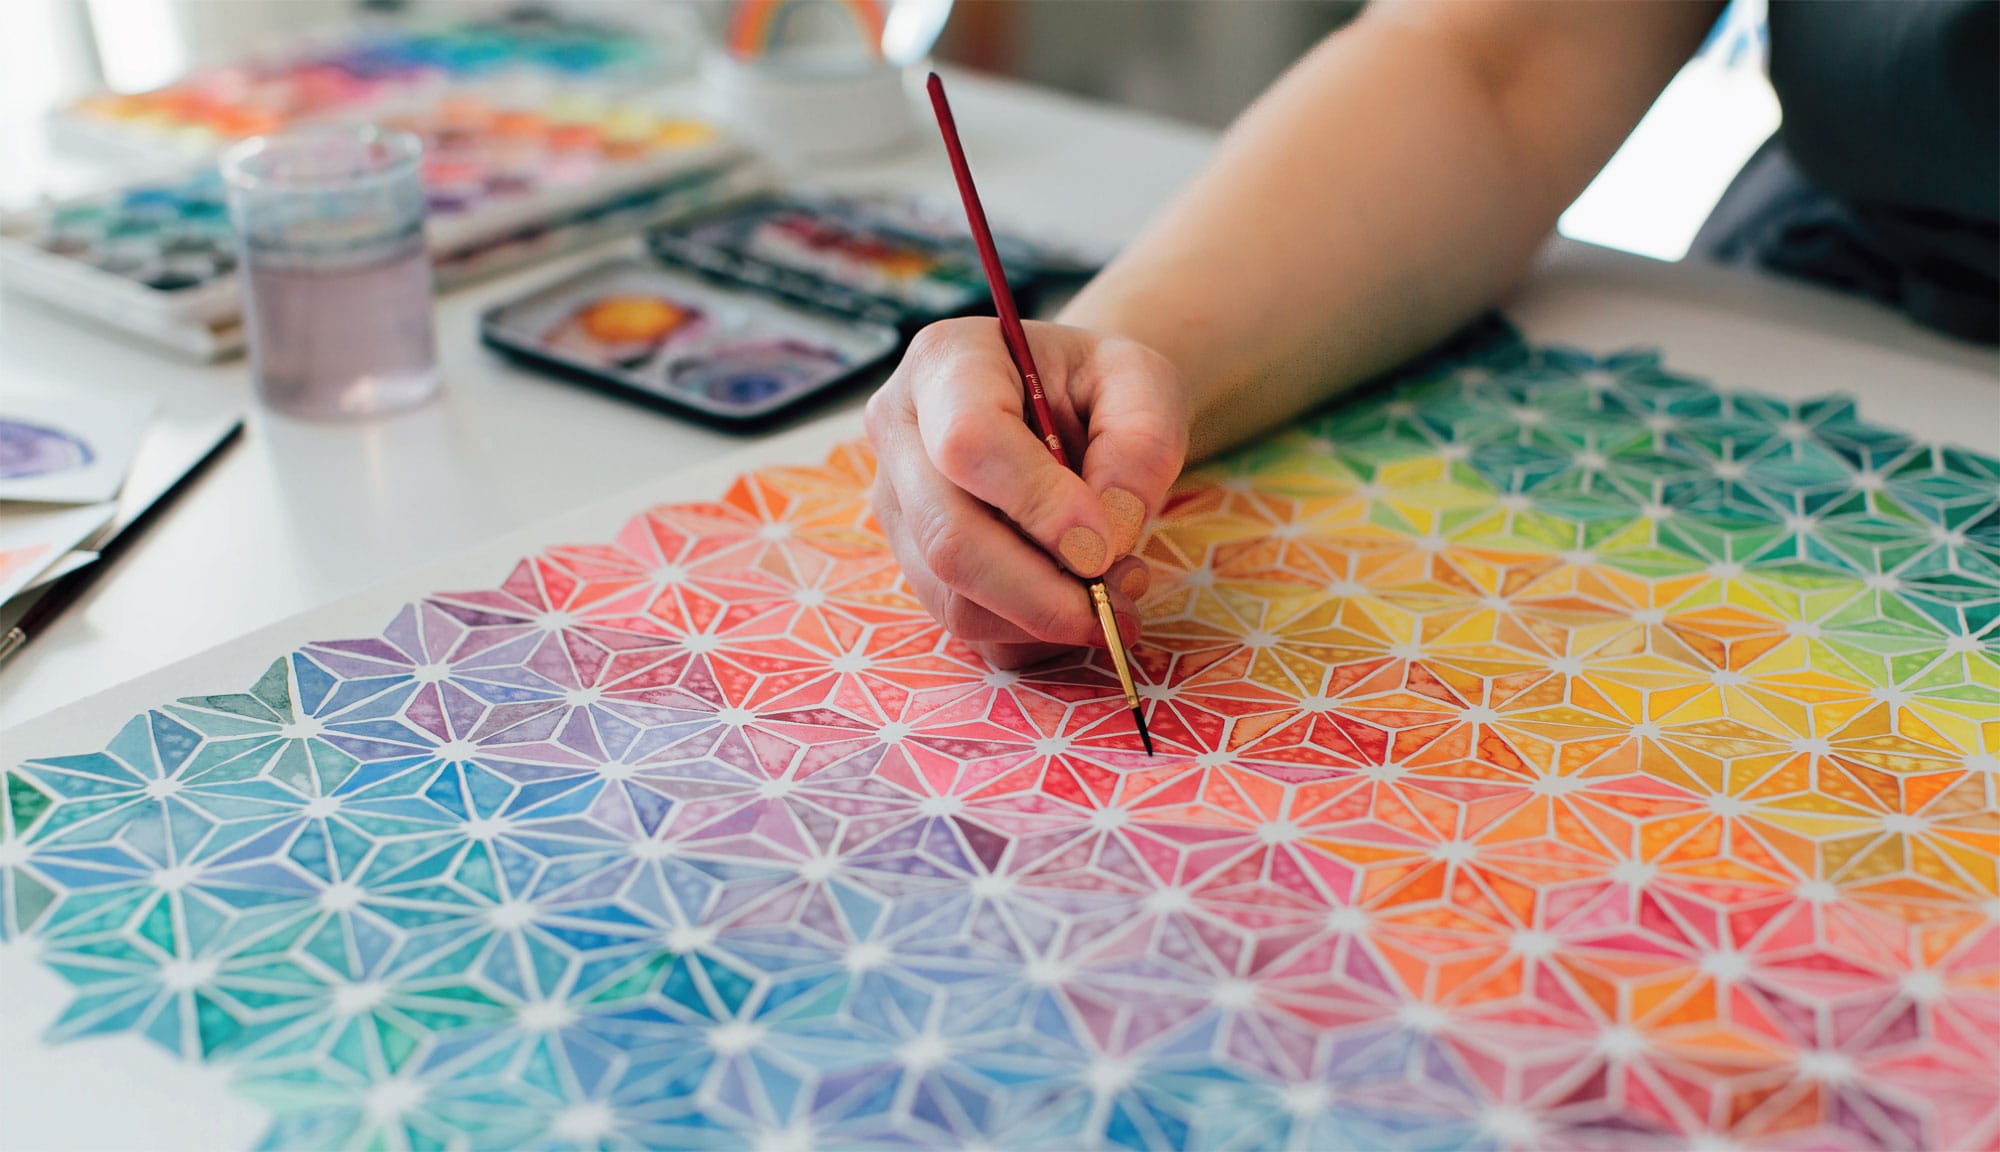
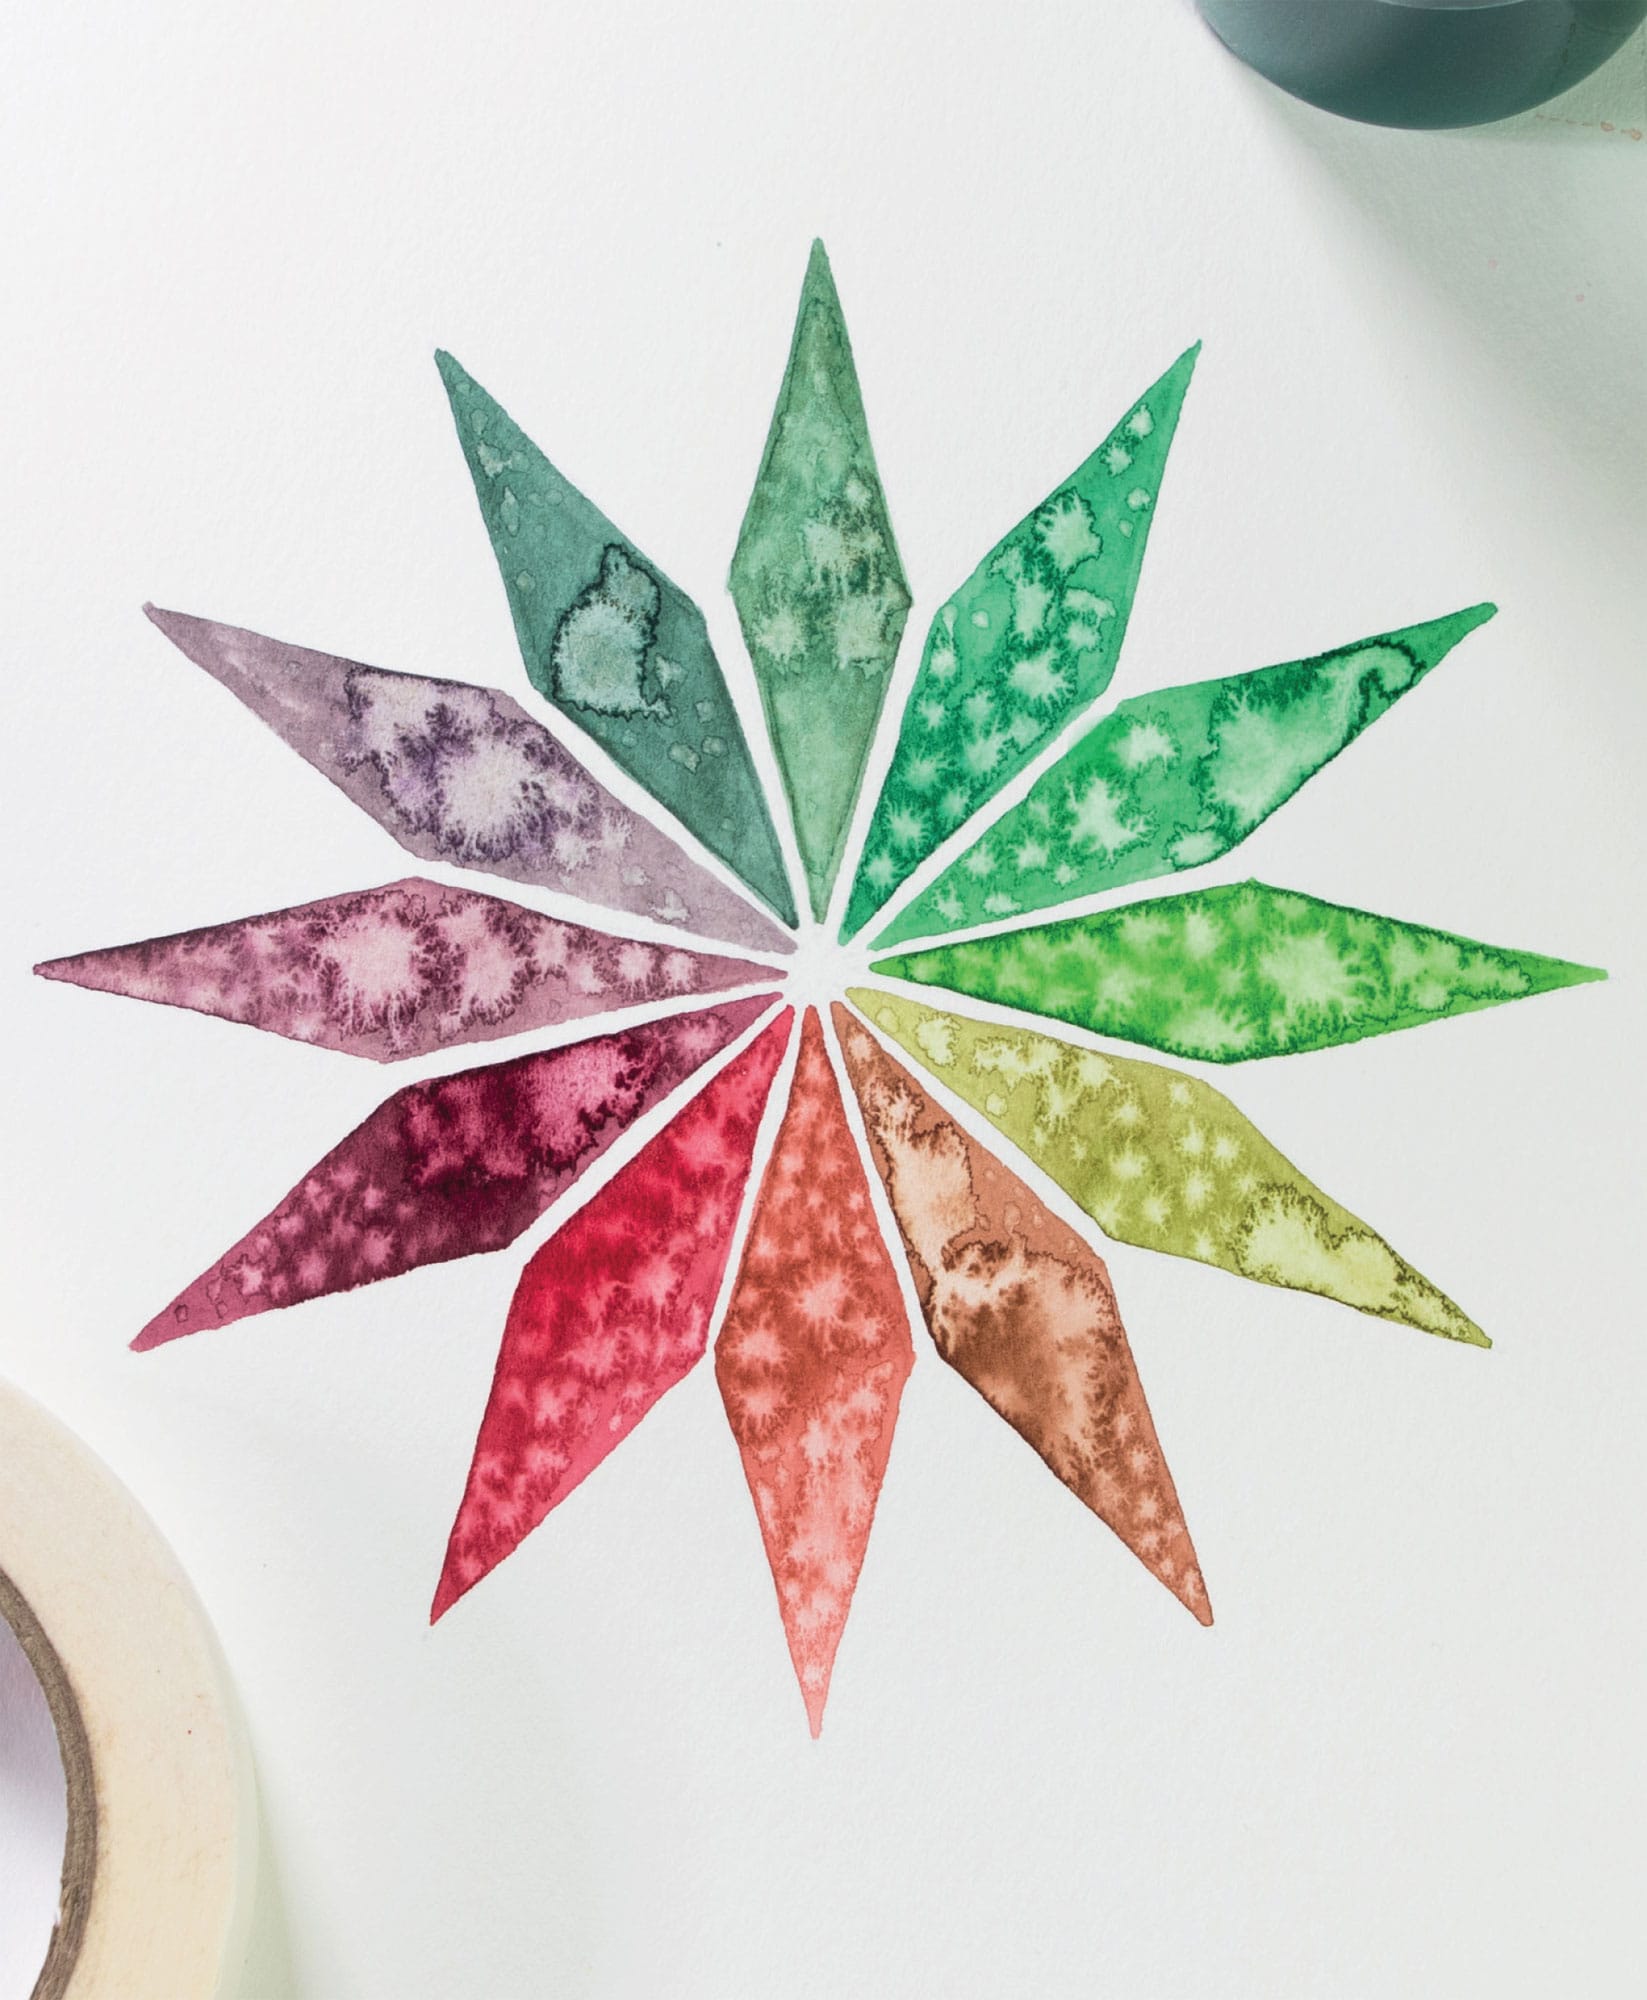
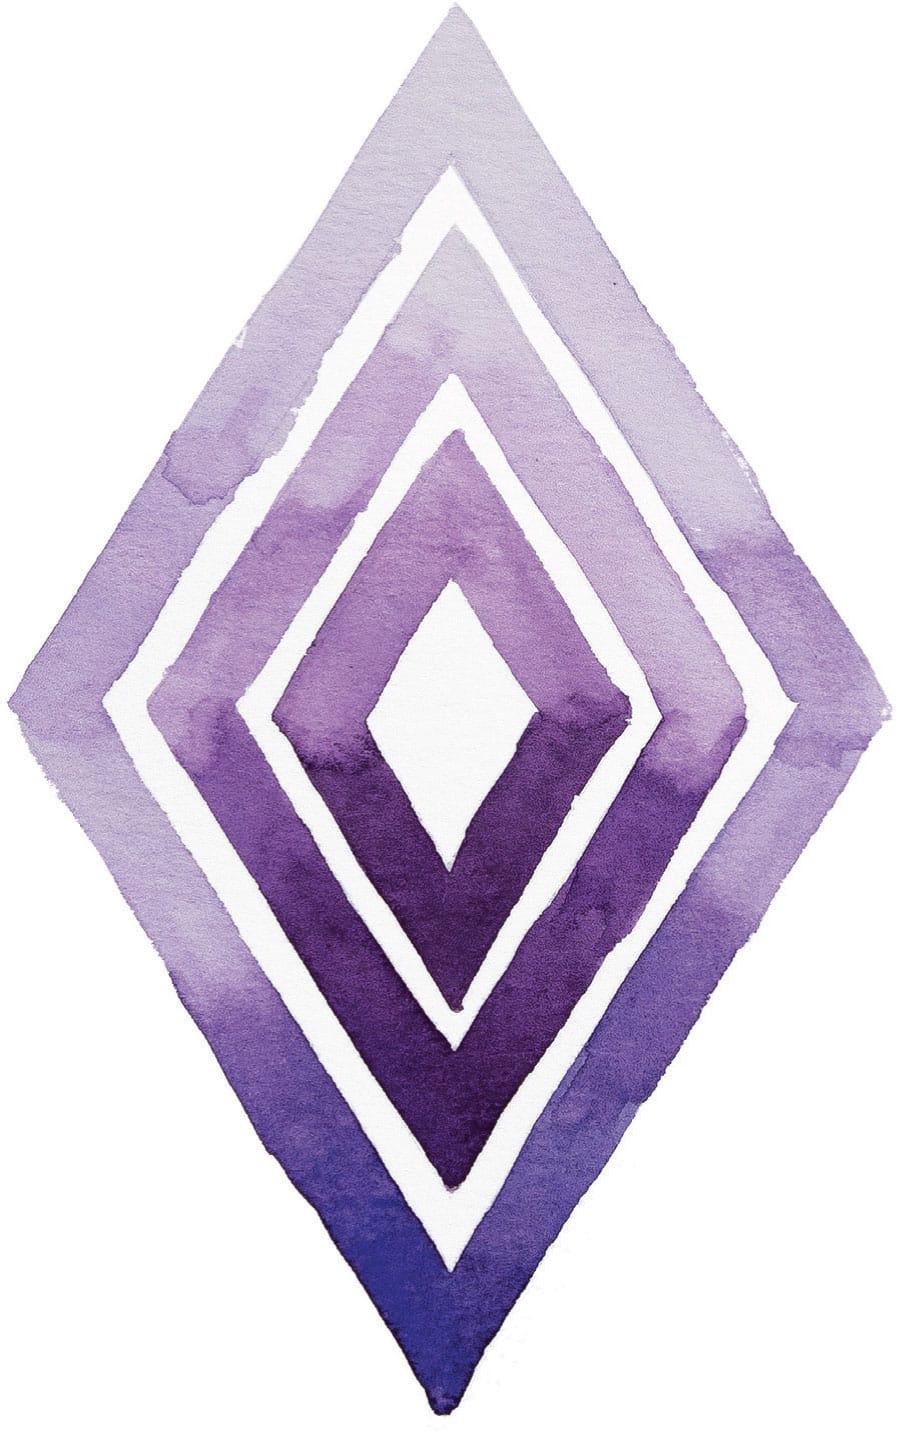
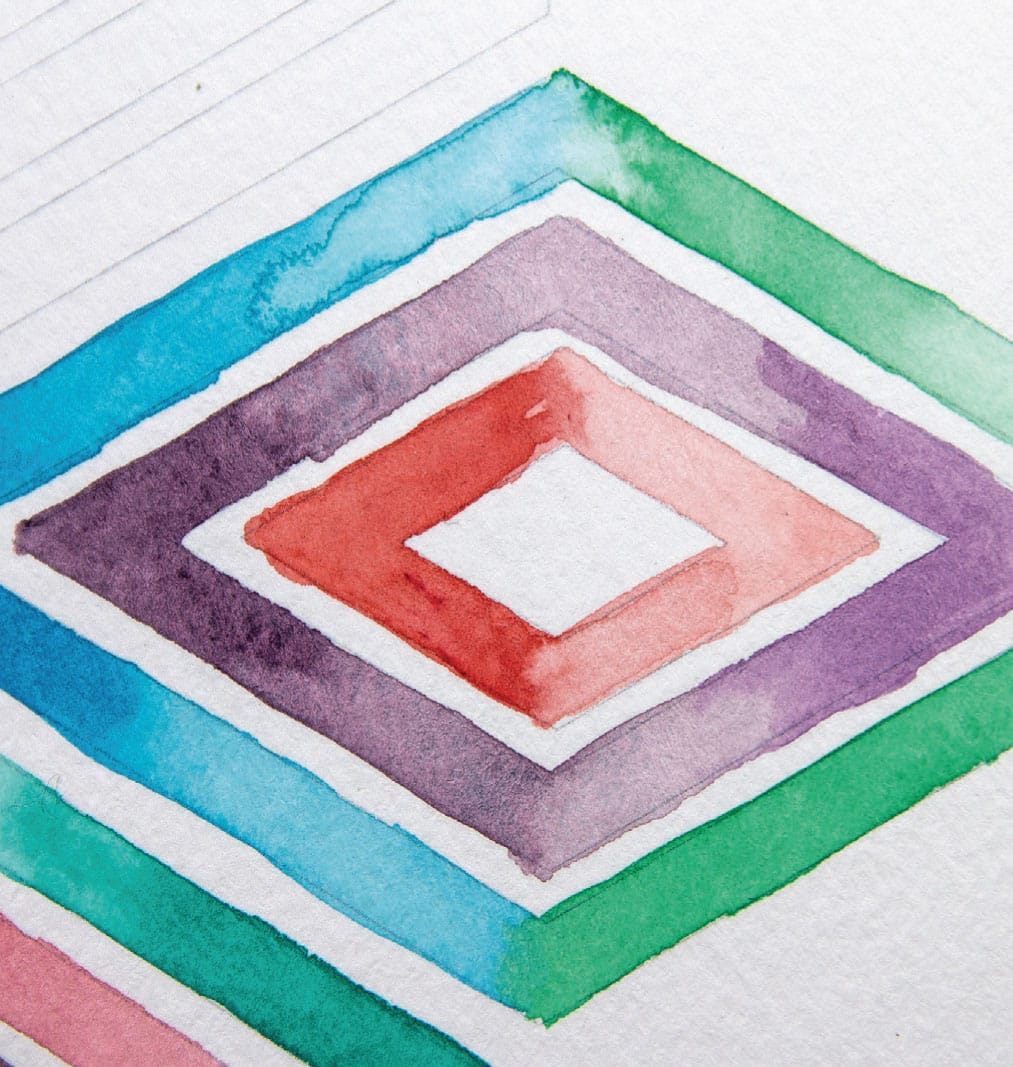
Waiting for the Diamonds
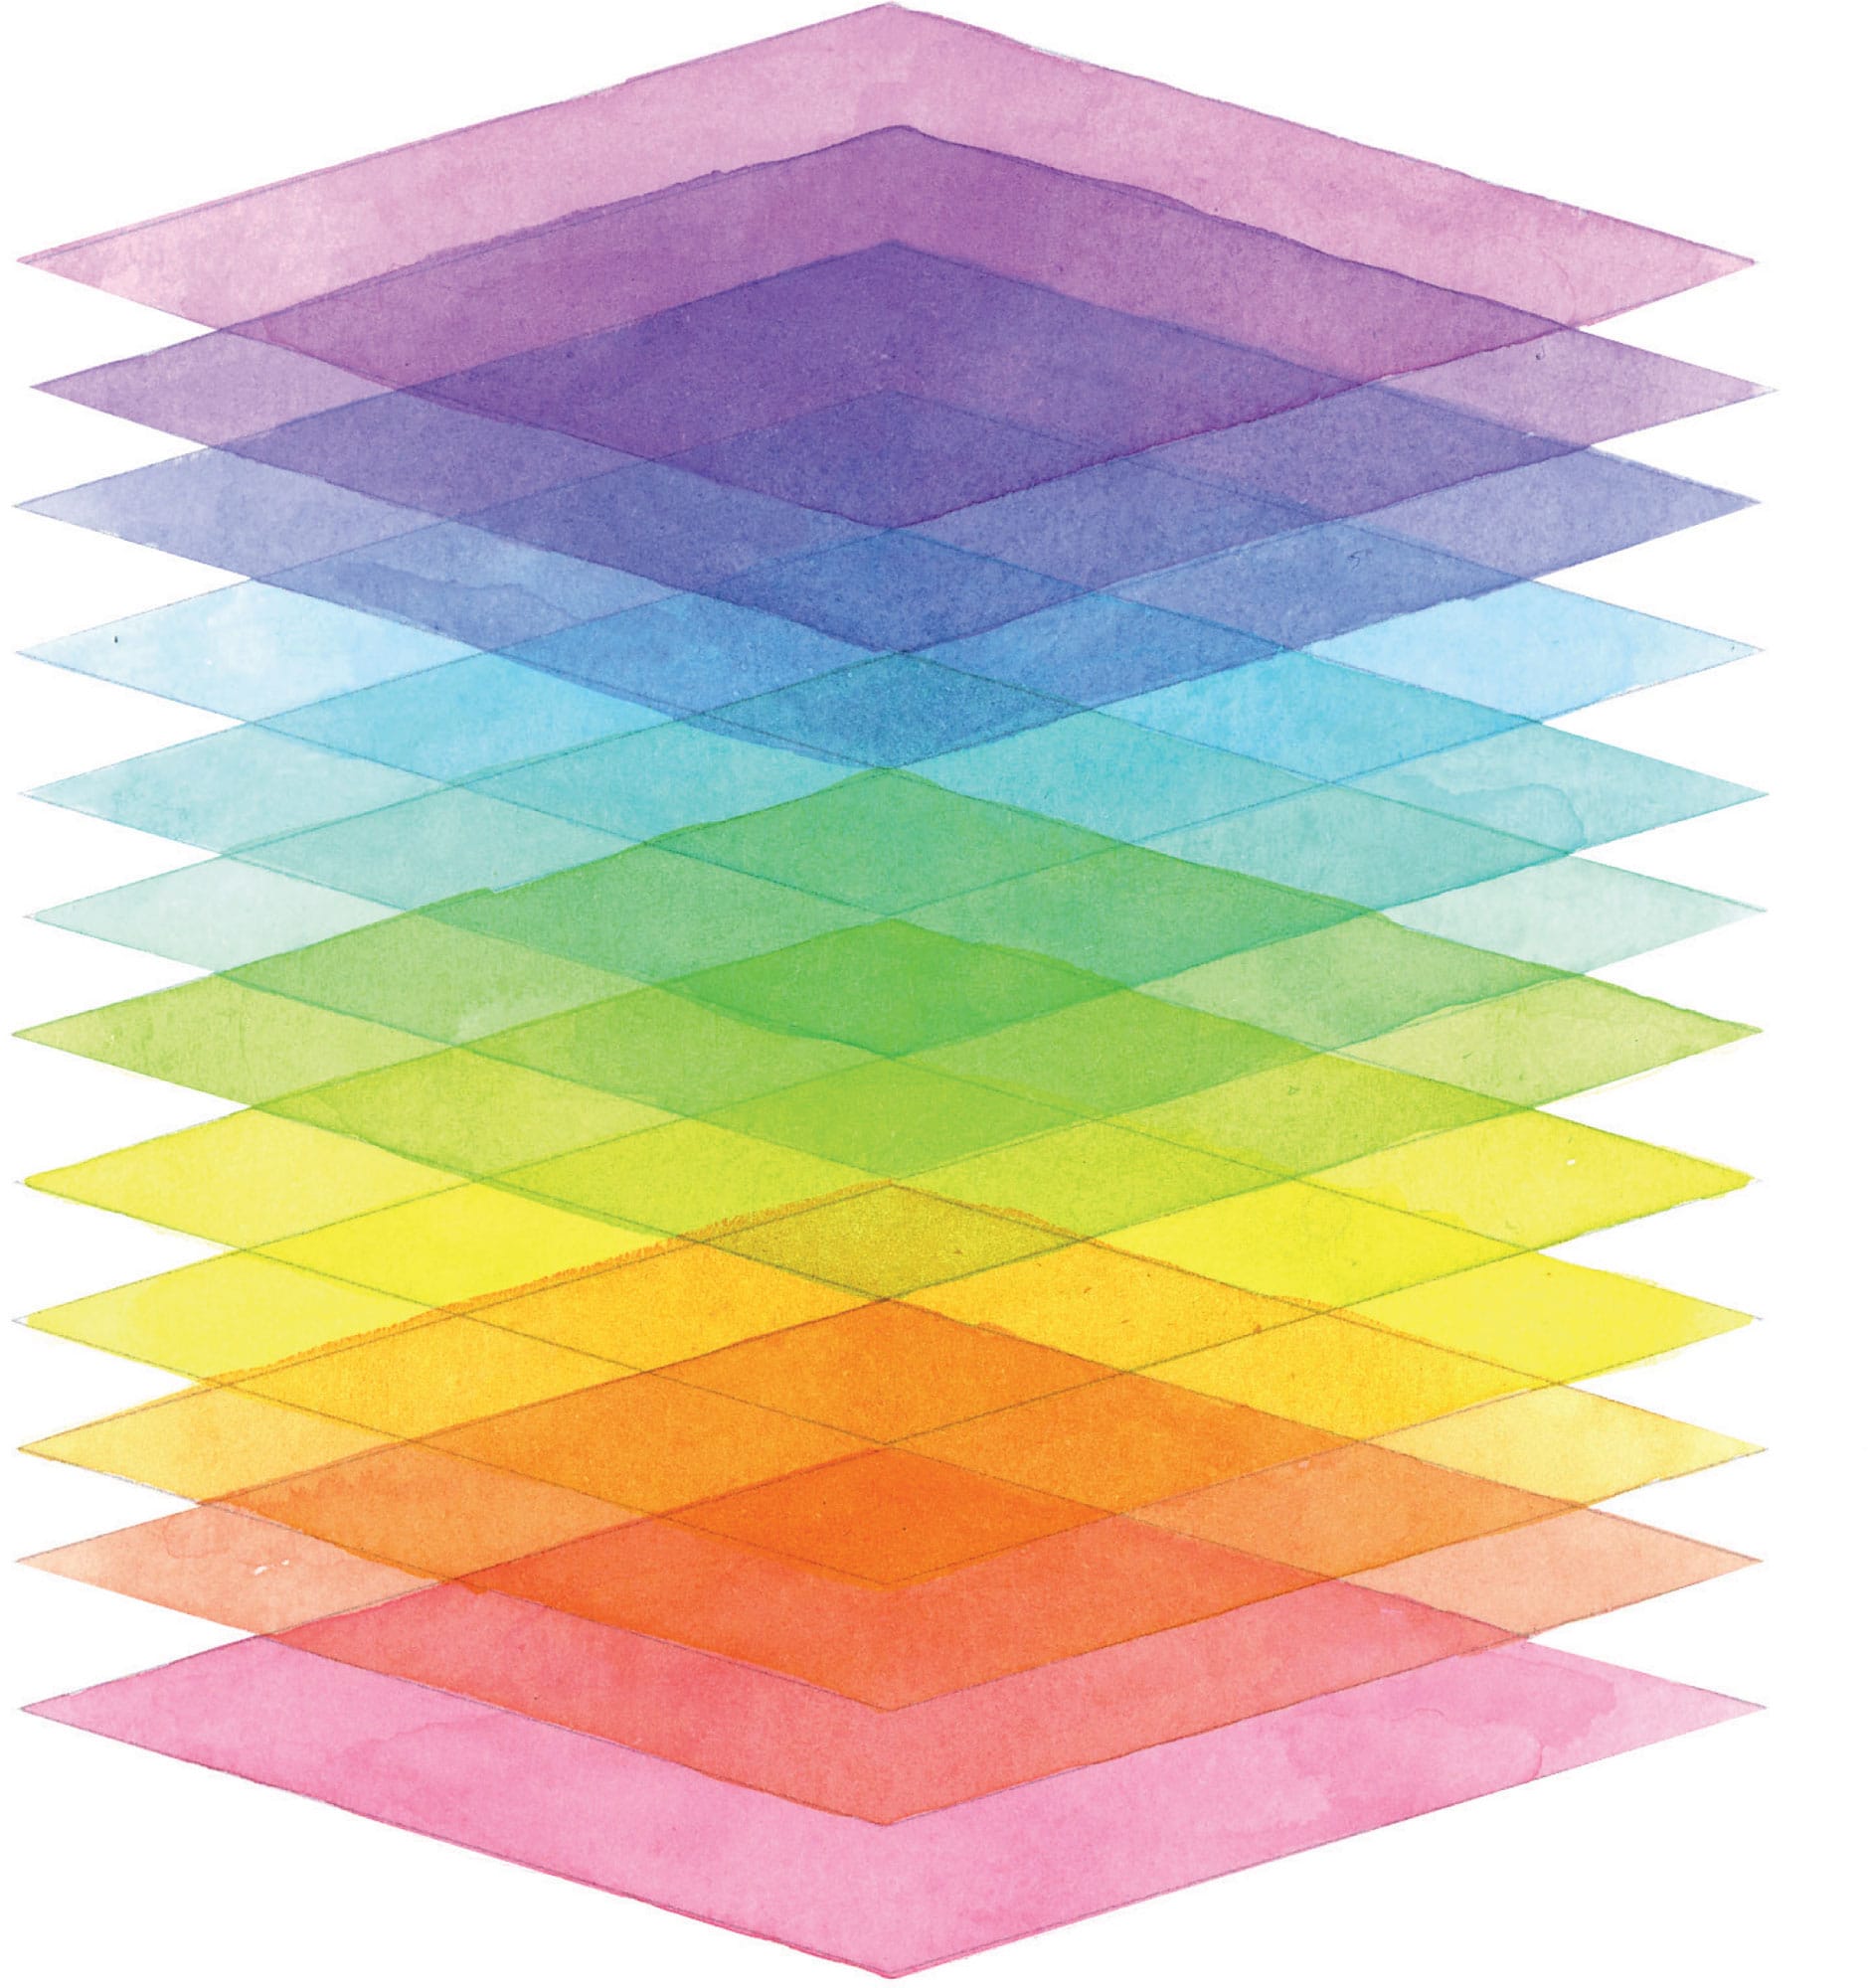
Watercolor can be fabulously luminous. I’ve heard it said that watercolor is like a veil of color draping on other colors. One way to work with watercolor’s translucence is to work wet on dry, which means you have to wait for the lower layers to completely dry before you try adding the next layer.
Yes, you have to wait. In order to get the paint veil to settle nicely and not leak all over the place, you have to make sure your previous layers are very dry, completely dry, like bone dry, dry like the Sahara, dry like a fine sherry, dry like my wit. Get it? If it’s not dry, it will bleed, and no one likes blood. Waiting is super annoying, so when I’m working wet on dry I will sometimes work with six simultaneous paintings so I can keeping going. Some people use a hair dryer to speed the drying process.
SKILL LEVEL
Moderate
SKILLS LEARNED
Working wet on dry
MATERIALS
Templates:
• Waiting for the Diamonds, shown here (shown in project shown here)
• Waiting for the Diamonds: Triangle Variation, shown here (shown here)
12-color watercolor kit (see here) or watercolor ink
Palette with mixing wells
#2 and #4 round brushes
Paper towel
MESS LEVEL
Minimal
TIME TO COMPLETE
2–3 hours, but a lot of that’s waiting

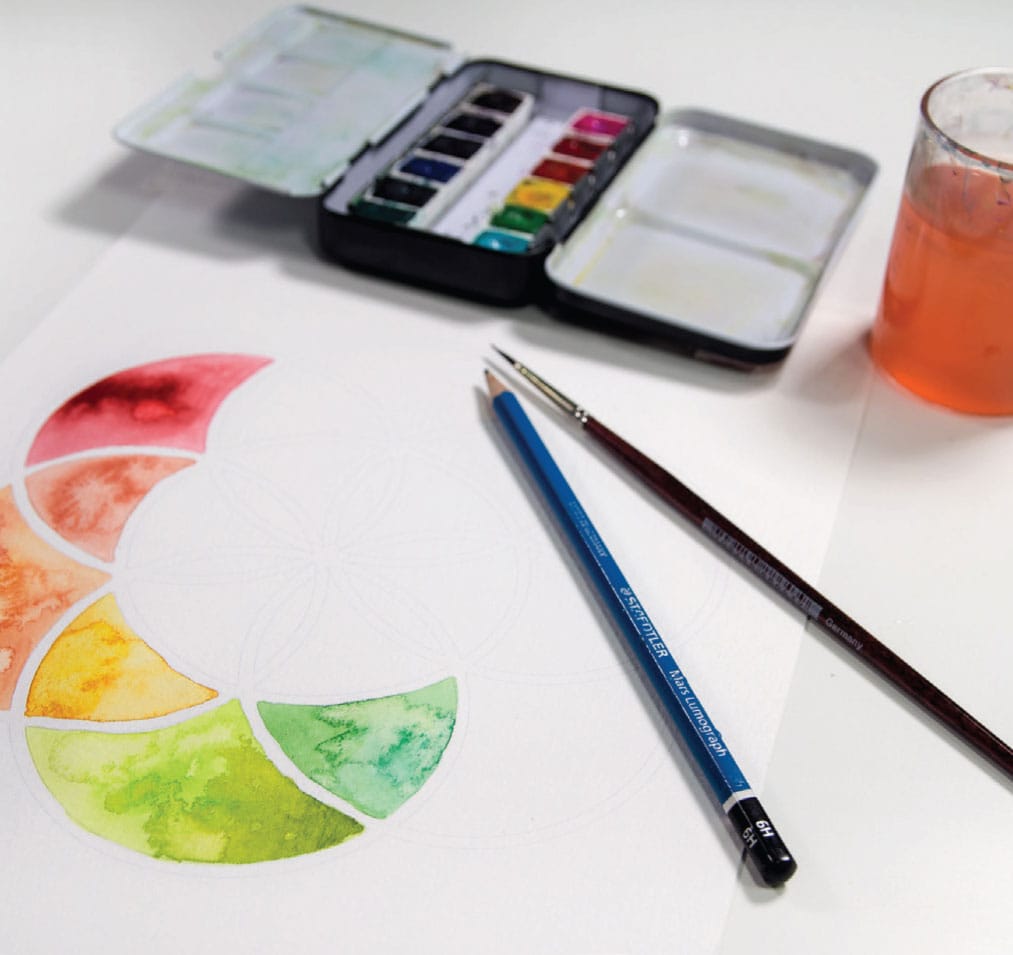
1 Use extremely diluted watercolor ink and little paint trays equipped with wells (kind of like a shallow egg carton). Add a tiny speck of the very concentrated watercolor ink and add water. You can also use paint from your watercolor pans diluted with water in the same fashion. It takes a while to get the color and shade right, so use a scrap page to test your colors.
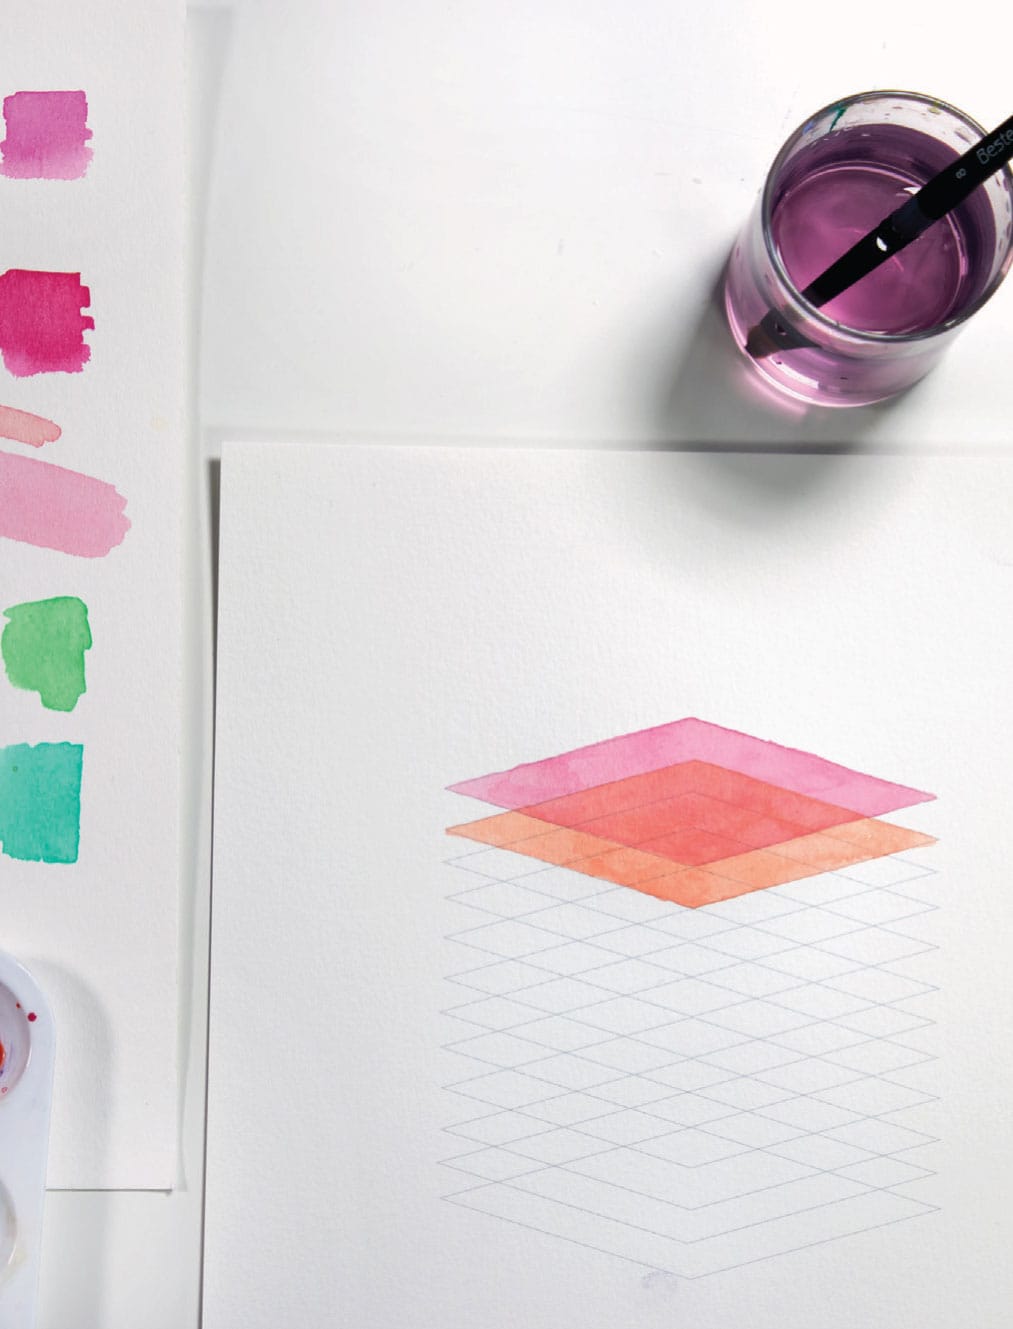
2 It can be tricky to get the right level of transparency for the wet on dry layers and the rule of thumb is to start very light. Watercolor will dry darker than it looks wet on the page.
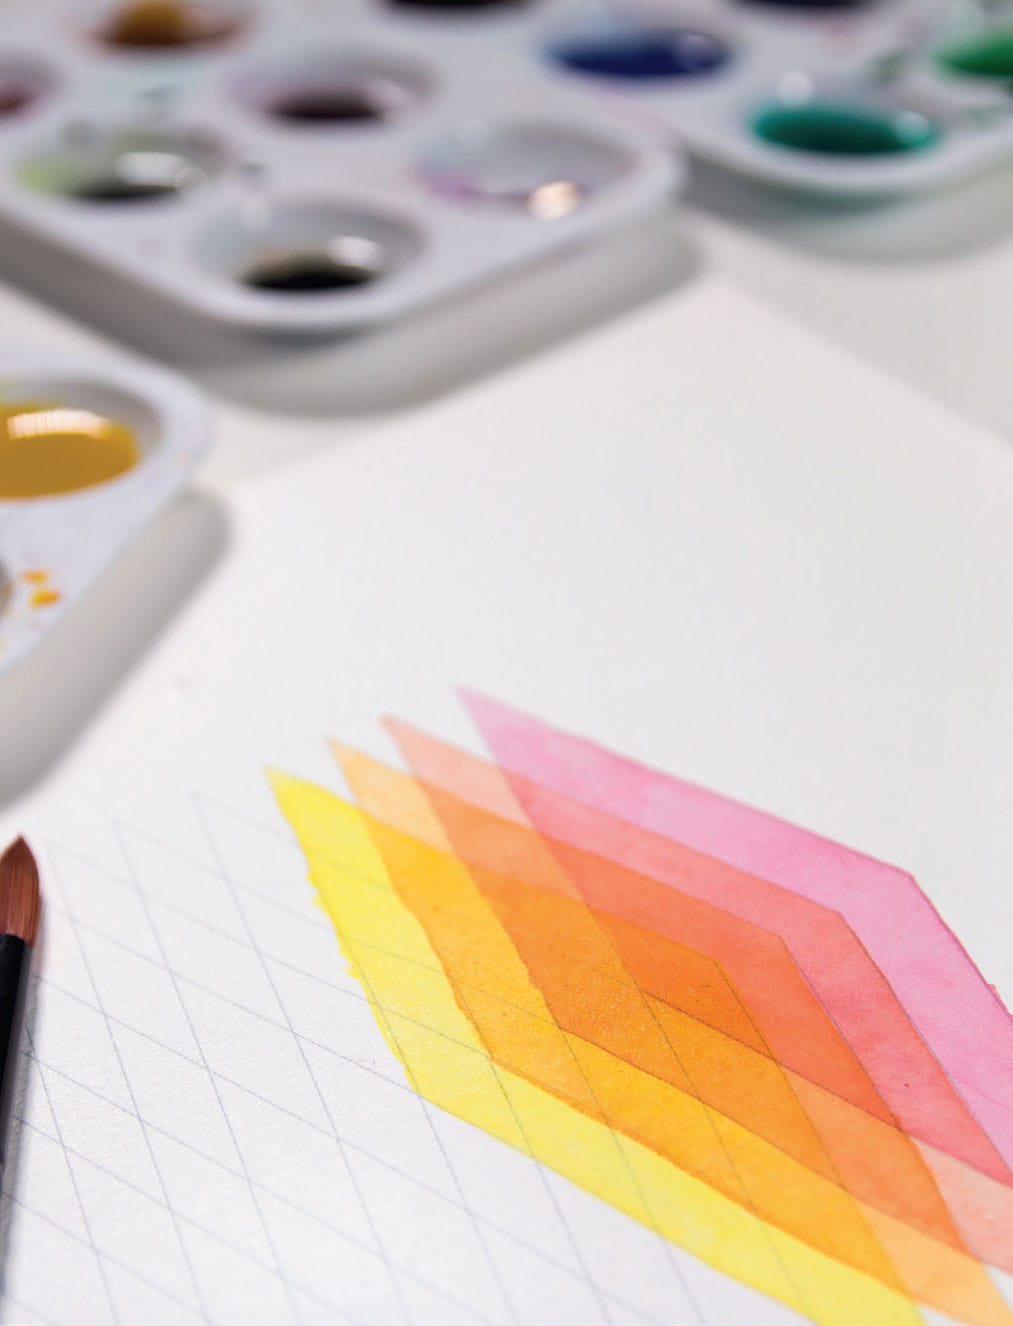
3 When you come back to add a new veil of color, use a light touch. The underlying area will “come up” if you work it too much, so you’ve got to get in and get out like a stealth bomber. Don’t let the paint even know you’re there.
Flat Diamond
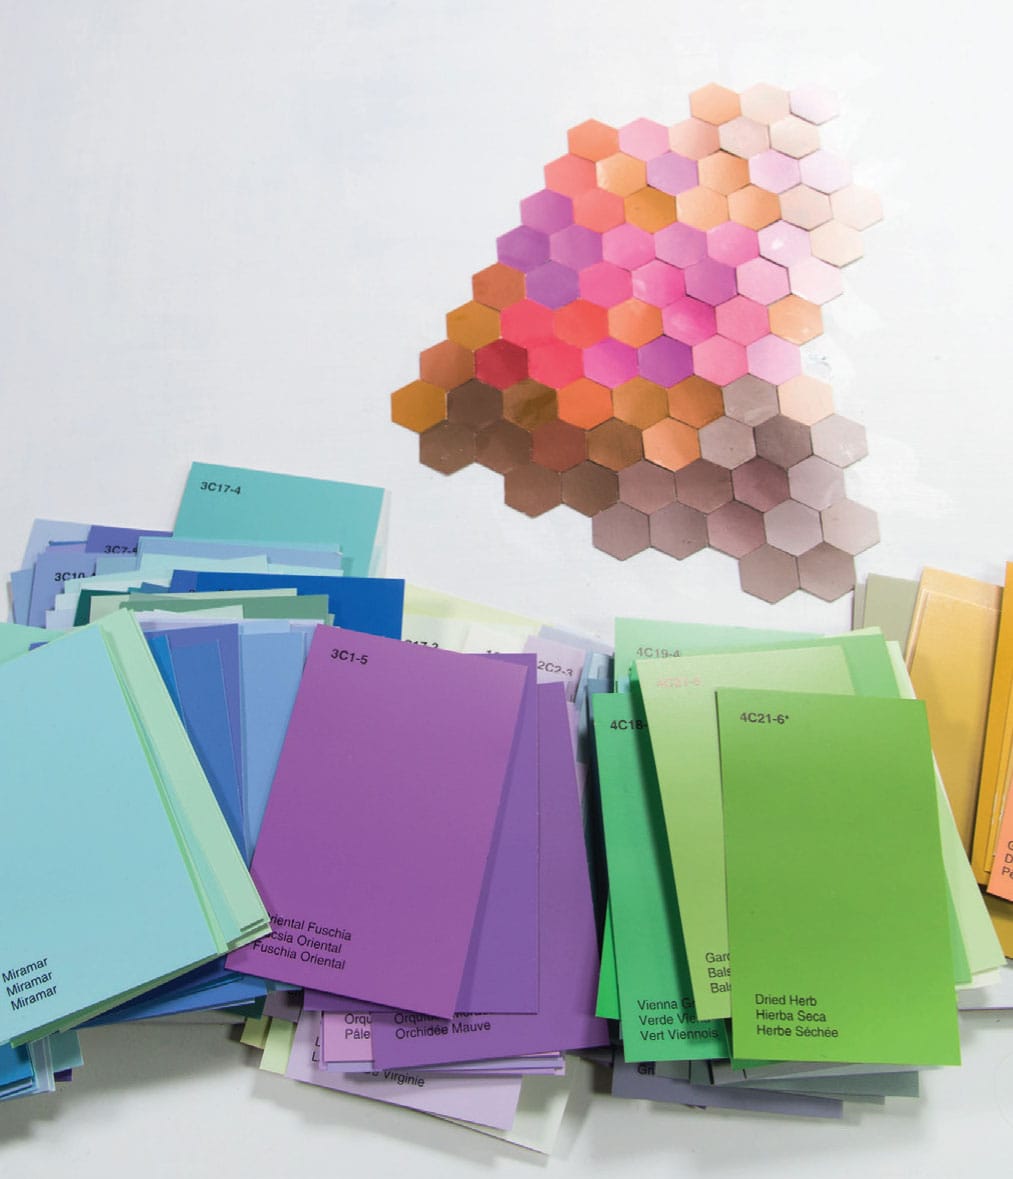
This is a progression from Tri Me (see here), a project where we examined a wide value range within one color root. It is deceptively hard to organize multiple colors in the same value range. This means that if you were looking at the colors in black and white, there would be little discernible difference in light or dark. We will pick one value and will try not to move up and down on the value scale, though the colors will shift around the wheel. Meanwhile, I would never encourage people to go to the big-box hardware stores and take free samples of paint chips and use them for a purpose for which they were not intended. Because that would be wrong. (Wink.) However, if the craft store card stock fails you by not providing the color range you need, pulling some of those paint chips that you’ve had saved in the back of the junk drawer might help the situation by adding more tonal variety. But you didn’t hear it from me.
SKILL LEVEL
Medium
SKILLS LEARNED
Establishing a consistent value scale
MATERIALS
Crafter’s card stock supplemented with paint chips
Triangle punch
18” x 24” (45.5 x 61 cm) mixed-media paper
Glue sticks
MESS LEVEL
Don’t work on your open-air ocean patio during a hurricane
TIME TO COMPLETE
60 minutes

1 For this project it’s helpful to have a wide variety of available colors (see note on paint chips shown here). Assembling the colors is the hardest part. I stacked everything up and then went back and pulled out colors that snagged my eye. (Try the earlier phone camera desaturation trick (see here) here if you’re having trouble.)
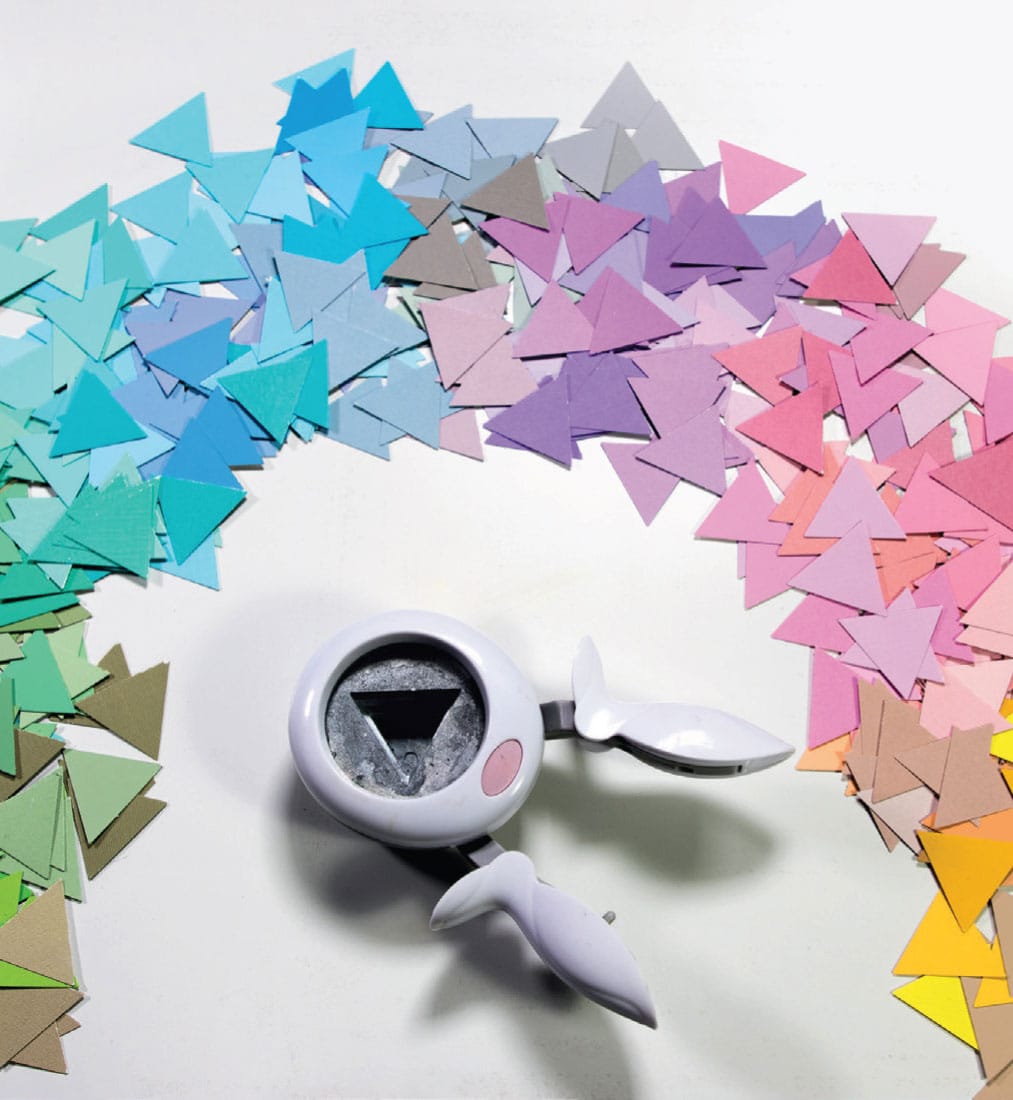
2 To make sure my diamond would fit on my paper, I established the middle point with a ruler (which will be the widest part of the triangle) and, using my 1-inch (2.5 cm) triangles as a guide, measured out to my starting point on the left (10 inches/25.4 cm). In this case, I punched the triangles out before I started.

3 I glued the triangles down by putting a spot of glue stick on the triangles, not the support paper. It takes longer, but the glue stick can leave marks on the other colors. It is also messier for fingers, but it’s worth it. Every time I do a collage, I realize toward the end that some of the colors aren’t quite right. Rather than peeling them off and risk tearing the paper, I just add the correct color right on top.
Seed of Life
For centuries, pattern design has been used by artists and craft persons for all sorts of embellishment. Patterns were used for religious purposes in mosques, temples, and churches. They are found in mosaic, stained glass, illuminated manuscripts, textiles, flooring, woodwork—you name it. The Renaissance (around 1500) emphasized naturalism, the style of art by which the art looks as much like real life as possible. Thus, for the past 600 years, pattern art has been regulated to the “decorative” and has been much less honored than naturalism. In the past one hundred years or so, art history has shifted to include “abstract” art in the high art lexicon (think the drippy paint canvases of Jackson Pollock). But pattern art and design is still generally regarded as “lesser.” Overall it seems that pattern art is the province of so-called women’s work such as stitchery and scrapbooking. There is probably some latent sexism/classism imbued in the bias since any cursory glance at the celebrities of art history from the Renaissance right up to the present day will turn up mostly Caucasian males. But hello. It’s a new dawn. The future, as they say, is female.
SKILL LEVEL
Moderate
SKILLS LEARNED
Granulation
MATERIALS
Templates:
• Seed of Life: Simple, shown here (shown in project shown here)
• Seed of Life: Advanced, shown here (see finished art shown here)
12-color watercolor kit (see here)
#2 and #4 round brushes
Paper towel
MESS LEVEL
Minimal
TIME TO COMPLETE
45–60 minutes
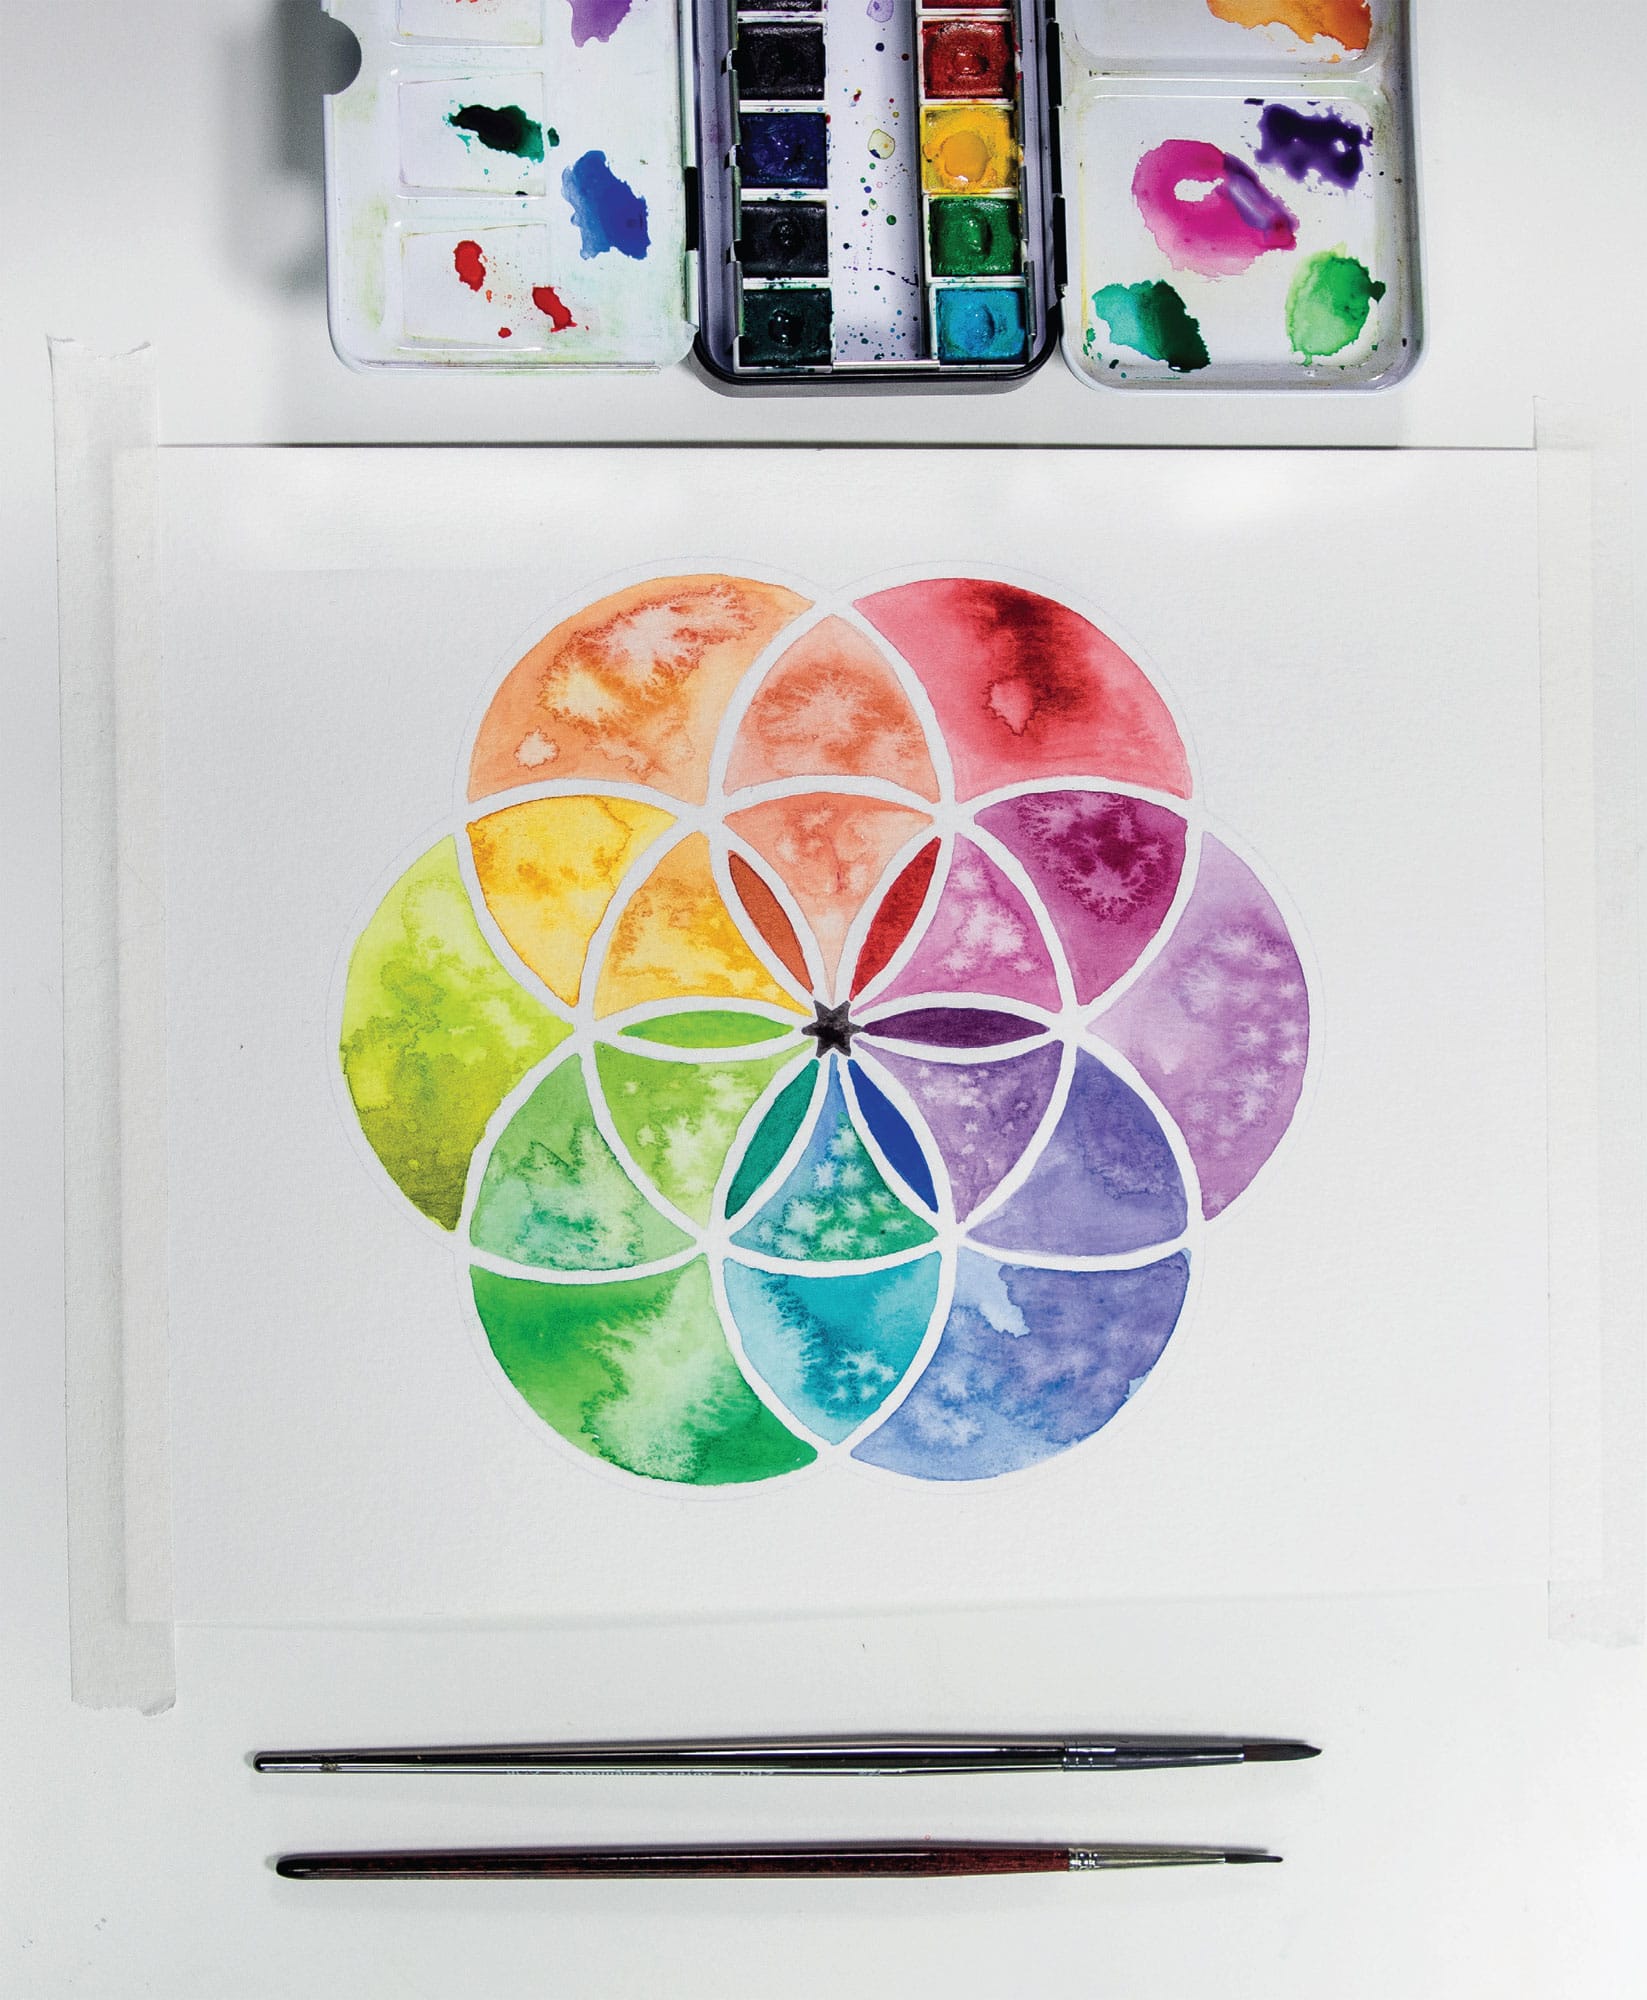
1 A lovely component of watercolor is a quality called granulation. Granulation is when the water collects the various pigments in patterns based on the path of the water and the texture of the paper. It can be quite beautiful, albeit hard to control or predict. In the ancient Seed of Life design, we explore a variation of a traditional color wheel using color-mixing techniques from around the wheel.

2 Try the following techniques to get the colors to pool, crystalize, and concentrate irregularly.
Paint will act differently depending on how wet it is (shiny wet versus damp, for instance). It will also act differently depending on your paper and the type and color of paint. Some ways to experiment with wet on wet:
• Brush on clear water. Drop in paint.
• Paint on a color. Drop in water.
• Paint on a color. Wait till it’s damp and then add tiny drops of water to get little crystals. (For more on this, see Diamond Crystals, shown here.)
Developing Your Fist
During World War II (and you just know it’s going to be a good story about art when it starts off with World War II), telegraph operators were the key agents of war communication. Naturally, all the messages were encoded, but the opposing army code breakers learned they could recognize an operator simply by how she delivered the code. (I’m not using “she” just for inclusion here; WWII Morse code operators were often women.) Even if they couldn’t decode the actual meaning, they could tell who was delivering the message because of distinctive characteristics in the execution. They called this personal style a fist.
It seems to defy logic—Morse code is essentially just a system of clicking buttons. Yet somehow the expert telegraph operators developed their own timing, rhythm, style, and delivery completely distinct from other operators. I am reminded about the Morse code fist when I teach workshops and give everyone an identical template and identical instruction. Lo and behold, every single one of these novice painters will approach the project completely differently. Even if every person was painting a series of red hexagons, it was easy to see unique features and styles between each artist. Often, someone would innovate in a way that I had never seen before.
And I have some good news. And bad news. No, wait—actually, it’s all good news! In order to develop your fist, you just have to practice. A lot. When you are pursuing your own creative path for intrinsic reasons, you will naturally find flow, and then you will actually want to do that thing more because flow is so rewarding, and then you will naturally get better at it. Even if you always keep the difficulty level at 4 percent, you will keep improving . . . indefinitely.
When you do something, anything, habitually, you will get very good at how you do it. Like a river finding its course, you will find a unique path to your own expression. This is a highly satisfying journey. However, no water: no river gorge. You need to turn on your tap by working (or, if you prefer, playing) to get the flow. When you first turn on the spout, your water will be running across a flat plane with no distinct quality or identity, picking up mud and debris until all you have is a hot mess. This is normal. The only way to clean it up and start to create an adorable little trickle that turns into a creek that turns into a brook that turns into a river is to keep making.
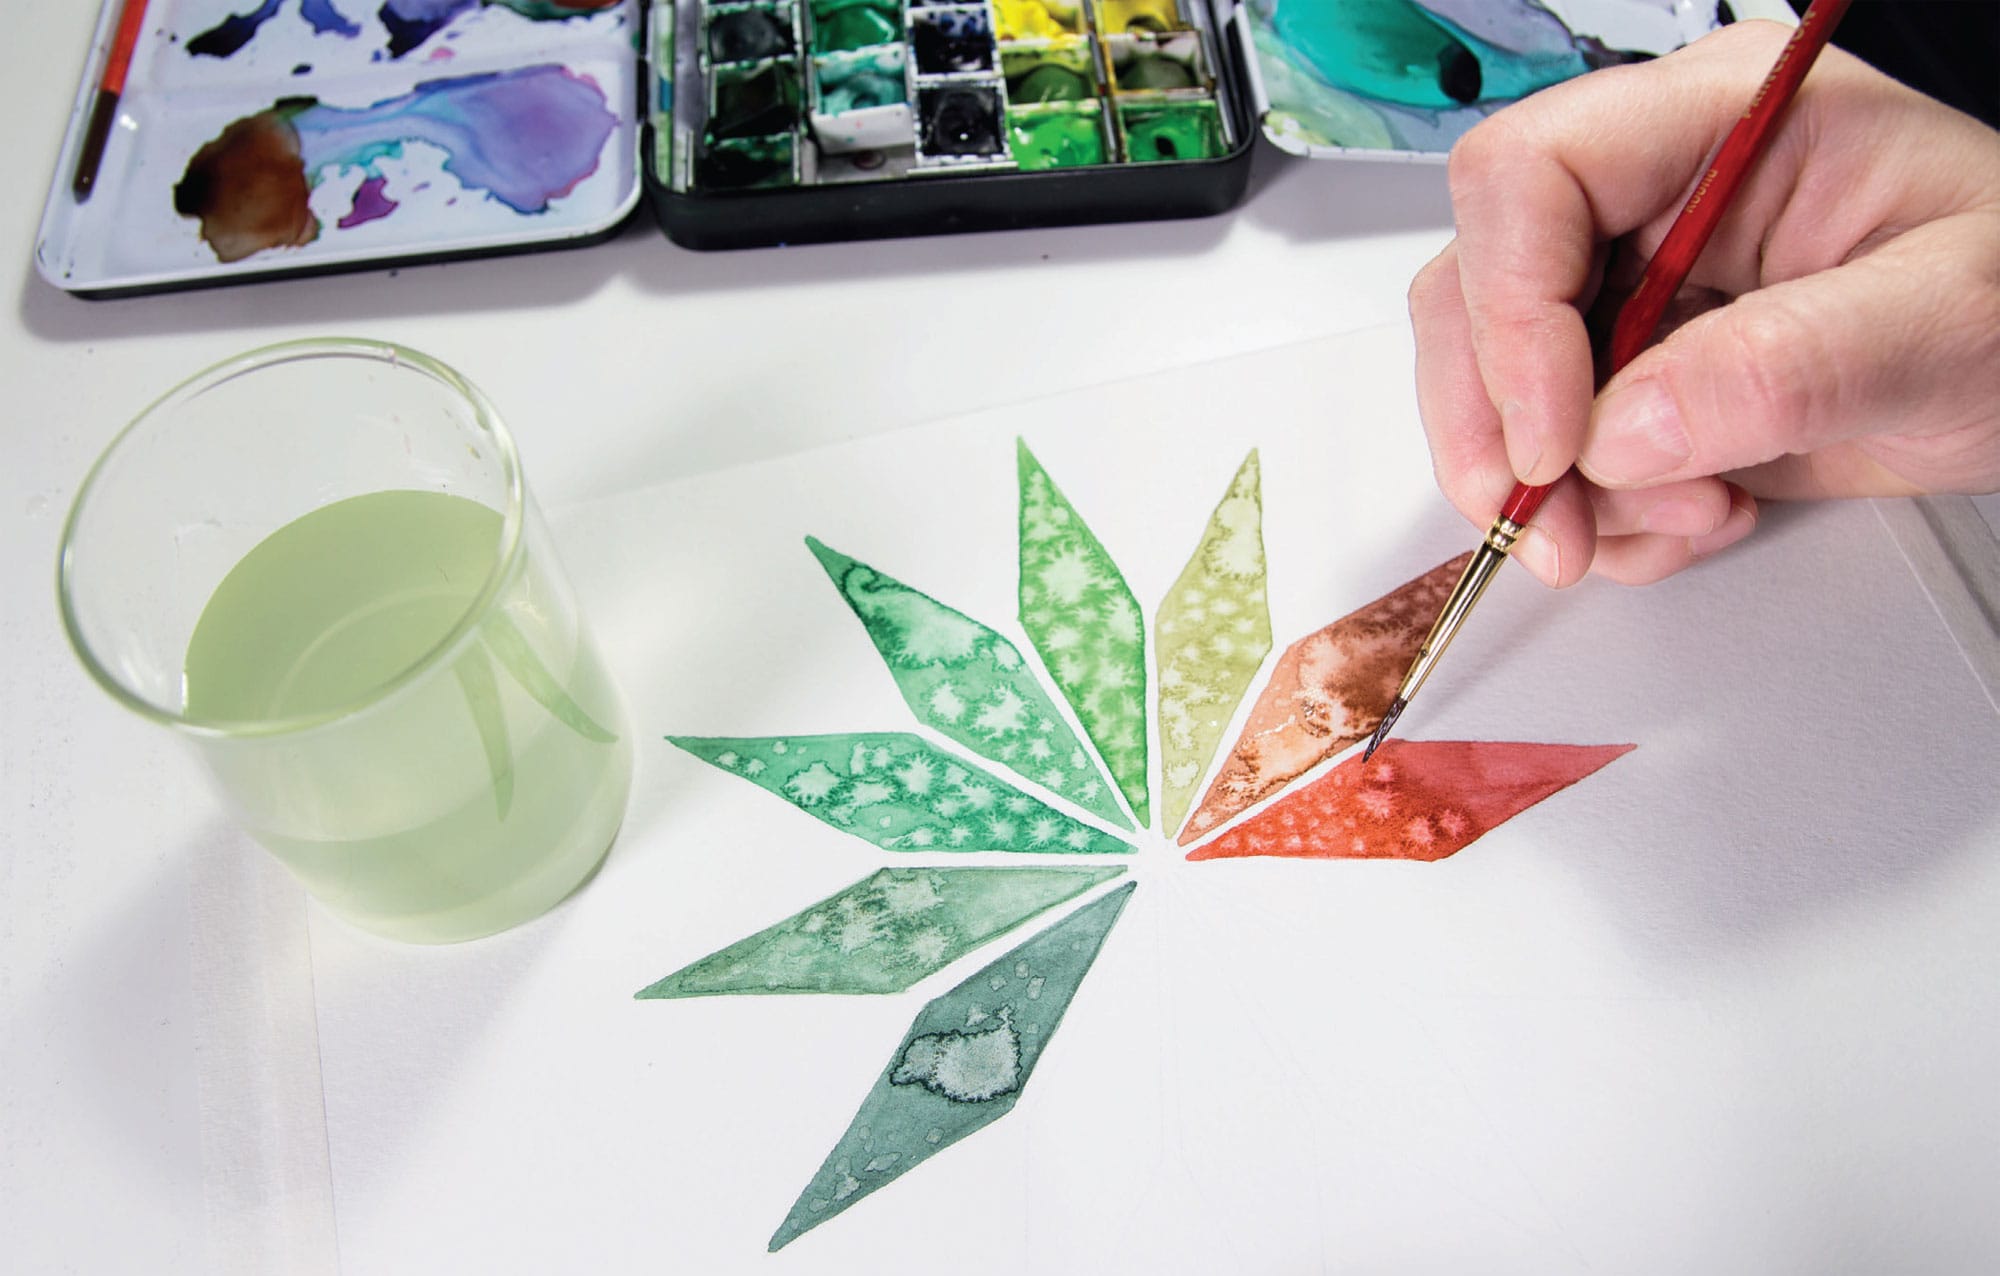
Diamond Crystals
I have a friend who does improv comedy. She took a watercolor class from me and told me it was a lot like improv. “I do something, then watercolor does something!” Basically, watercolor is your partner and will interact with your moves in unexpected ways. My friend Rob sagely says the difference between fighting and dancing is cooperation. The number one rule in improv (and, side note, in my life) is you never turn down a suggestion. So with watercolor, don’t fight with it—go with it. As you get better with watercolor, you will have a better sense of predicting how it might react to your inputs and how to guide it in a way that pleases you. Working wet on wet is a great way to “Let go and let flow.”
So many rhymes right now . . . I can’t even.
This project sounds fancy, but don’t worry—no precious gems will be used in the production of this technique! Also, you don’t have to introduce any other solvent or additive to get this effect. You just need water and paint. I admit the timing in this technique is the trickiest part. What you are trying to do is to get the watercolor to create interesting organic “crystal” or snowflake patterns as it dries. To encourage the paint, you need to introduce a tiny bit of water at an exact stage in the drying process. Remember, watercolor is a process of dual cooperation. If it’s too wet, everything will run and be a messy blob, and if it’s too dry, the water will bead on the page and refuse to do anything interesting.
SKILL LEVEL
Moderate
SKILLS LEARNED
Special effects with watercolor
MATERIALS
Templates:
• Diamond Crystals: Simple, shown here (shown here)
• Diamond Crystals: Advanced, shown here (see finished art shown here)
12-color watercolor kit (see here)
#2 and #4 round brushes
Paper towel
MESS LEVEL
Minimal
TIME TO COMPLETE
30–60 minutes
1 Fill in a shape with a fairly concentrated watercolor mix of a color of your choice. It helps if the shape isn’t larger than 1 to 2 inches (2.5 to 5 cm). Try to apply the watercolor uniformly. Now, the timed waiting. Sometimes I will move on to another shape and then circle back, or, in this case, “diamond back” (Ha). The time it takes me to fill in another shape is often the right amount of time for the first diamond to reach prime crystal time.
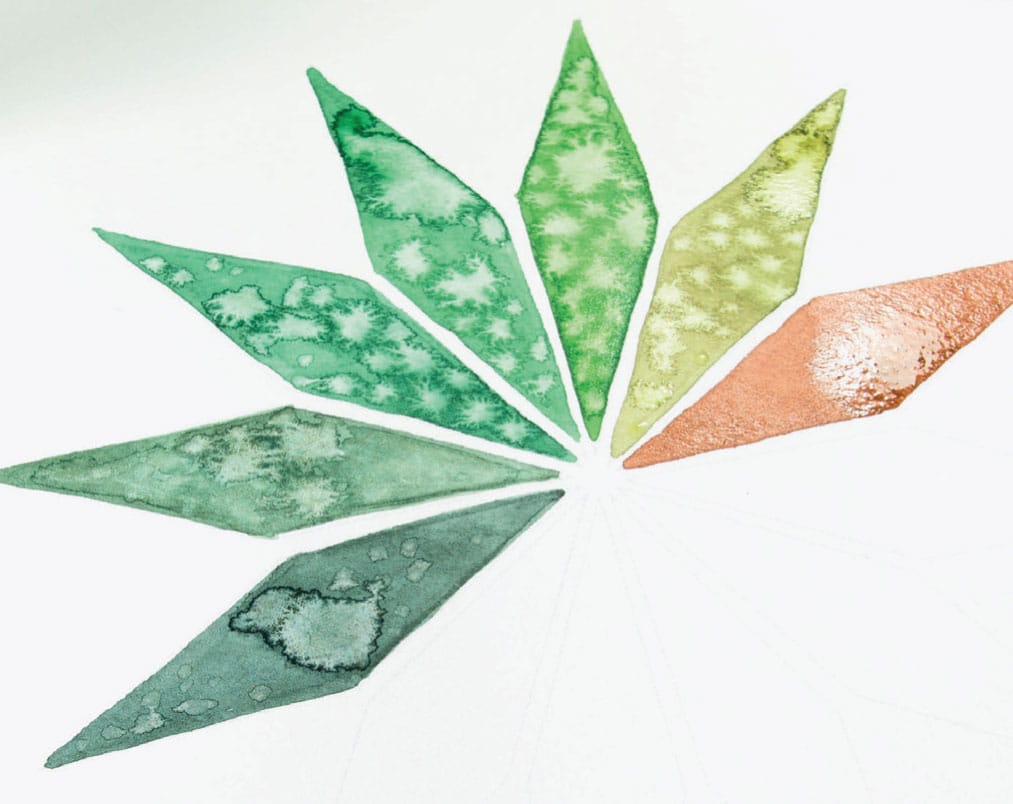
2 The paint should be damp to the touch but not shiny with water collecting on the surface of the paper. If there’s too much water on the page, it will look like the orange diamond.

3 Using your smallest brush (a #1 or #2 round), dip into clean water, and tap off the biggest drops. The brush will be wet but not dripping like it is in this image.
4 Use the barest touch of your brush to the surface of the paper, as if you’re a fairy putting a freckle on a baby’s nose. It’s a whisper, and at first you might not even see a change. But as the paint continues drying, that little bit of water will spread outward and create the crystal structure.
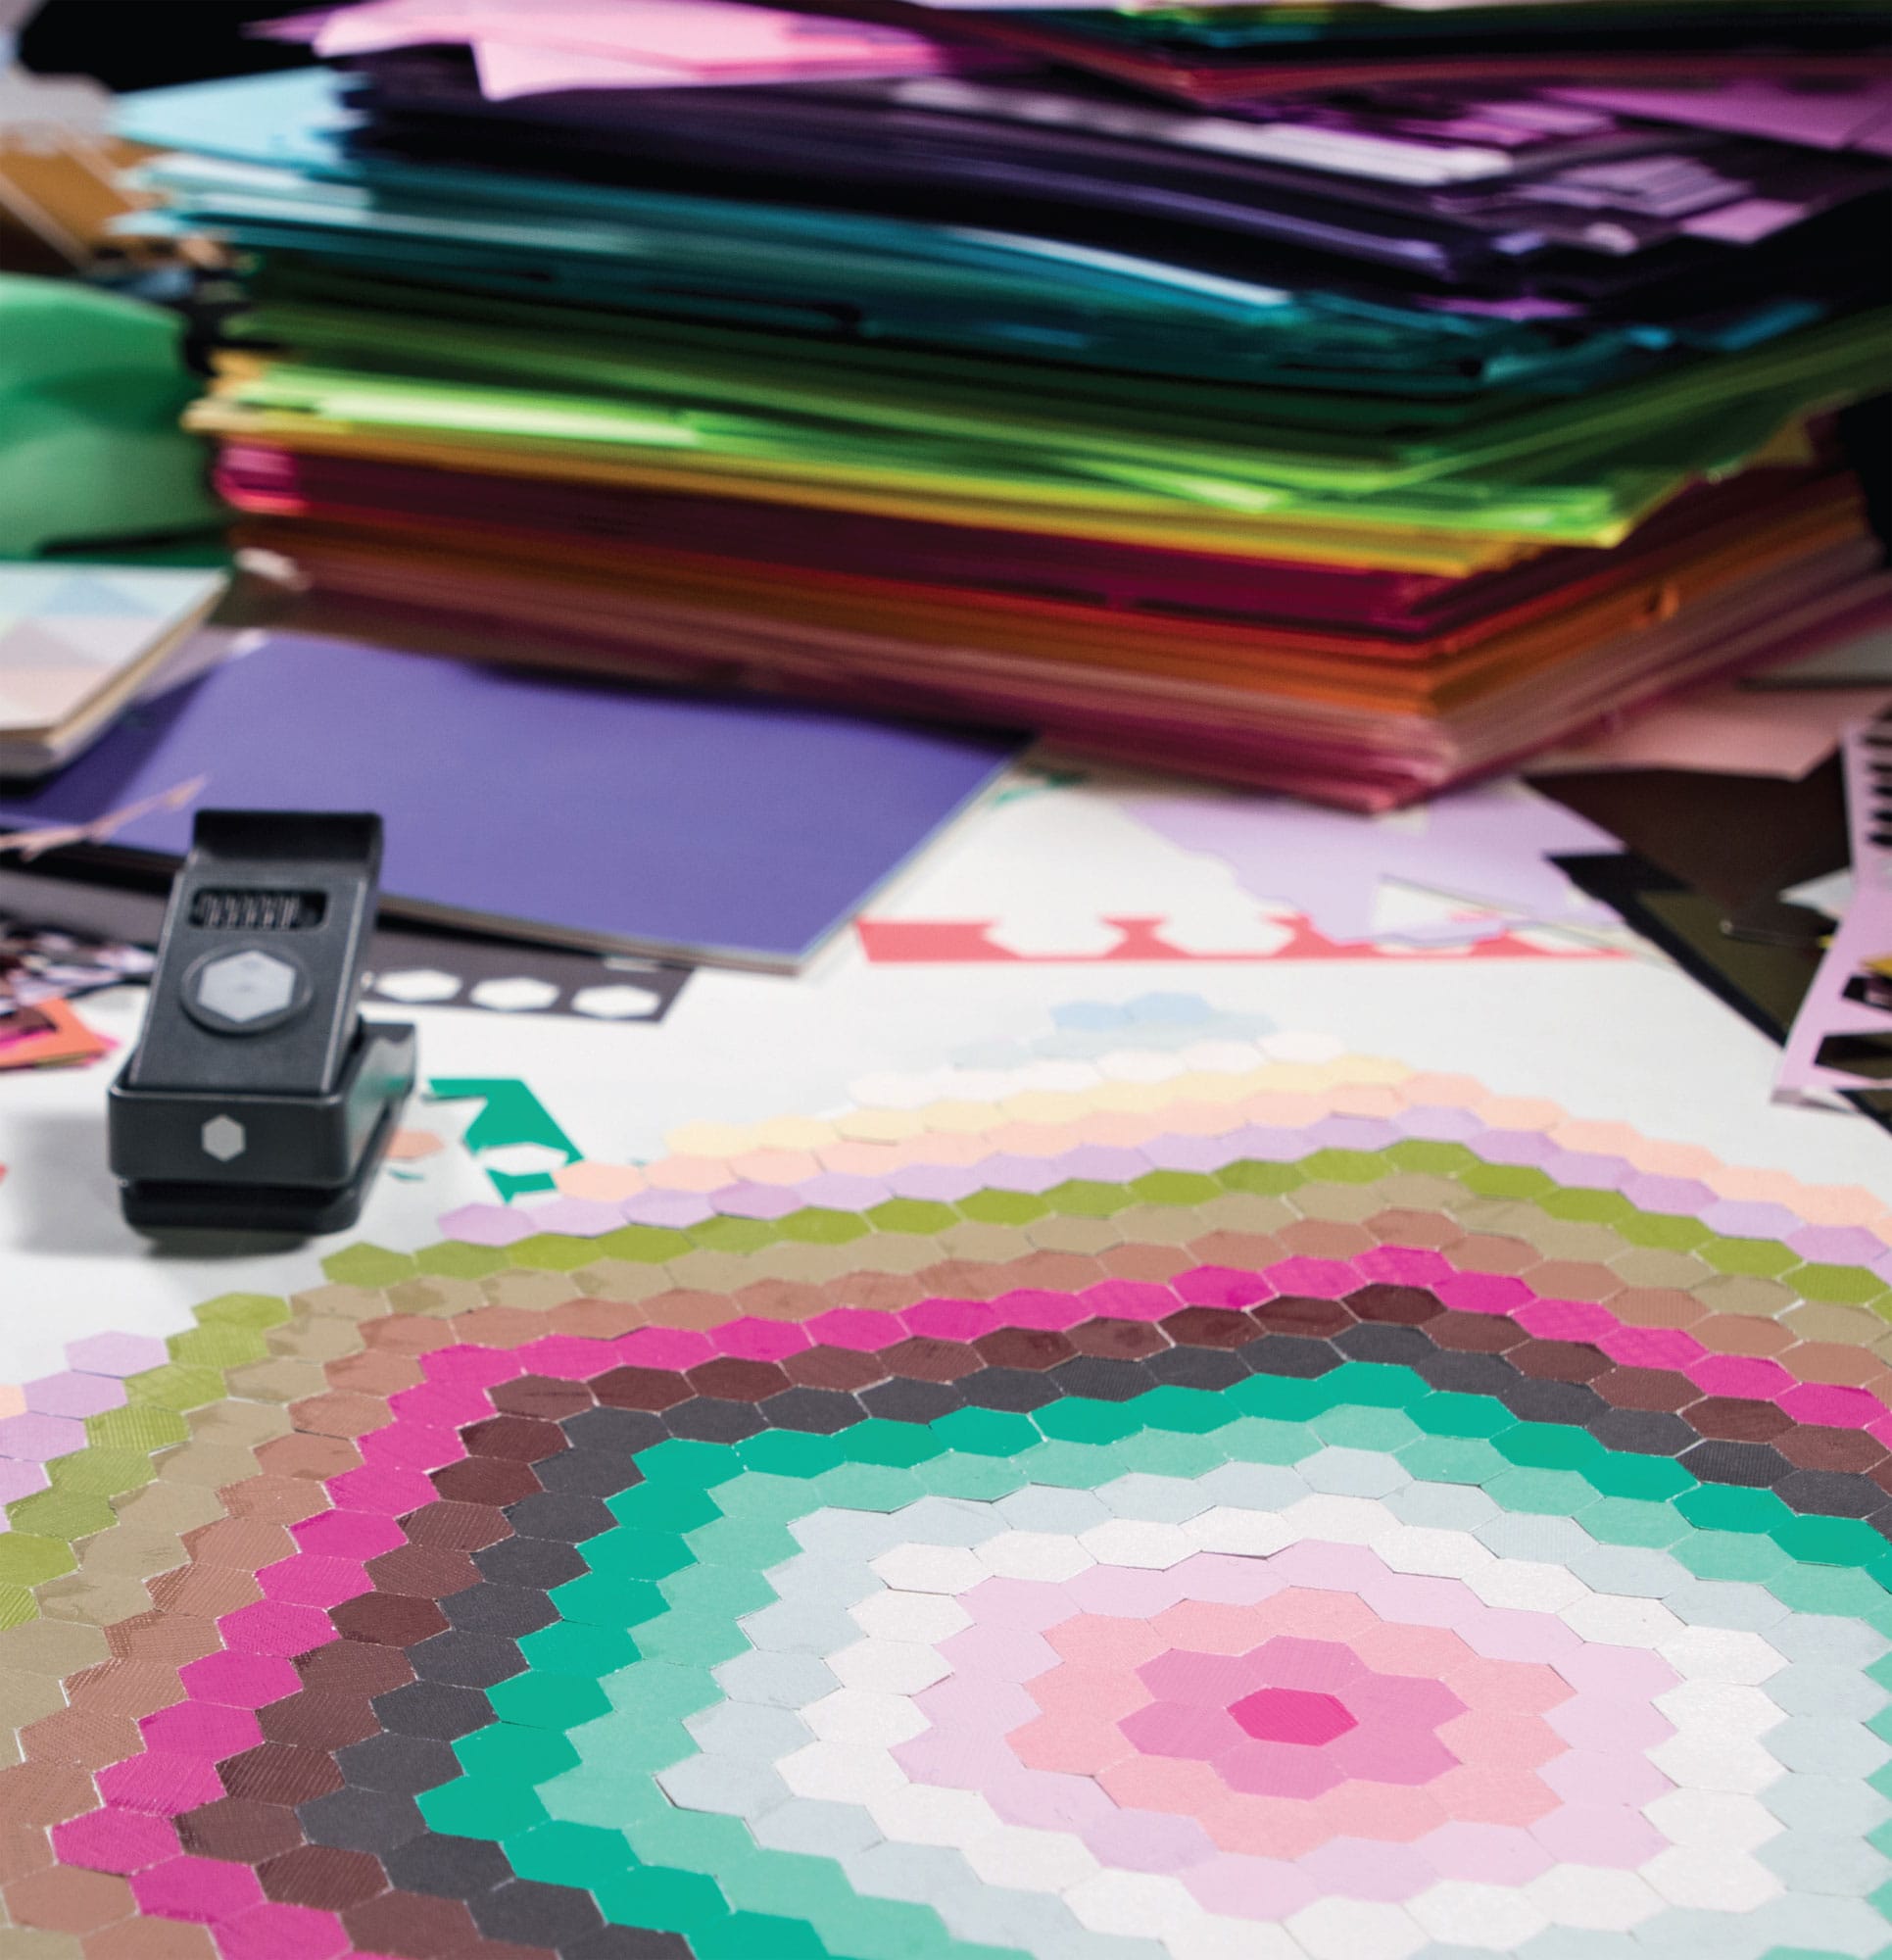
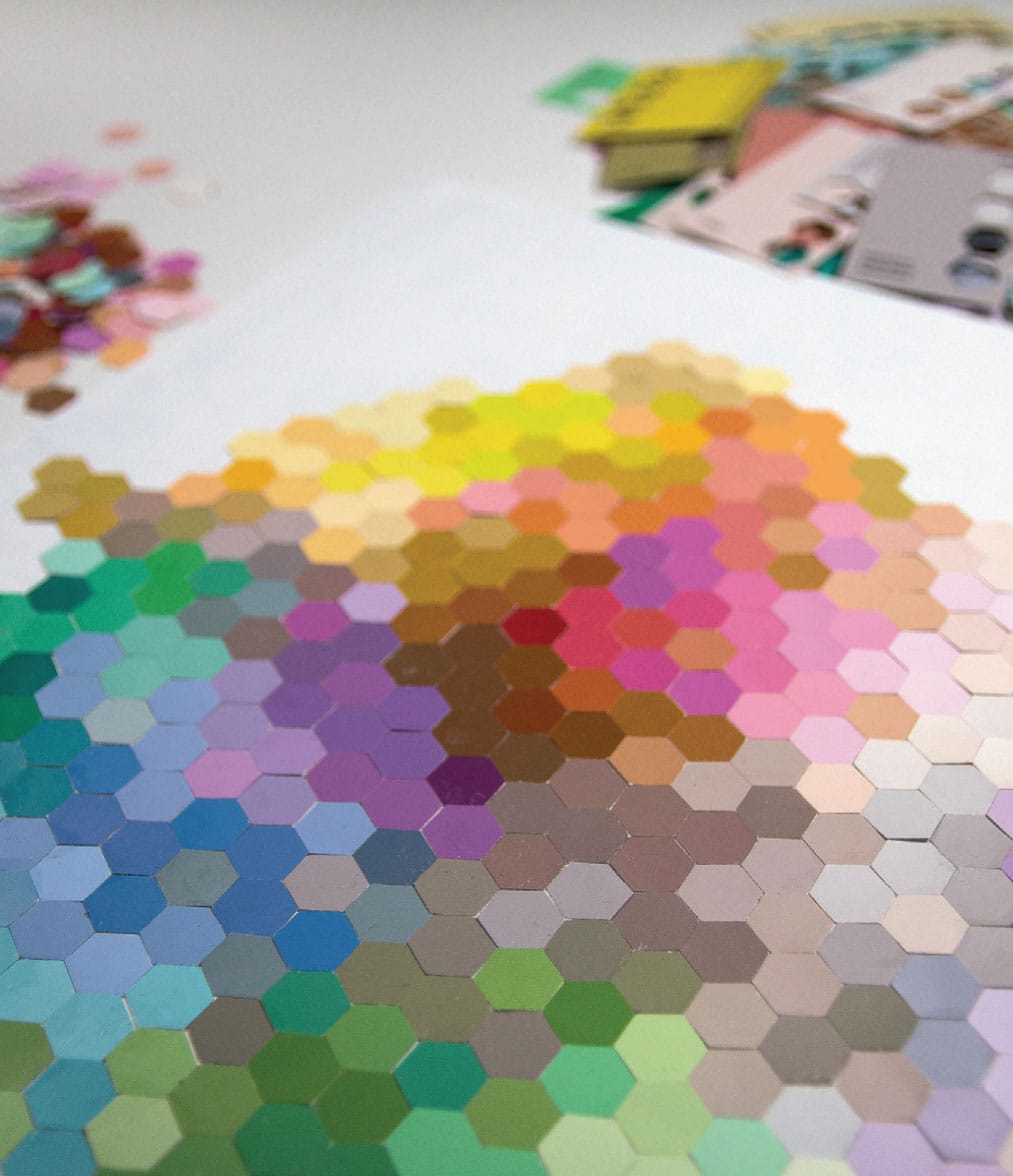
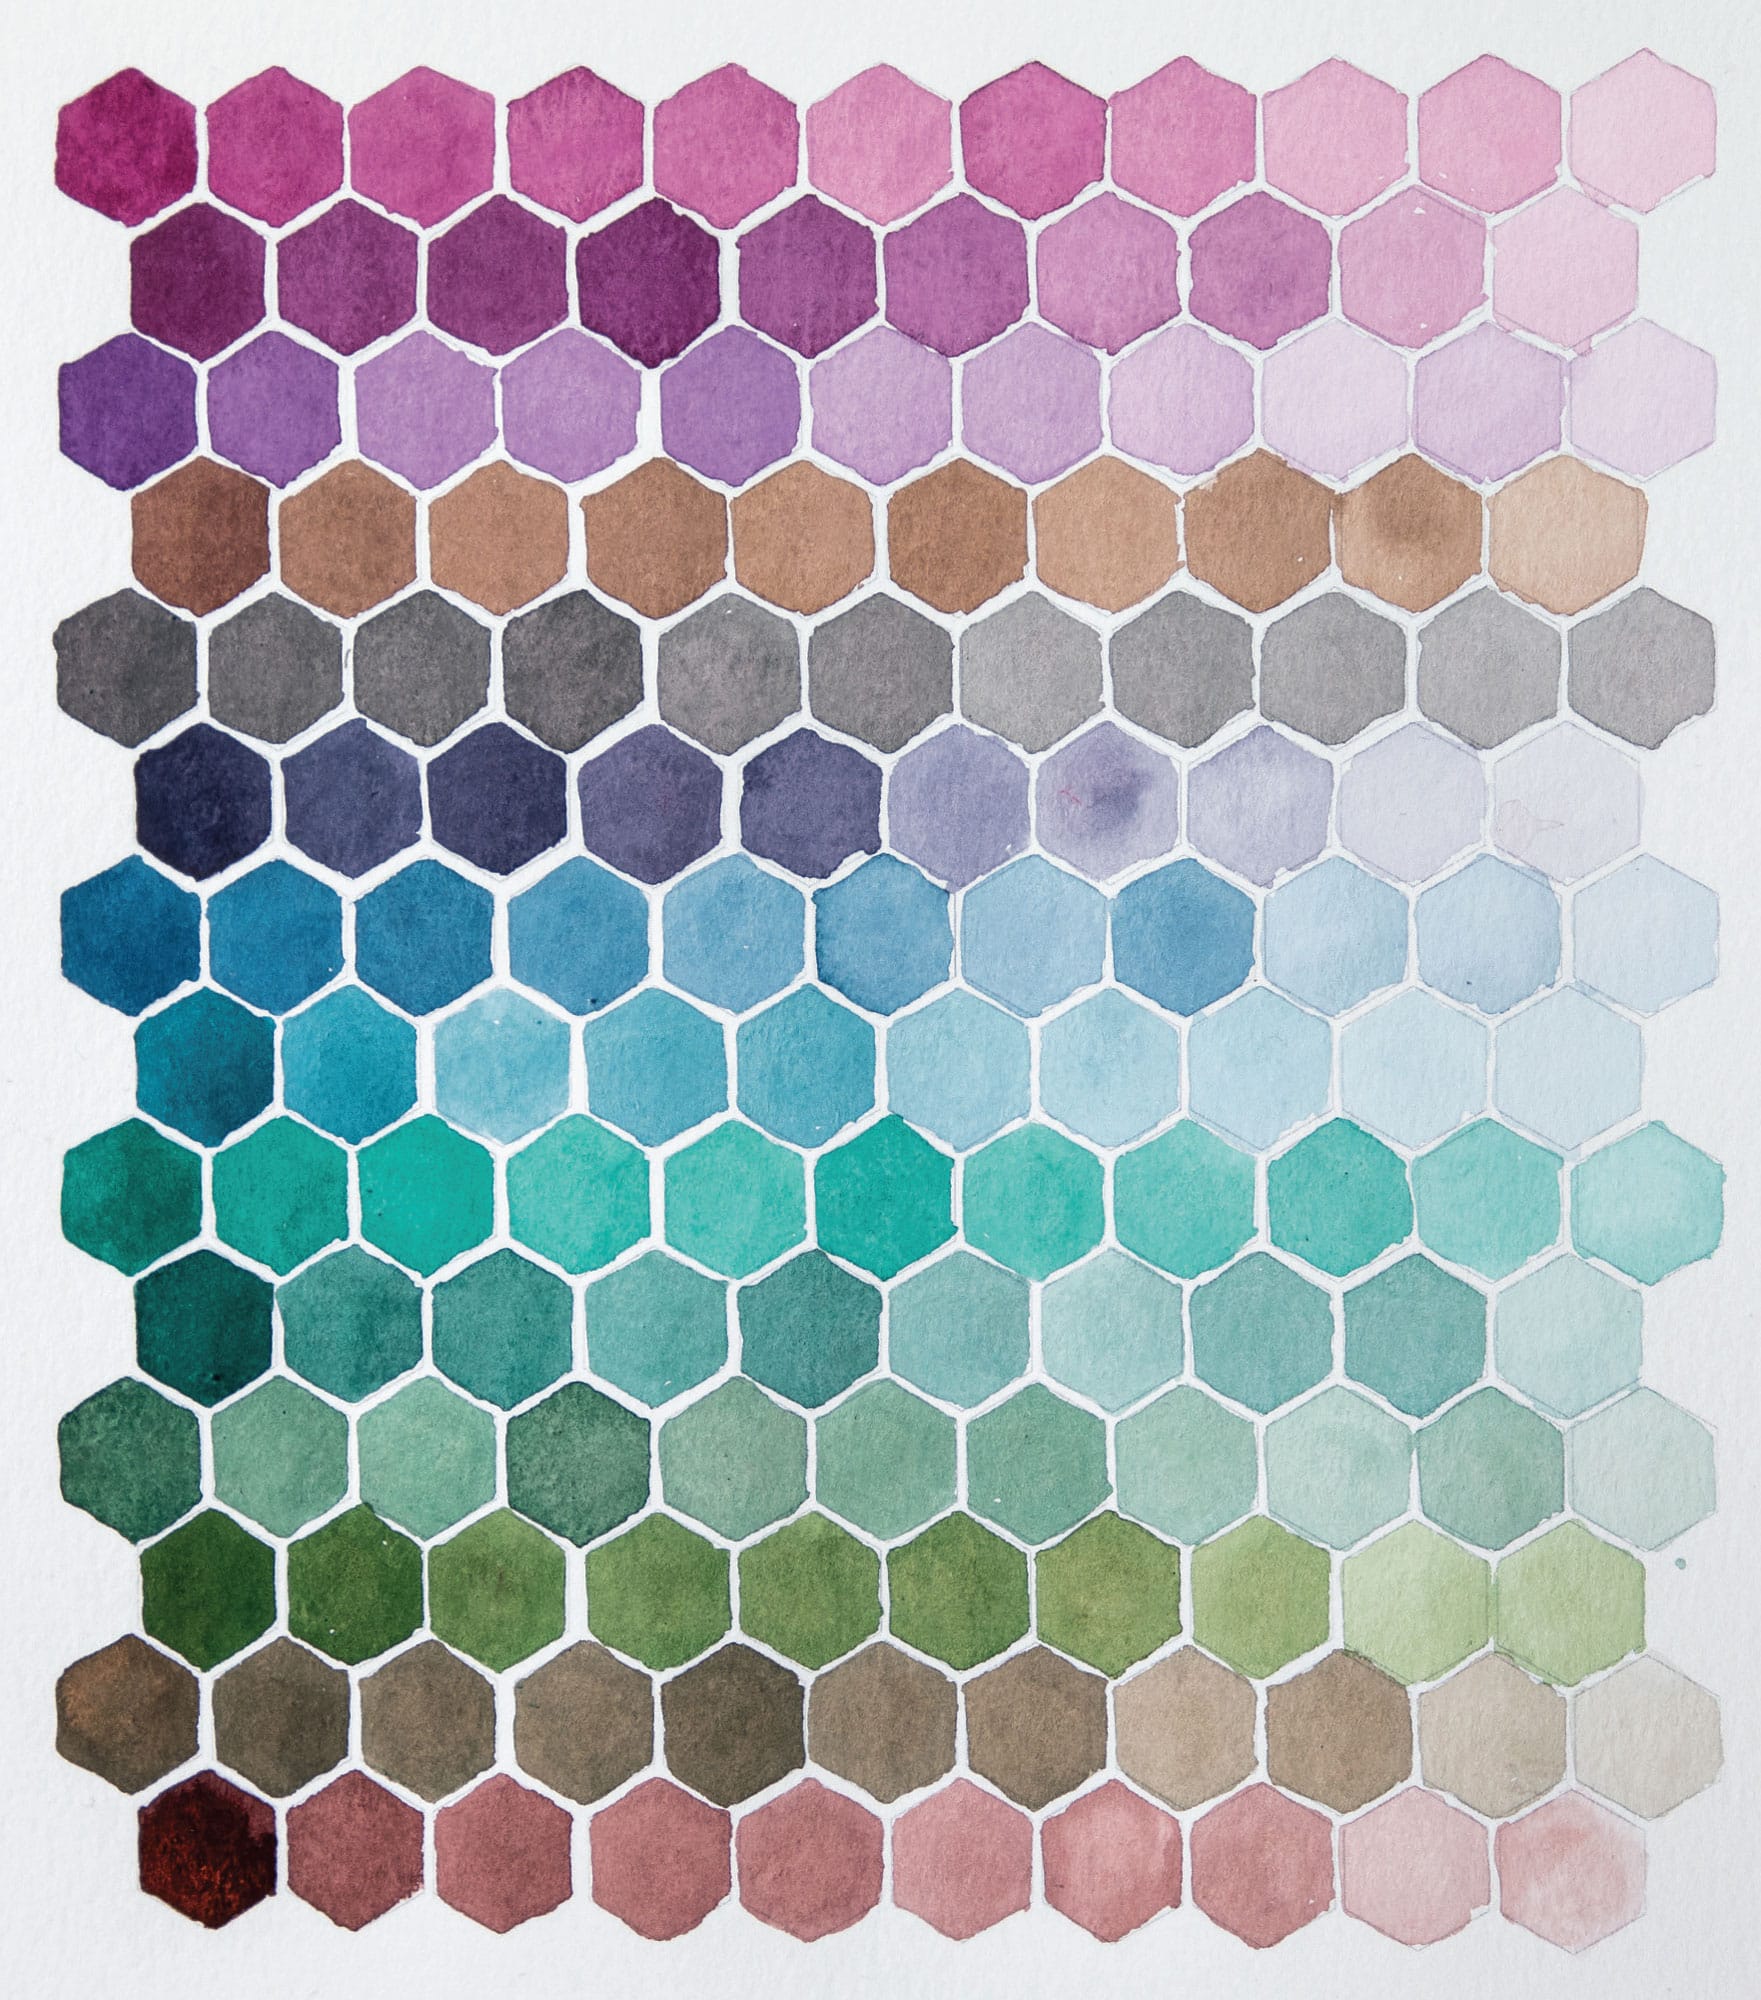
Hex Addict
One of my early memories was getting in trouble when I was at the drugstore with my grandma. She was waiting for a prescription, and while she tarried, I took the time to rearrange the nail polish display. This is a true story. Something about the beautiful bottles of color and lack of oversight from an authority figure made me lose my six-year-old mind. I imagined the Walgreens employees were deeply appreciative. I still have this almost irresistible response with nail polish displays, especially at the nail salon, where they don’t organize it on purpose. It makes me insane. Luckily, I have paper collage—color I get to organize and no one gets mad.
SKILL LEVEL
Medium
SKILLS LEARNED
Focal points; gradating value; neutral colors
MATERIALS
Craft paper
1” (2.5 cm) hexagon punch
18” x 24” (45.5 x 61 cm) mixed-media paper
Glue sticks
MESS LEVEL
Moderately bonkerballs
TIME TO COMPLETE
60–90 minutes


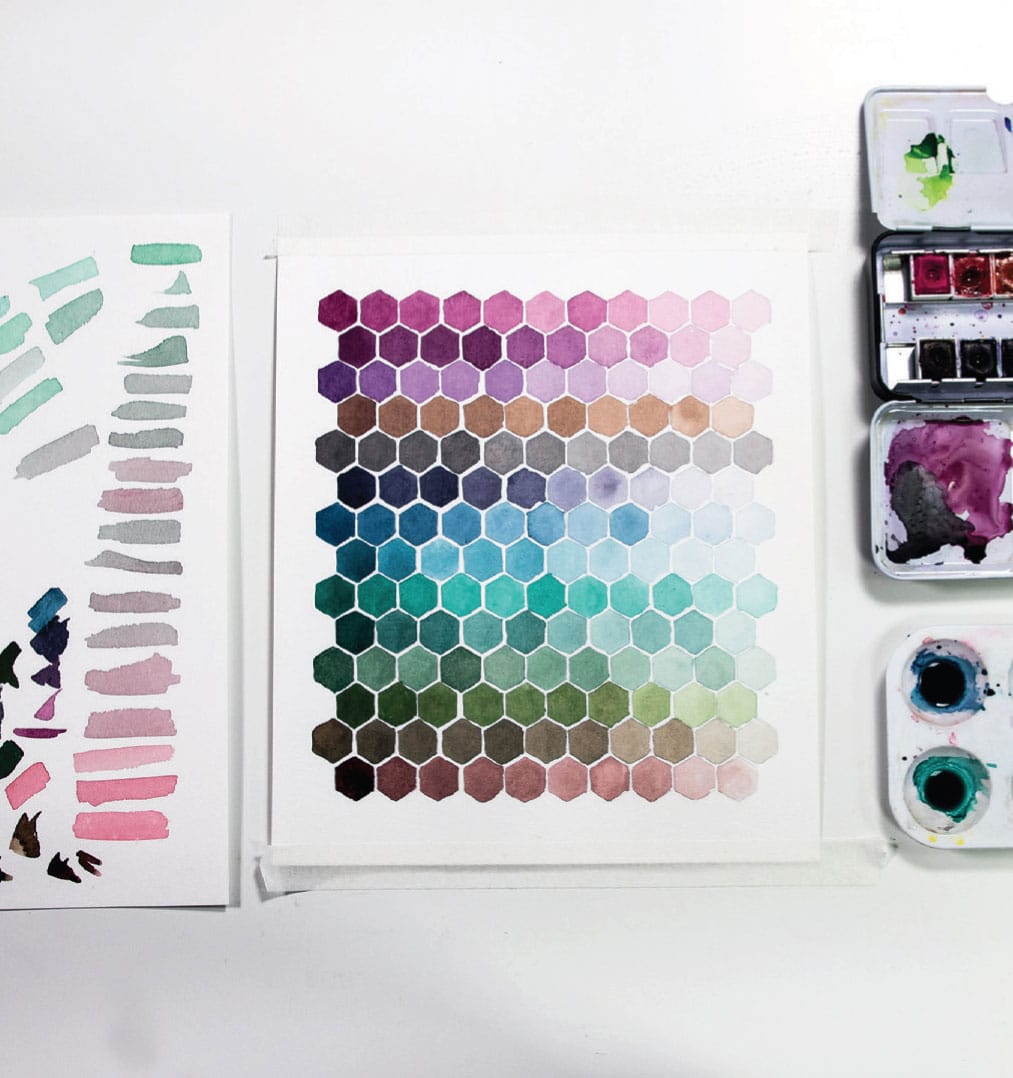
1 The innermost center hexagon is darker, and the next ring out is a little lighter in value, and so on. Hexciting! By the fourth ring, most color has been toned down to a tint (a color with white added) or neutral gray or taupe to prepare to the shift into the next orb of color.
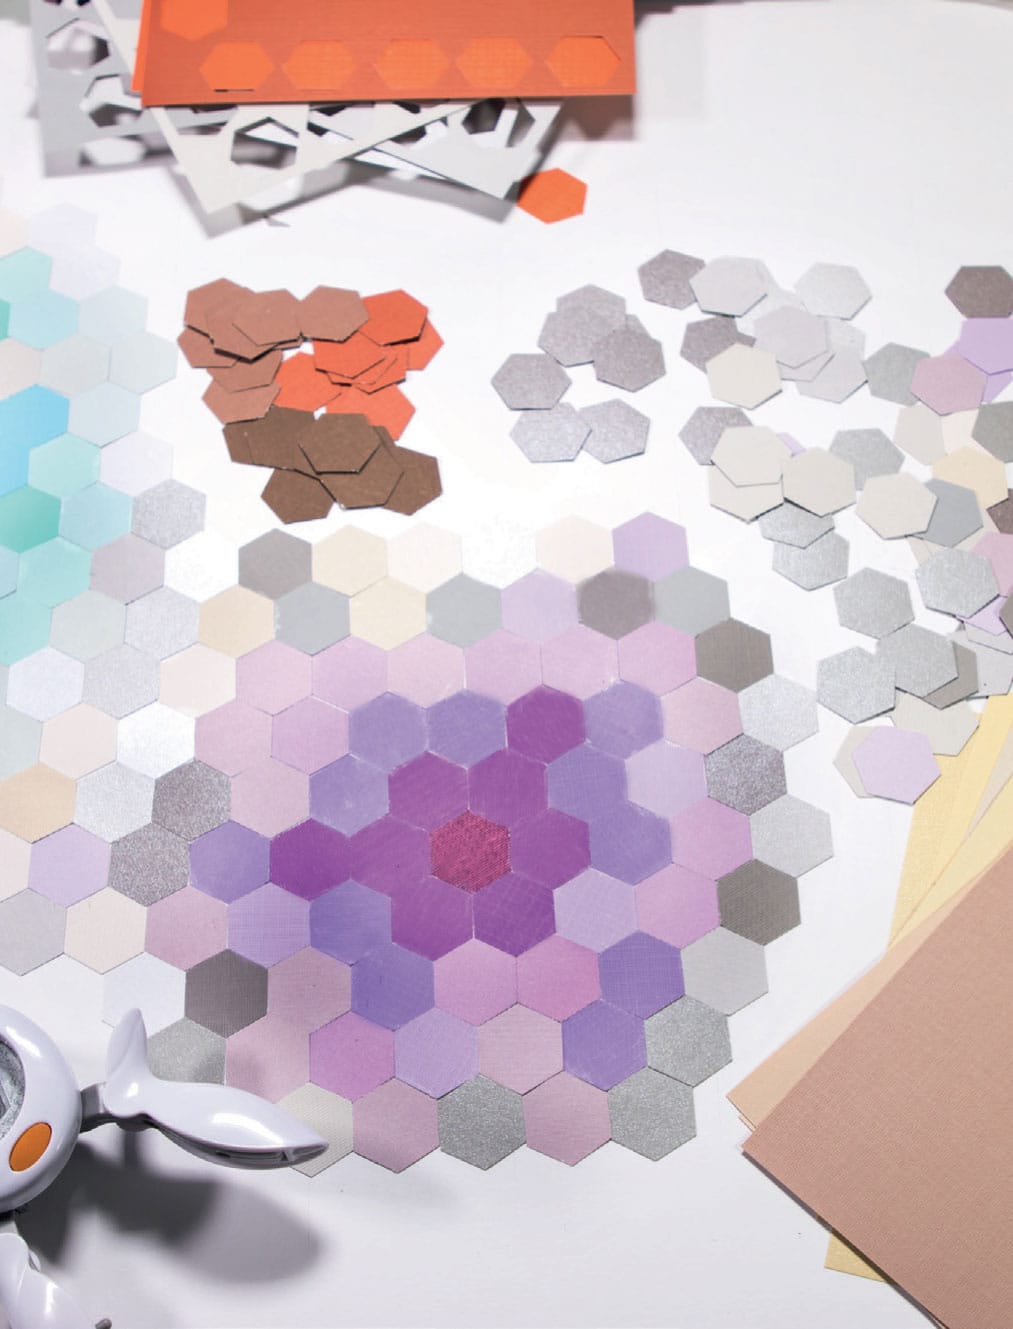
2 Transition to the next ring, this time working from the neutrals to high chroma. A note on perfectionism and mathematical precision: You can exercise that kind of precision with collage, but I think it’s usually pretty boring. I prefer to wing it. For instance, my blue orb is much bigger than the pink orb, and it’s not supersymmetrical. I think that creates a dynamic composition with unexpected visual interest. Either that or I’m kinda lazy.
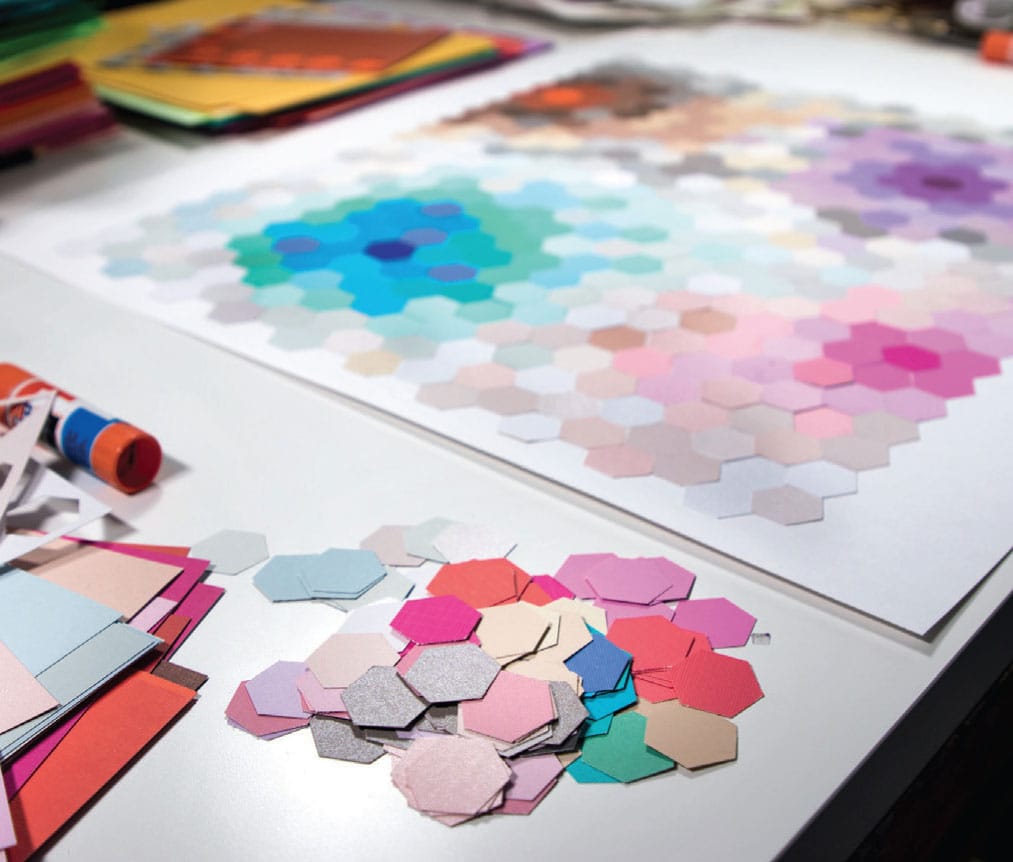
3 Continue to transition the colors to the next series of orbs. As usual, when I was done, I saw a lot of things that snagged my eye, not in a good way, and I adjusted them by picking a better color and hexing it right on there.
VARIATIONS: SWITCH IT UP
You can do a similar project with triangles and a different color palette. In this project, there’s less of an orblike locus, but there are color transitions and large sections of neutral, transitional colors (grays and beiges).

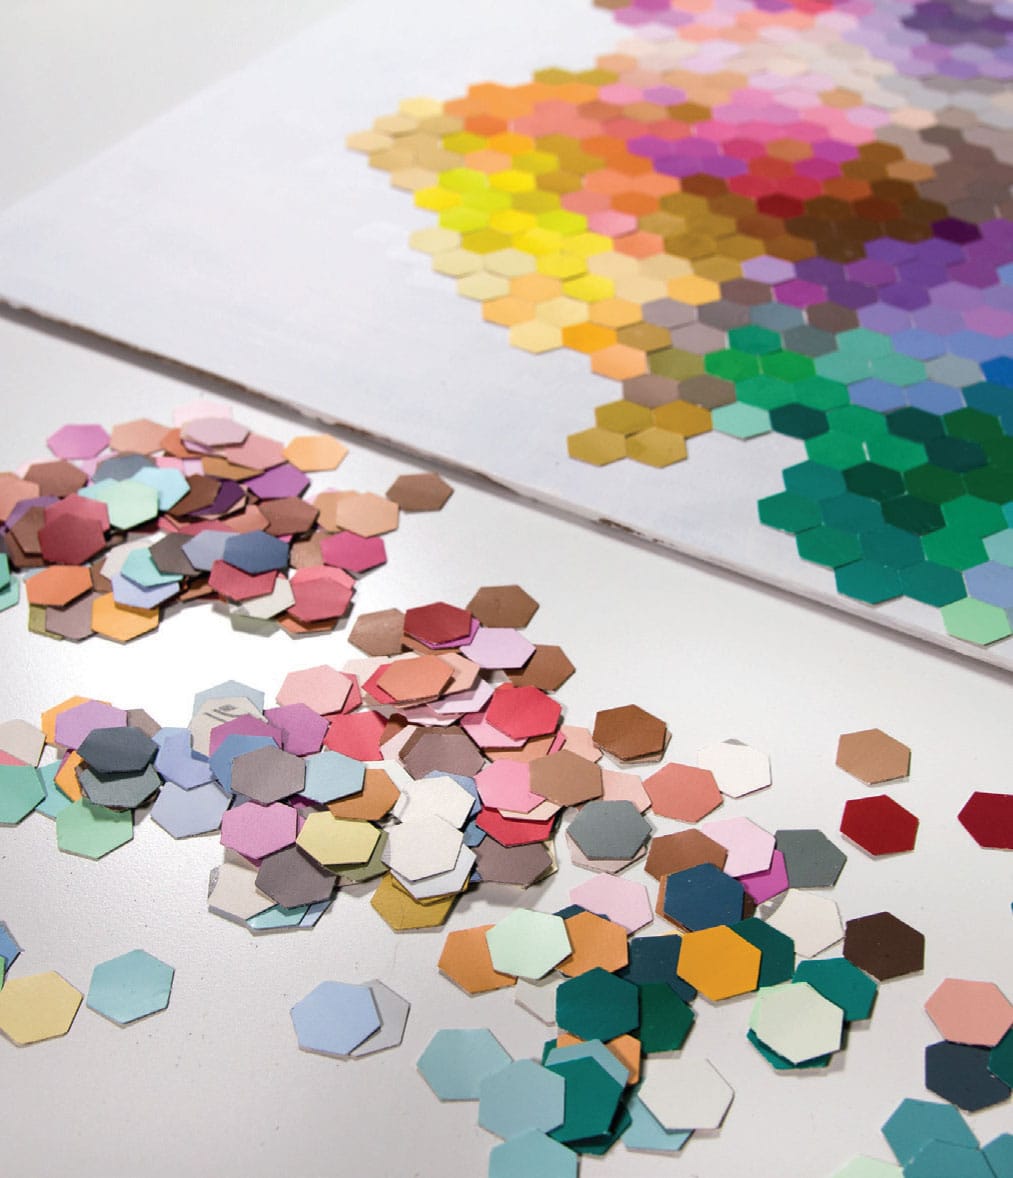
Mandala Hex
You may have heard of the Tibetan Zen monks who laboriously create beautiful and intricate mandalas out of colored grains of sand, spending weeks and months, and then ceremonially destroy them and release the sands into a river. For some people this probably sounds like punishment, but for me it sounds like exactly the kind of task I could use to focus my monkey brain and allow the spirit to run with the wolves. If the monks are hiring, I’m available. Can I bring my husband and my wine and my dystopian zombie audiobooks? (Fun fact: I love apocalyptic fiction.) Oh, maybe those things aren’t appropriate for a monk’s life? I guess I’ll just be over here with my wine, punching teeny, tiny hexagons.
SKILL LEVEL
Moderate to possibly annoying (if you like to knit, you’ll like this project)
SKILLS LEARNED
Attention to detail; peaceful om
MATERIALS
Crafter’s card stock
Small hexagon punch
12” x 12” (30.5 x 30.5 cm) premade frame
Glue sticks
MESS LEVEL
I found tiny hexes in my bra and in the dog’s tail
TIME
A week? A while?
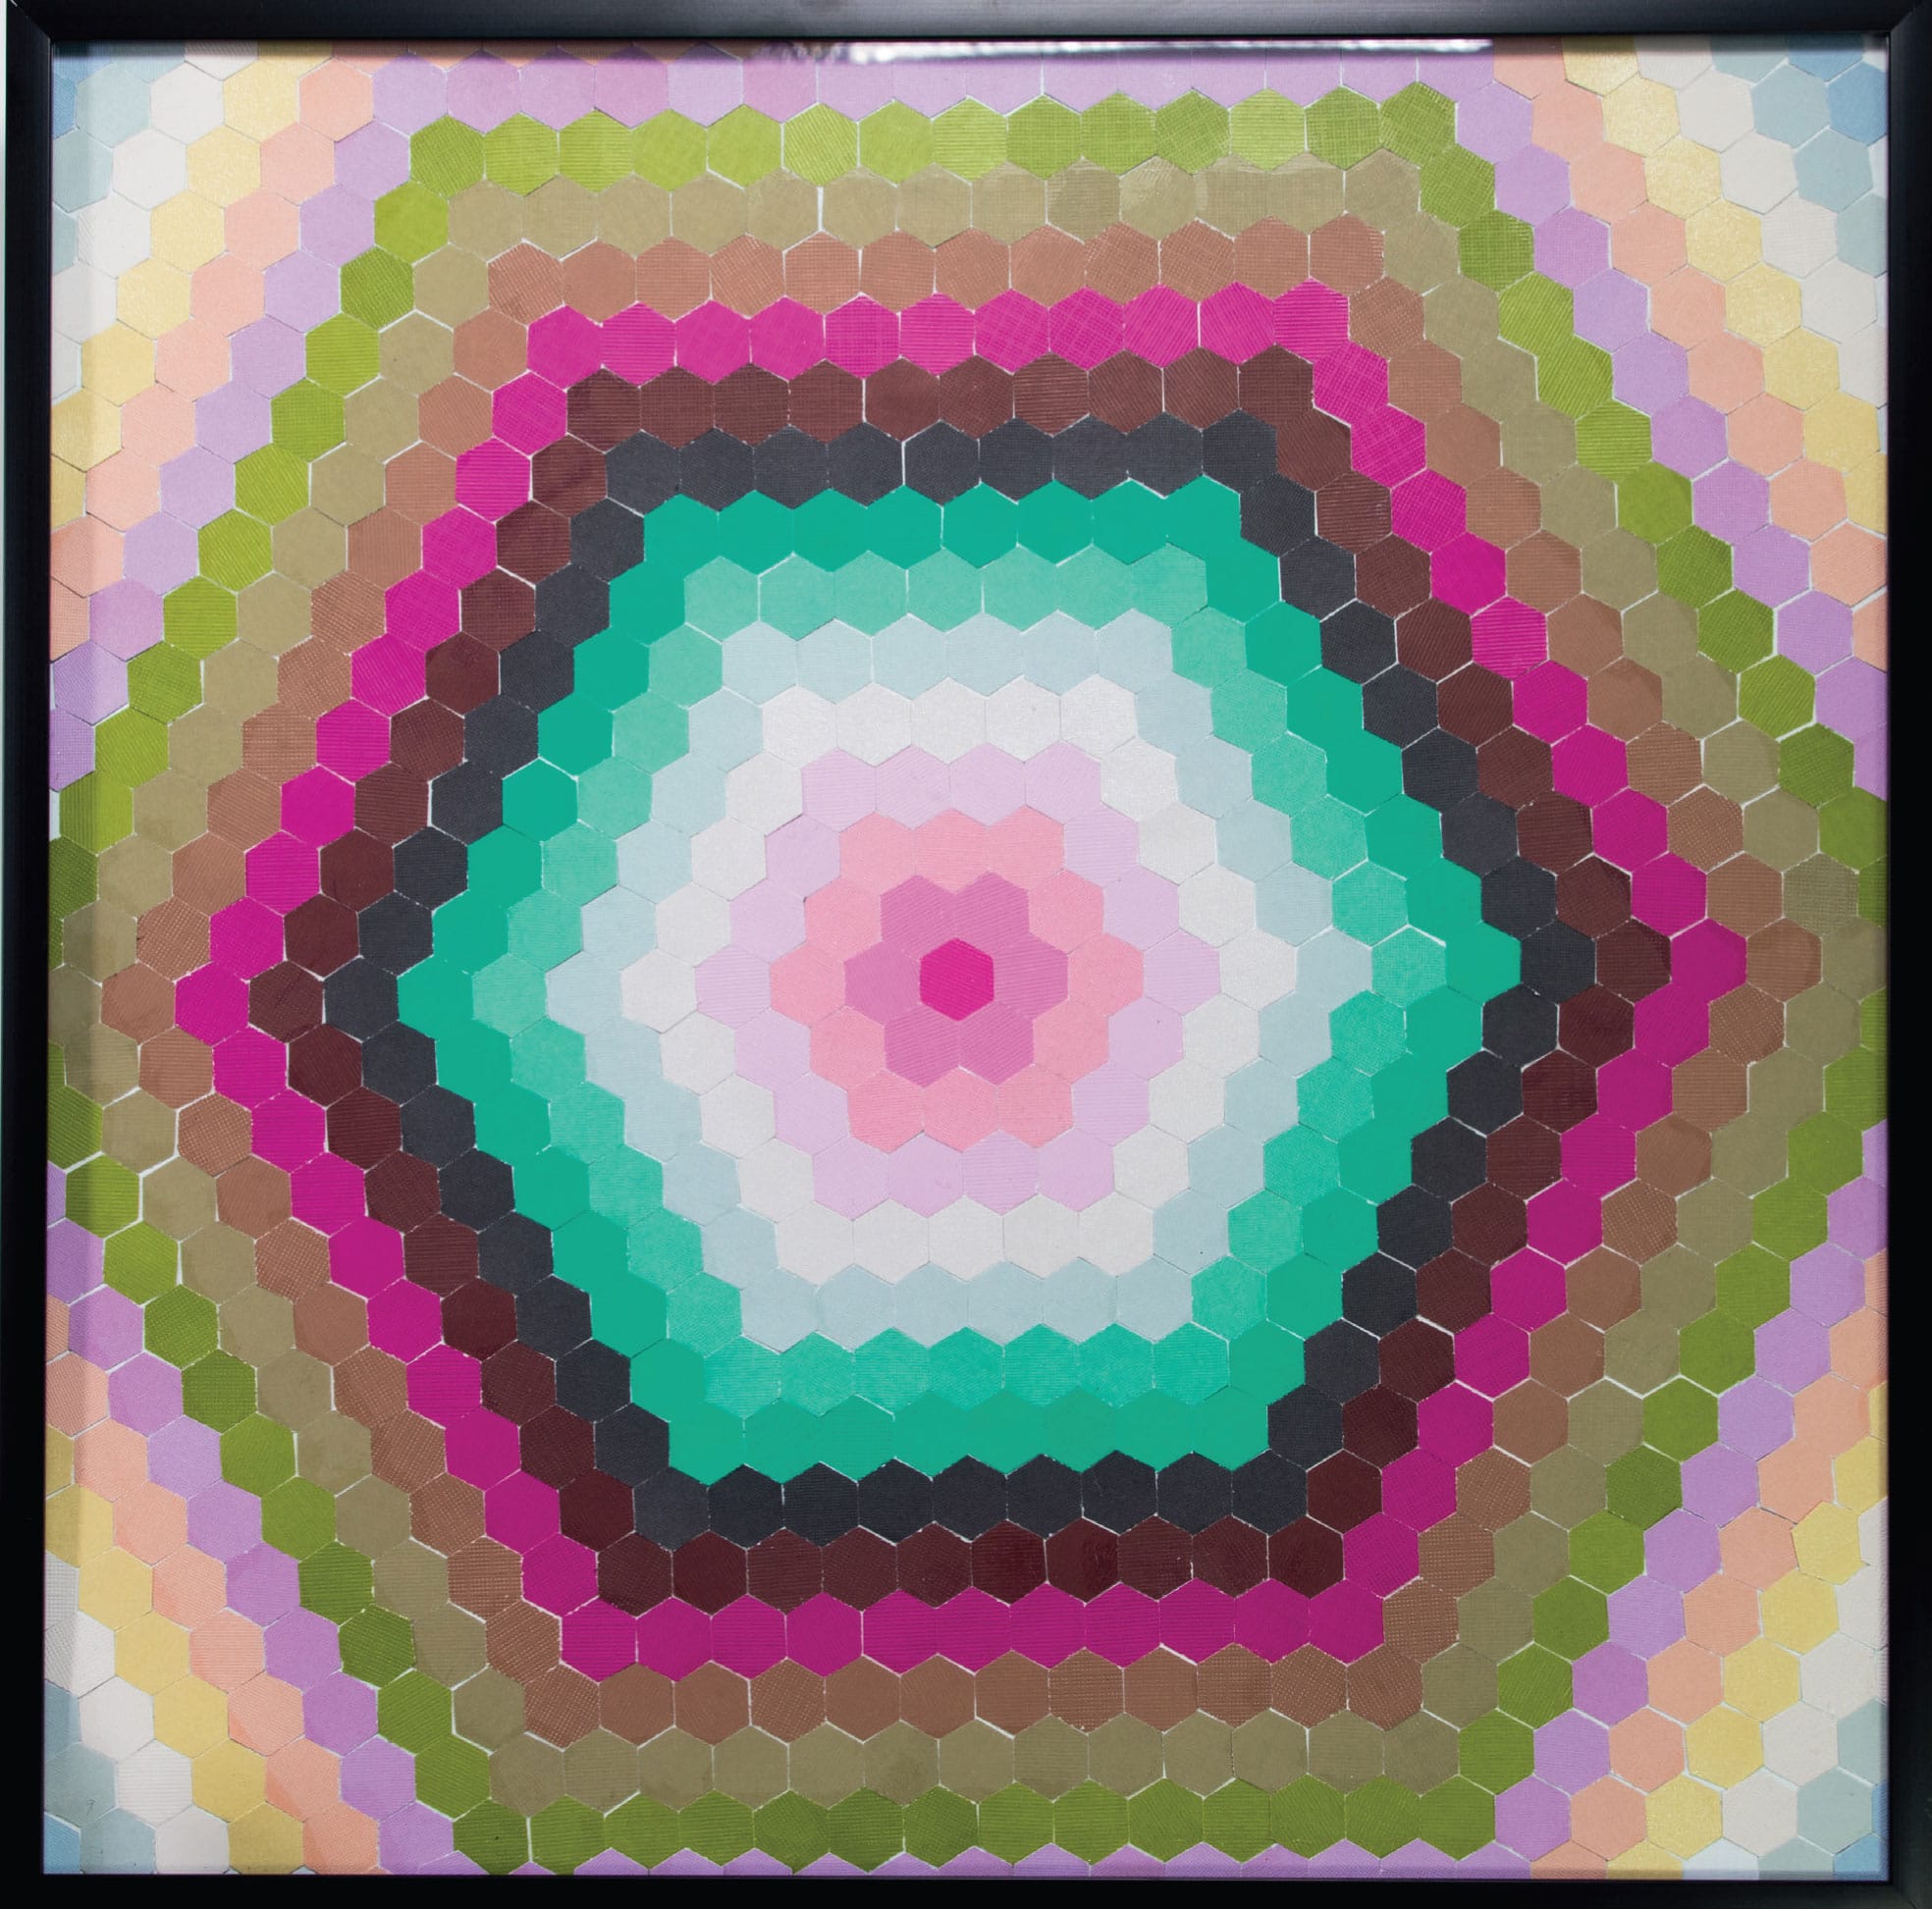
1 Use a ruler to make a mark in the center of your support. I painted my hardboard with white primer first. It makes it easier to see the colors and protects the collage from acids in the material.
2 You can make color decisions at each stage in the rings around the hexagon, or you can roughly plan them out. I did five or six rings in advance. Fan out your card stock colors and reorganize them a bit until you have the color progression you’re looking for.

3 Starting from the center mark, apply concentric hexagon rings in connected colors to create a sense of tree rings. It’s pretty nigh impossible to avoid getting gunky glue on the tiny hexagons. Even though it dries clear, it can sometimes be seen. Depending on the quality of your card stock, it is possible to wipe off dry glue with a bit of damp paper towel.
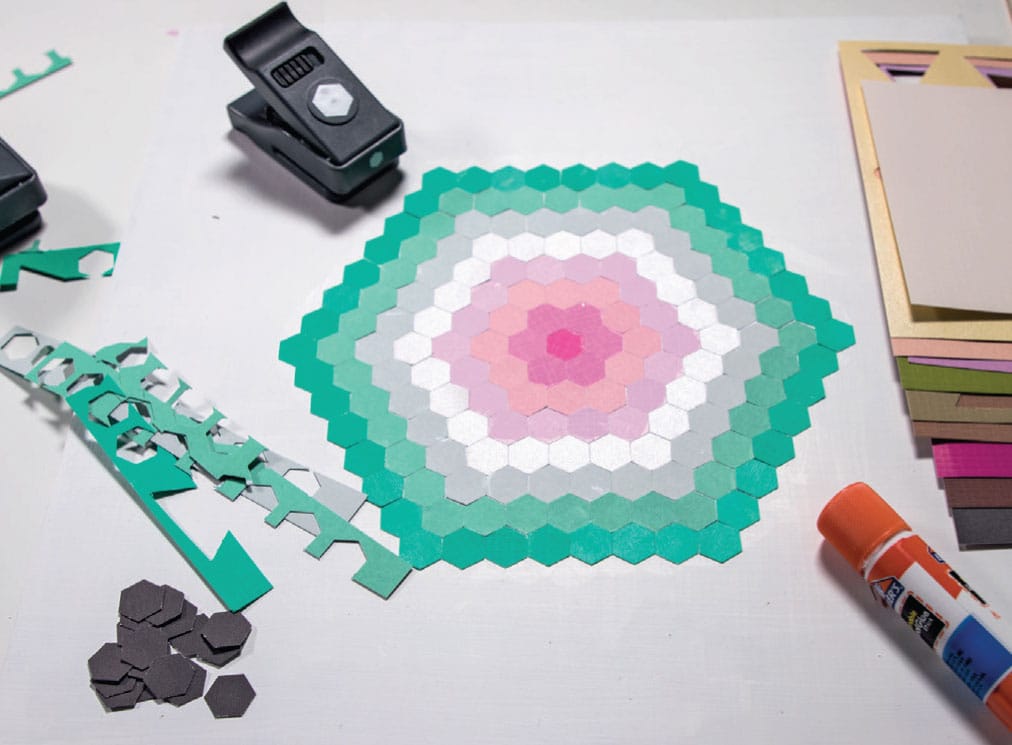
4 Add the collage in rings around the hex until you reach the edge. When you’re done, trim the edges, pop it in the frame, and you’ve got art! Or, ceremonially shred it and put it in the river. Your choice.


Hex Appeal
Here’s round two on grandma stories—this time the other grandma. Grandma Gladys was a pie-baking farmer’s wife, a low-key lady. She did quilting, knitting, and embroidery in her free time, when she wasn’t canning and baking bread and taking care of the livestock and children. Her busy schedule meant she was able to knit a full-size blanket and/or sweater only once every two weeks or so. And crochet some doilies and embroider some dolls’ dresses and darn socks and beautify her kitchen towels with applique flowers and prep the house for Christmas with all handmade décor. Anyway, the only time I saw her mad, literally spitting mad, was when I found her embroidery thread box and decided to “rearrange” it. My method was to unspool all her embroidery thread from their holders and carefully pile them up on her bed. (I had removed the quilted blanket to better see the colors on the white sheets). Well, you can see where this is going. When Grandma found me, it must have appeared as if a cloven-hooved devil was cavorting on her disheveled marriage bed while tossing her treasured thread in the air like confetti. For the record, that’s not what was happening. Everything I was doing made sense to me at the time—and still does. (For reference, see how I rearranged the Walgreens nail polish display with Grandma Cleo shown here.)
SKILL LEVEL
Moderate trending to absurd, if you like that sort of thing (I do)
SKILLS LEARNED
Intuitive color
MATERIALS
Crafter’s card stock
Decommissioned paint chips
Glue stick
Small hexagon punch
MESS LEVEL
Not permanent, but prodigious. Picking tiny hexes out of carpet is not my favorite.
TIME TO COMPLETE
2–3 hours

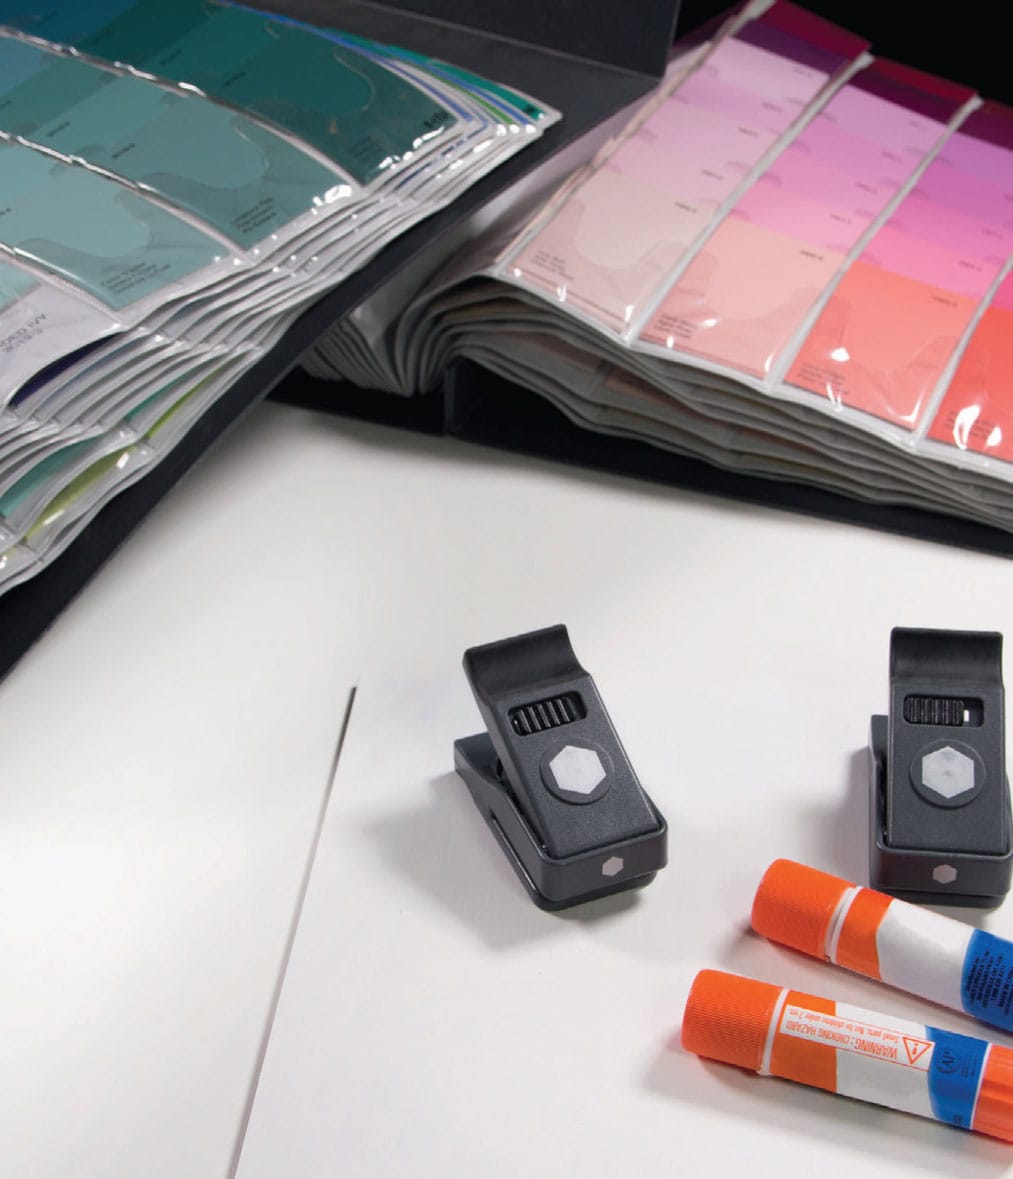
1 Like the Mandala Hex project (see here), I used a 12” x 12” (30.5 x 30.5 cm) pre-made glass frame with a hardboard backing (painted white). For this type of project, I work intuitively from section to section, following the three main color-mixing techniques (around the wheel, across the wheel, and up and down value). Depending on the available color range of the source material, the goal is to make all of these transitions throughout the whole. I was fortunate to be given a couple of books of ’80s interior-decorating color chips, and those served me beautifully for this project (thanks, John A). Standard crafter’s card stock will work as well.
2 Start in the center of the frame and find a rhythm of punching and gluing. I punch twenty or so different colors and apply ten, and keep up that rhythm till I have a mountain of extra hexes.
3 When applying, it’s easy to get the hexagons slightly off-kilter. Gaps may develop here and there. Not being a perfectionist, I usually just compensate for these gaps by doubling up and overlapping hexes when needed.
4 Cover the whole surface, then trim the overhanging hexes from the sides so that they will fit in the frame. It works best to trim these when the glue is dry. Sometimes, after I cover the whole surface, I add more hex colors in different spots to make sure the overall composition is pleasing to me.
Sashiko
I’ve been painting this pattern for a while now. I love the multiple internal shapes—triangles, hexagons, and stars. A lot of my designs are actually variations on ancient motifs found in tile and other applied arts. This design and the art on the cover of this book are reminiscent of a style of Japanese stitching design called Sashiko that originated in the 1600s. Sashiko handwork was traditionally made with a white embroidery geometric pattern hand-stitched over dark navy cloth. I found this particular pattern as a stencil in a craft store. And fell in love.
SKILL LEVEL
Moderate to difficult
SKILLS LEARNED
Analogous color
MATERIALS
Template: shown here
12-color watercolor kit (see here)
#2 round brush
Paper towel
MESS LEVEL
Minimal
TIME TO COMPLETE
60 minutes

1 This painting is made using analogous colors. Analogous colors are those that are next to one another on the color wheel.

2 Use a #2 round brush or smaller to paint the tiny triangles. Outline each shape with the color and then fill it in. These tiny shapes take a steady hand and careful attention to detail. Some artists use masking fluid to achieve a hard edge and intricate detail, but I have not found that to work very well. It is tedious to apply, requiring the same steady hand you’ll need to paint the shapes, and it causes more problems than efficiency. Since I’m right-handed, I usually work left to right on these complicated designs so that I don’t drag my fist across wet paint.

3 Mix the paint using The Mother Method (see here). Paint each triangle a slightly different color than the one before so that the pattern gradually changes as it moves across the page. You can use the water crystals technique (see here) to create tiny blooms in some of the triangles. This also generates intriguing textures.
Enemies of Flow
Let me be clear. There are enemies. There are enemies that want to prevent you from discovering something new. There are enemies that want to keep you in your safe, private, TV-watching world. All of those enemies are located pretty much in one place: your own head.
Now, I’m not opposed to your brain. It’s your prefrontal cortex we’ve got to deal with. As we’ve discussed, that’s the part of your brain that’s in charge of extremely important human skills, like complex planning, personality expression, reasoning, and judgment. You would think those basic life skills all seem like helpful things when you are trying to create something, but here’s the problem: The prefrontal cortex is extremely conservative. Studies have shown that social stresses (like public speaking or—gasp—a public art exhibition)are to our brains equivalent to life-and-death stress, like being stalked by a tiger in the woods. Who wants to eat you. Who might not kill you before he starts eating you. This is how most people feel about public speaking, amiright?
So your prefrontal cortex—in league with several other survival-centric parts of your brain—would like to talk you out of taking any kind of risk that is outside the very safe, known confines of basic survival. And to make sure you get the message, it offers you several strong impulses in times of experimentation. Be on the lookout for the following:
• Perfectionism
• Procrastination
• A negative script about your efforts (see Art Scars, shown here)
• Constant comparison
Perfectionism and procrastination go hand in hand. We know that we get good at something when we do it a lot (fun!), but when we want to learn a new skill, it is hard and awkward at first (not fun!). So because we’re not cool with the necessary failure that’s inherent in new learning (prefrontal cortex screaming danger!), we procrastinate starting something new (fear). Yes, procrastination is a function of fear, not laziness. Not doing the dishes is probably laziness. Avoiding starting a new, untried, and untested project is probably fear. Meanwhile, when we get around to actually making something, to mitigate our anxiety with the land mines of failure looming at every brush stroke, we are constantly saying to ourselves or others: “This sucks, I’m not artistic, I don’t have talent, this isn’t good, everyone else’s is better.”
The prefrontal cortex is there to help us survive, so it’s unreasonable to ask it to shut up. It’s like holding back the tide. Can’t fight city hall, and you can’t fight your brain’s powerful wiring. But we can set up conditions for it to quiet down. Make a list of known flow triggers and do those things more. In new activities, follow the 4 percent difficulty rule. Discipline yourself to not mutter curses and insults at your efforts. Treat yourself like a beloved child. All that constant jabber-jawing, thinking, planning, self-conscious reasoning will be set on mute.
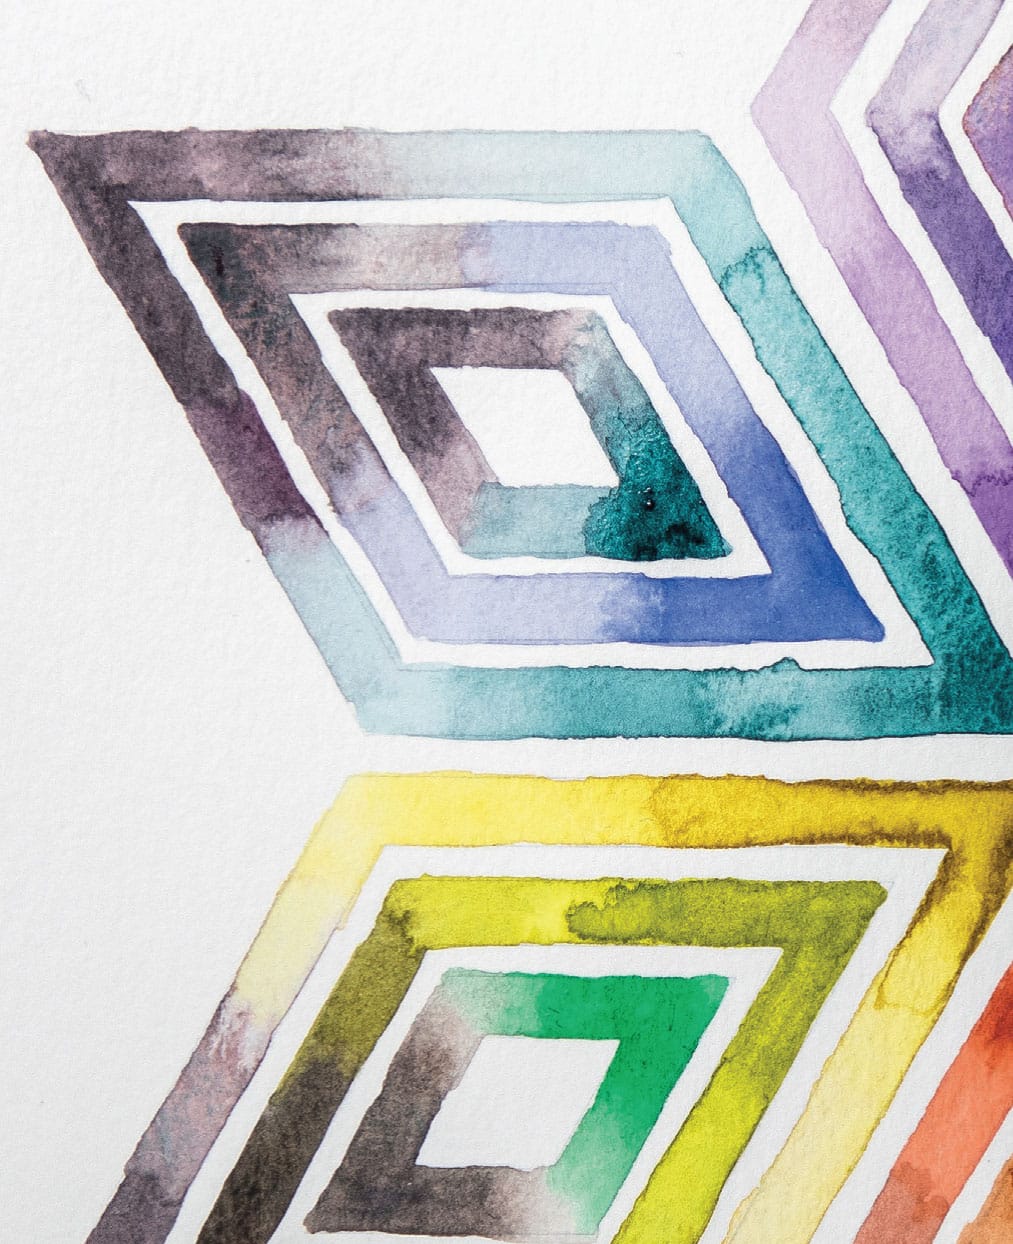
Radiating Diamonds
Let’s talk about steady hands for a second. I do not use masking fluid. Truth be told, one would have to have a steady hand to apply the masking fluid the way I need it, so what’s the point? No time savings whatsoever. In the social media comment world (there’s always good stuff to read at 3 a.m. when I can’t sleep), there are people who insist that I use some kind of aid to achieve my hard edges. Masking fluid. Tape. Witchcraft. Wizardry. Nope, just the steady hand given to me by the good lord. Also, probably, the muscles in my hand I’ve built up over the years (and yet, my hands look so feminine). By the way, I’m really good at painting trim, and I never tape. I’m pretty sure the steady hand is a learned skill, so if your edges look kind of wobbly, don’t despair—you’ll get better.
SKILL LEVEL
Moderate
SKILLS LEARNED
Transitioning wet-on-wet color
MATERIALS
Template: shown here
12-color watercolor kit (see here)
#2 round brush
Paper towel
MESS LEVEL
Minimal
TIME TO COMPLETE
60 minutes
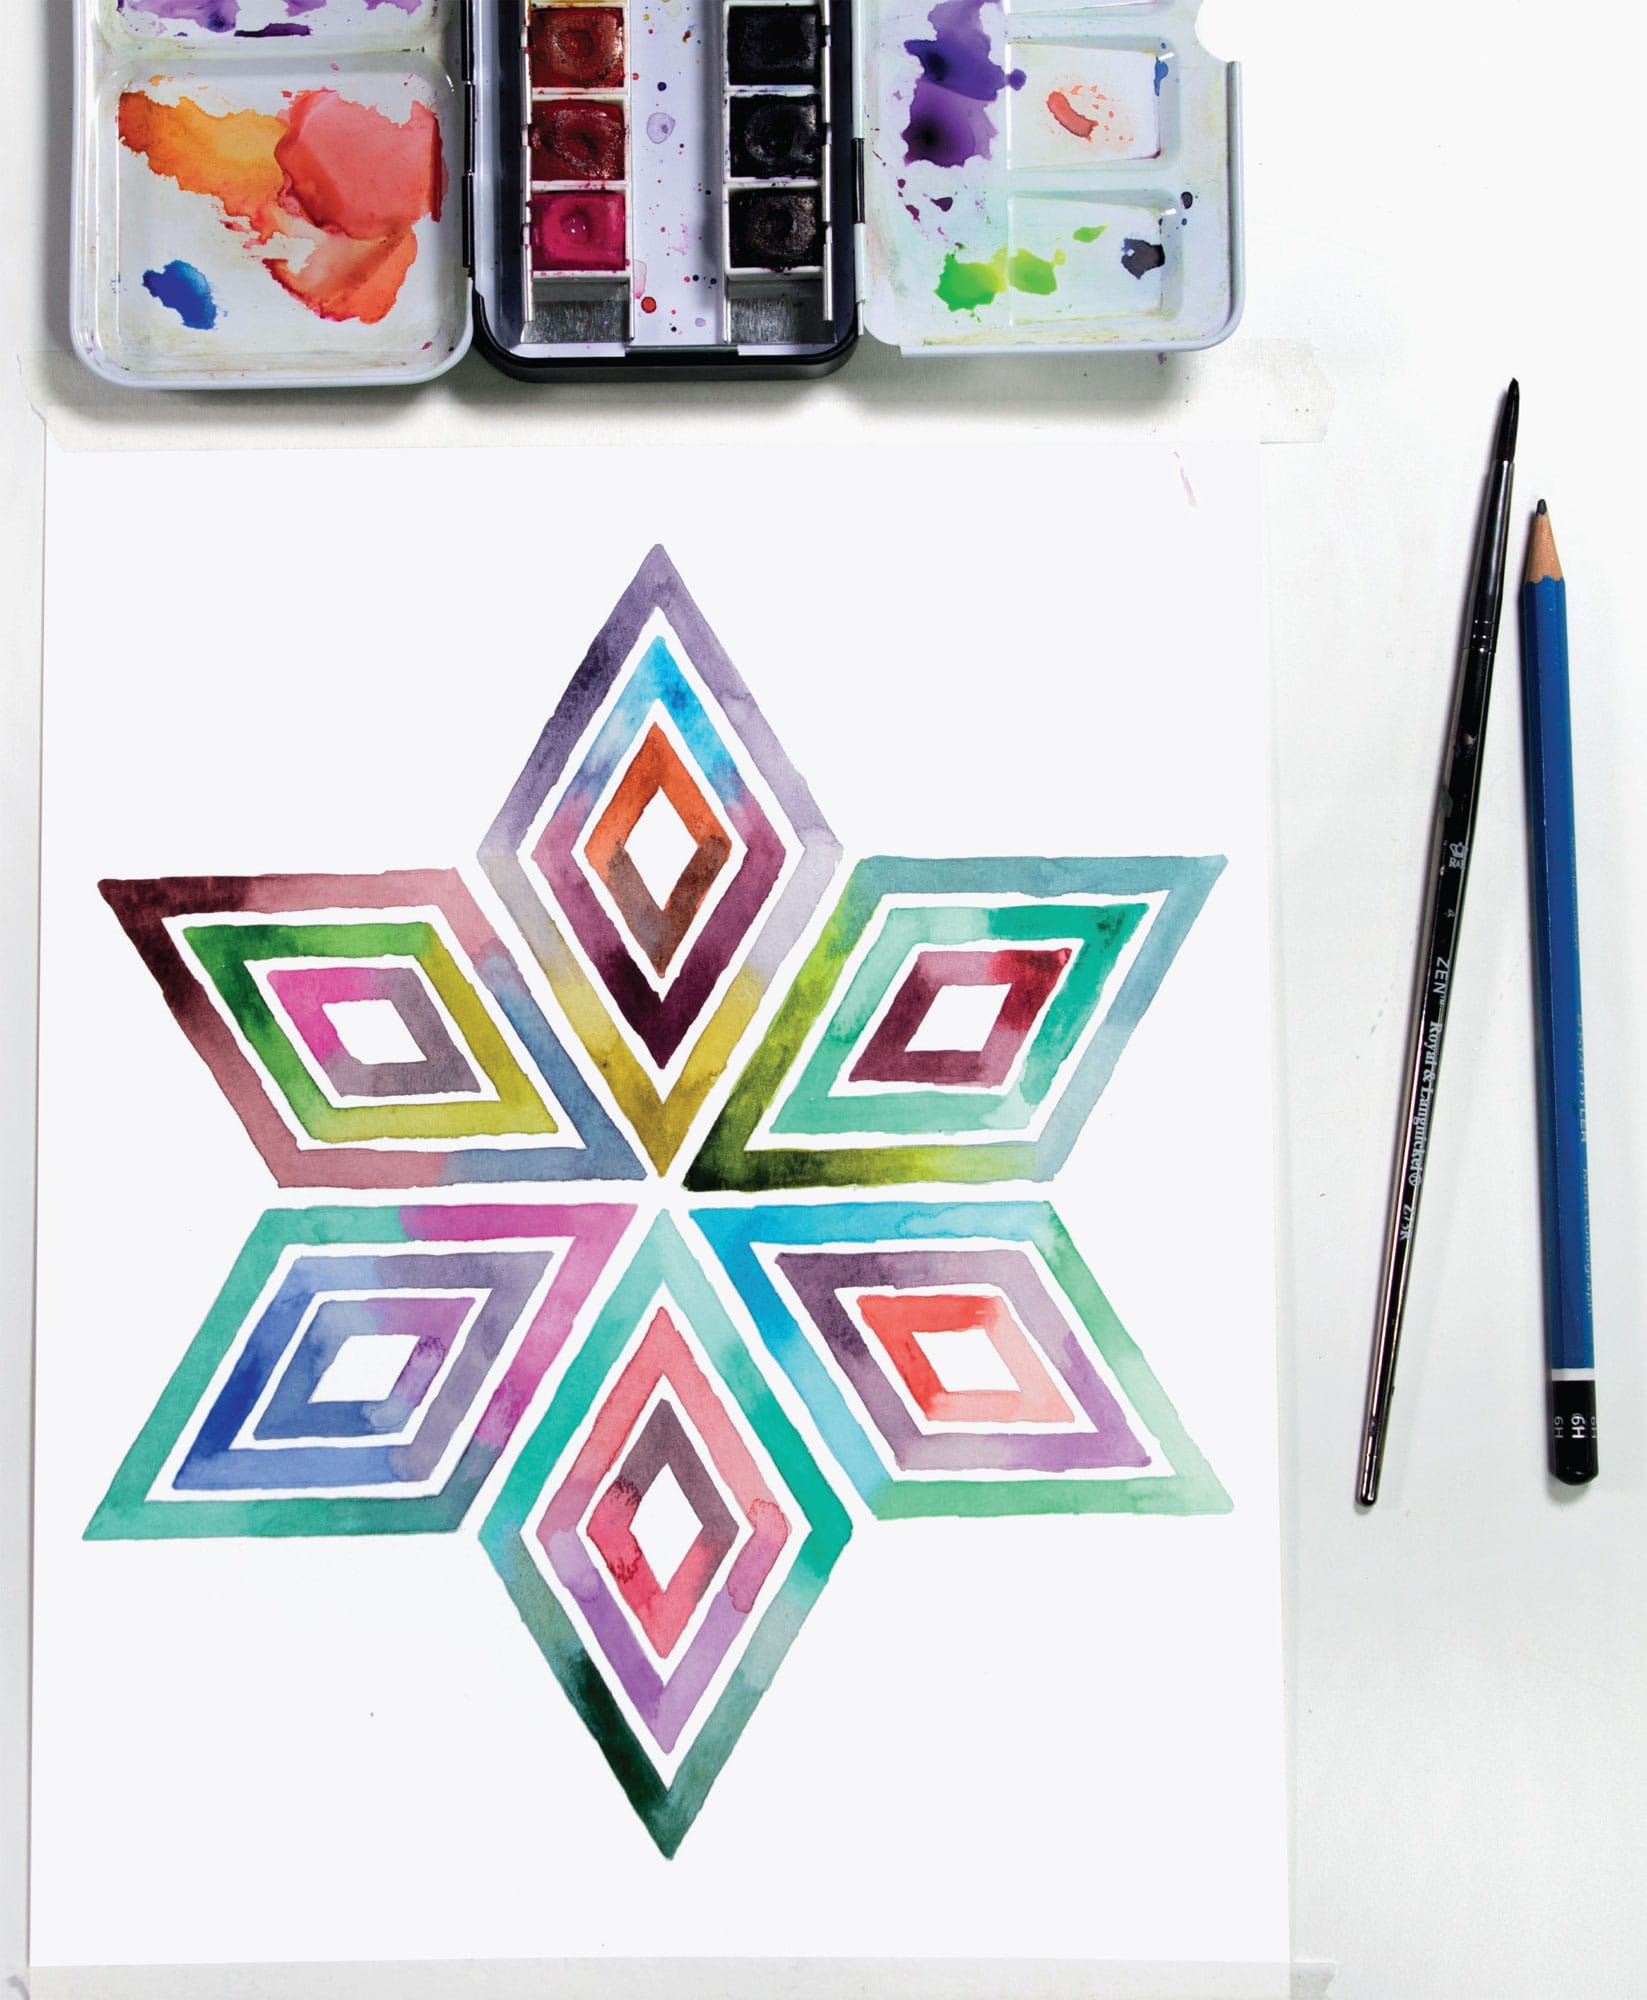
1 Making watercolor patterns glow and shimmer is extremely satisfying. In this design, I transitioned the color to gray, white, or another color across the span of the diamond-shaped band. Watercolor will tend to stay where the paper is wet. That means you can lay down a fairly complicated shape just with water and the color will stay within its bounds when you drop it in. If you have too much water, then water can start to pool and drip.
2 To get this method to work, you need to capitalize on the wet. Start at one point of the diamond and pull a concentrated color down either side from the point. With the color still quite wet, introduce the next color or more water.
3 The two colors will interact in interesting ways and naturally create value transitions that seem to pulsate. You can experiment by painting the entire shape with just water and then dropping color in at different points.

4 For this star, I concentrated the paint on the exterior point of the diamond, and when I had painted a V in highly saturated colors, I added more and more water to fill the entire shape.

5 For this look, I immediately transitioned one color to a completely different color. I was somewhat random about my color choices.
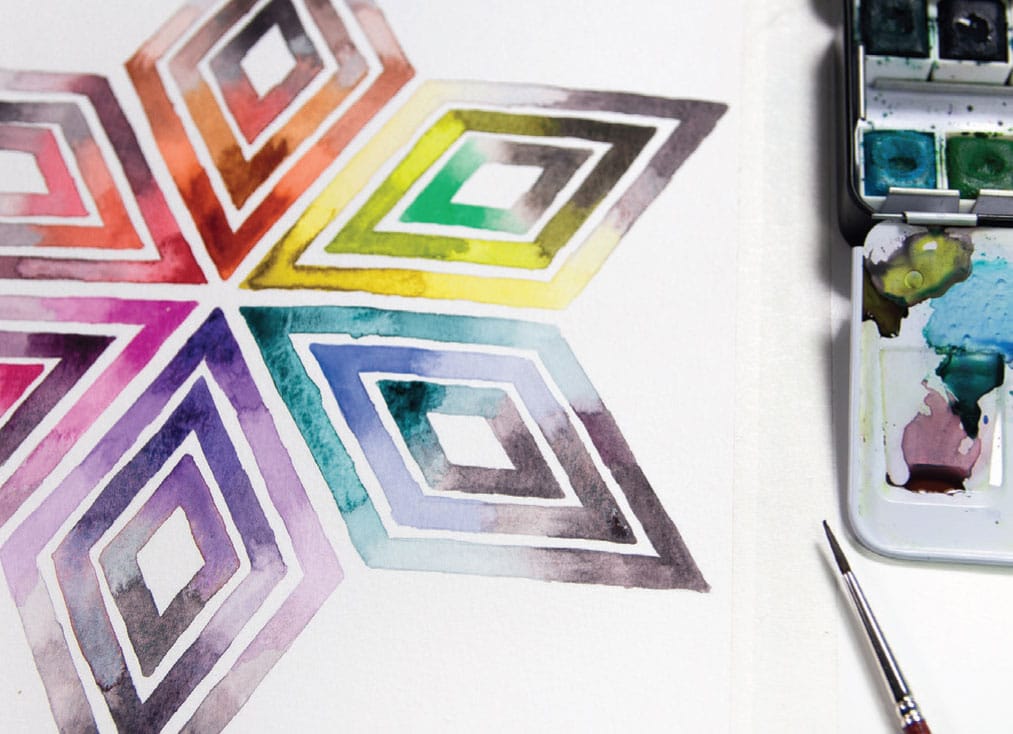
6 For this dramatic little number, I introduced a hand-mixed gray/black made with a blend of imperial purple, indanthrone blue, and lemon yellow. I kept the color the same for each ring in the star, with slight variations of tone.
Antagonistic Complements
I don’t know why they call them complementary colors, because frankly I don’t think there’s much complementary about them—in fact, they clash. The pairs are made of colors that are across the pie from each other on the old standby color wheel. Red/green is one complementary pair, blue/orange, and yellow/purple to name a few. Certain holidays notwithstanding, these are the combos your mom told you not to wear at the same time. I would much prefer to call them antagonistic colors.
But here’s the magic. If you mix two analogous colors together, like blue and purple, you get blueish purple. But if you mix a complementary set together, Bob is your freaking uncle. You have unlocked the door to beautiful neutrals and grays and toned-down primaries that will have you painting hexagons for years. Two complementary colors can be mixed in various amounts to create a bajillion different tones.
SKILL LEVEL
Moderate
SKILLS LEARNED
Complementary colors
MATERIALS
Template: shown here
12-color watercolor kit (see here)
#4 round brush
Paper towel
MESS LEVEL
Minimal
TIME TO COMPLETE
60 minutes

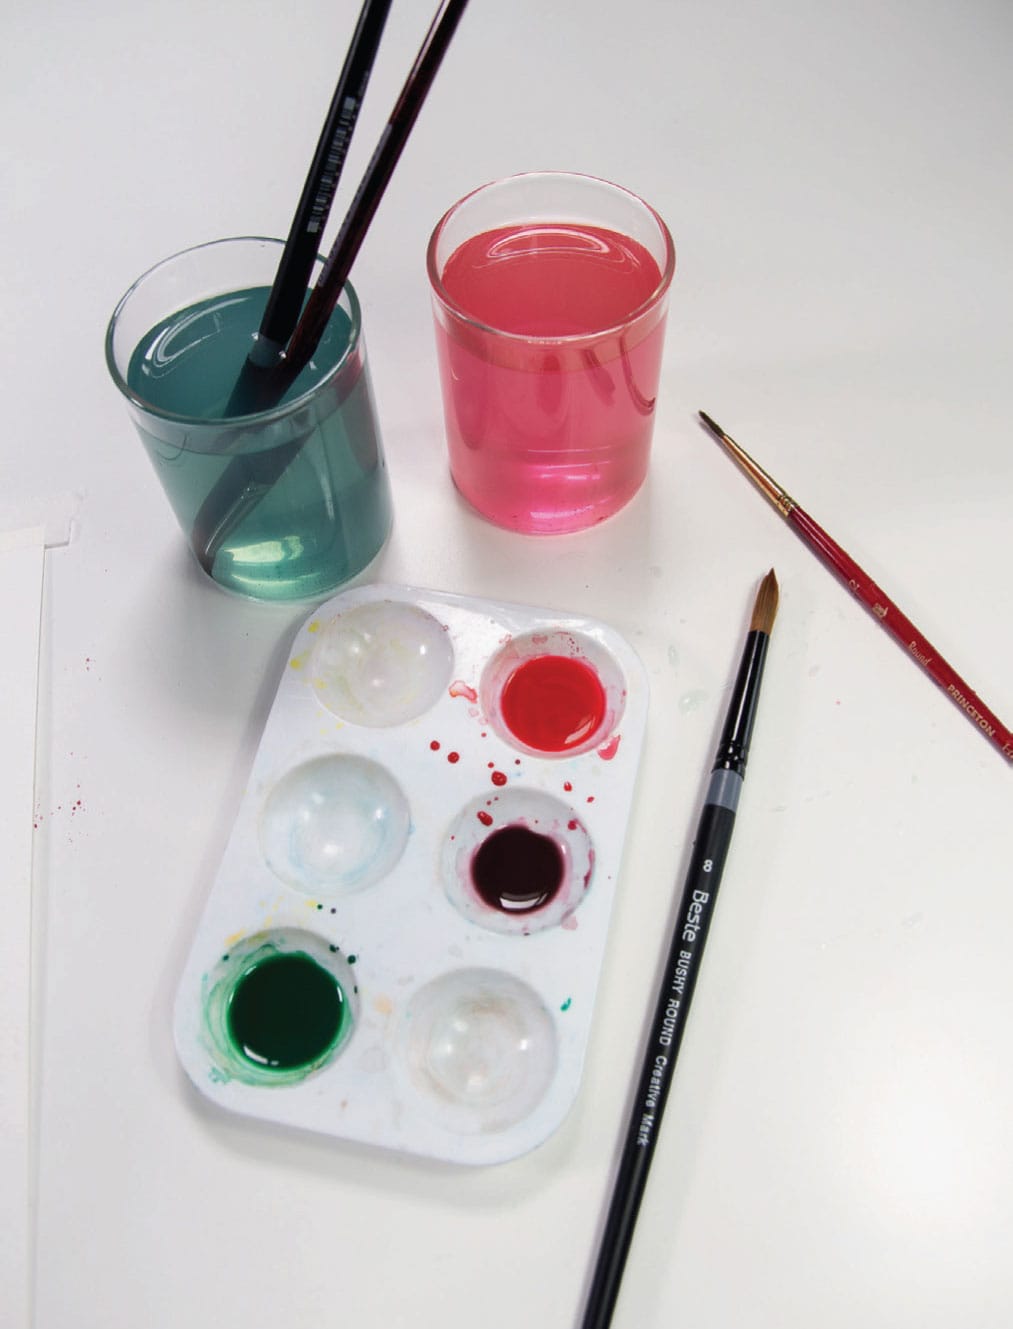
1 Use the paint palette with small wells to mix up the pure colors into the value strength you want. A blotter sheet is key because it’s impossible to gauge the strength of the color in the mixing palette. Start laying down the two pure colors on whichever opposite sides you designate.

2 You should have a decent amount of watery coral in the proper strength in your mixing well. Those two are your Mother paints (see here). By dipping and swabbing your brush, transfer some of those pure colors into a second well. You should end up with four wells of two pure colors.

3 To achieve the next color transition, a little goes a long way. With a rinsed, clean brush, dab the watery turquoise paint the tiniest bit and mix it into the coral. Use the blotting sheet to gauge the color. For the first color shift, the color should still look coral, but the tiniest bit duller.

4 Continually add a tiny drop of pure turquoise to your mix and paint your way down the hexagons. The middle area should look fairly neutral, a nice gray, neither reddish or bluish.
Faded Hex
If you run a casual Google search on “color harmony,” you will get a lot of theories. Many people have sought to find a “rule” of color harmony, some kind of computation that can be applied to different colors in different situations and, hey, presto! That color combo looks amazing! But can there be consistent, peer-reviewed rules assuring us color harmony? Good news! There’s actually a formula for that very thing:
Color harmony = f (color 1, 2, 3 + n) * (ID + CE + CX + P + T)
The formula’s author, Zena O’Connor, says (see here for the citation):
In line with current theoretical paradigms, the conceptual model is essentially probabilistic rather than predictive; plus it is idiographic rather than universal and deterministic . . .
Wow, thanks for . . . explaining. If you had trouble following that, don’t worry, I speak grad school! What O’Connor is saying with her formula is that color harmony is dependent on individual preferences, settings, social trends, and mood. In a nutshell, color harmony is completely subjective. Right. Got it.
So now we’ve established that universal color harmony is a fruitless pursuit. I’m sorry.
SKILL LEVEL
Moderate
SKILLS LEARNED
Gradients, color shifts
MATERIALS
Template: shown here
12-color watercolor kit (see here)
#4 round brush
Paper towel
MESS LEVEL
Minimal
TIME TO COMPLETE
60 minutes
1 These hexes really ring my current theoretical deterministic paradigm for color harmony. There’s something about this pattern (obviously, hexes are a long-term obsession), but also the transitions with the jewel tones.
2 This project combines all of The Mother Method (see here) paint transition techniques: around the wheel, across the wheel, and up and down value. And beehives, obviously, so that really takes it up a notch. Rarely did I use an unmixed color straight from the pan, and I did not clean my palette in between mixing. When I don’t need to have a highly saturated, pure color, I enjoy the grittiness of an unwashed palette. Actually, I enjoy the grittiness of a great many unwashed things, but that’s for another book.

3 All the colors used are mixed to some degree by their complement and the next color line. Working from dark to light, use the same batch of color for each line of hexes and gradually add water.
4 The tiny scale of the hexes takes some patience. If you look closely, you will see a lot of imperfections in the execution.
More Enemies of Flow
Other enemies of flow and creativity:
• Narrow definition of what creativity is
• Expectations of ourselves
• Unreasonable expectations of our abilities (linked to perfectionism)
• Overvaluing what other people expect or wish us to do
• Associating creativity with poverty
• Associating creativity with eccentricity
• Conformity
• Convergent thinking
• Unwillingness to let go of old patterns
• Feelings of inadequacy
• Fear of judgment
• Fear of vulnerability
• Inability to deal with our subconscious or deeper feelings
• Unwillingness to be a “novice”
• The myth of “talent” (and fear we don’t have it)
• The conception that people who are really excellent at something do it effortlessly
• Feeling like our efforts are insignificant or childish
• Feeling that everything has been done before
• Judgments about other people’s “bad art”
• Overemphasis on creative surrogates—other people that are makers; drugs and alcohol; or other ingestible chemicals (such as Doritos); various entertainment (such as Netflix)
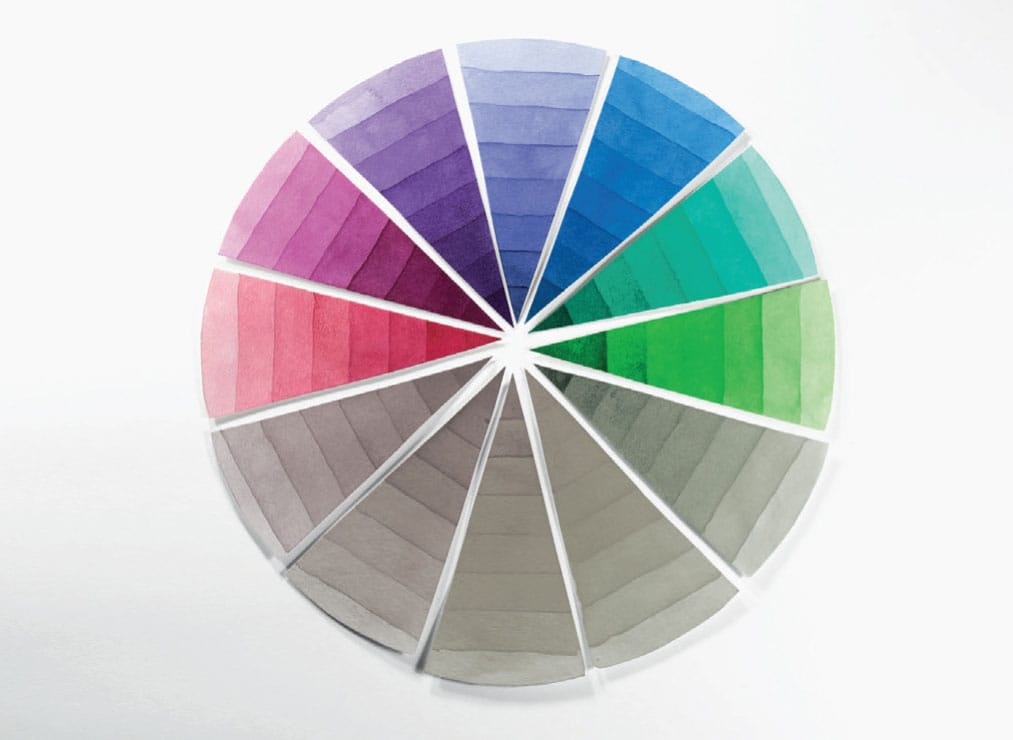
Working with Neutrals
At heart, we’re all four-year-olds. Or birds. Or four-year-old birds. We like brightly colored things and shiny objects. But, if you throw all the highly saturated color-wheel colors at a painting, things can get a little overwhelming. You might end up with a symphony in which every musician is using the flute and is playing their own song. And I never liked the flute much.
In these last few projects, we dig deeper into combining complementary colors to create neutrals and grays and midtones. The next three paintings are all about how to tone down the color in certain areas to allow other areas to dominate the eyes’ attention. The two main ways to tone down color are to go up and down value (tints and shades) or to blend across the wheel by combining complements. When a color becomes a shade or a neutral, I call it “grayed out.” As you know, I don’t use white or black paint with watercolors, so these projects will be about creating shades and neutrals out of the standard twelve watercolor kit colors.
SKILL LEVEL
Moderate to advanced
SKILLS LEARNED
How to mix neutrals and gray
MATERIALS
Templates:
• Neutral Dots, shown here (shown in project shown here)
• Simple Star, shown here (shown in project shown here)
• Advanced Star, shown here (finished art shown opposite)
• Pink Champagne, shown here (shown in lesson shown here)
12-color watercolor kit (see here)
Various round brushes
Paper towel
MESS LEVEL
Minimal
TIME TO COMPLETE
60 minutes for each painting

NEUTRAL DOTS
With these dots, we’re using the same pattern as the dots color chart (see here). In this case, however, the dots are neutralized with their complement.

1 I selected five dots out of 144 to be my highly saturated focus points. Note how the eye really jumps to those particularly bright dots.

2 To make this painting, I planned ahead a little and selected two dots for the bright treatment. I wanted the colors around them to be linked to them but grayed out.
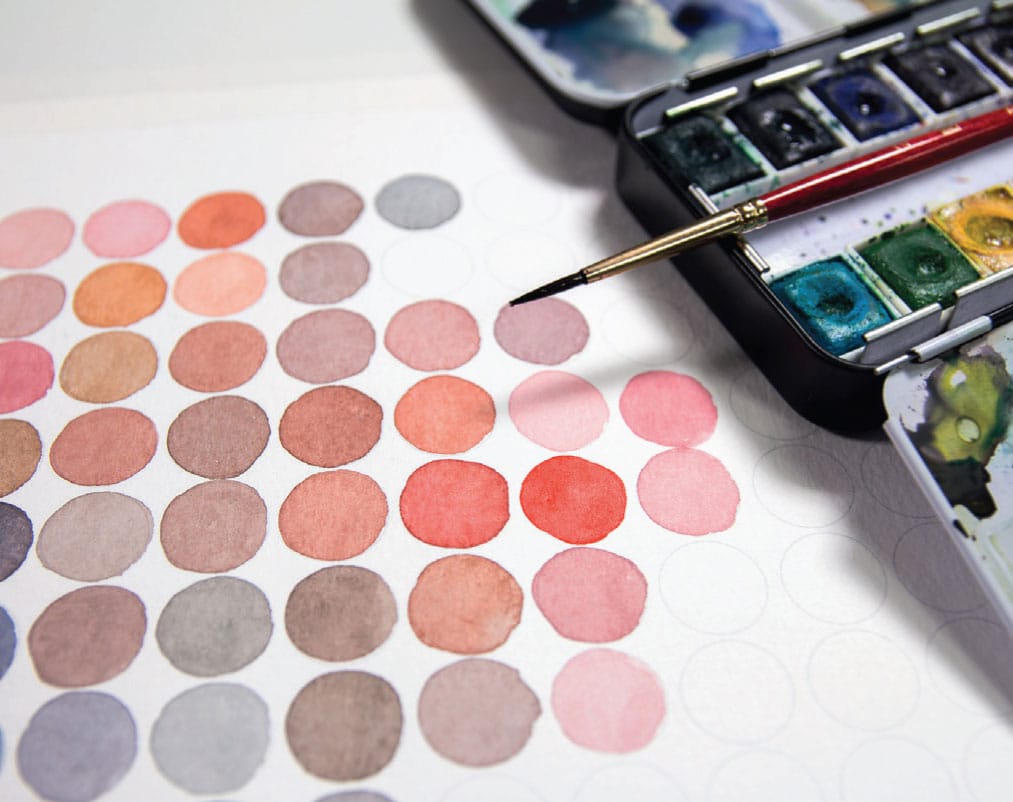
3 In the case of the coral orange dot in the upper middle, I surrounded it with other coral dots, but coral dots that were grayed out. I made sure not to create any color that would compete with the one bright coral dot in that area.
SIMPLE STAR

1 Note the difference between these two images. They are the exact same patterns. Above is made with colors around the wheel and up and down value; above right is painted with dark neutrals on the outside shapes, leading the eye to the highly saturated colors in the center. Both approaches have their merit, but above right has additional drama.

The image at the beginning of this project (see here) has the exact same pattern repeated seven times to create a recurring motif. The outside edges of the pattern are painted in a dark value with each color’s neutral. To achieve this, mix a color with its complement.

2 The middle ring is a slightly more saturated version of the color that fades into a lighter tone toward the center. To achieve this, mix a concentrated version of the color and paint it on the upper third of the shape. Dip your brush and, with a bit more water introduced, pull the still wet darker color down and in.
3 For the center diamonds, use a pure, unmixed paint tray color and incrementally add water to create a gradient inward.
PINK CHAMPAGNE
1 Use your gray skills from Antagonistic Complements (see here) to mix a nice pot of warm gray paint. Hmm, that sounds delicious! Gray paint soup, coming up.

2 Use the watercolor mixing palette with the shallow wells and a blotting sheet to play with the colors until you get a gray that you like. I used quinacridone coral and phthalo green (blue shade) in various amounts until I landed on the perfect midtone neutral.
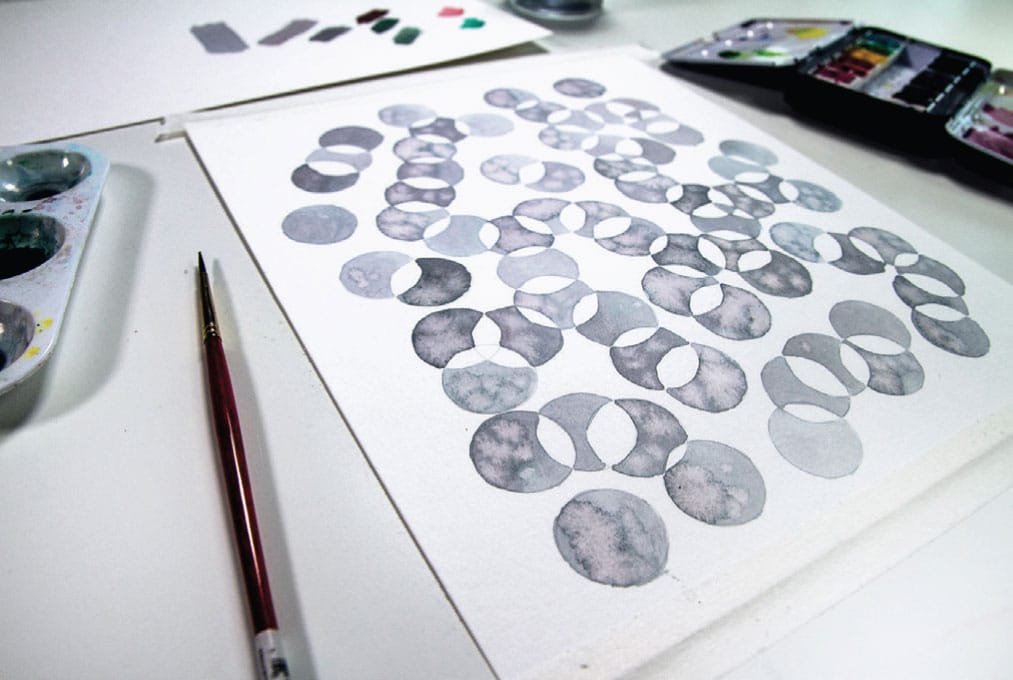
3 Add a bit of water to the mix to get the right value, and paint all the bubbles with the same color, but avoid painting the areas where the circles overlap. I added some water crystals to play up the granulation and enhance visual interest.

4 When the gray is dry, mix up saturated blends of coral and opera pink with a little bit of added yellow here and there. You can see that the pink really pops out of the gray bubbles.
Final Thoughts: Painting Heaven
In the university painting class I taught that included those charming senior citizens, there was a gentleman whose painting style was already quite distinct when he started the class. About midway through the program, he began a conversation with me by saying, “I don’t gamble.” You don’t? “And I don’t drink, or cheat people, or run around with women.” I had no idea where this was going. His name, by the way, was Christ. Not kidding. He pronounced it with a short “I” as in, crispy. Chris-t. “I’m almost eighty-five, and I don’t have very many more years left, and I was just wondering, if you wouldn’t mind, please consider telling me what you think . . .” (bracing myself now) “. . . I’m wondering how much better I should be at painting before I can paint heaven.”
The story unfolded. Christ, devoutly religious (which really seems the only option for him), had been wanting to paint his depiction of heaven as described by the apocalyptic literature in the Bible, all streets of gold and the Lord like a waterfall, and angels covered all round with eyes and wings. And while he felt that his good moral character would pass muster with the heavenly host, he wasn’t sure that his art skills were quite up to the high call.
My strong advice to him, and to everyone, is start immediately. If unimpeachable artistic mastery is your goal before you begin your high call, you will never achieve it in this life. But if you plunge in, heel to scalp, and paint your heaven, you will encounter the divine.
