Chapter 1. Installing SQL Server Reporting Services
SQL Server Reporting Services (SSRS) is a server-based reporting platform that provides comprehensive reporting functionality. An optional feature of System Center Configuration Manager (ConfigMgr), it enables you to use an industry-standard reporting system to query the ConfigMgr database.
This chapter walks you through the steps needed to install the features required for SSRS and enable ConfigMgr to leverage SSRS for reporting. It describes how to install the SQL SSRS features, configure SSRS, enable SSRS remote errors, and install the client tools so that you can review the existing ConfigMgr reports and create your own custom reports.
Although technically an optional feature, SSRS facilitates pulling data from ConfigMgr so that you can better understand your client computing environment. SSRS reporting in ConfigMgr allows you to understand items such as the software updates that are deployed, the computers to which those software updates are deployed, and the software installed on each computer. SSRS provides virtually endless possibilities in terms of what you can report on.
SSRS helps expose the information hidden within ConfigMgr, allowing you and your management team to make informed decisions on all aspects of your ConfigMgr environment. This could be key performance indicators (KPIs) of software deployments to software updates, or it might be as simple as understanding your hardware inventory assets. By making informed decisions, you provide increased efficiency and compliance, which ultimately helps your company’s bottom line.
Installing the SQL SSRS Component
Although an optional feature, SSRS is the only reporting mechanism available for ConfigMgr. If you don’t install and configure SSRS, even the default reports provided with ConfigMgr do not work properly.
SSRS allows you to display information within a SQL database in a graphical and formatted manner. Instead of showing row upon row of static tabular information, it enables you to mix and match charts, table data, and images within reports that can be used on websites, with SharePoint, or even within printed publications. SSRS reports display the information such that anyone can quickly digest it and make informed decisions based on that information.
Before you can use SSRS successfully, it must be properly installed and configured. This section discusses installing SSRS for ConfigMgr. The authors recommend installing SSRS on a Windows Server system that already has SQL Server 2014 configured without SSRS installed, preferably using the same SQL Server machine as your ConfigMgr SQL database. This server is also known as your ConfigMgr site database server. Chapter 2, “Installing and Configuring Configuration Manager Reporting,” discusses installing your ConfigMgr reporting services point.
Tip: Before Installing SSRS
Prior to installing SSRS, the authors recommend applying the latest software updates to both your Windows Server and SQL Server instance. In addition, confirm that you have full administrator permissions on both the Windows Server and SQL Server instance on which SSRS will be installed.
Using the default SQL instance on a Windows server, perform the following steps to install SSRS:
1. Launch SQL Server 2014 setup and select Installation from the left-hand menu (see Figure 1.1) and then select New SQL Server stand-alone installation or add features to an existing installation, as shown in Figure 1.2.


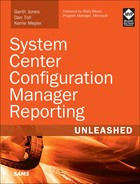
2. The Global Rules page (displayed in Figure 1.3) checks for rule errors. If you see this page, click Next. If the Global Rules Check does not generate any errors, the setup wizard automatically continues to the next step.
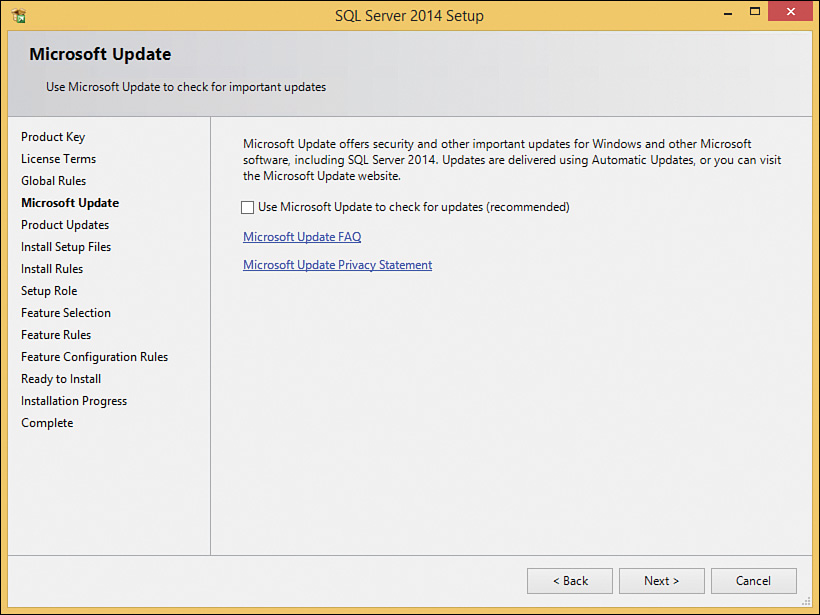
3. Click Next at the Microsoft Update page, shown in Figure 1.4.

4. On the Install Rules page shown in Figure 1.5, ignore the warning about the firewall if the firewall ports were previously opened. Click Next to continue.

Tip: Using Microsoft Update
The Use Microsoft Update to check for updates (recommended) check box displayed in Figure 1.4 is not selected by default. The authors recommend selecting this option unless the server is already managed by ConfigMgr or an internal Windows Server Update Services (WSUS) server. Be aware that if the server does not have Internet access, selecting this check box may cause this step to fail and generate an error message.
If the server is managed by WSUS or ConfigMgr, any missing software updates are identified on the server’s next scan cycle, and the information about missing software updates is returned to WSUS/ConfigMgr. At this point those software updates could be deployed to the server using normal software update deployment strategies.
5. On the Installation Type page, select Add feature to an existing instance of SQL 2014 (see Figure 1.6) and then click Next.

Real World: Location for Installing SQL Server and ConfigMgr
The authors recommend for performance reasons that you not install SQL Server or ConfigMgr on the C: drive.
6. As shown in Figure 1.7, on the Feature Selection page select the Reporting Services - Native check box. As the authors generally do not recommend installing SQL or any of its components on the C: drive for performance and security reasons, you should change the installation drivefolder to a more appropriate location. (For example, Figure 1.7 shows that SQL/SSRS was installed on E:.) After selecting the installation location, click Next to continue.

7. On the Server Configuration page (see Figure 1.8), update SQL Server Reporting Services to use the NT AUTHORITYNETWORK SERVICES account. Leave the default of Automatic as the Startup Type and click Next.

8. On the Reporting Services Configuration page shown in Figure 1.9, ensure that Install only is selected; you can later configure the optional email component discussed in the “Configuring Email” section of this chapter. Click Next.

9. On the Ready to Install page (see Figure 1.10), click Install to begin the installation process.

10. Wait until the SQL Server Reporting Services installation completes. Figure 1.11 shows an example of an installation in progress.

11. Click Close when the installation is complete. With a successful installation, you get the results shown in Figure 1.12.

This section has shown how to install SSRS. The next section discusses customizing your setup and enabling email subscriptions for SSRS.
Configuring SSRS
The following sections complete the SSRS installation process. After installing SSRS but prior to using it, you must configure SSRS by defining various items such as execution account details and database locations, enabling email subscription functionality and remote errors, and so on.
Configuring the SSRS Installation
Configuring SSRS includes defining the Web Service URL, creating a report server database, and specifying the Report Manager URL. To configure your SSRS installation, follow these steps:
1. From Start, select SQL Server Reporting Services Configuration Manager. The page shown in Figure 1.13 appears.

2. Click Connect to bring up the Report Server Status page, shown in Figure 1.14.

3. Select Service Account from the left-hand menu on the Report Server Status page.
4. Ensure that the Report Server Service account is using the Network Service account and then select Web Service URL from the left-hand menu (see Figure 1.15).

5. Accept the defaults and then click Apply, as shown in Figure 1.16.

6. In the Results pane shown in Figure 1.17, confirm that the configuration was successful and then select Database from the left-hand menu and Change Database on the right (see Figure 1.18).


7. Ensure that Create a new report server database is selected (see Figure 1.19) and then click Next.

8. Accept the defaults shown in Figure 1.20 and click Test Connection.

9. When the Test Connection Succeeded message appears (as shown in Figure 1.21), click OK.
10. After successfully testing the connection, click Next to continue (see Figure 1.22).

11. On the page shown in Figure 1.23, accept the defaults and click Next.

12. Click Next on the Credentials page, shown in Figure 1.24.

13. Click Next on the Summary page, shown in Figure 1.25.

14. Click Finish (see Figure 1.26) to return to Reporting Services Configuration Manager.

15. After configuring the report server database, select Report Manager URL on the left-hand menu and then click Apply (see Figure 1.27).

16. Notice the successful installation message in the Results pane in Figure 1.28.

You have completed your initial configuration of SSRS.
Configuring Email
Although the email subscription functionality is an optional feature, it is well worth enabling. This feature allows you to automatically send SSRS reports via email at a scheduled time to one or more email accounts.
If you’re planning to enable the email feature, before starting this task you should contact your email administrator to obtain the email sender address and the simple mail transfer protocol (SMTP) address, which are required for this configuration. Then follow these steps:
1. (This step is optional; however, the authors recommend it due to the added benefit it provides.) Select E-Mail Settings from the left-hand menu shown in Figure 1.29. Fill in the appropriate details in the screen shown in Figure 1.29 and then click Apply (see Figure 1.30).


Tip: Providing Email Settings Later
If you don’t have the details for the email settings available, you can return at a later time and enter them here by skipping over all other links and going directly to E-Mail Settings. Remember to click Apply to activate the settings.
2. Notice the successful installation message in the Results pane, as shown in Figure 1.31. As there are no more configuration changes required for SSRS, click Exit to complete your customization.

This section has discussed completing the installation and configuration of SSRS and configuring the optional email setup. The next section discusses enabling remote errors, which can help with troubleshooting SSRS.
Enabling Remote Errors
Troubleshooting errors within SSRS can be difficult, as generic error messages are displayed in most cases. To be able to receive details of errors that occur, you must either execute a report locally on the SSRS server or enable remote errors. Enabling remote errors removes the need to log on to the SSRS server to review the error message. Listing 1.1 shows an example of an error message.
LISTING 1.1 Error Message Example
An error has occurred during report processing. (rsProcessingAborted)
Query execution failed for dataset 'DataSet0'. (rsErrorExecutingCommand)
For more information about this error navigate to the report server on the local
server machine, or enable remote errors
To enable remote errors, follow these steps:
1. From Windows, launch SQL Server 2014 Management Studio with administrative rights, as shown in Figure 1.32.

2. Change the server type to Reporting Services (see Figure 1.33) and log in.

3. Next, right-click the server name, as shown in Figure 1.34, and select Properties.

4. Click Advanced on the Server Properties page shown in Figure 1.35 to open the page shown in Figure 1.36.


5. Change the value of EnableRemoteErrors to True and click OK (see Figure 1.37). When you’ve completed the steps, the Advanced page should look similar to Figure 1.38.


Once EnableRemoteErrors is enabled, you can re-execute the report to see the actual error that occurred and correct the issues. Using the previous example, shown in Listing 1.1, the true error is displayed in Listing 1.2.
LISTING 1.2 Complete Error Listing After Enabling Remote Errors
An error has occurred during report processing. (rsProcessingAborted)
Query execution failed for dataset 'DataSet0'. (rs ErrorExecutingCommand)
The multi-part identifier "PDisk.ResourceID" could not be bound. The multi-part
identifier "PDisk.Size0" could not be bound. The multi-part identifier "PDisk.Size0"
could not be bound. The multi-part identifier "PDisk.Size0" could not be bound. The
multi-part identifier "PDisk.Size0" could not be bound.
This section has shown how to enable remote errors. Using remote errors allows you to troubleshoot reporting issues. The next section discusses installing client tools and following Microsoft best practices by not creating SSRS reports on your ConfigMgr site server.
Installing Client Tools for SSRS Reporting
As with any other enterprise application, for security and performance reasons, you should not perform query and report development/testing in a production environment. This is true with SSRS, as you could easily create a query or report that will affect the performance of your SQL Server. Whenever possible, create and test your queries and reports in a development environment. Even in a development environment, it is better to perform your work on a workstation than on the server itself.
The following sections show how to install the SQL Server client tools, which you use to create SQL queries, and the SQL Server Data Tools Business Intelligence tool. These tools enable you to create SSRS reports that can help increase the productivity of those who will use your custom reports.
Installing Client Tools
You typically would not develop or create reports on a SQL Server or on the ConfigMgr site server. Rather, you create reports on your own workstation and then update those reports to your report server. In order to develop SQL queries and reports, it is necessary to install several tools on your workstation. This section discusses what you need to install.
Prior to installing the SQL client tools, ensure that .NET 3.5 Service Pack 1 is installed on your workstation.
To install the client tools, follow these steps:
1. Launch SQL Server 2014 setup. Figure 1.39 shows the SQL Server Installation Center that appears.

2. Select Installation in the left-hand pane and then select New SQL Server stand-alone installation or add features to an existing installation (see Figure 1-40).

3. Enter the product key and click Next.
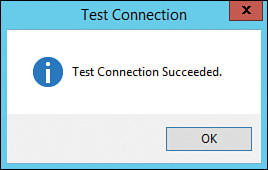
4. Accept the license terms shown in Figure 1.41 and click Next.
5. If the Global Rules page like the one in Figure 1.42 appears, click Next.

6. Click Next on the Microsoft Update page, shown in Figure 1.43.
Tip: Errors Using Microsoft Update to Check for Updates
If you are using ConfigMgr or WSUS to manage your software updates and select the Use Microsoft Update to check for updates (recommended) check box, this step may fail. Although such a failure will have no effect on the final installation, you will likely have software updates that should be applied during your next software update cycle for each computer on which you install these components.
7. On the Install Rules page (see Figure 1.44), ignore the warning about the firewall and click Next.

8. On the Setup Role page, displayed in Figure 1.45, select SQL Server Feature Installation and click Next.

9. Select Management Tools - Basic and then Management Tools - Complete, as shown in Figure 1.46, and click Next.

10. Click Next on the Feature Configuration Rules page, if it appears. This page is shown in Figure 1.47.

11. Click Install on the Ready to Install page (see Figure 1.48) to proceed with the SQL client tools installation.

12. When the setup is complete and the features are successfully installed, as shown in Figure 1.49, click Close.

This section has discussed how to install the SQL client tools. These tools are necessary to perform SQL work on your workstation. The next section describes how to install the final tool needed for creating SSRS reports: SQL Server Data Tools Business Intelligence.
Installing SQL Server Data Tools Business Intelligence
You should not develop or create reports on your SQL Server or the ConfigMgr site server. Therefore, before creating SSRS reports, you need to install another tool: SQL Server Data Tools Business Intelligence (SSDT-BI). Starting with SQL 2014, this tool is now a separate download from SQL Server. This section shows what you need to install.
Tip: Installing .NET 4.5
Prior to installing SSDT-BI, ensure that .NET 4.5 is installed on your workstation.
To install SSDT-BI, follow these steps:
1. Download and execute the current version of SSDT-BI from http://msdn.com/data/tools.aspx.
2. Select a location for extracting the files (as shown in the example in Figure 1.50) and click OK.

3. Accept the license terms and click Next.
4. Click Next on the Microsoft Update page, shown in Figure 1.51.

5. Click Next on the Feature Selection page, shown in Figure 1.52.

6. Click Close on the Complete page, shown in Figure 1.53, to exit the setup.

This section has discussed the steps involved in installing the SSDT-BI tool, which is required for creating SSRS reports.
Summary
This chapter has discussed the steps for installing SQL Server’s SSRS component, which is required for the ConfigMgr reporting services to leverage SSRS for its reporting needs. This chapter has also discussed the post-installation tasks involved in configuring SSRS, including enabling email support for report subscriptions and enabling remote errors for troubleshooting.
You use several client tools to create custom SQL queries and SSRS reports. This chapter has discussed installing these tools. SQL Server Management Studio is installed using the SQL 2014 installation media on computers where you plan to create your SSRS reports. This tool allows you to create and test your SQL queries without having to log on or use Remote Desktop Protocol (RDP) to access your SQL Server directly. Ideally, you should test your SQL queries in a development environment and not in your production environment.
The chapter has also discussed installation of the SQL Server Data Tools Business Intelligence client tool, which is the primary tool used for creating custom SSRS reports and exposing the information hidden within ConfigMgr. Creating custom SSRS reports provides virtually endless possibilities in terms of reporting and customization of the appearance of your reports. With custom SSRS reports for ConfigMgr, you can make informed decisions using the information exposed from your ConfigMgr environment; this can help your company’s bottom line.
The next chapter describes the steps for installing your ConfigMgr reporting services point and validating that it is working correctly. It also introduces an often-overlooked feature in ConfigMgr—role-based administration (RBA)—and how RBA and the principle of least privilege required can be used with ConfigMgr reporting. Chapter 2 also discusses how to customize Microsoft-provided ConfigMgr reports by adding your own company’s logo. The chapter also contains several demonstrations that you can perform within your own environment.