
14.2. The AJAX Client Library
While the server components of the AJAX Extensions are limited to use with ASP.NET, a good portion of the client components can be used with any web site regardless of the application server. With this having been said, ASP.NET developers have easier access to the client tools via Visual Studio.
14.2.1. Accessing the Client Tools with ASP.NET
Ironically, the simplest way to access the client tools with ASP.NET is to use the new server controls that come with the Extensions. To begin, you'll need an Ajax-enabled ASP.NET web site.
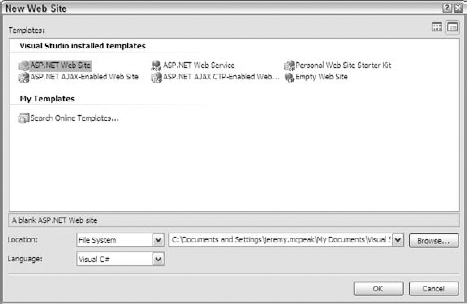
Open Visual Web Dev, and pull up the New Web Site dialog (see Figure 14-1) by going to the File menu and choosing New Web Site.
The AJAX Extensions CTP installs two new templates: ASP.NET AJAX-Enabled Web Site and ASP.NET AJAX CTP-Enabled Web Site; choose the second option and press OK. When Visual Studio creates and opens the project, the source code for the Default.aspx file is opened. It consists of the Page declaration at the top of the file, followed by the HTML's doctype, head, and body.
Figure 14.1. Figure 14-1
Inside the page's body is a server control:
<asp:ScriptManager ID="ScriptManager1" runat="server" />
The ScriptManager control manages the JavaScript components, partial-page rendering, and HTTP requests/responses for ASP.NET Ajax pages. In short, this control adds the core JavaScript files to the web page. This enables the use of components like the WebRequest class and the namespace constructs. It doesn't, however, add the JavaScript files from the CTP. For this, add a ScriptReference control.
<asp:ScriptManager ID="ScriptManager1" runat="server">
    <Scripts>
        <asp:ScriptReference Assembly="Microsoft.Web.Preview"
             Name="PreviewScript.js" />
    </Scripts>
</asp:ScriptManager>
The ScriptReference control registers a JavaScript file for use within the web page. This control can register a standalone JavaScript file or a script file that is embedded within an assembly. This example registers the PreviewScript.js file within the Microsoft.Web.Preview assembly, which contains UI controls (wrappers for DOM elements), among other components, and DOM extensions for Gecko-based browsers.
By use of the ScriptManager and ScriptReference server controls, the appropriate JavaScript files are added to the web page when the server processes this page. Of course, using these controls isn't the only way to add ASP.NET AJAX JavaScript files to the page.
14.2.2. Accessing the Client Tools without ASP.NET
When the Extensions are installed, it places the .NET binaries and the JavaScript files onto your hard drive at %Program Files%Microsoft ASP.NETASP.NET 2.0 AJAX Extensionsv1.0.61025 (your version number may be different). In the ScriptLibrary directory, you'll find the Debug and Release subdirectories containing JavaScript files. The Debug folder contains the original JavaScript files, while the scripts in the Release folder have had all white space removed.
These JavaScript files can be copied to other locations and referenced with a normal <script/> tag. The two files used in this section are MicrosoftAjax.js and PreviewScript.js.
You can use either the debug or release versions of the code for development purposes; however, the release files are smaller.
14.2.3. Using Classes
Before digging into the classes available, it is important to know how they are written. Like any other class, the ones included with the AJAX Library have constructors and methods. The real difference, however, comes with what are called properties. In traditional JavaScript, a property is a construct that gets or sets class data.
//Traditional property usage
element.style.top = "10px"; //Use the top property to set the top position
alert(element.style.top);   //Display the element's top position.
Properties in ASP.NET AJAX classes are actually methods, prefixed with either get_ (to get the value of a property) or set_ (to set the value of a property), that provide access to JavaScript properties within the class. Therefore, "properties" are accessed like this:
object.set_propertyName(newValue);
var value = object.get_propertyName();
Keep this in mind when using classes of the ASP.NET AJAX library, because they follow this pattern.
14.2.4. Writing Code with the ASP.NET AJAX Library
The ASP.NET AJAX library extends JavaScript with object-oriented programming constructs, such as namespaces, enumerations, and interfaces, as well as extending existing constructs such as classes and subclasses. Microsoft does this by introducing a new datatyping system much like the one that exists within the .NET Framework Class Library.
At the heart of this new typing system is the Type class, which exposes a number of static methods to aid in the creation of datatypes.
14.2.4.1. Registering Namespaces
JavaScript technically does not have a namespace construct. However, developers have emulated name-spaces by using objects. Consider the following code:
//create the ProAjax namespace
var ProAjax = {
    //create the Ch12 namespace
    Ch12    : {
        //create the Person class
Person : function () {
//constructor logic
}
}
}This code creates an object called ProAjax, where another object, Ch12, is defined within it. This essentially emulates two levels of a namespace. Inside Ch12 is the Person class; so to access this class, you must go through the two levels:
var oPerson = new ProAjax.Ch12.Person();
This works fine. However, it lacks any sense of a type: ProAjax and ProAjax.Ch12 are both considered objects, not namespaces.
Microsoft addresses this issue by creating its own namespace construct. Of course, these namespaces are just JavaScript objects, but the AJAX Extensions expose methods that allow the marking of an object as a namespace and the testing of an object to determine if it is a namespace.
To create a namespace, use the Type.registerNamespace() method:
Type.registerNamespace("ProAjax");This code creates the ProAjax namespace. Once a namespace is created, another namespace, a class, an interface, or an enumeration can be declared to reside in that namespace. To recreate the namespace made in the previous example, the following code can be used:
Type.registerNamespace("ProAjax.Ch12");This code actually does two things. First, it extracts "ProAjax" and tests to see if a namespace already exists with that name. If not, it creates the ProAjax namespace. Then, it goes on to perform the same process on "Ch12"; it creates the namespace only if it doesn't already exist.
To determine if an object is a namespace, use the Type.isNamespace() method like this:
Type.isNamespace(ProAjax.Ch12); //returns true
This method returns true if the object is a namespace, and false if not.
14.2.4.2. Registering Classes
Classes are another concept that JavaScript does not technically support. It does, however, provide the logical equivalent: constructors and the ability to create objects with these constructors. JavaScript also provides developers with the means to check if objects are an instance of a certain class, with the instanceof operator (which also allows you to check for inheritance relationships). But generally, JavaScript sees classes as functions, not proper class definitions.
Microsoft addresses these issues by emulating classes. Registering a class consists of three steps:
Create the class as you normally would. If the class is to be in a namespace, declare the class within the namespace.
Initialize the class with the initializeBase() method if you plan on using inheritance.
Register the class with the registerClass() method.
To declare a class called ProAjax.Ch12.Person, the following code is used:
ProAjax.Ch12.Person = function() {
    //more code here
};
This creates the Person class within the ProAjax.Ch12 namespace. Next, initialize the class for inheritance:
ProAjax.Ch12.Person = function() {
    ProAjax.Ch12.Person.initializeBase(this);
};

//more code here
The initializeBase() method initializes the base class and its members within the context of a given instance. This method accepts two arguments, in fact, the same two arguments used with the Function.apply() method. The first is the object to initialize, and the second is an array of arguments to pass to the base constructor (which may be null).
The final step in this process is to register the class.
ProAjax.Ch12.Person = function() {
    ProAjax.Ch12.Person.initializeBase(this);
};

ProAjax.Ch12.Person.registerClass("ProAjax.Ch12.Person");
The registerClass() method is invoked directly from the class, as demonstrated in this code. This method accepts multiple arguments. The first argument is required and is a string representing the fully qualified name of the class. The second argument is an optional base class to inherit from. Any argument passed after the second is considered an interface that the class implements.
Deriving a class from another class follows the same pattern. First create the class, then initialize it with initializeBase(), and register the class. However, the call to registerClass() must include the superclass to inherit from. For example, if a class ProAjax.Ch12.Author is to extend ProAjax.Ch12.Person, the following code is used:
ProAjax.Ch12.Person = function() {
    ProAjax.Ch12.Person.initializeBase(this);
};

ProAjax.Ch12.Person.registerClass("ProAjax.Ch12.Person");
ProAjax.Ch12.Author = function() {
ProAjax.Ch12.Author.initializeBase(this);
};
ProAjax.Ch12.Author.registerClass("ProAjax.Ch12.Author", ProAjax.Ch12.Person);This code ensures that the ProAjax.Ch12.Author class inherits all properties and methods of ProAjax.Ch12.Person.
In the event you need to determine if a specific type or function is a class, simply use the Type.isClass() method:
Type.isClass(ProAjax.Ch12.Person); //returns true
It's also possible to determine if one class inherits from another by using the inheritsFrom() method. This method is called directly from the subclass, such as:
ProAjax.Ch12.Author.inheritsFrom(ProAjax.Ch12.Person); //returns true
There are also two methods to deal directly with the type of class, getType() and getTypeName(). The getType() method returns the constructor used to create a particular object, whereas getTypeName() returns the fully qualified class name of the object (including the namespace). For example:
var oAuthor = new ProAjax.Ch12.Author();
var fnConstructor = Object.getType(oAuthor);

var bInherits = fnConstructor.inheritsFrom(ProAjax.Ch12.Person); //returns true
alert(Object.getTypeName(oAuthor)); //alerts "ProAjax.Ch12.Author"
14.2.4.3. Registering Enumerations
ASP.NET AJAX also allows the registration of enumeration (enum) types, because they are a concept not formally supported in JavaScript.
The registration of enums is a multistep process as well:
Create the type.
Add the name-value pairs to the prototype..
Register the type as an enum.
Creating an enum type is essentially the same as creating a class, except that the constructor is empty. To create an enum called ProAjax.Ch12.Color, the first step is to define the constructor:
ProAjax.Ch12.Color = function() {};This code creates the Color type. This will become an enum with red, green, and blue as its named constants:
ProAjax.Ch12.Color = function() {};
ProAjax.Ch12.Color.prototype = {
    red  : 0xFF0000,
    blue : 0x0000FF,
    green: 0x00FF00
};
//more code here
The last step is to register the type as an enum using the registerEnum() method:
ProAjax.Ch12.Color = function() {};
ProAjax.Ch12.Color.prototype = {
    red  : 0xFF0000,
    blue : 0x0000FF,
    green: 0x00FF00
};

ProAjax.Ch12.Color.registerEnum("ProAjax.Ch12.Color");
The registerEnum() method is called directly from the constructor. Like the previous registration methods, registerEnum() accepts a string argument that contains the fully qualified name of the enum. There is an optional second argument, a Boolean value, which indicates if the enum is a bit field (a field containing only binary values).
14.2.4.4. Registering Interfaces
An interface, in object-oriented programming, is a contract for a class. Traditional interfaces define a set of methods and properties that a class must implement. A class that implements an interface must implement all of the properties and methods of that interface.
Interface definitions using the AJAX Extensions closely resemble class and enum definitions:
//IAuthor interface
ProAjax.Ch12.IAuthor = function() {
    //more code here
};

ProAjax.Ch12.IAuthor.prototype = {
    get_books : function () {
        //more code here
    }
};

//more code here
In traditional JavaScript, this code creates a class called IAuthor and assigns the class' prototype to contain a method called get_books(). To make this an AJAX Extensions interface, you must make a few changes.
First, the constructor must throw an error, since interfaces cannot be instantiated.
Then, since interface methods don't contain the implementation details, each method must also throw an error.
The last step is to call registerInterface():
ProAjax.Ch12.IAuthor = function() {
    throw Error.notImplemented();
};

ProAjax.Ch12.IAuthor.prototype = {
    get_books : function () {
        var sTypeName = Object.getTypeName(this);
        throw Error.notImplemented(sTypeName + " does not " +
            "fully implement this interface.");
    }
};

ProAjax.Ch12.IAuthor.registerInterface("ProAjax.Ch12.IAuthor");
The Error.notImplemented() method creates an Error object that is thrown to stop code execution. When a class implements this interface but does not implement the get_books() method, an error is thrown when the method is called. This error states that the class (retrieved via Object.getTypeName()) does not fully implement the interface. The last line calls registerInterface() on the interface constructor and passes in the fully qualified name of the interface.
Interfaces are applied to a class when the class is registered via the registerClass() method. The following code changes the previous registration of the Author class to implement the ProAjax.Ch12.IAuthor interface:
ProAjax.Ch12.Author = function() {
    ProAjax.Ch12.Author.initializeBase(this);
};

ProAjax.Ch12.Author.prototype = {
    get_books    : function () {
        alert("We're in get_books()!");
    }

ProAjax.Ch12.Author.registerClass("ProAjax.Ch12.Author", ProAjax.Ch12.Person,
    ProAjax.Ch12.IAuthor);
Since Author now implements the IAuthor interface, it must implement all of the properties and methods of IAuthor. This new code defines the Author's prototype, which contains the get_books() method (the only method defined on IAuthor). There is no limit to the amount of interfaces a class can inherit from; simply pass the extra interfaces to the registerClass() method.
There may be times when it's necessary to determine if a particular object or class implements an interface. To do this, use the implementsInterface() method on the class in question:
var author = new ProAjax.Ch12.Author();

if (ProAjax.Ch12.Author.implementsInterface(ProAjax.Ch12.IAuthor)) {
    //It's safe to execute the following line
    author.get_books();
}
In this code, the ProAjax.Ch12.Author class is checked to see if it implements ProAjax.Ch12.IAuthor. If so, it is then safe to assume that an object of type ProAjax.Ch12.Author has the method get_books(). Though this is helpful, it's much more useful to check a specific object before it's used. To do so, pass the object in question to Object.getType() and then call implementsInterface() on the result (which is the class constructor):
var author = new ProAjax.Ch12.Author();

if (Object.getType(author).implementsInterface(ProAjax.Ch12.IAuthor)) {
    //It's safe to execute the following line
    author.get_books();
}
Here, the class constructor of author is returned and checked to see if it implements the specified interface. If the result is true, then it is safe to call get_books(). An alternate approach is to use the isImplementedBy() method that is present on the interface itself. This method accepts a single argument, which is the object to check. So, this example can be rewritten as:
var author = new ProAjax.Ch12.Author();

if (ProAjax.Ch12.IAuthor.isImplementedBy(author)) {
    //It's safe to execute the following line
    author.get_books();
}
All of these approaches are valid; use whichever approach fits your situation.
NOTE
It's been debated whether or not JavaScript needs interfaces. The main argument against interfaces is that it's easy enough to discover if a particular object implements some method or property with the typeof operator. With that said, ASP.NET AJAX brings the functionality to JavaScript, so it's up to developers whether or not to use the feature.
14.2.5. Using Controls
In Windows development terminology, controls are UI elements that the user interacts with; text boxes, images, drop-down boxes, and menus are all examples of controls. The more basic controls are mostly used in forms, allowing the user to input data and labeling form fields so that the user knows where to input data. The controls present in ASP.NET AJAX are similar in these aspects, because they are essentially wrappers for common HTML elements and offer alternate ways of accessing data (as opposed to DOM properties and methods).
The controls discussed in this section are not yet a part of the core library; they are features of the Futures CTP. All of the controls reside in the PreviewScript.js file and in the Sys.Preview.UI namespace. Each control constructor accepts an HTMLElement as an argument. Once an element is associated with the control, that association cannot be changed. To retrieve the HTMLElement, you can either use the document.getElementById() method or the AJAX Extensions-provided $get() function, which behaves in the same manner.
14.2.5.1. The TextBox Control
The Sys.Preview.UI.TextBox control corresponds directly to <input/> elements whose type attribute is set to "text" and <textarea/> elements. The constructor accepts either an HTMLInputElement or an HTMLTextAreaElement as an argument. To begin, assume that the following <input/> element is in the document's body.
<input id="inputUsername" type="text" />
Because the creation of this control depends upon the HTMLInputElement, the following code must execute after the element is loaded into the document (during the window's load event, for example):
var oUsername = new Sys.Preview.UI.TextBox($get("inputUsername"));This code creates a TextBox control by calling the Sys.Preview.UI.Textbox constructor and supplying it an element with the id of "inputUsername".
The TextBox control exposes one property: text, which can get and set the value in the text box:
oUsername.set_text("Enter Your Username."); //set the text

var sUsername = oUsername.get_text(); //gets the text in the TextBox
Using the TextBox control can be beneficial when you are dealing with forms. Once the control is created, retrieving the box's value is as simple as calling get_text() (and setting it is it just as easy). Of course, some state that the get_text() and set_text() methods are not necessary, as once you've found the element in the DOM, using the value property to get and set the text box's value is actually easier (and involves less typing) than using the TextBox properties. However, if you're using other controls, using the TextBox control keeps your code unified, as opposed to a mix of controls and DOM scripting. Ultimately, it boils down to personal preference.
14.2.5.2. The Button Control
The Sys.Preview.UI.Button control is used for elements that can exhibit button-like behavior; in other words, anything that can receive a click event can most likely be a Button. This is in stark contrast to the TextBox control, where only two types of elements can be used. For instance, a Button can be a simple <div/> element, such as:
<div id="divButton">A DIV Button</div>
To create a Button control using this <div/> element, use the Sys.Preview.UI.Button constructor and pass in a reference to the element:
var oDivButton = new Sys.Preview.UI.Button($get("divButton"));This code retrieves the <div/> element and passes it to the Button constructor. The next step is to initialize the control by calling initialize() (a step that wasn't necessary with the Textbox control). This must be done before event handlers can be added to the control:
var oDivButton = new Sys.Preview.UI.Button($get("divButton"));

oDivButton.initialize();
The final step is to add event handlers to the Button. This control exposes only one event: click. To add event handlers for the click event, use the add_click() method:
var oDivButton = new Sys.Preview.UI.Button($get("divButton"));

oDivButton.initialize();

function divButton_click(oButton, oEventArgs) {
    alert("You clicked a <div/> button!");
}

oDivButton.add_click(divButton_click);
The add_click() method emulates the behavior of the attachEvent() method in IE and the addEventListener() method in standards-based browsers; any number of handlers can be added to handle the click event.
Event handlers in the ASP.NET AJAX Library have two arguments passed to them. The first is the object that raised the event; the second is any event arguments that may be passed to event handler. In this case, the Button control is passed as the first argument, and an empty object is passed in the second.
To remove a click event handler, use the remove_click() method and pass in the same function pointer that was used with add_click():
oDivButton.remove_click(divButton_click);
Unlike the TextBox control, the Button control is a bit more diverse in its usage, since anything that can receive a click event can be a button, and the fact that the ASP.NET AJAX Library handles event handling in its own cross-browser way saves time when building applications for multiple browsers.
14.2.5.3. The Selector Control
The Sys.Preview.UI.Selector control is a wrapper for the <select/> element, such as:
<select id="selectBooks">
    <option value="9780470109496">Professional Ajax</option>
    <option value="0764579088">Professional JavaScript for Web Developers</option>
    <option value="0470051515">Beginning JavaScript, 3rd Ed</option>
</select>
There are three options in this drop-down box. The words displayed in the options are titles of books, and their values are the corresponding ISBN numbers.
To create a Selector control using this element, pass it to the Sys.Preview.UI.Selector constructor and then call the initialize() method:
var oSelectBooks = new Sys.Preview.UI.Selector($get("selectBooks"));

oSelectBooks.initialize();
Now that the control has been initialized, you are free to use the control's properties and assign event handlers. The most common event to handle is the selectionChanged event. To add a handler for this event, use the add_selectionChanged() method:
var oSelectBooks = new Sys.Preview.UI.Selector($get("selectBooks"));

oSelectBooks.initialize();


function selectBooks_selectionChanged(oSelect, oEventArgs) {
    //more code here
}

oSelectBooks.add_selectionChanged(selectBooks_selectionChanged);
This code creates the selectBooks_selectionChanged() function to handle the selectionChanged event. The event handler accepts two arguments: the Selector control and an event arguments object.
The Selector control also exposes a property called selectedValue, which gets or sets the value of the selected item:
var oSelectBooks = new Sys.Preview.UI.Selector($get("selectBooks"));

oSelectBooks.initialize();

function selectBooks_selectionChanged(oSelect, oEventArgs) {
    alert("Value: " + oSelect.get_selectedValue());
}

oSelectBooks.add_selectionChanged(selectBooks_selectionChanged);
This code gets the selectedValue and displays it to the user when the selection changes. Setting this property changes the selected item in the drop-down box to the option with the corresponding value. The following code changes the selected item to "Beginning JavaScript, 3rd Ed":
oSelectBooks.set_selectedValue("0470051515");If the value passed to the property does not exist in any of the <option/> elements, no change is made and no error is thrown. Also, setting the selectedValue property does not raise the selectionChanged event.
14.2.5.4. The Label Control
In Windows programming, a Label control contains only text, and it usually is used to label form fields. In the AJAX Extensions, the Sys.Preview.UI.Label control wraps almost any HTMLElement that can contain text or markup, with the most common being <span/> or <div/> elements, such as:
<div id="divTextLabel"></div>
<div id="divHtmlLabel"></div>
To create a Label control, use the Sys.Preview.UI.Label class constructor and pass in a reference to an element:
var oDivTextLabel = new Sys.Preview.UI.Label($get("divTextLabel"));
var oDivHtmlLabel = new Sys.Preview.UI.Label($get("divHtmlLabel"));
This code creates two Label controls using the two <div/> elements. The Label class exposes two properties.
The first, text, gets or sets the content of the Label; it can be either plain text or HTML markup.
The second property, htmlEncode, is a Boolean value specifying how the content should be displayed: true for plain text or false for HTML (the default).
The following uses both properties to set the content for the oDivTextLabel to plain text:
var oDivTextLabel = new Sys.Preview.UI.Label($get("divTextLabel"));
var oDivHtmlLabel = new Sys.Preview.UI.Label($get("divHtmlLabel"));

oDivTextLabel.set_htmlEncode(true);
oDivTextLabel.set_text("<b>Plain text label.</b>");
As a result of setting htmlEncode to true, the Label displays any content set by the text property as plain text, so any HTML tags passed to the text property are encoded using appropriate HTML entities. The oDivTextLabel element, therefore, displays the following:
<b>Plain text label</b>
Compare this to setting up a label for HTML content:
var oDivTextLabel = new Sys.Preview.UI.Label($get("divTextLabel"));
var oDivHtmlLabel = new Sys.Preview.UI.Label($get("divHtmlLabel"));

oDivTextLabel.set_htmlEncode(true);
oDivTextLabel.set_text("<b>Plain text label.</b>");


oDivHtmlLabel.set_text("<b>HTML label.</b>");
The default for htmlEncode is false, so the text in oDivHtmlLabel is displayed as bold text (because the <b/> element is taken literally).
NOTE
It is important to note that when set to true, the htmlEncode property only encodes HTML tags passed to the text property; any HTML set by other means is still rendered as HTML.
14.2.6. Making HTTP Requests
The ASP.NET AJAX Extensions wouldn't be much of an Ajax framework without providing its own API for asynchronous HTTP communication. The framework provides the WebRequest class in the Sys.Net namespace to perform GET or POST HTTP requests.
14.2.6.1. Making GET Requests
To create an instance of this class, use the WebRequest constructor:
var oRequest = new Sys.Net.WebRequest();

//more code here
The next step is to assign the url property with a URL to send the request to. The URL can be set to a fully qualified URL, an absolute URL, or a relative URL.
var oRequest = new Sys.Net.WebRequest();

oRequest.set_url("textfile.txt");

//more code here
This code assigns the property a relative URL value of textfile.txt.
Before the request is sent, however, the WebRequest object needs some way of dealing with the data it receives from the server. When using the zXml library, you had to code every step of the request and had to take several things into consideration (handling the readyStateChange event and checking the readyState property, for example). ASP.NET AJAX does all this for you; all you need to do is handle the completed event. To assign a handler, use the add_completed() method:
var oRequest = new Sys.Net.WebRequest();

oRequest.set_url("textfile.txt");
oRequest.add_completed(request_completed);

//more code here

function request_completed(oExecutor, oEventArgs) {
    //more code here
}
Like the click event of the Button control and the selectionChanged event of the Selector control, the handler for the completed event accepts two arguments. The first is an XMLHttpExecutor object, and the second is an event arguments object (which most of the time is empty). The XMLHttpExecutor class makes an asynchronous network request to the provided URL using the browser's XHR component. From this object it's possible to retrieve the server's response.
The first step in doing this is to make sure that a response was received from the server. This is done with the responseAvailable property.
var oRequest = new Sys.Net.WebRequest();

oRequest.set_url("textfile.txt");
oRequest.add_completed(request_completed);

//more code here

function request_completed(oExecutor, oEventArgs) {
    var sStatusCode = oExecutor.get_statusCode();

    //If data is available, fill the page with information
    if (oExecutor.get_responseAvailable() &&
       (sStatusCode == "200" ||
        sStatusCode == "304")) {
           //more code here
    }
    //otherwise something went wrong
    else {
        //more code here
    }
}
This code checks to see if a response is available and then checks the statusCode property for the HTTP response status. When it has been determined that the request was successful, the response body can be retrieved from the responseData property. If a response wasn't received, the XMLHttpExecutor object can provide some insight as to the reason by using the timedOut and aborted properties:
var oRequest = new Sys.Net.WebRequest();

oRequest.set_url("textfile.txt");
oRequest.add_completed(request_completed);

//more code here

function request_completed(oExecutor, oEventArgs) {
    var sStatusCode = oExecutor.get_statusCode();

    //If data is available, fill the page with information
    if (oExecutor.get_responseAvailable() &&
       (sStatusCode == "200" ||
        sStatusCode == "304")) {
            alert(oExecutor.get_responseData());
    }
    //otherwise something went wrong
    else {
//Check to see if the request timed out
if (oExecutor.get_timedOut()) {
alert("Request Timed Out");
}
//if not, check to see if it was aborted
else if (oExecutor.get_aborted()) {
alert("Request Aborted");
}
else if (sStatusCode != 200 || sStatusCode != 304) {
alert("HTTP Error! Status: " + sStatusCode);
}
}
}The changes to the code handle the possible errors that might have occurred if the request failed. It uses the timedOut, aborted, and statusCode properties to generate an alert with an appropriate message for the cause of the failure.
The final step of the request process is to send the request to the server. This is done with the invoke() method:
var oRequest = new Sys.Net.WebRequest();
oRequest.set_url("textfile.txt");
oRequest.add_completed(request_completed);
oRequest.invoke();
function request_completed(oExecutor, oEventArgs) {
var sStatusCode = oExecutor.get_statusCode();
//If data is available, fill the page with information
if (oExecutor.get_responseAvailable() &&
(sStatusCode == "200" ||
sStatusCode == "304")) {
alert(oExecutor.get_responseData());
}
//otherwise something went wrong
else {
//Check to see if the request timed out
        if (oExecutor.get_timedOut()) {
            alert("Request Timed Out");
        }
        //if not, check to see if it was aborted
        else if (oExecutor.get_aborted()) {
            alert("Request Aborted");
        }

        else if (sStatusCode != 200 || sStatusCode != 304) {
            alert("HTTP Error! Status: " + sStatusCode);
        }
    }
}It's possible to access the WebRequest object inside the completed event handler by using the webRequest property of the executor. Also, if your requested data is XML, you can use the executor's xml property, which attempts to load the response data into an XML DOM.
14.2.6.2. Making POST Requests
POST requests follow the same pattern as GET requests; the only difference is that POST requests incorporate the use of the body property. The following code makes two changes to the previous code:
var oRequest = new Sys.Net.WebRequest();

oRequest.set_url("posttest.aspx");
oRequest.set_body("name=Jeremy");
oRequest.add_completed(request_completed);

oRequest.invoke();

function request_completed(oExecutor, oEventArgs) {
    var sStatusCode = oExecutor.get_statusCode();

    //If data is available, fill the page with information
    if (oExecutor.get_responseAvailable() &&
       (sStatusCode == "200" ||
        sStatusCode == "304")) {
            alert(oExecutor.get_responseData());
    }
    //otherwise something went wrong
    else {
        //Check to see if the request timed out
        if (oExecutor.get_timedOut()) {
            alert("Request Timed Out");
        }
        //if not, check to see if it was aborted
        else if (oExecutor.get_aborted()) {
            alert("Request Aborted");
        }

        else if (sStatusCode != 200 || sStatusCode != 304) {
            alert("HTTP Error! Status: " + sStatusCode);
        }
    }
}
The highlighted portion of the code changes the url property to posttest.aspx. It also sets the body property to "name=Jeremy".
The posttest.aspx ASP.NET file simply gets the value of the name argument and concats that value with the string "Hello, [name]". Its code is:
protected void Page_Load(object sender, EventArgs e)
{
    Response.ContentType = "text/plain";
    Response.CacheControl = "No-cache";

    if (Request.Form["name"] != null)
{
string name = Request.Form["name"].ToString();
Response.Write("Hello, " + name + "!");
}
else
{
Response.Write("I'm sorry, but no name could be found");
}
}When the request is made, and a response received, an alert box shows "Hello, Jeremy!" as in Figure 14-2.
Figure 14.2. Figure 14-2
The key to POST requests is the body property. If the value of get_body() is non-null, then the WebRequest object performs a POST request. If get_body() is null, then a GET request executes.