Through the first six chapters of this book, we have discussed ways to create online content with digital tools, and concepts of web literacy, examined visual storytelling with creative online content such as videos and memes, and explained how to post your new and digital material on the web. Today’s savvy user creates a plethora of new content daily, with the intent to share on websites, social networking sites, blogs, and other online platforms. Sometimes, the content creator will share solely on the website they have designed (discussed in Chapter 3) or will share on the several social media sites where the savvy user participates. Occasionally, the content creator will take the “all-of-the-above” approach, posting on their website, Tumblr, community boards, comment sections, and countless other social media sites where the digital user–creator interacts with an audience. The options in the digital world are endless. Before we discuss how to create an online brand, the key term that has come up in discussion is the understanding of the word “share” for today’s user.
In order to define sharing, emphasis must be placed on the standard definition, followed up by the meaning in a digital context. The word share is a verb meaning to have, to give, or to use something with others. There are two parts to this definition in the context of the digital realm. For example, a content creator may create a meme using the popular “Overly Attached Girlfriend” photograph, putting it through a meme generator, and adding text to create an image macro. As we previously learned, image macro memes require an audience, and digital creators want to distribute content to others for entertainment, interaction, and creative use. Once the intent to share the meme with an audience is established, the user understands the receivers are the online community he or she has cultivated, which includes friends, family, and Internet followers. By sharing, the creator–participant offers their content to be downloaded, viewed, and interpreted by their audience, who finds the meme by a variety of methods—whether by search engines or social media. Also, the user who comes across the digital content (in this case, a meme) is offered an opportunity to participate in remixing and reinterpretation after viewing the material and thus becomes a creator and distributor in digital culture.
A savvy user of digital media does not just consume media, but participates in all of the media tools offered. Media theorist Henry Jenkins considered the theory of participation when discussing traditional media interaction between television fans and their favorite sitcom, drama, or comedy. In a chapter in Burgess and Green’s book YouTube: Online video and participatory culture (2009), Jenkins states “The emergence of participatory cultures of all kinds over the past several decades paved the way for the early embrace, quick adoption and diverse use of such platforms.”1 Since then, the ideology of sharing has increased, with the audience becoming more connected through social media, smartphones, and other advancements in technology. Therefore, the idea of sharing becomes a “two-way” interaction between the content provider—creating and posting to the web—and the user of digital media (becoming a participant with the idea of continuing to share the content with others.)
In 2012, Laina Morris and her “Overly Attached Girlfriend” meme went viral. As a participant in digital media, Laina created a video titled “Girlfriend” after Justin Bieber announced a contest asking fans to create their own version of his hit “Boyfriend” (2012). The photograph of Laina is a screen shot of the video that is infamously captioned and insinuates Laina as a stalker or jealous girlfriend. The meme has been shared by millions all over social media and was one of the top memes of 2012.

Figure 7.1
Laina Morris: The “Overly Attached Girlfriend” meme.
Sharing also means to have a common interest or viewpoint with others in crowds or markets. Sharing does not only have to involve content created by a web participant: It may be through a search engine, or when someone visits a video-sharing site and channel. You might visit a site and find a piece of content to be interesting, funny, or enjoyable. After the initial reaction, you might share it on your own social media platform for your digital audience to engage with. Different types of items shared by digital means include news articles, selfies, links, liked pages, or any form of digital media that the user feels their audience will, not only enjoy, but interact with, owing to common interests and relationships on both sides of the platform—you and the audience.
Users have become increasingly aware of how content in the digital space may affect the viewers, and this creates a demand to continue sharing media. The media may cause different reactions, depending on what they are: a viral video on Facebook that may make viewers laugh, or maybe a controversial article that causes readers to add to a stream of commentary among social media connections. It may be possible that sharing is increased by the opportunity to relive your personal experiences, such as spending the day with friends, going into the city to see a concert, or attending a sports game or theatre show.
Online Brand: Participate and create
Sharing Exercise
Locate an article online pertaining to your current or future career or college major. Post and share the article to your followers on either Twitter or Facebook.
Share more than the link and add personal commentary that includes insight into the article. Regardless of where you post, practice writing commentary in 140 characters (120 characters remain after the link is added) about the importance of the article or why it is important to you. Remember to add appropriate hashtags for your article and mention the company or author of the article. It’s possible that the writer or brand may like or favorite your post, and this will attract more readers to the link, as well as your posts.
In the social media environment, participants share media and commentary in a social circle of peers. Your social media feed is made up of people whom you follow and find interesting. You are probably aware that other users may have followed you for a similar reason. On Twitter, for example, you may have built an audience of followers consisting of classmates, relatives, communities, brands, and organizations.
Another aspect of sharing concerns how privacy settings are selected and updated throughout the user’s social media experience. What do these technology companies do with my information that I post or have online? Do they sell the information I supply to them? What will these companies do with the information I provide to them? Learning about privacy settings is an integral area of becoming a savvy user of digital media and creating an online brand, which will be discussed in the following sections of this chapter.
While the web is still considered young and in its adolescent stages, the answers to these questions are being thoughtfully discussed, by both companies and the society of users, who are figuring out the long-term effects of such valuable information. Although it is important to ask those questions, there are actually different questions you need to ask when discussing privacy and the ideology of online branding. Several questions we now pose to digital media users include: Who is viewing the content I post and share online? Who is visiting my website and viewing my social media profile? If someone is looking at my public website, does this effect the content I post on the pages? Who is viewing the picture albums on my social networking sites, and why would someone be interested? Who is reading my commentary of opinions and my daily activities I tweet to my followers? When I post a photograph on Instagram, who is the person looking at that selfie or short video? In general, what type of content should I be posting online?
Always keep in mind the content you create daily and post on the web. What type of information is online for the world to see as it pertains to you? You’ll have to go deeper than just thinking about the memes, videos, or pictures you post.
The Online Brand
Without speaking in the context of digital terms, the basic definition of a brand is the assigning of a name to a product. A personal online brand is a focused, structured, and thought-out “plan” for your digital presence that represents who you are online. The savvy Internet user has deliberately arranged all their information, content, and digital profiles, organized and connected together. This means that a user’s personality, career, goals, and interests are clearly defined by a visit to their personal website and social media pages of Twitter, Facebook, and Instagram. The goal of the online brand is to connect each one of those traits, qualities, and, especially, individuality and authenticity. Although many Internet communities and message boards have anonymous users, an online brand clearly identifies the individual on the web. You are also being upfront and honest with your audience and the brand created. This, in essence, leads to an individual needing to first decide what they want their brand to be.
Differentiating itself from anonymous groups and hacktivist movements such as Anonymous, from 4chan, an anonymous online brand is someone in our society who does not want to share their actual birth name online, to the masses, whether on social media sites or in emails, and sometimes portrays a different identity to the audience of online participants. This person wishes to retain a sense of privacy or utilizes a variation of their birth name (Middle Name, Last Name Initial). Furthermore, there are times when users take a name or a role in the style of their favorite fandom—for example, joining a community message board discussing comic books and taking the name of their favorite Marvel superhero character. A digital user going on this route may not have a clear understanding of how the web works or preconceived notions of privacy issues. It is imperative that college students and people looking to become savvy in digital media understand the impact or effects of keeping an anonymous name will have on their future careers.
When cultivating, starting, or adjusting an online brand, it is vital to note that the product is your name. Your name is intertwined in the digital media landscape. Take a moment and think about each social media site where you participate. From Instagram to Pinterest to Facebook and Twitter, each site asks for a user name and profile picture to be associated with the profile, including the text, comments, and content, where the online audience would want to communicate. We will discuss this ideal as the chapter continues, but your given name is associated with all of the content you have created, posted, or shared. Let’s review a few possible examples of name association online. Your name is associated with each photo album created on your Facebook profile page, the blog you wrote on the BuzzFeed community page about the top five controversial issues of the presidential debate, and the 6-second time-lapse video of a sunset posted on your Vine account. Your name is also associated with the comment posted to the Wall Street Journal’s website on an article about healthcare, an animation video posted on Instagram, or a tweet giving your opinion on global warming.
Online Brand: Participate and create
Discovery Exercise
Look through all of the social media pages in which you currently participate. Locate and examine the URL of each of your profile pages. Your goal is to have all the profile pages have matching URL addresses. Once you have decided which name to use for your brand, go to the settings of each platform and change the address.
Remember, this URL will be across all sites. Also, we recommend your actual name. If your given name is already taken, select the closest variation. Here are several examples and how each connects to a digital media or social media site:
In the section on “Online Identity,” we will discuss the importance of using your real name for today’s savvy digital media user. In this section, we will discuss some deeper implications of your brand in the digital space. If someone were to search your name on the web using an online search engine, what would come up in the search results that are associated with your name? What information is on the web with your first and last name? Lastly, what kind of content is connected to your name?
When you use your real name in various locations, you are acknowledging that your identity is creating a product out of the totality of your online presence. Your brand is the combined messages of all your participation. Once your name and identity are associated as a brand, as a savvy user of digital media, you will be able to figure out how to market yourself across the web, using all the new media tools offered to you and combining skills of design and storytelling on digital platforms. To explain how to make a brand out of the user, let’s look into two recognizable examples: Casey Neistat and Kingsley.
As we begin to discuss how to start the process of online branding, digital media management is a key ingredient of this. The first brand to manage is your own. This chapter will explore ways for someone to create their online brand. Through reading this chapter, users will understand how to utilize Google searches and their social media accounts to manage themselves.
Ask yourself and your friends how aware you are of what you are posting when using the web. Who is the audience intended for each post? Is it made up of friends, family, colleagues? Who visits your site and your profiles? We take for granted that our profile is open to a large audience. Do a search for your name on the major search engines, starting with Google, Bing, and Yahoo!, and find out what is currently attached to your name. As we go to the next section, we’ll help you manage this better.
Create and Participate
As we move forward, you’ll need to make sure you have a website as an online presence, in addition to your social media profiles. Make sure you modify your URLs to represent a consistent name across the platforms, so that you are more easily searchable and shareable. And lastly, gather together content that you will be posting online. We’ll walk you through the steps of managing this content in the next sections.
Up until this point of the book, we have reviewed all of the approaches in which you are utilizing digital media, in a variety of ways, without thinking about many of the consequences of your social media posts or personal website due to societal actions and involvement with others. We have posed several questions you should ask yourself when beginning an online brand and thinking about the identity you want in the digital realm. First, when posting any content online (text or media), who is the audience viewing it? Specifically, who is the one behind the laptop, computer, or mobile device visiting your personal website and social media profiles? If you ask your average college student about whom they think may be looking at their sites, their mostly likely response would be close family and friends.
Part of your daily activities includes regularly interacting with your loved ones through social media, as we are digitally connected at all times just by having a mobile device in our pocket. We regularly check a social networking site to see if there is a notification of any kind, including a new event, message, friend’s post to comment on to start a discussion, or a brand new photo album to relive an engaged or missed experience.
Your life is increasingly connected through the web and social networking sites. Even those who remember experiencing life without collaborating with new technologies and daily developments have become so accustomed to this current social landscape that it may seem impossible to enjoy activities without these components. As technology and social media become adopted by all generations, there is no chance of reducing the value of these online products. Similarly, the value of a developed online brand and identity cannot be decreased. No matter where they are in life at this moment, in terms of education or career status and ambitions, all cultures and groups of people, from teenagers to adults, have to understand the importance of creating an identity online and branding owing to the implications they have for your personal life and professional opportunities.
UNDERSTANDING THE PERSONAL BRAND
What is the goal of creating an online identity and branding? If you wish to be a savvy user of digital media, you will want to take advantage of all of the digital media tools, both software and platforms, in order to create an identity and brand across all digital media, for positive promotion of yourself, your interests, your causes, as well as career and revenue opportunities.
When you thoughtfully consider who views your posted or shared content, you have to think beyond your family and friends. If you are creating a brand that you wish to use for potential career advancement in your profession or as a way to open up new opportunities, then your audience may be future employers. If you are focused on advancing a cause or helping out a business or nonprofit organization, your audience may be activists. Either way, at some point in your life, you will email a résumé and cover letter and fill out an online application. Whether you are an adult looking to utilize today’s technology for a career change, a college student looking to gain a foot in the door, or a parent trying to understand the tools your children are using and hoping to learn, your online identity is open to the public, and the opportunity for an employer to view the day-to-day content you post online is available with a click of the mouse, especially once the email comes in, and the employer wants to research who you are. Today, the Internet is your part of your résumé.
Social media management is paramount for a savvy user of the web, and it is important to note that many social media users have never adjusted the privacy settings for visitors to their profile pages. Many first-time digital media users of a platform agree to the terms of service and immediately begin posting thoughts, opinions, and media, without thinking through the potential consequences and ramifications of their actions. You may not realize that a current or potential future employer may visit your website and social networking sites, thus coming across a wide array of your content. How you brand yourself matters when your content is viewed in a professional context.
Is it possible that a brand can be negative? If all of your digital content is poorly managed, without any thought about the audience viewing your work, all of your pictures, videos, comments, and content are open to the public. Potential examples may include if you are a young college student tweeting and posting thoughts and pictures of rambunctious activities, including mentioning each friend, a controversial meme, or a GIF created of you tripping and falling on the ground. All of these forms of created content can be viewed, searched, and found on the web, if an employer has the desire and simply types in your name on the web.
Privacy Settings
As soon as you create an account on many social media sites, you are immediately set up as a public profile. It is up to you to adjust these settings. Over the last several years, Facebook has tried to make the settings easier to understand, owing to varying complaints from users. You should create friend lists on your profile and carefully organize who gets to see what information on your page. Some examples of lists could be “friends” and “co-workers” and “college.” Then, go through the steps to filter out certain aspects of your profile for each list. Should your co-workers see all your tagged photos? Your videos? Make sure to look through everything.
You have control over every single piece of media on Facebook, but this may not be the case on other social media sites. We encourage you to read the terms of service and consider how you use each site. As a reminder, regardless of privacy settings, your data are still collected and sold to advertisers.
EMPLOYERS SEARCHING FOR YOUR NAME
Your name is your brand, and therefore, if an employer types your name into a search engine such as Google, it will retrieve everything related to you. With your online brand, you should keep positive information public and keep personal information restricted to the private. As a digitally savvy user, you should be certain that a search for your name would yield positive results. It is up to you to manage, define, and contemplate which platforms to use, which content will be open to the public, and which will be hidden, at your discretion. Having an online brand and identity involves finding a balance for both. A positive example of public content would be a college student designing a website showcasing a blog series from English class and posting examples of their college or professional works on both their website and each social networking site, with links to the blogs on Twitter and pictures of their artwork on Facebook. The rest of their personal pictures, with friends, family, and loved ones, should be set to private. The only content available and found on the searchable web should be the content you would want a future employer to possibly see. Thus, the blog series from your English class could potentially lead to you becoming a professional writer for an online journalism outlet.

Figure 7.2
Why would an employer want to visit your social networking sites and personal website? Today’s professional industries and environments have tools never before available and at their disposal. The main sentiment is that an employer can take a glance and inspect your developed content, because you have requested a position at their company, and they are looking for a good employee to represent them publicly. According to a survey by Career Builder.com, over a third of all employers check social media profiles.2 There are several ways to look at this. You may be a student graduating with a degree that involves having a library full of videos and other media, such as short films and documentaries. You have created a website to post these videos for a potential employer to find, which would be ideal, not only for you, but also for the employer to come across, because they would get a sample of your work and talents and gain an understanding of some of your skills and qualifications, even before meeting or inviting you for an interview. An employer can potentially view content that is poorly or rarely managed and come across risqué photographs, political opinion tweets, or cultural blogs that the company may not agree with, because they do not align with the company’s brand.
Another reason why an employer would want to locate information online before an interview or one-on-one is because they can form their own assumptions and basic understanding of your personality simply from the data you have provided online. By viewing pictures, watching videos, and reading comments and conversations you have posted online, the employer can have a point of view of who you are as a person. This includes your digital characteristics, traits, and overall qualities. They can make some assumptions about your likes, dislikes, and personality traits by viewing the search results. Employers could potentially eliminate you from their hirable pool because you have simply left discretionary content online. You may be perfect for the opportunity, but one lapse in judgment could close the doors on new professional directions. In order to be a savvy digital media user, you must control, manage, and organize all content, knowing that someone is possibly making assumptions and comments and coming up with their own viewpoints on your personality from what is posted to the web.
Besides future employees, who else is looking at your content, and why should you care? Frankly, everyone is looking at your content! This means your identity is being looked at by, not only employers, but also teachers, citizens of your community, classmates, co-workers, loved ones, and members of the digital landscape all over the world. Remember, we connect, not only nationally, but globally on the web. If someone cares about you, they’ll probably look you up.
The main purpose of the brand is for you to utilize its features for career and revenue opportunities, but, first, figure out who you are as a person and share your story to those connected, who, in today’s technological society, are everyone around the world. For instance, imagine your own Facebook timeline for a second. You have posted pictures each week capturing the moments of your life. As you get older, your entire story is posted and registered online forever. By the time you are an adult, society has been able to view your entire story, from the beginning, through every single post through the years. Now, as an adult, it is time for you to change the brand and identity to what you want to share with the world, as well as your accomplishments. It is never too late to change, manage, or update your online identity.
Throughout the remaining sections of the chapter, we will define online identity and figure out how you can evaluate your current online identity. Second, you will investigate and analyze your previous digital footprint and establish your new one. As we close out the section, you will understand the use and importance of social media management.
DISCOVERING WHO YOU ALREADY ARE IN THE ONLINE SPACE
The first step in creating an online brand is deciding what type of identity you want to have. This includes figuring out which platforms to use, what content to post, and which sites to continually manage. The brand that everyone comes with is their given name. This is the name that will be researched by employers, connected to your content, and represents who you are as a person. Now, it is time to decide what type of identity you wish to establish and present to the public. Whichever subject or area you wish to pursue, including the personality you wish to portray, it has to be continually and actively updated and made consistent on all platforms, using your new media tool kit.
It is important to understand your online identity and how it benefits from being made public. Having a public online identity doesn’t mean giving out or posting any personal information, including home phone numbers, addresses, and social security or credit card numbers, on social networking sites or individual websites. However, what having a public online identity means is being open to share your identity and your complementary content with other users. For example, if you have chosen an online identity focused on your future in the podcasting industry, your personal website would have a specific page with examples of past audio shows. Your creative content will be split across websites and social media accounts, with your name attached to it. Although having a public identity through a website or social media platform such as Twitter is the key to success, you can have an open identity while keeping personal information restricted to select groups of people. Remember, when you post a video or photograph to Facebook, as the user of the site, you have the option of having the post open to the public, private, viewed only by friends, or viewed by a certain number of individuals, if you individually tag two or three Facebook users to view the picture.
Online Brand: Participate and create
Clean-up Exercise
Sign in to all the social media accounts in which you participate. Also, visit your personal website. Once signed in, visit the “About” section and check the contact/basic information. Make sure that personal information, such as phone numbers, home address, etc., is not open to the public, or delete it immediately. Remember always to save your settings!
Certain forms of personal information are important to keep public for potential future employers and to help spread the brand you have created. For example, leave relevant work history and education. Previous jobs, college majors, or internships that coincide with the created brand can help explain your identity and build a sample résumé through social media sites. Plus, always leave your email address as the method of personal contact, instead of a phone number. Make sure it’s the same email address posted on all sites, and that it’s a professional address. Use your name ([email protected]) rather than a non-professional email address ([email protected]).
If you were interested in a career in podcasting or radio, you could use discretion to change the settings on photographs, but leave your audio files and playlists open to the public. If a potential employer came across your Facebook page, they would not be able to view your pictures, but would be able to listen to all of the audio recordings posted. There would then be no possible assumptions to be made about your personality from your profile, before meeting in person, if that could potentially occur.
Who are you currently online? Odds are, your name is already attached to information on websites, content, or products when you search your name. You’re already participating on several social media sites without ever thinking about your brand. The first thing you want to do before starting to convey a new or updated identity is conduct a digital review of yourself. Do your best to review each piece of content you have ever posted and try to determine the definition of your current identity. Don’t just Google yourself: Use the social media sites to go all the way back. Facebook allows users to download all the user data they have ever created. The main goal of conducting this review is to locate and review your social media growth, as well as consider reorganizing some of the data. Once you have gathered all of the information, put it all together and consider how you would describe your online identity before you ever tried to create one. What does this information say about you?
While you are conducting this review, think about how you are portrayed through your social media posts. It is vital to read through all of your tweets on Twitter or scroll through all your posts on Tumblr. Does each blog post on Tumblr describe your personality? Would you be comfortable with a future employer reading any of your tweets? Would you be comfortable if an employer came across your latest Vine or Instagram post? Would you be embarrassed by any of the visual storytelling that is posted?
This will take some time, but the benefits are immense. A review is beneficial to perform as an activity before you apply for that next career move and begin building a brand across the web. It is important to see what you have out there.
Online Brand: Participate and create
Exercise
Sign in to all of your social media accounts in which you participate. Review all of your posts from the last year that are on your profile pages, including pictures, videos, opinions, comments, and links. After reviewing the information, take a notepad and write down three themes and words that best describe your online identity. Write down responses to the following questions: Does your online identity convey to the audience your future goals and ambitions? Does it tell the audience what you do for a living or hope to do for a career? What assumptions would someone make about your personality?
Tip
A savvy user of digital media wants to utilize all forms of social media and make sure that their brand is across all platforms. If you were to visit your Twitter page and find it describes a different brand from your Pinterest page, using the same notebook, write down three strategies through which you can connect and focus the sites so that they better to complement each other.
Once you have reviewed all of your websites and understand what your online identity currently is in the digital space, it is time to decide what you want your online identity to become. It is time to take control of your brand. The question is: How do you come up with an online identity, and what should it be? Starting with your name, we’ll work our way to your digital identity. Make sure that your name is the heading of each social media platform and website. Then, decide what headline you would want to be associated with your name. For instance, let’s say you are a communications student enrolled in a state college and you want to become a video editor for a major film or television company, in New York City or Los Angeles. What should your online identity and brand become? If you are in any creative industry, you should definitely have a personal website. Also, nearly every profession benefits from the use of social media, and you should use Twitter to discuss media topics and retweet articles affecting the industry. You could also incorporate Instagram, to post 15-second short clips of edited films to showcase your work, and leave the link to your website on your profile, so that those interested can visit your site to see the full video.
Casey Neistat’s online brand can offer you a great example of how to manage your identity and promote it. Neistat has a career in film and television and regularly discusses his ventures on Twitter (@CaseyNeistat), posting original series and webisodes to YouTube and promoting his videos on Facebook and Tumblr. He uses all social media sites as a marketing tool for his brand, to increase revenue, open up new opportunities, increase awareness of his skills, and build an audience.
This is a bit different from Laina Morris, of the “Overly Attached Girlfriend” meme, who used an opportunity from a viral video and successful meme to begin an online brand, moving toward becoming an entertainer by beginning her own web series on YouTube. She successfully utilized the web and became a sensation, thus changing the way she distributes her content. Now, if you visit her website, Twitter, or YouTube channel, it is all focused on the goal of being an entertainer and branded as a personality. You should select a subject you have passion for to associate with your name. Your passion will come through in the tone of your posts, content, and comments on your website and social media pages.
WHAT IS YOUR DIGITAL FOOTPRINT?
From the moment you turned on your first computer and double-clicked on the icon for the web browser of your choice, you have created an abundance of personal information, available through search engines such as Google or Yahoo! Each day, you use the web for a number of resources. At the beginning of every semester, we have students research their online identity through different search engines. One semester, a student researched their web history and, at the top of the search results, he found his purchase-information history from when he ordered clothes from a particular online retailer—he had not been aware that the site shared his purchase socially. The credit card information was not stored, but the date of when he purchased the products and the specific items were listed. This simply came up when he typed his first and last name into a search engine.
Social media researcher danah boyd recognizes that the web’s own architecture affects how your identity is portrayed online. In her paper “Social Privacy in Networked Publics: Teens’ attitudes, practices, and strategies” (2011), she finds that your public sociality is reconfigured through four affordances that play a role in identity dynamics: persistence, replicability, scalability, and searchability.3
Persistence is your act of using the web in general—all of your expressions and usage are automatically recorded and archived. Replicability is digital content that is easily duplicated, and scalability is where your content’s visibility is greater (which we talked about in Chapter 4). Most importantly, searchability relates to the content you have created that is accessible through a search engine.
Each social network releases your data differently to the search engines, and you should understand the various results. Every Facebook profile photograph is required to be made public, and, every time you post a new profile picture, this picture can come up on the image section of search results. If all of your pictures posted online are made public, then there is a good chance someone will stumble upon them in a basic search of your name. If those images show up in the search results, those same images can be downloaded to someone’s machine by a simple copy and paste or by dragging them to the desktop and thereby replicating the content. Photos are also sent by email and posted on specific photograph sharing websites, such as Flickr. Think about each time a website asks for a photograph of you, whether it is a community board or a college website asking to associate a photograph with a name. You upload each picture with the knowledge that it is going to be made public for everyone. By no means is this a negative, as part of managing an online brand is being aware of the pictures you upload to any site. You’ll need a default image or avatar on nearly every site on the web that requires a profile.

Figure 7.3
Your daily posts, purchases, creative work, and participation all make up your digital footprint, which is available to the search engines. The search results show the entire history, road map, and footsteps you have taken on the web. We like to refer to it as a map, because, when you find any piece of information online, it usually leads to the location of more information along the way. For example, if you type your name into a search engine such as Google, three image results for your name come up on the feed. Clicking on any one of those photographs leads to locating additional information from the source. When you make it to the source, you may find more information about you, such as education information. Your digital footprint is a long trail of digital artifacts.
Online Brand: Participate and create
Digital Footprint Exercise
Use a browser that you never use to do this exercise. If you are using a browser you consistently use, clear out all of the cache and cookies. This means opening up a browser such as Google Chrome and clearing the browsing data history and the cache. If you clear these data, the browser will not remember any passwords or stored information that would ruin possible results. Once you have decided on the web browser, use Google to type in your name. We recommend you start with your first and last names. If no results come up, try different variations by also typing in your college, the city or town you currently live in, or specific detailed information attached to your name. Pretend that you found your wallet on the ground and you have several IDs of information. What can you search with those data?
Check the first three to five pages of both the web and image results that come up. You want to record any mentions of you, but also anything that seems out of place. This could mean that the information should be attached to someone else. You want to find out what data are connected to your name. (For example, a search for Tom Kenny will result in the voice of Spongebob Squarepants, without adding “Molloy College” to the search.) Is your brand consistent on the web? For example, are there conflicting stories or personalities that summarize you? Can you identify your hobby from the results? Remember, you want your main interest and subject of the brand to be the top result. What other interests appear? Was any of the information false or misleading? Was there a photograph of you associated with the wrong contact information or hobby? The final question when doing this activity is: Did someone else with your name dominate the results? If you are a student looking to brand yourself within a certain industry, you would not want a future employer searching your name and finding your brand attached to a completely different person, where the commonality is your name. Your goal should be to start a brand online, with the results you want on top of the search engines, while the misleading information is pushed back to the farther pages of the web results.
The goal for any savvy user is to learn to build an online identity as a resource and utility to control search results. An important process in creating your online identity is managing your social media presence. A social media platform can be looked at as a utility and resource for its users, instead of solely for entertainment value. Hopefully, it will not ruin your social media experience, but lead to you incorporating elements of brand management and keeping up with each post, so that there is no misleading, false, or damaging information on any social networking site. A user on any social media site must understand that likes, comments, and posts between friends and followers or on their personal page should be a factor of their online identity and experience, as their social networking profile pages will be one of the top hits in a search engine result. boyd refers to this as scalability, which means social media have a greater potential visibility.
In Erving Goffman’s 1959 book, The Presentation of Self in Everyday Life, he uses theatre performance as a metaphor and structure to explain human behavior in social situations. Goffman also takes a look at how others view us in social situations, which, in present day terms, would be how the audience views us on social networking sites. How would a fellow user think of you if they read or watched your content? Goffman relates how you present yourself to others, while attempting to control how others react or respond to your social activities.4
Posts
Your posts should incorporate a discourse between friends and followers relating to the subject of your brand. If you are a media student, your goal will be to post and share an article from the New York Times about the top films to view at the New York Film Festival. This leads to the user controlling the conversation and the way that others react by discussing the conversation in the comments area or retweets. This hopefully starts a discussion with others, who may follow your site for information and want to participate.
Goffman also states, “the performer must act with expressive responsibility, since many minor, inadvertent acts happen to be well designed to convey impressions inappropriate at the time.”5 It is your responsibility, as a social media user, to make sure that your content is not deemed inappropriate in the context of a job or career. A simple picture may seem innocent to you and your loved ones, but an employer may view the same photograph as inappropriate. Always double-check the privacy settings: If a certain video is only meant for your friends to view, make sure that it is only available for them to see. If a subject seems too controversial to discuss over Twitter, use discretion in your act of sharing the content. If you post the content without thinking who is viewing it, you will not be able to control the message and the response of your followers, thus possibly damaging your brand before you even start your career.
Goffman also states:
Unmeant gestures, inopportune intrusions, and faux pas are sources of embarrassment and dissonance which are typically unintended by the person who is responsible for making them and which would be avoided were the individual to know in advance the consequences of his activity.6
For every risqué picture or controversial tweet posted, there can always be consequences for the action, and the material you placed has a footprint on the web. An inappropriate tweet can easily get you fired or let go from a company. This has happened many times, for various reasons, since 2008. This is why many corporations institute social media policies in order for their employees to understand what they are allowed to post. Make sure, when you start working in a professional industry, you research and identify their social media rules and regulations. It is in your best interest to create your own social media policies for yourself. Not only will these save you from embarrassment, they will also keep the wrong message from being sent to the audience. Goffman adds, “It will be necessary for all the participants in the interaction, as well as those who do not participate, to possess certain attributes and to express these attributes in practices employed for saving the show.”7 Your attributes are your characteristics and skills that you can bring to the table to further your brand subject and future career path. To do so, always keeps your skills at the forefront of your social media pages, which is what you want to display to your audience.
Online Brand: Participate and create
Exercise
Locate an article or blog or start a discussion on the subject of your field on Facebook or Twitter. See who responds to the post, retweets the discussion, and interacts with you. Does this article showcase your talent and skill, without ruining your social media experience?
Social Media Grammar
Once you have an understanding of being responsible on social media platforms, it is important to note that all social media platforms have different, unique definitions of use. Because you are accustomed to using social media to interact daily, it is hard to realize that social media are still very new in terms of communication devices. For online branding, each social media site needs to have a specific purpose. Your website should be utilized as your “hub” and home base. Facebook should be used as your main site for marketing and visibility, and you can use it to showcase all of your content and work, from videos to pictures to articles to projects. Everything can be attached to the Facebook page, but it is up to you to filter out the information from other social networking sites. The question “Should I connect all of my social media accounts together?” comes up quite often. This means that, when you post on Facebook, your information will automatically appear on Twitter. This is called cross-posting. We do not recommend this method of sharing, because the language and grammar are different on each social media site.
How you word a post on Facebook is vastly different from a post on Twitter. You should be aware of native posting on each site. According to Gary Vanerchuk, in his book Jab, Jab, Jab, Right Hook (2013), a Facebook post should include a photograph and short blurb. Twitter, of course, is a sentence containing information and perhaps a link.8 It is vital to make sure your posts on Twitter are open to the public, so that the content being posted can be retweeted by other Twitter followers. For your brand, Twitter should be used to have a public conversation about topics, issues, and pop-culture references to your subject, while also promoting content that you are creating.
Social Media Editing
Using proper grammar on social media always seems like trial and error, but, as long as you are always considering how the post or tweet will be shared, you will be on the right track. Always remember to delete your link on Facebook after you paste it and try never to post without a short commentary. Leave enough room on your tweets for someone to respond to your tweet and add their commentary. For a tweet to be shared, a good length is around 60–70 characters (with a link or a photo). Another user can use the quote tweet feature and add additional information. If you found something, make sure you credit the source with a “hat-tip” (h/t) or, if you modify a tweet, you can say m/t.
Image and Video Branding
Instagram can be used to display photographs and short videos, giving your brand a timeline and telling a story through visuals. Regardless of your career, pictures and short videos enhance your brand. For example, the student majoring in media will be able to incorporate Instagram to post pictures of them working behind the scenes using a camera or short clips of their upcoming movie. As we learned at the beginning of the book, Vine and Instagram are fairly easy to use, but hard to master. You can create Pinterest boards by incorporating topics relating to your relevant interests. If you are majoring in media studies, you can have boards on television production equipment, Hollywood news, video editing software, and pictures relating to the industry. If you happen to be a journalism major, you can create a board that ties in information on your specific focus, from sports to politics.
How Many Profiles Should You Have?
There are additional social media principles to keep in mind. One of the biggest questions we get asked by students is whether they should create a second, separate profile. To illustrate, an example would be keeping a Twitter page for your friends and family, but creating a second profile on the platform for business purposes. Many journalists do this, when they keep a Facebook page for their fans and a profile user page for their personal use. However, this may cause confusion in brand management, especially when you are just starting out. We recommend you not be afraid of who you are online and represent yourself responsibly. Having too many of the same type of account may lead a future employer to assume that one of your profiles is fake, or that you may be hiding something.
Another important principle in social media management is only sign up for profiles that you will use regularly. It is important to keep your platforms busy and up to date, giving the visitor to your pages the idea that new content is created daily and engagement is being produced with the audience. If you are on a social networking site, and it has been years since you have looked at what is on that particular page, there could be spam messages and inappropriate comments all over your page and connected to your brand.
Online Brand: Participate and create
Exercise
Go through all the social media accounts in which you have ever participated. Delete any accounts of social media profiles you no longer utilize and participate in. Many social media sites allow you to export or download your content to archive the material. If you feel sentimentality about an unused account, then definitely back up your material.
Tagging
When you are a part of any social media platform, the possibility of being tagged in a picture with your name, so that it appears on your profile, may occur. Being tagged in a picture means that someone else took a photograph with you in the picture, then uploaded the media to their social media site, and mentioned your name so that it now appears on your profile. First, make sure that, in your privacy settings, all tags must be reviewed and approved before they appear on your profile. The majority of social media sites will send you an email notification when you are tagged. This way, you can see the picture, comment, or post that could potentially appear on your site, before it actually does. Additionally, make sure that you un-tag yourself in any controversial or risqué photos that you would not want to be associated with.
Online Brand: Participate and create
Tagging Exercise
Go through all of your pictures on Facebook. See which photographs you were tagged in. If there are any pictures that you question, un-tag yourself from the photograph, and it will disappear from your profile. (Note: It will not disappear from your friend’s social media page. The only way to remove it completely is to ask your friend to remove the image.)
Keep any pictures that display your personality, creativity, and online brand! Remember, it is not all about your brand. You have to keep a level of interactivity, entertainment, and participation with friends, but check the tone and image you display to the audience.
CONNECTING WITH OTHERS IN YOUR BRAND
Although a social media platform is a great way for you to connect with friends and family, as we have discussed, it is also a great database to connect with those who engage with your personal brand. Although it is important to post and share content matching your profession, it is equally important to follow important figures and industry influencers who play a pivotal role in your professional landscape. This will open up the opportunity for you to connect with someone in your field and possibly interact with one another. This also provides you the opportunity to open a line of communication, to send messages if you have any questions about the field, share content, and find content related to your brand to share on your profile page.
Using social media publicly does not mean that you want all of your information to be broadcast to the masses. You can have open discourse with your audience through Twitter and Facebook comments, but some areas can be made private for your personal life. As you become a savvy user of digital media, it is important to know which platforms are being used for your brand, and which platforms are for your personal life. You can combine platforms or keep platforms separate—the choice is yours. If you want to use a site such as Facebook for both, it is up to you to filter out the information. Much research has been devoted to the notion of privacy and whether the youth of America understand digital media rights and privileges when new technologies are introduced. danah boyd defines social media as a networked public where teens have a space to communicate with an audience thanks to new technologies, but there are challenges in the lack of understanding of a clear privacy definition in the online world, leading to issues about whether someone is allowed to have access to your public space or has to respect the world that is your own.9 Government attempts at policies such as the SOPA and stopping illegal music downloads make it clear that the entire audience does not have an understanding of what is allowed and not allowed on the web. When something is open source on the web and people have the ability to copy, paste, download, edit, post, and share information regularly, it gives the audience an open-door policy on taking or looking at content on other people’s social media pages.
CREATING CONTENT AND UNDERSTANDING SEO (SEARCH ENGINE OPTIMIZATION)
It is now time to build and advertise your brand. If you have organized your social media presence and designed a personal website, your brand should now be focused toward your occupation, skills, and individuality. You have researched and analyzed your online identity and decided on a brand to spread across the web, on multiple platforms and distributed throughout your social media pages for your audience, consisting of friends, followers, and fans. In this section, we have designed a step-by-step guide to producing content to be dispersed on multiple platforms in order to establish a brand, for students or anyone looking to showcase their skills for possible career advancement and ambitions.
CREATING CONTENT FOR YOUR BRAND
To maintain your brand appropriately, create new content or post content that directly affects your online identity. We suggest you begin by visiting your website. Take a look at the home page and see how it looks so far. Then, take a sheet of paper and map out the content you would like to add to your site’s pages. Think about the potential employer visiting your website for the first time. Which content would you want them to see in order for them to understand your brand and your creative personality? In the center of the sheet of paper, write down your first webpage (which is probably your home page or welcome page). Then, decide what other pages you would need as menu buttons at the top of the site, describing your brand. You want to make sure that each page has distinctly different content, but they connect together, representing your brand.
There are four pages of created content that we feel are vital to building a brand to place all over the web on multiple platforms; however, they are not the only pages to add, as certain occupations will gear particular tools, products, or materials from the skills you have become savvy in. For example, if you are a teacher, your personal website may look radically different than if you were a lawyer. The website for the teacher may include teaching standards and interactive learning activities for inside the classroom, whereas the lawyer may post example legal documents to download for potential clients. Depending on the occupation, the content will obviously change. The way we have organized content for a personal website is that these distinct pages would be able to showcase skills for all areas—whether occupational or collegiate—utilizing a variety of new media tools and would showcase well-rounded capabilities of the user. For our map and brand management, we recommend adding an online résumé, blog, podcast, and videos.

Figure 7.4
Melissa Grebe concept map.
Figure 7.4 showcases an example digital media concept map. College student Melissa Grebe organizes what she wants her online brand to be. Mapped out is the possible future career she wishes to pursue and what she wants her identity to be online. Connected throughout the map are platforms she wants to use to showcase her brand, with how she will use each one. For instance, Twitter will be used to post articles and discuss issues in the television industry relating to a future career in production.
Online Brand: Participate and create
Design your concept map for your personal website. Take a blank sheet of paper and write home page in the center. In bullets underneath the words home page, write down three important pieces of content that you feel need to be included on that page. Then, in a circle, draw a line connecting to the next webpage, which will also be a menu button. Again, write down three important details of content that is imperative to be seen on the page. Follow the same steps for blog, podcast, and video pages.
Tip
If you have a distinct subject area for your online brand and identity, write down additional menus and pages besides the ones we recommend. For example, a teacher would want to add a page for lesson plans, class examples, and possibly the rules and regulations of the classroom.
CREATING A HOME PAGE FOR YOUR WEBSITE
The first webpage you need to design for your brand is a home page and it is the most important part of the site. Most users spend the most amount of time on the home page, rather than clicking onward, so focus on this page the most. As far as SEO works, the title of your site matters most, then the content on your front page. Your title should be distinct and carry your name and your title, whether that is student or your profession. Choose a theme that best represents you, not the one with the most bells and whistles. Sometimes, a very cool theme is fun to have, but really hard to fill with content and maintain. Consider minimalistic themes at first and, as your material and brand grow, use more advanced themes.
If you are creating a personal website with a more basic, simple, and clean home page design, start out by writing no more than one or two paragraphs describing what your website is about. This will be your introduction to the person visiting your website. You want to explain the importance of the site and why the audience should navigate to other pages.
There are three main points that should be included in your paragraph. First, describe your interests. This can be written in an informal way, to have your personality shine through the pages. By telling the visitor to the site what your interests are, you are directly stating what your brand is, without explaining it or throwing it in someone’s face. State your goals for the future. This will help the audience get an idea of where you are going with the website and how you plan on accomplishing your goals. By stating your goals, you will give an employer an idea of how you are displaying your skills throughout the website. Close out your summary by explaining how you plan on using your website. Tell the audience what it will find when it navigates around the site and how this will translate into a career. Explain that you are using the website to display your artwork, animation, or films in order to help further your career or open new opportunities.
After you have written the introduction, make sure that there is a picture of you on the home page. The person visiting the site has to get an idea of the person behind the brand and words on the page, thus it is important to remember that a website is a combination of both text and visuals. It is suggested that the photograph represents your brand, such as a teacher posting a picture of himself in front of the classroom, a broadcast journalist behind a news desk, or an artist in the middle of working on a canvas. It could be a picture in formal attire, such as a suit and tie, but by no means is it required.
Online Brand: Participate and create
Design your website home page. Open your CMS and create a new page. Title the page: HOME or WELCOME. If you have chosen a basic theme, write one or two paragraphs explaining your interests, goals, and plans for the future. Make sure to include a photograph of yourself on the page!
Tip
Remember, when working on a website, it is both design and content. Make sure that the picture is placed in the correct spot, where it looks visually pleasing. First, upload a photograph that is of excellent quality. Then, think about where to place it on the website. Should the picture be between two paragraphs, in the center, or should the picture be aligned to the left, with text wrapped around it. The theme will decide the answer for you.
If your site has a responsive theme, this will change the layout and design of your home page. With a responsive site, there will possibly be animation and effects on the page as someone scrolls from the top of the home page to the bottom. As responsive sites scale the information down to fit, depending on the device, this will affect how much text is displayed on the front page. Your home page must have visuals that showcase both skills and brand. Make sure that the background image is not only clear, but is the main theme of your brand.
If there are multiple images, make sure each one matches the section that it is behind. For example, the home page may have sections displaying what will appear on each page, and thus the picture behind it must match the content. If your home page is geared toward visual storytelling, select images or videos that showcase your best work. For instance, a graphic designer’s home page may have two rows, with three boxes on each, totaling six images. Each box contains an animation he drew, and, when a visitor comes to the site, they can click on an image and it will pop up on the page. Another example may be for a videographer of weddings. When someone visits her website, the first page should be showcasing examples of her work. Look through the plug-in section for extensions to build tables or pre-built sections in a theme to design a layout for a video section on the home page. This may be the first time someone is looking at your skills and expertise; therefore, if they enjoy what they viewed, it will open to opportunities for navigating through the site, visiting the site regularly, or contacting you for a job opportunity.
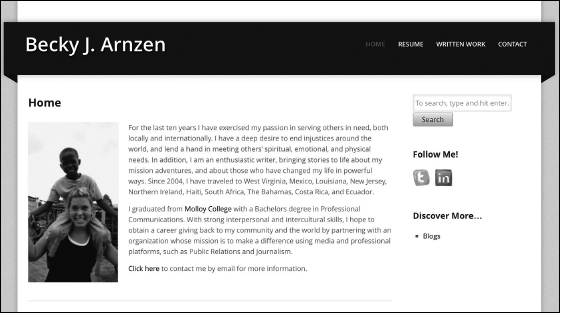
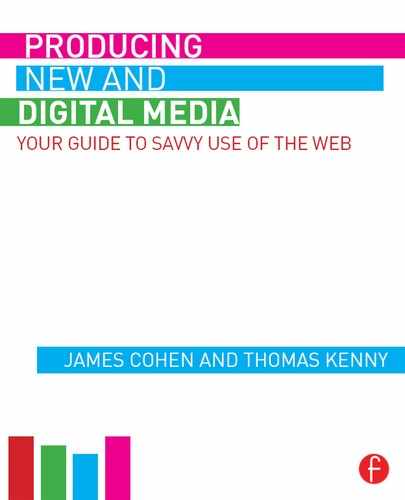
Figure 7.5
Becky Arnzen home page.
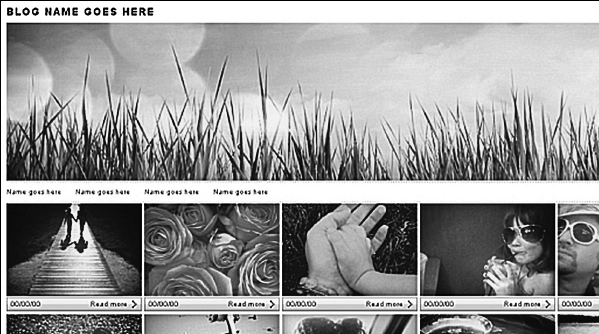
Figure 7.6
Photologger by emmakitchen.
Source: GNU GPL
CREATING A BLOG FOR YOUR WEBSITE
One of the most important skills someone can showcase on their website is the ability to write well. No matter which occupation you will have in the future, having the ability to write crosses all industries, from journalism to film to education to engineering. When it comes to writing, an excellent tool and branding mechanism you can add to your website is your very own blog. Starting your own blog series begins an open discussion with those who have the same passion for your area of interest. This is a way, not only to add content to your site, but also to have regular visitors come to your site daily to read your next post and opinion on the subject they share an interest in. By blogging about a topic in your brand, you are giving the impression to the audience that you are an expert in the field and to employers that you are very knowledgeable on the subject matter. Blogging will open many new doors and opportunities never imagined before.
As dicussed in Chapter 2, blogs have always been an intriguing phenomenon since their inception in the early days of the web, when users moved online to write open, personal diaries to display opinions on different subjects and everyday life. As the web advanced, so did the idea of blogs. Blogs now appear on both personal websites and professional industry ones involved in moneymaking ventures. The intriguing thing about blogs is that they begin as content for your brand and website, but can lead to career fortunes. Once a blog has brought a built-in audience or fan base to your website, this can lead to online journalism as a potential career, with advertisements being placed on your blog or website, or the blog becoming the central idea and product of the site. The blog you will create for your website is a combination of creativity, skills, and proficiencies, and you are expressing yourself by writing your opinions on the subject of your brand. The key ingredient that will make your blog stand out from others is that it will be a combination of both opinion and information on a subject someone can learn from or discuss with you, while the medium is also utilized as a marketing tool. There are three areas to analyze and plan when creating a blog for your website. You must select, first, the topic and, second, the design of how it will appear on your website and components of the blog itself; lastly, you must consider the advantages that having a blog on your website will create.
Oh My Old Soul
Figure 7.7 shows a personal blog by Jessica Schaefer about a young girl in her mid 20s who, after 2 years of graduating college, completing an internship, and starting an entry-level position, married the love of her life and had a baby girl. As a young mother, Jessica started a blog geared toward young adult mothers, discussing and showcasing her journey through marriage and parenthood, while also blogging about personal interests that she will always have, in film, writing, and crafts.
First, begin by selecting the subject matter of your blog. Our advice to you is to select a subject where the focus is geared toward your college major or the industry in which you wish to gain an occupation and is something you are passionate about. What will set your blog apart from others will be that you are not only giving an opinion, but also backing it up with facts and experience, as you have been trained in the specific area. Although having a blog post on your personal website about your love of animals may be a fun and informative read, sharing with the audience your passion and giving it a new insight, unless you plan on a future career working with animals, such as a veterinarian, your career-branded focus should be on education, for example, and otherwise may lead to brand confusion and an unfocused, unclear website, thus closing potential opportunities.
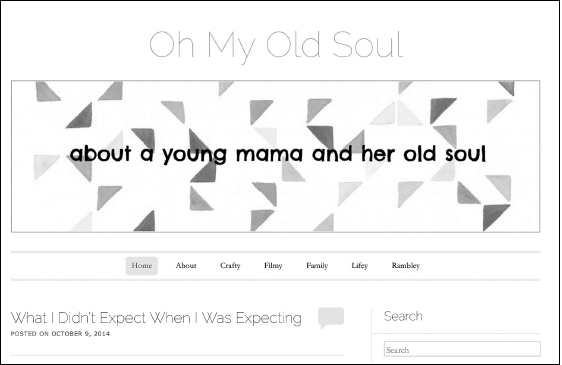
Figure 7.7
Jessica Schaefer’s personal blog.
When trying to figure out what to write about concerning an industry you hope to be in one day, select topics that will generate interest and discussion. For instance, if you hope to have a career in social media management, one direction to go with your blog is to come up with new platform ideas on mobile devices. You are explaining to the reader, who does not have understanding of how to develop a concept for online use, and possibly discussing issues on the social media that they utilize daily. If you are able to inform your audience about what it has never known, you will be showing your skills and proficiencies to a potential employer or fan who may come across your website and that you are a master of the information. If you wish to be an attorney, you can write a blog section focusing on current court cases ongoing through the legal system in New York. Each week, you can take an article published in the newspaper and explain to the readers, who may not be familiar with law terms, what the possible outcomes will be if the person is found guilty and what the law states in New York, explaining the entire legal process of the case for others who do not have a background in and knowledge of the law. This blog may open opportunities with potential employers looking to add a new lawyer to their team, but also with clients who come across the site and feel that you understand the legal system exceptionally and are so knowledgeable that they would want to hire you for their case.
Online Content: Create and participate
Decide what the subject of your blog will be. Take a blank sheet of paper and write down your college major in the center of the page. If you are out of college, select the industry or career area you are currently in. After you write down the main word, come up with different topics pertaining to the area. Try to come up with at least five subjects.
Tip
After you come up with a subject, show your ideas to fellow students, professors, or colleagues. This will give you an indication if it will attract those associated with your brand, as they are the potential readers of the blog.
Writing Your Blog
Now that you have selected the subject matter, it is time for you to start brainstorming the type of information you want to relay to the audience. Will your blog be informational, opinion based, or a how-to guide? If you take any of those choices, how will each post be different from the others, while discussing the same content? This means, how will your blog post from last Monday connect to the blog post being uploaded today to your website? Imagine an educational blog being written by one of your teachers, where she gives fellow teachers and aspiring students advice on ways to engage your class. One blog may discuss using technology as an engagement tool, whereas another blog will focus on collaborative efforts as an engagement tool. Two completely different blogs, but focused on the same subject concerning education. Your goal for the blog on the personal website is to post one that is both informational and opinion and is based on the experiences you have had in professional industries and education and the skills developed in your life.
Online Content: Create and participate
Begin planning your first three blogs. Now that you have decided on a subject and main topic, decide what your main points will be in each blog and how each one will connect with, but differentiate from, the others and not repeat any of the same information. Make sure you plan on keeping the blog going and up to date: A dull blog does not look good to readers.
A student majoring in communications is writing a blog about production techniques used in television dramas. Each month, he selects a different television show. This month, he is writing about AMC’s The Walking Dead. The first blog will be about camera techniques, the second blog will be about lighting techniques, and the last blog will be about special effects.
Tip
Take three sheets of paper and write down the subject of each of the three blogs. Using a bulleted breakdown, write down between five and ten main points you want to cover in each blog.
Even before you start writing your blog, you have to think about the design in two parts. First, where will the blog be located on your website when someone visits? Second, how will each blog post look? In WordPress, you have options to create content in either pages or posts. For a blog, always create the article in posts. There are several advantages to creating a blog in posts. For one, the latest article always appears on top, pushing the older posts toward the bottom of the main blog page and moving the titles down as well, if the headings appear on the home page. In posts, the date and time that the blog was posted are automatically published. This is a feature of all blogs, on personal and professional sites, as it shows how current the events, issues, and topics are that you are discussing.
Figure 7.8
Reynolds’ blog.
Keep in mind that, if you begin a blog for your website, you need to be consistent and persistent and publish new articles regularly. If you only post an article once a month, once every 6 months, or once a year, the information will be outdated, losing potential visitors to the website because the impression is given that the rest of the site (such as your résumé!) is outdated as well. As discussed in social media, if you are not going to use a platform, it is better to not join than to have an empty page.
College student Alyssa Reynolds created a blog series on reality television, which appears in posts that the audience and reader can find in recent posts on the right side of her home page (see Figure 7.8).
Starting Out
In WordPress, hover your mouse over Posts and select New post. Here, you will find a section for putting your posts in categories, which means adding a label and describing your posts with a main subject. This helps when you have articles with different topics within your subject. For example, using the earlier subject of your teacher writing an education blog series, one category may be titled “collaboration,” and another category will be called “technology.” When starting a new blog, make sure you place the post in the related category. This category will appear along with the date and time. Someone can click on the category when visiting your website and see all of the blogs posted on this particular subject matter. This will be labeled next to the date and time, underneath the heading (some themes may have different locations).
As we mentioned the idea of creating a heading in the post title, keep in mind that this is what will be searched through search engines. Remember to come up with a title that someone who has common interests or similar brand concepts would do a search for through Google, and your blog could come up in the possible results. Because of the sheer volume of content produced for the web daily, it’s important to optimize the title of your post. The readers on the web want to click on something interesting, so make sure your title is a clickable link. If you are writing about education and teaching strategies, you should optimize the title by wording it as though it’s a newspaper headline: “5 Strategies to Help You in the Classroom” or “Valuable Education Tips for Classroom Use.” Your title should be unique and optimized enough that, when someone searches for your article, it shows up at the top of the results.
You also have the option of creating tags and keywords, which are also some of the ways your work will come up in search results. If you create a top keyword for your blog post that you or someone you know would type into a search engine, the chances of your article coming up in the results is higher. Tags work the same way as when you place them on a video you have posted to YouTube. If your blog post is about social media, possible tags are: social networking, Facebook, Twitter, Instagram, Vine, etc. Commas separate tags when you create them in Word Press.

Figure 7.9
Tags.
Source: GNU GPL
Now, start writing your blog post. Remember, the post is from your point of view and perspective. Make sure to incorporate opinions, but follow it up with resources and facts, with hyperlinks to the source information. Adding links to your article helps SEO and brings additional traffic to your blog. When you write, use examples from your experiences in the industry or the classroom to back up statements. For instance, if your blog is about television production techniques in broadcast dramas, with the first post about the camera operation tricks used on the latest episode of The Walking Dead on AMC, the blog can start off explaining what the camera techniques were from the first few scenes of the episode. Then, you can follow it up in the next paragraph, giving your opinions on what you felt the director did right with the camera shots and what you would improve upon. There is no specific rule of thumb for how long the post should be, but keep it to a couple of paragraphs. It should be no longer or no shorter than the content requires. The Associated Press states that short-form, single-byline articles should be between 300 and 500 words,10 and that is often a nice size for writing. As long as you are writing consistently, you cannot do it wrong. Keep in mind to always bring it back to your brand as you are telling the story. Use strong verbs throughout and keep it in the active voice.
After you have written the article, keep in mind that today’s blogs are also visually driven. All you have to do is visit BuzzFeed to see the trend. The BuzzFeed model is heavy picture posting with minimal text, and its influence has affected the way readers consume blog posts. Therefore, for your professional blog, add media content such as pictures and video to keep the reader engaged with the article. Always locate a picture or video example that matches the text. This gives the reader an example of what you are discussing, and we think it works because, if you have written a long article, an embedded YouTube video on the subject gives the reader a break to take in all of the content and comprehend the material. After viewing the video, the reader can finish the blog, gaining well-rounded knowledge on the subject. If you are using WordPress, you are able to caption any photos that you insert in the page or post. If you post a photo that isn’t yours, make sure to credit the photographer or source website. Just because you are blogging about your favorite band or television show, you cannot post an image that someone else created, even if it is from Google Images, without permission.
Online Content: Participate and create
Write your first blog post! As it is your first post, keep it short: about 300–500 words (three or four paragraphs.) Make sure to add at least three forms of media (pictures or video) that coincide with the text. Always reread and revise the post before you press the publish button. Remember to add tags and create a category.
Tip
One of the key elements of a blog is the conversation between the author and visitors to the site. Leave the comments on. See what the reactions are from readers and interact with your audience. Reading comments can help you come up with new ideas for your next blog and help you become a better writer, as you might have missed something from your post that someone recommended!
Becoming a Professional
It’s intriguing and quite astonishing how quickly blogs changed the landscape of journalism. Starting as opinion pieces by a multitude of early Internet users, with relatively little chance to make money, bloggers found the opportunity to have their voice heard around the world, in hopes of instituting an ounce of change. Today, there are million-dollar corporations appreciating the benefits of blogs and understanding that a blogger doesn’t have to be a professional journalist, but someone who has the reach to a worldwide audience. Popular blogs are found on major websites all over the world, including ESPN, New York Times, Mashable, and the Huffington Post.
But how does an opportunity to blog for one of those companies come about? Is it only journalists with years of writing experience landing jobs as bloggers, or broadcast journalists being asked to blog on the network’s website? The opportunity starts with writing a blog on your website, building an audience, and promoting it all over the web. Following the same protocols as when a video becomes viral or a user-generated web series becomes the latest hit, the goal of creating your blog on your website can generate several opportunities for your brand.
Through employers finding out about or coming across your blog, you have potentially showcased your writing skills, which can be parlayed, and you can become a valuable asset for a blogging website such as Cracked.com or journalism outlets such as The Washington Post. You become an asset for an employer who may want you on their team because you have understood how to sell a product to readers, continually grabbing their attention and getting them to come back to your site. As with popular YouTube channels that cultivate a consistent audience on a regular basis, your blog can do the same thing. Your blog may become a success and become the main piece of content on your website; it may become a revenue stream, as advertisers may contact you because you have a massive following that is geared toward their product. It all comes down to how you market your brand by sharing on social media pages and promoting it the best you can. Between your website adding revenue or potential writing opportunities in several areas, this side project just to add to your brand has become a potential new career in the process!
CREATING A PODCAST FOR YOUR WEBSITE
As you are on your way to becoming a savvy user of digital media, you want to explore all of the tools available to you when creating content to post and market all over the web. One tool that is available for you to use to express your creativity and even promote your brand is through audio. In order for you to utilize the power of your voice, you can create your own podcast series.
Podcasts have become very popular over the last decade. If you open iTunes and visit the podcast section, you will find a vast amount of free audio shows to listen to, on subjects including technology, entertainment, education, sports, and health. Each one of those areas contains shows for anyone to enjoy listening to in their spare time or looking to gain knowledge about a subject. But, if you break down each one of those subjects, it would translate into academic majors, which got us thinking when we designed our course for online branding. What would happen if you could create a podcast discussing your college major or industry profession? How would this influence your online brand across all platforms? The results have been nothing but positive and added more tricks to the content creation toolkit for all users.
When designing a podcast, we take three concepts used in television production and bring them over to the audio world: pre-production, interviews, and editing. In podcast pre-production, you organize the show, script, and details needed to produce the show. In the previous step, we asked you to create a blog. As most of our students and industry professionals have never created a podcast before, we decided it would be best to turn your blog into an audio show. Start with the subject and topic of your blog that matches your college major or industry profession.
Next, find someone to interview. Rather than just make a podcast from your point of view, it would be more of a learning experience for you and for your listeners to hear from an expert in your area of research. For a podcast on your site, you will play the role of host. As far as the criteria for a guest, make sure the person shares the same interest and has experience in the subject matter. For example, if you are a college student interested in becoming a police officer, you can interview your criminal justice teacher; if you are a new media student and major interested in becoming a social media manager, you can interview someone who manages the social media account at your internship; or, if you are interested in politics, visit your local town hall and ask to interview the mayor. By interviewing a subject, you are learning from an expert and receiving advice from an industry expert you potentially want to navigate by after listening to it, while using the podcast to increase brand exposure of your identity, because you are involved in the conversation with the expert.
Online Content: Participate and create
Find someone related to your online brand to interview for a podcast. Once you have found your interviewee, write up at least ten questions for the show. Some topic points include: Ask about their background and where they grew up; how they got into the business; their journey, including accomplishments and obstacles; important subjects in the area; advice for listeners; and goals for the future.
Tip
If you are having difficulty finding someone to interview, ask a college professor, a colleague at your internship, or a recent graduate with an entry-level position.
After you have scheduled your guest and written up your questions for the interview, the final part of the podcast pre-production phase is developing and writing down your show opening and close. If you write down the show opening and close beforehand, you will be able to record before or after the interview privately, without the subject there. For the show opening, start off by giving the title of the podcast: This could be your blog title or your own creation. Make sure you introduce yourself and your guest and add some preamble right away. Give some basic background information and explain why you are doing this podcast. Next, give a brief overview, describing what this show will cover, leading to introducing your guest. State their name, title, and some accomplishments and highlights of their career.
Online Content: Participate and create
Write your podcast show opening. Remember to write down the following information in one paragraph.
1. Open with the title of your podcast (not required; only if it will be a regular series).
2. Introduce yourself to the audience (listeners).
3. Brief explanation of the conversation and topic.
4. Introduce your guest—include name, background and career highlights.
Tip
This is an audio show! Your personality has to shine through. Try not to speak in a monotone voice. Make sure you have energy and a lively conversation throughout the show, as it will keep your listener engaged throughout the entire podcast!
After you have written the show opening, you immediately want to write and record the closing. For the closing segment, start out by sharing with the audience a place they can visit for more information on the person who is the guest on the show. For example, give the person’s website or social media page. Don’t forget to sneak in a mention of your website too! Then, give a brief closing statement, with any final thoughts to share with your guest or with the audience. Our advice is to wrap up the key topics discussed as a review. Finally, close out by thanking both the audience and the guest.
Online Content: Participate and create
Write your podcast show closing statement. Remember to write down the following information in a paragraph.
1. Share with the audience where they can find more information about the guest, including contact information (website, social media).
2. Review the main topics discussed.
3. Thank both the audience for listening and the guest for joining the discussion.
Tip
If you have an idea for the next podcast, include a statement explaining what the next show will be about, as a way to bring the listener back to your website.
After the pre-production, it’s time to record the interview. If you are recording the show in person, we suggest using a portable audio recorder such as a Zoom microphone. The quality of your work represents your brand, so, if the audio sounds poor or distorted and the quality of the interview is not up to high standards, then visitors may turn off the podcast and perhaps not give you another try. You do have the ability to use more accessible technology, such as your mobile device, and you could use your headset microphone to record the audio. You can use voice memos or any number of recording apps made available through the app stores. Or, you can ask a friend or your college’s AV department or communications department to see if they have portable equipment for you to borrow. If your guest lives in a different city, state, or country, there are several apps that record two-way conversations on a phone as well. Make sure you inform the guest that you are recording before you start.
No matter which audio device you utilize, what makes your podcast stand out from a typical radio show is how well you interact with your guest. This is your time to show your personality and your ability to communicate clearly and effectively with another person. Try to put pauses between bites, stay calm, and be a good listener. Don’t ever talk over the guest, and, when they answer a question, give your opinions and experiences on the subject as well.
Online Content: Participate and create
Set a time with your guest and record the podcast. Make sure you find a quiet room or spot on campus that has no background noise. If you have an opportunity to borrow or purchase a portable audio recorder, record the show using that device. You can use your mobile device’s on-board voice memo app or download one from the app store. If you use your mobile phone, use the microphone that is attached to your headphones as your recording device.
Do your best to listen to the audio at all times. If it sounds fuzzy, it definitely is; make adjustments on the recorder (such as raising the volume or gain) or find another location.
Once the audio has been recorded, it is time to edit the podcast. We utilize audio editing software such as Apple’s GarageBand or Audacity (which is open-source software for either OS Mac or PC). Using this software, you should edit out any long pauses, the word “um,” and any details that are unnecessary or drag out the show. Many interviews will run between 15 and 30 minutes. This is a long time for someone to listen to new content for the very first time. We suggest trying to cut down your show to 5–8 minutes or break it up into two separate parts for multiple shows. Also, while in GarageBand or Audacity, check the audio waveforms for audio peaks, adjust the volume, and clean up any background noise you do not want to have appearing on the audio file, before posting to the web. When you have completed editing the audio file, export the file to your computer as an MP3 or WAV file.
After the file has been exported to your computer, it is time to post it on your webpage. Create a new page titled Podcast. A new menu button will appear on the top of your home page once you publish the page; if it doesn’t, use the Menus feature and add the page to the navigation bar. In the body of the page, write a one-paragraph description of what the podcast is about, the subject matter, and the main points. Import the media file into the CMS media library. The next step depends on your website theme. There are some themes that have an audio plug-in built into the CMS, where you can automatically select audio files, and the site builds a player for you. If not, you will have to save your current podcast webpage as a draft and visit the plug-in page of your WordPress. When you are in plug-ins, type in “Audio player.” Select a player to download and install to activate the plug-in. Very often, plug-in audio players will require the URL to the source file of your MP3 and will ask you to paste the link in the player’s short code.
Alternatively, you can use SoundCloud to upload your file and add it to the audio community. SoundCloud integrates with WordPress seamlessly and allows for your audio file to appear on your page. If you are not using WordPress, SoundCloud also provides embed code to post into your webpage to add the audio player.
An online résumé is one of the most important pieces of content you can add to your website. If a potential employer is visiting your website for the first time after receiving an email from you, the next link clicked will be your résumé. Having your résumé online has several advantages: One, you do not have to limit your résumé to only one paper page. You can add additional education and career descriptions and as many accomplishments as possible. Two, if you sent an email with an attachment of your résumé, the employer does not have to worry about clicking, downloading, and printing out your résumé. He can easily click the link for your résumé without printing, read the information quickly (which is beneficial for someone with a busy schedule), and look over the rest of your website, consisting of blogs, podcasts, videos, and accomplishments. Basically, you have turned your entire website into an online portfolio of your work.
If you already have a résumé, copy and paste it into a new WordPress page. On WordPress, you will find an option to paste from Word. The formatting is completely different from a Word document. If you have never completed a résumé before, let’s go over some basic tips and required sections you should have in order to showcase your skills to potential employers. Remember, there are different formats and styles for writing résumés. Also, depending on your area of study, the format may change, and certain information may have to be included. The format we are going over is a general format to go by for all majors.
Start by putting your name and email at the top of the webpage. Make sure that your email address is a hyperlink where the employer can click on the address and send you a quick message (highlight the email address, press the hyperlink button, and type mailto:[email protected], click OK, and the address is active). Unlike when you hand in a physical copy of your résumé, which includes your address information and phone number, you may want to keep that information private from an online audience. Just make sure to give out the email address that you use regularly.
If you are looking for an internship, the next section should be your education information. If you have prior work history or are currently working within your brand, you should put professional experience first. This can include internships for those in college, because you are taking the skills from the classroom and incorporating them into a professional environment. This depends on the current education and career situation you find yourself in. For education, include your area of study, the college, and expected graduation date. If you have attended more than one college, put the latest one first. In the education category, make sure to included honors and achievements, such as GPA, honor societies, dean’s list, or any other educational accolades. Always remember, a résumé is in reverse chronological order, just like your blog posts. Newest first.
We recommend adding related courses and giving the course descriptions. For students still in college who have yet to gain an internship, adding your related courses will show employers the skills you are learning in the classroom and potentially generate conversation during an interview. Add up to three courses that directly affect your college major and add the course descriptions. This will highlight the main points of the courses and also tell the employer the skills and areas you have studied.
Next, add your skills. You want this to be a bulleted breakdown of every skill you have learned in your college majors or completed internships. Highlight the key tools you have studied and have a proficiency such as software, writing, interpersonal, or technology skills. Just make sure you are grouping common themes together, such as keeping the software together and the writing skills together. Don’t be bashful—this is the time to show how skilled you are.
After you have posted your skills, add your work experience. For students who have had both internships and retail jobs at the same time, we recommend to break it up into two sections of professional experience and work experience, highlighting both jobs. Add the information in reverse chronological order, making sure to include your job title, city, state, and dates worked. Underneath, add at least three bulleted descriptions of your job duties. Always start with active verbs and, if you no longer work in the position, make sure it is written in the past tense. If you currently work in the area, place it in the present tense. But always try to write actively, not passively.
Close your résumé with a heading for activities if you have done any community service or are involved in any campus activities or sports teams. You do not have to add the statement “references available upon request,” as any job position contacting you will ask for that information.
USING LINKEDIN FOR ONLINE BRANDING
Now we have discussed the many ways you can create content, another tool that you should take advantage of as a student or digital citizen is the professional industry social networking site, LinkedIn. LinkedIn is a free platform (with a paid premium option) where you combine the information of your online résumé along with interactive features. LinkedIn is a social net working site geared toward businesses with the idea of creating a professional profile. You are able to connect with industry leaders in the career you wish to pursue, while also sorting through job opportunities listed by companies. Your main goal of using LinkedIn is to compliment your other sites and social media profiles to connect directly with companies. If you do not want to have any companies locate your personal Facebook or Twitter, then you will want to absolutely join LinkedIn. Over 90 percent of companies use LinkedIn to research potential employees,11 and your LinkedIn profile will usually always come up in the top ten results of a search for your name.
It is important for you to follow companies in the line of work you wish to pursue. Following companies through LinkedIn is important and part of the research process, as possible opportunities will come through on your newsfeed or email or as a new job posting is listed on a group board. Before we discuss the tools LinkedIn has to offer to you, keep in mind that it is preferred that you connect with past employers at internships, teachers, or professors who can help elevate your status and your brand for potential employers by interacting with you through LinkedIn.
There are many highlights for using LinkedIn along with your other social media websites. First, placing the information throughout your profile has never been easier, as most of the information across the profile page will be geared toward your occupation and skills developed through your online résumé. This leads to simply bringing over information and plugging it in where necessary. One of the first pieces of information that you will incorporate into your LinkedIn site is the summary. This section is one that you should take advantage of, as it allows you to put a creative biography that catches the attention of a possible employer. Here, you will want to express your individuality with a clear statement. Without repeating your résumé in the paragraph, work on a statement or bullet points that would make you an ideal candidate for any position. If you only had one sentence to tell the employer why you should be hired, what would you say? Start off with a clear, active statement, followed up with three to five bullet points that highlight who you are, indicating that the skills you are putting in the summary are both your interests and your passion. After posting several bullet points, add a short paragraph below with a brief description of any information that a potential job employer would need to know immediately. It may be wise for you to add your specialties and characteristics that you are proficient in, such as digital media, social media, web design, or online journalism.
Online Brand: Participate and create
Writing a summary on LinkedIn is sometimes a bit daunting, because it requires you to write about yourself while walking the fine line between being tenacious and overzealous. Keeping it short helps, and, if you can, write a summary in the form of an “elevator pitch,” or about the length of two tweets. Remember to use “spin” and keywords to amplify your skills, without seeming too egotistical. It’s tough and will require several rewrites. Have your classmates and friends read it to see if the balance is appropriate.
There are several key functions when starting your LinkedIn user profile. First, remember to always make sure that your URL is the same as on all of the social media platforms. If your Facebook, Twitter, and Instagram accounts have the same, unique name, then you will want to do the same with LinkedIn. This gives all your social media sites a distinct address for followers and fans to follow you. The next step is making sure that your job position is highlighted underneath your name. This subheading allows the person searching for you to quickly see your industry and your job title.
A profile picture on LinkedIn is essential. Unlike other social media, LinkedIn only allows one photo, so make sure that you are dressed in professional attire. Besides a profile picture, LinkedIn now enables users to have a cover photograph, which is important to promote your brand. In order to do this, make sure the cover photo references your skills. For instance, if you are a media student, have a cover photo of a production camera or studio; if you are a teacher, have a cover photo of a classroom; or, if you are an artist, post a cover photo reflecting a piece of your work. This is an excellent way of showcasing the expression and creativity of the brand.
Now, let’s fill in the rest of your profile and digital résumé. The first thing you will want to do is bring over your work experience from your online résumé. As with any résumé, you have the ability to add your job title, the time period you have held this position, along with the skills of the job. One of the highlights of the experience section is that it places the company logo next to the company you have listed. You have the ability to either place honors and awards below each job or create a separate section with your achievements. Follow the same format discussed with creating an online résumé and list all of your accomplishments, including educational or occupational awards.
The next step is where LinkedIn gets more interactive with your profile. This follows the traditional format of a résumé and lists your top skills. These skills include software, subjects, particular areas of expertise, and tools that you have mastered. To illustrate, if you are a student who has studied digital or new media, your list may include: social media, journalism, web design, blogging video editing, WordPress, Twitter, and photography. One of the great parts of having a LinkedIn profile is that you can have fellow students, colleagues, or teachers endorse your skills. When you visit your profile, LinkedIn will usually ask you what skills or expertise your other connections have. Connections can endorse one of your skills by visiting your profile page and pressing the plus symbol next to the skill, leaving their profile picture next to the skill. This is an excellent feature, as a potential employer looking through your skills can view the number of endorsements next to the skill. Another great option for employers is that they are able to hover their mouse over the picture of one of the endorsements, and their name and job title will appear. This is beneficial, because a potential employer can see that you have been endorsed by an industry professional, which shows that you are qualified for this skill and capable for the position.
Beneath the skills is where you will fill in information on your education background. As with the professional companies, logos will appear next to the title of the educational program that you are involved with. Remember to name the major and minor programs you are currently enrolled in or have received a degree in. Keep in mind to also add any activities or clubs you were involved with, as they may have a comparison and link to the brand you have created. Another good idea for students is to add projects, videos or research papers, such as a seminar thesis.
One of the best benefits of LinkedIn is the recommendation feature on your profile. Recommendations are added to your profile page by your other connections, who are current or previous colleagues who have experienced your skills by working with you. Recommendations appear underneath the specific job in the experience category and in a separate category. Potential employers will read first-hand experience of how you function in the work place and how you excel at the job. If an industry professional is recommending you for your skills and the job that you have completed, this shows your exceptional qualities.
LinkedIn also offers what it describes as groups for users to join. Groups are a place for discussion topics and message boards, for professional industries and jobs as well as academic ventures. Examples include groups for college alumni, for members to keep in touch, discuss job opportunities in the field, and stay connected for alumni events. There are also groups for software skills to match your brand, such as Adobe Photoshop or Apple’s Final Cut Pro, where members can discuss new skills using the program, ask other members for help on an issue, and interact with others who have the same interest and skills with the software. Interacting with those who have interests in or knowledge of the same software or skill may lead to future opportunities.
Now that you have increased the professional content on your website, cleaned your social media profiles, and joined LinkedIn, it’s time to control your search results. SEO plays an important role in Internet marketing industries, as well as your personal brand.
You have now generated content all over the web on social media platforms and built your own website. To start making sure that your brand appears on the top of Google searches for your name, make sure content appears on each of your platforms. Start with sending out the content and posting links all over the place on social media. Let your audience know where to find your brand and the content you are creating. It is important that, if you created a video for your website, the video can be found everywhere. If you uploaded a video on YouTube, embed the video on your website. Follow it up by uploading and promoting it on your Facebook page. Use Twitter to promote it and bring users to your website. Finish up by taking 15 seconds of your video and posting it to Instagram. Through your posting content on each platform, users are continually visiting the sites and clicking on the links. This will be the content that appears on the top of Google searches, with any misleading information attached to your name being pushed farther down the pages.
Your Content Online
It is important to note that Google personalizes the results of each individual using its services by the information it has through your Google Plus account and YouTube, and each one of those accounts works together. As Google owns these products, it will attempt to show these results higher on the search.
Additionally, when you add hashtags or tags to your content, you are essentially allowing your content to be used for public purposes. For instance, your college uses a tag such as #collegelife when asking students to take pictures around campus and posting those pictures through all social media platforms. While on campus, you take a photograph of a group of your friends having lunch and post it to Instagram using #collegelife. The college is then allowed to use that picture for any promotional purposes, such as articles or magazines.
To track how well you are faring in search results and content views, you should enable analytics and metrics, explained in Chapter 3. YouTube’s analytics come with every single video you post and can give you insight into how people are responding to your video content. If you add a digital résumé, you can see how many people are watching all the way through, and this can help you improve your content for future projects. YouTube’s analytic section now hosts a real-time view in which you can see the charts move up and down as it happens, live. If someone starts watching your video, you can see how long your viewer has watched your video.
One of the most helpful charts on YouTube is the audience retention chart. This chart will showcase your videos’ estimated amount of minutes watched. It will even give you the average view duration and the average percentage viewed. This gives you a clear indication of whether your audience was engaged and watched the entire video through. If the audience did not watch the entire video, you can see where they clicked away. This helps you, as a creator of content, to see what part of the video your audience is enjoying and what type of content it wants to see. You can even get specific engagement reports. This includes information on your subscribers, likes and dislikes (even seeing which country did not like the video), favorites, comments, and sharing. Under sharing, you can get a report to see on which platforms your videos are being shared. All of this information will only improve the videos you create and help you market your branded videos to the audience.
Google Analytics is a place where you can monitor your website traffic. Google Analytics is free to use, and Google also offers a premium service. When registering for the service, you have the ability to set the data sharing options. Once you are signed in, you will receive a JavaScript code that you must copy and paste into every webpage you want to track. Google Analytics will track and give you statistics on your visitors from social media sites and search engines. This gives you insight into how your webpages are performing.
HAVING ORGANIZED YOUR DIGITAL FOOTPRINT
What you most likely found through researching your digital footprint before you branded yourself is that you are a very creative individual who used a vast number of new media tools and technologies before you focused on personal promotion. By creating an array of different content and posting it on your personal website and social media pages, you have essentially cleaned up and organized your digital footprint, which may have originally had a lot of various content and scattered information. You have achieved a clear, focused, and manageable brand, incorporating your creativity, individuality, and definition of yourself, for loved ones and employers, without any questions of what you wish to accomplish professionally.
In organizing your digital footprint, what did you leave behind? The information on the top of Google search results that may have been misleading or unwanted is several pages away and moving farther away with each additional piece of content added to your social networking sites and websites. After organization, the top hit when you type in your name will be the created content of blogs, podcasts, online résumé, videos, LinkedIn profile, and other social media accounts where you have negotiated the balance of professional and personal content. Eventually, the dated information will fade into the background. An increase in clicks will provide more results on search engines and equal brand awareness.
How do you maintain your digital footprint? In order to be a savvy user and continue the brand that you have started, you must constantly create. All industries and fields today require you to constantly create and produce products. Do not be passive in creating digital media products if they have direct correlation to your brand. Connect with other new media users and trends and always join discussions in the online world. Building a brand is like a story you place online, with multiple chapters and locations. In order to continue to tell your story, you have to create and post new and digital media. The final goal with a digital footprint should be not just to maintain, but constantly to improve.
Does your entire experience have to be focused on your online brand? No, but always take a second to think about what you’re about to post and create. Take a moment to think about the possible outcomes, reactions, and consequences of anything you are about to post online. When you are about to add content to your social media platform of choice or personal website, reread the post and think about the possible outcomes. You should continue to enjoy your Internet experience to the fullest and continue to interact and participate with friends, family, and followers, creating Vines, memes, and GIFs. Think first, post second. What this entails is viewing what you write or create before you press the post or share button. Ask yourself, does this tweet, embedded video, or comment affect my brand? Will it become an obstacle that could keep me from advancing in my career? The ideal for using any social networking site is to have a balance between utility and entertainment.
Between using social media and the web for entertainment, use the resources you have available to you. Although Twitter is a fun place to post a joke in 140 characters, it is also an open source for researching and finding articles for college papers. It is also a great resource for locating internships. Facebook is fun for viewing pictures of your friends, but a Facebook group started by your professor in your math class allows you to practice math problems at any time, ask questions of your professor quickly, and study with your fellow class members while keeping a level of privacy. Let your overall experience be balanced. Check things such as spelling and grammar when posting on the web. Remember, your website can be viewed by anyone and is a reflection of you. If someone visits your website and there are spelling and grammar issues on the home page, you might have lost the job before the interview. Again, think first, post second. Review your content. Don’t be in a rush to press the publish button. The web is a toolkit for creativity and the development of ideas with others. If you use it for all that it has to offer, we guarantee, you will be happy with the results.
After reading this book, you will have created and figured out the importance of forging a strong online creative presence. This chapter on branding and overall text has helped you navigate ahead of peers who are less informed on online brand and message management. Imagine those who never take a class or learn how to create an online brand. It is the same for all parents, grandparents, and adults who do not wish to learn new technologies. Those who do not use or learn to be literate on social or digital media will be left behind, as technology always moves forward, and those users who have become savvy will reap the benefits and rewards of new opportunities and exciting interactivity in today’s society. As a motivated user of new media, you should always be aware of new platforms, software, and technologies that are released and can be incorporated to the benefit of your brand. Be aware of what is going on digitally and how it’s affecting you. When a new technology or social media platform gets released, ask the question “Why?” Why do we enjoy this technology? Why do we join and interact on this new social media site? If you can answer the question why something affects us culturally and socially, it will put you one step ahead of the rest, thus skipping the line.
NOTES
1 Burgess, J., and Green, J. (2009). YouTube: Online Video and Participatory Culture. Cambridge, UK: Polity.
2 CareerBuilder (2013). “More Employers Finding Reasons Not to Hire Candidates on Social Media, Finds CareerBuilder Survey.” Retrieved from www.careerbuilder.com/share/aboutus/pressreleasesdetail.aspx?sd=6/26/2013&id=pr766&ed=12/31/2013 (accessed May 8, 2015).
3 boyd, d., and Marwick, A. (2011, September). “Social Privacy in Networked Publics: Teens’ attitudes, practices, and strategies.” Presented at A Decade in Internet Time: Symposium on the Dynamics of the Internet and Society, p. 9.
4 Goffman, E. (1959). The Presentation of Self in Everyday Life. New York: Anchor Books.
5 Ibid., p. 142.
6 Ibid., p. 133.
7 Ibid., p. 135.
8 Vaynerchuk, G. (2013). Jab, Jab, Jab, Right Hook: How to tell your story in a noisy social world. New York: HarperBusiness.
9 boyd, d., and Marwick, A. (2011, September). “Social Privacy in Networked Publics: Teens’ attitudes, practices, and strategies.” Presented at A Decade in Internet Time: Symposium on the Dynamics of the Internet and Society.
10 Wemple, E. (2014). “Associated Press Polices Story Length.” Retrieved from www.washingtonpost.com/blogs/erik-wemple/wp/2014/05/12/associated-press-polices-story-length/ (accessed May 8, 2015).
11 Rothberg, S. (2012). “92% of Employers Use Twitter, Facebook, LinkedIn to Hire New Employees.” Retrieved from www.collegerecruiter.com/blog/2012/07/09/92-of-employers-use-twitter-facebook-linkedin-to-hire-new-employees/ (accessed May 8, 2015).