
CHAPTER
3
Understanding PeopleSoft Data Mover
 hat is PeopleSoft Data Mover? How can it efficiently and effectively work for me in conjunction with the PeopleSoft product? We will answer these questions as we explore the topic of Data Mover.
What Is Data Mover?
Data Mover is a platform-independent database tool that administrators and developers use to perform the following tasks:
■ Load databases after creation
■ Execute data definition language (DDL) and data manipulation language (DML) statements
■ Transfer data between databases
■ Convert between database platforms
Data Mover scripts often combine SQL with Data Mover–specific commands to import, export, and process data.
Most database platforms include their own data migration facilities. One of the key differences between Data Mover and other database-specific tools is Data Mover’s database-independent file format. This feature allows administrators to move data between databases regardless of platform or operating system. For example, you often need to transfer data from a production environment to a test environment to test with data that closely mimics current production. In addition, Oracle uses Data Mover to deliver important platform-independent PeopleTools and application updates.
PeopleSoft Data Mover is a standalone, two-tier program. On Microsoft Windows, it can run in graphical or command line mode. This allows developers and administrators to create, edit, and run scripts within a graphical environment and then transfer them to a server for batch processing. On other supported operating systems, it runs only in command line mode.
Data Mover plays a critical role in lifecycle management. It is required at PeopleSoft install to populate your application database. Likewise, upgrades and bundles include Data Mover scripts to convert existing data and import new data.
Installing Data Mover
Data Mover is part of a standard PeopleTools installation. The client-side version is available in two varieties:
■ psdmt.exe Graphical client
■ psdmtx.exe Command line client
Because the graphical version runs only on Microsoft Windows, make sure you have access to a PeopleTools installation for Windows. If these files do not exist on your network, you can download them from the Oracle Software Delivery Cloud (currently at http://edelivery.oracle.com) and follow the installation instructions included in the Oracle Software Delivery Cloud README file.
Configuration Manager
After gaining access to a Windows
PS_HOME directory, do the following:1. Launch
PS_HOMEinclientwinx86pscfg.exe (Configuration Manager).2. Switch to the Client Setup tab.
3. Select the Configuration Manager, Data Mover, and Install Workstation options.
4. Click the Apply button to install Data Mover. Figure 3-1 displays Configuration Manager’s Data Mover installation options.

FIGURE 3-1. Installing Data Mover through Configuration Manager
You should now have a PeopleSoft application group in your Windows Start menu that contains Configuration Manager and Data Mover.
If Configuration Manager is not running, launch it, and then do the following
1. Open the Profile tab. A standard installation includes a Profile named Default.
2. Ensure that this profile is selected, and then click the Edit button.
3. In the Edit Profile dialog (Figure 3-2), switch to the Common tab and enter values for the Input Directory, Output Directory, and Log Directory. Generally speaking, you set the Input Directory and Output Directory values to your
PS_HOMEdata directory and the Log Directory to PS_HOMElog. The PS_HOMEdata directory is where upgrade scripts look for upgrade data.
FIGURE 3-2. Data Mover profile options
Security
Data Mover is an extremely powerful tool and therefore requires special security clearance. Before running Data Mover scripts, log into your PeopleSoft system and verify that at least one of your permission lists grants access to Data Mover. You must have security access to Data Mover prior to using the tool. Data Mover access is granted through the Permission List PeopleTools page.
| NOTE
PTPT1200 is a delivered PeopleTools permission list that grants access to most client-side tools including Data Mover and Application Designer. |
Data Center Security Consideration
For normal, everyday usage, a PeopleSoft client needs only a web browser and HTTP(S) access to the PeopleSoft web server. Some PeopleSoft administration and security teams hide as many network resources as possible behind routers or firewalls. Although hiding the application and database servers may be an effective security measure for self-service users, it might hinder administration and development efforts.
Some PeopleTools client applications run in “three-tier” mode. This means the client application first connects to the PeopleSoft application server, which in turn connects to the database:
Client → Application Server → Database
Application Designer is an example of a client program that can run in three-tier mode. Three-tier applications do not require direct database access. Data Mover, however, only connects in “two-tier” mode:
Client → Database
In short, the computer running Data Mover must have network access to the database.
Writing and Running Data Mover Scripts
With Data Mover installed and configured, let’s learn how to write and run some scripts.
Effective communication involves syntax and semantics. More or less, syntax refers to grammar, or sentence structure. In Data Mover, “syntax” is the term we use to describe a valid command. When coding Data Mover scripts, you must follow certain syntax rules to ensure successful execution:
■ Text contained in a string constant is case-sensitive and needs to be surrounded by single quotation marks.
■ Every command must end with a terminating semicolon (
;) or slash (/). If using a slash, the slash must be on its own line immediately following the command statement.■ SQL commands used in Data Mover accept only physical table names.
■ Comments begin with
--, REM, or REMARK and end at line termination. They do not require a terminating semicolon.Semantics refers to meaning. When writing any code, you should always be cognizant of other programmers who will have to read and maintain your code. Just because you can write a syntactically correct, yet incomprehensible command doesn’t mean you should. The following list contains some of the semantic rules for Data Mover:
■ Data Mover commands accept both record and physical table names. You may use either.
■ Text in a command is not case-sensitive.
■ A command may contain any amount of white space (including new lines).
■ Commands may span multiple lines.
Can I Run Data Mover Scripts?
As a PeopleSoft application user, you’ll find that your profile likely contains dozens of permission lists. If you have database access, you can skip the exasperating effort of opening each permission list by running the following SQL:

Your First Data Mover Script
Launch Data Mover and log in with your standard PeopleSoft credentials. The Data Mover user interface looks very much like that of a normal text editor and represents a standard Windows single-document interface, with a menu at the top, a toolbar, and a main text editing area. The lower region of the UI, the output panel, is reserved for command output. Data Mover will fill this area with feedback while running scripts. Figure 3-3 shows an example of an empty Data Mover application window.

FIGURE 3-3. Data Mover application window
| CAUTION
Be sure that you connect in two-tier mode (any connection type except Application Server). Do not connect to Data Mover through the application server. Even though Data Mover allows you to log in using a three-tier connection, doing so will result in Data Mover displaying the error “Data Mover can be run in Two Tier mode only.” Data Mover will then exit and you will have to log in again using the appropriate database type. |
The following examples show how to use Data Mover to export and import data, starting with a full table export and progressing to targeted subquery selection exports and imports.
Exporting Data
In Data Mover’s text editor, enter the following text:

The first two lines tell Data Mover where to save exported data as well as log statements. In this example we used absolute file paths. Earlier we ran Configuration Manager to set Data Mover’s default log, input, and output directories. These first two lines override the default log and output directories. Later we will use the
INPUT parameter to override the default input directory.The three parameters
LOG, INPUT, and OUTPUT make up the three laws for Data Mover: location, location, location. If your default directories point to valid locations, you may omit the path portion of the file location, leaving just the filename. When you’re generating scripts to share, omitting the file path allows recipients to choose log, input, and output locations. This is especially important when you’re transferring scripts between computers with entirely different path structures.| NOTE
When writing scripts for my own consumption, I often use SET statements to send log and exported data to a location other than the default, reserving the default locations for maintenance. |
The final line exports all of the data in the
PS_INSTALLATION table. Notice that the Data Mover script lists the Application Designer record definition name, not the database physical table name. For Data Mover commands, either will work just as well.Inside Data Mover, you can run this script in one of three ways:
■ From the Data Mover menu bar, choose File | Run Script.
■ Press the key combination CTRL-R.
■ Click the green go traffic signal in the toolbar (fourth icon from the left).
Run the script and watch Data Mover write the results to the output panel. Because the
INSTALLATION record contains only one row, you should see the text “Export INSTALLATION 1”. The number following the record name signifies the total number of rows exported from the INSTALLATION record. Figure 3-4 shows the Data Mover window after exporting the INSTALLATION record.
FIGURE 3-4. Data Mover after exporting the INSTALLATION record
Looking for Data Mover Syntax Highlighting?
Many general-purpose text editors offer syntax highlighting for a variety of structured languages. You can find a listing of the most common text editors used by PeopleSoft developers on this site: http://peoplesoft.wikidot.com/text-editors. Although some of them offer out-of-the-box syntax highlighting support for many common PeopleSoft languages (COBOL, SQR, and SQL), I haven’t found any with support for Data Mover scripts. Being a fan of jEdit, I wrote my own jEdit syntax file for Data Mover. You can download my jEdit syntax files and read tips about installing syntax files on my blog at http://jjmpsj.blogspot.com/2009/08/using-jedit-to-edit-peoplesoft-files.html.
Let’s try another export example, but this time we will add some criteria to our export. Choose File | New. Enter the following into the Data Mover text editor:

This example exports the
JOBCODE_FULLSYNC batch publish rule. This rule exists in PeopleSoft’s Financials/Supply Chain and Human Capital Management systems (including Campus 9.0), but it might not exist in other PeopleSoft applications. Just as our first Data Mover script, running this export will create a .DAT file containing one row.I often find that I need to export specific data based on a relational hierarchy. The following example exports all batch publish rules (header rows) that have a corresponding batch publish program definition (child rows):

Notice the
EXISTS subquery that references fields from the PS_EOIU_ SOPUBDEFN table. Data Mover does not allow you to specify an alias with the EXPORT command. Text following the EXPORT command, however, can be any valid SQL. Data Mover will convert the EXPORT command into a SELECT * FROM TABLENAME statement and append the rest before sending it off to the database for execution.In this example I used the full physical table name instead of the record name. When using subqueries with
EXPORT statements, you can use either for the initial EXPORT command, but you must use the full physical table name in the subquery. In this case, I used the full table name to avoid any confusion.| TIP
As a general rule, I use table names rather than the shorter record names when referring to data structures. This eliminates any confusion that might arise from seeing a record name in the initial export and then a physical table name in the subquery. Even though Data Mover represents my initial audience, odds are very high that someone else is going to have to read my code, and I want it to be easy for someone else to comprehend. |
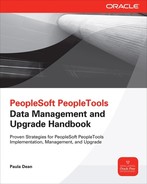
File attachment records are binary file repositories for the PeopleCode File Attachment API. File attachment records do not contain transaction fields. To ensure uniqueness, the
ATTACHSYSFILENAME field may contain concatenated transaction keys, but this is not required. Likewise, concatenated transaction keys are not helpful when attempting to export all files related to a particular transaction. Each attachment record usually has one or more transaction mapping records that associate transaction keys with the ATTACHSYSFILENAME field. Transaction mapping records contain transaction keys as well as the subrecord FILE_ATTACH_SBR (or at least the fields from FILE_ATTACH_SBR). PSFILE_ATTDET, for example, has several transaction mapping records. The following example exports transaction specific file attachments from the generic PSFILE_ATTDET attachment record.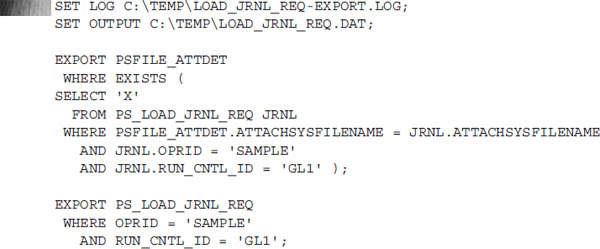
| CAUTION
When deleting transactions and associated file attachments, you must delete from the file attachment table first. If you delete from the transaction tables before the attachment table, you won’t have any transaction keys for identifying associated file attachments. |
Importing Data
Generally speaking, we export data with a future intent to import that same data somewhere else. Importing can be extremely simple. The exported .DAT file contains all of the metadata required to import the data. Here is a basic import template you can use when you know the exported information does not exist in the target database:

The
IMPORT command tells Data Mover to identify record definitions in the INPUT file, create tables that don’t exist in the target database, and then copy data from the INPUT file into the target database.What if the target database already contains the same record definitions with data? If the data in the .DAT file differs from data in the target database and does not violate any constraints, Data Mover will successfully import the new rows. If the same rows already exist, Data Mover will fail, throwing a unique constraint exception. How you proceed depends on whether you require a destructive or nondestructive import.
| NOTE
Because Data Mover is copying data from a text file into the database, all import methods use a row-by-row insert. Index changes from these uncommitted inserts may have a significant effect on undo space, and so on. |
Destructive Imports Data Mover contains two destructive variants of
IMPORT:■
REPLACE_DATA■
REPLACE_ALLThe
REPLACE_DATA command will delete existing rows from like tables in the target database prior to import. Unlike IMPORT, the REPLACE_DATA command won’t create tables if they don’t exist in the target database.Here is an example using
REPLACE_DATA:
The
REPLACE_DATA command issues a database TRUNCATE DDL statement. On some database platforms (such as Oracle), DDL statements automatically commit all database changes. Keep this in mind if you have operations in your DMS script that you want to execute as a transaction. Performing a REPLACE_DATA in the middle of those operations may leave your information in an indeterminate state.The
REPLACE_ALL command is the most destructive. Prior to import, REPLACE_ALL drops the target table along with all related indexes, triggers, and so on. Keep this in mind if you have custom database procedures that use these tables. Dropping tables may invalidate custom procedures. Nevertheless, of the two destructive methods, REPLACE_ALL might be more efficient. On my Oracle database, when I perform a REPLACE_DATA operation, the trace file shows a TRUNCATE and then a row-by-row insert, wreaking all kinds of havoc on my indexes. A REPLACE_ALL, on the other hand, drops the table along with its indexes, re-creates the table, performs the same row-by-row insert, and then builds the record’s indexes.Here is an example using
REPLACE_ALL:
Nondestructive Imports The least destructive way to import data into existing tables is first to delete potential duplicate rows. Oftentimes the
DELETE statement looks very similar to the initial EXPORT statement. Here is an example import for our file attachment export:
Each of the import commands—
IMPORT, REPLACE_DATA, and REPLACE_ALL—support modifiers allowing you to specify which records to import. If a .DAT file contains multiple tables, it would be possible for you to (destructively) load one table, re-create another, and then import only new rows from a third table using syntax similar to this:
These modifiers also allow you to specify which rows to import. Using the
WHERE clause, you can selectively import rows from a .DAT file:
Dates in Data Mover
Date functions vary widely among database platforms. Data Mover implements the following date and time-specific Meta-SQL abstractions, making it possible to run scripts against multiple database platforms:
■
CURRENTDATEOUT■
CURRENTTIMEOUT■
CURRENTDATETIMEOUT■
DATEIN■
TIMEINUse the
*OUT Meta-SQL statements in SELECT clauses and the *IN functions in WHERE and UPDATE clauses. Here are a couple of examples:
Running Scripts at the Command Line
The
IMPORT and EXPORT commands transfer data from a database to the computer running Data Mover. The Data Mover graphical client is great for running scripts that operate on minimal amounts of data. Large data transfers, however, might be more efficient when run on a server residing closer to the database. For example, when I run a Data Mover export from my workstation, that data travels a few thousand miles from a database through a handful of routers to a virtual private network (VPN) gateway, and then finally through an encrypted connection to my laptop. Encryption, routers, bandwidth, and distance can have a significant impact on export and import speeds. Another important consideration is disk IO. A well-tuned server with disk caching and large buffers will read and write data a lot faster than my little Dell with a 5400 RPM disk drive. If that server uses solid state, well… there is no comparison.Data Mover’s command line interface was designed for those situations when you need to move lots of data and would prefer a more efficient transfer mechanism (or you just don’t want to tie up your workstation; how can you take your laptop home at the end of the day when it is deeply entrenched in a full database export?).
On Microsoft Windows, the Data Mover command line utility (
psdmtx.exe) is located at %PS_HOME%inclientwinx86. For other operating systems, you will find psdmtx in $PS_HOME/bin.Let’s run a script from the command line just to get the hang of it. Open a command prompt and run the following:

To override the database type, connect identifier, and so on, run the following:

On a non-Windows operating system, run this Data Mover script with the following command:

When run from a Windows workstation, this command creates the Data Mover export in
C:pt8.52data and the log file in C:pt8.52log, the location I previously specified in Configuration Manager. On a Linux server, running this same command produces an export file in ~/PS_DM/data and a log file in ~/PS_DM/log.| CAUTION
Data Mover export files may contain sensitive information. This example just exported all the users from the system, including usernames, passwords, and roles. Make sure you secure your export files in the same manner as any other sensitive information. |
Here is the full
psdmtx call specification:

Table 3-1 shows a summary of the parameters used by
psdmtx.
TABLE 3-1. Data Mover (psdmtx) command line parameters
When executing Data Mover from shell scripts, a non-zero return value represents a failure, and a zero (0) return value means success. Here is a simple
bash script example
Bootstrap Mode
Data Mover allows an alternative connection mode called Bootstrap mode. This mode allows you to connect using your database username and password rather than your PeopleSoft username and password. This is critical when you’re creating a new PeopleSoft database, because the connect identifier, symbolic IDs, and operator IDs don’t exist at database creation time. Many of Data Mover’s commands are not valid in Bootstrap mode.
Data Mover in the Upgrade Process
Oracle often includes Data Mover scripts with patches and upgrades. These scripts contain data conversion routines, new application data, and unmanaged PeopleTools definitions. For example, upgrade scripts often contain new message catalog entries—PeopleTools definitions that can’t be migrated with Application Designer projects. Having a working knowledge of Data Mover can help you troubleshoot and even enhance these delivered scripts.
Creating Your Own Upgrade Data Mover Scripts
Oracle builds PeopleSoft applications with extensibility in mind. Odds are high that your implementation already includes custom application and configuration tables. As you change these custom tables, you may need to write your own transformation programs. Likewise, you may need to import new custom configuration options as you move from test to production. Here are a few guidelines to help you write better scripts:
■ Perform as much data manipulation on the database as possible.
■ Watch out for implicit commits from DDL statements.
■ Consider the performance and rollback/undo impact of existing indexes.
■ Test, test, test, and test some more. Data Mover is a very powerful program. It is very easy to delete or overwrite the wrong data accidentally.
Far too many times I have run a delete, executed a command with an implicit commit, and then seen the import fail. Before running any custom Data Mover script, I first run an export of each table affected by the script, and then I run the script.
Conclusion
In this chapter, we looked into installation and setup of the Data Mover tool. We demonstrated PeopleSoft Data Mover. We also reviewed command line execution in relation to UNIX and Windows. We continued our discussion with syntax and common coding examples regarding the construction of the script for execution.
..................Content has been hidden....................
You can't read the all page of ebook, please click here login for view all page.