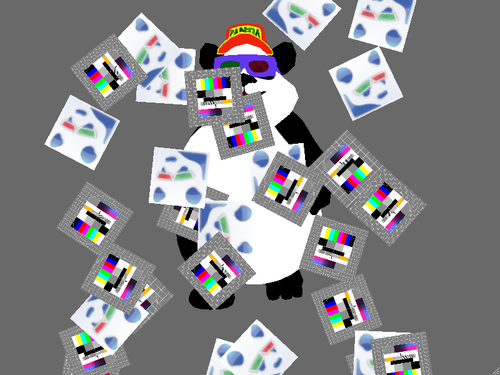
In this easy-and-short recipe you will learn how to display images in the 2D layer of Panda3D. For example, if you want to build 2D games or display a HUD in a shooter, this recipe is the way to go!
Apart from using the project structure found in Setting up the game structure found in Chapter 1, Setting Up Panda3D and Configuring Development Tools, you will need two texture images that will be displayed. Also, add an additional directory called textures to the project folder structure.
Follow these steps to put some images into the 2D rendering layer:
- Copy your texture image files to the
texturesdirectory and call thempanda.pngandtest.png. - Add the following code to Application.py:
from direct.showbase.ShowBase import ShowBase from direct.gui.OnscreenImage import OnscreenImage from direct.actor.Actor import Actor from panda3d.core import * import random class Application(ShowBase): def __init__(self): ShowBase.__init__(self) self.panda = Actor("panda", {"walk": "panda-walk"}) self.panda.reparentTo(render) self.panda.loop("walk") self.cam.setPos(0, -30, 5) files = ["panda.png", "test.png"] for i in range(30): OnscreenImage(random.sample(files, 1)[0], scale = Vec3(0.15, 0, 0.15), pos = Vec3(random.uniform(-1, 1), 0, random.uniform(-1, 1)), hpr = Vec3(0, 0, random.uniform(0, 360))) - Press F6 to start the application:

All it takes to display an image in the render2d layer of Panda3D is a call to OnscreenImage(). This loads the texture, puts it on a quad and adds it to the render2d scene graph, which is rendered using orthogonal projection after 3D drawing is done. The function also returns the created node, so we can change its properties later on.
