
5 Reusing Code and Writing Functions
THIS CHAPTER EXPLAINS HOW REUSING CODE leads to more consistent, reliable, maintainable code, with less effort. We demonstrate techniques for modularizing and reusing code, beginning with the simple use of require() and include() to use the same code on more than one page. We explain why these includes are superior to server-side includes. The example given here covers using include files to get a consistent look and feel across your site. We also explain how you can write and call your own functions using page and form generation functions as examples.
Key topics covered in this chapter include
![]() The advantages of reusing code
The advantages of reusing code
![]() Calling by reference versus calling by value
Calling by reference versus calling by value
The Advantages of Reusing Code
One of the goals of software engineers is to reuse code in lieu of writing new code. The reason for this is not that software engineers are a particularly lazy group. Reusing existing code reduces costs, increases reliability, and improves consistency. Ideally, a new project is created by combining existing reusable components, with a minimum of development from scratch.
Cost
Over the useful life of a piece of software, significantly more time will be spent maintaining, modifying, testing, and documenting it than was originally spent writing it. If you are writing commercial code, you should attempt to limit the number of lines in use within the organization. One of the most practical ways to achieve this goal is to reuse code already in use instead of writing a slightly different version of the same code for a new task. Less code means lower costs. If existing software meets the requirements of the new project, acquire it. The cost of buying existing software is almost always less than the cost of developing an equivalent product. Tread carefully, though, if existing software almost meets your requirements. Modifying existing code can be more difficult than writing new code.
Reliability
If a module of code is in use somewhere in your organization, it has presumably already been thoroughly tested. Even if this module contains only a few lines, there is a possibility that, if you rewrite it, you will either overlook something that the original author incorporated or something that was added to the original code after a defect was found during testing. Existing, mature code is usually more reliable than fresh, “green” code.
Consistency
The external interfaces to your system, including both user interfaces and interfaces to outside systems, should be consistent. Writing new code consistent with the way other parts of the system function takes a will and a deliberate effort. If you are reusing code that runs another part of the system, your functionality should automatically be consistent.
On top of these advantages, reusing code is less work for you, as long as the original code was modular and well written. While you work, try to recognize sections of your code that you might be able to call on again in the future.
Using require ( ) and include ( )
PHP provides two very simple, yet very useful, statements to allow you to reuse any type of code. Using a require() or include() statement, you can load a file into your PHP script. The file can contain anything you would normally type in a script including PHP statements, text, HTML tags, PHP functions, or PHP classes.
These statements work similarly to the server-side includes offered by many web servers and #include statements in C or C++.
The statements require() and include() are almost identical. The only difference between them is that when they fail, the require() construct gives a fatal error, whereas the include() construct gives only a warning.
There are two variations on require() and include(), called require_once() and include_once(), respectively. The purpose of these constructs is, as you might guess, to ensure that an included file can be included only once. For the examples we have looked at so far—headers and footers—this functionality is not particularly useful.
This functionality becomes useful when you begin using require() and include() to include libraries of functions. Using these constructs protects you from accidentally including the same function library twice, thus redefining functions and causing an error. If you are cautious in your coding practices you are better off using require() or include() as these are faster to execute.
Filename Extensions and require ( )
The following code is stored in a file named reusable.php:
<?php
echo 'Here is a very simple PHP statement.<br />';
?>
The following code is stored in a file named main.php:
<?php
echo 'This is the main file.<br />';
require( 'reusable.php' );
echo’The script will end now.<br />';
?>
If you load reusable.php, you probably won’t be surprised when the message Here is a very simple PHP statement. appears in your browser. If you load main.php, something a little more interesting happens. The output of this script is shown in Figure 5.1.
Figure 5.1 The output of main.php shows the result of the require() statement.
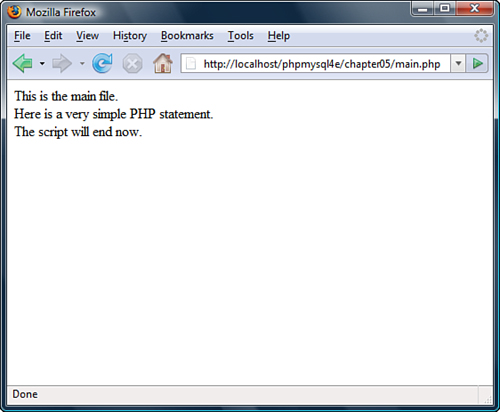
A file is needed to use a require() statement. In the preceding example, you used the file named reusable.php. When you run the script, the require() statement
require( 'reusable.php' );
is replaced by the contents of the requested file, and the script is then executed. This means that when you load main.php, it runs as though the script were written as follows:
<?php
echo "This is the main file.<br />";
echo "Here is a very simple PHP statement.<br />";
echo "The script will end now.<br />";
?>
When using require(), you need to note the different ways filename extensions and PHP tags are handled.
PHP does not look at the filename extension on the required file. This means that you can name your file whatever you choose as long as you do not plan to call it directly. When you use require() to load the file, it effectively becomes part of a PHP file and is executed as such.
Normally, PHP statements would not be processed if they were in a file called, for example, page.html. PHP is usually called upon to parse only files with defined extensions such as .php. (This may be changed in your web server configuration file.) However, if you load page.html via a require() statement, any PHP inside it will be processed. Therefore, you can use any extension you prefer for include files, but sticking to a sensible convention such as .inc or .php would be a good idea.
One issue to be aware of is that if files ending in .inc or some other nonstandard extension are stored in the web document tree and users directly load them in the browser, they will be able to see the code in plain text, including any passwords. It is therefore important to either store included files outside the document tree or use the standard extensions.
The PHP code was placed within the file in PHP tags. You need to follow this convention if you want PHP code within a required file treated as PHP code. If you do not open a PHP tag, your code will just be treated as text or HTML and will not be executed.
Using require ( ) for Website Templates
If your company’s web pages have a consistent look and feel, you can use PHP to add the template and standard elements to pages using require().
For example, the website of fictional company TLA Consulting has a number of pages, all with the look and feel shown in Figure 5.2. When a new page is needed, the developer can open an existing page, cut out the existing text from the middle of the file, enter new text, and save the file under a new name.
Figure 5.2 TLA Consulting has a standard look and feel for all its web pages.
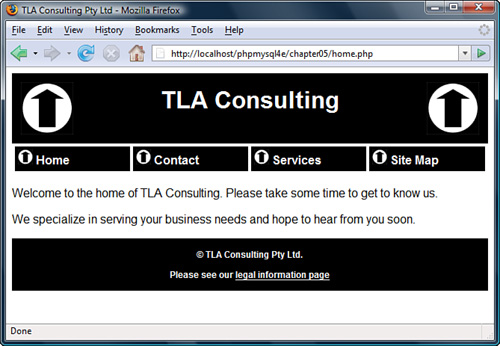
Consider this scenario: The website has been around for a while, and the company now has tens, hundreds, or maybe even thousands of pages all following a common style. A decision is made to change part of the standard look; the change might be something minor, such as adding an email address to the footer of each page or adding a single new entry to the navigation menu. Do you want to make that minor change on tens, hundreds, or even thousands of pages?
Directly reusing the sections of HTML common to all pages is a much better approach than cutting and pasting on tens, hundreds, or even thousands of pages. The source code for the home page (home.html) shown in Figure 5.2 is given in Listing 5.1.
Listing 5.1 home.html—The HTML That Produces TLA Consulting’s Home Page
<html>
<head>
<title>TLA Consulting Pty Ltd</title>
<style type="text/css">
h1 {color:white; font-size:24pt; text-align:center;
font-family:arial,sans-serif}
.menu {color:white; font-size:12pt; text-align:center;
font-family:arial,sans-serif; font-weight:bold}
td {background:black}
p {color:black; font-size:12pt; text-align:justify;
font-family:arial,sans-serif}
p.foot {color:white; font-size:9pt; text-align:center;
font-family:arial,sans-serif; font-weight:bold}
a:link,a:visited,a:active {color:white}
</style>
</head>
<body>
<!-- page header -->
<table width="100%" cellpadding="12" cellspacing="0" border="0">
<tr bgcolor="black">
<td align="left"><img src="logo.gif" alt="TLA logo" height="70"
width="70"></td>
<td>
<h1>TLA Consulting</h1>
</td>
<td align="right"><img src="logo.gif" alt="TLA logo" height="70"
width="70"></td>
</tr>
</table>
<!-- menu -->
<table width="100%" bgcolor="white" cellpadding="4" cellspacing="4">
<tr >
<td width="25%">
<img src="s-logo.gif" alt=" " height="20" width="20">
<span class="menu">Home</span></td>
<td width="25%">
<img src="s-logo.gif" alt=" " height="20" width="20">
<span class="menu">Contact</span></td>
<td width="25%">
<img src="s-logo.gif" alt=" " height="20" width="20">
<span class="menu">Services</span></td>
<td width="25%">
<img src="s-logo.gif" alt=" " height="20" width="20">
<span class="menu">Site Map</span></td>
</tr>
</table>
<!-- page content -->
<p>Welcome to the home of TLA Consulting.
Please take some time to get to know us.</p>
<p>We specialize in serving your business needs
and hope to hear from you soon.</p>
<!-- page footer -->
<table width="100%" bgcolor="black" cellpadding="12" border="0">
<tr>
<td>
<p class="foot">© TLA Consulting Pty Ltd.</p>
<p class="foot">Please see our
<a href="legal.php">legal information page</a></p>
</td>
</tr>
</table>
</body>
</html>
You can see in Listing 5.1 that a number of distinct sections of code exist in this file. The HTML head contains cascading style sheet (CSS) definitions used by the page. The section labeled “page header” displays the company name and logo, “menu” creates the page’s navigation bar, and “page content” is text unique to this page. Below that is the page footer. You can usefully split this file and name the parts header.php, home.php, and footer.php. Both header.php and footer.php contain code that will be reused on other pages.
The file home.php is a replacement for home.html and contains the unique page content and two require() statements shown in Listing 5.2.
Listing 5.2 home.php—The PHP That Produces TLA’s Home Page
<?php
require('header.php'),
?>
<!-- page content -->
<p>Welcome to the home of TLA Consulting.
Please take some time to get to know us.</p>
<p>We specialize in serving your business needs
and hope to hear from you soon.</p>
<?php
require('footer.php'),
The require() statements in home.php load header.php and footer.php.
As mentioned previously, the name given to these files does not affect how they are processed when you call them via require(). A common convention is to call the partial files that will end up included in other files something.inc (here, inc stands for include). This is not recommended as a general strategy, as .inc files will not be interpreted as PHP code unless the web server has been configured specifically for this.
If you’re going to do this, you should place your include files in a directory that can be seen by your scripts but does not permit your include files to be loaded individually via the web server—that is, outside the web document tree. This setup is a good strategy because it prevents these files from being loaded individually, which would either (a) probably produce some errors if the file extension is .php but contains only a partial page or script, or (b) allow people to read your source code if you have used another extension.
The file header.php contains the CSS definitions that the page uses, the tables that display the company name, and navigation menus, as shown in Listing 5.3.
Listing 5.3 header.php—The Reusable Header for All TLA Web Pages
<html>
<head>
<title>TLA Consulting Pty Ltd</title>
<style type="text/css">
h1 {color:white; font-size:24pt; text-align:center;
font-family:arial,sans-serif}
.menu {color:white; font-size:12pt; text-align:center;
font-family:arial,sans-serif; font-weight:bold}
td {background:black}
p {color:black; font-size:12pt; text-align:justify;
font-family:arial,sans-serif}
p.foot {color:white; font-size:9pt; text-align:center;
font-family:arial,sans-serif; font-weight:bold}
a:link,a:visited,a:active {color:white}
</style>
</head>
<body>
<!-- page header -->
<table width="100%" cellpadding="12" cellspacing="0" border="0">
<tr bgcolor="black">
<td align="left"><img src="logo.gif" alt="TLA logo" height="70" width="70"></td>
<td>
<h1>TLA Consulting</h1>
</td>
<td align="right"><img src="logo.gif" alt="TLA logo" height="70" width="70" /></td>
</tr>
</table>
<!-- menu -->
<table width="100%" bgcolor="white" cellpadding="4" cellspacing="4">
<tr >
<td width="25%">
<img src="s-logo.gif" alt=" " height="20" width="20" />
<span class="menu">Home</span></td>
<td width="25%">
<img src="s-logo.gif" alt=" " height="20" width="20" />
<span class="menu">Contact</span></td>
<td width="25%">
<img src="s-logo.gif" alt=" " height="20" width="20" />
<span class="menu">Services</span></td>
<td width="25%">
<img src="s-logo.gif" alt=" " height="20" width="20" />
<span class="menu">Site Map</span></td>
</tr>
</table>
The file footer.php contains the table that displays the footer at the bottom of each page. This file is shown in Listing 5.4.
Listing 5.4 footer.php—The Reusable Footer for All TLA Web Pages
<!-- page footer -->
<table width="100%" bgcolor="black" cellpadding="12" border="0">
<tr>
<td>
<p class="foot">© TLA Consulting Pty Ltd.</p>
<p class="foot">Please see our <a href="legal.php">
legal information page</a></p>
</td>
</tr>
</table>
</body>
</html>
This approach gives you a consistent-looking website very easily, and you can make a new page in the same style by typing something like this:
<?php require('header.php'), ?>
Here is the content for this page
<?php require('footer.php'), ?>
Most importantly, even after you have created many pages using this header and footer, you can easily change the header and footer files. Whether you are making a minor text change or completely redesigning the look of the site, you need to make the change only once. You do not need to separately alter every page in the site because each page is loading in the header and footer files.
The example shown here uses only plain HTML in the body, header, and footer. This need not be the case. Within these files, you could use PHP statements to dynamically generate parts of the page.
If you want to be sure that a file will be treated as plain text or HTML, and not have any PHP executed, you may want to use readfile() instead. This function echoes the content of a file without parsing it. This can be an important safety precaution if you are using user-provided text.
Using auto_prepend_file and auto_append_file
If you want to use require() or include() to add your header and footer to every page, you can do it another way. Two of the configuration options in the php.ini file are auto_prepend_file and auto_append_file. By setting these options to point to the header and footer files, you ensure that they will be loaded before and after every page. Files included using these directives behave as though they had been added using an include() statement; that is, if the file is missing, a warning will be issued.
For Windows, the settings look like this:
auto_prepend_file = "c:/Program Files/Apache Software
Froundation/Apache2.2//include/header.php"
auto_append_file = "c:/Program Files/Apache Group/Apache2/include/footer.php"
For Unix, like this:
auto_prepend_file = "/home/username/include/header.php"
auto_append_file = "/home/username/include/footer.php"
If you use these directives, you do not need to type include() statements, but the headers and footers will no longer be optional on pages.
If you are using an Apache web server, you can change various configuration options like these for individual directories. To do this, you must have your server set up to allow its main configuration file(s) to be overridden. To set up auto prepending and appending for a directory, create a file called .htaccess in the directory. The file needs to contain the following two lines:
php_value auto_prepend_file "/home/username/include/header.php"
php_value auto_append_file "/home/username/include/footer.php"
Note that the syntax is slightly different from the same option in php.ini: As well as php_value at the start of the line, there is no equal sign. A number of other php.ini configuration settings can be altered in this way, too.
Setting options in the .htaccess file rather than in either php.ini or your web server’s configuration file gives you a lot of flexibility. You can alter settings on a shared machine that affect only your directories. You do not need to restart the web server, and you do not need administrator access. A drawback to the .htaccess method is that the files are read and parsed each time a file in that directory is requested rather than just once at startup, so there is a performance penalty.
Using Functions in PHP
Functions exist in most programming languages; they separate code that performs a single, well-defined task. This makes the code easier to read and allows you to reuse the code each time you need to perform the same task.
A function is a self-contained module of code that prescribes a calling interface, performs some task, and optionally returns a result.
You have seen a number of functions already. In preceding chapters, we routinely called a number of the functions built into PHP. We also wrote a few simple functions but glossed over the details. In the following sections, we cover calling and writing functions in more detail.
Calling Functions
The following line is the simplest possible call to a function:
function_name();
This line calls a function named function_name that does not require parameters. This line of code ignores any value that might be returned by this function.
A number of functions are called in exactly this way. The function phpinfo() is often useful in testing because it displays the installed version of PHP, information about PHP, the web server setup, and the values of various PHP and server variables. This function does not take any parameters, and you generally ignore its return value, so a call to phpinfo() is written as follows:
phpinfo();
Most functions, however, do require one or more parameters, which are the inputs to functions. You pass parameters by placing data or the name of a variable holding data inside parentheses after the function name. You could call a function that accepts a single parameter as follows:
function_name('parameter'),
In this case, the parameter used is a string containing only the word parameter, but the following calls may also be fine depending on what parameters the function expects:
function_name(2);
function_name(7.993);
function_name($variable);
In the last line, $variable might be any type of PHP variable, including an array or object.
A parameter can be any type of data, but particular functions usually require particular data types.
You can see how many parameters a function takes, what each represents, and what data type each needs to be from the function’s prototype. We often show the prototype in this book when we describe a function.
This is the prototype for the function fopen():
resource fopen ( string filename, string mode
[, bool use_include_path [, resource context]])
The prototype tells you a number of things, and it is important that you know how to correctly interpret these specifications. In this case, the word resource before the function name tells you that this function will return a resource (that is, an open file handle). The function parameters are inside the parentheses. In the case of fopen(), four parameters are shown in the prototype. The parameters filename and mode are strings, the parameter use_include_path is a Boolean, and the parameter context is a resource. The square brackets around use_include_path and context indicate that these parameters are optional. You can provide values for optional parameters, or you can choose to ignore them and the default value will be used. Note, however, that for a function with more than one optional parameter, you can only leave out parameters from the right. For example, when using fopen(), you can leave out context or you can leave out both use_include_path and context; however, you cannot leave out use_include_path but provide context.
After reading the prototype for this function, you know that the following code fragment is a valid call to fopen():
$name = 'myfile.txt';
$openmode = 'r';
$fp = fopen($name, $openmode);
This code calls the function named fopen(). The value returned by the function will be stored in the variable $fp. For this example, we chose to pass to the function a variable called $name containing a string representing the file we want to open and a variable called $openmode containing a string representing the mode in which we want to open the file. We chose not to provide the optional third and fourth parameters.
Calling an Undefined Function
If you attempt to call a function that does not exist, you will get an error message, as shown in Figure 5.3.
Figure 5.3 This error message is the result of calling a function that does not exist.

The error messages that PHP gives are usually very useful. The one in the figure tells you exactly in which file the error occurred, in which line of the script it occurred, and the name of the function you attempted to call. This information should make it fairly easy to find and correct the problem.
Check these two things if you see this error message:
![]() Is the function name spelled correctly?
Is the function name spelled correctly?
![]() Does the function exist in the version of PHP you are using?
Does the function exist in the version of PHP you are using?
You might not always remember how a function name is spelled. For instance, some two-word function names have an underscore between the words, and some do not. The function stripslashes() runs the two words together, whereas the function strip_tags() separates the words with an underscore. Misspelling the name of a function in a function call results in an error, as shown in Figure 5.3.
Some functions used in this book do not exist in PHP4 because this book assumes that you are using PHP5. In each new version, new functions are defined, and if you are using an older version, the added functionality and performance justify an upgrade. To see when a particular function was added, you can check the online manual. Attempting to call a function that is not declared in the version you are running results in an error such as the one shown in Figure 5.3.
One other reason you may see this error message is that the function you are calling is part of a PHP extension that is not loaded. For example, if you try to use functions from the gd (image manipulation) library and you have not installed gd, you will see this message.
Understanding Case and Function Names
Note that calls to functions are not case sensitive, so calls to function_name(), Function_Name(), or FUNCTION_NAME() are all valid and all have the same result. You are free to capitalize in any way you find easy to read, but you should aim to be consistent. The convention used in this book, and most other PHP documentation, is to use all lowercase.
It is important to note that function names behave differently to variable names. Variable names are case sensitive, so $Name and $name are two separate variables, but Name() and name() are the same function.
Defining Your Own Functions
In the preceding chapters, you saw many examples using some of PHP’s built-in functions. However, the real power of a programming language comes from being able to create your own functions.
The functions built into PHP enable you to interact with files, use a database, create graphics, and connect to other servers. However, in your career, you often may need to do something that the language’s creators did not foresee.
Fortunately, you are not limited to using the built-in functions; you can write your own to perform any task that you like. Your code will probably be a mixture of existing functions combined with your own logic to perform a task for you. If you are writing a block of code for a task that you are likely to want to reuse in a number of places in a script or in a number of scripts, you would be wise to declare that block as a function.
Declaring a function allows you to use your own code in the same way as the built-in functions. You simply call your function and provide it with the necessary parameters. This means that you can call and reuse the same function many times throughout your script.
Examining Basic Function Structure
A function declaration creates or declares a new function. The declaration begins with the keyword function, provides the function name and parameters required, and contains the code that will be executed each time this function is called.
Here is the declaration of a trivial function:
function my_function() {
echo’My function was called';
}
This function declaration begins with function so that human readers and the PHP parser know that what follows is a user-defined function. The function name is my_function. You can call the new function with the following statement:
my_function();
As you probably guessed, calling this function results in the text My function was called. appearing in the viewer’s browser.
Built-in functions are available to all PHP scripts, but if you declare your own functions, they are available only to the script(s) in which they were declared. It is a good idea to have a file or set of files containing your commonly used functions. You can then have a require() statement in your scripts to make your functions available when required.
Within a function, curly braces enclose the code that performs the task you require. Between these braces, you can have anything that is legal elsewhere in a PHP script, including function calls, declarations of new variables, functions, require() or include() statements, class declarations, and plain HTML. If you want to exit PHP within a function and type plain HTML, you do so the same way as anywhere else in the script—with a closing PHP tag followed by the HTML. The following is a legal modification of the preceding example and produces the same output:
<?php
function my_function() {
?>
My function was called
<?php
}
?>
Note that the PHP code is enclosed within matching opening and closing PHP tags. For most of the small code fragment examples in this book, we do not show these tags. We show them here because they are required within the example as well as above and below it.
Naming Your Function
The most important point to consider when naming your functions is that the name should be short but descriptive. If your function creates a page header, pageheader() or page_header() might be good names.
A few restrictions follow:
![]() Your function cannot have the same name as an existing function.
Your function cannot have the same name as an existing function.
![]() Your function name can contain only letters, digits, and underscores.
Your function name can contain only letters, digits, and underscores.
![]() Your function name cannot begin with a digit.
Your function name cannot begin with a digit.
Many languages do allow you to reuse function names. This feature is called function overloading. However, PHP does not support function overloading, so your function cannot have the same name as any built-in function or an existing user-defined function. Note that although every PHP script knows about all the built-in functions, user-defined functions exist only in scripts where they are declared. This means that you could reuse a function name in a different file, but this would lead to confusion and should be avoided.
The following function names are legal:
name()
name2()
name_three()
_namefour()
These names are illegal:
5name()
name-six()
fopen()
(The last would be legal if it didn’t already exist.)
Note that although $name is not a valid name for a function, a function call like
$name();
may well execute, depending on the value of $name. The reason is that PHP takes the value stored in $name, looks for a function with that name, and tries to call it for you. This type of function is referred to as a variable function and may occasionally be useful to you.
Using Parameters
To do their work, most functions require one or more parameters. A parameter allows you to pass data into a function. Here is a sample function that requires a parameter; it takes a one-dimensional array and displays it as a table:
function create_table($data) {
echo "<table border="1">";
reset($data); // Remember this is used to point to the beginning
$value = current($data);
while ($value) {
echo "<tr><td>".$value."</td></tr>
";
$value = next($data);
}
echo "</table>";
}
If you call the create_table() function as follows
$my_array = array('Line one.','Line two.','Line three.'),
create_table($my_array);
you will see output as shown in Figure 5.4.
Figure 5.4 This HTML table is the result of calling create_table().

Passing a parameter allows you to get data created outside the function—in this case, the array $data—into the function.
As with built-in functions, user-defined functions can have multiple parameters and optional parameters. You can improve the create_table() function in many ways, but one way might be to allow the caller to specify the border or other attributes of the table. Here is an improved version of the function; it is similar but allows you to optionally set the table’s border width, cellspacing, and cellpadding.
<?php
function create_table2($data, $border=1, $cellpadding=4, $cellspacing=4 ) {
echo "<table border="".$border."" cellpadding="".$cellpadding.""
cellspacing="".$cellspacing."">";
reset($data);
$value = current($data);
while ($value) {
echo "<tr><td>".$value."</td></tr>
";
$value = next($data);
}
echo "</table>";
}
$my_array = array('Line one.','Line two.','Line three.'),
create_table2($my_array, 3, 8, 8);
The first parameter for create_table2() is still required. The next three are optional because default values are defined for them. You can create similar output to that shown in Figure 5.4 with this call to create_table2():
create_table2($my_array);
If you want the same data displayed in a more spread-out style, you could call the new function as follows:
create_table2($my_array, 3, 8, 8);
Optional values do not all need to be provided; you can provide some and ignore some. Parameters are assigned from left to right.
Keep in mind that you cannot leave out one optional parameter but include a later listed one. In this example, if you want to pass a value for cellspacing, you will have to pass one for cellpadding as well. This is a common cause of programming errors. It is also the reason that optional parameters are specified last in any list of parameters.
The function call
create_table2($my_array, 3);
is perfectly legal and results in $border being set to 3 and $cellpadding and $cellspacing being set to their defaults.
You also can declare functions that accept a variable number of parameters. You can find out how many parameters have been passed and what their values are with the aid of three helper functions: func_num_args(), func_get_arg(), and func_get_args().
For example, consider this function:
function var_args() {
echo "Number of parameters:";
echo func_num_args();
echo "<br />";
$args = func_get_args();
foreach ($args as $arg) {
echo $arg."<br />";
}
}
This function reports the number of parameters passed to it and prints out each of them. The func_num_args() function returns the number of arguments passed in. The func_get_args() function returns an array of the arguments. Alternatively, you can access the arguments one at a time using the func_get_arg() function, passing it the argument number you want to access. (Arguments are numbered starting from zero.)
Understanding Scope
You might have noticed that when we needed to use variables inside a required or included file, we simply declared them in the script before the require() or include() statement. When using a function, we explicitly passed those variables into the function partly because no mechanism exists for explicitly passing variables to a required or included file and partly because variable scope behaves differently for functions.
A variable’s scope controls where that variable is visible and usable. Different programming languages have different rules that set the scope of variables. PHP has fairly simple rules:
![]() Variables declared inside a function are in scope from the statement in which they are declared to the closing brace at the end of the function. This is called function scope. These variables are called local variables.
Variables declared inside a function are in scope from the statement in which they are declared to the closing brace at the end of the function. This is called function scope. These variables are called local variables.
![]() Variables declared outside functions are in scope from the statement in which they are declared to the end of the file, but not inside functions. This is called global scope. These variables are called global variables.
Variables declared outside functions are in scope from the statement in which they are declared to the end of the file, but not inside functions. This is called global scope. These variables are called global variables.
![]() The special superglobal variables are visible both inside and outside functions. (See Chapter 1, “PHP Crash Course,” for more information on these variables.)
The special superglobal variables are visible both inside and outside functions. (See Chapter 1, “PHP Crash Course,” for more information on these variables.)
![]() Using
Using require() and include() statements does not affect scope. If the statement is used within a function, function scope applies. If it is not inside a function, global scope applies.
![]() The keyword
The keyword global can be used to manually specify that a variable defined or used within a function will have global scope.
![]() Variables can be manually deleted by calling
Variables can be manually deleted by calling unset($variable_name). A variable is no longer in scope if it has been unset.
The following examples might help to clarify scope further.
The following code produces no output. Here, we declare a variable called $var inside the function fn(). Because this variable is declared inside a function, it has function scope and exists only from where it is declared until the end of the function. When you again refer to $var outside the function, a new variable called $var is created. This new variable has global scope and will be visible until the end of the file. Unfortunately, if the only statement you use with this new $var variable is echo, it will never have a value.
function fn() {
$var = "contents";
}
fn();
echo $var;
The following example is the inverse. Here, you declare a variable outside the function and then try to use it within a function:
<?
function fn() {
echo "inside the function, $var = ".$var."<br />";
$var = "contents 2";
echo "inside the function, $var = ".$var."<br />";
}
$var = "contents 1";
fn();
echo "outside the function, $var = ".$var."<br />";
The output from this code is as follows:
inside the function, $var =
inside the function, $var = contents 2
outside the function, $var = contents 1
Functions are not executed until they are called, so the first statement executed is $var = 'contents 1';. This statement creates a variable called $var, with global scope and the contents "contents 1". The next statement executed is a call to the function fn(). The lines inside the statement are executed in order. The first line in the function refers to a variable named $var. When this line is executed, it cannot see the previous $var that was created, so it creates a new one with function scope and echoes it. This creates the first line of output.
The next line within the function sets the contents of $var to "contents 2". Because you are inside the function, this line changes the value of the local $var, not the global one. The second line of output verifies that this change worked.
The function is now finished, so the final line of the script is executed. This echo statement demonstrates that the global variable’s value has not changed.
If you want a variable created within a function to be global, you can use the keyword global as follows:
function fn() {
global
$var;
$var = "contents";
echo "inside the function, $var = ".$var."<br />";
}
fn();
echo "outside the function, $var = ".$var."<br />";
In this example, the variable $var is explicitly defined as global, meaning that after the function is called, the variable will exist outside the function as well. The output from this script follows:
inside the function, $var = contents
outside the function, $var = contents
Note that the variable is in scope from the point in which the line global
$var; is executed. You could declare the function above or below where you call it. (Note that function scope is quite different from variable scope!) The location of the function declaration is inconsequential; what is important is where you call the function and therefore execute the code within it.
You can also use the global keyword at the top of a script when a variable is first used to declare that it should be in scope throughout the script. This is possibly a more common use of the global keyword.
You can see from the preceding examples that it is perfectly legal to reuse a variable name for a variable inside and outside a function without interference between the two. It is generally a bad idea, however, because without carefully reading the code and thinking about scope, people might assume that the variables are one and the same.
Passing by Reference Versus Passing by Value
If you want to write a function called increment() that allows you to increment a value, you might be tempted to try writing it as follows:
function increment($value, $amount = 1) {
$value = $value +$amount;
}
This code is of no use. The output from the following test code will be 10:
$value = 10;
increment ($value);
echo $value;
The contents of $value have not changed because of the scope rules. This code creates a variable called $value, which contains 10. It then calls the function increment(). The variable $value in the function is created when the function is called. One is added to it, so the value of $value is 11 inside the function, until the function ends; then you return to the code that called it. In this code, the variable $value is a different variable, with global scope, and therefore unchanged.
One way of overcoming this problem is to declare $value in the function as global, but this means that to use this function, the variable that you wanted to increment would need to be named $value.
The normal way that function parameters are called is through an approach dubbed pass by value. When you pass a parameter, a new variable is created containing the value passed in. It is a copy of the original. You are free to modify this value in any way, but the value of the original variable outside the function remains unchanged. (This is actually a slight simplification of what PHP does internally.)
The better approach is to use pass by reference. Here, when a parameter is passed to a function, instead of creating a new variable, the function receives a reference to the original variable. This reference has a variable name, beginning with a dollar sign ($), and can be used in exactly the same way as another variable. The difference is that instead of having a value of its own, it merely refers to the original. Any modifications made to the reference also affect the original.
You specify that a parameter is to use pass by reference by placing an ampersand (&) before the parameter name in the function’s definition. No change is required in the function call.
You can modify the preceding increment() example to have one parameter passed by reference, and it will work correctly:
function increment(&$value, $amount = 1) {
$value = $value +$amount;
}
You now have a working function and are free to name the variable you want to increment anything you like. As already mentioned, it is confusing to humans to use the same name inside and outside a function, so you can give the variable in the main script a new name. The following test code now echoes 10 before the call to increment() and 11 afterward:
$a = 10;
echo $a.'<br />';
increment ($a);
echo $a.'<br />';
Using the return Keyword
The keyword return stops the execution of a function. When a function ends because either all statements have been executed or the keyword return is used, execution returns to the statement after the function call.
If you call the following function, only the first echo statement will be executed:
function test_return() {
echo "This statement will be executed";
return;
echo "This statement will never be executed";
}
Obviously, this is not a very useful way to use return. Normally, you want to return from the middle of a function only in response to a condition being met.
An error condition is a common reason to use a return statement to stop execution of a function before the end. If, for instance, you write a function to find out which of two numbers is greater, you might want to exit if any of the numbers are missing:
function larger( $x, $y ) {
if ((!isset($x)) || (!isset($y))) {
echo "This function requires two numbers.";
return;
}
if ($x>=$y) {
echo $x."<br/">;
} else {
echo $y."<br/">;
}
}
The built-in function isset() tells you whether a variable has been created and given a value. This code gives an error message and returns if either of the parameters has not been set with a value. You test it by using !isset(), meaning “NOT isset(),” so the if statement can be read as “if x is not set or if y is not set.” The function returns if either of these conditions is true.
If the return statement is executed, the subsequent lines of code in the function will be ignored. Program execution returns to the point at which the function was called. If both parameters are set, the function will echo the larger of the two.
The output from the code
$a = 1;
$b = 2.5;
$c = 1.9;
larger($a, $b);
larger($c, $a);
larger($d, $a);
is as follows:
2.5
1.9
This function requires two numbers
Returning Values from Functions
Exiting from a function is not the only reason to use return. Many functions use return statements to communicate with the code that called them. Instead of echoing the result of the comparison in the larger() function, the function might have been more useful if it returned the answer. This way, the code that called the function can choose if and how to display or use it. The equivalent built-in function max() behaves in this way.
You can write the larger() function as follows:
function larger ($x, $y) {
if ((!isset($x)) || {!isset($y))) {
return false;
} else if ($x>=$y) {
return $x;
} else {
return $y;
}
}
Here, the function returns the larger of the two values passed in. It returns an obviously different value in the case of an error. If one of the numbers is missing, it returns false. (The only caveat with this approach is that programmers calling the function must test the return type with === to make sure that false is not confused with 0.)
For comparison, the built-in function max() returns nothing if both variables are not set and, if only one was set, returns that one.
The code
$a = 1; $b = 2.5; $c = 1.9;
echo larger($a, $b).'<br />';
echo larger($c, $a).'<br />';
echo larger($d, $a).'<br />';
produces this output because $d does not exist and false is not visible:
2.5
1.9
Functions that perform some task but do not need to return a value often return true or false to indicate whether they succeeded or failed. The boolean values true and false can be represented with integer values 1 and 0, respectively, although they are of different types.
Implementing Recursion
Recursive functions are supported in PHP. A recursive function is one that calls itself. These functions are particularly useful for navigating dynamic data structures such as linked lists and trees.
Few web-based applications, however, require a data structure of this complexity, so you have minimal use for recursion. It is possible to use recursion instead of iteration in many cases because both of these processes allow you to do something repetitively. However, recursive functions are slower and use more memory than iteration, so you should use iteration wherever possible.
In the interest of completeness, let’s look at the brief example shown in Listing 5.5.
Listing 5.5 recursion.php—Reversing a String Using Recursion and Iteration
<?php
function reverse_r($str) {
if (strlen($str)>0) {
reverse_r(substr($str, 1));
}
echo substr($str, 0, 1);
return;
}
function reverse_i($str) {
for ($i=1; $i<=strlen($str); $i++) {
echo substr($str, -$i, 1);
}
return;
}
reverse_r('Hello'),
reverse_i('Hello'),
Listing 5.5 implements two functions. Both of them print a string in reverse. The function reverse_r() is recursive, and the function reverse_i() is iterative.
The reverse_r() function takes a string as a parameter. When you call it, it proceeds to call itself, each time passing the second to last characters of the string. For example, if you call
reverse_r('Hello'),
it will call itself a number of times, with the following parameters:
reverse_r('ello'),
reverse_r('llo'),
reverse_r('lo'),
reverse_r('o'),
reverse_r(' '),
Each call the function makes to itself makes a new copy of the function code in the server’s memory, but with a different parameter. It is like pretending that you are actually calling a different function each time. This stops the instances of the function from getting confused.
With each call, the length of the string passed in is tested. When you reach the end of the string (strlen()==0), the condition fails. The most recent instance of the function (reverse_r(' ')) then goes on and performs the next line of code, which is to echo the first character of the string it was passed; in this case, there is no character because the string is empty.
Next, this instance of the function returns control to the instance that called it, namely reverse_r('o'). This function then prints the first character in its string—"o"—and returns control to the instance that called it.
The process continues—printing a character and then returning to the instance of the function above it in the calling order—until control is returned to the main program.
There is something very elegant and mathematical about recursive solutions. In most cases, however, you are better off using an iterative solution. The code for such a solution is also shown in Listing 5.5. Note that it is no longer (although this is not always the case with iterative functions) and does exactly the same thing. The main difference is that the recursive function makes copies of itself in memory and incurs the overhead of multiple function calls.
You might choose to use a recursive solution when the code is much shorter and more elegant than the iterative version, but it does not happen often in this application domain.
Although recursion appears more elegant, programmers often forget to supply a termination condition for the recursion. This means that the function will recur until the server runs out of memory, or until the maximum execution time is exceeded, whichever comes first.
Namespaces
In general, a namespace is an abstract container that holds a group of identifiers; in PHP this means that namespaces can contain the functions, constants, and classes that you define. There are several organizational advantages for creating namespaces for your custom function and class definitions, including:
![]() All functions, classes, and constants within a namespace are automatically prefixed with the namespace name.
All functions, classes, and constants within a namespace are automatically prefixed with the namespace name.
![]() Unqualified class, function, and constant names are resolved at runtime, with the first search taking place in the namespace before moving out to the global space.
Unqualified class, function, and constant names are resolved at runtime, with the first search taking place in the namespace before moving out to the global space.
![]() All functions, classes, and constants within a namespace are automatically prefixed with the namespace name.
All functions, classes, and constants within a namespace are automatically prefixed with the namespace name.
For more information and practical examples of namespaces in PHP, please see the PHP Manual at http://www.php.net/language.namespaces
Further Reading
The use of include(), require(), function, and return are also explained in the online manual. To find out more details about concepts such as recursion, pass by value or reference, and scope that affect many languages, you can look at a general computer science textbook, such as Dietel’s and Dietel’s C++ How to Program.
Next
Now that you are using include files, require files, and functions to make your code more maintainable and reusable, the next chapter addresses object-oriented software and the support offered in PHP. Using objects allows you to achieve goals similar to the concepts presented in this chapter, but with even greater advantages for complex projects.