
In this chapter we will cover the day-to-day administration activities associated with running a MySQL database, including the following:
• Starting up and shutting down
• Getting information about the server and databases
• Setting variables
• Killing threads
• Clearing caches
• Analyzing tables
• Understanding the log files
Although this chapter is structured in a task-oriented fashion, we will make use of one important script, mysqladmin, for several of these tasks.
The mysqladmin script is used with appropriate parameters to perform a wide variety of administrative tasks. A summary of these appears at the end of this chapter.
We will also cover the use of the mysqlshow and mysqlcheck scripts and the KILL, RESET, CHECK, REPAIR, and ANALYZE TABLE SQL commands in this chapter.
As we discussed in Chapter 1, “Installing MySQL,” you will typically configure your system to start the MySQL server automatically. However, there will be situations in which you need to shut down or restart the server in the event of a problem.
We have already discussed how to start the MySQL server. The way you do this varies depending on your operating system, path settings, and install choices. Under Linux, you can start the server with
/etc/init.d/mysqld start
but only if you have a copy of the mysqld executable in the standard Red Hat location. If you have it somewhere else, you will need to use the correct path. See Chapter 1 for more information. You can also start the server by running
safe_mysqld
This script attempts to determine the correct startup options automatically and then starts MySQL with those options. Again, if the script is not in your path, you will need to enter the full path to find it.
To shut down your MySQL server under Linux, you have a couple of options. You can use
/etc/init.d/mysqld stop
or
mysqladmin –u root –p shutdown
You can, of course, use a different administrator account, but root will work. Normal user accounts should not be given this privilege.
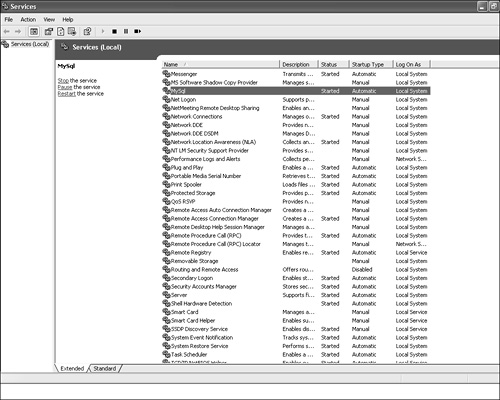
Under Windows, if you have installed mysqld as a service, the easiest way to start the service is to open the Control Panel and go to Administrative Tools, Services. If you select the MySQL service, Windows will give you options to Stop, Pause, or Restart the service, as shown in Figure 13.1. (This screenshot is from Windows XP Professional, so your display may vary a little depending on the version.)
You can also shut down the server using the mysqladmin script for Linux, as stated previously.
The mysqlshow script and SHOW SQL command allow you, as an administrator, to get a lot of information about what is going on with your databases and server.
The mysqlshow script gives information about databases. If you run it without any parameters, as
mysqlshow
it will give you a list of databases accessible to you as a user. This gives the same result as running
show databases;
from within the mysql monitor or other user interface.
As with most of the command-line scripts, you can supply mysqlshow with -u and a username and -p to supply that user's password. It also has various useful options. Running
mysqlshow –-help
will supply you with a full list of these options.
One option is to provide a database name to get more information about a particular database. For example, if you specify a database as follows, you will get a list of the tables in that database:
mysqlshow –u username –p database
You can get more information about the tables by adding --status to the end of this line. Try it for yourself with the employee database, as shown here:
mysqlshow -u username --status employee
The output is a little hard to read because it's so wide, but it includes information about the storage engine used in each table, how much data is in each table, the current value of any auto-increment column in a table, and the character set used in each table.
You can also use the SQL command SHOW inside your MySQL client to get information about a database and the status of the server. By this stage in this book, you should be familiar with using
show databases;
and
show tables;
to get information about databases and tables. However, the SHOW statement has a huge number of other options you can use.
show columns from tablename;
to give you the same information you would get from a DESC statement. Similarly, you can use
show table status
to get the same information we got from mysqlshow --status.
To get information about the server and how it's running, we can look at the server status and the values of variables.
To see the status of your MySQL server, you can use either
SHOW STATUS
inside MySQL, or
mysqladmin –u username –p –extended-status
from the command line.
What this mostly gives you is a lot of statistics about what the server has been doing since it was started. You may be interested to look at the values named com_*—for example, com_select tells you how many select statements have been executed by the server.
Some other particularly interesting values to look at are listed here:
• threads_connected: This is the current number of connections to the server.
• slow_queries: This is the number of queries this server has run that have taken more time than the value of the server variable long_query_time. These queries are logged in the Slow Query Log. We will return to slow queries in Chapter 19, “Optimizing Your Queries.”
• uptime: This is how long this server instance has been running in seconds.
To see the values of server variables, you can use
show variables;
from inside MySQL or
mysqladmin –u username –p variables
from the command line.
The values of most of these variables can be set in your configuration file, from the command line when you start the server, or dynamically inside MySQL using the SET command. Configuration is covered in Chapter 12, “Configuring MySQL,” and the use of SET is covered later in this chapter.
You can see what processes are currently running on your server by running the following command inside MySQL:
show processlist;
At a minimum you will see information about the query you just typed (show processlist).
You can get the same information from the command line using
mysqladmin –u username –p showprocesslist
You can see what privileges an individual user has been granted by typing
show grants for username@host;
This is expressed in terms of a GRANT statement that could be used to reproduce the privileges the user has. For example,
mysql> show grants for root@localhost;
on my system will produce the following results:
1 row in set (0.40 sec)
You can also remind yourself what the various privileges are by typing
show privileges;
This will give you a reference list of the privileges available on the system.
You can see what table types are installed and available by typing
show table types;
You can see the create statement that would be needed to create any particular table in a database by typing
show create table tablename;
For example, in our sample employee database, typing
show create table department;
CREATE TABLE 'department' (
'departmentID' int(11) NOT NULL auto_increment,
'name' varchar(30) default NULL,
PRIMARY KEY ('departmentID')
) TYPE=InnoDB CHARSET=latin1
(Note that the column names are quoted to be safe, and the default character set—which we didn't specify—is specified here.)
The SET statement is used to set the value of server variables—the same variables we could see via the show variables statement in the preceding section. This statement uses the syntax
set variable=value;
For example, we might use:
set sql_safe_updates=1;
This turns on safe updates (as we can at the command line with -–i-am-a-dummy).
We will make good use of this statement when we come to server optimization in Chapter 17, “Optimizing Your MySQL Server Configuration.”
The show processlist statement we looked at earlier in this chapter allows us to see what threads are running on a server. This command also tells you the id or unique identifier for each thread. If we have a problematic thread (for example, a query that is taking forever, or a problem user), we can terminate the thread using
kill process_id;
MySQL has a set of internal caches. These can be cleared using the FLUSH and RESET commands. For example, if we have updated user privileges by manually altering the grant tables, we can make sure that these changes roll through the system by executing a
flush privileges;
statement.
Another common use of FLUSH is to clear the query cache:
flush query cache;
This will defragment the query cache, improving performance.
The RESET statement is used in a similar way to FLUSH. For example, we can use
reset query cache;
Rather than defragmenting the query cache, this will actually clear it altogether.
A complete list of flushable and resettable variables can be found in the MySQL manual.
MySQL keeps various log files that may be useful to you. Most of these logs are not enabled by default, so if you want logging, you will have to switch it on. Each of these logs can be turned on with a command-line option on server startup or via the set command.
These are the logs you can keep:
• Error log: Tracks all the errors that have occurred. This one is logged by default and will appear in your data directory. The file is called hostname.err on Linux and mysql.err on Windows. You can set the location to something else with the option log-error=filename in your my.ini or my.cnf file.
• Query log: Logs all the queries run on the system. You can turn on this log and specify the location with the option log=filename.
• Binary log: Logs all the queries that change data. This replaces the update log, which will still be around until MySQL version 5.0, but is deprecated. You can turn on this log and specify the location with the option log-bin=filename.
• Slow query log: Logs all queries that took longer to execute than the value stored in the variable long_query_time. You can turn on this log and specify the location with the option log-slow-queries=filename
All of these except the binary log are simply text files. The binary log can be viewed using
mysqlbinlog logfile
We will look at the use of the slow query log in Chapter 19.
Log files will continue to grow larger so you should regularly rotate your log files. If you are using Linux, MySQL comes with a script called mysql-log-rotate to do this for you.
If you are using another operating system, you can move the old log files to a safe location manually and then tell MySQL to start using a new log file with the command
mysqladmin flush-logs
There are many options, with varying degrees of usefulness, that control mysqladmin.
Certain tasks can be done in SQL or using mysqladmin, such as creating and dropping databases:
mysqladmin create databasename
mysqladmin drop databasename
A common use for mysqladmin is to get information about the server and current status. The information can be as simple as “Is the server up?” (ping) or much more detailed, giving a list of available variables or processes. Many of the uses for mysqladmin follow.
To find out whether the server is up, use this:
mysqladmin ping
To find out what version of the MySQL server software is on this machine, use this:
mysqladmin version
To retrieve a short or long status message from the server, use this:
mysqladmin status
mysqladmin extended-status
To get a list of current active threads within the server, use this:
mysqladmin processlist
If you do get a list of processes (threads), you can selectively kill them like so:
mysqladmin kill id1, id2, id3...
To print the value of MySQL variables, use this:
mysqladmin variables
• Start the server with mysqladmin, by running the mysqld executable, or by using the Windows Services manager.
• Shut down the server with mysql.server stop or mysqladmin shutdown.
• Use mysqlshow or SHOW to get information about the current database or MySQL server.
• Set variables with set variable=value;.
• See threads with show processlist and kill them with kill processid.
• Clear caches with FLUSH and RESET.
• Improve the speed of joins with analyze table tablename;.
• MySQL stores log information in the error log, the query log (all queries), the binary log (queries that change data), and the slow query log (queries that take longer than long_query_time).
In Chapter 14, “Backup and Disaster Recovery,” we will look at how to make backup copies of your databases and what to do when things go wrong.