
3. Using Your Windows 10 PC

In this chapter, you find out how to turn on and start using a new Windows 10 computer.
![]() Finding Your Way Around Windows
Finding Your Way Around Windows
![]() Switching from Windows S Mode to Windows Home
Switching from Windows S Mode to Windows Home
Whether you’ve been using computers forever or just purchased your first PC, there’s a lot you need to know about using the Windows operating system—such as where everything is, what it does, and how to do what you need to do.
Powering Up and Powering Down
If you’ve already read Chapter 1, “Understanding Computer Basics,” you know how to connect all the components of your new computer system. Now that you have everything connected, it’s time to turn everything on.
Booting Up
Technical types call the procedure of starting up a computer booting or booting up the system. Restarting a system (turning it off and then back on) is called rebooting.
Turn On Your Computer
Each time (after the first) you turn on your computer, you go through pretty much the same routine—but without the initial configuration steps.
![]() Turn on your printer, monitor (for a traditional desktop PC), and other powered external peripherals.
Turn on your printer, monitor (for a traditional desktop PC), and other powered external peripherals.

![]() If you’re using a laptop PC, open the laptop’s case so that you can see the screen and access the keyboard.
If you’re using a laptop PC, open the laptop’s case so that you can see the screen and access the keyboard.

![]() Press the power or “on” button on your computer. Windows launches automatically and displays the lock screen.
Press the power or “on” button on your computer. Windows launches automatically and displays the lock screen.

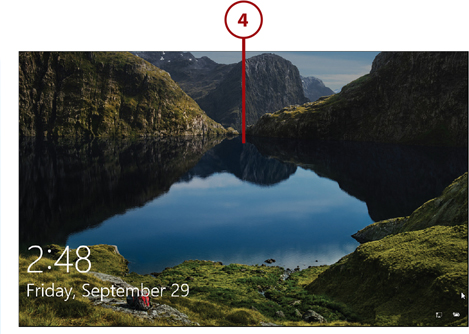
Lock Screen Information
The Windows lock screen displays a photographic background along with some useful information—including the date and time, power status, and Wi-Fi (connectivity) status.
![]() Press any key or move your mouse to display the sign-in screen.
Press any key or move your mouse to display the sign-in screen.
![]() Enter your password (if necessary), and then press the Enter key on your keyboard or click the next arrow key onscreen. Windows displays the desktop, ready for use.
Enter your password (if necessary), and then press the Enter key on your keyboard or click the next arrow key onscreen. Windows displays the desktop, ready for use.

Turn Off Your Computer
How you turn off your PC depends on what type of computer you have. If you have a laptop or 2-in-1, you can press the unit’s power (on/off) button—although that typically puts your PC into Sleep mode instead of turning it all the way off. The better approach is to shut down your system through Windows.
![]() Click the Start button at the far-left side of the taskbar (or press the Windows key on your computer keyboard) to display the Start menu.
Click the Start button at the far-left side of the taskbar (or press the Windows key on your computer keyboard) to display the Start menu.
![]() Click Power to display the submenu of options.
Click Power to display the submenu of options.
![]() Click Shut Down.
Click Shut Down.

Sleep Mode
If you’re using a laptop or 2-in-1 PC, Windows includes a special Sleep mode that keeps your computer running in a low-power state, ready to start up quickly when you open the lid or turn it on again. You can enter Sleep mode from the Power Options menu—or, with many laptop PCs, by pressing the unit’s power button.
Finding Your Way Around Windows
When it comes to finding your way around Windows 10, it’s all about learning the different parts of the desktop.
Use the Start Menu
You access all the software programs and utilities on your computer via the Windows Start menu. Your most frequently used programs and basic Windows tools are listed on the left side of the Start menu; your favorite programs are “pinned” as tiles to the right side. To open a specific program, just click the icon or tile.
![]() Click the Start button (or press the Windows key on your keyboard) to open the Start menu.
Click the Start button (or press the Windows key on your keyboard) to open the Start menu.
![]() Icons for basic operations (Power, Settings, Pictures, Documents, and your account) are listed on the far left of the Start menu.
Icons for basic operations (Power, Settings, Pictures, Documents, and your account) are listed on the far left of the Start menu.
![]() To expand the left section to display icon labels, click the Expand button at the top of the Start menu.
To expand the left section to display icon labels, click the Expand button at the top of the Start menu.
![]() All applications are listed in the middle portion of the Start menu. You see Recently Added and Most Used apps first, then a complete list of all installed apps, in alphabetical order. Scroll down to view additional apps; click an app to open it. (Some apps are organized in folders by publisher or type of application; click a folder to view its contents.)
All applications are listed in the middle portion of the Start menu. You see Recently Added and Most Used apps first, then a complete list of all installed apps, in alphabetical order. Scroll down to view additional apps; click an app to open it. (Some apps are organized in folders by publisher or type of application; click a folder to view its contents.)

![]() Favorite programs are “pinned” to the right of the main Start menu in tiles. To launch an application, click an item with your mouse, or move to that item using the arrow keys and press Enter on your keyboard.
Favorite programs are “pinned” to the right of the main Start menu in tiles. To launch an application, click an item with your mouse, or move to that item using the arrow keys and press Enter on your keyboard.

Different Looks
Your Start screen probably looks a little different from the ones shown in this chapter—in particular the tiles you see. That’s because every person’s system is different, depending on the particular programs and apps you have installed on your PC.
Quick Access Menu
If you right-click (instead of left-click) the Start button, you’ll display an alternate Quick Access menu. This is a menu of advanced options, including direct links to File Explorer, Mobility Center, and Task Manager.
Use the Taskbar
The taskbar is that area at the bottom of the Windows desktop. Icons on the taskbar can represent frequently used programs, open programs, or open documents.
![]() Open an application from the taskbar by clicking the application’s icon.
Open an application from the taskbar by clicking the application’s icon.

![]() Search your computer for files and apps, or the Web for additional information, by clicking within the Search box (“Type here to search”), by typing your query, and then pressing the Enter key.
Search your computer for files and apps, or the Web for additional information, by clicking within the Search box (“Type here to search”), by typing your query, and then pressing the Enter key.
![]() View all open applications in thumbnail form by clicking the Task View button.
View all open applications in thumbnail form by clicking the Task View button.
![]() Open File Explorer by clicking the File Explorer icon.
Open File Explorer by clicking the File Explorer icon.

![]() The far-right side of the taskbar is called the notification area, and it displays icons for essential Windows operations—sound, networking, power, time and date, and so forth. View more details about any item displayed in this area by clicking that item’s icon.
The far-right side of the taskbar is called the notification area, and it displays icons for essential Windows operations—sound, networking, power, time and date, and so forth. View more details about any item displayed in this area by clicking that item’s icon.
![]() Click the up arrow to view icons for more items, normally hidden.
Click the up arrow to view icons for more items, normally hidden.
![]() Open the Windows Action Center, which includes system notifications and key actions, by clicking the Notifications icon.
Open the Windows Action Center, which includes system notifications and key actions, by clicking the Notifications icon.
![]() Minimize all open applications by clicking the slim Peek button at the far right of the taskbar.
Minimize all open applications by clicking the slim Peek button at the far right of the taskbar.

Taskbar Icons
A taskbar icon with a plain background represents an unopened application. A taskbar icon with a line underneath represents a running application. A taskbar icon with a shaded background represents the highlighted or topmost window on your desktop. An application with multiple documents open is represented by “stacked” lines underneath the icon.
What’s New in Windows 10?
The Windows operating system has been around for more than 30 years now. Version 1.0 of Windows was released in November of 1985 and has gone through numerous small and more significant revisions since then.
Windows 10, released in 2015, is the latest major version of Windows. Since the initial release of Windows 10, Microsoft has released a series of updates to fix bugs and add functionality. In recent years, Microsoft has released these Windows updates twice a year—in the spring (typically April) and fall (typically October).
What’s new in the latest update—and other recent updates? Read on to find out.
Update Numbering
Here’s how to read Microsoft’s Windows update numbering. The first two digits represent the year of the release; the second two digits represent the month. So update 1709 was released in 2017 in September (the ninth month). Note that the month isn’t always accurate; for example, the 1709 update actually shipped in October of that year. (Microsoft missed the mark by a month!)
Anniversary Update (1607)
Microsoft released its first major Windows 10 update on the operating system’s first anniversary, in August 2016. This update included a lot of bug fixes and performance enhancements, including the following new features:
Dark mode, to display apps with a black background instead of the traditional white
New Skype app for video, audio, and text messaging
Windows Ink for drawing in select apps
Creators Update (1703)
The Creators Update was released eight months after the Anniversary Update, in April 2017. This release saw even more new features and changes to how a few things looked and worked. These changes included the following:
Changes to how Windows updates are delivered, so that you can opt not to receive some minor updates automatically
Game Mode to enhance game playback
New interface for the Windows Defender antimalware app
Paint 3D app for drawing three-dimensional shapes
Virtual reality functionality
Fall Creators Update (1709)
In October 2017, Microsoft released what it called the Fall Creators Update. This update added even more new functionality to the operating system, along with some important interface changes. These changes included the following:
The ability to pin individual websites to the taskbar
Controlled folder access in Windows Defender to guard against ransomware attacks
Fluent Design elements to improve the look of the operating system and apps
Integration with Android, iOS, and Windows phones and tablets to enable the sharing of data and messages between multiple devices
My People app to manage your favorite contacts directly from the Windows taskbar
OneDrive Files on Demand for working with files stored online
Story Remix in the Photos app to create “highlight reels” of your pictures and videos
Support for “mixed reality” headsets and apps
Removal of Windows Media Player app
April 2018 Update (1803)
The April 2018 (1803) update introduced only a few minor changes to Windows 10. The biggest change was the addition of Windows S Mode, which restricts Windows to run only Microsoft-approved Windows apps. Other changes included the following:
Changes to Action Center interface
Changes to Cortana interface and functionality
Fluent Design Acrylic effect for taskbar and desktop elements
New Game Bar for game play and screen capture
Nearby Sharing to share files via Bluetooth or Wi-Fi
Introduction of Windows S Mode that runs only Microsoft-approved apps
Removal of Homegroup networking
October 2018 Update (1809)
This update was Microsoft’s buggiest. It actually caused more problems than it solved, forcing Microsoft to halt the update for a few months until all the kinks were worked out.
New features were few and included the following:
New Snip & Sketch tool for taking and editing screenshots
New Your Phone app for integrating/syncing Android phones to the Windows desktop
Enhanced Clipboard and Windows search functionality
May 2019 Update (1903/19H1)
The 1903 update was the first to carry the alternative “half year” naming. (It came out in the first half—H1—of 2019.) It was a much more stable update than the previous one and included the following new or updated features:
New Light mode
Cortana separated from the core Windows search
Ability for users to pause scheduled updates for 35 days
Notifications hidden while in full-screen mode
November 2019 Update (1909/19H2)
Starting with this update, the second-half updates became minor updates, and major changes were scheduled for the first-half updates. Here’s what was in this one:
Improvements to notification management
Ability to create Calendar events from the taskbar
Minor functionality changes to the Start menu
Integrated OneDrive with File Explorer search
Windows Defender renamed as Microsoft Defender and treated as separate app
Game Bar renamed as Xbox Game Bar
My People app removed
May 2020 Update (2004/20H1)
Given that the 1909 changes were minimal, Microsoft scheduled more robust feature changes for the first update in 2020. Here’s what’s new in this latest Windows 10 update:
Updated designs for most app icons
Cortana separated into its own app and repositioned as a Microsoft 365 Assistant
Windows Search interface changes and improvements to File Explorer search
Reset This PC feature improved to feature cloud-based reset
Your Phone app updated to include making and receiving phone calls
Ability to name virtual desktops
Enhanced ability to turn off notifications
Improvements to Xbox Game Bar
2004/20H1 Update
This book is written on the 2004/20H1 update. If you’re still running an older version of Windows 10, you can update your system to this newer version or use previous editions of this book that are designed for those versions.
Switching from Windows S Mode to Windows Home
With the April 2018 (1803) update, Microsoft introduced a new version of Windows called Windows S Mode. Windows S Mode is just like regular Windows except it can run only Windows apps downloaded from the Microsoft Store. Computers running in Windows S Mode cannot use traditional desktop software, such as Adobe Reader and Photoshop Elements.
Cloud Apps in S Mode
Windows S Mode can run cloud-based apps that run within a web browser, such as Google Docs.
Microsoft’s stated reason for introducing Windows S Mode is to make Windows-based computers more secure. Apps available in the Microsoft Store are “Microsoft-verified” for security, whereas traditional software apps are not.
The built-in limitations of Windows S Mode make it less than ideal for many computer users, especially those using older software not available in the Microsoft Store. Unfortunately, many (if not most) new computers come with Windows S Mode installed, which limits their functionality. If you just purchased a new PC, chances are that it’s running Windows S Mode by default.
Fortunately, you can quickly and easily switch your version of Windows from Windows S Mode to Windows Home, which does run traditional desktop software. The switch takes just a few minutes of your time, and it’s totally free.
Is Your Computer in S Mode?
To see if your computer is running in S Mode, click the Start button and select Settings. From the Settings tool, click System and then select the About tab. Scroll to the Windows Specifications section and look at the Edition entry. If it says Windows 10 Home in S Mode, your computer is running in S Mode. If it doesn’t say S Mode, it’s not.
Switch from Windows S Mode to Windows Home
Any computer running Windows S Mode, new or old, can be upgraded to Windows Home for free. (Note, however, that you cannot switch back to Windows S Mode from Windows Home; this is a one-way switch.)
![]() Click the Windows Start button to open the Start menu.
Click the Windows Start button to open the Start menu.
![]() Click Settings to open the Settings tool.
Click Settings to open the Settings tool.

![]() Click Update & Security.
Click Update & Security.

![]() Click to select the Activation tab.
Click to select the Activation tab.

![]() Go to the Switch to Windows 10 Home section, and click Go to the Store. This opens the Microsoft Store app to the appropriate Switch Out of S Mode page.
Go to the Switch to Windows 10 Home section, and click Go to the Store. This opens the Microsoft Store app to the appropriate Switch Out of S Mode page.

![]() Click the Get button.
Click the Get button.

![]() When prompted, click the Install button. Your computer will be switched from Windows S Mode to Windows Home. (It only takes a few seconds, no rebooting required.)
When prompted, click the Install button. Your computer will be switched from Windows S Mode to Windows Home. (It only takes a few seconds, no rebooting required.)
