7. Contacts

In this chapter, you become familiar with your Galaxy Note II’s contact-management application, which is called Contacts. You find out how to add contacts, synchronize contacts, join duplicate contacts together, and even how to add a contact to your Home screen. Topics include the following:
→ Importing contacts
→ Adding contacts
→ Synchronizing contacts
→ Creating favorite contacts
On any smartphone, the application for managing contacts is essential because it is where you keep all of your contacts’ information. On the Galaxy Note II, this application is called simply Contacts. It is the central hub for many activities, such as calling and sending text messages (SMS), multimedia messages (MMS), or email. You can also synchronize your contacts from many online sites, such as Facebook and Gmail, so as your friends change their Facebook profile pictures, their pictures on your Galaxy Note II change as well.
Adding Accounts
Before you look around the Contacts app, add some accounts to synchronize contacts from. You already added your Google account when you set up your Galaxy Note II in the Prologue, “Getting to Know Your Galaxy Note II.”
Adding Facebook, Twitter, LinkedIn, and Other Accounts
To add accounts for your online services such as Facebook, Twitter, LinkedIn, and so on to your Galaxy Note II, install the apps for those services from Google Play. Please see how to install apps in Chapter 11, “Working with Android Apps.” After they are installed and you have signed in to them, if you visit the Accounts settings as shown in the following sections, you see new accounts for each online service.
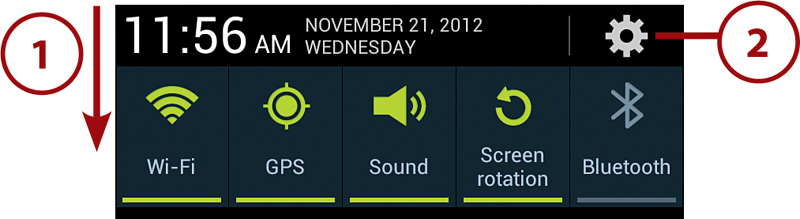
1. From the Home screen, pull down the Notification bar.
2. Touch the Settings icon.
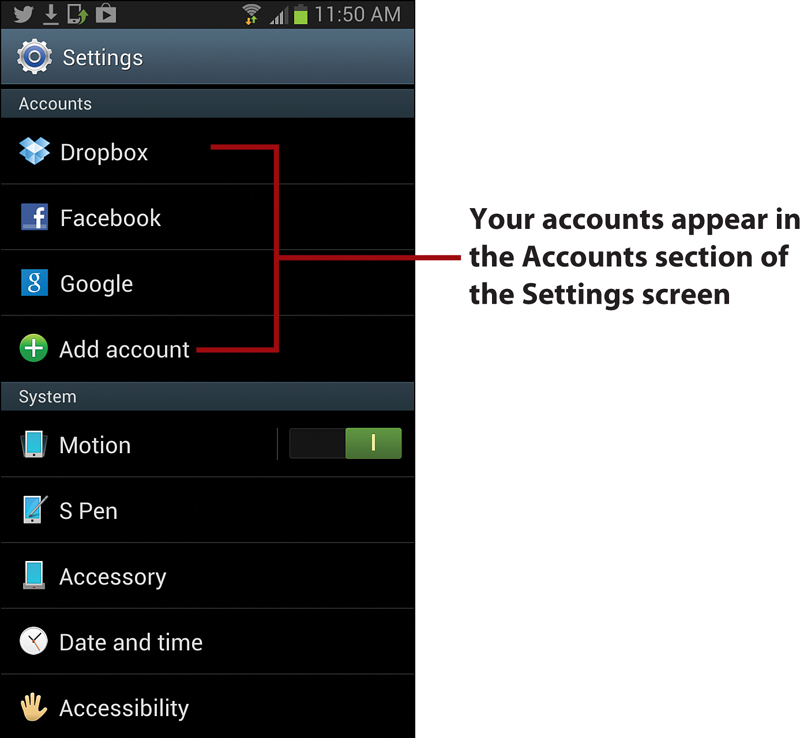
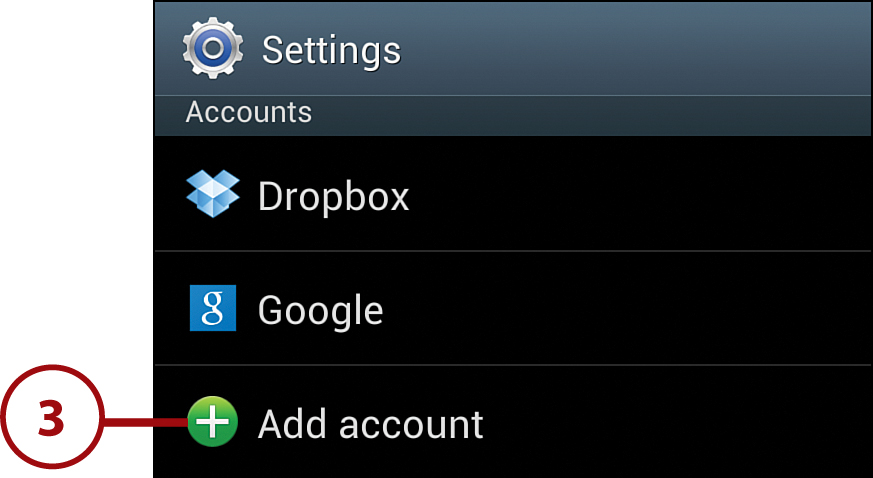
3. Scroll up or down as necessary to reach the Accounts section, and then touch Add Account.
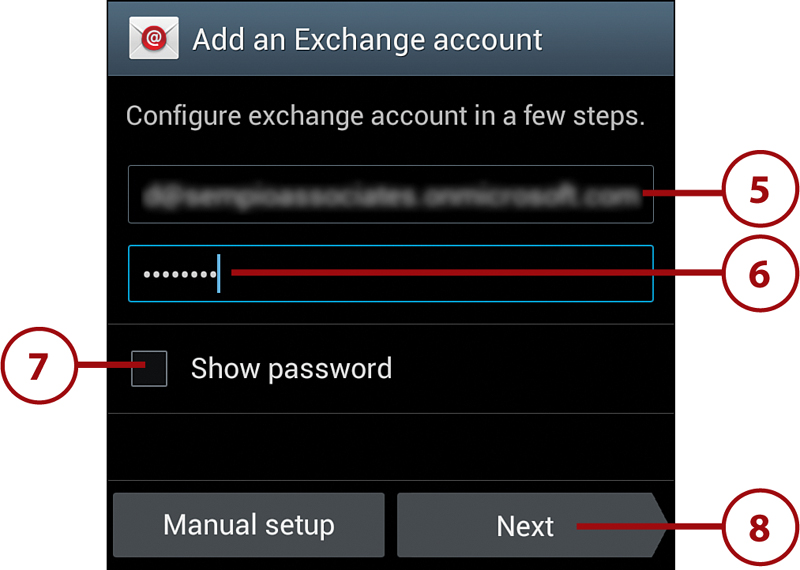
4. Touch Microsoft Exchange ActiveSync.

5. Type the email address for the account.
6. Touch Password and type the password.
7. Touch Show Password if you want to see the password rather than the dots the Galaxy Note II shows for security. Seeing the password can be helpful when entering complex passwords.
8. Touch Next.
Providing ActiveSync Server Information
Your Galaxy Note II tries to work out some information about your company’s ActiveSync setup. If it can’t, it prompts you to enter the ActiveSync server name manually. If you don’t know what it is, you can try guessing it. If, for example, your email address is [email protected], the ActiveSync server is most probably webmail.allhitradio.com. If this doesn’t work, ask your email administrator.
9. Touch OK to agree that your mail administrator may impose security restrictions on your Galaxy Note II after you connect to the Exchange server.

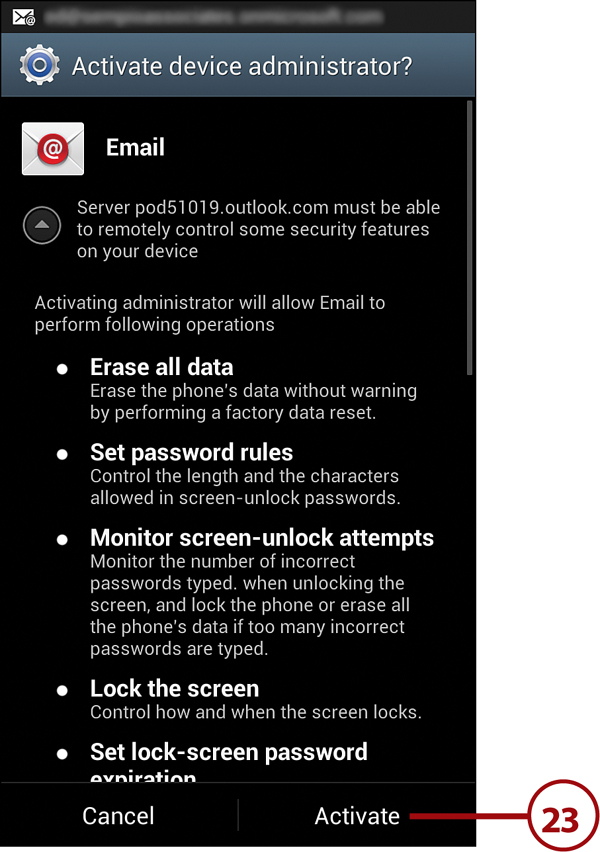
Remote Security Administration
Remote Security Administration is another way of saying that when you activate your Galaxy Note II against your work email servers, your email administrator can add restrictions to your phone. These can include forcing a device password, imposing the need for a very strong password, and requiring how many letters and numbers the password must be. It also means that your email administrator has the power to remotely wipe your Galaxy Note II so that it is put back to factory defaults. This is normally done if you lose your phone or it is stolen.
10. Touch to choose how often your Galaxy Note II receives Exchange email during peak hours.
Push and Other Options for Getting Email
Push means that as email arrives in your Inbox at work, it is delivered to your phone. You can set it to Manual, which means that your Galaxy Note II checks for email only when you open the Email app. You can also set the checking interval from every 5 minutes to every hour.
11. Touch to choose how often your Galaxy Note II receives Exchange email during off-peak hours.
12. Touch to choose how many days in the past email is synchronized to your Galaxy Note II or set it to All to synchronize all email in your Inbox.
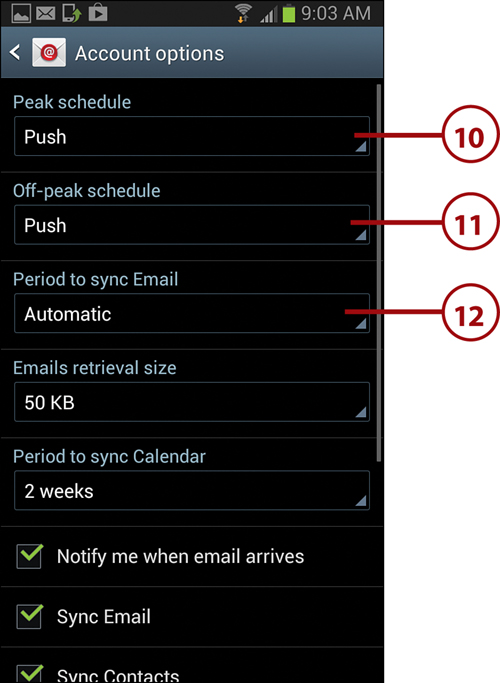
13. Touch to choose the largest email size to retrieve. You can choose from 5KB to 100KB, choose All to retrieve all messages no matter how big they are, or choose Automatic to use the server’s settings.
14. Touch to choose how long a period of calendar appointments to synchronize. Your choices are 2 weeks, 1 month, 3 months, 6 months, or All calendar.
15. Check this box to receive a notification when email messages arrive.
16. Check this box to sync your email messages with the server. Normally, you will want to do this.

17. Scroll down the screen and then check this box to enable synchronizing your corporate contacts to your Galaxy Note II.
18. Check this box to enable synchronizing your corporate calendar to your Galaxy Note II.
19. Check this box to enable synchronizing your corporate task list to your Galaxy Note II.
20. Check this box to enable synchronizing your SMS messages to your Galaxy Note II.
21. Check this box to make your Galaxy Note II automatically download email attachments when connected to a Wi-Fi network.
22. Touch Next.
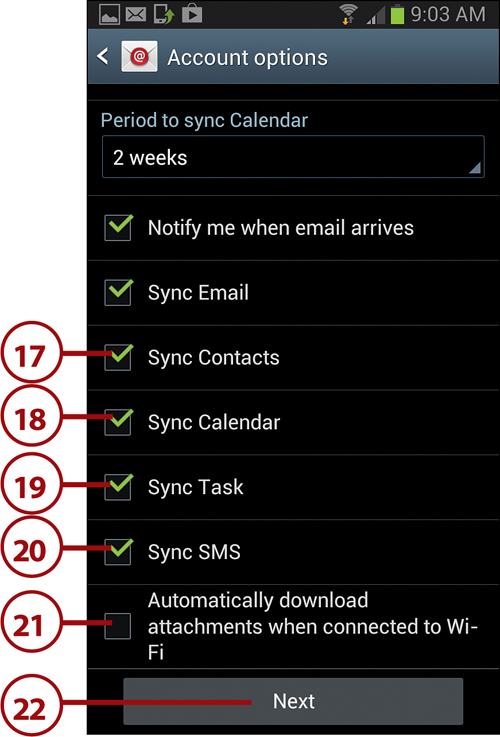
You might decide that you don’t want to synchronize all your work information to your Galaxy Note II. You might decide to just synchronize email, and not the calendar, or maybe just the calendar but not the contacts and email. Unchecking these boxes enables you to choose the information you don’t want to synchronize.
23. Touch Activate.
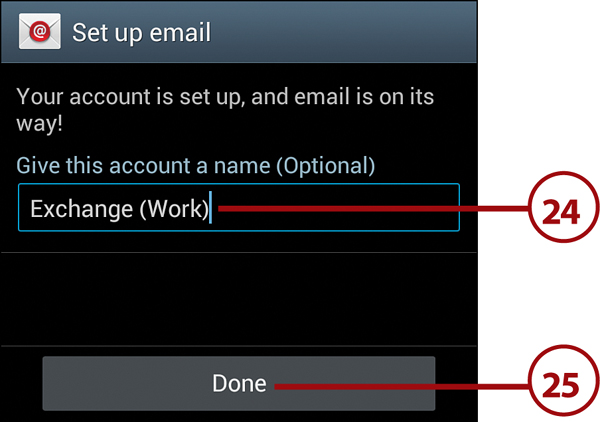
24. Enter a name for this email account. Use something meaningful that describes the purpose of the account such as Exchange (Work).
25. Touch Done to complete the setup.
Removing an Account
To remove an account, open the Settings screen and touch the account to be removed. On the screen for the account, touch the account in the Accounts list and then touch Remove Account on the screen that appears.
Navigating Contacts
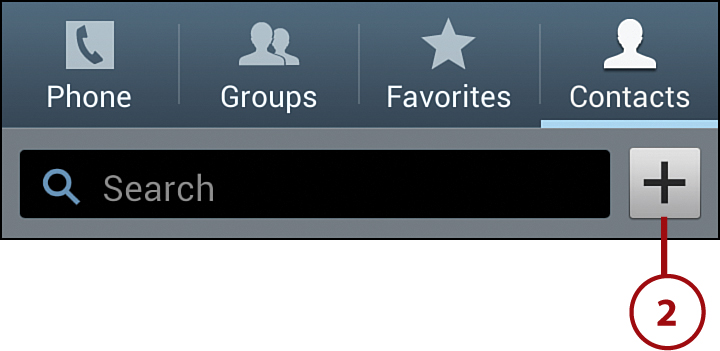
The Contacts app consists of four screens: Phone, Groups, Favorites, and Contacts. Normally, the Contacts app displays the Contacts screen first, showing your list of contacts, but you can navigate to any of the other screens by touching its tab.
1. From the Home screen, touch the Contacts icon.

2. Touch to add a new contact.
3. Touch to switch to the Phone app. From the resulting screen, you can dial a number on the keypad.
4. Touch to see your contact groups. See more information about creating contact groups in the later section titled “Create Contact Groups.”
5. Touch to see your list of favorite contacts.
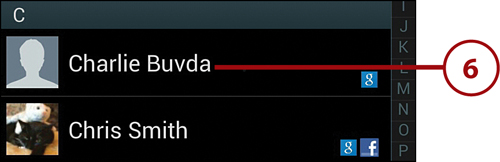
6. Touch to see all contacts.
7. Touch to search for a contact.
8. Touch a contact to see all information about her.
9. Touch a contact picture (or picture placeholder) to see the Quick Connect bar.

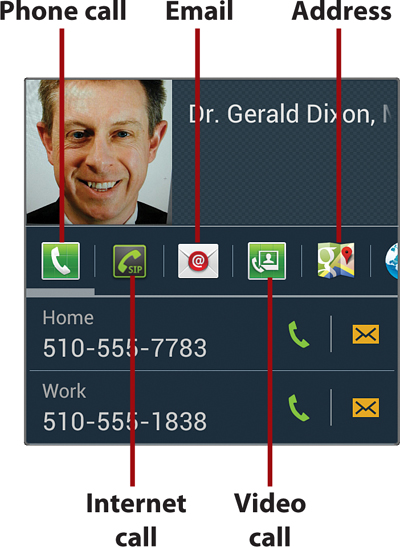
Quick Connect Bar
When you touch a contact picture, the Quick Connect bar displays. This bar enables you to quickly access different ways of communicating with the contact. If the icon list extends off the screen, swipe left to reveal further icons.
Check a Contact’s Status
If you have added contacts that belong to social networks such as Facebook, you can check their statuses right from the Contacts app.
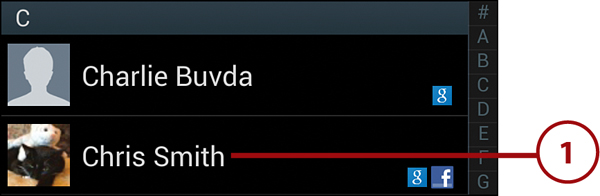
1. Touch a contact.
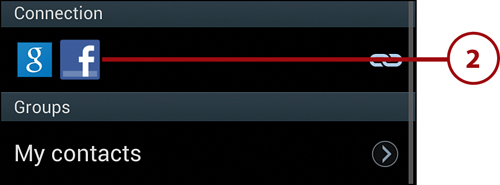
2. Touch to view the contact’s Facebook profile.
Edit a Contact
When you need to, you can easily change a contact’s existing information or add further information to it.
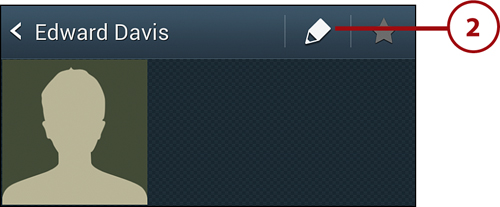
1. Touch the contact you want to edit.
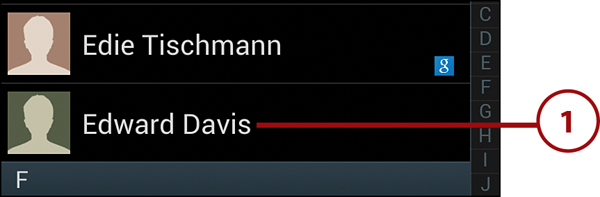
2. Touch to open the contact record for editing.
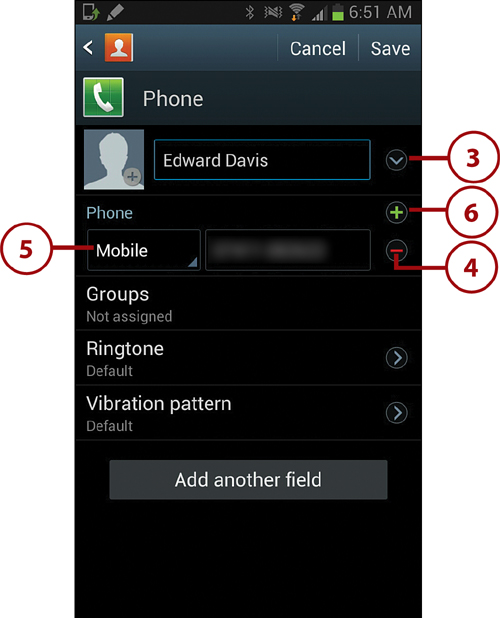
3. Touch to enter a name prefix, middle name, or name suffix.
4. Touch a – sign next to an existing field to delete it.
5. Touch to change the field subcategory. For example, you can change a phone number’s subcategory from Mobile to Home.
6. Touch + to add a new field in a specific category. In this example, touching + enables you to add a new phone number and choose its subcategory, such as Work.
7. Touch to put the contact in a contact group. The Galaxy Note II comes with built-in groups, including ICE Emergency Contacts, Co-Workers, Family, and Friends, but you can also create as many other groups as you need.
8. Touch to assign a different ringtone to calls from the contact. By giving important contacts distinctive ringtones, you can easily identify important calls.
9. Touch to assign a different vibration pattern to calls from the contact. Vibration patterns help you identify important calls when you have silenced the ringer.
10. Touch to add a new field to the contact record. Extra fields include things such as the contact’s phonetic name (to help you pronounce it correctly), IM (Instant Messaging) addresses, Notes, and Relationship, which you use to specify how someone is related to the contact—for example, an assistant or manager.
11. Touch Save to save the changes to the contact record.

Add a Contact Photo
A contact record on your Galaxy Note II includes a contact photo when you link a social network account to the contact or when you import a contact record that includes a photo (for example, from a vCard file). You can manually add a picture as needed, either from an existing file or by taking a photo.
1. Touch the contact.

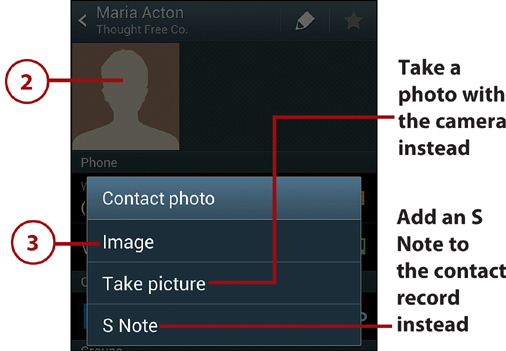
2. Touch the contact photo to open the Contact Photo dialog.
3. Touch to add a photo already saved on your Galaxy Note II.
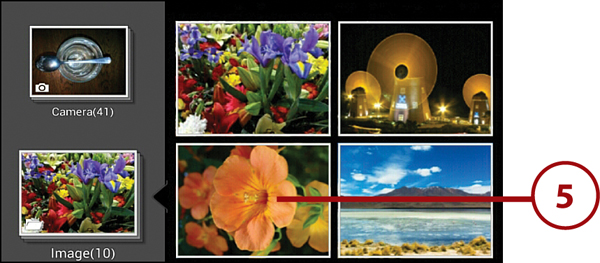
4. Touch the album that contains the photo.

5. Touch the photo you want to use.
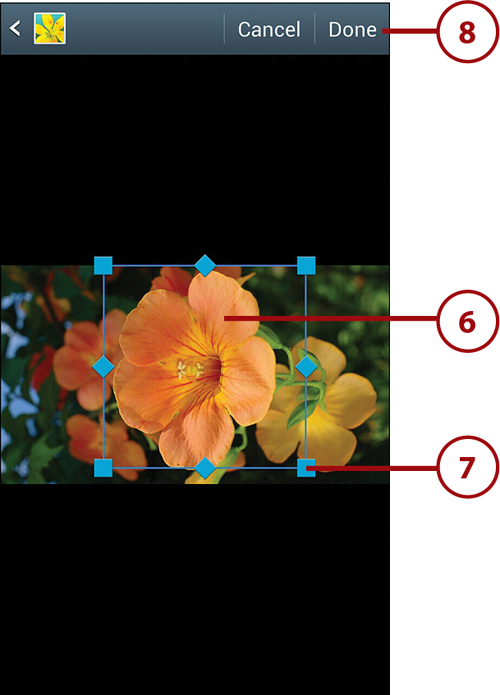
6. Drag the cropping box to select the area of the photo you want to use for the contact photo.
7. Drag the outside of the cropping box to expand or contract it as needed.
8. Touch Done to save the cropped photo as the contact photo.
Adding and Managing Contacts
As you add contacts to your work email account or Google account, those contacts are synchronized to your Galaxy Note II automatically. When you reply to or forward emails on your Galaxy Note II to an email address that is not in your Contacts, those email addresses are automatically added to the contact list or merged into an existing contact with the same name. You can also add contacts to your Galaxy Note II directly.
Add a Contact from an Email
To manually add a contact from an email, first open the email client (either Email or Gmail) and then open a message. Please see Chapter 4, “Email,” for more on how to work with email.
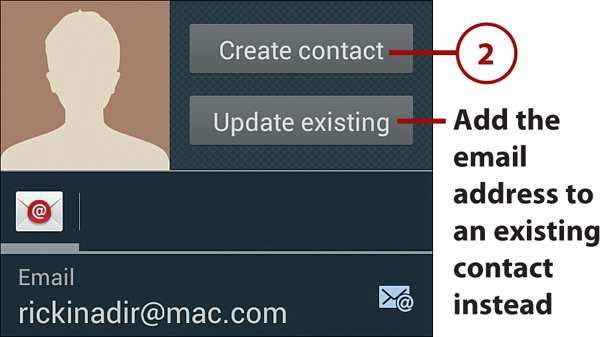
1. Touch the blank contact picture to the left of the sender’s name.

2. Touch Create Contact.
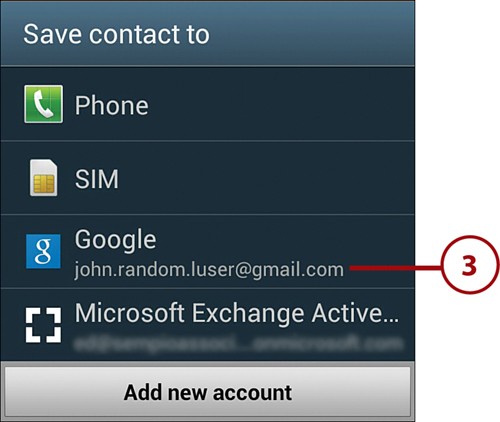
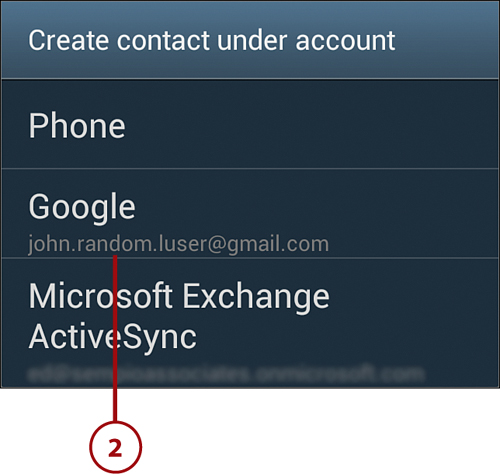
3. In the Save Contact To dialog, touch the account to which you want to save the contact.
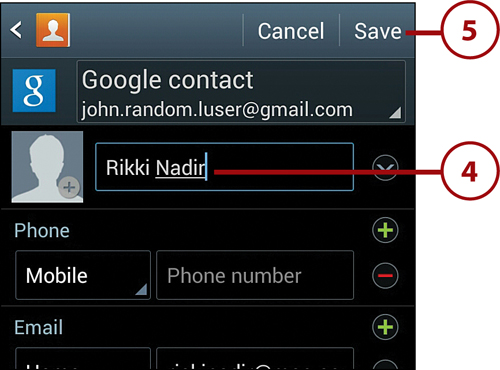
4. Type the contact’s name.
5. Touch Save to save the contact.

2. Touch to add a new contact.
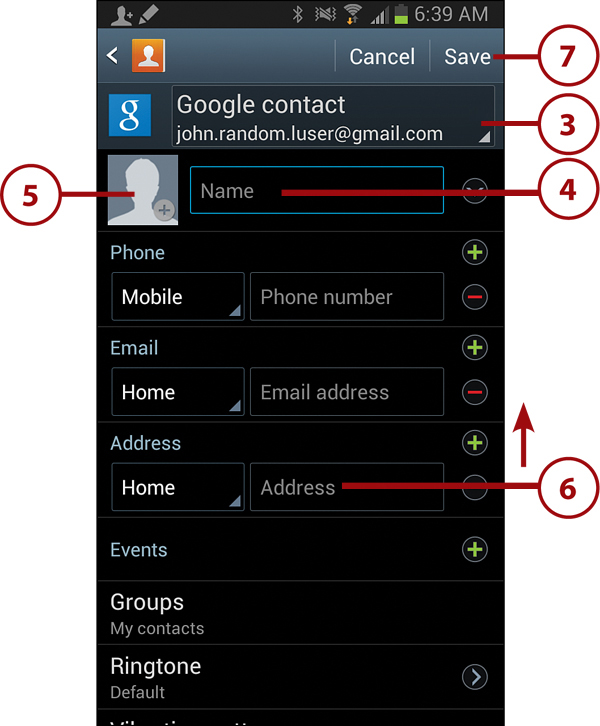
3. Touch to select which account you add the new contact to. For example, you might want to add the new contact to your work email account instead of to your personal account.
4. Type the person’s full name, including any middle name. Your Galaxy Note II automatically populates the first name, middle name, and last name fields.
5. Touch to choose a contact picture.
6. Touch and drag up to scroll down to reach other fields.
7. Touch Save to save the new contact.
Add a Contact from a vCard
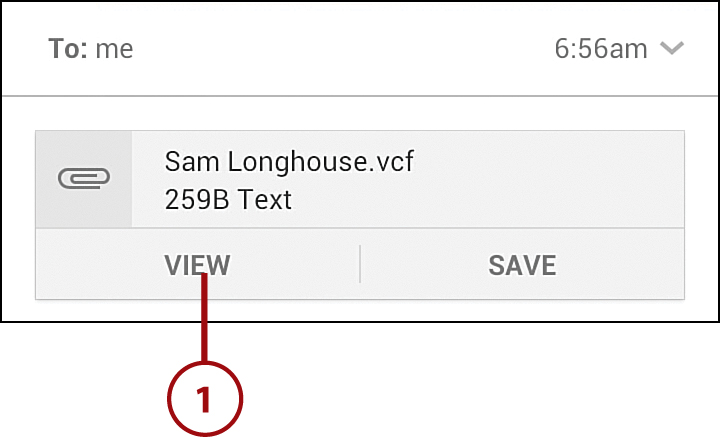
A vCard is a file that contains a virtual business card—which can include a contact’s name, job title, email address, physical address, phone numbers, and so on. You can easily exchange vCards with other people by attaching them to email messages or instant messages. When you receive a vCard, you can import it into the Contacts app as a new contact by using the following steps.
1. Touch View under the attachment that has the .vcf extension.
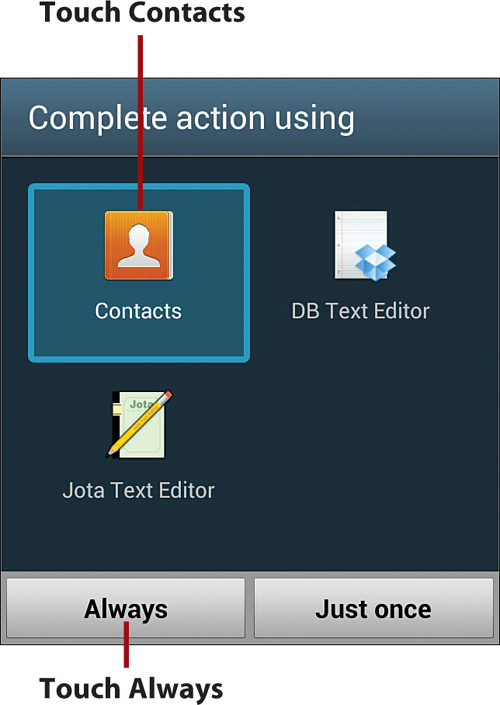
Choosing the App for vCard Files
If your Galaxy Note II displays the Complete Action Using dialog when you touch View to open a vCard file, touch Contacts and then touch Always.
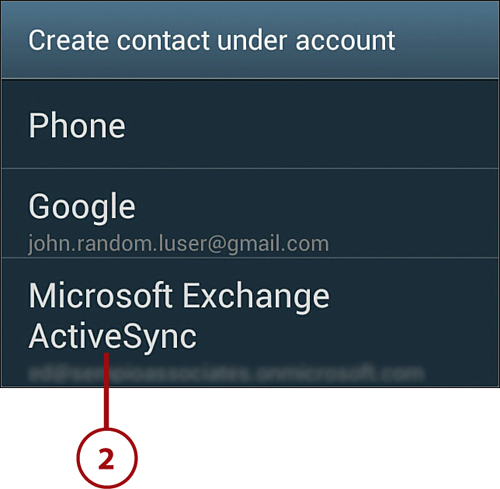
2. Touch to select the account to add the new contact to. For example, you might want to add the new contact to your work email account instead of to your personal account.
Add a Contact Using Near Field Communications
Your Galaxy Note II has Near Field Communications (NFC) functionality built in. This enables you to exchange contact cards between NFC-enabled smartphones or to purchase items in a store by holding your Galaxy Note II near the NFC reader at the checkout counter. If you encounter someone who has an NFC-enabled smartphone, or she has an NFC tag that contains her business card, follow these steps to import that information.
1. Hold the other person’s smartphone back to back with your Galaxy Note II and give the command for sharing via NFC, or hold the NFC tag close to the back cover of your Galaxy Note II. Your Galaxy Note II’s screen dims and the phone plays a tone to indicate that it is reading the NFC information.
2. Touch to select which account you want to add the new contact to. For example, you might want to add the new contact to your work email account instead of to your personal account.
Manage Contacts Settings
To make the Contacts app display contacts the way you prefer, you can customize it. For example, you can choose the contact list display order and whether to display contacts using their first names first or last names first.
1. Touch the Contacts icon on the Home screen.
2. Touch the Menu button.
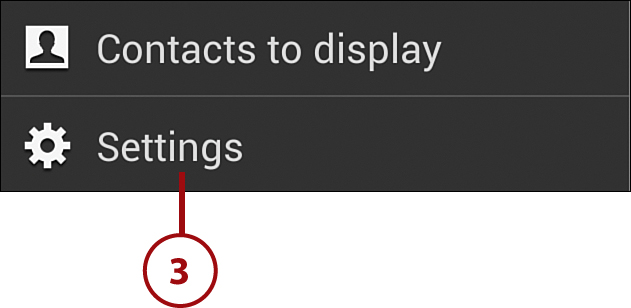
3. Touch Settings.
4. Touch to choose the sort order of the list of contacts in the Contacts app. You can sort the list by first name or last name.
5. Touch to choose how each contact is displayed. You can display contacts with the first name first or the last name first.
6. Touch Settings to save the settings and return to the Contacts app.

Create Contact Groups
You can create contact groups—such as Friends, Family, Inner Circle—and then divide your contacts among them. This can be useful if you don’t want to search through all your contacts. For example, to find a family member, you can simply touch the Family group and see only family members.
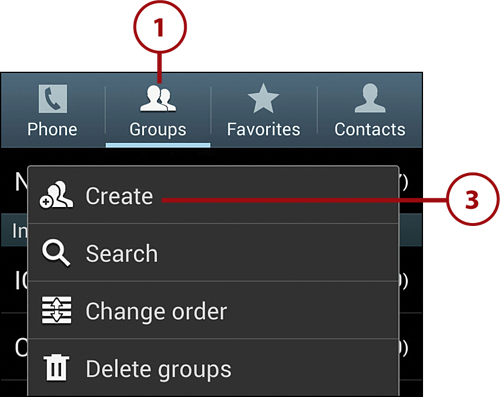
1. Touch the Groups icon from the Contacts main screen.
2. Touch the Menu button.
3. Touch Create.
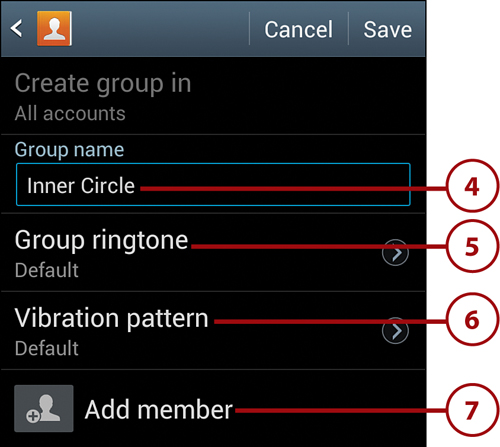
4. Enter a name for your new group.
5. Optionally, touch to set a specific ringtone for the group. You can use the ringtone and vibration pattern (discussed next) to make calls from the group easy to distinguish.
6. Optionally, touch to set a specific vibration pattern for the group.
7. Touch to add members to the group.
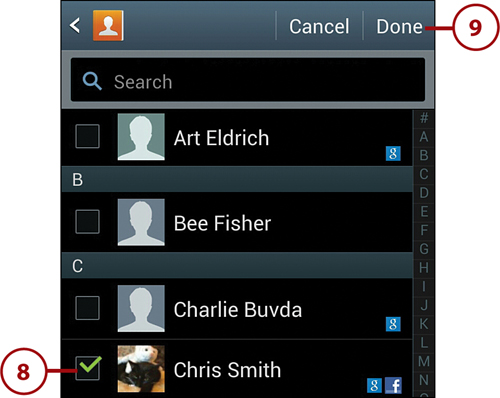
8. Touch the check boxes next to contacts’ names to select each member of the group.
9. Touch Done.
10. Touch Save to save the group.

2. Touch the group to edit.

3. Touch to add a contact to the group.
4. Touch the Menu button.
5. Touch Remove Member.
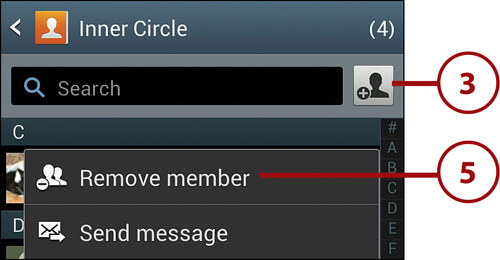
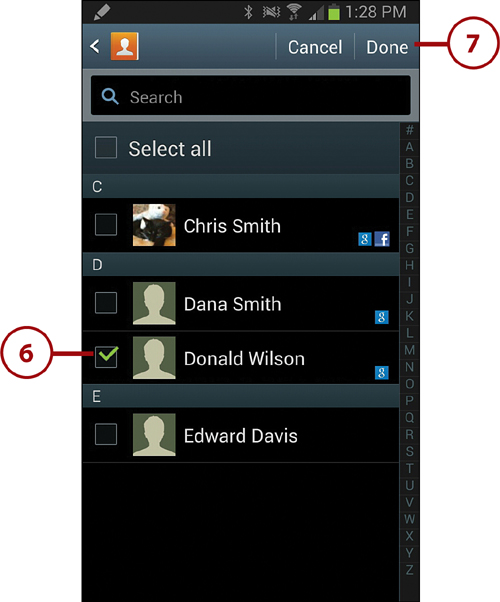
6. Touch the contact or contacts you want to remove.
7. Touch Done to remove the contact and save the changes.
Choose Which Contacts to Display
You can choose to hide certain contact groups from the main contacts display. For example, you can choose to show only contacts from Twitter. You can also choose which contact groups in each account to include.
1. Touch the Contacts icon on the Home screen.

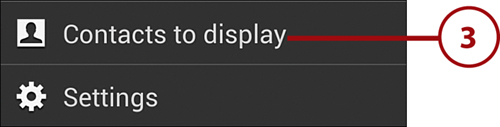
2. Touch the Menu button.
3. Touch Contacts to Display.
4. Touch to display all contacts from all accounts.
5. Touch an account to show only contacts in that account.
6. Touch to choose a customized selection.
7. Touch to customize which groups in each account are displayed.

8. Touch to expand an account to see subgroups of contacts.
9. Touch to select or deselect a subgroup of contacts.
10. Touch Done to save your settings.

Join and Separate Contacts
As you add contacts to your Galaxy Note II, they are automatically merged if the new contact name matches a name that’s already stored. Sometimes you need to manually join contacts together or separate them if your Galaxy Note II has joined them in error.
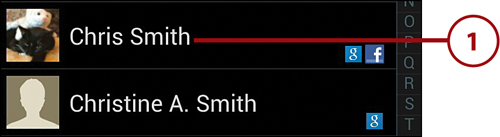
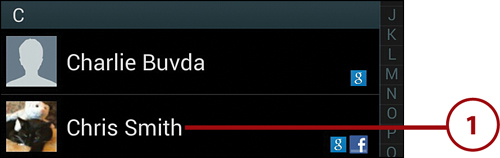
Join Contacts Manually
1. Touch the contact that you want to join a contact to.
2. Touch the Menu button.
3. Touch Join Contact.

4. Touch the contact you want to join with.
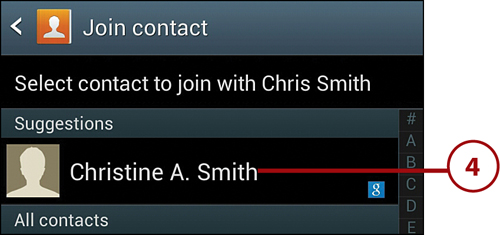
5. Touch the contact’s name to return to the Contacts screen.

2. Touch the Menu button.
3. Touch Separate Contact.

4. Touch the contact you want to separate.
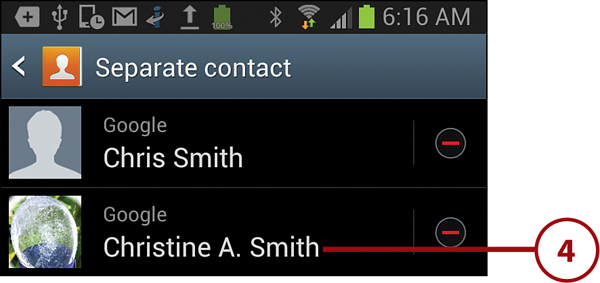
5. Touch OK to separate the contacts.

Adding a Contact to Your Home Screen
If you communicate with some contacts so much that you are constantly opening and closing the Contacts application, you can save time and effort by adding a shortcut to the contacts on the Home screen.
2. Touch Widgets.
3. Swipe right until you see the Contact widget.
4. Touch and hold the Contact widget.

5. While still holding the widget, position the widget on the Home screen and release your finger. The list of contacts appears automatically.
6. Touch the contact you want to add to the Home screen.
>>>Go Further: Importing and Exporting Contacts
