2. Customizing Your Galaxy Note II

In this chapter, you find out how to customize your Galaxy Note II to suit your needs and lifestyle. Topics include the following:
→ Using wallpapers and live wallpapers
→ Replacing the keyboard
→ Adjusting sound and display settings
→ Setting region and language
Your Galaxy Note II arrives preconfigured to appeal to most buyers; however, you might want to change the way some of the features work, or even personalize it to fit your mood or lifestyle. Luckily your Galaxy Note II is customizable.
Changing Your Wallpaper
Your Galaxy Note II comes preloaded with a cool wallpaper. You can install other wallpapers, use live wallpapers that animate, and even use pictures in the Gallery application as your wallpaper.
1. Touch and hold in an open area on the Home screen.
2. Touch Set Wallpaper.
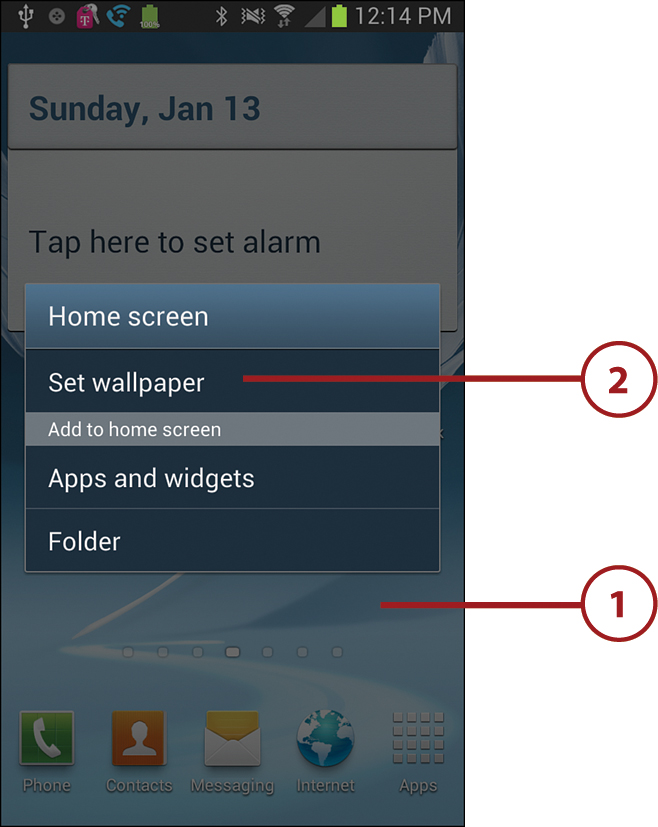
3. Select where you want to change the wallpaper.

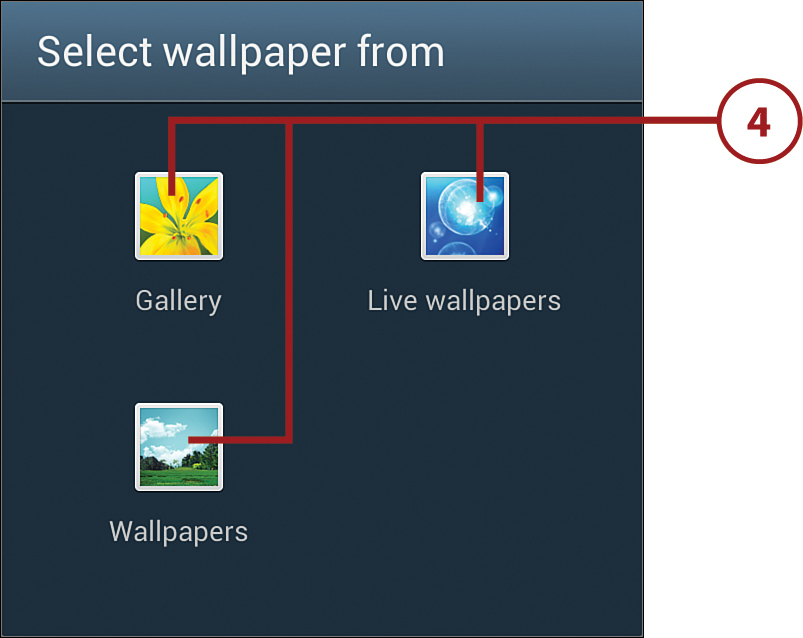
4. Touch the type of wallpaper you want to use. Use the steps in one of the following three sections to select your wallpaper.
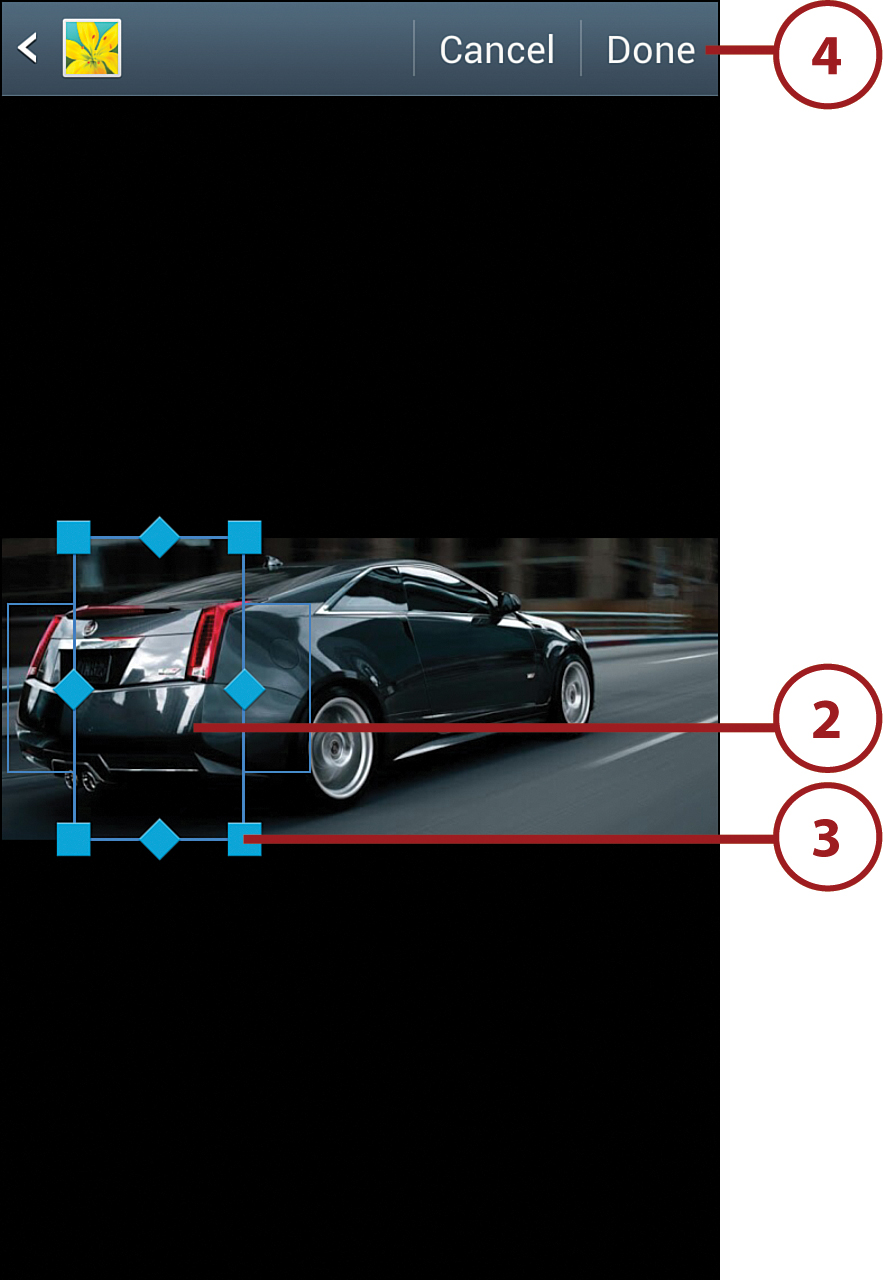
1. Select the photo you want to use as your wallpaper.

2. Move the crop box to the part of the photo you want to use.
3. Adjust the size of the crop box to include the part of the photo you want.
4. Touch Done to use the cropped portion of the photo as your wallpaper.
Live Wallpaper
Live wallpaper is wallpaper with some intelligence behind it. It can be a cool animation or even an animation that keys off things such as the music you are playing on your Galaxy Note II, or it can be something simple such as the time. There are some very cool live wallpapers in Google Play that you can install and use.
1. Touch the live wallpaper you want to use. This example uses the Star Trek: Red Alert live wallpaper.

2. Touch to see and change the live wallpaper settings.
3. Touch Set Wallpaper to use the live wallpaper.

Finding More Wallpaper
You can find wallpaper or live wallpaper in Google Play. Open Google Play and search for “wallpaper” or “live wallpaper.” Read more on how to use Google Play in Chapter 11, “Working with Android Apps.”
Wallpaper
Choose a static wallpaper.
1. Scroll left and right to see all of the wallpapers.
2. Touch a wallpaper to preview it.
3. Touch Set Wallpaper to use the wallpaper.

Changing Your Keyboard
If you find it hard to type on the standard Galaxy Note II keyboard, or you just want to make it look better, you can install replacement keyboards. You can download free or purchase replacement keyboards from Google Play. Make sure you install a keyboard before following these steps.
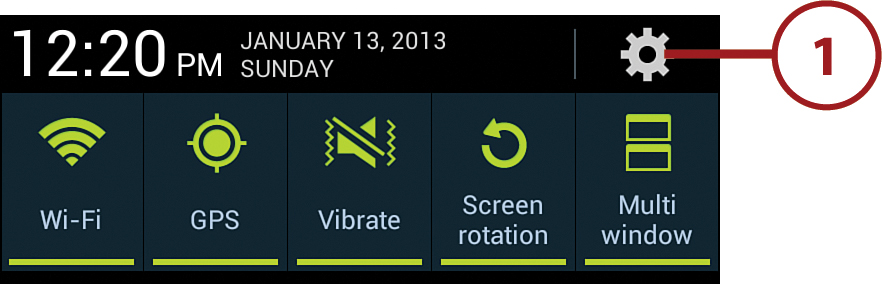
1. Pull down the notification bar and touch the Settings icon.
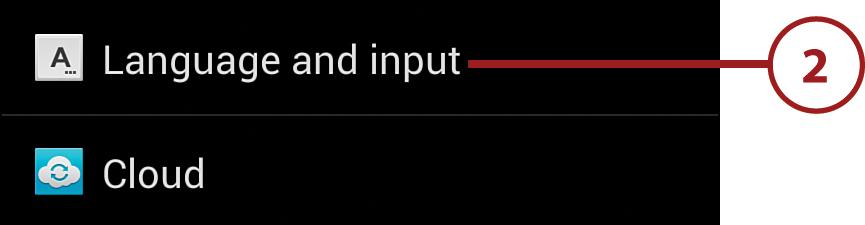
2. Touch Language and Input.

3. Check the box next to a keyboard you have previously installed from the Google Play store (in this example, we used SwiftKey 3) to make that keyboard available for use.

4. Touch OK to change the input method.

Doing Your Research
When you choose a different keyboard in step 3, the Galaxy Note II gives you a warning telling you that nonstandard keyboards have the potential for capturing everything you type. Do your research on any keyboards before you download and install them.
5. Touch Default to change the default keyboard to the one you have just enabled.

6. Touch the name of your new keyboard to select it to be the default.

What Can You Do with Your New Keyboard?
Keyboards you buy in Google Play can do many things. They can change the key layout, change the color and style of the keys, offer different methods of text input, and even enable you to use an old T9 predictive input keyboard that you might have become used to when using an old “dumb phone” that only had a numeric keypad.
Adding Widgets to Your Home Screens
Some applications that you install come with widgets that you can place on your Home screens. These widgets normally display real-time information, such as stocks, weather, time, and Facebook feeds. Your Galaxy Note II also comes preinstalled with some widgets. Here is how to add and manage widgets.
Add a Widget
Your Galaxy Note II should come preinstalled with some widgets, but you might also have some extra ones that have been added when you installed other applications. Here is how to add those widgets to your Home screens.
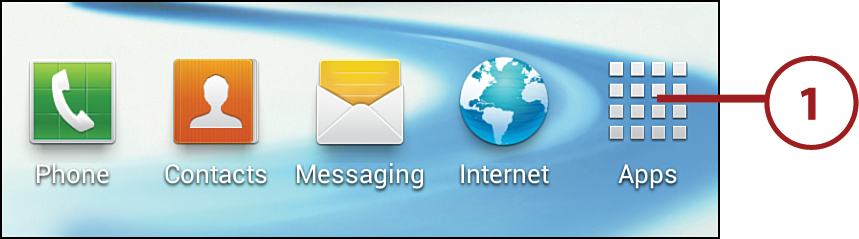
1. Touch the Launcher icon.
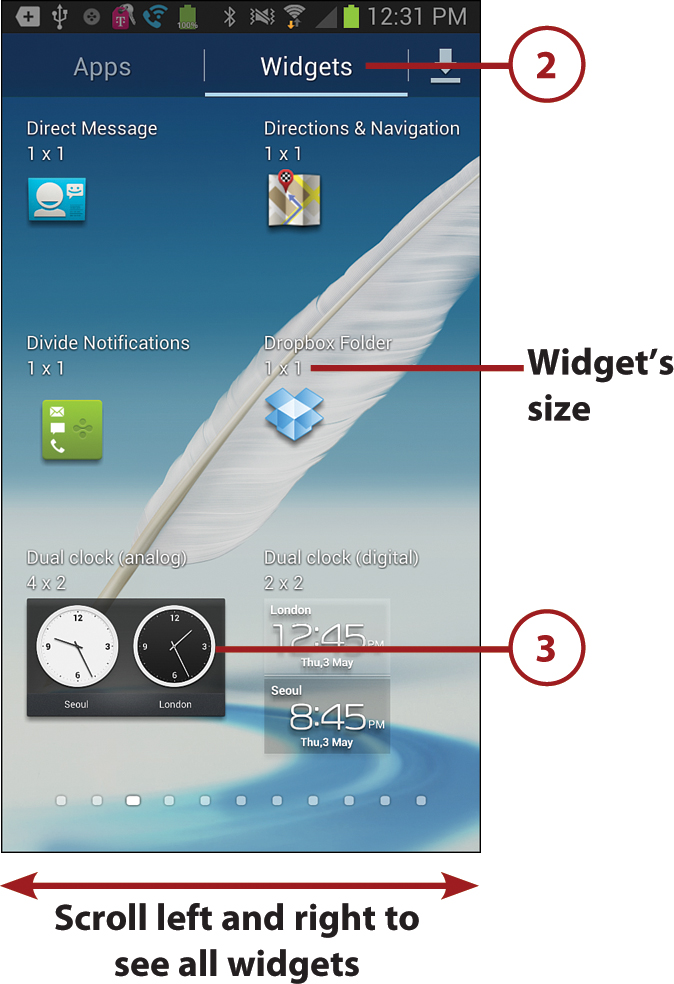
2. Touch Widgets.
3. Touch and hold a widget to move it to the Home screen. Keep holding the widget as you move to step 4. This example uses the Dual Clock (Analog).
4. Position the widget where you want it on the Home screen.
5. Drag the widget between sections of the Home screen.

6. Release your finger to place the widget. Some widgets ask you a few questions after they are positioned.
How Many Widgets Can I Fit?
Each part of the Home screen is divided into four blocks across and four blocks down. In the figure for steps 2 and 3, notice that each one shows its size in blocks across and down (such as 1×1). From that, you can judge if a widget is going to fit on the screen you want it to be on, but it also helps you position it in step 3.
Resizing Widgets
Some (not all) widgets can be resized. To resize a widget, touch and hold the widget until you see an outline and then release it. If the widget can be resized, you see the resizing borders. Drag them to resize the widget. Touch anywhere on the screen to stop resizing.

1. Touch and hold the widget until you see a blue shadow, but continue to hold the widget.
2. Drag the widget to the word Remove to remove it.
3. Drag the widget around the screen or drag it between sections of the Home screen to reposition it.

4. Release the widget.
Setting the Language
If you move to another country or want to change the language used by your Galaxy Note II, you can do so with a few touches.
1. Pull down the Notification bar and touch the Settings icon.

2. Touch Language and Input.
3. Touch Language.

4. Touch the language you want to switch to.

What Obeys the Language Setting?
When you switch your Galaxy Note II to use a different language, you immediately notice that all standard applications and the Galaxy Note II menus switch to the new language. Even some third-party applications honor the language switch. However, many third-party applications ignore the language setting on the Galaxy Note II. So you might open a third-party application and find that all of its menus are still in English.
Changing Accessibility Settings
Your Galaxy Note II includes built-in settings to assist people who might otherwise have difficulty using some features of the device. The Galaxy Note II has the ability to provide alternative feedback, such as vibration and sound. It can even read menu items aloud to you.
1. Pull down the Notification bar and touch the Settings icon.

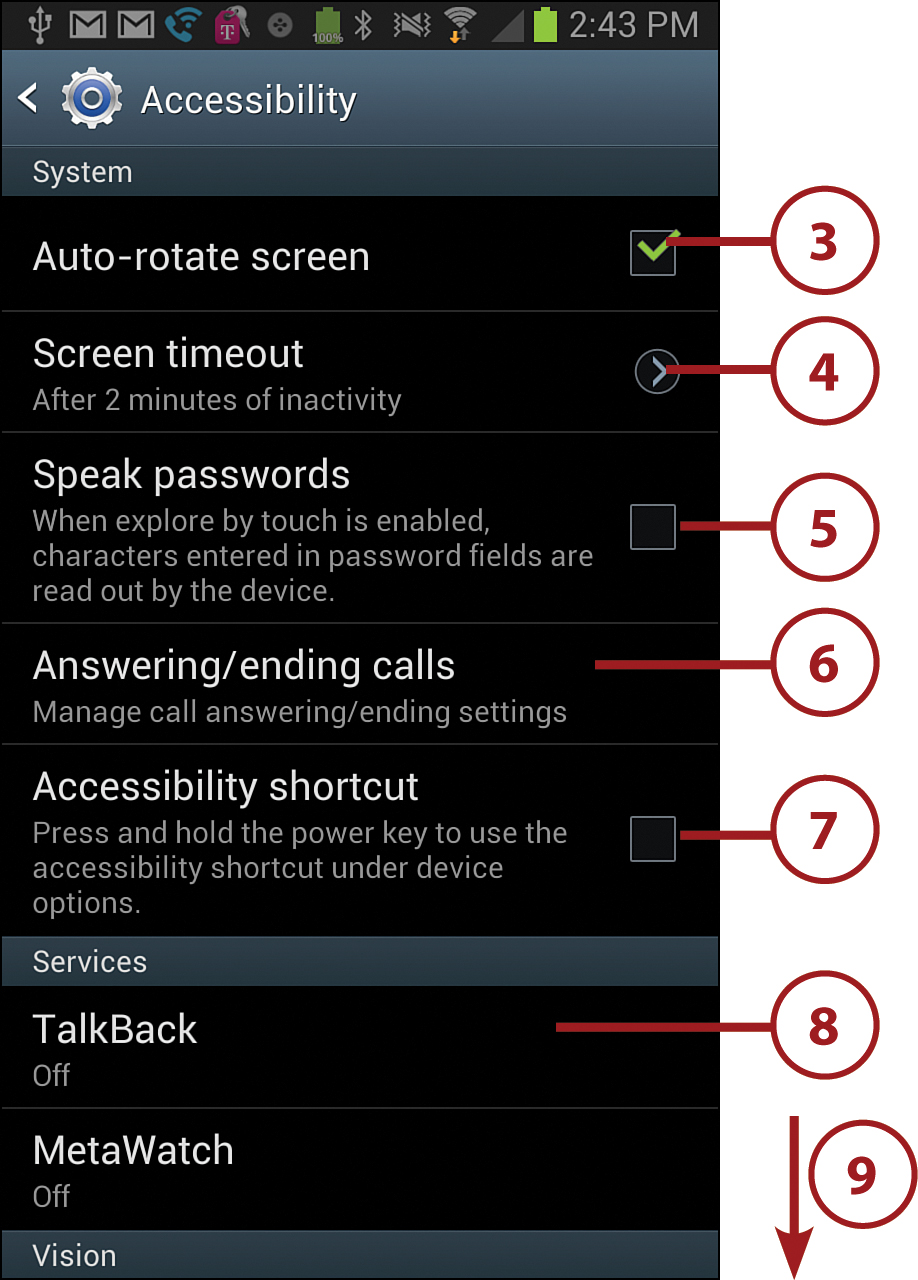
2. Touch Accessibility.

3. Touch to enable automatic screen rotation. When disabled, the screen does not rotate between Portrait and Landscape modes.
4. Touch to set how many minutes of inactivity your Galaxy Note II waits before timing out the screen.
5. Touch to enable or disable the feature where your tablet speaks your passwords as you type them.
6. Touch to choose whether to use the Home key to answer calls and/or the power key to end calls.
7. Touch to enable or disable the feature where you can press and hold the power key to jump straight to this Accessibility settings screen.
8. Touch to enable or disable TalkBack. When enabled, TalkBack speaks everything, including menus.
9. Scroll down for more settings.
10. Touch to set the font size used on your Galaxy Note II. You can choose sizes ranging from tiny to huge.
11. Touch to enable or disable negative colors where all colors displayed on your Galaxy Note II are reversed.
12. Touch to choose which text-to-speech service to use (Google or Samsung) and rate of the speech.
13. Touch to allow or disallow Google web scripts that make websites more accessible.
14. Touch to adjust the balance of audio played when wearing earphones.
15. Touch to use mono audio when wearing one earphone.
16. Scroll down for more settings.

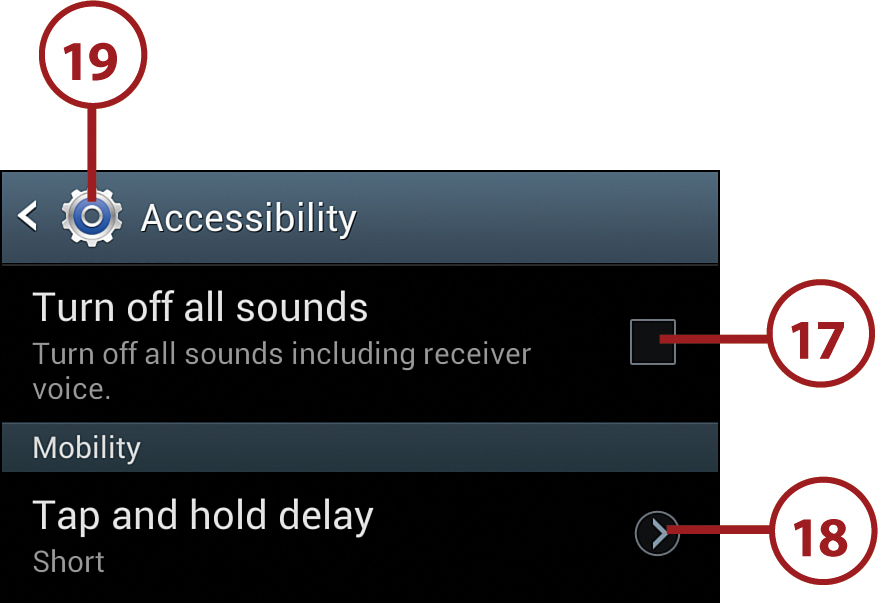
17. Touch to turn off all sounds.
18. Touch to change how long you have to hold when you perform a touch-and-hold on the screen.
19. Touch to save your settings and return to the previous screen.
More About Text-to-Speech
By default, your Galaxy Note II uses the Google Text-to-Speech service with an option to use the Samsung service to speak any text that you need to read. You can install other text-to-speech software by searching for them in the Google Play store. After you’ve installed the software, it shows as a choice in step 12.
Adjusting Sound Settings
You can change the volume for games, ringtones, and alarms, change the default ringtone and notification sound, plus control what system sounds are used.
1. Pull down the Notification bar and touch the Settings icon.
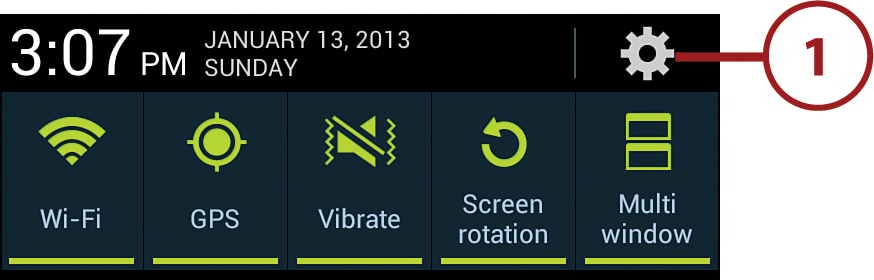
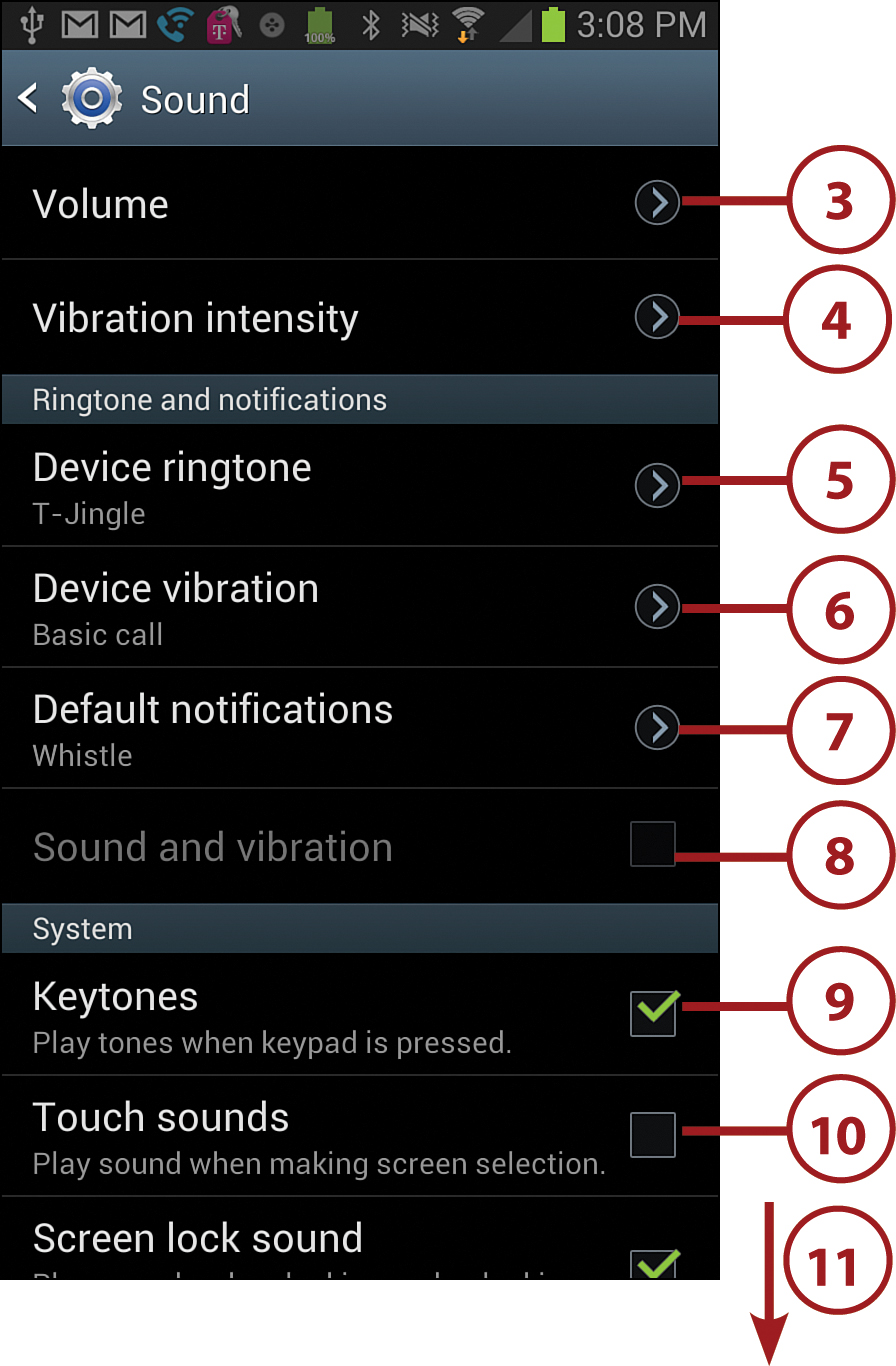
2. Touch Sound.
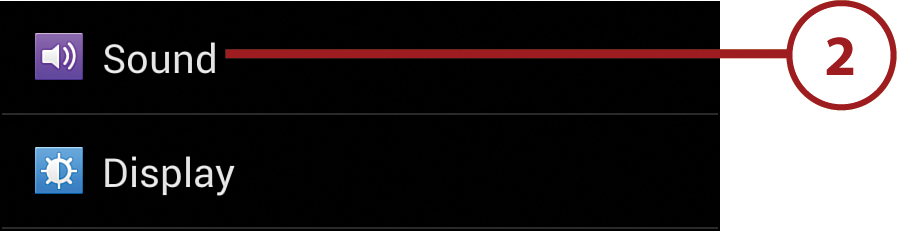
3. Touch to change the volume for games and media, such as videos and music, ringtones and notifications, and alarms.
4. Touch to choose the intensity of vibrations for incoming calls, notifications, and haptic feedback.
5. Touch to choose the default notification ringtone or add new ones.
6. Touch to choose the vibration pattern used for notifications or create your own.
7. Touch to choose the sound that plays for notifications.
8. Touch to enable or disable playing a sound and vibration when being notified. This option is only available when you have your Galaxy Note II in Sound mode.
9. Touch to enable or disable playing touch-tone sounds when typing numbers on the phone keypad.
10. Touch to enable or disable the touch sounds that play when you touch something on the screen or a menu.
11. Scroll down for more settings.
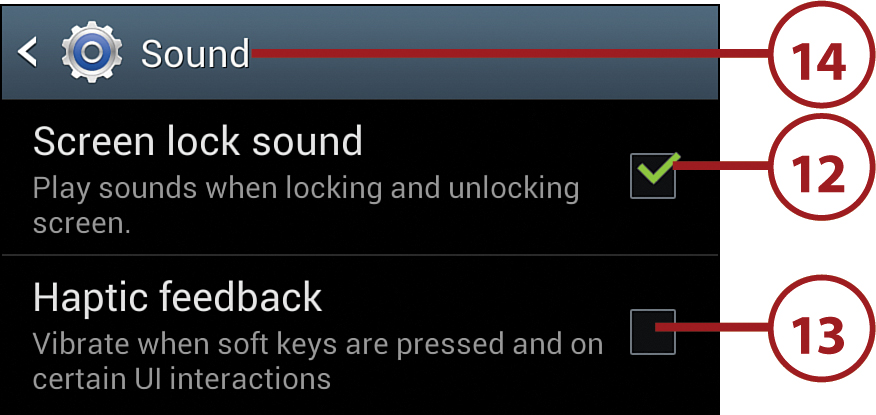
12. Touch to enable or disable the screen lock sound that plays when your Galaxy Note II locks the screen after the inactivity timeout.
13. Touch to enable or disable Haptic feedback, which is a vibration that indicates that you have successfully touched the Menu and Back keys.
14. Touch to save your changes and return to the previous screen.
Creating Your Own Vibration Patterns
In step 6, you can choose the vibration pattern to be used when you are notified, but you can also create your own. Touch Create. On the next screen, touch in the area where it reads “Tap to create,” and then tap out your vibration pattern on the screen using short taps for short vibrations and long taps for longer vibrations. The example in the figure uses Morse Code for SOS. You can literally create any vibration pattern you want.

Modifying Display Settings
You can change the screen brightness or set it to automatic, change the wallpaper, change how long to wait before your Galaxy Note II goes to sleep, change the size of the font used, and change whether to use the Pulse notification light.
1. Pull down the Notification bar and touch the Settings icon.

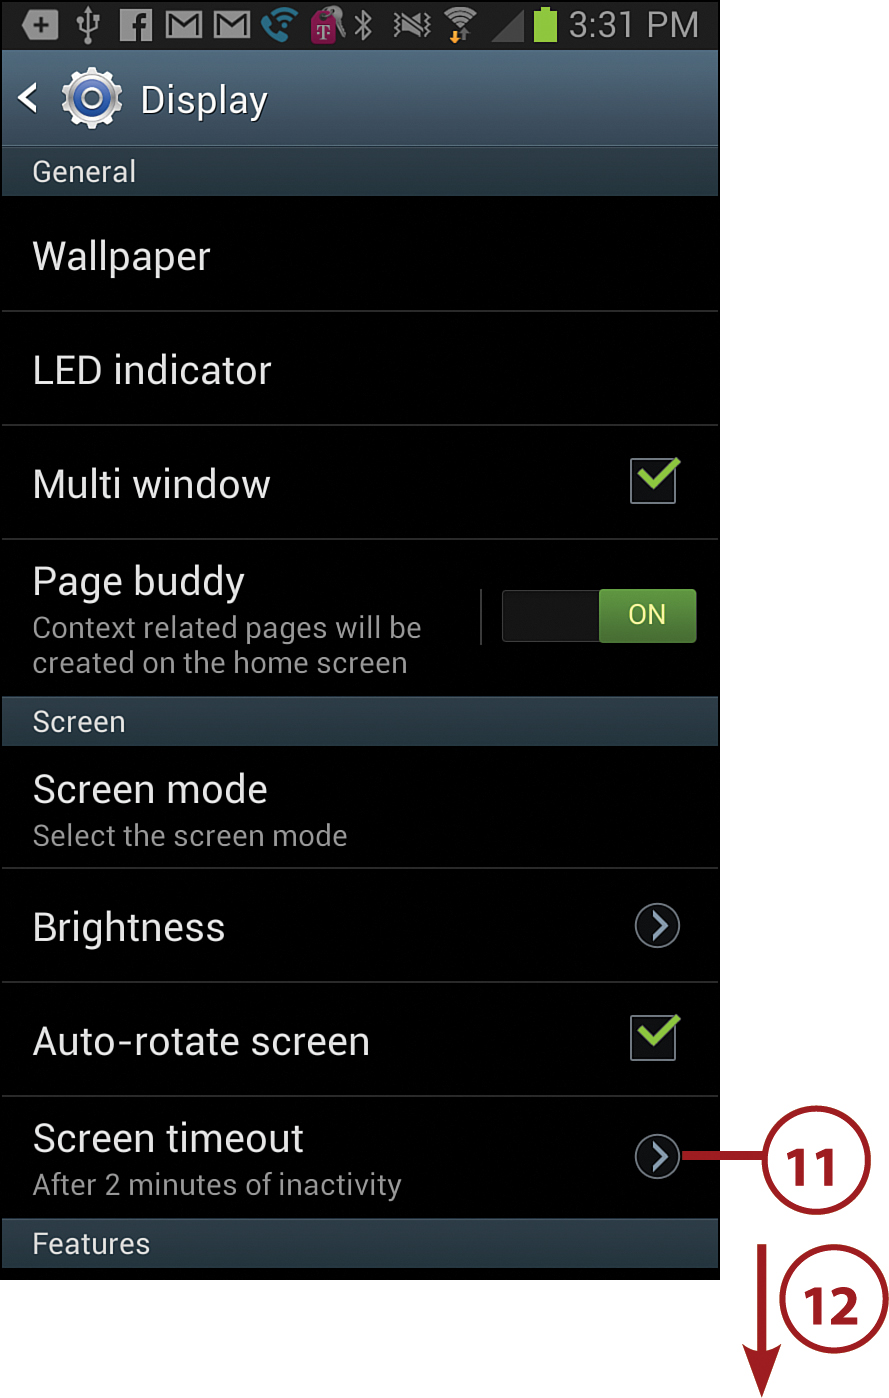
2. Touch Display.

3. Touch to change the wallpaper. Read earlier tasks in this chapter for more about how to change the wallpaper.
4. Touch to choose when the LED indicator is used.
5. Touch to enable or disable Multi Window, which is when two apps run on the screen at the same time. See the Prologue, “Getting to Know Your Galaxy Note II,” for more information on Multi Window.
6. Touch to enable or disable Page Buddy. Page Buddy displays a helpful page when it detects that you’ve done certain things, such as plugging in your headset, plugging your phone into a dock, roaming, or removing the S Pen.
7. Touch to choose which Page Buddy pages are used.
8. Touch to choose the Screen mode, which is how the screen represents colors. You can choose Dynamic, Standard, Natural, or Movie.
9. Touch to change the screen brightness manually or set it to automatic. When on automatic, your Galaxy Note II uses the built-in light sensor to adjust the brightness based on the light levels in the room.
10. Touch to enable or disable Auto-Rotate, which is when your Galaxy Note II uses the accelerometer to detect its orientation and rotate the screen to match it.

11. Touch to choose how many minutes of inactivity must pass before your Galaxy Note II puts the screen to sleep.
12. Scroll down for more settings.
13. Touch to enable or disable a feature that uses the front-facing camera to determine the orientation of the screen based on the orientation of your face.
14. Touch to enable or disable a feature that uses the front-facing camera to keep the screen turned on while you are looking at your phone no matter what the screen timeout is set to.
15. Touch to choose the font style used for all text.
16. Touch to choose the font size used for all text.
17. Touch to set the key light duration, which is how long the light under the Menu and Back keys remains lit after you have touched them.
18. Touch to enable or disable displaying the battery level as a percentage as well as showing the level graphically.
19. Touch to enable or disable automatically adjusting the tone of the screen based on the kinds of images being shown.
20. Touch to save your changes and return to the previous screen.

Adjusting Samsung-Specific Settings
On top of the regular Android features, Samsung has added some that only work on their phones. Here is how to set those settings. For this section, assume that all screens start on the Settings screen.
Home Screen Mode
Home Screen mode changes which widgets are placed on your Home screen and how many you have on the Home screen. Easy mode places a lot of widgets that have shortcuts to many apps.
1. Touch Home Screen Mode under the Device section.

2. Touch to choose Basic Mode or Easy Mode.
3. Touch to save your changes and return to the previous screen.

Blocking Mode
Blocking mode enables you to choose a time period when notifications are blocked. This would normally be while you are asleep, but it could be anytime you choose.
1. Touch to enable or disable Blocking Mode.
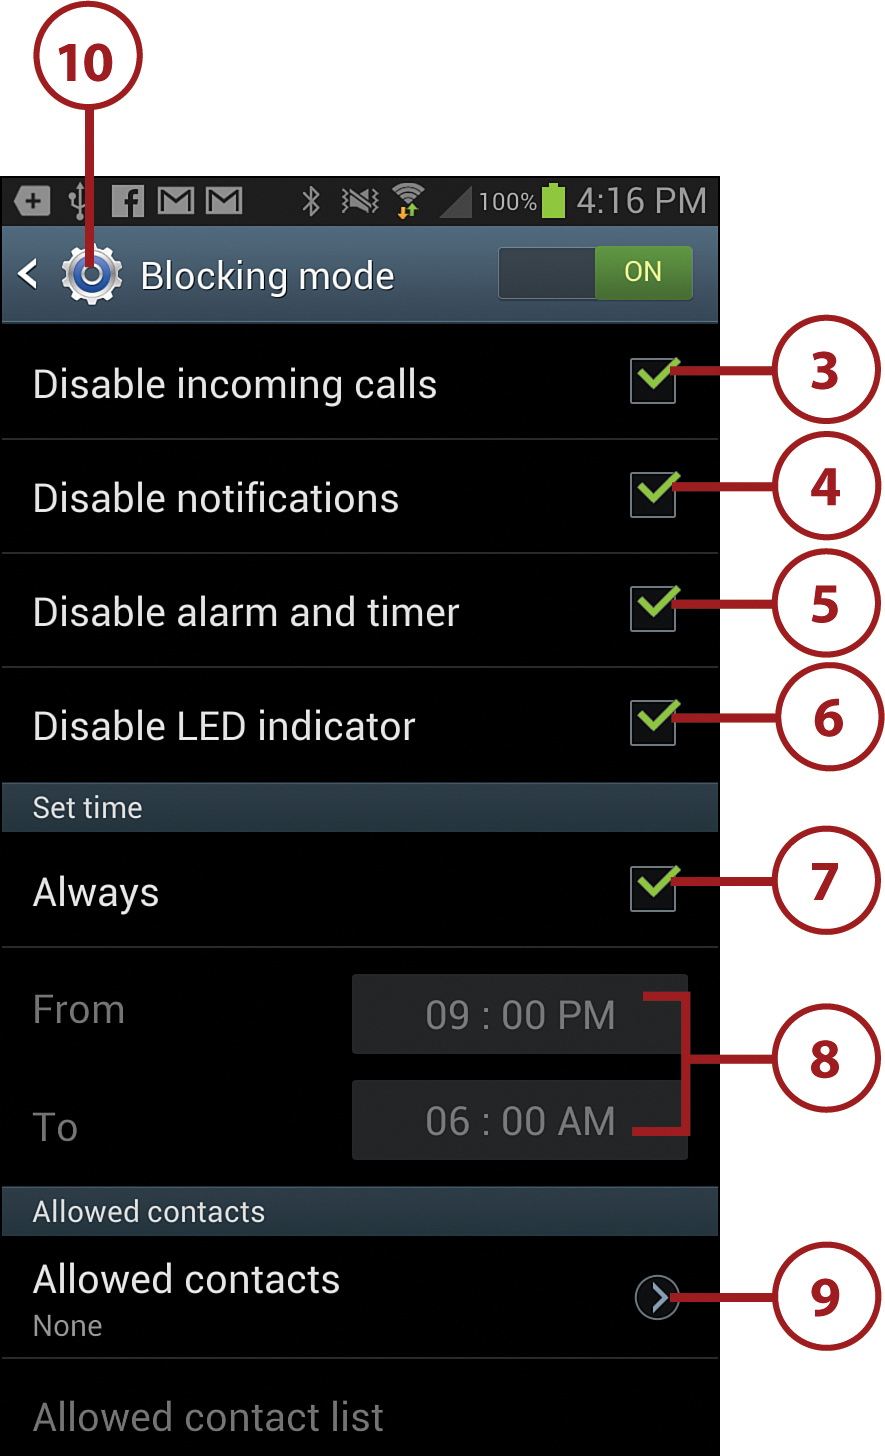
2. Touch to configure Blocking Mode.

3. Touch to enable or disable blocking all incoming calls while in Blocking mode.
4. Touch to enable or disable blocking all notifications while in Blocking mode.
5. Touch to enable or disable blocking all alarms and timers while in Blocking mode.
6. Touch to enable or disable blocking the LED indicator while in Blocking mode.
7. Touch to set the Blocking mode to Always. Uncheck to set it for a specific period.
8. Set the period of time when Blocking mode is automatically enabled and disabled.
9. Touch to configure which contact’s calls will get through when Blocking mode is enabled.
10. Touch to save your changes and return to the previous screen.
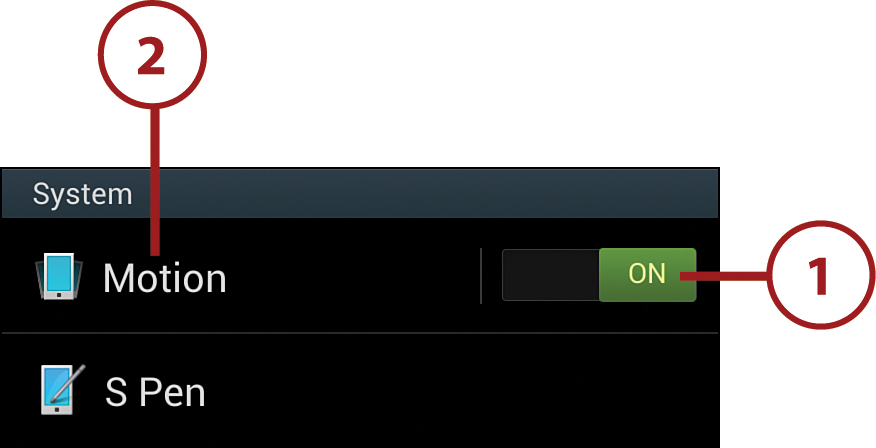
Motion
Motion has a number of features that enable you to use hand movements and phone movements to show information and perform certain functions.
1. Touch to enable or disable Motion.
2. Touch to configure Motion.
3. Touch to enable or disable Quick Glance, which displays key information such as number of missed calls, number of unread emails, and battery percentage if you reach toward your phone while the screen is off.
4. Touch to enable or disable Direct Call, which enables you to lift the phone to your ear to automatically place a call to a contact whose phone number is on the screen.
5. Touch to enable or disable Smart Alert, which vibrates the phone as you pick it up if you have missed any calls or messages.
6. Touch to enable or disable Double Tap to Top, which allows some apps to scroll to the top of a list if you double-tap the top of your Galaxy Note II.
7. Touch to enable or disable Tilt to Zoom, which enables you to tilt your phone to zoom in and out of images.

8. Touch to enable or disable Pan to Move Icon. To use this feature, touch and hold an icon to start moving it, and instead of moving it left and right, move the phone left and right to scroll between Home screens.
9. Touch to enable or disable a feature that allows you to move around a zoomed-in image by moving your phone rather than swiping around the image.
10. Touch to enable a feature that enables you to shake your phone to manually update content when in certain apps or settings screens. Examples include checking for new email, scanning for Bluetooth devices, or scanning for Wi-Fi networks.
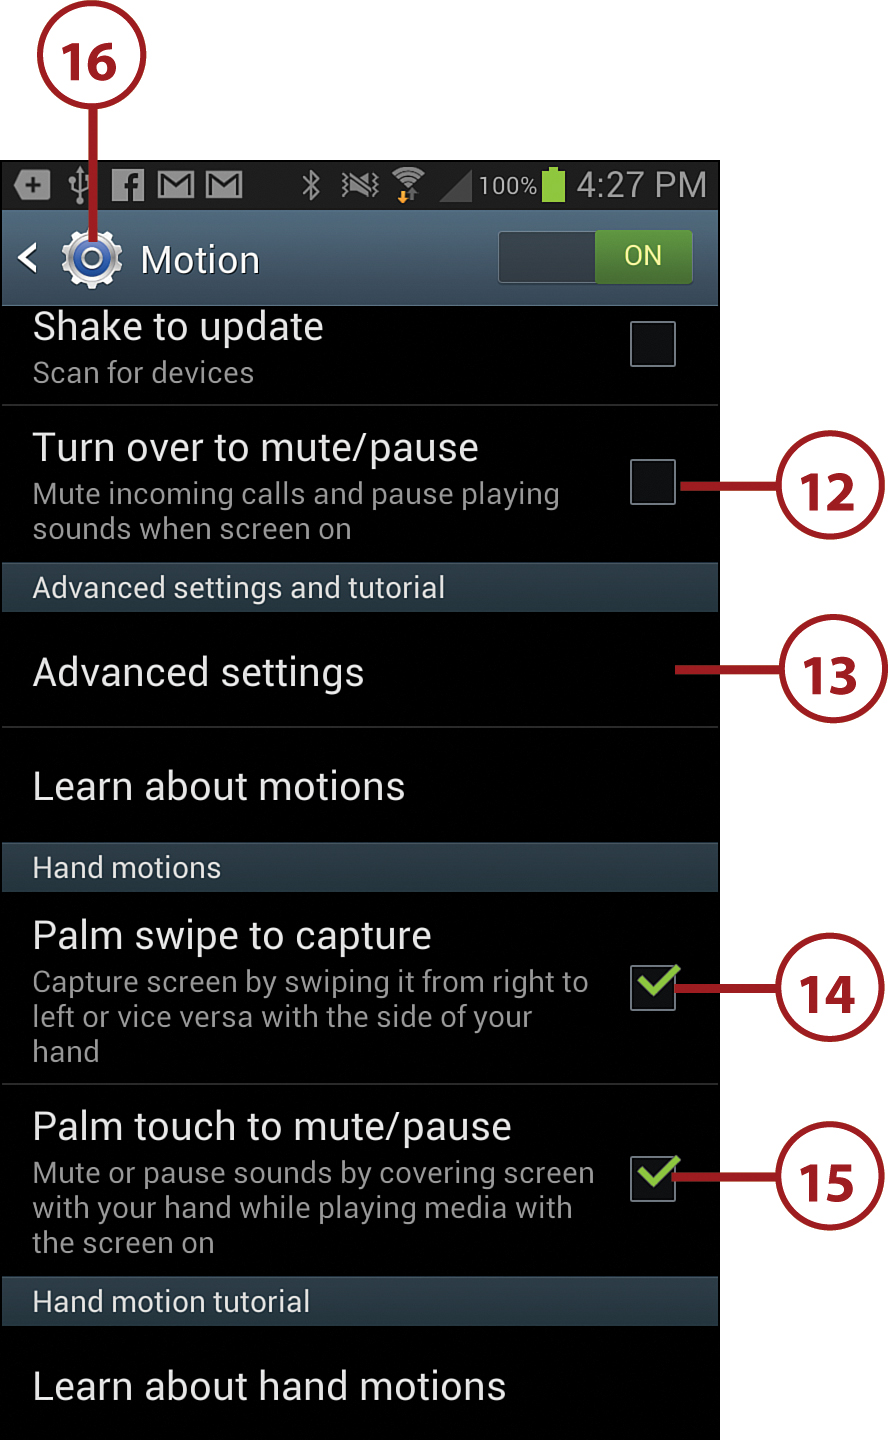
11. Scroll down for more settings.

12. Touch to enable or disable a feature that mutes your phone when you turn it over.
13. Touch to choose what information is shown when Quick Glance is enabled in step 3.
14. Touch to enable or disable a feature that allows you to take a screenshot by swiping across the screen with the side of your hand.
15. Touch to enable or disable a feature that allows you to mute or pause sounds by covering the screen with your hand.
16. Touch to save your changes and return to the previous screen.
S Pen
The S Pen Settings screen enables you to configure how your S Pen behaves and even makes it possible for your Galaxy Note II to alert you if you leave your S Pen on the desk and walk away.
1. Touch S Pen.

2. Touch to change the dominant hand from left handed to right handed.
3. Touch to change the sound that is played when you detach your S Pen.
4. Touch to enable or disable a feature that opens Popup Note, which is a mini version of S Note, when you detach your S Pen. This can be useful for writing quick notes.
5. Touch to enable or disable S Pen detection, which saves the battery. S Pen detection enables your Galaxy Note II to detect when you remove the S Pen from its holder.
6. Touch to enable or disable S Pen Keeper that alerts you if you leave your S Pen lying around and walk away without it.
7. Touch to enable or disable Air View. See the Prologue to learn more about Air View.
8. Touch to configure which Air View settings are enabled.
9. Touch to enable or disable sound and haptic feedback while using the S Pen.
10. Touch to save your changes and return to the previous screen.
