Chapter 3. Managing Contacts

In this chapter, you explore Pre’s Contacts and Synergy functionality. Topics include the following:
→ Synergy
→ Configuring how contacts display
→ Loading and synchronizing contacts
→ Managing calls
→ Editing or deleting contacts
Managing all your contacts on a cell phone can be an arduous task. It’s not unheard of for a user to have information for a hundred contacts or more loaded into their phone. This makes being able to organize and manage your contacts very important. It’s a task that gets more complicated on a phone like the Pre, where you can communicate with your contacts in so many different ways (voice, text, instant messaging, and so on). Fortunately, as I’ll detail in the next section, the Palm Pre includes a feature, called Synergy, that helps make keeping track of all of the information for contacts you maintain, both online and off, extremely simple. Additionally, the Contacts application itself enables you to keep all your contacts in one place, search for them, and take actions on them such as email, call, text, or MMS.
Synergy
Synergy is a unique feature of the Palm Pre that takes a regular Smartphone contacts feature to the next level by enabling you to combine all of your own contact information, and all the contacts you have connected to it, into one place. So, if you have contacts on your Facebook account, a Yahoo! Mail account, and a LinkedIn account, you can bring them all together on your Palm Pre. It’s all a part of the Contacts application, which you can open from your Pre’s home screen.

Because Synergy is such an important feature, let’s spend a few minutes setting it up.
Synergy works by combining contacts and calendars from multiple locations on the Internet into one view. It does not synchronize changes between these different contacts and calendars, but it does combine the information on your Palm Pre. As you can see here, all of my contact information is listed in one easy-to-reference place.
Synergy has combined the information from all sources (like Facebook and Google) into one view

When you add new contacts to your Palm Pre, those contacts synchronize with your Default Account. Your Palm Pre sets the Default Account to your Palm Pre account (or Palm Profile account), which is a free account set up when you activated your Pre. You can change your Default Account to be any online account, like Google. When you add new contacts to your Palm Pre, they are always stored in your Default Account. Think of your Default Account like your master account. All other accounts are read-only, which means that your Palm Pre will only read information from them and not add any information.
Step-by-Step: Adding Synergy Accounts
To make use of Synergy or to add one online contacts source, you must add accounts to your Contacts.
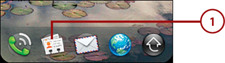
- Tap Contacts to launch the application.
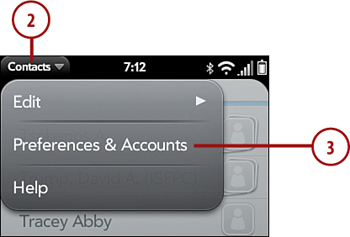
- Tap on the Contacts menu.
- Choose Preferences & Accounts.
- Tap Add An Account to add your first online account.

- Tap the type of account you want to add. This can be Google (Gmail), Facebook, a corporate Microsoft Exchange account, LinkedIn, or Yahoo!. For this example, we’ll go with Google.

- Enter your email address and password.
- Tap Sign In. Repeat these steps to add more accounts if you want. After a few minutes your contacts populate for each account you added. Any duplicates you have consolidate or link under one contact.

- If you tap on a contact in your main contact list you see the number of linked profiles for that contact. A number appears on the bottom left of the contact’s picture. To see all the linked profiles, tap on the number. The linked profiles expand on the screen.

- Tap one of the profiles to review its information or make changes to it.

- You can take several actions when reviewing an account associated with a contact’s profile. You can unlink it (if you don’t think it should be linked to this contact), set it as the Primary profile for that contact (which makes the Palm Pre use the picture from that profile when displaying the contact), or Delete the profile to remove it from contacts altogether. If you don’t want to make any changes to the profile, click Cancel.

Adding Corporate Email on your Palm Pre
If your company runs Microsoft Exchange, you can connect your Palm Pre to it and synchronize your Contacts, Calendar, and Email. Before you start, contact your email administrator and find out the following information:
• Incoming Mail Server address
• Active Directory Domain name
• Your full email address
• Your network username
After you have this information, tap Microsoft Exchange when you add a new account, and follow these steps:
- Enter your corporate email address and your corporate network login password.
- Tap Sign In to log into the account.

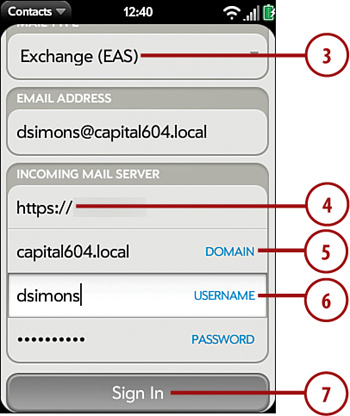
- Unlike previous account setups, there are more screens to fill out when connecting to your corporate account. Make sure that Exchange (EAS) is selected in the Mail Type field.
- Type the Incoming Mail Server address.
- Type your Domain (this is your Active Directory Domain name).
- Type your network username (you normally type this in to login to your network connected computer) and password.
- Tap Sign In.
If all of the information you entered is correct, you will be connected and your information will start synchronizing.
Using Contacts on Palm Pre
After you set up one or multiple sources for your Palm Pre to synchronize contact information from, you can start to use it for your daily communications. From someone’s contact information you can call her, send her a text message (SMS) or multimedia message (MMS), and email her.
To find a contact on your Palm Pre, you can either enter a contact name into the universal search, or you can access it through the Contacts application. The following sections describe each of these methods.
Step-by-Step: Searching for a Contact
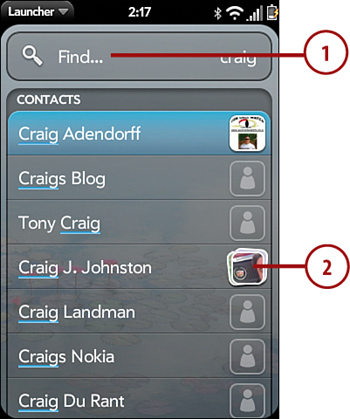
- In Card View or Launcher, type the person’s first or last name. Universal Search pops up and displays the list of matches. In this example, I entered “Craig” resulting in a list of contacts with the name Craig. Notice that it doesn’t matter if it’s a first or last name.
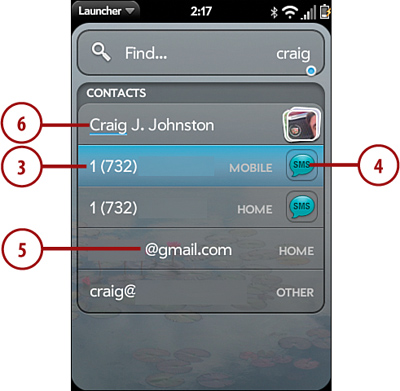
- Tap on the person you are searching for and his contact information displays.
- Tap a phone number to call him.
- Tap SMS next to a phone number to send him a text message (SMS) or multimedia message (MMS).
- Tap an email address to start composing a new email to him.
- If you tap on his name, the Contacts application launches, enabling you to take more actions such as editing his contact details.
Launching the Contacts Application
The more traditional way to see a contact’s information (although not as efficient and quick as Universal Search) is to access it from the Contacts application.
- Tap the Contacts application to launch it. When in Contacts, start to type the person’s first or last name. As you type, the list of results narrows until you see the person you are looking for.
- Tap the person to see his details.

- As with Universal Search described in the previous section, you can tap a phone number to call, SMS to send a text message, or an email address to send an email.

Adding Contacts
Although you might have many contacts on your Palm Pre already, there is always a need to add more. We will cover adding a contact manually on your Palm Pre, and adding a contact from an email you have received.
Step-by-Step: Adding a Contact Manually
You can add new contacts directly to your Palm Pre’s contacts by entering the information manually.
- After opening Contacts from the Launcher, tap the Add Contact icon.

- Enter all of the information you know like name, company, position, email addresses, phone numbers, etc. If you don’t have all of this information handy, it’s no trouble. You can always go back and fill in missing details later.
- To add a contact picture, tap on the contact picture icon.

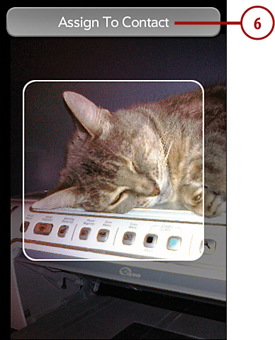
- Choose from an existing picture, or tap New Photo to take a picture right away using your Palm Pre’s camera.

- After you have taken a new picture, or chosen an existing one, fit the person’s head inside the square by moving the picture around with your finger, or by zooming the picture in and out using the pinch gesture.
- Tap Assign To Contact once you are satisfied with the contact picture.
- A new contact is added to your default account. If you want to change where this new contact is added, tap the icon to the right of the name.
- Choose to which account this new contact will be added.

Adding a Contact from an Email
One way to add new contacts is to get their information from an existing email. After all, the person’s name and email address are already right there in the From field so why not just add them to your Contacts directly.
- While reading an email, tap on the sender or someone in the recipient field.
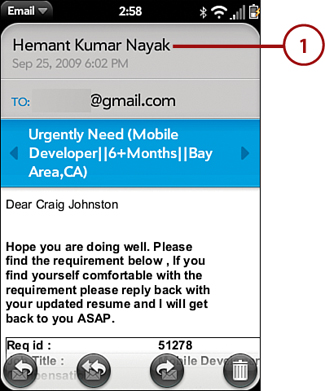
- If that person is not already in your Contacts, you see an Add To Contacts button. Tap it to add the person to your Contacts.

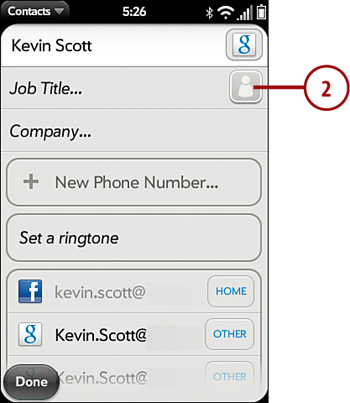
- You are then asked to tap Save As New to add the person as a new contact or Add To Existing to add this person to an existing contact. Use Add To Existing if you know that the person is already in your Contacts under a slightly different name, or if you have them as a contact already but you don’t have their email address.
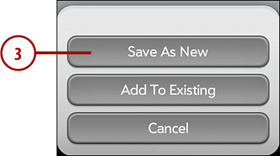
- When you tap Save As New, you see the person’s contact card. You can fill in as much or as little of the contact’s details as you like. This information can include phone numbers, job title, company, and more. To fill in a field, tap it and enter the applicable information.
- When you finish making changes to the contact’s information, tap Done to save it.

Adding Information to an Existing Contact
If you tap Add To Existing in step 3, you see all your contacts. From here you can search for and then tap the one to which you want to add this new contact.
Remember that when you add contacts to your Palm Pre, those contacts synchronize with your Default Account and not all Synergy account profiles. Your Palm Pre uses your Palm Profile as the default account unless you change it. To change it tap on the top-left corner, and choose Preferences and Accounts as previously discussed.
Changing or Deleting Contacts
Sometimes you need to make changes to your contacts. Maybe when you initially entered their information you were missing an email or IM address. Maybe they’ve changed their phone number. Other times you may need to delete a contact from your list because they’re no longer needed. Regardless of the need, it’s all very simple to accomplish on the Palm Pre.
Step-by-Step: Deleting a Contact
- While you have a specific contact open, tap the Contact menu on the upper-left corner of the screen.
- Tap Delete Contact.

- When a confirmation screen appears, tap Delete All Profiles to remove all traces of the contact.

- If you have a Facebook profile linked to the contact, Pre informs you that you cannot delete the Facebook profile. Tap Delete Other Profiles to remove all other details about the contact.

Step-by-Step: Changing a Contact
- While you have a contact open, tap Edit.

- Make changes to any fields in the contact by tapping on the field to edit or add information.
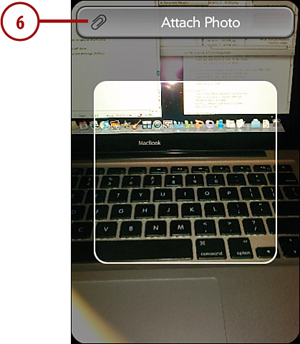
- To add a contact picture, tap the contact picture holder.
- A list of your pictures displays. Either select one of the existing pictures, or tap New Photo to take a new picture with your Palm Pre’s camera.

- After you select a picture or take one with your Palm Pre’s camera, you need to crop the picture so that it fits into the contact picture frame. Slide the picture around, and resize it so that the part of the picture you want as the contact picture fits into the frame.
- Click Attach Photo to finish.
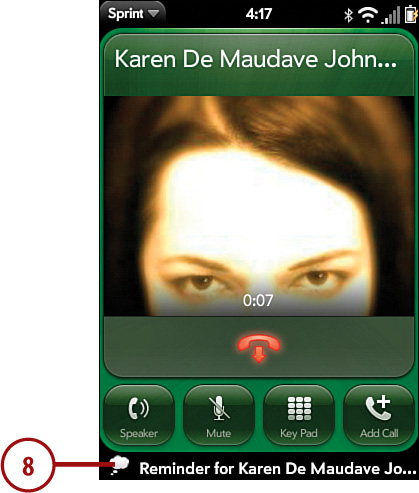
- To add a reminder to yourself for a contact, tap on the Reminder field. Type your reminder. This unique feature of the Palm Pre is useful for simply reminding yourself to ask that person a question if he calls or you call him.
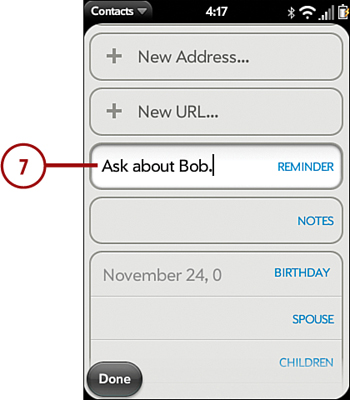
- The next time you call this person, the reminder displays in the Notification area of the screen.