
Chapter 17
Building Web Parts for Maintaining SharePoint 2007 Lists
IN THIS CHAPTER
Extending the concept of building Web Parts, this chapter discusses creating Web Parts that interact with Microsoft Office SharePoint Server (MOSS) lists. This chapter shows you how to easily manipulate data that is contained in lists.
Web Parts and SharePoint Lists
Out of the box, a lot of power is built in to SharePoint 2007 lists. You can easily create custom lists that fit the needs for whatever kind of data you are trying to collect; however, there are some drawbacks. For example, it is difficult to customize the way that you collect data in a list without a little bit of custom code. This chapter’s example shows you how to interact with data in a list by using a Web Part, as well as some of the reasons why you would need to use a Web Part to customize your list interaction.
The SharePoint List Example
The example that is used in this chapter is a simple list that contains time sheet information from users. This is a common scenario as many enterprises are using SharePoint to collect data such as this from users; the common problems that you encounter in this chapter map to the real world.
The list contains five columns: Employee Name, Week End Date, Total Hours Worked, Client, and Project. Each user submits a time sheet at the end of each week that states how many hours he worked in a given week. Out of the box, this is quite a simple list; however, when a user enters their time sheet, more validation is needed to require the user to submit time where Week End Date is a Friday.
Note
Note that although you could accomplish this goal in many other ways, this scenario is being used to illustrate how to write a custom Web Part to manipulate data in a SharePoint list.
Figure 17.1 illustrates the list that contains time sheet entries for two people.

The next section shows you how to configure a Visual Studio 2005 Class Library project to access a SharePoint list.
Accessing a List
The example used in this chapter starts out as a very simple Web Part class that displays data in a list and expands into a library of Web Parts that will be used to maintain the list’s data.
There is a hierarchy that must be followed to “walk down” to lists in SharePoint. Figure 17.2 illustrates this hierarchy.
Figure 17.2. SharePoint hierarchy.

At its core, SharePoint is a collection of related Site, Web, and List objects. A single site (SPSite) can contain multiple webs (SPWeb). Each web can contain multiple lists (SPList). You can easily walk down this chain of objects to get to the object with which you want to interact.
Luckily for the developer community, the SharePoint object model provides a lot of functionality to make this process easy. The Microsoft.SharePoint namespace contains an object called SPContext that you can use to get a handle to a SharePoint site. You can think of using the SPContext object with SharePoint as you would use the HTTPContext object with your web applications. From the Web Part perspective, SPContext allows you to “hook” into the instance of SharePoint in which your Web Part is running. This is important because you can get a reference to whatever object (list, workflow, and so forth) that you would like to access and utilize the SharePoint application programming interface (API) to manipulate that object.
By using the Current property of SPContext, you can gain access to practically every object in your site. Table 17.1 describes the three core objects that you will utilize in your custom code libraries.
Table 17.1. Core SharePoint Objects
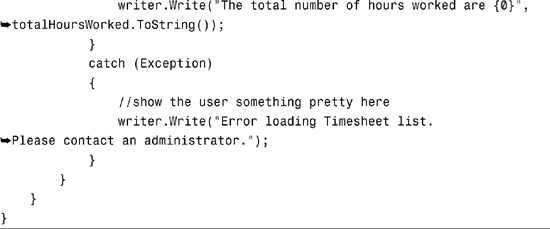
Listing 17.1 illustrates a very simple example of a Web Part that utilizes SPContext to gain access to the Timesheet list described earlier in this chapter and output the total number of hours entered by the users.
Listing 17.1. Using SPContext to Reference Timesheet List

In the Render method of this Web Part, an instance of the SPWeb object is created and references a handle to the current web in which the Web Part is running. Next, an instance of the Timesheet list is created by accessing the current web’s Lists collection. You can reference list items by either string name, unique ID (as a globally unique identifier [GUID]), or index. Because the list is named “Timesheet,” it is easiest to reference it by name.
Note
Note that accessing lists by name performs a bit slower than accessing lists by index or unique ID; however, if you ever restore or redeploy your site to another server, these values could change, so it is best to access lists by string name, even though it performs slower.
After the list object is created, you can then iterate the list in a loop and total up the Total Hours Worked column of the list. Notice that the column in the list is referenced exactly as it is named. Like the list, you can also access columns by name, by unique ID (GUID), or by index.
What’s common about the SharePoint object model and what you are probably familiar with already is that a list object is simply a collection of list items, which can be iterated just like any other collection. If you bypass the learning curve and think of a list as you would a DataTable, it makes learning the object model a lot easier. As you progress into the next section, “Updating List Data,” this becomes even more evident.
Updating List Data
More than likely, if you are interacting with a list, you are probably providing some sort of customized data entry Web Part for the user. In the previous section, you learned how to create a Web Part that accessed list data, iterated all of the list data, and displayed a sum of the Total Hours Worked column. This is a good example to provide a setup to this section, but its functionality can easily be replicated in a customized view without writing any code.
An example of when you might want to provide some custom functionality to a list is a Web Part that allows a user to enter information that will be saved to a list. For example, out of the box, SharePoint provides a couple of default interfaces for entering data into a list. You can either use the Create New Item interface, which provides labels and data entry controls (TextBoxes, DropDowns, Calendars, and so forth) for entering data, or you can use the Edit in DataSheet interface to edit the records in a spreadsheet-style interface.
Although very powerful, these interfaces don’t always provide the functionality or validation required to accurately collect data from the users. For example, in the Timesheet list, what if you only want users to enter time where the “Week End Date” occurs on a Friday? This is difficult to do out of the box, but can be easily achieved by using a Web Part to validate the data and then add the new record to the list.
Listing 17.2 illustrates the Timesheet Entry Web Part class.
Listing 17.2. Timesheet Entry Web Part


Most of the functionality of the Web Part has been covered in previous chapters, but just in case, here’s a quick review of how the control is laid out; you will learn about inserting the data in the next few paragraphs.
The Web Part itself generates a table with controls that collect time sheet data from the user. The controls are defined as member variables of the Web Part class and initialized in the CreateChildControls event. Each control contains the data that needs to be validated either by using client-side JavaScript and/or server-side code.
Extending This Web Part
To provide brevity in this example, not all of the validation functionality has been implemented. In addition, the control only provides basic functionality to collect information from the user. In the real world, you might consider adding more custom functionality such as a DropDown calendar picker control or a DropDown list of current clients to the Web Part to make it a little richer experience for the user.
The Render event is used to output the actual table that the user will see. Notice that every label (left column on each row of the table) has an asterisk that is surrounded by a span tag, which has a class called ms-formvalidation associated with it. This is a class that is built in to SharePoint’s style sheets. You can view the style sheets that are built in to SharePoint by opening the /_layouts/1033/styles/core.css file, which is associated with your site. If you don’t feel like digging through all those lines of code, you have another option. When you see a style that you like inside your SharePoint site, the easiest approach is to view the Hypertext Markup Language (HTML) source and find the particular style in the HTML code. Figure 17.2 illustrates the Web Part as it is rendered in SharePoint.
Figure 17.3. Time sheet entry Web Part.

The functionality to insert data into the list is contained in the btnSave_Click event. Due to brevity and to give the Web Part some validation functionality, the first couple lines of code ensure that the date entered is a Friday. If the date is a Friday, the record is inserted; otherwise, an error message is displayed to the user.
Inserting the data is quite simple. After you have a reference to your web and your list, you can call the list’s Items.Add method. This returns an instance of a new row in your list. In this example, a new row in the Timesheet list is returned, where each column is set to the corresponding TextBox value. To add the row to the list, you must call the Update method of the SPListItem, or in this example, newTimesheetEntry.
There are a lot of different solutions to this problem; however, you have a lot of flexibility when you write your own Web Part to update data in a list. In addition, in a lot of scenarios, your Web Part must interact with external enterprise systems (that is, outside of SharePoint), so a Web Part-based solution makes integration and maintenance a lot easier on you as a developer. The following is a small list of things to watch out for when interacting with data in a list:
- If you are getting an exception thrown when you try to access a column in a list, make sure that the column’s name wasn’t initially “Title.” When you set up a list, it has a text-only field called Title associated with it, which can’t be deleted. If you change the column name to something different, its root name is still Title, so you must reference it as such.
- Make sure that you call the
Updatemethod when you are ready to commit your changes to the list. Failure to callUpdaterolls back any changes that you have made to the data. - Know that when you utilize
SPContext.Currentfrom within a Web Part, you are getting instances to objects in the site/web where the Web Part is running. If you create a generic Web Part that will be used in multiple sites/webs, ensure that you have access to the appropriate objects that you will be accessing.
Summary
The examples in this chapter are not complete solutions in their entirety, but are meant to give you a base skill set that you can build upon to provide better solutions to your users. This chapter showed you how to manipulate data in a SharePoint list by first learning how to use the SharePoint API to iterate a list and output a calculation of one column. Then, this chapter showed you how to customize a data entry Web Part that allows you to provide custom validation of data that the user enters.