
I hope that you now understand the different ribbon types within Microsoft Dynamics CRM. Let's add a custom button, and also hide some buttons in the ACM system. To add or hide buttons, the first step is to export the entity definition. In this example, we are going to modify the Crew Member entity ribbon.
Note that it is recommended to create a solution for each of the entities for which you want to modify the ribbon. That way, the size of the customization file will be smaller and easier to manage. Also, for the purpose of editing the ribbon, you do not have to include the required component in the solution that you are going to export.
- Navigate to Settings and then click on Customization.
- Click Solutions.
- Click New.
Enter the Display Name, Unique Name, and Version number. In our example, we are going to enter "Contact" for Display Name, select the default ACM publisher, and "1.0.0.0" as the version number:
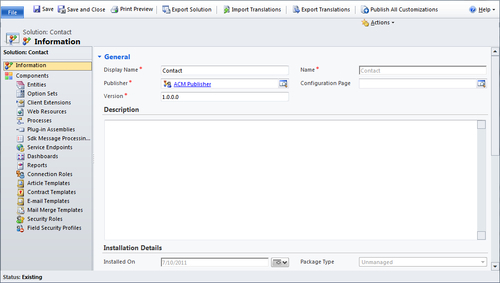
- Select Publisher.
- Click the Save icon.
- Click on Add Existing, and then click Entity.
- Select the Crew Member entity and then click OK. Don't include the required components if you see the Missing Required Components window.
- Click on Add Existing, and then select Application Ribbons.
- Click on Save and Close to save the solution.
- Select the solution that you want to export, and then click Export.
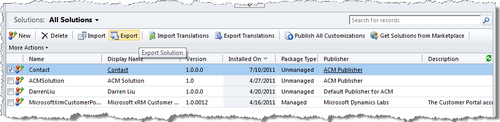
- If you published the recent changes that you made to that entity, click Publish All Customizations. Otherwise, click Next.
- Select the Unmanaged option, and then click Export.
- Save the customization to your local desktop.
In the previous chapter, we have created a dialog to help agents to add flight activities for the ACM system. Now let's walk through the steps for adding a button to the application ribbon so that it shows up on all ACM entity ribbons within the ACM system.
The first step is to upload the images and the JScript for the ribbon button to the Web Resources library. Please follow the steps below.
We are going to upload the following three web resources:
|
Name |
Display Name |
Type |
|---|---|---|
|
/images/LaunchDialog16x16.png |
/images/LaunchDialog16x16.png |
PNG Format |
|
/images/LaunchDialog32x32.png |
/images/LaunchDialog32x32.png |
PNG Format |
|
/scripts/globalfunctions.js |
/scripts/globalfunctions.js |
Script(JScript) |
- Navigate to the Ribbon Solution.
- Click on Web Resources in the left most navigation pane.
- Click the New button on the grid menu.
- Enter
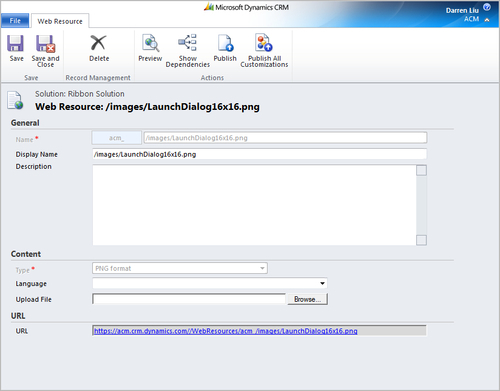
/images/LaunchDialog16x16.pngin the Name textbox. - Enter
/images/LaunchDialog16x16.pngin the Display Name textbox. - Select PNG format in the Type drop-down box.
- Click the Browse… button, and then navigate to and select
LaunchDialog16x16.pngfrom your local computer. - Click Save and Close to close the new Web Resource window.
- Repeat the steps above to upload the second image:
LaunchDialog32x32.png. - Repeat the steps above to upload the
globalfunction.jsfile. SelectScript(JScript)from the Type drop-down box.Copy and paste the following JScript code into the file
globalfunction.js:function acm_LaunchDialog() { // Replace with your Dialog Id var dialogId = "D5C4E511-C013-4455-AC4C-31A80766C925"; // Replace window.open(Xrm.Page.context.getServerUrl() + "/cs/dialog/rundialog.aspx?DialogId=" + escape(dialogId) + "&EntityName=" + "systemuser" + "&ObjectId=" + Xrm.Page.context.getUserId()); }
The second step is to modify the ribbon:
- Extract the exported solution ZIP file,
RibbonSolution.zip. - Open the
customizations.xmlfile using any text editor. - Locate the default
RibbonDiffXmlnode, shown below for the application ribbon:<RibbonDiffXml> <CustomActions /> <Templates> <RibbonTemplates Id="Mscrm.Templates"></RibbonTemplates> </Templates> <CommandDefinitions /> <RuleDefinitions> <TabDisplayRules /> <DisplayRules /> <EnableRules /> </RuleDefinitions> <LocLabels /> </RibbonDiffXml> - Edit the Rule Definition node to define the display rule, and then enable rules. We are only going to show the button on the Airport, Flight, Flight Route, Compensation, and Crew Member entities.
<RuleDefinitions> <TabDisplayRules /> <DisplayRules> <DisplayRule Id="acm.all.form.CustomGroup.LaunchDialog.Display"> <OrRule> <Or> <EntityRule EntityName="acm_airport" /> </Or> <Or> <EntityRule EntityName="acm_compensation" /> </Or> <Or> <EntityRule EntityName="acm_flight" /> </Or> <Or> <EntityRule EntityName="acm_flightroute" /> </Or> <Or> <EntityRule EntityName="contact" /> </Or> </OrRule> </DisplayRule> </DisplayRules> <EnableRules /> </RuleDefinitions> - Edit the
LocLabelsnode to set the localized labels.<LocLabels> <LocLabel Id="acm.all.form.CustomGroup.LaunchDialog"> <Titles> <Title languagecode="1033" description="Launch ACM Dialog" /> </Titles> </LocLabel> <LocLabel Id="acm.all.form.CustomGroup.LaunchDialog.Text"> <Titles> <Title languagecode="1033" description="Launch ACM Dialog" /> </Titles> </LocLabel> </LocLabels> - Edit the
CommandDefinitionnode to add your commands.<CommandDefinitions> <CommandDefinition Id="acm.all.form.CustomGroup.LaunchDialog.Controls.Launch.Command"> <EnableRules /> <DisplayRules /> <Actions> <JavaScriptFunction Library="$webresource:acm_/scripts/globalfunctions.js" FunctionName="acm_LaunchDialog"> </JavaScriptFunction> </Actions> </CommandDefinition> <CommandDefinition Id="acm.all.form.CustomGroup.LaunchDialog.Command"> <EnableRules /> <DisplayRules> <DisplayRule Id="acm.all.form.CustomGroup.LaunchDialog.Display" /> </DisplayRules> <Actions /> </CommandDefinition> </CommandDefinitions> - Edit the
CustomActionselement to add your custom actions—one for each of the buttons that you are going to create.<CustomActions> <CustomAction Id="acm.all.form.CustomGroup.LaunchDialogAction" Location="Mscrm.Form.{!EntityLogicalName}.MainTab.Groups._children" Sequence="1007"> <CommandUIDefinition> <Group Id="acm.all.form.CustomGroup.LaunchDialog" Command="acm.all.form.CustomGroup.LaunchDialog.Command" Title="$LocLabels:acm.all.form.CustomGroup.LaunchDialog" Sequence="1008" Template="Mscrm.Templates.Flexible2"> <Controls Id="acm.all.form.CustomGroup.LaunchDialog.Controls"> <Button Id="acm.all.form.CustomGroup.LaunchDialog.Controls.Launch" Command="acm.all.form.CustomGroup.LaunchDialog.Controls.Launch.Command" Sequence="11" LabelText="$LocLabels:acm.all.form.CustomGroup.LaunchDialog.Text" ToolTipTitle="$LocLabels:acm.all.form.CustomGroup.LaunchDialog.Text" ToolTipDescription="$LocLabels:acm.all.form.CustomGroup.LaunchDialog.Text" TemplateAlias="isv" Image16by16="$webresource:acm_/images/LaunchDialog16x16.png" Image32by32="$webresource:acm_/images/LaunchDialog32x32.png" /> </Controls> </Group> </CommandUIDefinition> </CustomAction> <CustomAction Id="acm.all.form.CustomGroup.MaxSize.LaunchDialog" Location="Mscrm.Form.{!EntityLogicalName}.MainTab.Scaling._children" Sequence="1006"> <CommandUIDefinition> <MaxSize Id="acm.all.form.CustomGroup.MaxSize2" GroupId="acm.all.form.CustomGroup.LaunchDialog" Sequence="16" Size="LargeLarge" /> </CommandUIDefinition> </CustomAction> </CustomActions> - Save the changes.
The XML below shows the final modified RibbonDiffXml for the Application Ribbon:
<RibbonDiffXml>
<CustomActions>
<CustomAction Id="acm.all.form.CustomGroup.LaunchDialogAction" Location="Mscrm.Form.{!EntityLogicalName}.MainTab.Groups._children" Sequence="1007">
<CommandUIDefinition>
<Group Id="acm.all.form.CustomGroup.LaunchDialog" Command="acm.all.form.CustomGroup.LaunchDialog.Command" Title="$LocLabels:acm.all.form.CustomGroup.LaunchDialog" Sequence="1008" Template="Mscrm.Templates.Flexible2">
<Controls Id="acm.all.form.CustomGroup.LaunchDialog.Controls">
<Button Id="acm.all.form.CustomGroup.LaunchDialog.Controls.Launch" Command="acm.all.form.CustomGroup.LaunchDialog.Controls.Launch.Command" Sequence="11" LabelText="$LocLabels:acm.all.form.CustomGroup.LaunchDialog.Text"
ToolTipTitle="$LocLabels:acm.all.form.CustomGroup.LaunchDialog.Text"
ToolTipDescription="$LocLabels:acm.all.form.CustomGroup.LaunchDialog.Text"
TemplateAlias="isv" Image16by16="$webresource:acm_/images/LaunchDialog16x16.png"
Image32by32="$webresource:acm_/images/LaunchDialog32x32.png" />
</Controls>
</Group>
</CommandUIDefinition>
</CustomAction>
<CustomAction Id="acm.all.form.CustomGroup.MaxSize.LaunchDialog" Location="Mscrm.Form.{!EntityLogicalName}.MainTab.Scaling._children" Sequence="1006">
<CommandUIDefinition>
<MaxSize Id="acm.all.form.CustomGroup.MaxSize2" GroupId="acm.all.form.CustomGroup.LaunchDialog" Sequence="16" Size="LargeLarge" />
</CommandUIDefinition>
</CustomAction>
</CustomActions>
<Templates>
<RibbonTemplates Id="Mscrm.Templates"></RibbonTemplates>
</Templates>
<CommandDefinitions>
<CommandDefinition Id="acm.all.form.CustomGroup.LaunchDialog.Controls.Launch.Command">
<EnableRules />
<DisplayRules />
<Actions>
<JavaScriptFunction Library="$webresource:acm_/scripts/globalfunctions.js" FunctionName="acm_LaunchDialog"></JavaScriptFunction>
</Actions>
</CommandDefinition>
<CommandDefinition Id="acm.all.form.CustomGroup.LaunchDialog.Command">
<EnableRules />
<DisplayRules>
<DisplayRule Id="acm.all.form.CustomGroup.LaunchDialog.Display" />
</DisplayRules>
<Actions />
</CommandDefinition>
</CommandDefinitions>
<RuleDefinitions>
<TabDisplayRules />
<DisplayRules>
<DisplayRule Id="acm.all.form.CustomGroup.LaunchDialog.Display">
<OrRule>
<Or>
<EntityRule EntityName="acm_airport" />
</Or>
<Or>
<EntityRule EntityName="acm_compensation" />
</Or>
<Or>
<EntityRule EntityName="acm_flight" />
</Or>
<Or>
<EntityRule EntityName="acm_flightroute" />
</Or>
<Or>
<EntityRule EntityName="contact" />
</Or>
</OrRule>
</DisplayRule>
</DisplayRules>
<EnableRules />
</RuleDefinitions>
  <LocLabels>
    <LocLabel Id="acm.all.form.CustomGroup.LaunchDialog">
      <Titles>
        <Title languagecode="1033" description="Launch ACM Dialog" />
      </Titles>
    </LocLabel>
    <LocLabel Id="acm.all.form.CustomGroup.LaunchDialog.Text">
      <Titles>
        <Title languagecode="1033" description="Launch ACM Dialog" />
      </Titles>
    </LocLabel>
  </LocLabels>
</RibbonDiffXml>
For the ACM System, we are going to add a button to the existing Collaborate group of the Crew Member entity ribbon. The first step is to identify the IDs for Existing Items.
- Open the
contactRibbon.xmlfile using any text editing tool. ThecontactRibbon.xmlfile defines the ribbon for the Crew Member entity and it is the file that we exported using the tool in the SDK that we mentioned earlier this chapter. - Locate the following XML code in the Collaborate group for the form and the homepage grid:
<Group Id="Mscrm.Form.contact.MainTab.Collaborate"
     Command="Mscrm.Enabled"
     Sequence="40"
     Title="$Resources:Ribbon.HomepageGrid.MainTab.Collaborate"
     Image32by32Popup="/_imgs/ribbon/assign32.png"
     Template="Mscrm.Templates.Flexible2">
<Controls Id="Mscrm.Form.contact.MainTab.Collaborate.Controls">
Homepage Grid Collaborate Group XML
<Group Id="Mscrm.HomepageGrid.contact.MainTab.Collaborate" Command="Mscrm.Enabled" Sequence="30" Title="$Resources:Ribbon.HomepageGrid.MainTab.Collaborate" Image32by32Popup="/_imgs/ribbon/assign32.png" Template="Mscrm.Templates.Flexible2"> <Controls Id="Mscrm.HomepageGrid.contact.MainTab.Collaborate.Controls"> - In the
contactRibbon.xmlfile, locate the Assign button definition in the Form and homepage Collaborate groups.Form Assign Button Definition XML
<Button Id="Mscrm.Form.contact.Assign"
  ToolTipTitle="$Resources:Ribbon.HomepageGrid.MainTab.Actions.Assign"
  ToolTipDescription="$Resources(EntityPluralDisplayName):Ribbon.Tooltip.Assign"
  Command="Mscrm.AssignPrimaryRecord"
  Sequence="32"
  LabelText="$Resources:Ribbon.HomepageGrid.MainTab.Actions.Assign"
  Alt="$Resources:Ribbon.HomepageGrid.MainTab.Actions.Assign"Image16by16="/_imgs/ribbon/assign16.png"Image32by32="/_imgs/ribbon/assign32.png"TemplateAlias="o1" />
Homepage Grid Assign Button Definition XML
<Button Id="Mscrm.HomepageGrid.contact.Assign"
  ToolTipTitle="$Resources:Ribbon.HomepageGrid.MainTab.Actions.Assign" ToolTipDescription="$Resources(EntityPluralDisplayName):Ribbon.Tooltip.Assign"
  Command="Mscrm.AssignSelectedRecord"
  Sequence="40"
  LabelText="$Resources:Ribbon.HomepageGrid.MainTab.Actions.Assign"
  Alt="$Resources:Ribbon.HomepageGrid.MainTab.Actions.Assign"Image16by16="/_imgs/ribbon/assign16.png"Image32by32="/_imgs/ribbon/assign32.png"TemplateAlias="o1" />
The second step is to upload all of the components (images, JScript) that your ribbon referenced in the Web Resources. The import of the ribbon customization will fail if the referenced components are not in the Web Resources library. Please follow the steps mentioned earlier to create the following web resources:
|
Name |
Display Name |
Type |
|---|---|---|
|
|
|
PNG Format |
|
|
|
PNG Format |
|
|
|
Script(JScript) |
The third step is to modify the RibbonDiffXml. To change the entity ribbon, follow these steps:
- Extract the exported solution ZIP file,
RibbonSolution.zip. - Open the
customizations.xmlfile using any text editor. - Locate the default
RibbonDiffXmlnode, shown below for the contact entity:<RibbonDiffXml> <CustomActions /> <Templates> <RibbonTemplates Id="Mscrm.Templates"></RibbonTemplates> </Templates> <CommandDefinitions /> <RuleDefinitions> <TabDisplayRules /> <DisplayRules /> <EnableRules /> </RuleDefinitions> <LocLabels /> </RibbonDiffXml> - Edit the Rule Definition node to define the display rule and enable rules.
<RuleDefinitions> <TabDisplayRules /> <DisplayRules> <DisplayRule Id="acm.contact.form.FormStateNotNew.DisplayRule"> <FormStateRule State="Create"InvertResult="true" /> </DisplayRule> <DisplayRule Id="acm.contact.WebClient.DisplayRule"> <CrmClientTypeRule Type="Web"/> </DisplayRule> </DisplayRules> <EnableRules> <EnableRule Id="acm.contact.WebClient.EnableRule"> <CrmClientTypeRule Type="Web" /> </EnableRule> <EnableRule Id="acm.contact.form.NotNew.EnableRule"> <FormStateRule State="Create"InvertResult="true" /> </EnableRule> <EnableRule Id="acm.contact.grid.OneSelected.EnableRule"> <SelectionCountRule AppliesTo="SelectedEntity"Maximum="1"Minimum="1" /> </EnableRule> </EnableRules> </RuleDefinitions> - Edit the
LocLabelsnode to set the localized labels.<LocLabels> <LocLabel Id="acm.contact.SendToOtherSystem.LabelText"> <Titles> <Title languagecode="1033" description="Send to Other System" /> </Titles> </LocLabel> <LocLabel Id="acm.contact.SendToOtherSystem.ToolTip"> <Titles> <Title languagecode="1033" description="Sends this Record to another system" /> </Titles> </LocLabel> </LocLabels> - Edit the
CommandDefinitionnode to add your commands.<CommandDefinitions> <CommandDefinition Id="acm.contact.form.SendToOtherSystem.Command"> <EnableRules> <EnableRule Id="acm.contact.WebClient.EnableRule" /> <EnableRule Id="acm.contact.form.NotNew.EnableRule"/> </EnableRules> <DisplayRules> <DisplayRule Id="acm.contact.form.FormStateNotNew.DisplayRule" /> <DisplayRule Id="acm.contact.WebClient.DisplayRule" /> </DisplayRules> <Actions> <JavaScriptFunction Library="$webresource:acm_SendToOtherSystem.js"FunctionName="send" /> </Actions> </CommandDefinition> <CommandDefinition Id="acm.contact.grid.SendToOtherSystem.Command"> <EnableRules> <EnableRule Id="acm.contact.WebClient.EnableRule" /> <EnableRule Id="acm.contact.grid.OneSelected.EnableRule"/> </EnableRules> <DisplayRules> <DisplayRule Id="acm.contact.WebClient.DisplayRule" /> </DisplayRules> <Actions> <JavaScriptFunction Library="$webresource:acm_SendToOtherSystem.js"FunctionName="send" /> </Actions> </CommandDefinition> </CommandDefinitions> - Edit the
CustomActionselement to add your custom actions—one for each of the button that you are going to create. Use the ID values that you gathered earlier in thecontactRibbon.xmlfile to set theLocationandSequenceattributes to control where this button will be displayed.Note that a custom action is a statement of how you want to change the default ribbon definition. It is evaluated and applied to the ribbon at run-time. To set the context for a custom action, you must include information about the location of the items that you want to change:
<CustomActions> <CustomAction Id="acm.contact.grid.SendToOtherSystem.CustomAction"Location="Mscrm.HomepageGrid.contact.MainTab.Collaborate.Controls._children"Sequence="41"> <CommandUIDefinition> <Button Id="acm.contact.grid.SendToOtherSystem.Button"Command="acm.contact.grid.SendToOtherSystem.Command"LabelText="$LocLabels:acm.contact.SendToOtherSystem.LabelText"ToolTipTitle="$LocLabels:acm.contact.SendToOtherSystem.LabelText"ToolTipDescription="$LocLabels:acm.contact.SendToOtherSystem.ToolTip"TemplateAlias="o1"Image16by16="$webresource:acm_/icons/TIcon16x16.png"Image32by32="$webresource:acm_/icons/TIcon32x32.png" /> </CommandUIDefinition> </CustomAction> <CustomAction Id="acm.contact.form.SendToOtherSystem.CustomAction"Location="Mscrm.Form.contact.MainTab.Collaborate.Controls._children"Sequence="33"> <CommandUIDefinition> <Button Id="acm.contact.form.SendToOtherSystem.Button"Command="acm.contact.form.SendToOtherSystem.Command"LabelText="$LocLabels:acm.contact.SendToOtherSystem.LabelText"ToolTipTitle="$LocLabels:acm.contact.SendToOtherSystem.LabelText"ToolTipDescription="$LocLabels:acm.contact.SendToOtherSystem.ToolTip"TemplateAlias="o1"Image16by16="$webresource:acm_/icons/TIcon16x16.png"Image32by32="$webresource:acm_/icons/TIcon32x32.png" /> </CommandUIDefinition> </CustomAction> </CustomActions> - Save the changes.
- Compress the modified customization file for the solution.
- Import and publish the solution.
The XML below shows the final modified
RibbonDiffXmlfor the Crew Member entity:<RibbonDiffXml> <CustomActions> <CustomAction Id="acm.contact.grid.SendToOtherSystem.CustomAction"Location="Mscrm.HomepageGrid.contact.MainTab.Collaborate.Controls._children"Sequence="41"> <CommandUIDefinition> <Button Id="acm.contact.grid.SendToOtherSystem.Button"Command="acm.contact.grid.SendToOtherSystem.Command"LabelText="$LocLabels:acm.contact.SendToOtherSystem.LabelText"ToolTipTitle="$LocLabels:acm.contact.SendToOtherSystem.LabelText"ToolTipDescription="$LocLabels:acm.contact.SendToOtherSystem.ToolTip"TemplateAlias="o1"Image16by16="$webresource:acm_/icons/TIcon16x16.png"Image32by32="$webresource:acm_/icons/TIcon32x32.png" /> </CommandUIDefinition> </CustomAction> <CustomAction Id="acm.contact.form.SendToOtherSystem.CustomAction"Location="Mscrm.Form.contact.MainTab.Collaborate.Controls._children"Sequence="33"> <CommandUIDefinition> <Button Id="acm.contact.form.SendToOtherSystem.Button"Command="acm.contact.form.SendToOtherSystem.Command"LabelText="$LocLabels:acm.contact. SendToOtherSystem.LabelText"ToolTipTitle="$LocLabels:acm.contact.SendToOtherSystem.LabelText"ToolTipDescription="$LocLabels:acm.contact.SendToOtherSystem.ToolTip"TemplateAlias="o1"Image16by16="$webresource:acm_/icons/TIcon16x16.png"Image32by32="$webresource:acm_/icons/TIcon32x32.png" /> </CommandUIDefinition> </CustomAction> </CustomActions> <Templates> <RibbonTemplates Id="Mscrm.Templates"></RibbonTemplates> </Templates> <CommandDefinitions> <CommandDefinition Id="acm.contact.form.SendToOtherSystem.Command"> <EnableRules> <EnableRule Id="acm.contact.WebClient.EnableRule" /> <EnableRule Id="acm.contact.form.NotNew.EnableRule"/> </EnableRules> <DisplayRules> <DisplayRule Id="acm.contact.form.FormStateNotNew.DisplayRule" /> <DisplayRule Id="acm.contact.WebClient.DisplayRule" /> </DisplayRules> <Actions> <JavaScriptFunction Library="$webresource:acm_SendToOtherSystem.js"FunctionName="send" /> </Actions> </CommandDefinition> <CommandDefinition Id="acm.contact.grid.SendToOtherSystem.Command"> <EnableRules> <EnableRule Id="acm.contact.WebClient.EnableRule" /> <EnableRule Id="acm.contact.grid.OneSelected.EnableRule"/> </EnableRules> <DisplayRules> <DisplayRule Id="acm.contact.WebClient.DisplayRule" /> </DisplayRules> <Actions> <JavaScriptFunction Library="$webresource:acm_SendToOtherSystem.js"FunctionName="send" /> </Actions> </CommandDefinition> </CommandDefinitions> <RuleDefinitions> <TabDisplayRules /> <DisplayRules /> <EnableRules /> <RuleDefinitions> <TabDisplayRules /> <DisplayRules> <DisplayRule Id="acm.contact.form.FormStateNotNew.DisplayRule"> <FormStateRule State="Create" InvertResult="true" /> </DisplayRule> <DisplayRule Id="acm.contact.WebClient.DisplayRule"> <CrmClientTypeRule Type="Web"/> </DisplayRule> </DisplayRules> <EnableRules> <EnableRule Id="acm.contact.WebClient.EnableRule"> <CrmClientTypeRule Type="Web" /> </EnableRule> <EnableRule Id="acm.contact.form.NotNew.EnableRule"> <FormStateRule State="Create" InvertResult="true" /> </EnableRule> <EnableRule Id="acm.contact.grid.OneSelected.EnableRule"> <SelectionCountRule AppliesTo="SelectedEntity" Maximum="1" Minimum="1" /> </EnableRule> </EnableRules> </RuleDefinitions> <LocLabels> <LocLabel Id="acm.contact.SendToOtherSystem.LabelText"> <Titles> <Title languagecode="1033" description="Send to Other System" /> </Titles> </LocLabel> <LocLabel Id="acm.contact.SendToOtherSystem.ToolTip"> <Titles> <Title languagecode="1033" description="Sends this Record to another system" /> </Titles> </LocLabel> </LocLabels> </RibbonDiffXml>
To hide a ribbon element, follow the same steps above to export the ribbon. Then locate the Location and the ID of the control that you want to hide from the exported <entity>Ribbon.xml. Finally, specify the control that you want to hide, in the CustomActions area, as shown in the sample code below:
Hide Data Group on the Crew Member Entity Ribbon
<RibbonDiffXml>
  <CustomActions >
    <HideCustomAction Location="Mscrm.HomepageGrid.contact.MainTab.ExportData" HideActionId="Sample.HomepageGrid.contact.MainTab.ExportData.HideAction" />
  </CustomActions>
  <Templates>
    <RibbonTemplates Id="Mscrm.Templates">
    </RibbonTemplates>
  </Templates>
  <CommandDefinitions />
  <RuleDefinitions>
    <TabDisplayRules />
    <DisplayRules />
    <EnableRules />
  </RuleDefinitions>
  <LocLabels />
</RibbonDiffXml>