Chapter 7
Azure Cloud Shell
Overview
In November 2017, Microsoft made Azure Cloud Shell with bash generally available, and made PowerShell modules generally available in October 2018. Azure Cloud Shell provides a browser-based shell to run bash and PowerShell cmdlets and scripts to manage Azure resources.
Azure Cloud Shell provides an interactive experience that uses role-based access control (RBAC) to provide access based on permissions. This provides users with a cloud-native command-line environment from any device, anywhere in the world. On the back end, Microsoft assigns a free VM for each user who runs Cloud Shell. This same VM is presented to the user via the tool they are using to access the service.
Key features
The key features of the Cloud Shell are as follows:
Authenticated and secure accessCloud Shell is integrated with the Azure AD service and can therefore provide secure access to authenticated users based on their permission levels.
Support for bash and PowerShellCloud Shell provides support for both bash and PowerShell, making it easier for organizations to use their preferred language for scripting and automation.
Compatible with most modern browsersCloud Shell is compatible with most widely used modern browsers, such as the latest versions of Microsoft Edge, Microsoft Internet Explorer, Apple Safari, Google Chrome, and Firefox.
Integrated editorCloud Shell has an integrated graphical editor, based on the open-source Monaco Editor, that lets you easily create and edit scripts in code.
Multiple service connection pointsCloud Shell is accessible using different connection access points such as portal.azure.com, shell.azure.com, Azure PowerShell connection URLs, Azure CLI connection URLs, and Visual Studio.
Open-source tool integrationsCloud Shell has deep integrations with open-source tools such as Ansible, Chef, and Terraform.
File persistenceCloud Shell supports file persistence across sessions using Azure file share. It requires a one-time setup of the file share and associated connection, and it is automatically remapped each time going forward.
Free to useMicrosoft assigns a free VM in the back end to each user who runs Cloud Shell.
Encryption at restMicrosoft encrypts all Cloud Shell infrastructure with double-encryption at rest to ensure it meets the compliance needs of most organizations.
Support for multiple programming languagesCloud Shell supports the use of multiple programming languages such as .NET Core, Go, Java, Node.js, PowerShell, and Python.
Usage concepts and considerations
Azure Cloud Shell helps to automate Azure service deployment and management operations using either bash or PowerShell commands. One of the easiest ways to access the service is via the Azure Portal (assuming you are logged in to your tenant).
There are a few caveats to be aware of when using the service, as follows:
The session times out after 20 minutes of inactivity.
You must mount an Azure file share the first time you use it. Cloud Share will persist that configuration going forward. The same share will be used for both bash and PowerShell sessions.
$HOME is persisted as a 5GB image mounted inside the Azure file share connected to the shell. This is the home drive where all the user’s data is stored, including files and credentials stored by the user during their session.
When using the bash shell, user permissions are set up as a regular Linux user.
Azure file share
To store their home directory—which could contain files, access tokens, and credentials—each Cloud Shell user can associate their session with a new or existing Azure file share storage account. This ensures that their data is carried forward from one session to another, making it easier for admins to continue their activities in the shell across sessions. You can use an LRS, ZRS, or GRS storage account to store this data. For redundancy purposes, it is recommended that you use a ZRS or GRS storage account, so the home directory and all files stored therein are available in case of a regional outage.
TipBecause all Azure subscriptions use RBAC and permission inheritance, it is possible for admins assigned permission on the resource group or subscription level in to obtain access to all storage accounts, including those containing access tokens and credential files stored by other admins. To prevent breaches, it is important for each admin or Cloud Shell user to set up their own storage account in Azure and for RBAC permissions to that storage account to be updated to allow access only to the required administrator.
Azure file share walkthrough
The following section shows you how to create the Azure file share using the Azure Portal.
Using The Azure Portal
To create the Azure file share using the Azure Portal with the bash module, follow these steps:
To open Cloud Shell, do one of the following:
Log in to the Azure Portal and click the Cloud Serviceicon in the top-right bar. (See Figure 7-1.)

FIGURE 7-1Start Cloud Shell from the Azure Portal.
Enter https://shell.azure.com in the Address bar of any supported web browser. (See Figure 7-2.)

FIGURE 7-2Navigate to Cloud Shell.
Because this is the first time you are accessing Cloud Shell, you will be prompted to create the Azure file share. (See Figure 7-3.)
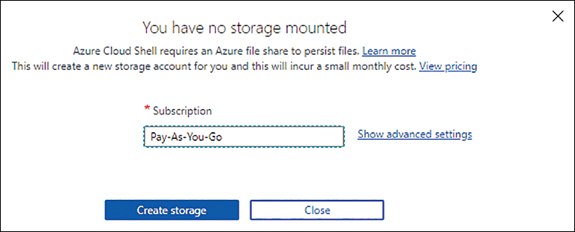
FIGURE 7-3Create cloud shell storage.
Click Show Advanced Settings.
On the page that opens (see Figure 7-4), enter the following information. Then click Create Storage:
SubscriptionSelect the subscription to use to create the storage account and file share.
Cloud Shell RegionSelect the region to use to create the storage account and file share.
Resource GroupSelect the Create New option button and enter a unique name for the resource group to be created. Alternatively, select the Use Existing option button to select an existing resource group from the drop-down list for this deployment.
Storage AccountSelect the Create New option button and enter a unique name for the storage account to be created. Alternatively, select the Use Existing option button to select an existing storage account from the drop-down list for this deployment.
File ShareSelect the Create New option button and enter a unique name for the file share to be created. Alternatively, select the Use Existing option button to select an existing file share from the drop-down list for this deployment.
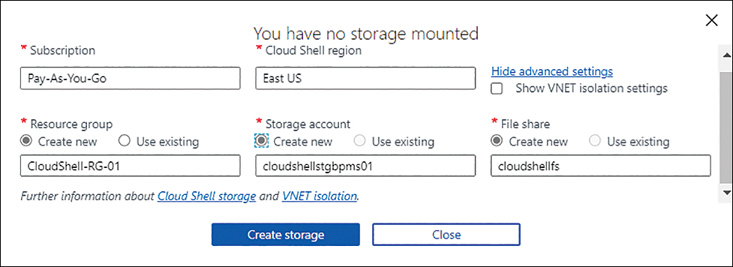
FIGURE 7-4Create Storage.
Azure connects to or creates the resource group, storage account, and file share, and connects you to a Cloud Shell. (See Figure 7-5.)

FIGURE 7-5Cloud Shell connection.
Azure drive
When using the PowerShell module in Azure Cloud Shell, you can discover and navigate all the Azure resources provisioned in the subscription. To do so, you must use the cd Azure: command to switch the shell to the Azure drive. You can manage resources using standard PowerShell cmdlets from any of the shell drives, including the home drive (cd ~), however, to be able to browse the resource volumes, you will have to switch to the Azure drive first.
Cloud Shell Editor
The team behind the development of Azure Cloud Shell worked closely with the Visual Studio Code team as part of their open-source Monaco project to integrate the Monaco Editor into Cloud Shell. This web standards-based editor makes it easy for admins who are familiar with Visual Studio Code features—such as auto-completion, code snippets, syntax coloring, and so on—to use those same features within the Cloud Shell. Cloud Shell includes a file explorer for easy navigation and exploration of the Cloud Shell file system.
NoteYou can use vi, emacs, and nano to edit files from Cloud Shell, and the “code .” Cmdlet to open the file explorer when accessing Cloud Shell via a web browser.
Embed Cloud Shell
You can embed the Cloud Shell URL shell.azure.com in the HTML code of your website using the standard code provided by Microsoft. This makes it easier for admins and users who need to use the service to access it easily.
To enable a JavaScript-based launch button on your web page, you can embed the following code in HTML. When this button is clicked, it launches Cloud Shell in a pop-up window:
<a style="cursor:pointer" onclick='javascript:window.open("https://shell.azure.com", "_blank", "toolbar=no,scrollbars=yes,resizable=yes,menubar=no,location=no,status=no")'><img alt="Launch Azure Cloud Shell" src="https://shell.azure.com/images/launchcloudshell.png"></a>To force users to employ the bash or PowerShell versions of the Cloud Shell, you can change the URL in the code to one of the following based on your enforcement requirements:
Cloud Shell deployment in a vNET
By default, Cloud Shell cannot access resources that are set up to be accessible only via specific private virtual networks in Azure. For example, a locked-down Kubernetes cluster cannot be accessed using kubectl unless Cloud Shell is integrated within the same virtual network. However, in some scenarios, you might want to use Cloud Shell to access such private resources.
For Cloud Shell integration, you must dedicate a subnet on the virtual network to the Azure Container Instances (ACI) service. When a user requests the creation of a Cloud Shell session, ACI deploys a container in that subnet to host the Cloud Shell.
Along with the dedicated subnet in the virtual network, as shown in Figure 7-6, an Azure Relay service is needed to control which public or private networks can be used to access the Cloud Shell service. This is not a free service, so the costs for the service should be taken into consideration when planning this deployment.
TipTo deploy these additional resources, Microsoft provides and maintains a free template online. Use this template to deploy the required resources before integrating Cloud Shell into the virtual network.
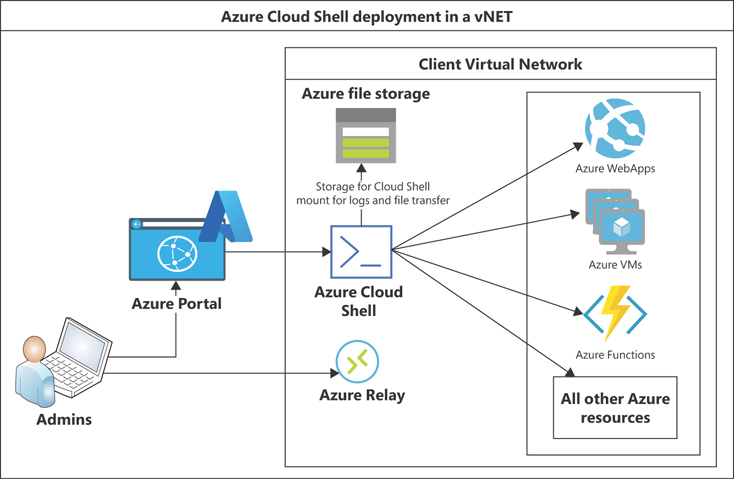
FIGURE 7-6Cloud Shell deployment in a vNET.
Azure Cloud Shell walkthrough
This section walks you through the Cloud Shell using the Azure Portal with bash and PowerShell modules.
Using The Azure Portal: Bash Module
To access and use Cloud Shell with the bash module, follow these steps:
To open Cloud Shell, do one of the following:
Log in to the Azure Portal and click the Cloud Serviceicon in the top-right bar. (See Figure 7-7.)

FIGURE 7-7Start Cloud Shell from the Azure Portal.
Enter https://shell.azure.com in the Address bar of any supported web browser. (See Figure 7-8.)

FIGURE 7-8Navigate to Cloud Shell.
Azure connects you to a Cloud Shell. (See Figure 7-9.) Once you are connected, you see the home directory. (See Figure 7-10.) By default, you are connected to the Bash shell. You can now run bash commands to list, get, create, modify, or delete resources as needed based on your permissions.
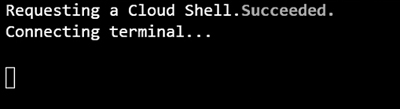
FIGURE 7-9Cloud Shell window.
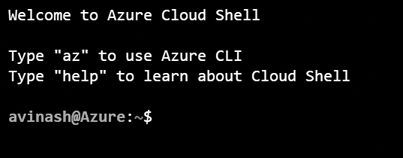
FIGURE 7-10Cloud Shell home directory.
Run the az storage account list bash command (see Figure 7-11) to list all the storage accounts set up in your Azure subscription (see Figure 7-12).

FIGURE 7-11Cloud Shell service connection.
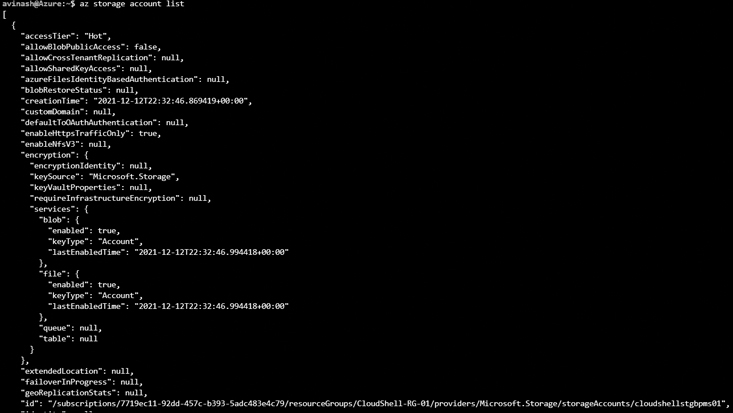
FIGURE 7-12Account storage list in Cloud Shell.
To change the text size in the session window, click the Settingsicon at the top of the Cloud Shell window, choose Text Size, and select Small, Medium, or Large. (See Figure 7-13.)
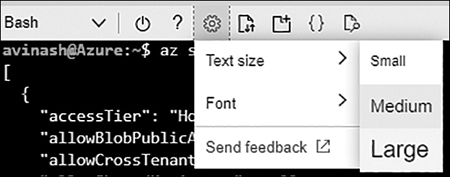
FIGURE 7-13Change the text size.
To change the font in the session window, click the Settings icon, choose Font, and select the font you prefer. (See Figure 7-14.)
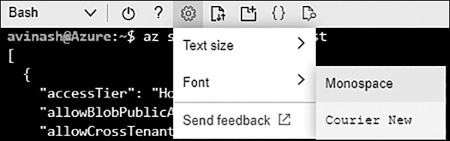
FIGURE 7-14Change the font.
In case you need to restart the current Cloud Shell session—for instance, if it is not responding or has timed out—click the Power icon at the top of the Cloud Shell window, next to the Bash down arrow (see Figure 7-15), and click Restart in the window that appears (see Figure 7-16).
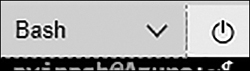
FIGURE 7-15Click the Power button.
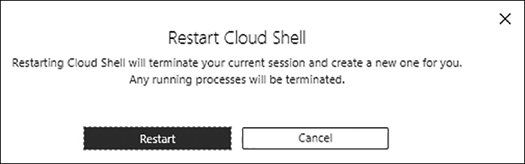
FIGURE 7-16Click the Restart button.
To download a file from Cloud Shell, click the Folder icon at the top of the Cloud Shell window and choose Download. (See Figure 7-17.)

FIGURE 7-17Choose the Download menu command.
Enter the path and name of the file you want to download and click the Download button. (See Figure 7-18.)
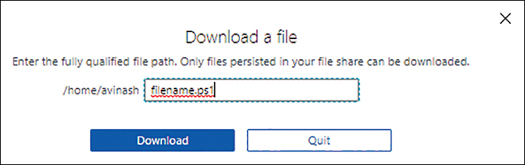
FIGURE 7-18Specify the file you want to download.
To verify that the file was downloaded successfully, browse the Downloads folder in your profile. (See Figure 7-19.)
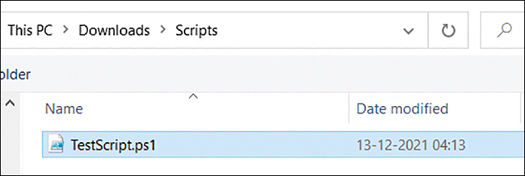
FIGURE 7-19Verify the file was downloaded.
To upload a file, click the Folder icon and choose Upload. (See Figure 7-20.)
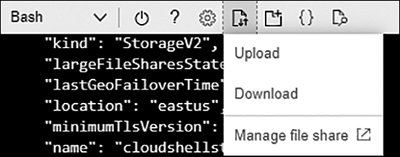
FIGURE 7-20Choose the Upload menu command.
Locate and select the file you want to upload. Then click the Upload button. When the upload is done, it will be marked as complete. (See Figure 7-21.)

FIGURE 7-21The upload is complete.
Confirm that the file has been successfully uploaded to the Cloud Shell session. (See Figure 7-22.)

FIGURE 7-22Confirming the file upload.
To open the Monaco Editor, click the Editor icon at the top of the Cloud Shell window. (See Figure 7-23.)

FIGURE 7-23Open the Monaco Editor.
A new browser tab or window with the open-source Monaco Editor opens. (See Figure 7-24.) You can now edit any JSON templates stored in the home drive or create new ones as needed.
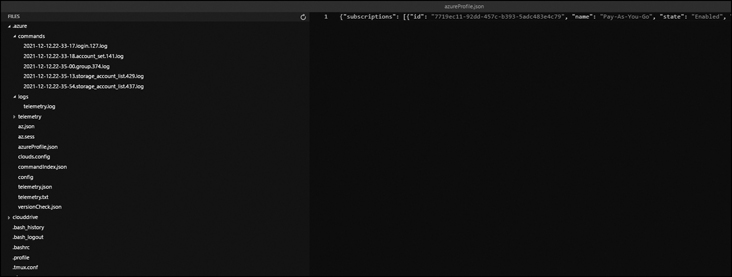
FIGURE 7-24Monaco Editor.
Using The Azure Portal: Powershell Module
To access and use Cloud Shell with the PowerShell module, follow these steps:
Open Cloud Shell and do one of the following:
Log in to the Azure Portal and click the Cloud Serviceicon in the top-right bar.
Enter https://shell.azure.com in the Address bar of any supported web browser.
Click the down arrow at the top of the Cloud Shell window and select PowerShell.(See Figure 7-25.)
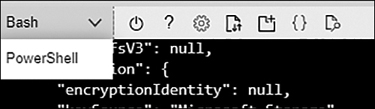
FIGURE 7-25Switch to PowerShell.
In the Switch to PowerShell in Cloud Shell pop-up, click the Confirm button. (See Figure 7-26.)

FIGURE 7-26Click Confirm to switch to PowerShell.
Cloud Shell connects to the PowerShell module and switches to the home directory. You can now run standard Azure PowerShell cmdlets to access, deploy, and manage resources in your Azure environment. (See Figure 7-27.)
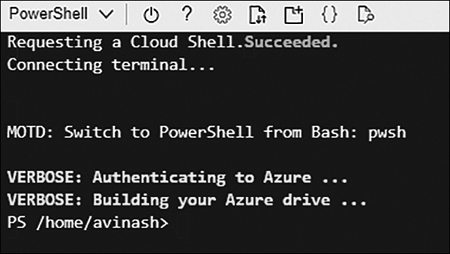
FIGURE 7-27The PowerShell module.
Run the Get-AzureRMStorageAccount PowerShell cmdlet to list all the storage accounts set up in your Azure subscription. (See Figure 7-28.)

FIGURE 7-28The Get-AzureRMStorageAccount cmdlet shows a list of storage accounts.
To switch to the Azure drive, run the cd Azure: cmdlet. (See Figure 7-29.)
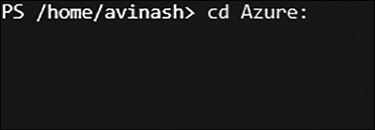
FIGURE 7-29Switch to the Azure drive.
You’ll see the Azure: prompt. (See Figure 7-30.) You can now run File Explorer commands to discover and manage Azure resources.
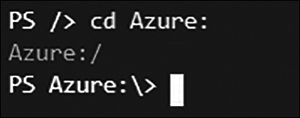
FIGURE 7-30The Azure: prompt.
Run the dir cmdlet to view information about your subscriptions. (See Figure 7-31.) Be sure you are able to see all of your subscriptions, and that the correct subscription is currently selected. (The active subscription has a + sign next to the Mode heading.)
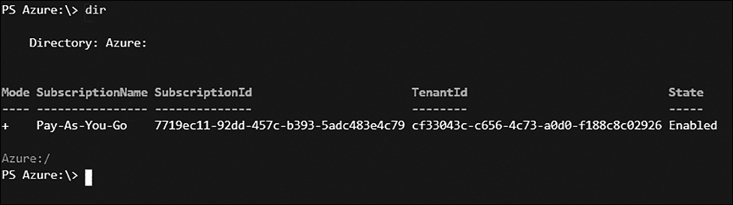
FIGURE 7-31The cd Azure drive with a list of subscriptions.
To browse the subscription, run the cd subscriptioname cmdlet (see Figure 7-32).
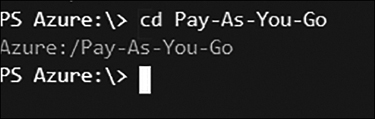
FIGURE 7-32Browsing to subscriptions.
You are now logged in to the subscription and can browse for resources.
Run the dir cmdlet again to list all the resources you can browse. (See Figure 7-33.)
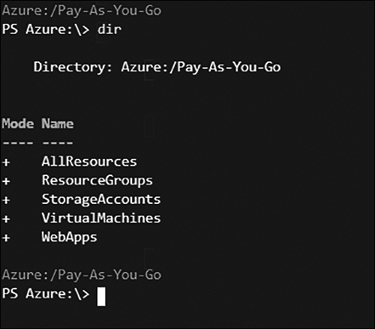
FIGURE 7-33The list of resources in subscriptions.
Run the cd StorageAccounts cmdlet to browse to the storage accounts container. (See Figure 7-34.)
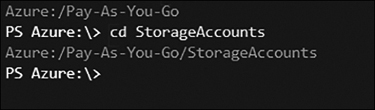
FIGURE 7-34The storage accounts container.
Run the dir cmdlet again to list all the storage accounts in the selected subscription. (See Figure 7-35.)
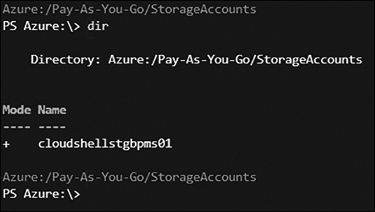
FIGURE 7-35Storage accounts in the subscription.
Continue to run cmdlets as needed on the storage accounts and other resources. You can obtain help at any time on cmdlet options within the Cloud Shell window.
Best practices
Following are some general best practices regarding setting up and using Azure Cloud Shell:
Use RBAC and MFA to protect access to Cloud ShellReview the admins who can use Cloud Shell, and the resources and permissions they have access to, so there is a clear demarcation of roles and permissions in your environment. Take advantage of the RBAC roles provided in Azure AD or create custom roles based on your organization’s needs to achieve this. Ensure that all admin accounts are set up with Azure MFA, which is provided free of cost in Azure. This can help prevent unwanted access to your environment, even in the event of a password breach.
Use Azure Key Vault to store secretsBecause you can store code and credentials inside Cloud Shell or the connected file share, there is a chance of credential exposure if they are stored in plain text. You can use tools such as Credential Scanner provided by Microsoft to locate these credentials and preferably move them to Azure Key Vault or some other secure credential-storage solution.
Restrict access to Cloud ShellBecause Cloud Shell can be used to easily run scripts and code against your Azure services, it is a good practice to protect access to Cloud Shell from specific secured workstations using Cloud Conditional Access. You can completely restrict access to Cloud Shell from any environment using a combination of conditional access and firewall policies that target the URLs associated with the service—for example, ux.console.azure.com and ux.console.azure.us (used for Azure Government Cloud). If you need to prevent such access, you can set up policies targeting these URLs to prevent access except from specific locations, IPs, or workstations.
Restrict access using Azure PolicyYou can prevent access to Cloud Shell by using Azure Policy and allowing only specific admins to create storage accounts. Admins who do not have such access can either select existing storage accounts accessible by them for write operations or be denied access if none exist.