Chapter 6
Azure Portal
Overview
Microsoft provides various options to create and manage Azure services. Of these, one of the most widely used is the Azure Portal. A GUI-based web interface, the Azure Portal provides tools to build and manage all Azure services, ranging from simple single-service solutions to complex multi-service architectures. Each individual user can customize the Azure Portal per their unique requirements; at the same time, there are certain standardization rules that can be pushed out on an organizational level to ensure some degree of synchronicity.
Over the years, the Azure Portal has gone through a number of iterations and upgrades. The Azure Portal experience has been updated as new services have been introduced and as new features in existing services have come online.
The Azure Portal is currently accessible from https://portal.azure.com. The first time you log in to the Azure Portal using the credentials generated when you signed up or that were given to you by another admin, you will see the default version of the main Azure Portal window. (See Figure 6-1.)
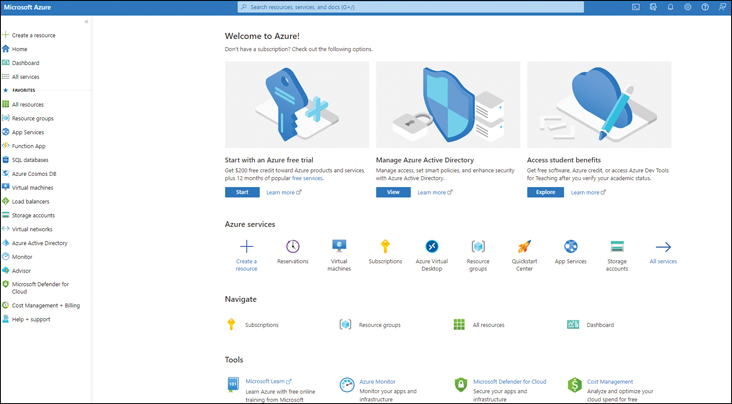
FIGURE 6-1Azure Portal default view.
The left pane of the Azure Portal window (see Figure 6-2) contains a list of the most commonly used options. (You can customize this list to suit your needs.) They include the following:
Create a Resource
Home
Dashboard
All Services
Favorites

FIGURE 6-2Left pane of the Azure Portal.
In the top-right corner of the main Azure Portal screen (see Figure 6-3), you will find a second set of options. You can use these to configure the Azure Portal. These options include the following:
Cloud Shell
Directories + Subscriptions
Notifications
Settings
Help
Feedback

FIGURE 6-3Portal configuration options in the Azure Portal.
Key features
The key features of the Azure Portal are as follows:
GUI-based experienceThe Azure Portal provides a centralized GUI web console to build and manage Azure resources.
Secure SSL-based web portalThe Azure Portal works over port 443 and SSL, ensuring all communication is secure.
Resilient by designThe Azure Portal is deployed across all Azure datacenters. This ensures that a regional outage will not cause the entire service to go offline. Service updates are continuous and designed to work without requiring downtimes.
Supported by modern browsersThe Azure Portal is accessible using any modern browser, including the latest versions of Microsoft Edge, Google Chrome, Mozilla Firefox, and Apple Safari.
Supports management of all Azure servicesThe Azure Portal supports the entire lifecycle management of all Azure services. It is the default method of access for most Azure architects and administrators.
Cloud Shell IntegrationCloud Shell is integrated directly inside the Azure Portal interface, making it easy to initiate sessions to run scripts, bash commands, and automated activities.
Role-based access control (RBAC) for access managementThe Azure Portal provides RBAC to provide granular access to Azure services using Azure Active Directory.
Customizable dashboardsThe Azure Portal allows each user to create dashboards according to their individual needs, viewable only by them, to monitor the services most critical for them. They can also publish and share these dashboards to provide a consistent view across the environment. This flexibility maximizes productivity.
Global view of services and regionsThe Azure Portal provides a global view of service health across all Azure regions and services. Views can be customized on an individual basis.
Integration with Azure MarketplaceThe Azure Portal is deeply integrated with the Azure Marketplace, which supports the procurement and deployment of third-party solutions on Azure.
Allowlisting Azure URLs
The Azure Portal has a number of different URLs that should be allowlisted on firewalls, proxy servers, and any other intermediate devices handling traffic to these services to ensure that performance and connectivity to the service are not impacted. These URLs include the following:
*.aka.ms | *.applicationinsights.io | |
*.loganalytics.io | ||
Customization and usability concepts and considerations
The Azure Portal allows you to create your own personalized experience. It offers settings to set the portal’s appearance and views, default dashboards, and other shared dashboards. In addition, you can use the portal to access the Azure Marketplace, which contains third-party solutions and packaged services. Finally, the Azure Portal is where you go to log support tickets and search the vast Microsoft knowledge base for information about any issues you are encountering. This section discusses all these features of the Azure Portal.
Azure Portal settings
The Azure Portal provides settings to establish a default view, select the subscriptions you want to view and manage, specify language and regional settings, enter profile information, and set your session preferences to control timeouts and notifications. With these settings, each administrator can set up their default experience when using the Azure Portal. It is a good practice to review these at least once when you begin using the Azure Portal and align them based on your needs.
Azure Portal settings walkthrough
This section walks you through the process of accessing and managing your Azure Portal settings using the Azure Portal.
Using The Azure Portal
To access and manage your Azure Portal settings using the Azure Portal, follow these steps:
Log in to the Azure Portal and click the Settings icon in the top-right bar. (See Figure 6-4.)

FIGURE 6-4Settings icon.
In the Directories + Subscriptions tab of the Portal Settings page (see Figure 6-5), which opens by default, optionally click the star icon next to a subscription to set it as a “favorite.”

FIGURE 6-5The Directories + Subscriptions tab on the Portal Settings page.
Click the Appearance + Startup Views tab and adjust the following options according to your needs (see Figure 6-6):
Menu BehaviorSpecify how the left menu bar behaves on all screens. It can be permanently docked or set as a flyout bar that opens when you scroll to it.
ThemeSelect a visual theme to apply.
High Contrast ThemeChoose a high-contrast theme if desired or required due to your visual needs.
Startup PageChoose the default startup page. This will appear when you sign in to the Azure Portal.

FIGURE 6-6The Appearance + Startup Views tab on the Portal Settings page.
Click the Language + Region tab and specify your default language and regional format. (See Figure 6-7.)
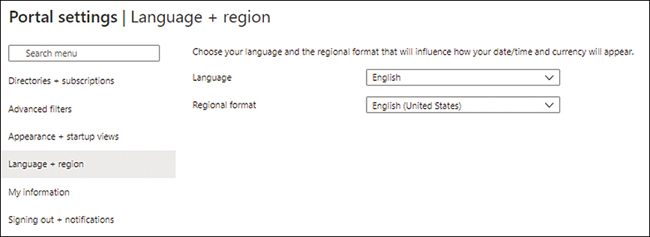
FIGURE 6-7The Language + Region tab on the Portal Settings page.
Click the My Information tab, confirm or enter the email you want to use to receive notifications from Microsoft, and optionally select the I Would Like to Hear from Microsoft and Its Family of Companies Via Email… check box. (See Figure 6-8.)
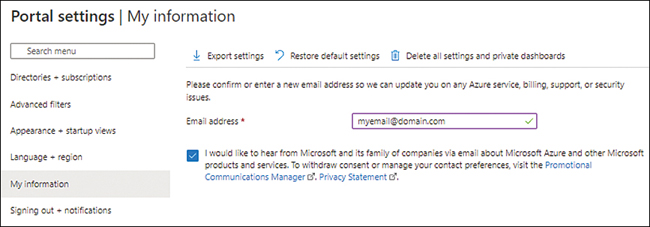
FIGURE 6-8The My Information tab on the Portal Settings page.
Click the Signing Out + Notifications tab and adjust the following options according to your needs (see Figure 6-9):
Enable Directory Level Idle TimeoutSelect this check box if you want sessions to time out after a certain period.
Sign Me Out When InactiveUse this drop-down list to specify how long the system should be inactive before the user is signed out.
Enable Pop-Up NotificationsSelect this check box if you want to receive pop-up notifications during your sessions.

FIGURE 6-9The Signing Out + Notifications tab on the Portal Settings page.
Custom dashboards
The Azure Portal allows you to create custom dashboards. These can be a mix of resource views, quick links, and shortcuts to day-to-day operations, critical metrics, and information about the overall health of your Azure environment.
Each administrator can create custom dashboards to view the services, resources, and information that are most critical for their day-to-day function. Custom dashboards can be shared between team members. Updates to shared dashboards are available to all admins that subscribe to that dashboard.
Custom dashboards walkthrough
This section walks you through the process of creating a custom dashboard using the Azure Portal.
Using The Azure Portal
To create a custom dashboard using the Azure Portal, follow these steps:
Log in to the Azure Portal and click the Dashboard option in the left pane. A default dashboard view opens in the right pane. (See Figure 6-10.)

FIGURE 6-10Default dashboard in the Azure Portal.
You can either edit this default dashboard (by clicking the Edit button) or create a new dashboard. This walkthrough shows you how to create a new one.
Click the down arrow to the right of the New Dashboard button and choose Blank Dashboard. (See Figure 6-11.)
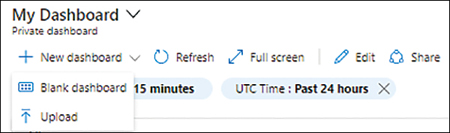
FIGURE 6-11Create a new dashboard.
The Tile Gallery page opens. You use this page to select predefined tiles that present different views of resources within your subscription. (See Figure 6-12.)
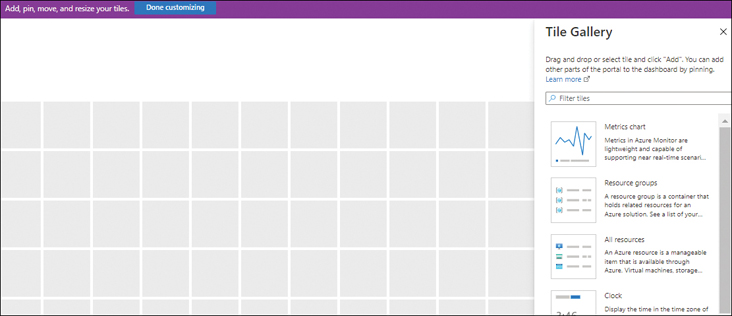
FIGURE 6-12The Tile Gallery page.
Click a tile that represents a metric you want to include on your dashboard and drag it to the blank dashboard on the left to add it. Repeat this step for any other tiles you want to add.
TipTo rearrange the tiles on the dashboard, simply click a tile and drag it to the desired location.
When you finish adding and arranging tiles on your new dashboard, click the Done Customizing button.
The dashboard is saved. (See Figure 6-13.)
TipYou can adjust the Auto Refresh and UTC Time settings based on your personal preferences.

FIGURE 6-13The new dashboard.
Azure Marketplace
Azure Marketplace is a store that contains thousands of IT applications, services, and solutions, provided by third-party vendors known as independent software vendors (ISVs). You can try and buy these solutions based on your organizational requirements. Available applications and services range from software products to back up your Azure resources to services to monitor and manage them.
Azure Marketplace walkthrough
This section walks you through the process of locating and adding solutions from Azure Marketplace to your Azure Portal.
Using The Azure Portal
To locate and add a solution from Azure Marketplace to your Azure Portal, follow these steps:
Log in to the Azure Portal, type marketplace in the search box, and select it from the list that appears. (See Figure 6-14.)
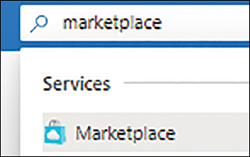
FIGURE 6-14Search for Azure Marketplace.
The Marketplace page opens. It lists a default set of available services in the right pane. Among other options, the left pane displays a list of categories of Azure services. (See Figure 6-15.)
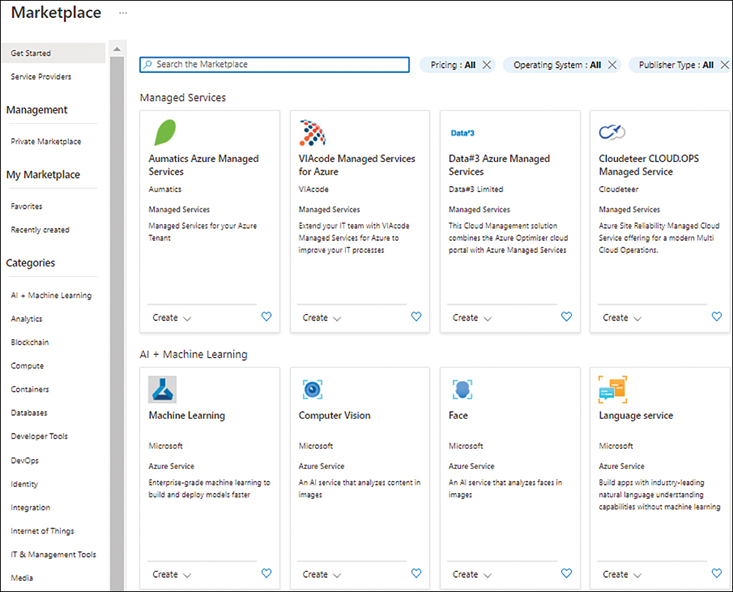
FIGURE 6-15Marketplace services categories.
Click a category in the left pane—in this case, Compute.
The right pane displays a list of compute solutions from Microsoft (such as Windows Server), as well as from third-party vendors (such as Red Hat Enterprise, Debian Linux, and Ubuntu), organized by subcategory. (See Figure 6-16.)
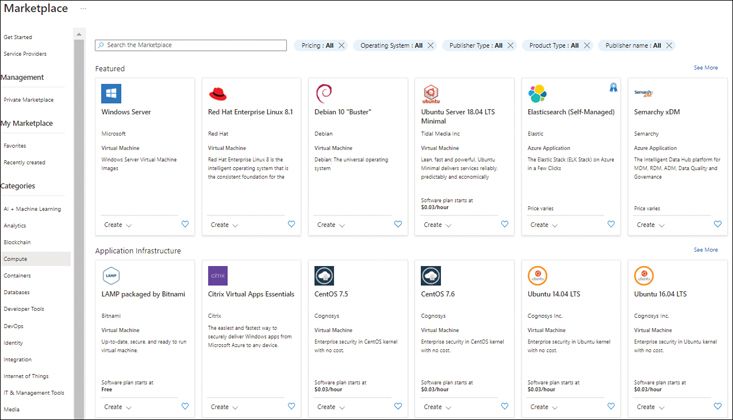
FIGURE 6-16Marketplace services Compute category.
To see additional services, such as pre-built custom OS solutions (including hardened, or pre-configured versions), click the See More link to the right of a subcategory heading. Alternatively, use the search box above the right pane to search for a specific solution.
When you find the solution you’re looking for, click Create, and follow the prompts to add it.
Help and support
The Azure Portal has a help and support section that allows you to buy support plans, raise support tickets, monitor your service health, review Azure Advisor recommendations, visit the Azure community for free guidance and support, and access many other helpful resources to improve your knowledge on Azure.
Help and support walkthrough
This section walks you through the process of finding recommended solutions from Microsoft for your issue or creating a support request in the Azure Portal.
Using The Azure Portal
To create a support request in the Azure Portal, follow these steps:
Log in to the Azure Portal and do one of the following:
Type help + supportin the search box and select it in the list that appears.
Click Help + Supportin the left pane. (See Figure 6-17.)
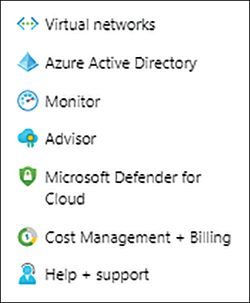
FIGURE 6-17Click Help + Support.
In the Overview tab of the Help + Support page, click the Create a Support Request button. (See Figure 6-18.)
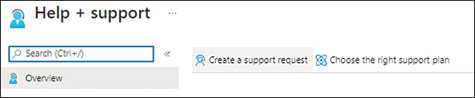
FIGURE 6-18Create a support request.
In the Problem Description tab of the New Support Request wizard (see Figure 6-19), enter the following information and click Next:
What Is Your Issue Related To?In this case, select Azure Services.
Issue TypeSelect the option that matches most closely to your issue—in this case, Technical.
When you choose your issue type, the Problem Description tab changes to display options that relate to that issue type (in this case, Technical).
SubscriptionSelect the Azure subscription that contains the workload for which you want to log the support request.
ServiceSelect the My Services option button to select a specific resource or service based on your environment or the All Services option button if you are facing a larger issue across multiple or all services.
Service TypeSelect the type of service for which you want to log the service request.
ResourceSelect the exact resource from your subscription for which you want to log the support request.
SummaryEnter a brief description of your issue.
Problem TypeChoose the problem type that most closely matches the problem you are experiencing. (The options listed here will differ depending on the service type you selected previously.)
Problem SubtypeChoose the problem subtype that most closely matches the problem you are experiencing. (The options listed here will differ depending on the problem type you selected previously.)

FIGURE 6-19The Problem Description tab.
Based on the information you submitted in the Problem Description tab, Microsoft searches for, filters, and displays information about any ongoing issues with your workload, service type, or region already under investigation in the Recommended Solution tab. If none are found, Microsoft will display solutions from its knowledge base that might help you to fix your issue under Recommended Steps and Common Issues Associated with Your Issue Type. (See Figure 6-20.)
Review the solutions shown. If none match your needs, or if the solutions presented have already been tried unsuccessfully, click Next.
In the Additional Details tab, provide additional information about your issue as well as your contact information if your subscription already has a support plan. (See Figure 6-21.) If your subscription does not have a support plan, you will be asked to procure one. (See Figure 6-22.)

FIGURE 6-20The Recommended Solution tab.
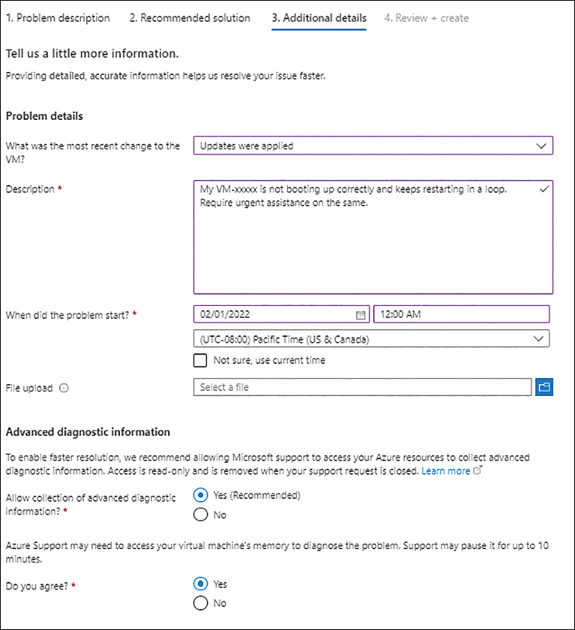
FIGURE 6-21The Additional Details tab.
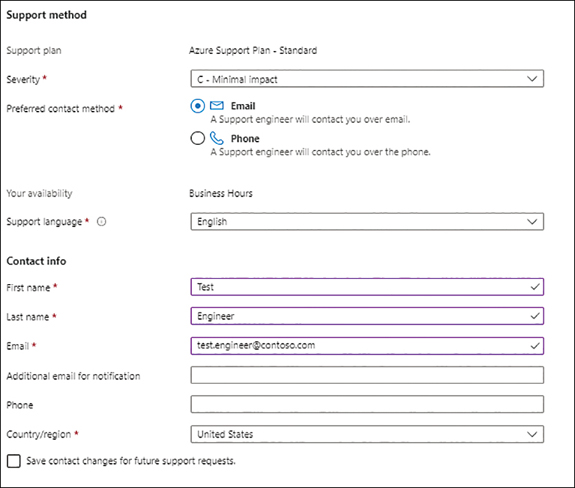
FIGURE 6-22The Additional Details tab
TipIf you do not want to procure a plan, you can get help for free from the Microsoft Azure community by clicking the View Azure Community Support link under Ask Our Community. (See Figure 6-23.)

FIGURE 6-23Buy a support plan or ask for community support.
Click Next.
Review your settings in the Review + Create tab. Then click Create to create the ticket.
Best practices
Following are some general best practices for setting up and using the Azure Portal:
Use RBAC and MFA to protect access to the Azure PortalIt is important to set up access to the Azure Portal using the provided RBAC options. There are a number of built-in groups that limit access to users based on their individual needs. You can also create custom groups if the standard built-in groups do not address your needs. Be sure to turn on MFA for all users accessing the Azure Portal. Azure MFA is provided free of cost. Use this service to ensure that a password breach does not open access to your Azure environment.
Limit access based on required geographies or known IPsRestrict access to the Azure Portal based on the following criteria to protect it against brute-force attacks:
Allow access only from known IPs. Have admins to log in centrally using only those known allowlisted IPs.
Block access from known botnets and malicious IPs.
Allow access only from geographic locations where your admins are based or accessing the environment.
Block access from geographic locations attempting brute-force attacks, according to the Azure Portal logs.
You can use conditional access to accomplish this, as per your organization’s requirements.
Limit access from managed devicesLimit access to the Azure Portal to devices under your direct and complete management, monitoring, and control. These can be devices managed by MDM solutions such as Microsoft Intune or Microsoft SCCM. You can use conditional access to identify whether access is being attempted from unmanaged devices and block them.
Perform regular access auditsImplement a regular internal audit process to track and review all administrator access assigned in the Azure Portal. Having a monthly, quarterly, or half-yearly process, based on your organization’s size and complexity, can help eliminate temporary access rights that are no longer required. Automated auditing solutions for access management can make this process faster and more accurate.
Set up long-term log retentionAzure Portal access and activity logs are retained for short periods of time, ranging between 90 and 180 days. To retain logs for a longer period for auditory and compliance reviews, set up long-term log retention.
Use a security information and event management (SIEM) tool to monitor access and activitiesUse a SIEM tool to analyze and identify patterns that indicate ongoing attacks or unwanted access to the Azure Portal. Azure Sentinel is one such tool provided in Azure. You can use other third-party services to achieve this as well.