
Chapter 27
Working with Events in Outlook
If you want to write macros to automate tasks in Outlook, you may sometimes need to write code that responds to Outlook events. Outlook has two classes of events, application-level events and item-level events, and between them, they enable your macros to respond to most anything that happens in Outlook. In this chapter, you will learn how to work with both types of events, and you will see code examples showing how to manage some of the events.
In addition to the events discussed in this chapter, Outlook supports form events such as those discussed in “Using Events to Control Forms” in Chapter 15, “Creating Complex Forms.” However, as is so often the case with Outlook and Access, the folders in Outlook are somewhat unique and are different from the VBA forms you worked with earlier in this book. Outlook's folder/form is described later in this chapter in the sidebar titled “What Is VBScript?” As you'll see, you even use a special version of the VBA language when programming this folder-slash-form.
We'll conclude this chapter with a brief look at Outlook's Quick Steps feature. For those who don't want to, or can't, write macros, Quick Steps provides an alternative, albeit seriously limited, way to automate some tasks. This tool is similar to Access's Macro Designer, although even more simplistic.
How Event-Handler Procedures Differ from Ordinary Macros
The techniques used to write and test an event-handler procedure differ from the techniques you've employed throughout this book to create and test ordinary macro procedures. If you intend to test the examples in this chapter, I suggest that you first read the sidebar titled “How to Test Event-Handler Procedures” later in this chapter.
The following points summarize the ways in which event-handler procedures differ from ordinary procedures:
- An event handler must be located within a class module, not in an ordinary macro module. Therefore, you're entering the world of object-oriented programming (OOP). And, in spite of some useful qualities, OOP has the potential to sink us programmers into a quagmire of complexity. A complete example demonstrating how to add an event handler to Outlook and then test it can be found in the sidebar “How to Test Event-Handler Procedures.”
- You must declare an object variable.
- Next, you initialize the object variable to connect it to an actual object.
- You then write code in a procedure triggered by the event you're interested in.
- You test your code differently than you would in ordinary modules. In a class module, you cannot simply test the event handler by pressing F5 to run it directly. Pressing F5 brings up the Macro dialog box. Instead, you do something in Outlook to trigger the event. For example, modifying a contact in the Contacts folder would trigger an associated event.
Working with Application-Level Events
By default, for security reasons, macros are disabled in Outlook 2019. To work with the examples in this chapter, or to use macros in general, you must select an enabling option in Outlook's Trust Center. To do so, follow these steps (if you haven't already):
- Click the File tab on the Ribbon.
- Choose Options in the left pane of the File window.
- Click Trust Center in the left pane of the Outlook Options dialog box.
- Click the Trust Center Settings button.
- Click Macro Settings in the left pane of the Trust Center dialog box.
- Now choose one of the two lower options: Notification For All Macros (which gets old quickly) or Enable All Macros.
Recall that an event is something that happens to an object, such as a click, a mouse drag, a keystroke, and so on. You can write code in an event procedure, as it's called, to respond to clicking or other events.
An application-level event is an event that happens to the Outlook application as a whole rather than to an individual item within it. For example, the Startup event is an application-level event that occurs when Outlook starts, and the Quit event is an application-level event that occurs when Outlook closes. By contrast, item-level events represent things that happen to individual items: opening of a particular email message, modifying a contact record, or switching from one folder to another.
Application-level events are easier to access than the item-level events because the Application object is the topmost object and is always available when Outlook is running. This means that you don't have to use an event handler to create (instantiate) the Application object. It just always exists. You do, however, have to write code that creates an object for an item-level event.
To access the application-level events, you use the built-in ThisOutlookSession class module. It's automatically inserted into the VBA Editor:
- Click Developer ➢ Visual Basic to open the VBA editor.
- Look in the Project Explorer and expand the Project1 item (click the + next to Project1) that represents the Outlook VBA project and then expand the
Microsoft Outlook Objectsitem.You now see the
ThisOutlookSessionitem. - Double-click
ThisOutlookSessionto open a Code window showing its contents.If this is the first time you've opened the
ThisOutlookSessionclass module, it will have no contents.
Each of the events described in the following sections works with the Application object. For simplicity, most of the following examples directly use the Outlook Application object itself, but you could declare an object variable and then use it to return the Application object if you want.
Recall that you can find the Application object in the drop-down list on the top left of the VBA Editor's Code window. All the events available to the Application object can be selected from the drop-down list on the top right of the Code window, as shown in Figure 27.1.

Figure 27.1 The drop-down list on the right shows all the events available in the Application object.
You can select these various events from the drop-down list (causing the Editor to type in the procedure structure for you) or just type the event name yourself as a sub directly in the Code window. However, if you select from the drop-down list, the VBA Editor will automatically add any necessary arguments as well. So that's the easier approach.
Also, if you declare object variables using the WithEvents statement, like this, the Editor's drop-down lists will include these objects and their available events:
Public WithEvents myInspectors As InspectorsPublic WithEvents myInspector As Inspector
That can be a useful shortcut while programming because you can then view every event available in an object—and also have the Editor type in the arguments. Later in this chapter you'll experiment with the Inspectors collection and the Inspector argument. In short, the inspector is the window in which an Outlook item is being shown to the user.
Using the Startup Event
The Startup event, which takes no arguments, occurs when Outlook starts. In other words, every time the user starts Outlook, any code you might have written in the Sub Application_Startup() procedure will automatically execute.
The Startup event is useful for making sure that Outlook is correctly configured for the user to start work. Say that someone always starts off by writing notes, and the first note is always a reminder about time cards. The following example creates a new NoteItem object (a note), assigns text to its Body property, and uses the Display item to display it (see Figure 27.2):
Private Sub Application_Startup()Dim myNoteItem As NoteItemSet myNoteItem = Application.CreateItem(ItemType:=olNoteItem)myNoteItem.Body = "Please start a new time card for the day."myNoteItem.DisplayEnd Sub
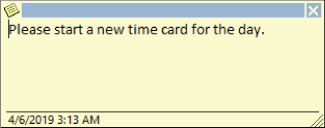
Figure 27.2 This note automatically appears when the user first starts Outlook.
You can also put the Startup event to good use by writing code with the Set command to connect an object variable to a real object it is supposed to represent. More on this later in this chapter, in the section titled “Declaring an Object Variable and Initializing an Event.”
Using the Quit Event
The Quit event occurs when Outlook is shut down. This event is triggered three possible ways:
- By the user choosing Exit in the File tab of the Ribbon
- By the user clicking the red X icon in the upper right of the Outlook window
- By the programmer using the
Quitmethod of theApplicationobject in VBA
By the time that the Quit event fires (is triggered), all of Outlook's windows have already been closed and all global variables have been released, so there's little left for a programmer to access via code in this event procedure. One possibility, however, is to display a parting message to the user, as in the following example, which displays a message on the workday that precedes a national holiday to remind the user of the holiday:
Private Sub Application_Quit()Dim strMessage As StringSelect Case Format(Date, "MM/DD/YYYY")Case "01/18/2019"strMessage = "Next Monday is Martin Luther King Day."Case "02/15/2019"strMessage = "Next Monday is President's Day."Case "05/23/2019"strMessage = "Next Monday is Memorial Day."Case "07/03/2019"strMessage = "Friday is Independence Day." & _" Monday is a company holiday."Case "08/29/2019"strMessage = "Next Monday is Labor Day."'other National Holidays hereEnd SelectMsgbox "No holidays this week."If strMessage = "" Then Exit SubMsgBox strMessage, vbOKCancel + vbExclamation, “Don't Forget…”End Sub
Note that to test this macro, you need to quit Outlook. What's more, this macro can be tested only on the dates listed or by suppressing the Exit Sub code line (commenting it out) like this:
'If strMessage = "" Then Exit Sub
Using the ItemSend Event
The ItemSend event occurs when an item is sent, either by the user issuing a Send command (for example, by clicking the Send button in a Message window) or by executing the Send method in VBA code. The syntax for the ItemSend event is as follows:
Sub expression_ItemSend(ByVal Item As Object, Cancel As Boolean)
Here, expression is a required expression that returns an Application object. Item is a required argument that specifies the item that's being sent. Cancel is an optional Boolean argument that you can set to False to prevent the item from being sent.
The following example examines the Subject property of the Item object being sent. If the Subject property is an empty string, the message box prompts the user to add a subject line, and the Cancel = True statement cancels the sending of the item:
Private Sub Application_ItemSend(ByVal Item As Object, Cancel As Boolean)If Item.Subject = "" ThenMsgBox "Please add a subject line to this message before sending it."Cancel = TrueEnd IfEnd Sub
Remember to test event procedure macros like these; you can't just press F5 (the way you test ordinary macros). You must instead do something in Outlook to fire the event. In this example, you must attempt to send an email message without its Subject field filled in.
Using the NewMail Event
The NewMail event occurs when one or more new mail items arrives in the Inbox. The NewMail event can be useful for sorting messages automatically. You can also specify custom rules to sort messages automatically. The NewMail event takes no arguments.
The following example displays a message box that offers to show the Inbox when new mail arrives, triggering the NewMail event:
Private Sub Application_NewMail()If MsgBox("You have new mail. Do you want to see your Inbox?", _vbYesNo + vbInformation, "New Mail Alert") = vbYes ThenApplication.GetNamespace("MAPI").GetDefaultFolder(olFolderInbox).DisplayEnd IfEnd Sub
Using the AdvancedSearchComplete and the AdvancedSearchStopped Events
Outlook provides two events for working with advanced searches created using the AdvancedSearch method. The AdvancedSearchComplete event fires when the AdvancedSearch method is run via VBA (in macro code, not by the user) and finishes searching. The AdvancedSearchStopped event fires when the AdvancedSearch method is run via VBA, and is stopped by using the Stop method of the search.
The syntax for the AdvancedSearchComplete event is as follows:
Private Sub expression_ AdvancedSearchComplete(ByVal SearchObject As Object)
Here, expression is a required expression that returns an Application-type object variable that has been declared with events in a class module. SearchObject is the Search object that the AdvancedSearch method returns.
The following example uses the AdvancedSearchComplete event to return the number of search results that were found by the AdvancedSearch method:
Private Sub Application_AdvancedSearchComplete(ByVal SearchObject As Search)MsgBox "The search has finished running and found " & _SearchObject.Results.Count & " results.", vbOKOnly + vbInformation, _"Advanced Search Complete Event"End Sub
The following example uses the AdvancedSearchStopped event to inform the user that the search has been stopped:
Private Sub Application_AdvancedSearchStopped(ByVal SearchObject As Search)MsgBox "The search was stopped by a Stop command.", vbOKOnlyEnd Sub
Using the MAPILogonComplete Event
The MAPILogonComplete event occurs when the user has successfully logged on to Outlook. You can use the MAPILogonComplete event to ensure that Outlook is configured correctly for the user or simply to display some information in a message. The MAPILogonComplete event takes no arguments.
The following example of a MAPILogonComplete procedure displays a message about current trading conditions when the user has successfully logged on to Outlook. The code includes a commented line indicating where the String variables strPubDownBegin and strPubForecast would be declared and assigned data in a real-world implementation of this example:
Private Sub Application_MAPILogonComplete()Dim strMsg As String'strPubDowBegin and strPubForecast declared and assigned strings herestrMsg = "Welcome to the UltraBroker Trading System!" & vbCr & vbCrstrMsg = strMsg & "Today's starting value is " & strPubDowBegin & "." _& vbCr & vbCrstrMsg = strMsg & "Today's trading forecast is " & strPubForecast & "."MsgBox strMsg, vbOKOnly + vbInformation, _"UltraBroker Trading System Logon Greeting"End Sub
This macro displays a message box, but it's underneath the blue Outlook startup splash graphic. To see it, drag the splash out of the way. Unfortunately, there's no simple way to force a message box to display anywhere other than directly in the middle of the screen.
Using the Reminder Event
The Reminder event fires immediately before a reminder for a meeting, task, or appointment is displayed to the user. You can use the Reminder event to take an action related to the reminder. Because the reminder itself is usually by itself adequate for reminding the user, the Reminder event tends to be more useful when accessing Outlook programmatically than when a user is working interactively with Outlook. The syntax is as follows:
Sub expression_Reminder(ByVal Item As Object)
Here, expression is a required expression that returns an Application object, and Item is the AppointmentItem, MailItem, ContactItem, or TaskItem object associated with the reminder.
Using the OptionsPagesAdd Event
The OptionsPagesAdd event occurs when either the Options dialog box (Tools ➢ Options) or the Properties dialog box for a folder, such as the Inbox, is opened. (To open the Properties dialog box for a folder, right-click the folder and then choose Properties from the context menu.) You can use this event to add a custom page (which is contained in a COM [Component Object Model] add-in that you have created) to the Options dialog box or the Properties dialog box. The syntax for the OptionsPagesAdd event is as follows:
Sub expression_OptionsPagesAdd(ByVal Pages As PropertyPages, _ByVal Folder As MAPIFolder)
Here, expression is a required expression that returns an Application object or a NameSpace object. Pages is a required argument that gives the collection of custom property pages added to the dialog box. Folder is a required argument used when expression returns a MAPIFolder object. Folder returns the MAPIFolder object for which the Properties dialog box is being opened.
Working with Item-Level Events
In addition to the application-level events discussed so far, Outlook has a wide variety of item-level events—events that fire when specific items (such as tasks or notes) are manipulated, as opposed to events related to Outlook as a whole (such as shutting Outlook itself down).
You can handle item-level events in Outlook in two ways:
- By declaring an event in a class module and running an initialization procedure so that VBA then traps the event when it fires. This chapter takes this approach because it's simpler and more straightforward.
- By creating Visual Basic Script (VBScript) code and placing it in a “custom form” used by the item.
- Don't confuse custom forms with the UserForms we've been working with in the VBA Editor throughout this book. You create a custom form in Outlook by clicking the Developer tab on the Ribbon and then choosing options displayed on the Custom Forms section of the Ribbon.
Declaring an Object Variable and Initializing an Event
Follow these steps to declare an object variable and initialize an event:
- Use a class module to contain your object-variable declaration, in one of the following three ways:
- Use the built-in
ThisOutlookSessionmodule. In the Project Explorer, expand the project name (it's in boldface and by default is named Project1). Expand the Microsoft Outlook Objects item, and double-click theThisOutlookSessionitem to open its Code window. - Create a new class module by right-clicking the project name in the Project Explorer and choosing Insert ➢ Class Module from the context menu. The VBA Editor automatically opens a Code window for the class.
- If a class module already exists, double-click it in the Project Explorer.
- Use the built-in
- In the declarations area at the beginning of your class module (at the top of the Code window), declare a variable to represent the object to which the event applies. Use the
WithEventskeyword to specify that this object has events.The following example creates a public variable named
myPublicContactItem:Public WithEvents myPublicContactItem As ContactItem - Initialize the object variable by setting it to represent the appropriate object. The following example sets our
myPublicContactItemvariable to represent the first item in the default contacts folder:Set myPublicContactItem = Application.GetNamespace("MAPI") _.GetDefaultFolder(olFolderContacts).Items(1)
Once you've initialized the object variable, the procedure will run after the event fires.
You can initialize the object variable manually if necessary, and you may find it convenient to do so when you're writing and testing code to handle events. But if you need to handle the event each time Outlook runs—if you want to make the macro a permanent part of your macro collection—it's obviously best to automatically execute the code to initialize the object variable. For example, you might use the Startup event of the Application object (discussed in “Using the Startup Event,” earlier in this chapter) to run event-handling initialization code automatically each time Outlook starts. In other words,
Private Sub Application_Startup()Set objMyPublicContactItem = Application.GetNamespace("MAPI") _.GetDefaultFolder(olFolderContacts).Items(1)End Sub
Understanding the Events That Apply to All Message Items
Table 27.1 lists the common message events. I'm using the term message here to refer to the AppointmentItem, MailItem, ContactItem, and TaskItem objects. In other words, Table 27.1 lists the most common events that are available to these four objects.
TABLE 27.1: Common item-level events
| EVENT | EVENT OCCURS |
AttachmentAdd |
After an attachment is added to the item |
AttachmentRead |
When the user opens an email attachment for reading |
BeforeAttachmentSave |
When the user chooses to save an attachment but before the command is executed |
BeforeCheckNames |
Before Outlook checks the names of the recipients of an item being sent |
BeforeDelete |
Before an item is deleted |
Close |
When an inspector is being closed but before the closing occurs |
CustomAction |
When the custom action of an item is executed |
CustomPropertyChange |
When a custom property of an item is changed |
Forward |
When the user forwards an item |
Open |
When an item is opened in an inspector |
PropertyChange |
When a standard property (as opposed to a custom property) in the item is changed |
Read |
When an item is opened for editing in an inspector window or is selected for editing in-cell |
Reply |
When the user issues a Reply command for an item |
ReplyAll |
When the user issues a Reply All command |
Send |
When a Send command has been issued, but before the item is sent |
Write |
When an item is saved, either explicitly by the user or implicitly by Outlook |
But be aware that there are additional “item” objects in Outlook, such as the DocumentItem, DistListItem, JournalItem, MeetingItem, and so on. To view these various items, and see descriptions of their events, visit this web page:
https://msdn.microsoft.com/en-us/library/office/ff866465.aspx
Also note that although Table 27.1 describes 16 common events, each of the “item” objects actually has 26 events. As an example, the complete list of events for the MailItem object in Outlook is provided on this web page:
https://msdn.microsoft.com/EN-US/library/office/dn320337.aspx
Note that the Close event applies to the Inspector object and the Explorer object as well as to the objects just mentioned.
The events that fire before an action occurs allow you to cancel the action, preventing it from happening at all. The syntax for these events uses a Boolean argument named Cancel that you can set to True to prevent the action from taking place. For example, the syntax for the BeforeDelete event is as follows:
Sub expression_BeforeDelete(ByVal Item As Object, Cancel As Boolean)
Here, expression is a required expression that returns one of the message items to which the event applies (for example, a TaskItem object). The following example uses the BeforeDelete event to see if the TaskItem object that's open in an inspector is marked as complete when the user tries to delete it. If the task is not marked as complete, a message box prompts the user to complete the task, and the example then sets the Cancel argument to True to prevent the deletion:
Private Sub myTaskItem_BeforeDelete(ByVal Item As Object, Cancel As Boolean)If myTaskItem.Complete = False ThenMsgBox "Please complete the task before deleting it.", _vbOKOnly + vbExclamation, "Task Is Incomplete"Cancel = TrueEnd IfEnd Sub
Understanding the Events That Apply to Explorers, Inspectors, and Views
Table 27.2 lists the events that apply to explorers, inspectors, and views. Some events apply to both explorers and inspectors.
TABLE 27.2: Events that apply to explorers, inspectors, or views
| EVENT | APPLIES TO | EVENT OCCURS |
BeforeFolderSwitch |
Explorer | Before the explorer displays a new folder |
BeforeItemCopy |
Explorer | When the user issues a Copy command but before the Copy operation takes place |
BeforeItemCut |
Explorer | When an item is cut from a folder |
BeforeItemPaste |
Explorer | Before an item is pasted |
BeforeViewSwitch |
Explorer | Before the view changes in the Outlook window |
Close |
Explorer, Inspector | When an explorer is closing |
FolderSwitch |
Explorer | After an explorer displays a new folder |
SelectionChange |
Explorer | When the focus is moved to a different item in a folder, or when Outlook itself automatically selects the first item in a folder because the user has selected that folder |
AttachmentSelectionChange |
Explorer, Inspector | When a new or different attachment is selected |
ViewSwitch |
Explorer | When the view changes in the Explorer window |
Activate |
Explorer, Inspector | When an Explorer window or an Inspector window is activated (becomes the active window) |
Deactivate |
Explorer, Inspector | When an Explorer window or an Inspector window is deactivated (stops being the active window) |
BeforeMaximize |
Explorer, Inspector | When the user maximizes the explorer or inspector but before maximization takes place |
BeforeMinimize |
Explorer, Inspector | When the user minimizes the explorer or inspector but before minimization takes place |
BeforeMove |
Explorer, Inspector | When the user moves an Explorer window or an Inspector window but before the action takes place |
BeforeSize |
Explorer, Inspector | When the user resizes the Explorer window or Inspector window but before the resizing takes place |
PageChange |
Inspector | When the active form page changes |
InlineResponse |
Explorer | When an inline response appears in the reading pane |
InlineResponseClose |
Explorer | When an inline response in the reading pane closes |
NewExplorer |
Explorers | When a new Explorer window is opened |
NewInspector |
Inspectors | When a new Inspector window is opened |
ViewAdd |
Views | When a view is added to the Views collection |
ViewRemove |
Views | When a view is removed from the Views collection |
If you work on a small screen (for example, a laptop screen), you might prefer to use the NewInspector event to maximize each Inspector window you open and to hide any toolbars you don't need. The first procedure in the following example (which includes the necessary declarations) uses the NewInspector event to make sure the Standard toolbar is displayed, hide the Advanced toolbar, and assign the Inspector object representing the new inspector to the Public object variable myInspector. The second procedure uses the Activate event of the myInspector object to maximize its window by setting the WindowState property to olMaximized.
The net effect of these two event procedures is to configure the toolbars as described earlier and maximize the Inspector window. Put more simply, if you, for example, double-click an email, it opens in a new window. That window is the “inspector” object. The Activate event procedure is necessary because the NewInspector event runs before the Inspector window is displayed, which means the NewInspector event procedure cannot maximize the Inspector window.
Public WithEvents myInspectors As InspectorsPublic WithEvents myInspector As InspectorPrivate Sub myInspectors_NewInspector(ByVal Inspector As Outlook.Inspector)With InspectorWith .CommandBars.Item("Standard").Visible = True.Item("Advanced").Visible = FalseEnd WithSet myInspector = InspectorEnd WithEnd SubPrivate Sub myInspector_Activate()myInspector.WindowState = olMaximizedEnd Sub
Events That Apply to Folders
Outlook provides three events (see Table 27.3) that apply to folders.
TABLE 27.3: Events that apply to folders
| EVENT | EVENT OCCURS |
FolderAdd |
When a folder is added to the specified Folders collection |
FolderChange |
When a folder in the specified Folders collection is changed |
FolderRemove |
When a folder is removed from the specified Folders collection |
Understanding the Events That Apply to Items and Results Objects
Table 27.4 lists the events that apply to items and results.
TABLE 27.4: Events that apply to items and results
| EVENT | EVENT OCCURS |
ItemAdd |
When one or more items are added to the collection but not when many items are added all at once |
ItemChange |
When an item in the Items collection or the Results collection is changed |
ItemRemove |
When an item is deleted from the Items collection or the Results collection but not when 16 or more items are deleted at once from a Personal Folders file, an Exchange mailbox, or an Exchange public folder; also not when the last item in a Personal Folders file is deleted |
The example in the sidebar “How to Test Event-Handler Procedures” earlier in this chapter employs the ItemChange event to monitor when any contact is changed in the Contacts folder.
Understanding the Events That Apply to Reminders
Table 27.5 explains the events that Outlook provides for reminders. You can use these events to take actions when a reminder fires, before the reminder dialog box appears, when the user clicks the Snooze button to dismiss a reminder, or when reminders are added, changed, or removed.
TABLE 27.5: Events that apply to reminders
| EVENT | EVENT OCCURS |
BeforeReminderShow |
Before Outlook displays the Reminder dialog box |
ReminderAdd |
When a reminder is added |
ReminderChange |
After a reminder has been changed |
ReminderFire |
Before a reminder is executed |
ReminderRemove |
When a reminder is removed from the Reminders collection |
Snooze |
When the user dismisses a reminder by clicking the Snooze button |
Understanding the Events That Apply to Synchronization
If you write procedures to synchronize Outlook, you may need to use the three events that apply to the SyncObject object, which represents a Send/Receive group for a user. (You can access the SyncObject object by using the SyncObjects property of the NameSpace object to return the SyncObjects collection.) Table 27.6 explains the events that apply to the SyncObject object.
TABLE 27.6: Events that apply to the SyncObject object
| EVENT | EVENT OCCURS |
SyncStart |
When Outlook starts synchronizing a user's folders |
Progress |
Triggers periodically during the synchronization of Outlook folders |
SyncEnd |
After synchronization ends |
OnError |
When an error occurs during synchronization |
The following example uses the OnError event with the object variable mySyncObject. If an error occurs during synchronization of the SyncObject represented by mySyncObject, this procedure displays an error message giving the error code and description:
Private Sub mySyncObject_OnError(ByVal Code As Long, _ByVal Description As String)Dim strMessage As StringstrMessage = "An error occurred during synchronization:" & vbCr & vbCrstrMessage = strMessage & "Error code: " & Code & vbCrstrMessage = strMessage & "Error description: " & DescriptionMsgBox strMessage, vbOKOnly + vbExclamation, "Synchronization Error"End Sub
Understanding Quick Steps
A Quick Steps feature allows nonprogrammers to combine actions in Outlook without having to record a macro (Outlook has no recorder anyway) or write a procedure using VBA.
Although not nearly as flexible and powerful as writing macros in VBA, for a common task you might consider seeing if it's possible to create a Quick Step.
While looking at the Mail page in Outlook, click the Home button on the Ribbon. You'll see the Quick Steps area right in the middle of the Ribbon.
The reason to use this Quick Steps feature is the same as for writing or recording macros: After you've specified and saved a set of actions, you won't need to manually repeat those actions in the future—you can merely run the macro (or Quick Steps “program”) and the behaviors will be carried out automatically.
Quick Steps is similar to Access's Macro Designer: You're presented with a list of common actions and you can choose to combine two or more of them into a macro-like little “program.” And, like a macro, a Quick Steps one-click button saves time by launching its “program” anytime the user chooses. Nonprogrammers can build the Quick Steps “programs” out of actions that they frequently perform.
Some sample Quick Steps are already available in the Ribbon; and when you first click them, you're asked to customize their behavior to suit your way of working. Click, for example, the MoveTo: ? sample, and the First Time Setup dialog box opens, as shown in Figure 27.3.

Figure 27.3 You can experiment with the sample Quick Steps to get an idea how to create and customize them.
As you see in Figure 27.3, you're allowed to customize this Quick Step by changing its name, specifying the target folder, and deciding whether or not to mark it as read. So this performs two actions at the click of a button. That could be a time-saver if you frequently store read email in a particular folder. Also notice the Options button where you can further modify the behavior of this Quick Step. You can add more actions, delete actions, specify a shortcut key, and write a tooltip.
Quick Steps makes 20 actions available to you, so it's no competition for the tens of thousands of things you can do with VBA. Nonetheless, you might want to consider employing the Quick Steps tool for quick and easy automation of common mail-related tasks in Outlook.
The Bottom Line
- Create event handlers. Event handlers are procedures that contain code that responds to an event. In other words, if a user modifies one of their contacts, an event can detect this modification and execute code you've written to respond to the modification.
- Master It Event-handler procedures are unlike ordinary macro procedures in several ways. Name one of the differences.
- Work with application-level events. Application-level events happen to Outlook as a whole.
- Master It Name an important Outlook application-level event.
- Work with item-level events. Outlook has two primary kinds of events.
- Master It What are the two types of events in Outlook? And how do they differ?
- Understand the Quick Steps tool. With Outlook's Quick Steps feature, you can build a set of actions the user can later trigger to automate a frequently repeated task. This is quite similar to the nature and purpose of macros.
- Master It What is the key difference between a Quick Step and a macro?