
Chapter 22
Understanding the Excel Object Model and Key Objects
This chapter shows you how to start working with the Excel object model, the architecture underlying Excel. It also shows you how to perform common tasks with the most frequently useful Excel objects. These objects include the Workbooks collection and the Workbook object, the ActiveCell object, and Range objects. You'll also see how to set options in Excel.
Getting an Overview of the Excel Object Model
As with the other Office applications, it's not necessary (or even possible for most people) to understand how the entire Excel object model fits together in order to work with VBA in Excel. However, you'll find that knowing a bit about the main objects in the object model is helpful. And as usual, the code examples in the Help system's object-model reference are invaluable—showing you how and where to employ objects in your own programming.
To see the Excel object-model reference, follow these steps:
- Launch or activate Excel, and then click Developer ➢ Visual Basic to activate the VBA Editor.
Unfortunately, Excel 2019 has a rather poor substitute for its previous (and Word's current) help system. Rather than being taken online to MSDN, you're presented with a help section on the Ribbon. You'll find two search tools (one is called Tell me what you want to do…). Alas, neither tool is of much use when working with objects. They can't even find object model.
- So just type this URL into your browser's address field:
https://docs.microsoft.com/en-us/office/vba/api/overview/excel/object-model - Please ignore the references to 2016 on that web page. The object model was updated October 2018.
You now have access (in the left pane of this web page) to the whole collection of syntax specifications, useful descriptions, and code examples, as shown in Figure 22.1.

Figure 22.1 The entries in the Excel object model reference will help you write your own VBA code.
Understanding Excel's Creatable Objects
Excel exposes (makes available for your use in code) various creatable objects, meaning that you can employ most of the important objects in its object model without explicitly going through (mentioning) the Application object. And, for most programming purposes, these creatable objects are the most commonly used objects. Here's a list:
- The
Workbookscollection contains theWorkbookobjects that represent all the open workbooks.- Within a workbook, the
Sheetscollection contains theWorksheetobjects that represent the worksheets and theChartobjects that represent chart sheets. - On a sheet, the
Rangeobject gives you access to ranges, which can be anything from an individual cell to a complete worksheet.
Remember that, because the Workbook object is creatable, you need not write
Application.Workbooksin your code. You can leave off theApplicationand merely writeWorkbooks. - Within a workbook, the
- The
ActiveWorkbookobject represents the currently active workbook. - The
ActiveSheetobject represents the active worksheet. - The
Windowscollection contains theWindowobjects that represent all the open windows. - The
ActiveWindowobject represents the active window. When using this object, be sure to check that the window it represents is the type of window you want to manipulate, because the object returns whatever window currently has the focus. - The
ActiveCellobject represents, you guessed it, the active cell. This object is especially valuable for simple procedures (for example, those that compute values or correct formatting) that work on a cell selected by the user.
Managing Workbooks
In many of your Excel procedures, you'll need to manipulate workbooks: creating new workbooks, saving them in various locations and formats, opening, closing, and printing them. To accomplish these tasks, you employ the Workbooks collection, which contains a Workbook object for each open workbook in Excel.
Creating a Workbook
To create a new workbook, use the Add method with the Workbooks collection. The syntax is as follows:
Workbooks.Add(Template)
Here, Template is an optional Variant argument that specifies how to create the workbook. The following subsections discuss the available options.
CREATING A NEW BLANK WORKBOOK
To create a blank workbook (same as if you'd clicked the File tab on the Ribbon and then clicked the New button), omit the Template argument:
Workbooks.Add
The new workbook receives the number of sheets specified in the Excel Options dialog box. (Click the File tab on the Ribbon, and then choose Options to display the When Creating New Workbooks section of the dialog box—you'll see a field where you can specify the Include This Many Sheets option. The default is one.)
You can get (access) or set (change) this value in VBA by using the SheetsInNewWorkbook property of the Application object. For example, the following macro declares an Integer variable named mySiNW, stores the current SheetsInNewWorkbook property in it, sets the SheetsInNewWorkbook property to 12, creates a new workbook (with those 12 worksheets), and then restores the SheetsInNewWorkbook setting to its previous value:
Sub MVBA_New_Workbook_with_12_Sheets()Dim mySiNW As IntegermySiNW = Application.SheetsInNewWorkbookApplication.SheetsInNewWorkbook = 12Workbooks.AddApplication.SheetsInNewWorkbook = mySiNWEnd Sub
CREATING A NEW WORKBOOK BASED ON A TEMPLATE
To create a workbook based on a template, specify the full path and name of the template file. For example, the following statement creates a new workbook based on the template Balance Sheet.xlt in a network folder \server emplateexcel:
Workbooks.Add Template:= "\server emplateexcelBalance Sheet.xlt"
CREATING A NEW WORKBOOK BASED ON AN EXISTING WORKBOOK
To create a workbook based on an existing workbook, specify the full name and path of the workbook file. For example, the following statement creates a new workbook based on the existing workbook named Personnel.xlsx in the C:Business folder:
Workbooks.Add Template:= "C:BusinessPersonnel.xlsx"
CREATING A CHART WORKBOOK, A MACRO SHEET, OR A WORKSHEET
You can also create a workbook that contains a single chart, macro sheet, or worksheet by using the constants shown in Table 22.1 with the Template argument.
TABLE 22.1: Constants for creating a chart workbook, macro sheet, or worksheet
| CONSTANT | CREATES A WORKBOOK CONTAINING |
xlWBATChart |
A chart sheet |
xlWBATExcel4IntlMacroSheet |
An international macro sheet |
xlWBATExcel4MacroSheet |
A macro sheet |
xlWBATWorksheet |
A worksheet |
For example, the following statement creates a workbook containing a single chart sheet:
Workbooks.Add Template:=xlWBATChart
Saving a Workbook
The first time you save a workbook, you must specify the path and filename to use (this is the SaveAs option). After that, you can save the workbook under the same name and path by default, or you can specify a different path, name, format, or all three (this is the Save option).
SAVING A WORKBOOK FOR THE FIRST TIME OR AS A DIFFERENT FILE
To save a workbook for the first time, or to save a workbook using a different path, name, or format, use the SaveAs method. The syntax is as follows:
expression.SaveAs(FileName, FileFormat, Password, WriteResPassword,ReadOnlyRecommended, CreateBackup, AccessMode, ConflictResolution,AddToMru, TextCodePage, TextVisualLayout, Local)
The components of the syntax are as follows:
expressionis a required expression that returns aWorkbookobject.FileNameis an optional Variant argument that specifies the name for the workbook. If you omitFileName, VBA uses the current folder and the default filename ofBookn.xlsxfor a workbook, wherenis the next available number (for example,Book5.xlsx).VBA uses the default file format, which is specified in the Options dialog box's Save page. (Click the File tab on the Ribbon, then click Options to display the Options dialog box, and then click the Save button on the left. You'll see a Save Files In This Format drop-down list.)
You can get and set the default save format by using the
DefaultSaveFormatproperty of theApplicationobject. For example, the following statement sets the default save format toxlNormal, the “Excel Workbook” format:Application.DefaultSaveFormat = xlNormalFileFormatis an optional Variant argument that specifies the format in which to save the workbook. Table 22.2 lists theXlFileFormatconstants for specifying commonly used formats.TABLE 22.2: XlFileFormat constants for widely used formats CONSTANT SAVES DOCUMENT AS xlNormalA normal workbook xlXMLSpreadsheetAn XML spreadsheet xlWebArchiveA single-file web page xlHtmlA web page xlTemplateA template xlExcel9795An Excel workbook for Excel versions 95 and later Passwordis an optional Variant argument that you can use to supply the password that is to be required to open the workbook (the “password to open”).Passwordis case-sensitive. If the user can't provide the password, Excel won't open the workbook.WriteResPasswordis an optional Variant argument that you can use to supply the password that is required to open the workbook in a writable form (the “password to modify”).WriteResPasswordis case-sensitive. If the user can't provide the password, Excel will open the workbook as read-only.-
ReadOnlyRecommendedis an optional Variant argument that you can set toTrueto have Excel recommend that the user open the document as read-only.People can freely ignore this recommendation, so if you want to lock a workbook to prevent others from modifying it, you'd do better to employ a “password to modify.” (See the sidebar “Setting Passwords and Read-Only Recommendations for a Workbook” later in this chapter for details.)
CreateBackupis an optional Variant argument that you can set toTrueto make Excel automatically create a backup of the workbook. The default setting isFalse.AccessModeis an optional argument that you can use to specify whether the workbook is shared or is in Exclusive mode. SpecifyxlExclusivefor Exclusive mode,xlSharedfor Shared mode, andxlNoChangeto leave the access mode unchanged (this is the default setting).ConflictResolutionis an optional argument that you can use to specify how to resolve any conflicting changes to the workbook. UsexlLocalSessionChangesto accept the changes in the current Excel session,xlOtherSessionChangesto accept the other user's or users' changes, andxlUserResolutionto display the Resolve Conflicts dialog box so that the user can choose how to resolve the conflicts.AddToMruis an optional Variant argument that you can set toTrueto add the workbook to the list of recently used files at the bottom of the File menu. The default setting isFalse.TextCodePageandTextVisualLayoutare optional Variant arguments used in international versions of Excel (not in U.S. English Excel).Localis an optional Variant that controls whether the language used is that of Excel (True) or of VBA (False). (You'll seldom need to useLocal.)
For example, the following statement saves the active workbook in the current folder under the name Salaries.xlsx using the default save format:
ActiveWorkbook.SaveAs FileName:="Salaries.xlsx"
The following statement saves the open workbook named Schedule.xlsx under the name Building Schedule.xlsx in the folder named \server2Public using the Microsoft Excel 97–2003 & 5.0/95 format (from Excel 2003):
ActiveWorkbook.SaveAs Filename:="\server2PublicBuilding Schedule.xlsx", _FileFormat:=xlExcel9795
To see a complete list of all the Excel 2019 file formats, visit this web page:
http://msdn.microsoft.com/en-us/library/office/ff198017.aspx
SAVING A WORKBOOK THAT HAS ALREADY BEEN SAVED
Once a workbook has been saved, you can just save it again with the same name by using the Save method. For a Workbook object, the Save method takes no arguments. For example, the following statement saves the workbook named Data Book.xlsx:
Workbooks("Data Book.xlsx").Save
SAVING ALL OPEN WORKBOOKS
The Workbooks collection doesn't have a Save method, but you can save all open workbooks by using a loop such as that shown in the following subroutine:
Sub Save_All_Workbooks()Dim myWorkbook As WorkbookFor Each myWorkbook In WorkbooksmyWorkbook.SaveNext myWorkbookEnd Sub
Note that if any of the currently opened workbooks have not been previously saved, and if they include any macros, a security message will be displayed when this procedure executes. Users are told that they must agree to save the potentially dangerous executable content in a macro-enabled file format (.xlsm). However, if the file has already been saved with the .xlsm filename extension, no message is displayed. If you want to suppress such messages, you can insert the following code at the start of this procedure:
Application.DisplayAlerts = False
However, be sure to set the DisplayAlerts property back to True as soon as you can in the code. This particular warning message is quite useful as a reminder to the user—so you likely won't want to suppress it.
Accessing Cloud Storage
Having VBA access OneDrive, Dropbox, or one of the other cloud storage systems is fairly easy. Just open from, or save a file to, the OneDrive or Dropbox folder.
The only thing to figure out is the file path, and it will look something like this: “C:UsersRichardOneDriveExcelToCloudTest”, with Richard replaced by your name.
This example saves the current document to OneDrive. Because this is a source of so many errors, I repeat: Change my name, Richard, to your username in the file path in this example code:
ActiveWorkbook.SaveAs ("C:UsersRichardOneDriveExcelCloudTest")
To save to Dropbox, it's pretty much the same:
ActiveWorkbook.SaveAs ("C:UsersRichardDropBoxExcelCloudTest")
Opening a Workbook
To open a workbook, use the Open method with the Workbooks collection. The syntax is as follows:
expression.Open(FileName, UpdateLinks, ReadOnly, Format, Password,WriteResPassword, IgnoreReadOnlyRecommended, Origin, Delimiter,Editable, Notify, Converter, AddToMru, Local, CorruptLoad)
The components of the syntax are as follows:
expressionis a required expression that returns aWorkbookscollection. Often, you'll want to use theWorkbookscollection itself.FileNameis a required String argument that supplies the path and name of the workbook to open.UpdateLinksis an optional Variant that controls how Excel updates any links in the workbook. If you leave out this argument, the user is prompted to specify how to update the links.Table 22.3 shows the values and their effects. If Microsoft Excel is opening a file in the WKS, WK1, or WK3 format and the
UpdateLinksargument is2, Microsoft Excel generates charts from the graphs attached to the file. If the argument is0, no charts are created.TABLE 22.3: Values for the UpdateLinks argument
VALUE EFFECT (If you omit this argument) Excel prompts the user to decide how to update links. 1User specifies how links are to be updated. 2Links are never updated for this workbook when it's opened. 3Excel always updates links for this workbook when opening it. ReadOnlyis an optional Variant that you can set toTrueto open the workbook as read-only. The default isFalse.Formatis an optional Variant that you can use to specify the delimiter character when opening a text file. Use1for tabs,2for commas,3for spaces,4for semicolons,5for no delimiter character, and6for a delimiter you specify using theDelimiterargument.Passwordis an optional Variant argument that you can use to provide the password required to open the workbook (the “password to open”).Passwordis case-sensitive. If you omitPasswordand a password is required, Excel prompts the user for it.WriteResPasswordis an optional Variant argument that you can use to provide the password required to open the workbook in a writable form (the “password to modify”).WriteResPasswordis case-sensitive. If you omitWriteResPasswordand a password is required, Excel prompts the user for it.IgnoreReadOnlyRecommendedis an optional Variant argument that you can set toTrueto have Excel ignore a read-only recommendation on the workbook.Originis an optional Variant argument that you can use when opening a text file to specify the operating system used to encode it and, thus, how to treat carriage-return/line-feed characters and character encoding. UsexlWindowsto indicate Windows,xlMacintoshto indicate Mac OS, orxlMSDOSto indicate DOS.Delimiteris an optional Variant argument you can use with aFormatvalue of6to specify one delimiter character to use when opening a text file.Editableis an optional Variant argument that you can set toTruewhenFileNamespecifies a template to open the template itself rather than start a workbook based on the template (False).Editablealso applies to Excel 4.0 add-ins:Trueopens the add-in in a visible window, whileFalseopens the add-in hidden. However, you can't employ this option with add-ins created in Excel 5.0 or later.Notifyis an optional Variant argument that you can set toTrueto have Excel add the workbook to the notification list when someone else has the workbook open for editing and VBA requests the workbook. Excel then notifies the user when the workbook becomes available. If you specifyNotify:=False, opening the workbook fails if someone else has the workbook open.Converteris an optional Variant argument that you can use to specify the first file converter to use when opening a file.AddToMruis an optional Variant argument that you can set toTrueto add the workbook to the list of recently used files at the bottom of the File menu. The default setting isFalse.Localis an optional Variant that controls whether the language used is that of Excel (True) or of VBA (False). (You'll seldom need to useLocal.)CorruptLoadis an optional Variant that you can use to control how Excel handles corruption it encounters when opening the workbook. UsexlNormalLoadto use normal behavior—first, opening the workbook as usual; second, repairing the file if there's a problem; and third, recovering the data from the workbook. UsexrRepairFileto go straight to the repair stage orxlExtractDatato go straight to the recovery stage.
For example, the following statement opens the workbook named Expenses.xlsx stored in the C:Business folder without updating links:
Workbooks.Open Filename:= "C:BusinessExpenses.xlsx", UpdateLinks:=0
The following statement opens the workbook named Plan.xlsx stored in the D:Planning folder, providing the password for opening the workbook:
Workbooks.Open Filename:="D:PlanningPlan.xlsx", Password:="s@cur1ng!"
The following statement opens the text file named Data13.txt in the folder z: ransfer using an exclamation point (!) as the delimiter character:
Workbooks.Open _Filename:="z: ransferData13.txt", Format:=6, Delimiter:="!"
Closing a Workbook
To close a workbook, use the Close method with the appropriate Workbook object. The syntax is as follows:
expression.Close(SaveChanges, Filename, RouteWorkbook)
The components of the syntax are as follows:
expressionis a required expression that returns aWorkbookobject or theWorkbookscollection.SaveChangesis an optional Variant argument that lets you specify whether to save any unsaved changes in the workbook (True) or not (False). If you omit theSaveChangesargument, Excel prompts the user to save any workbook that contains unsaved changes.Filenameis an optional Variant that you can use to specify the filename under which to save the workbook if it contains changes. In most cases, it's best to use theSaveAsmethod to save the workbook under a different name before you use theClosemethod to close it.RouteWorkbookis an optional Variant argument that you can set toTrueto route the workbook to the next recipient on its routing slip, orFalseto refrain from routing the workbook. If the workbook has no routing slip attached,RouteWorkbookhas no effect.
For example, the following statement closes the active workbook without saving changes:
ActiveWorkbook.Close SaveChanges:=False
CLOSING ALL OPEN WORKBOOKS
To close all open workbooks, use the Close method with the Workbooks collection:
Workbooks.Close
The Close method takes no arguments. Excel prompts you to save any workbook that contains unsaved changes. If such prompts will be inconvenient in a procedure, use a loop (for example, a For Each…Next loop with the Workbooks collection) to close each open workbook individually, using the SaveChanges argument to control whether Excel saves or discards any unsaved changes.
Sharing a Workbook
To determine whether a workbook is shared, check its MultiUserEditing property. This is a read-only Boolean property.
To share a workbook, use the SaveAs method (discussed in “Saving a Workbook for the First Time or as a Different File,” earlier in this chapter) to save the file using the xlShared value for the AccessMode argument.
For example, the following statements share the workbook named Brainstorming.xlsx if it is not already shared:
With Workbooks("Brainstorming.xlsx")If MultiUserEditing = False Then.SaveAs Filename:=.FullName, AccessMode:=xlSharedEnd IfEnd With
Protecting a Workbook
To protect a workbook, use the Protect method with the appropriate Workbook object. The syntax is as follows:
expression.Protect(Password, Structure, Windows)
The components of the syntax are as follows:
expressionis a required expression that returns aWorkbookobject.Passwordis an optional Variant argument that specifies the password for unprotecting the workbook.Passwordis case-sensitive. You'll almost always want to supplyPassword—if you don't, anybody who can open your workbook can unprotect it.Structureis an optional Variant argument that you can set toTrueto protect the workbook's structure (how the worksheets are positioned relative to each other) or leave at its default setting,False.Windowsis an optional Variant argument that you can set toTrueto protect the workbook windows or omit to leave the windows unprotected.
For example, the following statement protects the structure and windows of the active workbook with the password 0llsecurd:
ActiveWorkbook.Protect Password:="0llsecurd", Structure:=True, Windows:=True
Working with the ActiveWorkbook Object
The ActiveWorkbook object returns a Workbook object that represents the active workbook (whichever workbook currently has the focus in the Excel window). The ActiveWorkbook object behaves like a Workbook object and is very useful in macros that users execute after opening the workbook they want to manipulate.
If no workbook is open, there is no ActiveWorkbook object, so any code that tries to use the ActiveWorkbook object returns an error. Therefore, it's a good idea to verify that at least one workbook is open before trying to execute code that assumes there is an active workbook. One option is to check that the ActiveWorkbook object is not Nothing before running the code, as in the following example:
If ActiveWorkbook Is Nothing ThenMsgBox "Please open a workbook and click in it before running this macro." _& vbCr & vbCr & "This macro will now end.", _vbOKOnly + vbExclamation, "No Workbook Is Open"EndEnd If
It's also a good idea to check that the workbook your code assumes is the active workbook actually is the active workbook. This problem can easily occur when a macro starts with the active workbook and then creates a new workbook to work in. The new workbook becomes the active workbook, and from this point on, the code may start accessing the wrong workbook.
If there's any doubt about which workbook you're working with, declare a Workbook object variable and use that object variable in your code rather than the ActiveWorkbook object. For example, the following statements declare a Workbook object variable and assign the ActiveWorkbook object to it. Now subsequent code can work with the object variable, which will not change to a different workbook:
Dim myWorkbook As WorkbooksSet myWorkbook = ActiveWorkbookWith myWorkbook'actions hereEnd With
Working with Worksheets
Most workbooks you need to manipulate via VBA will contain one or more worksheets. As a result, many macro procedures will need to work with worksheets—inserting them, deleting them, copying or moving them, or simply printing a range from them.
Each worksheet is represented by a Sheet object. The Sheet objects are contained within the Sheets collection.
Inserting a Worksheet
To insert a worksheet into a workbook, use the Add method with the Sheets collection. The syntax is as follows:
expression.Add(Before, After, Count, Type)
The components of the syntax are as follows:
expressionis a required expression that returns aSheetscollection. Often, you'll want to use theSheetscollection itself.Beforeis an optional Variant argument that specifies the sheet before which to add the new sheet.Afteris an optional Variant argument that specifies the sheet after which to add the new sheet. Typically, you'll want to specify eitherBeforeorAfter, but not both. You can also omit both arguments to make Excel insert the new sheet before the active worksheet.Countis an optional Variant argument that specifies how many sheets to add. If you omitCount, VBA uses the default value,1.Typeis an optional Variant that specifies the type of sheet to insert. The default isxlWorksheet, a standard worksheet. You can also insert a chart sheet (xlChart), an Excel 4 macro sheet (xlExcel4MacroSheet), or an Excel 4 international macro sheet (xlExcel4IntlMacroSheet).
For example, the following statements declare a Worksheet object variable named mySheet, insert a worksheet before the first sheet in the first open workbook and assign the new sheet to mySheet, and then set the Name property of mySheet to Summary (the Name property controls the text that appears on the worksheet's tab):
Dim mySheet As WorksheetSet mySheet = Workbooks(1).Sheets.Add(before:=Sheets(1))mySheet.Name = "Summary"
If you run this macro, look for the new Summary worksheet on the tab at the bottom of your workbook.
The following statements insert two chart sheets after the last worksheet in the active workbook. The chart sheets receive default names, such as Chart1 and Chart2:
ActiveWorkbook.Sheets.Add _After:=Sheets(Sheets.Count), Count:=2, Type:=xlChart
Deleting a Worksheet
To delete a worksheet, use the Delete method of the appropriate Sheet object. The Delete method takes no arguments. For example, the following statement deletes the worksheet named Summary from the workbook referenced by the myWorkbook object variable:
Dim myWorkbook As WorkbookSet myWorkbook = Workbooks(1)myWorkbook.Sheets("Summary").Delete
If you delete a worksheet, you lose any data stored on that worksheet. So when in interactive mode (the user is deleting via a keyboard, not a macro), Excel asks the user to confirm the deletion by default (see Figure 22.2).

Figure 22.2 When deleting a worksheet by hand, Excel displays this warning dialog box.
However, in a macro you may want to avoid displaying this warning message. For example, in a procedure that adds a worksheet without the user's knowledge, uses it to manipulate data, and then deletes it, you simply don't need this alert dialog box. By default, it will not display when a delete is accomplished via a macro. However, if you do need your macro to suppress a dialog box, you can turn off alerts in Excel by setting the DisplayAlerts property of the Application object to False before executing the main macro code, and then turning alerts back on before exiting the macro, like this:
Application.DisplayAlerts = FalsemyWorkbook.Sheets("Summary").DeleteApplication.DisplayAlerts = True
Copying or Moving a Worksheet
To copy a worksheet, use the Copy method of the appropriate Sheet object. To move a worksheet, use the Move method. The syntax is as follows:
expression.Copy(Before, After)expression.Move(Before, After)
Here, expression is a required expression that returns a Worksheet object. Before is an optional Variant argument that specifies the sheet before which to place the copy or the moved sheet. After is an optional Variant argument that specifies the sheet after which to place it:
- Typically, you'll want to specify either
BeforeorAfter, but not both. - You can specify another workbook by name to copy or move the worksheet to another workbook.
- You can also omit both arguments to make Excel create a new workbook containing the copied or moved sheet. The new workbook becomes the active workbook, so you can use the
ActiveWorkbookobject to start working with it or to assign it to an object variable.
For example, the following statement copies the worksheet named Costs – Materials in the workbook named Building Schedule.xlsx, placing the copy after the last of the current worksheets in the workbook:
Workbooks("Building Schedule.xlsx").Sheets("Costs - Materials").Copy, _After:=Sheets(Sheets.Count)
The following line of code moves the worksheet named Homes from the workbook named Planning.xlsx to the workbook named Building Schedule.xlsx, inserting the worksheet before the first existing worksheet in the workbook:
Workbooks("Planning.xlsx").Sheets("Homes").Move , _Before:=Workbooks("Building Schedule.xlsx").Sheets(1)
Printing a Worksheet
To print a worksheet, use the PrintOut method with the appropriate Worksheet object.
The syntax for the PrintOut method is as follows:
expression.PrintOut(From, To, Copies, Preview, ActivePrinter,PrintToFile, Collate, PrToFileName, IgnorePrintAreas)
The components of the syntax are as follows:
expressionis a required expression that returns the appropriateWorksheetobject or other object to which thePrintOutmethod applies.Fromis an optional Variant argument that specifies the number of the page at which to start printing. OmitFromto start printing at the beginning of the object. Note thatFromandTorefer to the pages in the printout, not to the overall number of pages that the object would take up.Tois an optional Variant argument that specifies the number of the page at which to stop printing. Omit theToargument to print to the end of the object.Copiesis an optional Variant argument that specifies the number of copies to print. If you omitCopies, Excel prints one copy.Previewis an optional Variant argument that you can set toTrueto display the object in Print Preview before printing it. SetPreviewtoFalse, or simply omit this argument, to print the object without previewing it. Use thePrintPreviewmethod to display an object in Print Preview without printing it.ActivePrinteris an optional Variant argument that you can use to specify the printer on which to print.PrintToFileis an optional Variant argument that you can set toTrueto make Excel print to a print file rather than a printer. When printing to a file, you can use thePrToFileNameproperty to specify the filename, or omit it and have Excel prompt the user for the filename.Collateis an optional Variant argument that you can set toTrueto have Excel print multiple copies for collation rather than printing all the copies of one page, all the copies of the next, and so on.PrToFileNameis an optional Variant argument that you can use withPrintToFile:=Trueto specify the filename of the print file.IgnorePrintAreasis an optional Variant argument:- Set to
False, this argument prints the entire specified print area. - When it's
True, the entire object is printed and any print area is ignored.
A print area can be defined in Excel and is useful as a way of printing only a specified range of cells. Once specified, the print area is retained by Excel until you either clear it or specify a new print area. You define a print area by selecting the cells you want to print and then clicking the Ribbon's Page Layout tab. Click the Print Area option in the Page Setup area of the Ribbon.
- Set to
The following statement prints two copies of each page of the first worksheet in the active workbook, collating the pages:
ActiveWorkbook.Sheets(1).Printout Copies:=2, Collate:=True
The following statement prints the first two pages of the worksheet named Summary in the workbook named Planning.xlsx to a file named Planning Summary.prn in the network folder \server o_print:
Workbooks("Planning.xlsx").Sheets("Summary").PrintOut From:=1, To:=2, _PrintToFile:=True, _PrToFileName:="\server o_printPlanning Summary.prn"
Protecting a Worksheet
To protect a worksheet, use the Protect method with the appropriate Worksheet object. The syntax is as follows:
expression.Protect(Password, DrawingObjects, Contents, Scenarios,UserInterfaceOnly, AllowFormattingCells, AllowFormattingColumns,AllowFormattingRows, AllowInsertingColumns, AllowInsertingRows,AllowInsertingHyperlinks, AllowDeletingColumns, AllowDeletingRows,AllowSorting, AllowFiltering, AllowUsingPivotTables)
The components of the syntax are as follows:
expressionis a required expression that returns aWorksheetobject.Passwordis an optional Variant argument that specifies the password for unprotecting the worksheet.Passwordis case-sensitive. You'll almost always want to supplyPasswordto prevent unauthorized people from unprotecting the workbook.DrawingObjectsis an optional Variant argument that you can set toTrueto protect shapes in the worksheet. The default setting isFalse.Contentsis an optional Variant argument that protects the locked cells when set toTrue, its default value. SetContentstoFalseto leave the locked cells unprotected.Scenariosis an optional Variant argument that protects scenarios when set toTrue, its default value.UserInterfaceOnlyis an optional Variant argument that you can set toTrueto leave macros unprotected while protecting the user interface. The default value isFalse.AllowFormattingCells,AllowFormattingColumns, andAllowFormattingRowsare optional Variant arguments that you can set toTrueto allow the formatting of cells, columns, and rows, respectively. The default value for each argument isFalse.AllowInsertingColumns,AllowInsertingRows, andAllowInsertingHyperlinksare optional Variant arguments that you can set toTrueto allow the user to insert columns, rows, and hyperlinks, respectively. The default value for each argument isFalse.AllowDeletingColumnsandAllowDeletingRowsare optional Variant arguments that you can set toTrueto allow the user to delete columns or rows, respectively, where every cell in the column or row is unlocked. The default setting isFalse.AllowSortingis an optional Variant argument that you can set toTrueto allow the user to sort unlocked cells on the protected worksheet. The default setting isFalse.AllowFilteringis an optional Variant argument that you can set toTrueto allow the user to set filters or change filter criteria (but not enable or disable an autofilter) on a protected worksheet. The default setting isFalse.AllowUsingPivotTablesis an optional Variant argument that you can set toTrueto allow the user to work with pivot tables on the protected worksheet. The default setting isFalse.
For example, the following statement protects the worksheet referenced by the object variable myWorksheet using the password no1gets1n:
myWorksheet.Protect Password:="no1gets1n"
The following statement protects the myWorksheet worksheet with the same password but allows the formatting of cells and allows the sorting of unlocked cells:
myWorksheet.Protect Password:="no1gets1n", AllowFormattingCells:=True, _AllowSorting:=True
Working with the ActiveSheet Object
The ActiveSheet object returns the active worksheet. If you specify a workbook, the active worksheet in that specified workbook is returned.
If no sheet is active, ActiveSheet returns Nothing. Before executing code that depends on there being an active sheet, it's a good idea to check, as in this example:
If ActiveSheet Is Nothing Then End
Working with the Active Cell or Selection
In a procedure that manipulates a selection that the user has made, you'll typically work with either the active cell or the selection. The active cell is always a single cell, but the selection can encompass multiple cells or other objects.
Working with the Active Cell
The ActiveCell property of the Application object or the Window object returns a Range object that represents the active cell in the Excel application, or in a specified window. If you use ActiveCell without specifying a window, VBA returns the active cell in the currently active window.
For example, the following statement returns the address of the active cell in the active workbook:
MsgBox (ActiveCell.Address)
This code would return the result shown in Figure 22.3 if the currently selected cell is A1.
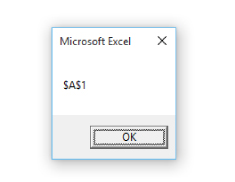
Figure 22.3 The currently active cell is fetched via the ActiveCell object.
The following statement returns the text in the active cell in the first window open on the workbook named Planning.xlsx:
MsgBox Workbooks("Planning.xlsx").Windows(1).ActiveCell.Text
If no worksheet is active, or if a chart sheet is active, there is no active cell. If you try to access ActiveCell, VBA returns an error. So before using code that assumes there is an active cell, check that ActiveCell is not Nothing:
If ActiveCell Is Nothing Then End
GETTING AND SETTING THE VALUE OF THE ACTIVE CELL
To return the value of the active cell, use the Value property. For example, the following statement sets the value of the active cell to 25:
ActiveCell.Value = 25
And the following statement retrieves the value of the active cell:
MsgBox ActiveCell.Value
CHANGING THE ACTIVE CELL TO A DIFFERENT CELL
The ActiveCell object is often convenient to work with in your code, so sometimes you'll want to make a different cell the active cell in order to work with it via the ActiveCell object. To make a cell the active cell, use the Activate method with the appropriate Range object. For example, the following statement makes cell L7 the active cell in the worksheet identified by the object variable myWorksheet:
myWorksheet.Range("B5").Activate
Often, you'll need to move the active cell to a different range a specified number of rows or columns away (in other words, to an address relative to the location of the active cell—as opposed to an absolute address, such as C12). To do so, use the Offset property of the active cell object, specifying the number of rows with the RowOffset argument and the number of columns with the ColumnOffset argument. Use a positive offset to move the active cell right or down and a negative offset to move the active cell left or up. For example, the following statement moves the active cell up two rows (RowOffset:=-2) and four columns to the right (ColumnOffset:=4):
ActiveCell.Offset(RowOffset:=-2, ColumnOffset:=4).Activate
In your macros that the user triggers, it's usually a good idea to return the active cell to where it was when the user started the procedure. To do so, you can store the location of the active cell and then return it to the stored location after your procedure is finished with its tasks. Here's an example:
Set myActiveCell = ActiveCellSet myActiveWorksheet = ActiveSheetSet myActiveWorkbook = ActiveWorkbook'take actions heremyActiveWorkbook.ActivatemyActiveWorksheet.ActivatemyActiveCell.Activate
WORKING WITH THE REGION AROUND THE ACTIVE CELL
You can work with the range of cells around the active cell by using the CurrentRegion property to return the CurrentRegion object. The current region extends from the active cell to the first blank row above and below and to the first blank column to the left and right. In other words, if there are no blank rows or columns in the entire worksheet, then the region is all the cells in the worksheet.
For example, the following statements use the Font property of the CurrentRegion object to set the font of the current region to 12-point Times New Roman with no bold or italic:
With ActiveCell.CurrentRegion.Font.Name = "Times New Roman".Size = 12.Bold = False.Italic = FalseEnd With
Working with the User's Selection
In macros designed to be run by a user, you will often need to work with cells that the user has selected. For example, a user might select a range of cells and then run a macro to manipulate the contents of that range.
To work with the range the user has selected, use the RangeSelection property of the appropriate Window object. For example, you might assign the RangeSelection property to a range so that you could work with it in a macro and then select it again at the end of the macro, leaving the user ready to work with their selection again. Here's an example:
Dim myMacroRange As RangeSet myMacroRange = ActiveWindow.RangeSelectionWith myMacroRange'take actions on the range hereEnd WithmyMacroRange.Activate
Working with Ranges
Within a worksheet, you'll often need to manipulate ranges of cells. You can work with absolute ranges (ranges for which you specify the absolute addresses of the cells you want to affect, such as C12) or ranges relative to the active cell, where you merely describe an offset.
You can either specify a range by using the Range property or create a named range by using the Names collection. Excel also provides the UsedRange property for working with the used range on a worksheet, and the SpecialCells method of the Range object for working with cells that meet specific criteria.
Working with a Range of Cells
To work with a range of cells, use the Range property of the appropriate Worksheet object to specify the cells. For example, the following statement sets the value of cell C12 on the active worksheet to 44:
ActiveSheet.Range("C12").Value = "44"
Creating a Named Range
To create a named range, use the Add method with the Names collection. The syntax is as follows:
expression.Add(Name, RefersTo, Visible, MacroType, ShortcutKey,Category, NameLocal, RefersToLocal, CategoryLocal, RefersToR1C1,RefersToR1C1Local)
The components of the syntax are as follows:
expressionis a required expression that returns aNamesobject.Nameis an optional Variant argument that specifies the name to assign to the named range.Nameis required if you don't specify theNameLocalargument (later in this list). The name cannot be a cell reference, nor can it contain spaces.RefersTois an optional Variant argument that specifies the range for the named range. You need to specifyRefersTounless you use theRefersToLocalargument, theRefersToR1C1argument, or theRefersToR1C1Localargument.Visibleis an optional Variant argument that you can omit, set toTrueto have Excel make the name visible in the user interface (in the Go To dialog box, the Paste Name dialog box, and other locations), or set toFalseto make the name hidden.MacroTypeis an optional Variant argument that you can use to assign a macro type to the range:1for a user-definedFunctionprocedure,2for aSubprocedure, and3or omitted for no macro.ShortcutKeyis an optional Variant argument that specifies the shortcut key for a command macro assigned to the named range.Categoryis an optional Variant argument that specifies the category of the macro or function specified byMacroType. You can specify one of the categories used by the Function Wizard, or specify another name to have Excel create a new category with that name.NameLocalis an optional Variant argument that specifies the name for the range in the local language. UseNameLocalwhen you omitName.RefersToLocalis an optional Variant argument that specifies the range for the named range. UseRefersToLocalwhen you omitRefersTo,RefersToR1C1, andRefersToR1C1Local.CategoryLocalis an optional Variant argument that you use to specify the category of the macro or function specified byMacroType. UseCategoryLocalwhen you omitCategory.RefersToR1C1is an optional Variant argument that specifies the range for the named range using R1C1 notation (R1C1 would mean row 1 column 1). UseRefersToR1C1when you omitRefersTo,RefersToLocal, andRefersToR1C1Local.RefersToR1C1Localis an optional Variant argument that specifies the range for the named range using R1C1 notation in the local language. UseRefersToR1C1Localwhen you omitRefersTo,RefersToLocal, andRefersToR1C1.
For example, the following statement defines a range named myRange, which refers to the range A1:G22 on the worksheet named Materials in the workbook named Building Schedule.xlsx:
Workbooks("Building Schedule.xlsx").Names.Add Name:= "myRange", _RefersTo:="=Materials!$A$1:$G$22"
Deleting a Named Range
To delete a named range, use the Delete method with the appropriate Name object. For example, the following statement deletes the range named myRange in the workbook named Building Schedule.xlsx:
Workbooks("Building Schedule.xlsx").Names("myRange").Delete
Working with a Named Range
To work with a named range, specify the name with the Range object. For example, the following statements set the row height of the rows in the named range myRange to 20 points and applies 16-point Arial font to the cells:
With Range("myRange").RowHeight = 20.Font.Name = "Arial".Font.Size = "16"End With
Working with the Used Range
If you need to work with all the cells on a worksheet, but not with any unoccupied areas of the worksheet, use the UsedRange property. For example, the following statement autofits all the columns in the used range in the active worksheet:
ActiveSheet.UsedRange.Columns.AutoFit
Working with SpecialCells
If you need to work with only certain types of cells on a worksheet or in a range, use the SpecialCells method of the Range object to return the cells you need. The syntax is as follows:
expression.SpecialCells(Type, Value)
These are the components of the syntax:
expressionis a required expression that returns aRangeobject.Typeis a required argument that specifies which cells you want. Table 22.4 lists the constants you can use.
TABLE 22.4: Constants for the Type argument for the SpecialCells method
| CONSTANT | RETURNS THIS KIND OF CELL |
xlCellTypeAllFormatConditions |
All formats |
xlCellTypeAllValidation |
Cells that use validation |
xlCellTypeBlanks |
Empty |
xlCellTypeComments |
Containing notes |
xlCellTypeConstants |
Containing constants |
xlCellTypeFormulas |
Containing formulas |
xlCellTypeLastCell |
The last cell in the used range |
xlCellTypeSameFormatConditions |
Having the same format |
xlCellTypeSameValidation |
Containing the same validation criteria |
xlCellTypeVisible |
All visible |
Valueis an optional Variant argument that you can use whenTypeisxlCellTypeConstantsorxlCellTypeFormulasto control which cells Excel includes. Table 22.5 shows the constants and what they return.
TABLE 22.5: Constants for the Value argument for the SpecialCells method
| CONSTANT | RETURNS CELLS CONTAINING |
xlErrors |
Errors |
xlLogical |
Logical values |
xlNumbers |
Numbers |
xlTextValues |
Text formulas |
For example, the following statement activates the last cell in the worksheet referenced by the object variable myWorksheet:
myWorksheet.Cell.SpecialCells(Type:=xlCellTypeLastCell).Activate
The following statement identifies all the cells that contain formulas resulting in errors in the active worksheet:
ActiveSheet.Cells.SpecialCells(Type:=xlCellTypeFormulas, _Value:=xlErrors).Activate
Entering a Formula in a Cell
To enter a formula in a cell, set the Formula property of the appropriate Cell object. For example, the following statement enters the formula =SUM($G$12:$G$22) in the active cell:
ActiveCell.Formula = "=SUM($G$12:$G$22)"
Setting Options
With Word, most of the options that you find in the Word Options dialog box (click the File tab and then click Options) are available through Word's Options object. By contrast, most of Excel's options are located in the Application object. And workbook-specific options are accessed through the Workbook object.
Setting Options in the Application Object
The following sections show three examples of setting widely useful options in the Application object.
CONTROLLING EXCEL'S CALCULATION
In complex worksheets that perform many calculations, you may need to turn off automatic calculation so that a procedure can enter data quickly without the calculations taking place.
To do so, set the Calculation property of the Application object to xlCalculationManual, enter the data, and then set the Calculation property back to its previous value:
Dim varAutoCalculation As VariantvarAutoCalculation = Application.CalculationApplication.Calculation = xlCalculationManual'enter the data hereApplication.Calculation = xlCalculationAutomatic
CLEARING THE RECENTLY USED FILES LIST
Sometimes you may find it useful to clear all the entries from recently displayed documents (shown when you click the File tab on the Ribbon and then click Recent). Perhaps, for example, your macro creates some temporary files that you want to remove from this list.
You can do this by setting the Maximum property of the RecentFiles object to 0. After doing so, you’ll likely want to restore the user's previous setting, as the following example illustrates:
Dim myMax As LongWith Application.RecentFilesmyMax = .Maximum 'store the user's preference, currently in effect.Maximum = 0.Maximum = myMaxEnd With
After you execute this code and then click the File tab on the Ribbon and click Recent, no files will be displayed in the Recent Documents list.
SETTING A DEFAULT FILE LOCATION
To set the default location for saving and opening files, use the DefaultFilePath property of the Application object, as in this example:
Application.DefaultFilePath = "\server3usersmjonesfiles"
Setting Options in a Workbook
Workbook-specific options include the following:
- Security options (such as those shown in the following section and the sidebar “Setting Passwords and Read-Only Recommendations for a Workbook”)
- Whether to update remote references in the workbook (the Boolean
UpdateRemoteReferencesproperty) and whether to save external link values (the BooleanSaveLinkValuesproperty) - Whether to use AutoRecover (the Boolean
EnableAutoRecoverproperty) - Whether to accept labels in formulas (the Boolean
AcceptLabelsInFormulasproperty) and whether to use the 1904 date system (the BooleanDate1904property)
FORCING EXCEL TO REMOVE PERSONAL INFORMATION FROM THE FILE PROPERTIES WHEN YOU SAVE
To make Excel remove personal information from a workbook's properties when you save it, set the RemovePersonalInformation property of the workbook to True:
ActiveWorkbook.RemovePersonalInformation = True
The Bottom Line
- Work with workbooks. You often need to create a new, blank workbook in a macro (mimicking a user clicking the File tab on the Ribbon and then clicking the New button). And writing code that accomplishes this is not difficult. It requires only two words.
- Master It What code would you write to create a new, blank notebook?
- Work with worksheets. Most workbooks you access via VBA will contain one or more worksheets, so most procedures will need to work with worksheets—inserting, deleting, copying, or moving them, or simply printing the appropriate range from them.
- Master It Name the object you use in VBA code to represent a worksheet.
- Work with the active cell or selection. In a procedure that manipulates a selection that the user has made, you'll typically work with either the active cell or the current selection.
- Master It What is the difference between the active cell and a selection?
- Work with ranges. Within a worksheet, you'll often need to manipulate ranges of cells. Excel includes a special kind of range—represented by the
UsedRangeproperty.- Master It What is unique about
UsedRange?
- Master It What is unique about
- Set options. Word employs an
Optionsobject to contain most of the options that you find in the Word Options dialog box (click the File tab on the Ribbon and then click Options). Excel uses a different object to contain its options.- Master It From which object do you access most of Excel's options?