Chapter 1
Hey, It Really Does Have Everything I Need
IN THIS CHAPTER
![]() Identifying the important parts of your Mac laptop
Identifying the important parts of your Mac laptop
![]() Comparing MacBook models
Comparing MacBook models
![]() Finding the best location for your computer
Finding the best location for your computer
![]() Unpacking, plugging in stuff, and getting hooked up
Unpacking, plugging in stuff, and getting hooked up
![]() Handling your MacBook with care
Handling your MacBook with care
![]() Playing with your bundled software
Playing with your bundled software
![]() Buying additional stuff you might need
Buying additional stuff you might need
Most action films have one scene in common: I call it “gearing up,” because the good guys strap on their equipment in preparation for battle. (The era doesn’t matter: You see “gearing up” scenes in Gladiator, Aliens, and virtually every movie Arnold has made.) You’re sure to see lots of clicking straps and equipping of offensive weapons (and sometimes even a dash of war paint). The process usually takes a minute or so all told, with whiplash camera work and stirring martial music in the background.
Well, fellow Mac road warrior, it takes only two seconds and one move — closing the lid — for you to gear up. Your MacBook is a self-contained world, providing virtually all the essentials you’ll find on a desktop iMac, Mac Pro, or Mac mini. This is indeed the second “decade of the laptop,” meshing nicely with your smartphone and that wireless connection at your local coffee shop. You’ve selected the right companion for the open road.
Unlike Apple’s other designs — such as the Mac mini, the Mac Pro, and the iMac — your MacBook’s exterior looks like a PC laptop running Windows. (In fact, an Intel-based Mac laptop can run Windows if it absolutely must.)
But your laptop holds several pleasant surprises that no PC laptop or tablet can offer — and, with the MacBook Air and MacBook Pro, you’ll lose pounds and inches from your chassis!
In this chapter, I introduce you to the hardware and all the major parts of the machine. You even find out how to unpack and connect your computer. And as frosting on the cake, I preview the software of which Apple is so proud, as well as the accessories you should buy now rather than later.
Welcome to your Mac laptop, good reader. Gear up!
An Overview of Your Mac Laptop
Sure, your MacBook Pro may be about half an inch thin (a MacBook Air is even more svelte; I get to that later in the chapter), but a lot of superb design lives inside. You encounter the same parts you’d find in a desktop machine. In the following sections, I discuss those important parts — both the stuff you can see and the stuff that’s shoehorned within.
The parts you probably recognize
Every laptop requires some of the same gizmos. Figure 1-1 helps you track them down. Of course, as you’d expect, a computer has a body of sorts in which all the innards and brains are stored, a display screen, a keyboard, a trackpad or other pointing device, and ports for powering and exchanging data with outside toys.

FIGURE 1-1: The charismatic form of a typical Mac laptop.
That magnificent screen
What a view you have! Today’s Mac laptops feature a 13- or 15-inch LED display. LED screens use far less electricity than their antique CRT ancestors, and they emit practically no radiation.
Apple’s laptop screens offer a widescreen aspect ratio (the screen is considerably wider than it is tall), which augurs well for those who enjoy watching movies. (A favorite editor of mine loves it when I use the antique word augur, meaning to predict or foretell.)
The keyboard and trackpad
Hey, here’s something novel for your laptop. Unlike the external input devices on a standard desktop computer, your MacBook has a built-in keyboard and trackpad (which does the job of a mouse). The illuminated keyboard is a particular favorite of mine, offering special keys for activating all sorts of features within macOS (as well as keys for adjusting brightness and volume).
The latest crop of Mac laptops feature a great trackpad design as well. The Force Touch trackpad can sense the amount of pressure you apply with your fingers, activating features in macOS Catalina that used to require a right click (such as displaying the definition of a word in a Pages document or displaying a map of an address in Contacts). The Force Touch trackpad can even provide tactile feedback to your fingertips while you’re using some applications!
 The MacBook Air and MacBook Pro don’t have an internal optical drive. (More on both models later in this chapter.) You can use the CD & DVD Sharing feature in Catalina to read discs remotely (from another Mac or PC on your network), or you can pick up an external optical drive from Apple for about $80. (Such is the price you pay for super-thin and super-light.)
Food for your ears
A machine this nice had better have great sound, and the Mac doesn’t disappoint. You have a couple of options for Mac laptop audio:
- All Mac laptops sport built-in stereo speakers and two microphones to boot. The 13- and 15-inch MacBook Pro models with the Touch Bar even have three microphones.
- Use the built-in headphone jack to connect your Mac’s audio to a pair of headphones, a more powerful (and expensive) external speaker system, or a home stereo system. (Some portable USB and Bluetooth speaker systems can provide better-quality audio.)
The power cable
Sorry, you can’t get a wireless power system — yet. (Apple’s working hard on this one.) All current MacBook models use a USB-C port for charging the battery. The USB-C cable also does double-duty as a port for Thunderbolt 3 and USB-C–compatible devices.
Many MacBook owners ask me whether they should disconnect the power after the battery is fully charged or leave it connected. I leave the cable connected. It won’t cause any damage to your MacBook, and you can continue to use your laptop while it’s charging. (Oh, and road warriors prefer a laptop battery that’s always topped off when it’s time to go mobile!)
The power button
The latest MacBook Air with Touch ID and the MacBook Pro with Touch Bar actually turn on whenever you open them. To turn these models off, you press and hold the Touch ID button on the far-right side of the keyboard.
Owners of the older MacBooks still have a power button. It’s in the top-right corner of the keyboard, bearing the familiar “circle with a vertical line” logo.
The FaceTime HD camera
Check out that tiny square lens above your screen. That’s a built-in FaceTime HD camera, which allows you to chat with others in a videoconferencing environment by using the Messages and FaceTime applications that come with Catalina. You can even take photos with the camera, using the Photo Booth software that comes with your laptop, or set up a travelin’ webcam. (If you need a higher-resolution camera — or one that can be easily turned or tilted — check out the discussion later in this chapter.)
 Note that a green light appears next to the lens when the camera is on — handy information that could prevent visual embarrassment! As my technical editor points out, you can also cover the lens for guaranteed privacy. (Some companies even offer plastic clips especially designed for covering the lens.)
The battery
Apple’s current laptop computers don’t include user-replaceable batteries. The battery is sealed inside the case and can be replaced only by an Apple technician. But you should get several years of trouble-free operation from your MacBook’s battery.
The holes called ports
The next stop on your tour of Planet Laptop is Port Central — those holes on the sides of your computer. Each port connects a different type of cable or device, allowing you to easily add all sorts of functionality to your computer.
Each of these stellar holes has an icon to help you identify it. Here’s a list of what you’ll find and a quick rundown of what these ports do.
The following connections are used for external devices and networking:
Thunderbolt 2/Thunderbolt 3 port: The Thunderbolt 2 port (and its faster descendent, Thunderbolt 3) is the expansion racehorse of today’s MacBooks. It offers the fastest data-transfer rates and the ability to add all sorts of peripherals, from external drives to monitors to wired Ethernet connections. (A peripheral is another silly techno-nerd term that means a separate device you connect to your computer.) Thunderbolt 3 devices are somewhat more expensive than their Thunderbolt 2 and USB cousins, but prices are dropping as more Thunderbolt 3 peripherals arrive on the market.
Although Thunderbolt-compatible monitors are available, they’re significantly more expensive than standard displays. Luckily, you can also buy an adapter for this port that allows you to send the video signal from your laptop to another VGA, DVI, or HDMI monitor.USB port(s): Short for universal serial bus, the familiar USB port is the jack-of-all-trades in today’s world of computer add-ons. Most external devices you want to connect to your laptop (such as portable drives, scanners, and digital cameras) use a USB port, including the iPod touch. (Today’s PCs also include USB ports, allowing you to share external USB peripherals such as optical drives and scanners between your MacBook and your desktop PC.) USB 3.0 connections are much faster than the old USB 2.0 standard, but they still accept USB 2.0 devices running at the slower speed.
Get the lowdown on Thunderbolt 2 and 3 and USB ports in Chapter 21. All current MacBook models use the cutting-edge USB-C port that allows you to charge the laptop, connect a Thunderbolt 3 or USB-C, or connect an external monitor or projector — all from one port! To make the USB 3.0 connection, you’ll need a USB-C–to–USB adapter (about $20) and a USB-C AV Multiport adapter (about $70) to connect an external display.- Ethernet port: Older MacBook Pro laptops used to include a standard Gigabit (10/100/1000) Ethernet port, so the laptop was immediately ready to join your existing wired Ethernet network. But because today’s MacBook Air and MacBook Pro are designed to be completely wireless — as I explain in Chapter 11 — they don’t have a built-in wired Ethernet port. If a wired connection is a necessity, you can add a Thunderbolt–to–Gigabit Ethernet (or USB–to–Gigabit Ethernet) adapter to add a wired network port to your laptop. (Apple sells one for about $35.) Or you can invest in a laptop dock with a wired Ethernet port (which I discuss at the end of this chapter).
- SD/SDXC card slot: Your older MacBook Air may include an SD (Secure Digital) or SDXC (Secure Digital Extended Capacity) card slot, allowing you to plug SD or SDXC memory cards from digital cameras, cellphones, and portable devices directly into your laptop.
- Headphone/optical output port: Last (but certainly not least), you can send the high-quality audio from your rectangular beast to a set of standard headphones or an optical digital audio device such as a high-end home theater system.
Don’t forget the parts you can’t see
When you bought your new digital pride and joy, you probably noticed a number of subtle differences between the MacBook Air and the pricier MacBook Pro models. I call these differences the Important Hidden Stuff (or IHS, if you’re addicted to acronyms). They’re just as important as the parts and ports you can see.
Internal storage devices are as follows:
- CPU: Today’s Mac laptops feature the latest Intel Core i5, i7, and i9 processors. The faster the processor, of course, the better. (This is definitely not rocket science.)
Storage: Today’s MacBook models are equipped with solid-state drives that use memory chips. The drive capacities are different across the entire MacBook product line.
Solid-state drives have several advantages over traditional magnetic hard drives: You’ll find no moving parts in a solid-state drive, and it offers better performance than a standard hard drive. Think of the solid-state drive as an internal USB flash drive that uses RAM chips rather than magnetic platters to hold your data.
Wireless communications devices include the following:
Wireless Ethernet: “Look, Ma, no wires!” As mentioned earlier, you can connect your laptop to an existing wireless Ethernet network. All current Mac laptops have built-in AirPort Extreme hardware. With wireless connectivity, you can share documents with another computer in another room, share a single high-speed Internet connection between computers, or enjoy wireless printing. Truly sassy!
Apple no longer sells the Apple AirPort Extreme Base Station or the AirPort Time Capsule unit, which were great devices for building a wireless network. But you can use your Mac with any standard 802.11b/g/n/ac wireless network. And yes, PCs and Macs can intermingle on the same wireless network without a hitch. (Scandalous, ain’t it?)- Bluetooth: Let’s get the old “digital pirate” joke out of the way: “Arrgh, matey, I needs me a wireless parrot.” (Engineers again … sheesh.) Although strangely named, Bluetooth is another form of wireless connectivity. This time, however, the standard was designed for accessories such as your keyboard and mouse and devices like wireless headphones and your smartphone. (The latest Macs support version 4.2 Bluetooth hardware.)
Here’s the hidden display device:
- Video card: The standard Intel video hardware that’s built into today’s MacBooks is fine for typical home and business laptop applications. If your applications rely heavily on high-speed 3D graphics or digital video, however, you’ll be pleased as punch to discover that today’s 15-inch MacBook Pro model can be ordered with the muscle-bound AMD Radeon Pro 560X. This card is well suited to high-end mobile 3D modeling, video editing on the road, and … well, honestly, blasting the latest video game enemies into small smoking pieces with aplomb.
Meet the MacBooks
So far in this chapter, I’ve discussed the common hardware shared by today’s MacBook models. Now it’s time to compare the MacBook Air and MacBook Pro with an eye toward selecting the right one for you. (Unless you decide to pick up one of each. Certainly an elegant choice, but not everyone has that option!)
Consider the least expensive MacBook: the MacBook Air (shown in Figure 1-2), which is unique for both its size and weight. Yet the Air is just like the MacBook Pro. Well, mostly.

FIGURE 1-2: Behold the MacBook Air.
“Hold on, Mark. How can it be so singular and yet share so much with its road-warrior sibling?” I answer that question in the following sections, which discuss the many similarities and the handful of striking differences among both of the laptop models in the MacBook line. If you’re considering buying an Apple laptop, these sections can help you decide whether you’d like to go ultra-thin or stick with the more traditional (and slightly thicker) laptop crowd.
One thing’s for sure: Apple never creates a mundane design!
Comparing the MacBooks
Do you remember when Apple introduced the first iMacs? Although they had the same basic components as any other computers — a monitor, keyboard, ports, speakers, and cables — the iMac was revolutionary because it was completely self-contained. And it came in colors. And it didn’t have a floppy drive. In fact, Apple redesigned the common computer with the focus on style and ease of use and scrapped the floppy drive (and rightly so, seeing as how floppies had become practically useless and were unreliable to boot).
I consider the MacBook Air and the MacBook Pro to be extensions of the iMac revolution. With these designs, Apple focused on physical dimensions and weight, and tossed out everything that isn’t absolutely necessary for the lecture hall, boardroom, or city park. I’m happy to note, however, that these ultra-light MacBooks are neither toys nor bare-bones netbooks. In fact, the MacBook Air has some of the features of the high-end MacBook Pro.
What are the similarities?
Consider the similarities among the different models:
- Widescreen display: Each model sports a widescreen, backlit LED display. The MacBook Air offers a 13-inch display and the MacBook Pro is the star of the show, with the highest resolution available on any Apple laptop. (It’s available in a 13- or 15-inch display.)
- Intel processor power: You can order both models from Apple with Core i5 or i7 power. The new, superfast Core i9 processor is available exclusively in the MacBook Pro 15-inch models.
- Keyboard and trackpad: Both MacBook models offer a backlit keyboard and the unique Force Touch trackpad. The Touch ID sensor is offered for the MacBook Air, allowing you to use your fingerprint to log in and pay for online purchases. The Touch Bar (available on the MacBook Pro) offers several nifty features within your favorite applications. (Read more about Force Touch, Touch ID, and the Touch Bar in Chapter 3.)
- Catalina: All current laptops from Apple naturally run the latest version of macOS with aplomb.
- FaceTime: Every MacBook is video-ready, using a built-in FaceTime camera. You can record audio with the built-in microphones as well.
- Sealed battery: You can’t swap batteries with any models in Apple’s current MacBook line because the battery is sealed inside. (Think iPad and iPhone.)
- Wireless support: The MacBook Air and MacBook Pro each have built in the latest AirPort Extreme hardware (802.11ac). Both models feature built-in Bluetooth hardware. (Read more about AirPort Extreme in Chapter 11.)
I think most Apple laptop owners would agree that these major MacBook features show there’s no underpowered pushover in the lineup!
So what’s so flippin’ radical?
I’m glad you asked! Here’s the checklist of striking differences that set the MacBook Air apart from the MacBook Pro:
- Physical dimensions: You need a thin laptop? You’ve come to the right place! The current Air laptop with Retina display measures a mere 0.61 inches in height (at its tallest point) when closed. Oh, and hold on to your chair for this one: The MacBook Air is also the lightweight champ, at 2.75 pounds! (That’s a couple of pounds you won’t be carrying around all day at that convention expo. Take it from this traveler: You will feel the refreshing difference in just an hour or two.) By comparison, the 13-inch MacBook Pro weighs 3.02 pounds, and the 15-inch MacBook Pro is a (comparatively) hefty 4.02 pounds.
- Cost: At the time of this writing, an entry-level 13-inch MacBook Air will set you back $1,199. By comparison, the 13-inch MacBook Pro is $1,299, whereas the 15-inch MacBook Pro model starts pricier at $2,399.
Ports: As I mention earlier in this chapter, each of the two current MacBook models offer only two types of ports: the USB-C (which requires adapters for use as a USB 3.0 and external video port) and a headphone jack. The difference is in the number of USB-C ports provided. The MacBook Air includes two, and the MacBook Pro includes two or four USB-C ports.
As I mention earlier, all current MacBooks lack a wired Ethernet port. All three models require a USB-C–to–Gigabit Ethernet adapter. (Rats.)- Sealed case: You can’t add or replace RAM modules on the MacBook Air or the MacBook Pro. If you haven’t ordered your laptop yet, it’s a very good idea to configure your MacBook with the maximum RAM it can carry, because you won’t be able to add more in the future.
- No built-in optical drive: Whoa, Nellie! The lack of this drive is a dramatic departure from most Windows laptops, and it applies to all current MacBook models. Apple decided that owners of these slimmer, trimmer laptops are likely to use a wireless connection for transferring files and media. But what if you have to reinstall applications that are available only on disc? If you need to read or burn discs, you can buy a separate external USB SuperDrive for about $80, or you can use the Remote Disc feature and share the drive on another computer. (More on Remote Disc in the later section “Sharing a CD or DVD drive.”)
As you can see, these striking differences make the choice between a MacBook Air and a MacBook Pro easy indeed. To wit:
- The MacBook Air is designed for travelers who appreciate minimum weight and size. These folks see a laptop as a race car: nimble, with reduced weight, and no unnecessary frills. (Think of a typical NASCAR entry: Who needs an expensive stereo or air conditioning?)
- The MacBook Pro is all about the brilliant high-resolution display, of course, and it’s considerably faster than the MacBook Air. The MacBook Pro appeals to presenters, graphics professionals, and video editors, who appreciate the higher-resolution display and the better performance. Oh, and if you spend the extra coin for a MacBook Pro, you’ll enjoy the enhanced control of your applications provided by that snazzy Touch Bar!
Look, Ma, no moving parts!
You’re probably familiar with the common species of usbius flashimus, more commonly called the USB flash drive. With one of these tiny devices, you get the equivalent of a 4–512GB hard drive that plugs into a USB 3.0 port, allowing you to carry your data with you as you jet across the continents. But have you ever asked yourself, “Self, why don’t they make internal drives that use this same technology?”
Actually, dear reader, solid-state drives have been around for years. (Think the iPod shuffle and iPod nano.) Unfortunately, however, the solid-state memory used in today’s flash drives gets pretty expensive as capacity increases. In fact, cost has been the limiting factor, because a solid-state drive offers advantages that set it apart from a conventional magnetic hard drive:
- No moving parts: Unlike a typical magnetic hard drive, you find no read-write heads and no magnetic platter — just gobs of happy silicon memory chips. In effect, a solid-state drive works along the same lines as your MacBook’s system RAM. Unlike your Mac’s RAM, though, a solid-state drive doesn’t lose the data it stores when you turn off your laptop. As you can imagine, no moving parts on a computer in motion is superior on two levels:
- The solid-state drive never wears out or needs replacing.
- If your laptop is accidentally abused (gets knocked off your desk), it’s far less likely that you’ll lose a hard drive’s worth of priceless data when it hits the ground.
- Speed: Oh my goodness, is this thing fast! Your MacBook will boot, restart, or awaken in far less time, and everything you do on your laptop will benefit from the speed boost. A solid-state drive can read data far faster than a conventional magnetic hard drive.
- Power usage: Forget your hard drive spinning up from sleep mode. The solid-state drive uses far less power than a conventional hard drive, resulting in significantly longer battery life.
- Blessed silence: The solid-state drive is silent. (No more of that gargling noise while the disk is accessed. Sweet.)
What if I need that pesky optical drive?
Can a laptop survive in the jungle that’s Real Life without a DVD drive? The terse answer is no. I’ll be honest: Ripping an audio CD or watching a DVD movie without an optical drive is impossible. (It’s rather like driving a cheap sports car.) And the wonders of digital media are a big part of the iWorld. So what was Apple thinking?
First, a bit of explanation. Today’s DVD drives are thin, but not MacBook thin. To create these stunning designs with truly revolutionary dimensions, Apple engineers had to leave out the drive. If you own a current Mac laptop, however, you have two choices when it comes to reading the contents of a CD or DVD: Go external, or find out how to share.
The external USB route
I have no problem toting around an external USB DVD burner with a MacBook Air. Heck, half the time, you’re likely to leave it at home because you don’t install software every day. The folks at Cupertino want you to download your movies from the iTunes Store and your software from the App Store, so if you follow the Apple Path, you still don’t need an optical drive!
A USB SuperDrive from Apple costs a mere $80, and it can read and write DVDs as well as any built-in drive. But you’ll need a $20 USB-C–to–USB adapter to connect it.
You can also use any third-party USB-C DVD drive that’s compatible with Apple’s laptops and macOS Catalina.
Sharing a CD or DVD drive
The other option for installing software or reading a DVD on your MacBook is the CD/DVD Sharing feature within macOS. Sharing is an option if you have a wired or wireless network (see Chapter 11) with at least one of the following computers available:
- A Mac running OS X Tiger or later
- A PC running Windows 7 through Windows 10 (and a Windows application supplied by Apple with your MacBook)
 You can only read from a shared optical drive. You can’t write data to the remote drive, even if that drive is a DVD recorder.
On the Mac computer with the optical drive, open System Preferences, click the Sharing icon, and select the DVD or CD Sharing check box. Note that you can set whether the Mac will request your permission when another computer attempts to share the drive.
On a PC, display the Control Panel, click the DVD or CD Sharing icon, and then select the Enable DVD or CD Sharing check box. Again, you can specify that permission is required if security is a concern.
After you set up the shared drive, just load the disc and select the Remote Disc item in any Finder sidebar. (Remote Disc appears below the Devices heading in the sidebar.) Now you can access the drive as though it were directly connected to your MacBook Air or MacBook Pro. Ah, technology!
Location, Location, Location!
If you choose the wrong spot to park your new laptop, I guarantee you’ll regret it. Some domiciles and office cubicles don’t offer a choice. You have one desk at work, for example, and nobody will hand over another one. But if you can select a home for your MacBook, consider the important placement points in this section:
- Keep things cool. Your new laptop is silent, but that super-fast Intel processor generates heat. Make sure that the location you choose is far from heating vents and shielded from direct sunlight. I also recommend a laptop cooling pad, which elevates the base of your laptop to allow air to circulate underneath. (Some MacBooks are even equipped with their own fans.) Although you can stow your MacBook in the close confines of a bag or backpack while it’s in Sleep mode, avoid putting that laptop away while it’s hot! Let your MacBook Pro cool off first.
- Outlets are key! Your computer needs at least one nearby outlet and perhaps as many as two:
- A standard AC outlet (using a current adapter if you’re traveling abroad, if necessary)
A nearby Ethernet jack (if you use a wired Ethernet network)
If you prefer to send your data over the airwaves, consider wireless networking for your Mac. I discuss everything you need to know in Chapter 11.
- Don’t forget the lighting. Let me act as your mom. (I know that’s a stretch, but bear with me.) She’d say, “You can’t possibly expect to work without decent lighting! You’ll go blind!” She’s right, you know. You need a desk lamp or floor lamp at minimum if you need to refer to books or documents often in your work.
Plan to expand. If your laptop hangs out on a desk, allow an additional foot of space on each side. That way, you have room for external peripherals, more powerful speakers, and an external keyboard and mouse if you need them.
If you want to keep an external keyboard handy, consider using a laptop shelf. These Plexiglas or metal stands elevate your laptop several inches above the desk, putting the screen in a better ergonomic position and allowing you to park your keyboard and external mouse below.
Unpacking and Connecting Your Laptop
You’ll love the following sections. They’re short and sweet because configuring a laptop on your desktop is a piece of cake. (Sorry about the cliché overload, but this really is easy.)
Unpacking for the road warrior
Follow these guidelines when unpacking your system:
Check for damage. I’ve never had a box arrive from Apple with shipping damage, but I’ve heard horror stories from others (who claim that King Kong must have been working for That Shipping Company).
Check all sides of the box before you open it. If you find significant damage, take a photograph (just in case).- Search for all the parts. When you’re removing those chunks o’ foam, make certain that you’ve checked all sides of each foam block for parts snuggled therein or taped for shipment.
Keep all packing materials. Do not put the box and packing materials in the trash. Keep the box and all packing materials for at least a year, until the standard Apple warranty runs out. If you have to ship your laptop to an Apple service center, the box and the original packing are the only way for your machine to fly.
And now, a dramatic Mark’s Maxim about cardboard containers:
 Smart computer owners keep their boxes far longer than a year. If you sell your laptop or move across the country, for example, you’ll want that box. Trust me on this one.™
Store the invoice for safekeeping. Your invoice is a valuable piece of paper.
Save your original invoice in a plastic bag, along with your computer’s manuals, original software, and other assorted hoo-hah. Keep the bag on a shelf or stored safely in your desk, and enjoy a little peace of mind.Read the Mac’s manual. “Hey, wait a minute, Mark. Why do I have to read the manual from Apple along with this tome?” Good question, and here’s the answer: The documentation from Apple may contain new and updated instructions that override what I tell you here. (Say, “Never cut the red wire. Cut the blue wire instead.” Or something to that effect.) Besides, Apple manuals are rarely thicker than a restaurant menu.
You can always download the latest updated manuals for Apple computers in electronic format from Apple’s website. (Adobe’s PDF format is the standard for reading documents on your computer. You can open and display any PDF document in Catalina by using the Preview application or the Quick Look feature.) I always keep a copy of the PDF manual for my MacBook Air on my drive, just in case.
Connecting Cables 101
Your laptop makes all its connections simple, but your computer depends on you to get the outside wires and thingamabobs where they go.
The absolutely essential connection
After your new Mac is resting comfortably in its assigned spot (I assume that’s a desktop), you need to make just one required connection: the power cable. First, plug the cable into the corresponding USB-C port on the MacBook; and then plug ’er into that handy AC outlet. After your battery is completely charged, you can go mobile at a moment’s notice.
Adding the Internet to the mix
If you have high-speed Internet service, or if you’re in an office or school with a local computer network, you can probably connect through your older MacBook’s built-in Ethernet port (or by using an adapter with your USB-C port). You make two connections:
- Plug one end of the Ethernet cable into the Ethernet port (or the USB-C–to–Ethernet adapter on a current MacBook Air or MacBook Pro).
Plug the other end of the Ethernet cable into the Ethernet port from your network.
Your network port is probably one of the following: an Ethernet wall jack, an Ethernet hub or switch, or a cable or DSL Internet router (or sharing device).
Will you be joining a wireless network? If so, you can find the information you need about configuring Catalina for wireless networking in Chapter 11.
Great — a Lecture about Handling My Laptop
Proper handling of your laptop is important, so take a moment to read the Rules of Proper Laptop Deportment. Okay, perhaps I’m lecturing a bit, but a little common sense goes a long way when you’re handling any computer equipment, and your laptop is no different. (Scolding mode off.)
Keep these rules in mind while opening and carrying your laptop:
- The cover is your friend. Open your laptop’s cover slowly, without jerking or bending it.
- Close it before you move it. By closing your laptop, you put your macOS operating system into sleep mode, and (if your older MacBook uses a magnetic hard drive for storage) the hard drive automatically spins down, making it safer to move. The laptop is still on; it will spring back to life when you open the cover.
- Don’t stack stuff on your laptop. You’d be surprised how many horror stories I’ve heard about laptop owners piling a stack of books or other heavy stuff on their computers. Remember that LED display? Made of glass?
- Be nice to your keyboard. Don’t press those keys too hard! Use the same amount of pressure you use on a desktop computer’s keyboard.
- Keep food and drinks far away. Care to turn your laptop into an expensive doorstop? Go ahead and park your soda next to it. (Oh, and crumbs are perfect if you’re interested in buying replacement keyboards.)
- Keep your laptop as level as possible. Using your older Mac laptop while it’s tilted too far in any direction can eventually cause problems with your magnetic hard drive. I kid you not. (If your MacBook uses a solid-state hard drive, of course, this rule doesn’t apply.)
An Overview of Mac Software Goodness
The following sections answer the most common novice computer question: “What the heck will I do with this thing?” You find additional details and exciting factoids about the software you get for free, software you’ll want to buy, and stuff you can do on the Internet.
What comes with my laptop?
Currently, Apple laptops ship with the following major software applications installed and ready to use:
- macOS Catalina: Naturally, your MacBook comes preloaded with Catalina.
Apple’s digital lifestyle suite: You know you want these applications! They turn your Mac into a digital hub for practically all kinds of high-tech devices, including camcorders, digital cameras, tablets, portable music players, and even smartphones.
Chapters 12 through 15 focus on the major applications that will appeal to MacBook owners: Music, TV, Photos, iMovie, and GarageBand.
- Apple’s digital productivity suite: Owners of new MacBooks can download all three of Apple’s great productivity applications — Pages, Numbers, and Keynote — for free in the App Store. Pages is a desktop publishing jewel, Numbers is a great spreadsheet tool, and Keynote is a superb slideshow/presentation application. Chapters 16 through 18 are your guides to the basic functions of all three applications. ’Nuff said.
The installed software on your MacBook may change as new programs become available.
Connecting to the Internet from your lap
What’s a modern computer without the Internet? Apple gives you great tools to take full advantage of every road sign and off ramp on the Information Superhighway right out of the box:
Web surfing: I use Apple’s Safari web browser every day. It’s fast and well designed, with features such as tabbed browsing and Facebook and Twitter sharing.
If tabbed browsing sounds like ancient Aztec to you, don’t worry. Chapter 8 is devoted to Safari.
Instant messaging and video chat: Messages lets you use your MacBook to chat with others around the world for free on the Internet. You can also use the FaceTime application to video-chat with folks who have an iPhone, iPad, or iPod touch, as well as another Mac. If you’ve never seen a video chat, you’ll be surprised just how good your friends and family look!
Always wear a shirt when videoconferencing.- Email: Soldier, Apple has you covered. The Apple Mail application is a full-featured email system complete with defenses against the torrent of junk mail awaiting you. (Imagine a hungry digital predator with an appetite for spam.) Send pictures and attached files to everyone on the planet, and look doggone good doing it.
Applications that rock
Dozens of small applications are also supplied with macOS Catalina. I mention many of them in later chapters, but here are three good examples to whet your appetite:
- DVD Player: If your MacBook has an internal or external DVD drive, put all that widescreen beauty to work by watching your favorite DVD movies with a DVD Player! You have all the features of today’s most expensive stand-alone DVD players, including spiffy onscreen controls.
- Contacts: Throw away that well-thumbed collection of fading addresses on paper. Use the Catalina Contacts application to store, search, and recall just about any piece of information on your friends, family, and acquaintances.
- Chess: This isn’t the chessboard your dad used! Play the game of kings against a tough (and configurable) opponent — your MacBook — on a beautiful 3D board. Heck, your Mac even narrates the game by speaking the moves!
You can use the data you store in your Contacts in other Apple applications included with Catalina, such as Apple Mail and Messages.
Boot Camp For Dummies
macOS Catalina includes one particularly exciting feature for Windows switchers: You can use the Apple Boot Camp utility and your licensed copy of Windows 10 to install and boot Windows on your Mac laptop!
Boot Camp creates a Windows-specific partition (or section) on your drive where all your Windows files are stored. Other than the slightly strange key assignments you have to remember, Boot Camp is reliable and easy to use. I strongly urge you to back up your laptop on a regular basis, however; inviting Windows onto your Mac laptop invites potential viruses as well.
Apple’s Boot Camp Assistant provides step-by-step instructions, making it easy to configure your laptop for Windows. To run the Boot Camp Assistant, click the Launchpad icon on the Dock, click the Utilities folder icon, and then click the Boot Camp Assistant application icon. You’ll find more detailed information on using Boot Camp in Chapter 19.
Other Stuff That Nearly Everyone Wants
No man is an island, and no computer is either. I always recommend the same set of stuff for new Windows and Mac laptop owners. These extras help keep your new computer clean and healthy (and some make sure you’re happy as well):
- A laptop sleeve or case: Most laptop owners eschew the traditional bulky laptop bag because a bag broadcasts the fact that you’re carrying a valuable MacBook (and adds yet another item to carry on your trip). On the other hand, if you pack your MacBook in a briefcase, book bag, or backpack, you need to provide protection from bumps and scratches. (Make sure that any sleeve or case you buy provides padding around the entire computer, not just on the top surface.) That’s where a laptop sleeve or thin case comes in. I use the very cool BookBook hardback leather case from Twelve South (
https://www.twelvesouth.com), which looks — you guessed it — like an old-fashioned leather-bound book. (I think it makes me appear scholarly while disguising my MacBook.) The BookBook (shown in Figure 1-3) is available for all sizes of MacBooks, costs about $80, and provides long-lasting, cushioned protection for your expensive road warrior computer. - An external camera: Your MacBook has a built-in FaceTime camera, but many folks prefer a stand-alone external camera that they can pan, tilt, and point where they like (especially moviemakers who need high-resolution video clips of whatever’s happening around them). Most of these gems can be clipped to your MacBook, or they may include a desktop stand for use on any flat surface.
- Surge suppressor: Even an all-in-one computer like your laptop can fall prey to a power surge. I recommend using one of these:
- A basic surge suppressor with a fuse can help protect your MacBook from an overload.
A UPS (uninterruptible power supply) costs a little more but does a better job of filtering your AC line voltage to prevent brownouts or line interference from reaching your computer.
 Your laptop’s battery immediately kicks in if you experience a blackout, of course, so a UPS is less important for your MacBook. But any computer tech will tell you that filtered AC current is far better for your laptop, and your UPS can also provide backup power for external devices that don’t have a battery.
- A laptop docking station: Will your MacBook often do double duty as a desktop computer and a mobile powerhouse? If so, a laptop docking station will prevent you from disconnecting a bird’s nest of USB-C cables each time you hit the road. In essence, you need to unplug only one connection between your MacBook and the docking station. All your external desktop peripherals — monitor, backup hard drive, USB trackball, and such — remain blissfully in place. When your MacBook returns to the desktop, you simply reconnect that one USB-C cable, and you’re back in business.
Screen wipes: Invest in a box of premoistened screen wipes to keep your screen pristine. Your MacBook’s screen can pick up dirt, fingerprints, and other unmentionables faster than you think.
Make sure that your wipes are especially meant for LED, LCD, or laptop computer screens.- Blank CDs and DVDs: If you’re using a MacBook with an internal or external optical drive, you’ll want blank discs. Your choices are
- CD-R (record once) and CD-RW (record multiple times)
- DVD-R (record once) and DVD+RW (record multiple times)
- Cables: Depending on the external devices and wired network connectivity you’ll be using, these are
- A standard Ethernet cable (for wired networks or high-speed Internet)
- USB-C cables and adapters for devices you already have
- Wrist rest: You may have many reasons to buy a new Mac laptop, but I know that a bad case of carpal tunnel syndrome isn’t one of them. Take care of your wrists by carrying a keyboard wrist rest in your laptop bag.
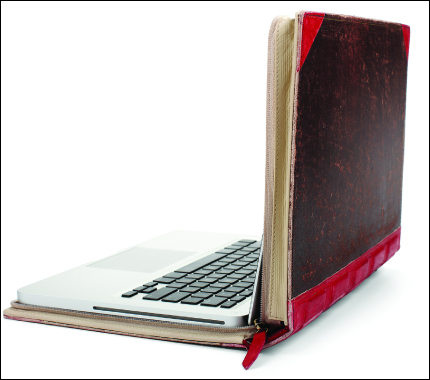
FIGURE 1-3: The BookBook case provides protection and camouflage for your MacBook.