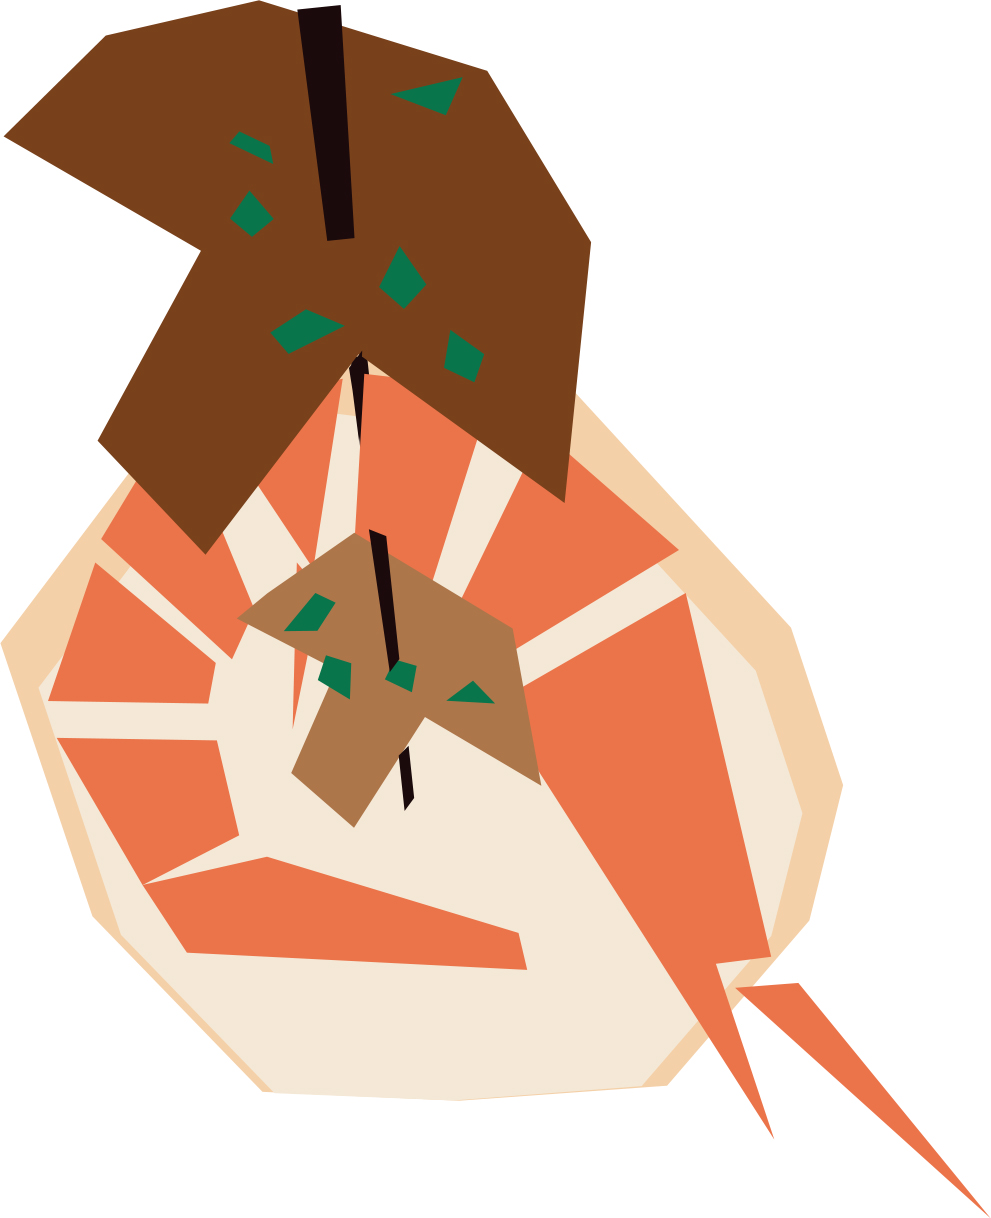
Bread with Olive Oil, Tomato, and Iberian Ham
Iberian pigs, called “olives with legs,” are our unique and special ingredient because they have a high nutritional value and live in a specific ecosystem, the Dehesa, found only in a small part of Spain in the areas around Salamanca, Extremadura, Andalucía, and on the border with Portugal. Prairies with holm oaks supply these free-range animals with grass and acorns, which are rich in oleic acid, the same component found in olive oil. This dish is best made with freshly baked bread.

ham - jamón
tomato - tomate
Cut the tomato in half across the width, not from the stem, and grate with a coarse vegetable grater. Be careful with your fingers! Discard the leftover tomato skin.
Drizzle the bread with olive oil, spread with grated tomato (not too much), and put a slice of ham on top. If you choose to add garlic, do so by rubbing it on the bread before adding olive oil or tomato.
You may lightly toast the bread, but do not let it become hard. We often have bread, tomato, and olive oil for breakfast. A little Iberian ham adds high-quality protein.
Note: Bread, olive oil, and tomato go with everything including fish, meats, vegetables, and cheese. Make a sauce by mixing tomato, olive oil, salt, and mashed garlic. Place the bread and some spoons around for everyone to help themselves. Be sure to make plenty!

oil - aceite
Pan con aceite de oliva, tomate y jamón ibérico
El cerdo ibérico, llamado ‘aceituna con patas’ es nuestro ingrediente más particular y singular, por su alto valor nutricional, y porque vive. En un ecosistema especifico, la dehesa, que se encuentra en pequeñas áreas de la frontera con Portugal de Salamanca, Extremadura y Andalucía. Son praderas con encinas y alcornoques, alimentan a estos animales con hierba y bellotas, ricas en ácido oleico, el mismo componente que encontramos en el aceite de oliva. Lareceta prepara mejor con pan recién horneado.
Corta el tomate por la mitad a lo ancho y rállalo con un rallador grueso. ¡Ten cuidado con los dedos! Desecha la piel.
Riega el pan con un poco de aceite de oliva, añade el tomate rallado, no demasiado y bien repartido. Pon encima el jamón. Puedes untar el ajo en el pan antes de echar el aceite y el tomate si lo deseas.
Puedes tostar el pan ligeramente, pero no dejes que se endurezca pues no es agradable al comer. Nosotros solemos tomar pan con aceite y tomate de desayuno. Un poco de jamón ibérico le aporta un extra de proteínas.
Nota: El pan con aceite de oliva y tomate va bien con todo, pescado, carne, verdura y queso. También puedes hacer una salsa meclando mezclar tomate, aceite, ajo machacado y sal y ponerlo en el centro con pan alrededor para que cada uno se sirva. ¡Asegúrate de hacer una buena cantidad!
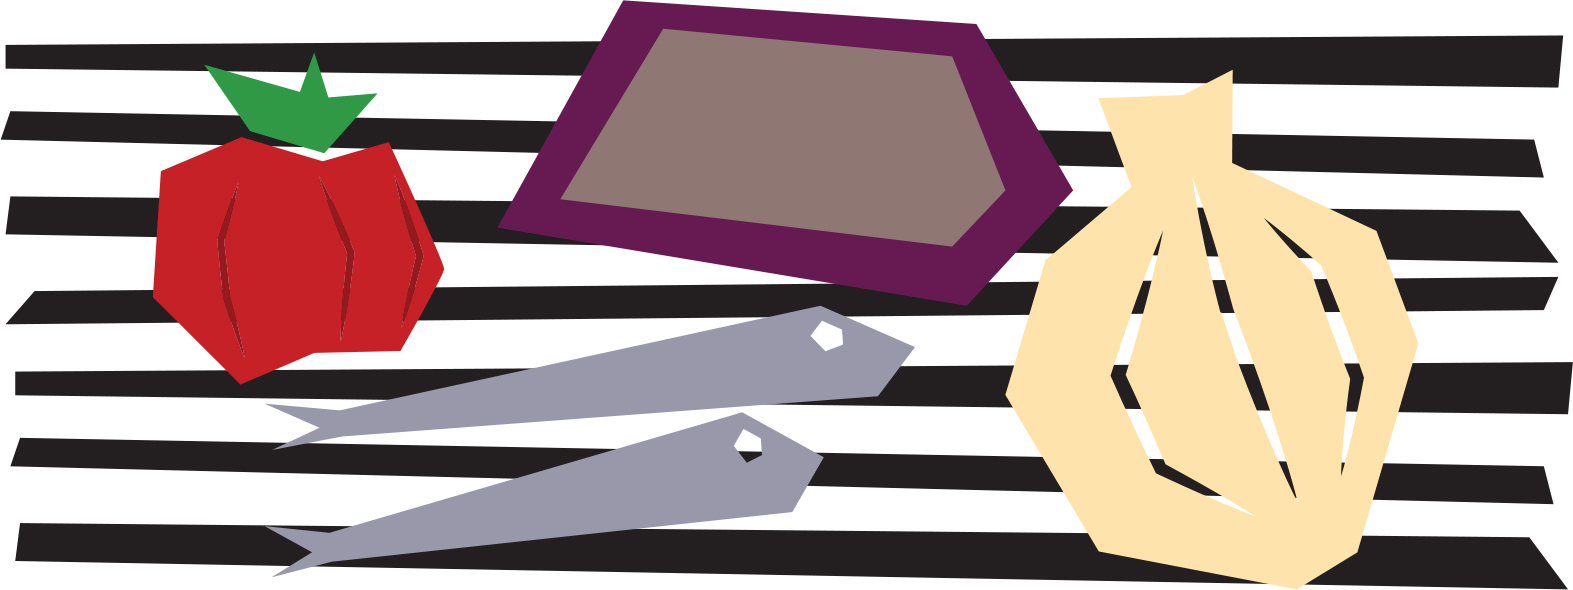
Basic Potato Omelet
In Spain, the potato omelet is the typical mid-morning tapa. When I was a kid, we used to have it for dinner accompanied by a tomato and tuna salad. You can personalize this dish by adding fried chorizo or other type of sausage or by adding other vegetables. The recipe requires your parents’ help because it involves very hot oil.
Put olive oil in the pan. Add the onion. Peel potatoes and slice thinly using a knife or mandoline. Place the potatoes in the pan. Add half the salt and place the pan over high heat.
When the oil starts bubbling around the edges of the pan, lower the heat to medium-low, cover, and let potatoes cook for approximately 15 to 20 minutes. Stir occasionally so that they cook evenly. They should be soft but not browned. They should not lose their shape. Drain in a colander, and reserve the olive oil.
Crack the eggs in a bowl, add the remaining salt, and beat thoroughly. Add the potatoes and mix gently. Put the pan over heat with 1 1/2 tablespoons (23 ml) of olive oil and, when very hot, add the egg-potato mixture. It is very important that the pan be sizzling hot. Cook for 2 minutes over high heat and turn the omelet over.
To turn the omelet over: Use a kitchen glove so you do not burn your hand. Place the plate firmly over the pan and your gloved hand over the plate. Take the handle of the pan with the other hand. With a quick movement, flip the contents of the pan onto the plate. Return the pan to the heat, add one tablespoon (15 ml) of olive oil, and slide the uncooked side of the omelet back into the pan. Cook for another 2 minutes, shaking the pan to prevent sticking. Lower the heat and cook for another 1 or 2 minutes to the consistency you prefer. We like our omelets a little runny.

potatoes - patatas
eggs - huevos
Stuffed potato omelet:
If for any reason the omelet is too dry, you can stuff your omelet as they do in the North of Spain or add a sauce to it to give it juiciness.
Split the omelet in half. Spread each half with mayonnaise, and then add lettuce and tomato. Then place the omelet together. Slice into 8 portions or triangles and place each over a piece of toast and garnish with an olive, a cherry tomato, or more mayonnaise to taste.
Tortilla de patatas
En España, la tortilla de patatas es la típica tapa de media mañana. Cuando yo era pequeña, la tomábamos de cena con una ensalada de tomate y bonito. Puedes personalizar este plato añadiendo chorizo frito u otro tipo de salchicha o embutido, y también cualquier otra verdura. Necesitarás la ayuda de tus padres pues se utiliza aceite hirviendo.
Poner aceite de oliva en una sartén. Añade la cebolla. Pela las patatas, cortarlas en rodajas finas, con la ayuda de una mandolina japonesa. Añade la mitad de la sal y pon en la sartén a fuego alto.
Cuando el aceite empiece a burbujear, bajad el fuego a temperatura media y dejad que se vayan haciendo durante unos 15-20 minutos. Podeis dar la vuelta a las patatas y cebolla, intentando no romperlas. Para que las de abajo queden arriba y las de arriba abajo y se hagan todas por igual. Tienen que quedar blandas sin quemarse ni perder su forma.
Escurre las patatas en un colador. Con un tenedor bate bien los huevos en un bol y añadimos el resto de la sal. Incorporamos las patatas escurridas y las mezclamas con el huevo. Ponemos a calentar en la misma sartén 1,5 cucharadas soperas de aceite. Cuando el aceite empiece a humear, es decir que esté bien caliente, añadimos la mezcla de huevos y patatas. Deja 2 minutos al fuego vivo y da la vuelta a la tortilla.
Para dar la vuelta a la tortilla: Utiliza un guante de cocina para no quemarte. Pon un plato sobre la sartén y sujétalo bien con la mano enguantada. Toma el mango de la sartén con la otra mano. Con un movimiento rápido, vuelca el contenido de la sartén sobre el plato. Devuelve la sartén al fuego y añade una cucharada sopera de aceite de oliva. Desliza la parte cruda de la tortilla sobre la sartén. Cocina durante otros 2 minutos, sacudiendo la sartén para que no se pegue. Baja el fuego y cocina 1 ó 2 minutos más. A nosotros nos gustan las tortillas bastante jugosas por dentro.
Tortilla rellena:
Si por algún motivo te sale muy seca la puedes reconvertir en la famosa tortilla rellena del norte de España o hacer una tortilla guisada, es decir añadirle una salsa caliente que le imparta jugosidad.
Corta la tortilla en 2 mitades en sentido horizontal. Unta cada mitad con mayonesa y rellena con lechuga, y tomate. Vuelve a unir las dos mitades de la tortilla. Cortas la tortilla rellena en 8 triángulos y los pones sobre un trozo de pan, decorándolos con una aceituna o un poco de mayonesa y un trozo de tomate cherry.
Mushrooms with Garlic Parsley Sauce in the Style of La Rioja
These pinchos are messy to eat, but that is part of the fun. Some people prefer to remove the skewer and arrange the mushroom and the shrimp on top of the bread. Soriano, a family bar on Logroño’s Laurel Street, is packed with customers eating this pincho. Their family recipe is a closely guarded secret. I have often enjoyed tapas here with my friend Judith from La Rioja, and I have created my own version of this pincho.
mushroom - champinoñ
shrimp - gamba
bread - pan
Combine the garlic, parsley, 4 tablespoons (60 ml) of the olive oil, lemon juice, and salt in a blender until it is a green sauce. Set aside.
Clean the mushrooms with a soft brush and remove the stems. Put the remaining 1 tablespoon (15 ml) olive oil in a pan that can fit all the mushroom caps.
Heat the pan, and when the oil is hot, add the mushrooms, stem-side down. Sprinkle with salt and pepper, and cook for 2 to 3 minutes over medium heat. When they begin to brown, turn over, and add the shrimp with a little more salt and pepper. Cook for 2 to 3 minutes, drizzling some of the garlic parsley sauce over each mushroom. Remember to cook the shrimp on both sides.
Pierce 1 shrimp and 3 mushrooms on each skewer. Add a slice of bread and place on a serving platter. Continue with the remaining shrimp and mushrooms until finished. Drizzle with a little more garlic parsley sauce.
Champiñones con salsa de ajo y perejil al estilo de la Rioja
Estos pinchos son complicados de comer y esa es parte de su gracia. Algunos preferimos quitar el palillo y colocar los champiñones y la gamba sobre el pan. El bar de la familia Soriano, en la calle Laurel de Logroño siempre está lleno hasta la bandera y solo sirven este pincho, pero mantienen en secreto su famosa receta. A menudo tapeo aquí con mi amiga riojana Judith y esta es mi versión de este famoso plato
Mezcla el ajo, el perejil, 4 cucharadas (60 ml) de aceite de oliva, el zumo de limón y sal, y licúalo en la batidora hasta obtener una salsa verde. Reservar.
Limpia los champiñones con un cepillito suave y retírales el tallo. En una sartén en la que quepan todos los champiñones pon el resto de cucharada (15 ml) de aceite de oliva.
Pon la sartén al fuego y cuando el aceite esté caliente, coloca todos los champiñones con la parte del tallo hacia abajo. Salpimienta y cocina 2 ó 3 minutos a fuego medio. Cuando empiecen a tomar un poco de color, dales la vuelta y añada las gambas y salpimienta otro poco. Cocina durante 2 ó 3 minutos y baña con un poco de la salsa de perejil y ajo cada champiñón. No olvides cocer las gambas por ambos lados.
Coloca 1 gamba y 3 champiñones en cada pincho. Añade una rebanada de pan y ponlos en una fuente de servir. Termina de hacer los 6 pinchos, y báñalos con más salsa de perejil y ajo.
Pickled Tuna Fish
In hot climates, pickling in vinegar is a traditional way to preserve food. Any fish can be used but it works better with blue fish such as sardines, tuna, and mackerel. There are many slight variations in the pickling of vegetables and spices, but olive oil and vinegar are essential. Pickles are best made in earthenware pots because they do not react to vinegar.
Wash the fish thoroughly and pat dry. Cut into thick chunks or slices of approximately 1 inch (2.5 cm).
Put 2 tablespoons (30 ml) of the olive oil in a pan and sear the tuna on all sides until golden. Set aside. (You may also steam the fish if you prefer.)
Peel the garlic cloves. Using an enamel pot, heat the remaining oil, and fry the onion and garlic for 3 minutes. Add the wine, both vinegars, water, peppercorns, bay leaves, garlic clove, thyme, salt, and sugar, bringing to a boil. Boil for 6 to 8 minutes. Reduce the heat to low.
Add the fish to the escabeche liquid and cook for 1 to 2 minutes over very gentle heat.
Turn the heat off and allow to cool to room temperature. Once cool, transfer to a glass or earthenware bowl (do not store in a metal or plastic container) and keep in the refrigerator. The fish must be completely covered with liquid. If more liquid is needed, boil 2 cups (470 ml) water with 1/4 cup (60 ml) vinegar for 5 minutes and add to the fish. Wait for 3 days before eating. It will keep for at least a month.
The pickled fish can be used for many different recipes such as salads, patties, stuffed vegetables, and all kinds of tapas.

tuna - bonito
thyme - tomillo
Bonito en escabeche
El escabeche es una forma tradicional de conservar alimentos en países de clima caliente. Se puede utilizar cualquier tipo de pescado pero funciona mejor con pescado azule como sardinas, bonito y jurel o caballa. Hay muchas variaciones en los ingredientes, tanto en las especias como en los vegetales, pero el aceite de oliva y el vinagre son imprescindibles. El escabeche se hace mejor en cazuelas de barro pues no reacciona con el vinagre.
Lava bien y seca el pescado. Córtalo en pedazos gruesos o en rodajas de aproximadamente 1 pulgada (2.5 cm).
Pon 2 cucharadas (30 ml) de aceite de oliva en una sartén y a el bonito por todas partes. Reserva. (Se puede cocer al vapor si lo prefieres.)
Pela los dientes de ajo. En un cazo de hierro esmaltado o de barro, calienta las 14 cucharadas (205 ml) restantes de aceite y fríe la cebolla y los dientes de ajo durante 3 minutos. Añade el vino, el vinagre, el agua, la pimienta, el laurel, el clavo, el tomillo, la sal y el azúcar, y hierve durante 6 u 8 minutos. Reduce a fuego suave.
Incorpora el pescado al escabeche con cuidado y cocina a fuego suave 1 ó 2 minutos más.
Apaga el fuego y deja enfriar a temperatura ambiente. Una vez frío, conserva en la nevera en un recipiente de cristal, porcelana o barro (no lo cocines ni lo almacenes en un recipiente de metal o de plástico). El pescado debe estar totalmente cubierto por el líquido del escabeche. Si hiciera falta más líquido, cuece 2 tazas de agua con 1/4 de taza de vinagre durante 5 minutos y viértalo encima del pescado. Espera 3 días antes de comerlo. Se conservará por lo menos un mes.
El escabeche se utiliza en muchas recetas, como ensaladas, empanadillas, verduras rellenas, y es imprescindible en todo tipo de tapas.
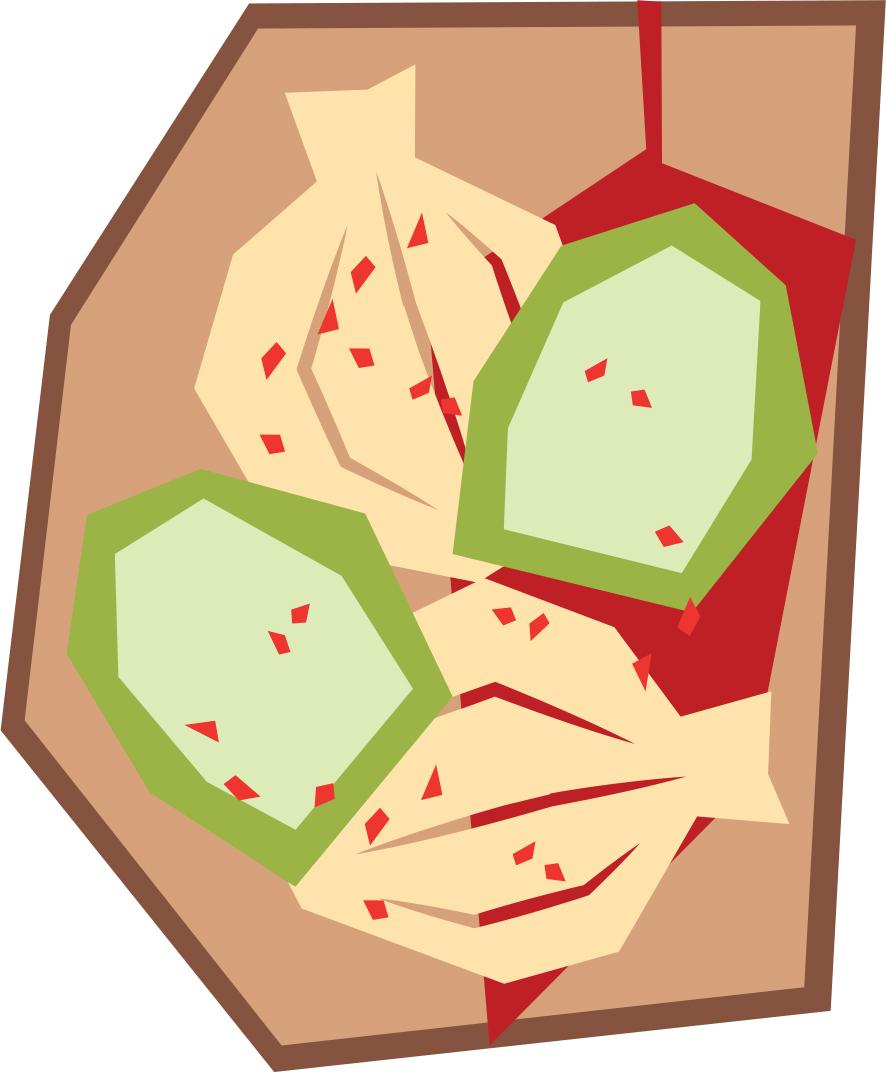
Stuffed Eggs
Eggs are a great revitalizing food. In addition to being a good source of protein, in Spain they also have a symbolic significance representing renewal and fertility. For example, we use them as decorations during Easter time in sweet cakes, such as monas, where they are placed whole and raw in their shells, on top of the batter just before baking. They make simple and beautiful decorations.

olives - aceitunas
mayonnaise - mayonesa
Remove 2 egg yolks and set aside.
Combine the tuna fish, mayonnaise, 2 remaining egg yolks, and minced parsley in a bowl. Cut off a small slice of the bottom of the egg white to help the egg stay in place. Stuff the eggs with this mixture and place on a serving platter.
Skewer an olive and a shrimp on each skewer and stick on each stuffed egg.
Garnish with the minced parsley. Place the reserved egg yolks in a colander, press with a big spoon. The egg yolk decoration dries out quickly, so it should be made just before serving.
Huevos rellenos
Los huevos son un alimento revitalizante. Además de ser una gran fuente de proteína, en España también tienen significado simbólico y representan renovación y fertilidad. Por ejemplo, los utilizamos en Semana Santa para las ‘monas’ de Pascua. Se colocan crudos y enteros sobre la masa, antes de hornear. Se transforman en sencillos y bonitos elementos decorativos.
Retira 2 yemas de huevo y resérvalas.
Mezcla la mayonesa, el atún, las 2 yemas restantes y el perejil picado en un recipiente. Corta una pequeña parte de la base de la clara para que el huevo se mantenga firme en su lugar. Rellena los huevos con la mezcla y colócalos en una bandeja de servir.
Pincha una aceituna y una gamba en cada palillo y clava uno en cada huevo relleno.
Decora con el resto del perejil picado. Coloca las yemas que reservaste en un colador y aplasta con una cuchara y una especie de nube amarilla caerá sobre los huevos. La yema se seca muy rápido por eso hay que decorarlos justo antes de servir.
Monkfish and Shrimp Salad
Salpicón is a cold dish prepared with cooked ingredients such as seafood or chicken, diced or shredded, and seasoned with vinaigrette. Originally made with cheap cuts of meat and considered a humble dish, salpicón today is known as a fish dish. It can be served as a tapa, an appetizer, or a healthy main dish. Make it your own by mixing in different seafood, such as mussels or squid. Just remember to cook them first. In some parts of Spain, minced, hard-boiled egg is added as well.

cucumber - pepino
Heat water in a saucepan, add salt, the bay leaf, and the monkfish fillets and bring to a boil. Lower the heat and cook for 5 to 8 minutes. This will depend on the size of the fish. Turn the heat off, strain, and set aside. (You may also grill the fish.)
In a glass or ceramic bowl, combine the peppers, onion, mango, cucumber, extra-virgin olive oil, both vinegars, lemon juice, and salt. Mix well. Add the shrimp or prawns.
Peel the monkfish if there is any skin left, and cut into chunks the size of a cherry tomato or a little larger. Add to the bowl and mix gently. Garnish with the minced parsley.
Refrigerate or serve at room temperature. As a tapa, put a lettuce leaf over toast and scoop some salpicón on top.
Note: The addition of mango and pickled cucumber is not traditional, but we really love it at home. Sometimes we add diced avocado, yellow bell pepper, and even corn.
Salpicón de rape y gambas
El ‘Salpicón’ es un plato frío preparado con ingredientes cocidos como pescado, marisco o pollo, cortado en dados o desmigado y aderezado con vinagreta. Originalmente se hacía con los trozos más baratos de la carne y se consideraba un plato humilde, pero hoy se considera un plato de pescado. Puede ser una tapa, un aperitivo o un entrante sano. Haz tu propia versión con mariscos, como por ejemplo con mejillones o calamares. Sólo recuerda cocinarlos antes. En algunas partes de España se le añade huevo duro picado.
Pon agua a calentar en un cazo y añade, sal, el laurel y el rape. Cuando empiece a hervir, baja el fuego y deja a fuego medio durante 5 a 8 minutos. Eso dependerá del tamaño del pescado. Apaga el fuego, escurre y reserva. (También puedes hacer el pescado a la plancha.)
En una fuente de cristal o cerámica, combina los pimientos, la cebolla, el mango, los pepinos, el aceite de oliva, ambos vinagres, el zumo de limón y la sal. Mezcla bien. Añade las gambas cocidas.
Si han quedado pieles en el pescado, retíralas y corta el rape en trozos del tamaño de un tomate cereza o un poco más grande. Incorpóralo a la ensalada y mezcla con cuidado. Adiciona cualquiera de los ingredientes facultativos. Adorna con perejil picado.
Sirve a temperatura ambiente. O como tapa, pon una hoja pequeña de lechuga sobre una tostada y un poco de salpicón encima.
Nota: Agregarle mango y pepinillo no es un clásico pero en casa nos encanta así. También a veces le añadimos aguacate en dados, pimiento amarillo e incluso maíz.
Grilled Green Asparagus with Orange Mayonnaise
Did you know that green and white asparagus are the same beautiful plant? White asparagus are covered with earth as soon as they begin to poke through. They never see the sunlight. Green asparagus are allowed to grow out of the earth and catch the sun’s rays, therefore generating green chlorophyll. I grow them in my orchard and they are great fun to pick. You will find this is a very popular vegetable tapa.
Hold the asparagus with both hands and break off the hard bottom part. If they do not break easily, try a bit higher on the stalk. Cut the base with a knife to even the break. Clean them and allow to dry.
Place a cast-iron pan over high heat, add 1 tablespoon (15 ml) of the olive oil, sprinkle some salt all over the pan, and place the asparagus on top. Grill for 3 to 4 minutes, and then turn over. Add the remaining 1 tablespoon (15 ml) olive oil, a sprinkle of salt, and grill for a few more minutes. They must retain their green color and remain a little crunchy.

asparagus - espárragos
saffron - azafrán
To make the orange mayonnaise: Heat the orange juice in a small pan over medium heat, and when hot, add the saffron. Place in a bowl. Add the lemon juice, grated orange peel, and mayonnaise. Season with salt and pepper. Mix well.
Serve the asparagus from the grill with a bowl of sauce and some extra salt and pepper over them. You may also garnish with some minced fried almonds or thinly sliced, cured Manchego cheese.
Note: If you want to cook this dish on the barbecue, it is easier to spread olive oil on the asparagus before placing on the grill. Asparagus should be salted after grilling.
Espárragos verdes a la plancha con mayonesa de naranja
¿Sabías que los espárragos verdes y blancos vienen de la misma preciosa planta? Los blancos se vuelven a cubrir con tierra en cuanto asoman y nunca les da el sol. Los verdes crecen hacia arriba y gracias a la luz del sol, reflejan la clorofila verde. Tengo espárragos en mi huerta, y son muy divertidos de recoger, a menudo los comemos crudos. Es una tapa verde muy popular.
Sujeta el espárrago con las dos manos e intenta romper la parte de abajo que es la más dura. Si no se rompe con facilidad, prueba un poco más arriba. Los espárragos se rompen solos cuando alcanzas la parte más suave. Corta la base con un cuchillo para igualarlos, lávalos y sécalos.
Pon una sartén o un grill de hierro sobre el fuego, añade 1 cucharada (15 ml) de aceite de oliva y espolvorea un poco de sal sobre la sartén y pon encima los espárragos. Ásalos durante unos 3 ó 4 minutos, y luego dales la vuelta. Añade la cucharada restante (15 ml) de aceite de oliva y un pellizco de sal y ásalos unos minutos más. Deben mantener su color verde y quedar un poco crujientes.
Para preparar la mayonesa de naranja: calienta el zumo de naranja en una sartén pequeña a fuego medio, cuando esté caliente, añade el azafrán en polvo. Ponlo en un bol. Añade el zumo de limón, la ralladura de naranja y la mayonesa. Adereza con sal y pimienta y mezcla bien.
Sirve los espárragos de la plancha junto con un bol de mayonesa y poco más de sal y pimienta encima. También se pueden adornar con almendra frita picada por encima o lonchas finas de queso manchego curado.
Nota: Si quieres hacerlos en la barbacoa, aderézalos antes con el aceite. No olvides añadirles sal una vez hechos.
Salad My Way
Ensaladilla rusa, a favorite tapas of ours, is a potato, pea, and carrot salad with mayonnaise. Everyone here has his or her own recipe, including famous chefs. It can be made with tuna fish, shrimp, sea urchin, even salmon. I change the recipe according to the ingredients I have on hand. When using store-bought mayonnaise, always add some very good, extra-virgin olive oil. It is also a great accompaniment for fish and cold meats.

peas - guisantes
Cook the green beans in abundantly salted boiling water for 4 minutes. Drain to another pan and place the beans in a bowl. Cook the carrots and peas in the same salted water for 3 minutes, then drain and add to the bowl. Cook the asparagus in the same water for 1 minute, then drain and add it to the bowl. Finally, add the potatoes and cook for 4 to 5 minutes, depending on the size of the chunks. Drain and place in the bowl.
In a separate bowl, mix together the mayonnaise, yogurt, olive oil, anchovy paste, lemon juice, grated peel, chives, salt and pepper. Pour over the vegetables and mix carefully.
This is a great classic with many uses in the tapas world. You may serve it on toast or in small bowls with a garnish of your choice, such as cooked shrimp, pickled tuna, anchovies, olives, roasted red pepper, capers, beetroot, or pickled cucumber. You can also roll it in a slice of smoked salmon and put it on top of bread.
Note: If you do not eat dairy, you can make a dressing with tofu, soy creamer, olive oil, lemon, vinegar, chives, and yellow miso paste.
Ensaladilla a mi manera
La ensaladilla rusa es uno de nuestros grandes favoritos, y lleva patatas, guisantes, zanahoria y mayonesa. Cada uno tiene su propia receta incluidos los chefs famosos. Se le puede poner, atún, gambas, erizo de mar y hasta huevas de salmón. Yo cambio la receta según los ingredientes de que disponga y cuando compro mayonesa hecha siempre le añado un buen aceite de oliva virgen extra. Es un gran acompañamiento para pescados y carnes frías.
Cocer las judías verdes en abundante agua con sal durante 4 minutos. Escúrrelas y ponlas en un bol. Cocinar las zanahorias y los guisantes en el mismo agua salada durante 3 minutos, luego escúrrelas y ponlas en el bol. Cocina los espárragos en el mismo agua durante 1 minuto, luego escúrrelas y ponlas en el bol. Finalmente cocina las patatas durante unos 4 ó 5 minutos, dependiendo de su tamaño. Escúrrelas y ponlas en el bol.
En un recipiente diferente, mezcla la mayonesa, el yogur, el aceite de oliva, la pasta de anchoas, el zumo y ralladura de limón, cebollino picado, sal y pimienta. Cubre las verduras con la salsa. Mezcla con cuidado.
Esta ensalada es un gran clásico con muchas utilidades en el mundo de las tapas. Se puede servir en pan o en pequeños recipientes con guarnición al gusto: gambas cocidas, bonito en escabeche, anchoas, aceitunas, pimiento asado, alcaparras, remolacha o pepinillos en vinagre. También puedes rellenar una loncha de salmón ahumado y ponerlo sobre pan.
Nota: Si no tomas lácteos, puedes hacer un aliño con tofu, crema de soja, aceite de oliva, limón, vinagre, cebollino y miso claro.
Roasted Vegetables on Toast
We have a great tradition of roasting potatoes, garlic, pumpkin, chestnuts, and sweet potatoes over hot coals. It comes from our very wise and humble popular country cuisine, which uses fire as a cooking method. This is more of a late summer/early autumn dish, when peppers, tomatoes, eggplants, and onions are at their best. It is very popular in the area of Aragón, Valencia, and Barcelona. Try roasting a whole garlic head and a few raw almonds, and then mash and mix with extra-virgin olive oil and salt as a substitute for the olive sauce.

bread - pan
Preheat the oven to 425°F (220°C or gas mark 7).
To make the sauce: Wash the olives in cold water, place in a blender, and add the rest of the ingredients. Process until smooth and set aside.
To roast your vegetables on the barbecue: Cut the onions, peppers, tomatoes, and eggplant in half to shorten cooking time and drizzle with a little olive oil. The skin gets charred and the vegetables have a smoky aroma, which adds to the flavor. Peel the vegetables while still warm (it will be easier).
On a slice of bread, spread a teaspoon of olive sauce, place a piece of each vegetable, add any of the garnishes, drizzle with extra-virgin olive oil, and add a little minced parsley.
Note: You may also toss the roasted vegetables in the olive sauce, add greens or cooked pasta, and make a delicious salad!
Tosta de verduras asadas
Tenemos una gran tradición de asar a las brasas patatas, ajos, calabaza, castañas y boniatos. Viene de nuestra humilde y sabia cocina popular, que usa las brasas para cocinar. Este es un plato de finales de verano principio y otoño, cuando los pimientos, los tomates, las berenjenas y las cebollas están en su esplendor. Es muy popular en la zona de Aragón, Valencia y Barcelona. Intenta asar una cabeza entera de ajos, unas cuantas almendras crudas, y luego machaca y mezcla con aceite de oliva virgen extra y sal, como sustituto a la salsa de aceitunas.
Praclienta el horno a 220°C (425°F o gas 7).
Para preparar la salsa: lava las aceitunas en agua fría, pon las en una batidora junto con el resto de los ingredientes. Tritura hasta que esté suave y reserva.
Asa las verduras en la barbacoa: corta las cebollas, los tomates y la berenjena por la mitad para asarlas más rápido, y riégalas con un poco de aceite de oliva. La piel se quema y le imparte a las verduras un ligero aroma ahumado. Pela las verduras mientras estén calientes (te resultará más fácil).
En una rebanada de pan, pon una cucharadita de salsa de aceitunas, un trozo de cada una de las verduras, y añade una guarnición al gusto; riega con aceite de oliva y añádele perejil picado.
Nota: Puedes también mezclar las verduras asadas con la salsa de aceitunas, y añadir hojas de lechuga o pasta cocida y ¡hacer una ensalada deliciosa!
Barbecued Shrimp in Garlic Sauce
This traditional tapa from central and southern Spain is best made with fresh, whole shrimp. Peel the shrimp and set aside the heads and shell for fish stock. Cook with sliced garlic and some dried chile pepper in a generous amount of extra-virgin olive oil and serve sizzling hot from its earthenware casserole. The resulting oily sauce is delicious for dipping bread! This is adapted for a barbecue; be careful not to overcook the shrimp.

garlic - ajo
In a blender, combine the olive oil, parsley, garlic, chile peppers, and salt. Blend until you obtain a smooth green sauce with little red bits. Pour into a large bowl. Add shrimp to the bowl with the sauce and marinate for 10 minutes.
Place 3 shrimp on each skewer. Do not press each shrimp too close to each other or the center one will not cook properly. Spread a little marinade on the shrimp and grill over high heat for 1 minute on each side. You may cook this directly on the barbecue or in a skillet.
While one side is cooking, add more marinade before turning over. Feel free to adapt the amount of garlic and chile pepper to suit your taste. We like them very garlicky.
Serve as they come off the grill. A small glass of cold gazpacho or salmorejo is a refreshing contrast. Place a bowl of lemon mayonnaise on the table for those who wish to dip.
Gambas al ajillo para tu barbacoa
Una tapa muy tradicional del centro y del sur de España que se hace con gambas frescas y enteras. Se pelan las gambas y se reservan las cabezas y las cáscaras para caldo. Se cocina en cazuelita de barro con ajo laminado, guindilla y abundante aceite de oliva. La salsa aceitosa resultante es ¡deliciosa para mojar pan! Esta es una receta adaptada para barbacoa, ten cuidado de no cocinar las gambas en exceso.
En una batidora, mezcla el aceite de oliva, las hojas de perejil, el ajo, la guindilla y la sal. Licuar hasta obtener una salsa verde con destellos rojos. Viértela en un bol grande. Ponlas en el recipiente con la salsa y marina 10 minutos.
Pon 3 gambas en cada pincho. No las aprietes una con otra para no dificultar la cocción de la gamba central. Riega con un poco de salsa y cocina a fuego fuerte durante 1 minuto cada lado. Puedes hacerlo directamente en la barbacoa o en una sartén.
Mientras se están cocinando de un lado, puedes añadir un poco más de salsa antes de darles la vuelta. Adapta la cantidad de ajo y picante a tu gusto. A nosotros nos gustan con mucho ajo.
Sírvelas recién hechas. Un pequeño vaso de gazpacho o salmorejo es un contraste muy refrescante. Pon un bol de mayonesa con bastante zumo de limón por si alguien quiere mojar.
Vegetable Cocas
Peppers were first introduced to Spain by the explorer Christopher Columbus. In Spain, the farming of peppers is now associated with the monasteries of San Pedro de Ñora in Murcia, and San Jerónimo de Yuste in Extremadura, the retirement place of Emperor Charles the Fifth. Both areas are still producing excellent pimentón (paprika), but Yuste’s is well known for its smoky flavor. This is because in this region the climate is more humid and the peppers are dried with oak wood.
zucchini - calabacín
pepper - pimiento
Preheat the oven to 425° F (220° C or gas mark 7).
Sauté the olive oil, onion, and salt over medium heat for 3 to 4 minutes. Add spinach and Swiss chard leaves and sauté over high heat for 10 more minutes. Season with pepper and drain in a colander. Set aside. (If vegetables are not drained properly, they will spoil the dough.)
To make the dough: In a bowl, combine water, olive oil, salt, sugar, and yeast. Stir well and add the flour. (This process can be done by machine.) Knead for 1 to 2 minutes, until the dough is very soft and not sticky. If it is too hard, add oil and water in the same proportion simultaneously, until you reach the desired consistency.
Roll the dough out on a parchment paper into a 12 x 24-inch (30 x 60 cm) thin rectangle. Transfer to a baking tray. Distribute the drained vegetables on top of the dough, spread evenly, and then sprinkle with pimentón (paprika), drained raisins, and pine nuts. Bake in the center of the oven for 15 to 20 minutes, or until the edges turn golden.
Serve hot or warm.
Note: Cocas are our local pizza. There is a great variety of them. You may use different vegetables, add cheese if you like, and make them your own.
Cocas de verduras
Cristóbal Colón introdujo los pimientos en España. Su cultivo se asocia a los monjes Jerónimos de San Pedro de Ñora en Murcia y San Jerónimo de Yuste en Extremadura, este último, bien conocido por ser el lugar de retiro del Emperador Carlos V. Ambas zonas siguen produciendo excelente pimentón pero el de Yuste es famoso por su sabor ahumado pues, al ser zona húmeda, los pimientos se secan con leña de encina y roble.
Precalienta el horno a 220° C (425° F o gas 7).
Pon en una sartén aceite, cebolla y sal y saltea a fuego medio durante 3 ó 4 minutos. Añade las hojas de espinaca y acelga y saltea a fuego vivo 10 minutos más. Sazona con pimienta al gusto y escurre en un colador. Reserva. Si las verduras están excesivamente húmedas, estropean la masa.
Para la masa: Mezcla en un bol agua, aceite, sal, azúcar y levadura. Remuévelo bien y añade la harina. Amasa 1 ó 2 minutos hasta que la masa quede muy flexible y suave y no se pegue a las manos (se puede hacer a máquina). Si la masa queda excesivamente dura, añade simultáneamente agua y aceite en la misma proporción hasta que obtengas la consistencia deseada.
Estira la masa en papel de hornear en tamaño aproximado de 30 x 60 cm (12 x 24 pulgadas) y coloca en la bandeja de horno. Reparte las verduras bien escurridas por encima, espolvorea con pimentón y termina con las pasas escurridas y los piñones. Hornea durante unos 15 ó 20 minutos o hasta que los bordes de la masa se doren.
Sirve caliente o templado.
Nota: las cocas son nuestra ‘pizza’ local y tenemos una gran variedad de ellas. Combina verduras diferentes, añade queso si quieres y hazla a tu gusto.