
Groups are a common way of managing users in any information system. A group often represents a collection of users, usually based on their positions and responsibilities within the organization. In JIRA, groups provide an effective way to apply configuration settings to users, such as permissions and notifications.
Groups are global in JIRA, which is something that should not be confused with project roles (discussed later). This means if you belong to the jira-administrators group, then you will always be in that group regardless of which project you are accessing. You will see in later sections how this is different from project roles and their significance.
One important point to keep in mind is that group association does not cascade in JIRA. For example, just because a user is in the jira-developers group, it does not mean he/she will have the privileges of the jira-users group.
Similar to User Browser, Group Browser allows you to search, add, and configure groups within JIRA:
- Browse to the JIRA administration console
- Select Groups under the Users section to bring up the Group Browser page:
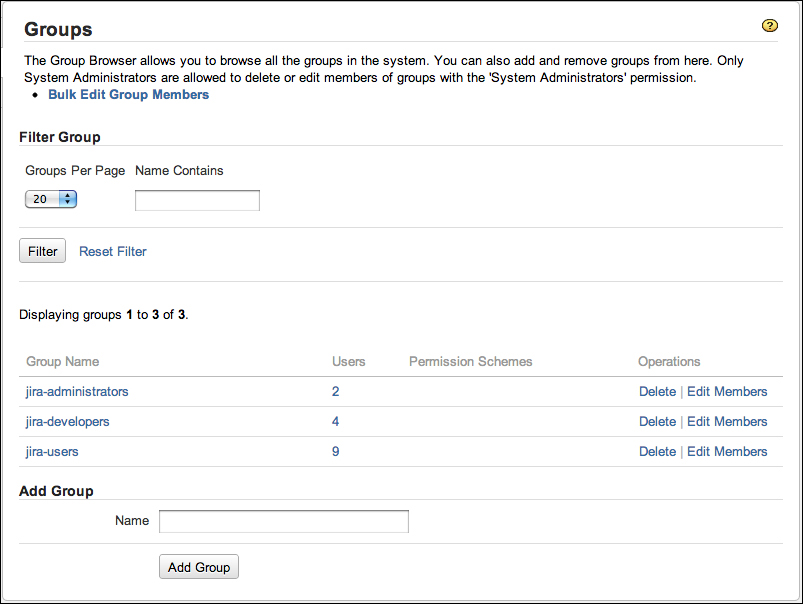
JIRA comes with three default groups. These groups are created automatically when you install JIRA:
|
Group |
Description |
|---|---|
|
Administrators of JIRA | |
|
Usually developers or people that will work on issues | |
|
Normal users in JIRA |
Out of the three groups, jira-administrators and jira-users are of most significance. As you will see later in this chapter, by default, users of jira-administrators are given the global permission to administer JIRA while users of jira-users are given permission to access JIRA. You can, as we will learn, change this default behavior to have your custom groups have the same permissions.
Other than the three groups that come by default with JIRA, you can create your own groups. It is important to note that once you have created a group, you cannot change its name. So, make sure you think about the name of the group carefully before you create it:
- Browse to the Group Browser page.
- Specify a unique name of the new group in the Add Group section.
- Click on the Add Group button to create the new group.
After a group has been created, it will be empty and have no members. It will also have no configuration settings, such as the permissions applied.
Often, people move around within an organization, and your JIRA needs to be kept up to date with the movement.
In Group Browser, there are two ways to manage group membership. The first option is to manage the membership on a per-group level, and the second option is to manage several groups at the same time. Both the options are actually very similar, so we will be covering both at the same time.
Perform the following steps to manage individual groups:
- Browse to the Group Browser page.
- Click on the Edit Members link for the group you wish to manage the member for. This will bring you to the Bulk Edit Group Members page.
Perform the following steps to manage multiple groups:
- Browse to the Group Browser page.
- Click on the Bulk Edit Group Member link. This will bring you to the Bulk Edit Group Members page.
You will notice that both options will take you to the same page. The difference is if you have chosen the individual group option, JIRA will auto select the group to update, and if you have chosen the bulk edit option, then no groups will be selected. However, regardless of which option you choose, you can still select one or all of the groups to apply your changes to.
Perform the following steps to update the membership in one or more groups:
- Browse to the Bulk Edit Group Members page.
- Select one or more groups to update.
- Select users from the middle box and click on the Leave button to take users out of the groups.
- Specify users (by typing usernames) in the right-hand box and click on the Join button to add users to the groups.
If a group has become redundant, you can remove it from JIRA:
- Browse to the Group Browser page.
- Click on the Delete link for the group you wish to remove. This will take you to the Delete Group page.
- Click on the Delete button to permanently remove the group.
Once you remove the group, all the users who previously belonged to it will have their group associations updated to reflect the change.