Back in the older versions of JIRA, issues could only be linked to other issues in the same JIRA instance. In JIRA 5, Atlassian has introduced a new feature called Remote issue links , which lets issues be linked to any arbitrary resources. For example, for a support type issue, you can link it to a web page that contains information on how to resolve similar types of problems. Another example will be to link the issue to another issue on a different JIRA instance.
Issue linking is enabled by default when you first install JIRA. Issue linking is configured globally, so once it is enabled, it will become available for all projects in JIRA.
You need to be a JIRA administrator in order to enable issue linking. Perform the following steps to enable issue linking:
- Log in as a JIRA administrator user.
- Browse to the administration console by clicking on the Administration link at the top navigation panel.
- Click on Issue Linking under the Issue Features section. This will take you to the Issue Link Administration page.
- Click on Activate to enable issue linking in JIRA:

From this page, you will be able to see a list of Link Types available. A link type defines the nature of the link between issues. As shown in the preceding screenshot, the default Blocks link type defines that issue A blocks issue B. This means that issue B cannot be completed until issue A is resolved. It is important to note that issue linking does not place any restrictions on issues. So in our example, although the link states that issue B cannot be completed until issue A is done, this is not enforced and users can close issue A while issue B remains open.
All the link types shown here are for standard issue links. There are no remote issue link types. However, you do need to enable issue linking to make use of remote issue links.
JIRA comes with four link types by default: Blocks, Cloners, Duplicate, and Relates. As we have discussed earlier, a link type is simply a type of association or a label on the association, that describes the relationships between two issues, and so you can define your own link types in JIRA. For example, one issue can support another issue, and we can create a link type called Supports.
Perform the following steps to create a new link type:
- Browse to the Issue Linking Administration page.
- Make sure issue linking is enabled.
- Fill in the Add New Link Type form. Do the following for the Support link type:
- Enter
Supportsfor the Name field - Enter
supportsfor the Outward Link Description field - Enter
is supportedfor the Inward Link Description field
- Enter
- Click on the Add button.
Outward and inward link descriptions define what is shown when users select the type of link to use when linking two issues together. We will see an example of this in a later section. Once a new link type is added, it will be displayed in the table on the Issue Linking Administration page:
Issues are often related to other issues in some way. For example, issue A might be blocking issue B, or issue C might be a duplicate of issue D. You can add descriptions to the issue to capture this information, or delete one of the issues in the duplication case, but with this approach, it is hard to keep a track of all these relationships. Luckily, JIRA provides an elegant solution for this, with the standard issue link feature.
The standard issue link lets you link an issue with one or more other issues in the same JIRA instance. So, you can link two issues from different projects together (if you have access to both the projects). Linking issues this way is very simple; all you need to know is whether the target issues to a link or not:
- Browse to the View Issue page for the issue you wish to create a link for.
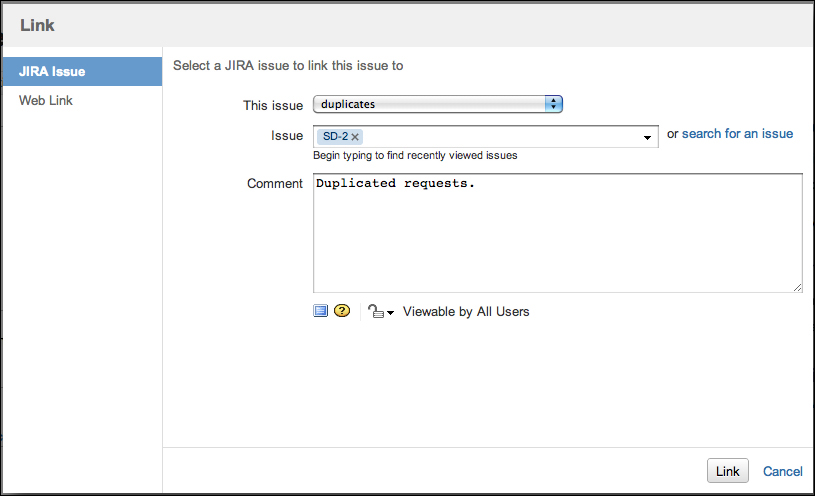
- Select Link from the More Actions menu. This will bring up the Link Issue dialog box.
- Select the JIRA Issue option from the left panel.
- Select the type of issue linking.
- Select the issues to link to. You can use the search facility to help you locate the issues you want.
- Click on the Link button:
After you have linked your issues, they will be displayed in the Issue Links section on the View Issue page. JIRA will display the target issue's key, description, priority, and status.
The standard JIRA issue link allows you to link multiple issues in the same JIRA instance, the new JIRA 5 remote issue link lets you link issues from different JIRA instances, and other resources such as a web page on the Internet.
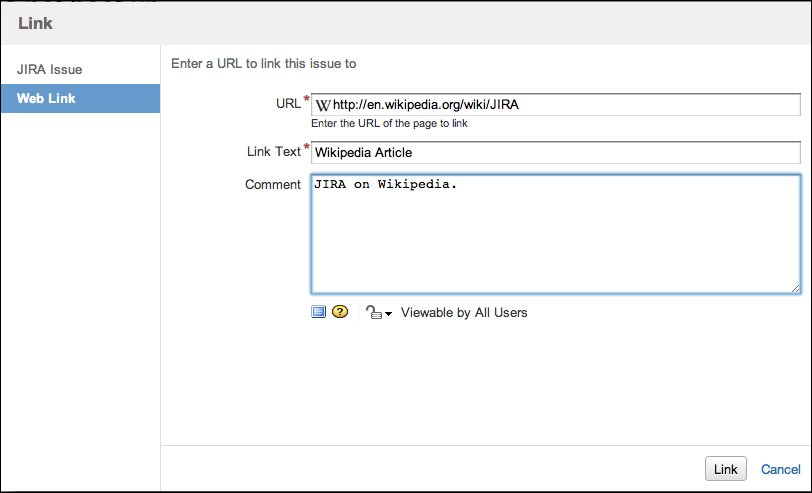
Using remote issue links is very similar to the standard issue link; the difference is that instead of selecting another issue, the URL address of the target resource is specified:
- Open up the Link Issue dialog box.
- Select the Web Link option from the left panel.
- Specify the URL address for the target resource. JIRA will automatically try to find and load the appropriate icon for the resource.
- Provide the name for the link in Link Text field. The name you provide here will be what is shown for the link when viewing the issue.
- Click on the Link button: