
As we have seen earlier, users with the JIRA Administrator's permission are the only ones allowed to create and delete projects, and this is done through the JIRA Administration interface. It can be accessed as follows:
- Log in to JIRA with a username that has the JIRA Administrator's permission.
- Click on the Administration link at the top-right corner:

The JIRA Administration interface is where JIRA administrators can manage and control all the aspects of JIRA, including setting up projects, managing users, backing up and restoring the system, and requesting support from Atlassian, to just name a few. You can leave this interface by clicking on the Exit Administration link at the top-right corner.
If you are familiar with previous versions of JIRA, you will notice that in JIRA 5, this interface looks completely different. Atlassian has been revamping JIRA's user interface, making it cleaner and easier for the end users. In the older versions of JIRA, all the administration options are listed in a menu bar to the left-hand side, in JIRA 5 however, all the options are grouped together and laid out nicely under appropriate headings.
If you have a brand new JIRA, as we have, where you have no pre-existing projects, the JIRA Administrator interface will have three blue boxes at the top. You can click on the Create your first project in the first box to bring up the Add a new project dialog box. However, you can also use the plus sign at the right-hand side or from the Projects drop-down menu and select the Add Project menu item. All the three options will have the same effect:
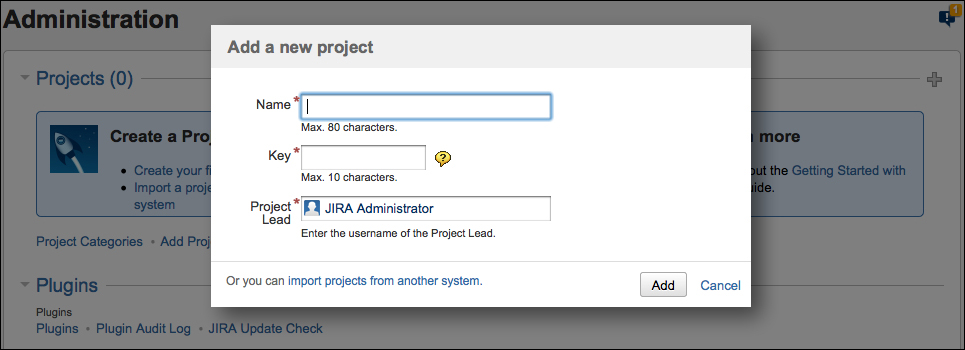
You will notice that unlike the JIRA versions, JIRA 5 will present you with a dialog box with only three fields to fill in, namely Name, Key, and Project Lead. All the other fields, such as notification scheme, are no longer required. As the projects are often created with the default settings, it is much more efficient to remove those settings at creation time, and you can update all the settings later, when you really need to:
|
Field |
Description |
|---|---|
|
Name |
A unique name for the project. |
|
Key |
A unique identity key for the project. This key cannot be changed once the project is created. As you type the name of your project, JIRA will auto fill the key based on the name, but you can change the auto-generated key with one of your own. The project key will also become the first part of the issue key for issues created in the project. |
|
Project Lead |
The lead of the project. Each project can only have one lead. |
Once you have created the new project, you will be taken to the Project Administration interface, which we will discuss in the following sections, where you, as a project administrator, can update the settings and delete the project.